Does it light up?
Slim Pickens would love it ![]()

brilliant AND a sense of humor, priceless…
TK that made me laugh so hard I had tears.


I used these two items a big thick rubber band and some thicker /hard diffuser film to make a BLF-Q8 diffuser .
I only had the baby bottle with a blue nipple .I didn't have that interesting snap on /off cover which looks like it may be an interesting option for a diffuser .
- Cut off the flip lid on the 4oz. specimen bottle...neatly trim the edge.
- Cut a round disk of diffuser film to fit in the inside of the baby bottle cap
- Throw baby bottle and nipple away .."All we want is the lid with a nice hole in it."
- Add one of those thicker rubber bands into the lid which supports the diffuser film and takes up the play from the baby bottles lid being just a bit bigger than the 60mm head of the BLF-Q8. Mine becomes a very tight fit and now we have a flat diffuser film cap on top of the Q8......
- Now the cool part ...For those who want a tower of lanternish light .. >>the specimen bottle snaps right into the hole and stays right in place whether hanging ,walking ,dancing a jig ..whatever ..snap in ,snap out... :P
- Cheap and easydiffuser /lantern that fits both the Q8 and the U Torch UT02
http://www.supplymylab.com/Supplies/Sample-Vials/_/4-oz-High-Profile-Flip-Top-Polypropylene-Vials?=
baby bottle is a First years Soothie 9oz .. My bet is the lids on the 5oz bottles are the same size.
BLF Q8 bottom left

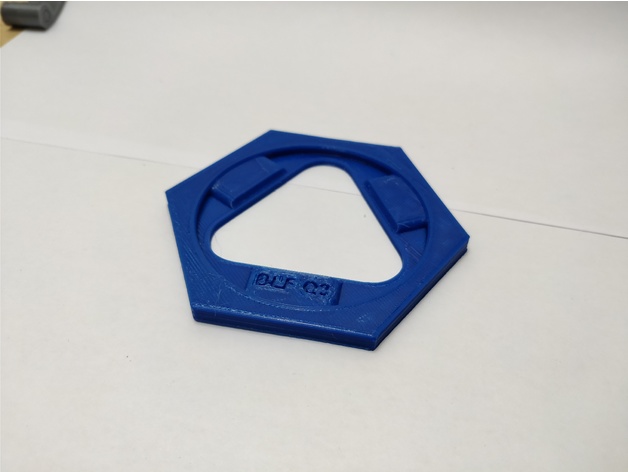
For those of you with an 3D printer, I’ve designed some parts for the Q8 to help assembly / modding.
Everything was printed with PETG at 0.2mm layer height.
BLF Q8 Bezel Removal Tool for easier unscrewing / assembly of the bezel without leaving tool marks
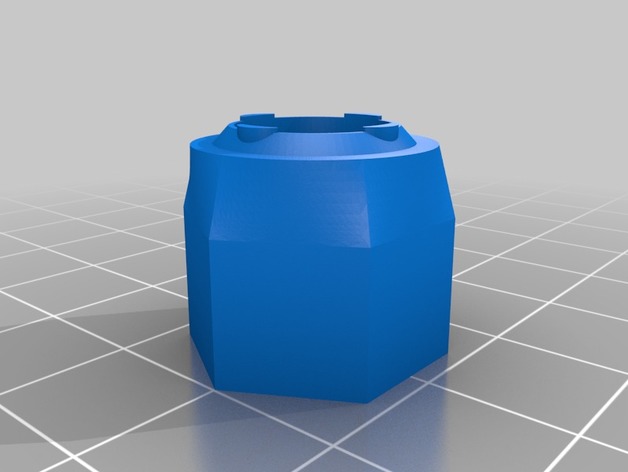
BLF Q8 Button Tool for easier unscrewing / assembly of the button
It strips out pretty easy when printed in PETG, but maybe PLA or ABS fare better.
But even when heavily damaged it still provides enough torque to screw in/unscrew the button.
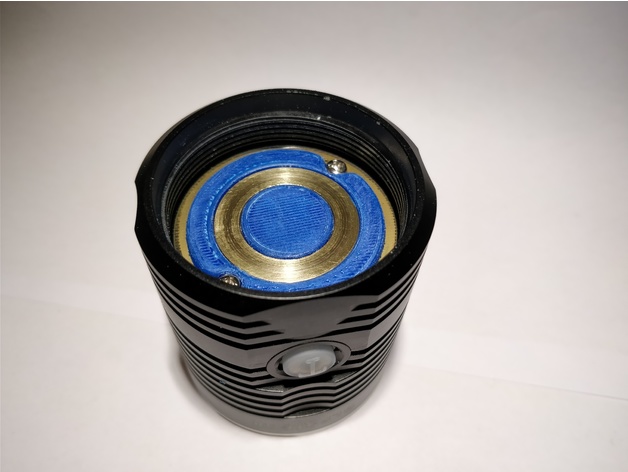
And a remix of 5ars reverse polarity protection with slightly different dimensions.
Q8 reverse polarity protection
FWIW, another easy bezel removal tool is carpet. Press the Q8 bezel-down on carpet and turn the head. Works with most SRK-like lights. The same can also be done using a spare sheet of wood, as long as it’s not super-hard like ironwood.
Or I removed some flat bezels on my car tire sidewall. Press against it and twist.
Hi everyone, this is my life hack for Q8. Diffuser from LED bulb. Just fix right diameter.


Hi and welcome Quadrupel. Nice mod. ![]()
Too cool Quadrupel, portable light bulb. ![]()
Quadruple that is thinking outside of the bulb, err box. Well done and I’ll be trying that soon!
I have to move the big copper ring at the battery side of Q8 driver to an other PCB. I already removed the ring from one Q8 PCB with my new hot air station but during the process some of the SMD parts at the driver got also loose and fell down. This is no big problem but the new PCB is empty and needs to be reflowed, so I’m curious what to do first - reflow the parts to the new PCB first or reflow the copper ring first? And how to solder the copper ring - hot air, heatplate, soldering iron, a combination of them?
Any ideas?
I would do it this way:
put brass ring on hot plate, put driver pcb (parts side up) over it and set 100-120 deg temperature. Solder all parts (smd) with hot air, increase hot plate temperature to solder driver ring and get it cold faster with non-heated air (gun or hair dryer).
Interesting, thanks. I thought of soldering the brass ring first like this (but without parts) but I’m concerned it might not sit at the right place (the copper trace for the ring on the PCB is wider than the ring). Hope it pulls itself to the proper position since I can’t check under the PCB.
I would reflow the ring first
Put the ring on a 120dC plate
Reflow driver parts
It seems less intensity on xpl hi? Or am i wrong? That isn’t supposed to be this way
Its a thinner beam and should produce more throw. Also the 5A3 tint will appear to have lower intensity than a cooler tint.
I received my KD lens 2 days ago. It’s in already. ![]()
Maybe it’s because of the photographer ![]()

Q8 XP-L HI Original Q8 lens

Q8 XP-L HD KD lens
As vwpieces pointed out the tint and bin also makes a difference, and going from HD to HI decrease the overall lumen output.
I haven’t made any “scientific” throw tests, but I think the XP-L HI version has the better beam profile even though the output is lower.
Mine arrived today :

KD lens (left) original Q8 lens (right)
Edit :
In the two pictures above I actually think the original Q8 lens makes the XP-L HI 5A3 look colder than the KD lens and the XP-L HD 3D