What kind of switch are you planning? A pull switch would be cool. Than you could scream:“fire inda hole” and pull the trigger
R86`s contest build - WWII Flashgrenade (Finished light in post #1 - Underground pictures and video)
Very cool idea for a build. I second the pull switch idea, though I know it will be more work...
I did a bump switch in one light. The weight of the cells provided the mass to compress the switch. Hard bump = on/off, soft bump = mode change. 3 small springs in a triangle to augment the switch spring. Pull switch shouldn’t be too hard but gets complicated by where you put the cells. Good luck on this. Hope you finish.
I could ask if you want to Hi-beam. But id guess they are steel casings too.
I cant compete with you guys when it comes to machine work so Im glad you guys like the concept of the build. :) There wont be much machine made on this light. But since I used a lathe to open up the handle/battery tube, pill have been made on the lathe too (coming in a chapter in few days). Still several obstacles to pass. Im working on the light every day now. Just finished something for the upcoming chapters. I actually started on the light and did the stuff shown in OP early on.. Then I started to do things slower and slower and now time is limited. The build is now on the top of my to-do-list. Hopefully I wont stumble across too many more issues and failures (more about those are coming).
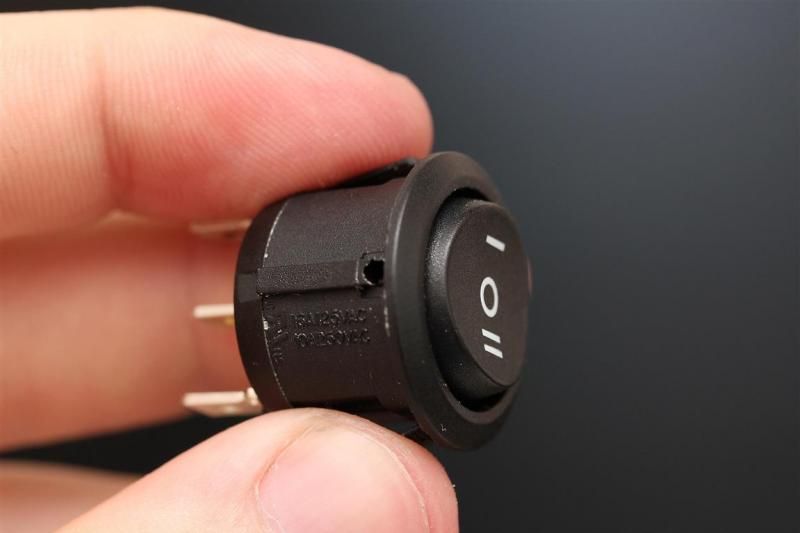
About the switch. I have played with many concepts and various different switches. This being one of them.

I considered various side switch solution and rear switch solutions. And even a combination. It would be cool having something to pull, (load it up with ultrafires and see it blow up) but at the end of the day. I need to easily have control over two driver circuits. This will hopefully become a useable light that will replace my friends Led Lenser X21R for use in bunkers and such. The place where his X21R is mostly used.
I wanted the light to be usable without having to unscrew the tailcap in order to get to a switch. That would be too much hassle the way the light will be used. He wanted it pretty much stock looking, so no switch or drilling through the tailcap. So im going for two side switches mounted on the side of the light. One to each driver circuit. About the same wiring as seen in chapter four.
If you are interested, here is the one that was turned into a laser host
Cool! Thanks for sharing. Now im jealous.
There are several differences between our replicas. Especially the tailcap. How to do the battery tube and tail will be my main issue. Its work in progress. But it wont be anywhere as nice as the machine made stuff done on that laser build.
I dont have the right drill size (only have one 20mm drill) or tools to make an insert tube like he have. And if I had, I probably would not dare. The middle section of my handle is only 28,5mm. I consider inner tube diameter to fit the fat protected 18650 to be 18,6-19mm). If the wall size if the insert tube is about 2,5mm. that would be 19+2,5+2,5=24mm. With the outer wood diameter of 28,5mm that would mean the wood wall on my light would only be 2,25mm thick in the middle section. I would not have been comfortable making it that thin or making a super thin aluminium tube. Im way to good at breaking stuff and not used to working with wood. Not much used to working on a lathe either. 0:)
Hopefully ill compensate with some uniqueness not seen in other flashlights.
very cool build ![]()
Nice work sofar, and an original idea! Hope you get it done :-)
Thanks guys!
UPDATE IN OP.
Added chapter 5-9. A good amount of failing. Highlighted the "fail" word in previous chapters too.
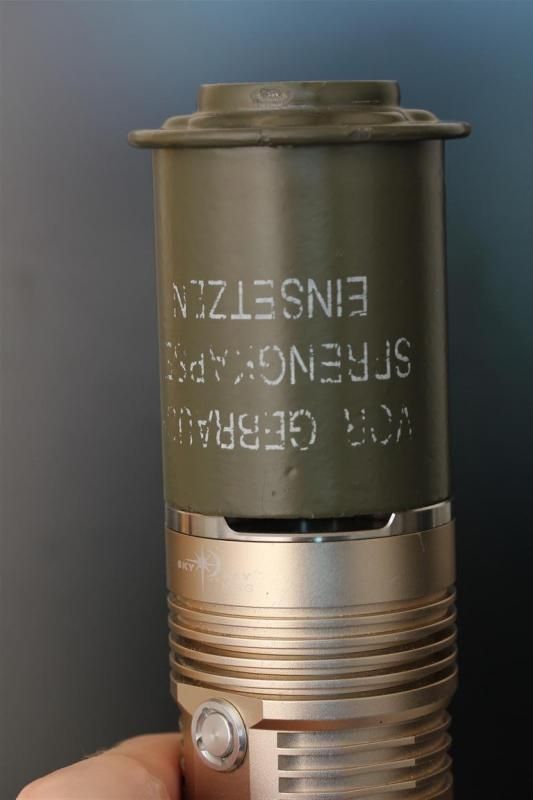
Bonus pic: SRK vs flashgrenade head

The fails make it more rewarding when you finally get it right. Keep up the great work!
I hope so. Hopefully ill end up finishing in time. And hopefully the final chapter will not just be "epic fail". :P
The word fail will be an ongoing theme in my build. :D (I know, because I have still done some stuff now shown yet. And I have more to do).
The amount of fails just shows how far im outside my usual comfort/modding zone.
There are many good quotes on failing. Here are several that I liked and came across.
If you're not failing every now and again, it's a sign you're not doing anything very innovative.
There's no learning without trying lots of ideas and failing lots of times.
Our greatest glory is not in never failing, but in rising up every time we fail.
The biggest job we have is to teach a newly hired employee how to fail intelligently. We have to train him to experiment over and over and to keep on trying and failing until he learns what will work.
Success is not in never failing, but rising everytime you fall!
I can accept failure, everyone fails at something. But I can't accept not trying.
Do not be embarrassed by your failures, learn from them and start again.

All good quotes. I'm partial to Jordan's.
Way to push through. What you are doing is great and it looks like you’re stubborn enough to finish.
:)
How you guys and gals liking the emitter setup?
Ingenious use of the blank reflector space.
I like it.
Cool idea. I don’t know how you managed to fit those tiny stars on.
Lots of time, testing and failing. :p
Luckily a learn a little bit too. I think...
Added two new chapters to OP.
9 and 10
Where?
Just joshin with ya. Looks good. You have kept me amused with all the woops going on. I'm glad I was not there when this was going on. Progress is looking good though. 