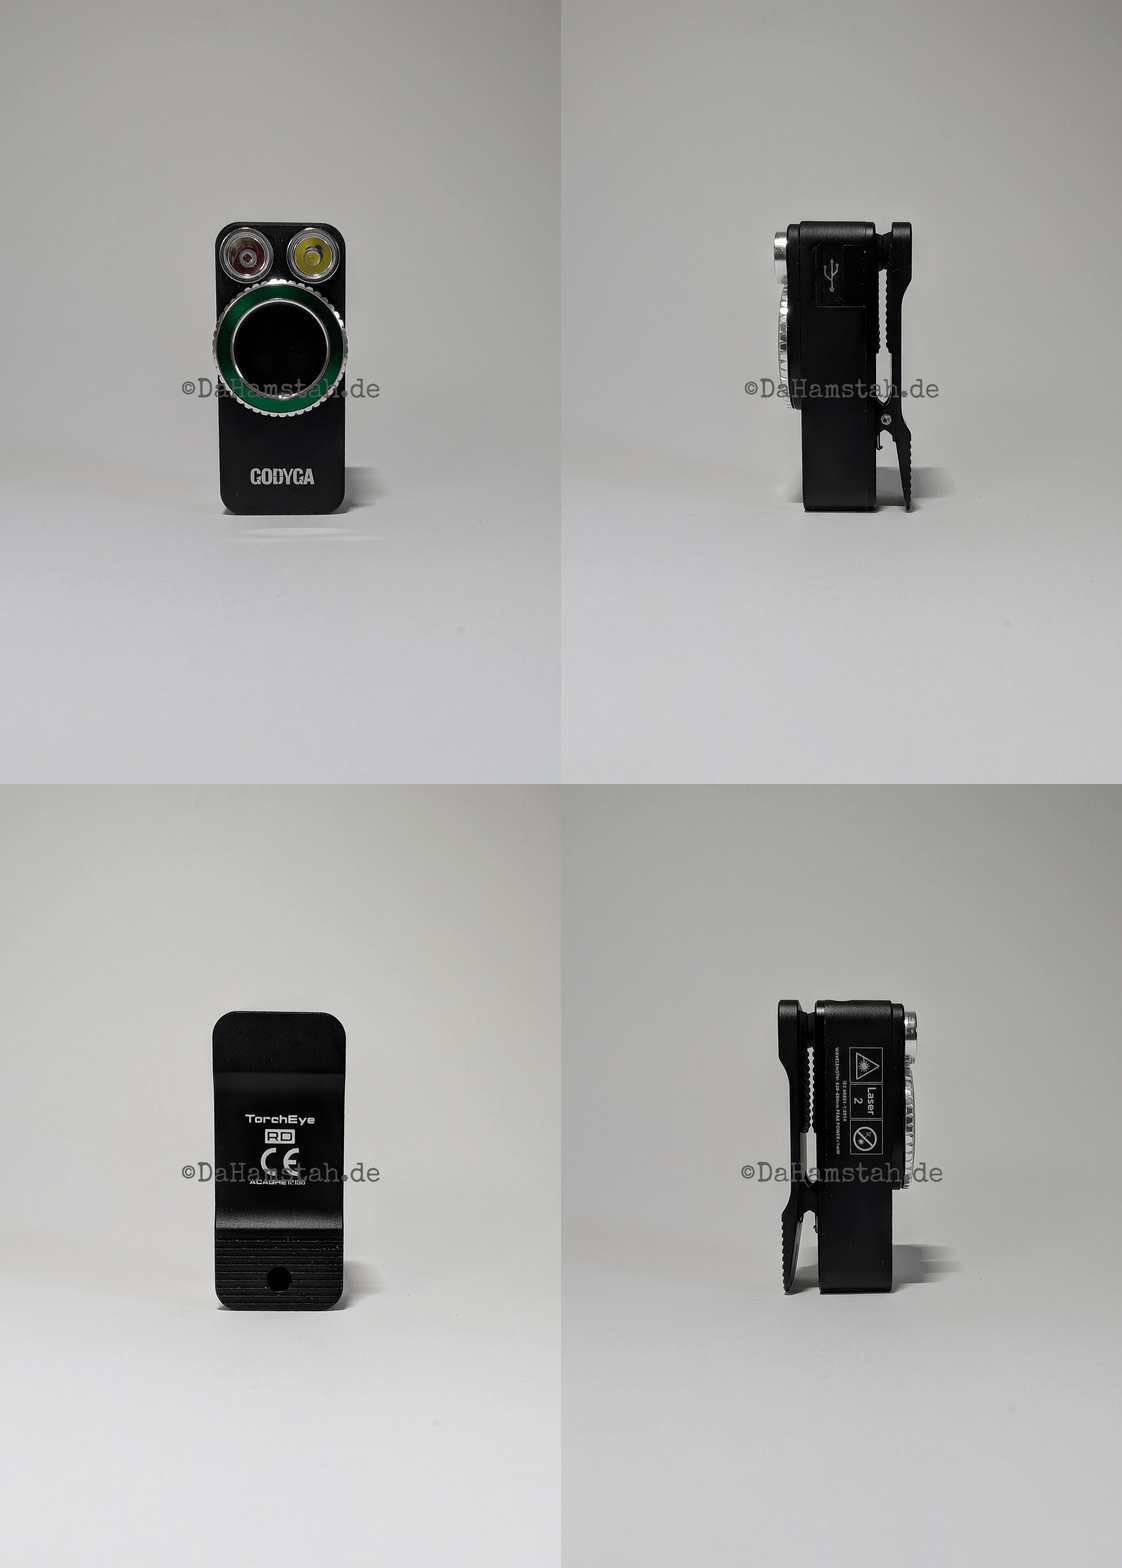
Godyga had posted about the flashlight themselves on the BLF. Since I could find very little information about the light, I reached out to Godyga and we quickly agreed that this review would happen. I own quite a few clip lights, and there have already been several reviews of such lights - but the Torcheye is definitely a bit different!
All my reviews can be found on my website.
Disclaimer: GODYGA provided this light to me free of charge. This had no influence on the review.
All measurements were done using hobby-grade equipment, inaccuracies and deviations are therefore possible.

There is a version with a laser, a version without a laser, and now newly available, a version with a spirit level.
You can find the flashlight on Amazon or at GODYGA.


The flashlight arrives in a high quality, two part box. Inside you will find the light, a short USB-C-C cable (with a rubber strap for tidy winding), and an unusually thick manual. All of this is neatly packed in individual boxes.
The manual covers several versions of the flashlight. Once you figure out which features are included in your specific version, everything is well described.
The first glance at the flashlight is surprising. Sure, it is a clip light, there is a clip on the back.There are LEDs on the front that somewhat resemble owl eyes - but these still fade a bit into the background because a beautiful satin green ring catches the eye. This ring, just like the LEDs, is framed in silver. It looks visually striking, is beautifully designed, and conveys a premium impression. On its own, the ring could easily pass as part of a fancier watch.


Pressing the surface in the center of the circle wakes up a display at this spot. This small but surprisingly high resolution display shows a lot of information. On the right side, there is always a percentage accurate reading of the battery - combined with the display of remaining runtime or charging time, you are always perfectly informed about the power status. By the way, the flashlight can be fully used while charging.


The brightness is also graphically represented, as well as the selected mode. More on the display indicators later in the UI section.
For now, I can already say that the display is excellently executed. All important data is immediately visible, such as the previously mentioned battery level and brightness tier, but also the light source, reference point for distance measurements, and there is even a settings menu!
The ring I just mentioned is not just for decoration either, but controls the flashlight together with the display acting as a button. It turns buttery smooth and has well defined detents that signal when an input is reached.

The LEDs are neatly centered in the small, smooth reflectors - there is no specification as to which LEDs are used.

When viewed from the front, there is a USB-C port on the right side. In front of it, there is a sliding door. This should effectively prevent larger particles from entering, and the operation is flawless. The whole thing looks premium and feels that way too.

On the top side of the flashlight are the laser and the specialty of this light - a distance measurer. Not exactly typical for a flashlight, but not surprising for a company whose name is composed of GO (Going forward), DY (Dynamic), and GA (Gadgets & Gears).

The measurements are simple. Start the measurement and, after a short delay, the distance to the point where the laser rests appears on the display. If you move the flashlight, the display updates continuously. A single button press and the value is saved. Indoors, this works very reliably. GODYGA does not explicitly comment on outdoor use. The measurement does work there too, but only in relatively open fields and with a sufficiently large target area. A van across a street is no problem even at 15m, but a thinner post between two trees can already be problematic at 3m. Conclusion: Great indoors, usable outdoors, but not optimal.
There is even an option to perform a calibration / set an offset. So the Torcheye is not just a pretty clip light, but a serious measuring tool. This naturally includes being able to adjust the reference point between the rear and front end of the light.
I don’t want to hide a small drawback. It happens relatively easily that you turn on the light while looking at the display (or switch the light source). Due to the arrangement of the LEDs, you often end up shining it directly into your eyes. The operation doesn’t really differ from other clip lights, but the display is naturally an eye-catcher - with other clip lights, there isn’t much reason to look at the front.
One last small, but impressive detail: The light has haptic feedback in the form of a vibration motor. With every turn of the wheel and every successful input, there is a short vibration. This makes the operation very pleasant and is really well integrated!

Sofirn ST10, Wurkkos HD03, Godyge Torcheye RD, Olight Oclip Pro
The flashlight weighs a mere 57g, with a size of LxWxH 59.2mmx26.1mmx27.5mm.
Lanyard: No lanyard is included, but there is a hole on the clip to attach one.
Clip: The clip is part of the flashlight. To open it, you press on the lower part of the body so that neither the screen nor the LEDs are in the way. This causes the flashlight to stand upside down when clipped in a normal position. The clip is rubberized on both sides and has good tension. I do not see any risk of losing the light. The opening is large enough for any hem, which is then held gently but firmly by the well made rubber coating.

Magnet: A magnet is also integrated into the opening part of the clip. This holds the flashlight securely, even on smooth, uneven, or rounded surfaces, the light never slipped.

(Jacket)pocket: I never find clip lights particularly well placed in pants pockets. A bit too thick, the clip does not go deep enough - but that is not a problem unique to the Torcheye, but rather of clip lights in general. In a jacket pocket, or clipped to an inside pocket, the situation looks completely different. Here, the clip can fully show off its strengths. The flashlight will surely feel right at home in a cargo pocket or attached to a sling bag / a backpack as well.

Explanation 1C, 1H...
1C: short click, 2C: double click, …
1H: press and hold without letting go
2H: short click, followed by 1H
…
Where should I start… The UI is incredibly extensive and a look at the manual certainly cannot hurt. Yet, most of it is still designed to be largely intuitive. Nevertheless, the flashlight requires a bit more getting used to, as it differs quite a lot from “normal” lights in some aspects.
The ring allows you to select the mode - white, red, laser / distance measurer, or settings - and if activated, the golf mode, which I will not consider further here.
In white mode, you could almost call the UI standard:
| 1C | on / off | on, last used mode |
|---|---|---|
| 2C | Turbo | |
| 1H | light on: change brightness | light off: lowest level |
| 3C | light on: beacon | light off: Strobe |

On the display, you can see the blue headlight symbol for white, the remaining runtime, the battery level, and at the very bottom edge, the brightness level.
With the red light, it is similar:
| 1C | on / off | on, last used mode |
|---|---|---|
| 2C | Turbo | |
| 1H | light on: beacon | light off: lowest output level |

For red, the display representation matches that of white - except for the red headlight, of course.
Of course, the laser / distance measurement works a bit different:
- 1C to turn the laser on / off.
- 1H to start measuring.
- 1C while measuring to hold the value.
- once more 1C to stop the measurement and only use the laser. 1H to start a new measurement.
- If there is no active measurement, 1C to turn off the laser.

The image shows an active measurement. At the bottom of the display is the reference point on the flashlight, in the middle is the measured distance, and on the right, the battery level is still shown.
Turning off the flashlight is also unusual. Because turning it off means the light source is switched off, but the display stays on for now. It only turns off after a short time delay.
The settings menu is fairly self explanatory, so I will not explain it in more detail here.
All measurements were done in my 30cm integrating sphere. The temperature was at around 29°, thanks to a heatwave. Additionally, an Opple Light Master III and a TASi TA636B lux meter were used. Please note that this is hobby equipment, so inaccuracies and deviations (also upwards!) are possible! The accuracy is currently at approx. 10-15% possible deviation.
For a measuring tool, the flashlight illuminates surprisingly well. The spot is large, the beam free of artifacts - however, there is a tint shift from spot to spill. The spill is colder, slightly purple-bluish. Red is a bit more turbulent and has a slight donut hole, but it is perfectly usable away from white walls.
The laser is visibly pulsed, but has a clean dot and is more than powerful enough for the specified measuring distances.
The flashlight misses the specified 650lm (according to the instruction manual) in my measurement. However, it hits the 500lm specified on the homepage without any problems. The modes, however, are overall a bit different from how they are listed in the manual.


| moon | low | mid | high | turbo (30s) | |
|---|---|---|---|---|---|
| Specs | 1 | 10lm für 2h30min | 100 für 1h25min | 360 für 1/65/13min | 650 für 1/30/10min |
| measured output (lm) | 7 | 102 | 153 | 300 | 528 (513) |
Low and mid are quite close to each other. Of course, you can still see the difference, but this also explains the small runtime difference between low and mid. If the steps were as specified, the spacing would be great - whether this is generally the case or just with my sample, I do not know. For the modes that match the specifications, the runtimes also fit - for the others, the runtimes match the output.

Apart from the fact that the specifications do not match the measurements, you cannot blame the flashlight for poor performance. Both output and sustain are not bad and can certainly compete with other clip lights. As you can see above, no other light in the comparison maintains a higher output continuously!
At one meter, I measured 1566cd, which corresponds to a range of 79m.
There is also a diagram of the red high mode. I have no way of measuring the red output, but the flashlight holds up well against the Olight Oclip Pro. The output is by no means bad for its size!

| Low | Turbo | |
|---|---|---|
| CCT | 6450 | 6250 |
| CRI | 69 | 71 |
| DUV | 0,007 | 0,002 |
Flicker is in the green zone.
Expand here for all screenshots of the Opple III.
 low
low low
low low
low low
low Turbo
Turbo Turbo
Turbo Turbo
Turbo Turbo
Turbo
I could not detect any PWM with either my eyes or the camera.
Settings were the same for all beamshots, except white balance which was on auto this time, sadly. The lights were about 1m away from the wall.


The charging curve looks flawless. Both the CC- as well as the CV-phase are cleanly executed, only the termination current could be a bit lower. 0.1A is relatively high. So if you want to save power, you should not leave the fully charged device permanently hanging on the charger - even though the consumption will be negligible compared to normal household usage. With a charging time of a good two hours, the small battery is charged gently, which will hopefully ensure a long lifespan for the non-replaceable battery.
The Torcheye is a light where the flashlight function works well, but nevertheless plays more of a supporting role. The show is simply stolen - visually by the beautiful display, functionally by the excellently working distance measurer. So it is not a typical clip light, but a functioning combination of a flashlight and a measuring tool.
Like many devices with a large range of functions in a small housing, the flashlight makes compromises - especially that it can happen that the light sources are pointed at your face and turn on directly when looking at the display to select them. Apart from that, the flashlight shows no real weaknesses. Sure, the brightness tiers do not match the manufacturer specifications, but the runtimes are good and the sustained output speaks for itself.
On top of that, the flashlight is stylish, and the ring with its soft detents makes a great fidget toy. Whether on a construction site, in the office, or as a household helper, the flashlight will perform well in many places, and I can thoroughly recommend it.
As far as I know, a version with a spirit level has just been released, which can of course be even more useful in combination with the laser distance measurer.