Looking for a simple EDC flashlight? The new Manker E05 II could be the right choice for you! Support for Li-ion and NiMH batteries, mechanical tail switch and three levels of brightness, in multiple materials and colors as well.
You can find the German version of this review on my website: SammysHP Blog › Manker E05 II
I’ve got this flashlight from flashlightgo for free in return for a review. Thank you very much!
![]()
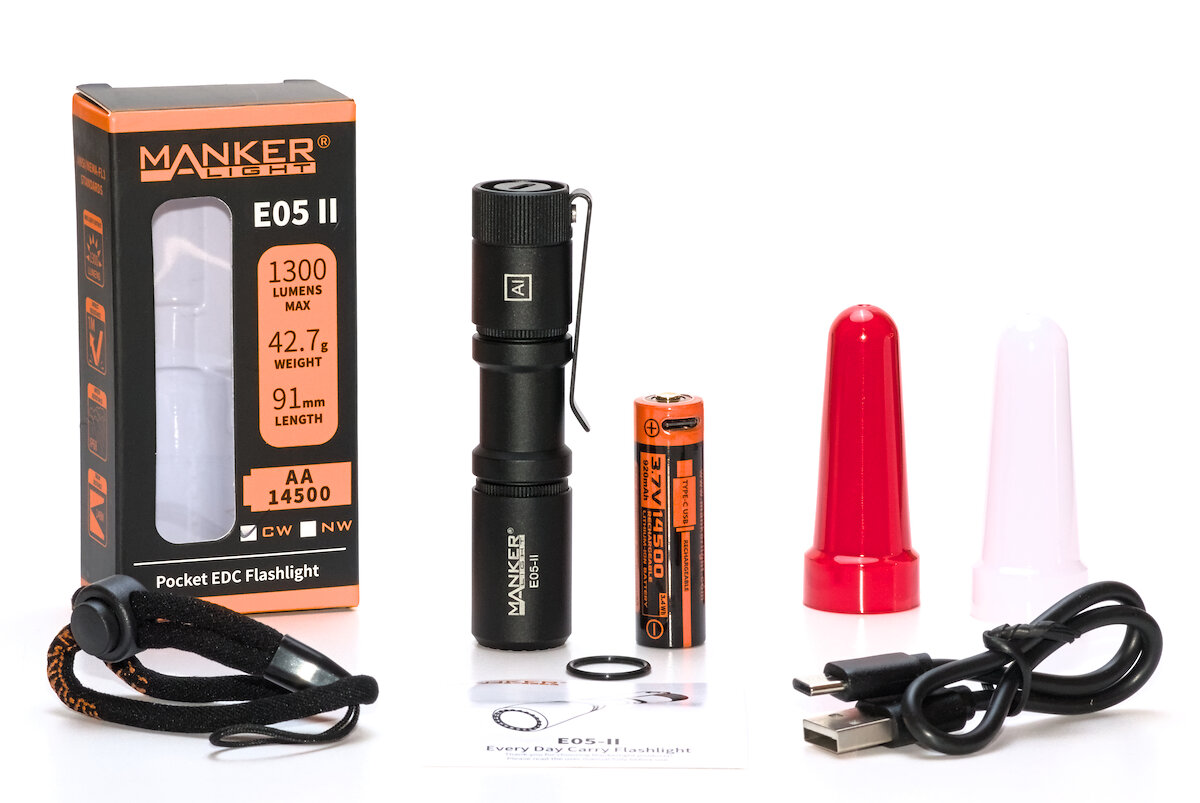
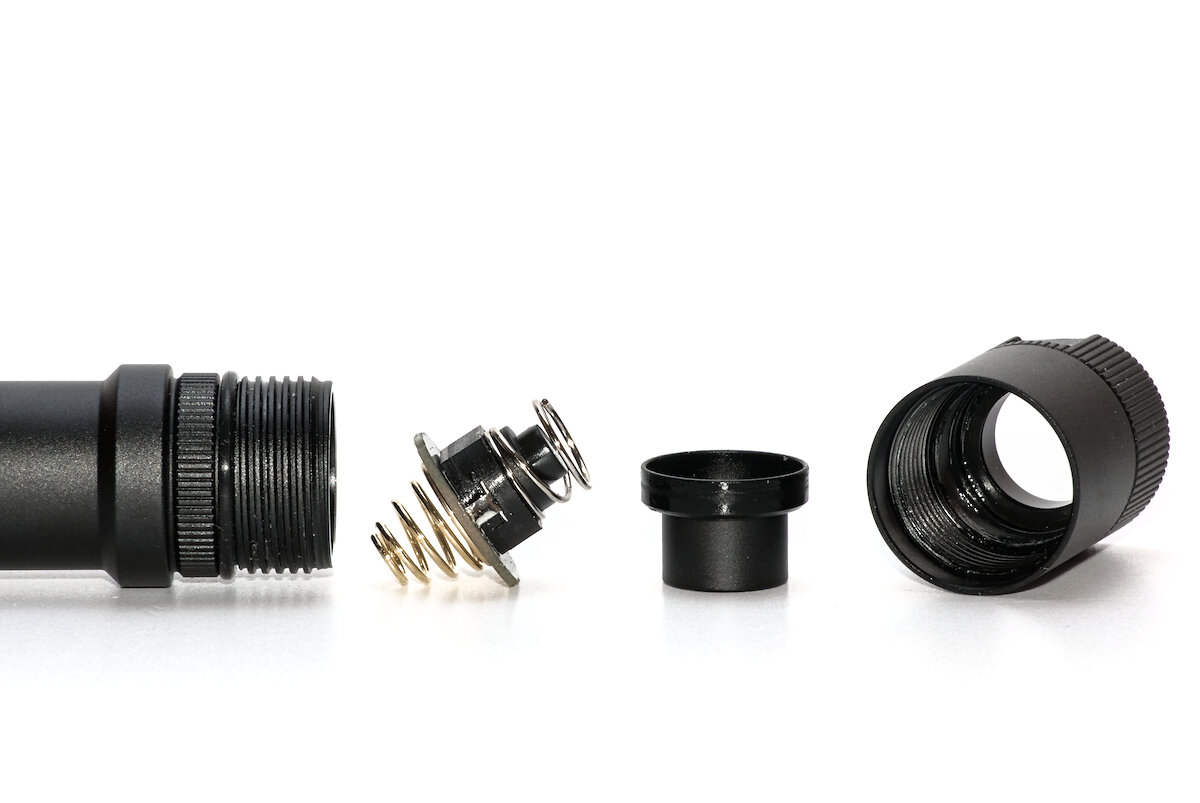
Supplied parts and hardware
You have the choice between five body colors: black, green, silver, sand and red. There are also versions in copper and titanium. If you want, you can also get two optional diffusers in white and red.
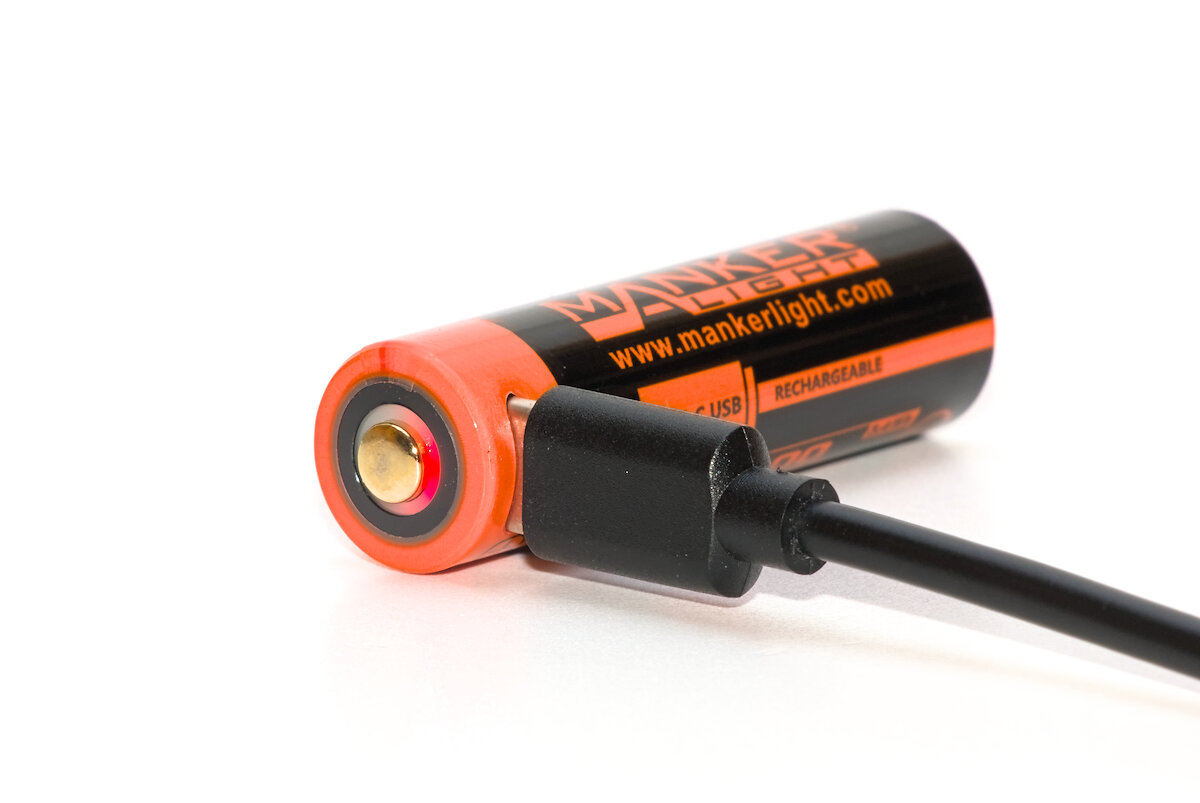
- 14500 Li-ion battery with 920 mAh (3.40 V at arrival)
- Lanyard
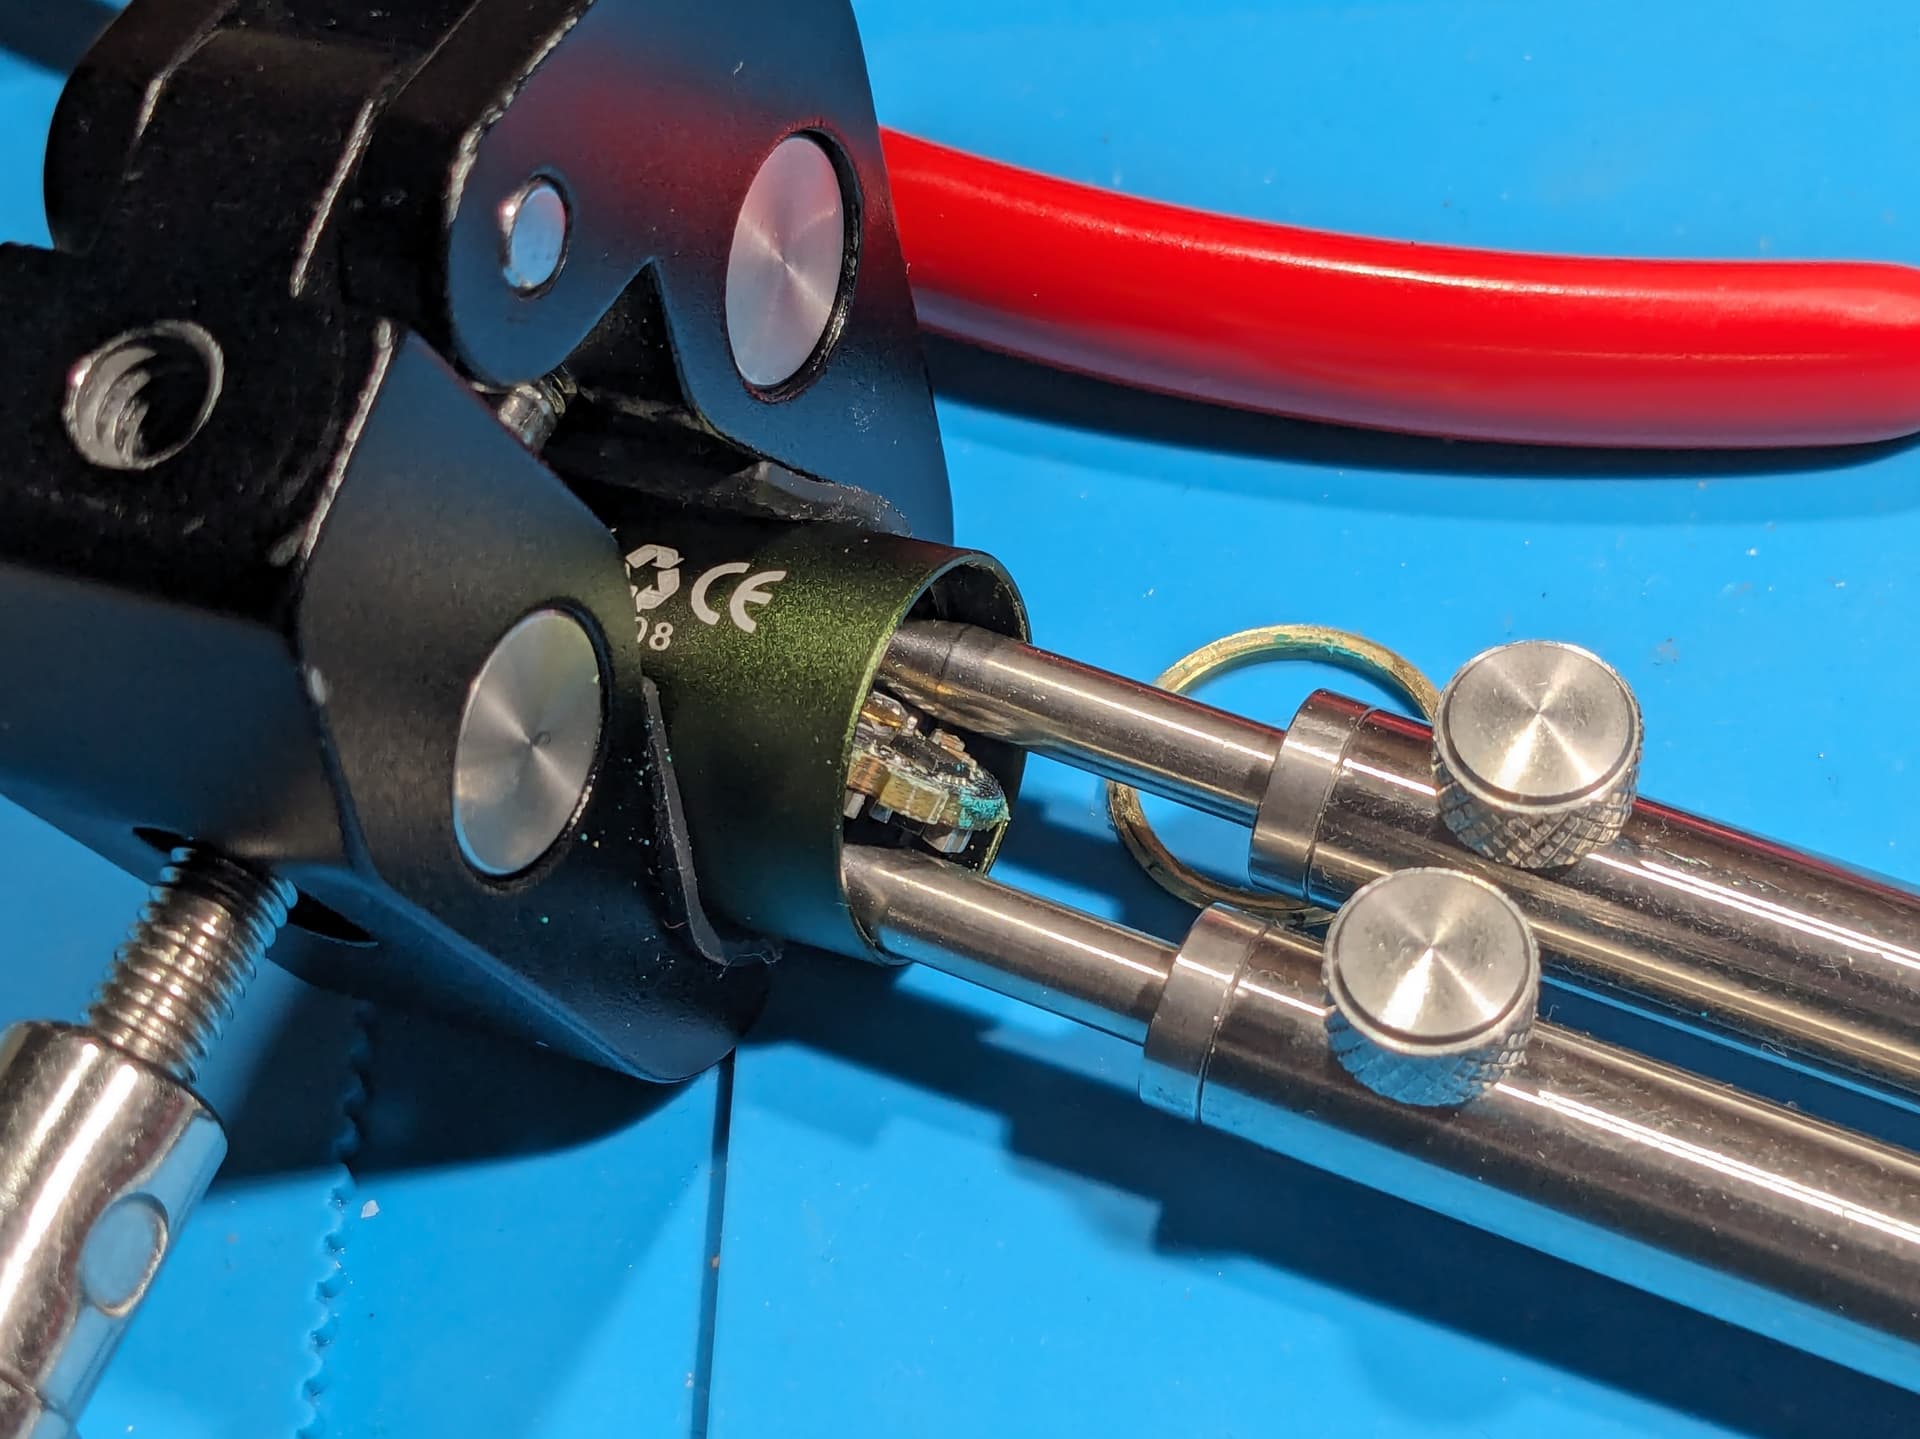
- Replacement o-ring
- Clip (attached)
- USB-C cable
- Red and white diffuser (optional)
- Manual (EN, CN)
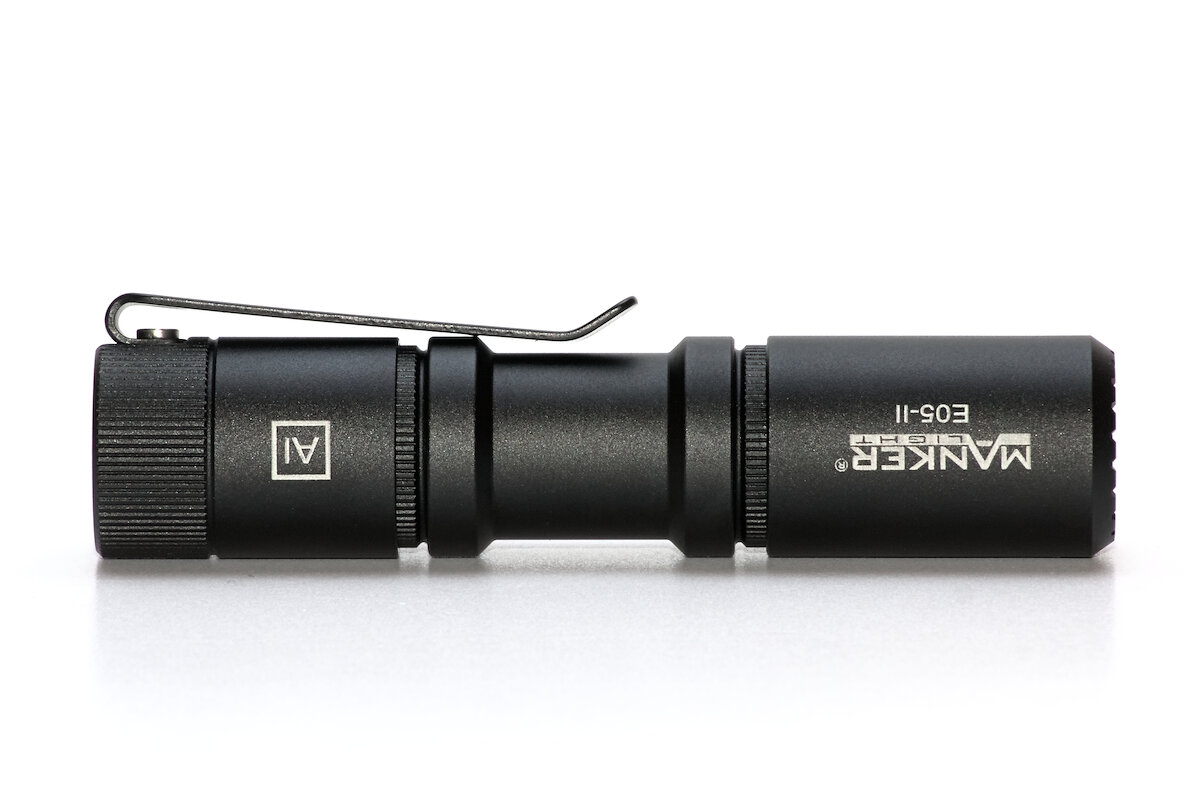
Length: 92 mm
Diameter: 20 mm
Weight: 42 g (plus 21 g for the battery)
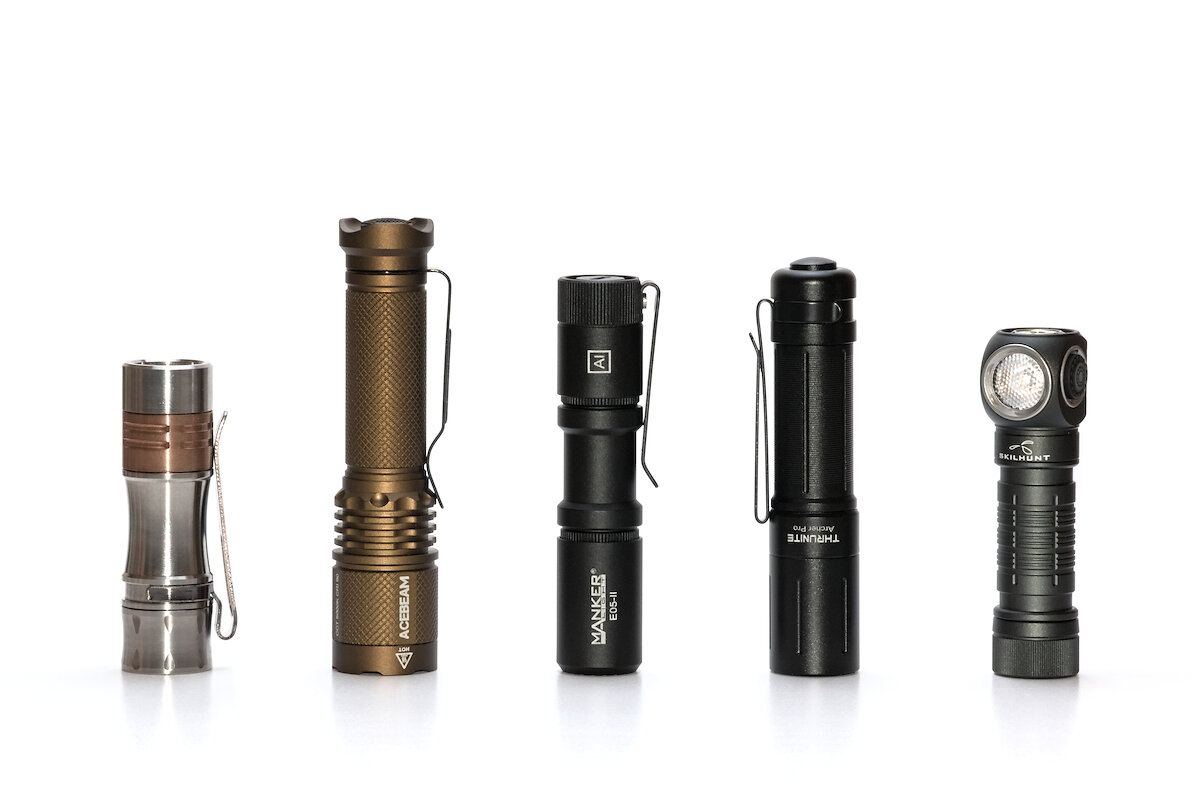
Wurkkos TS10 | Acebeam TAC AA | Manker E05 II | ThruNite Archer Pro | Skilhunt H150
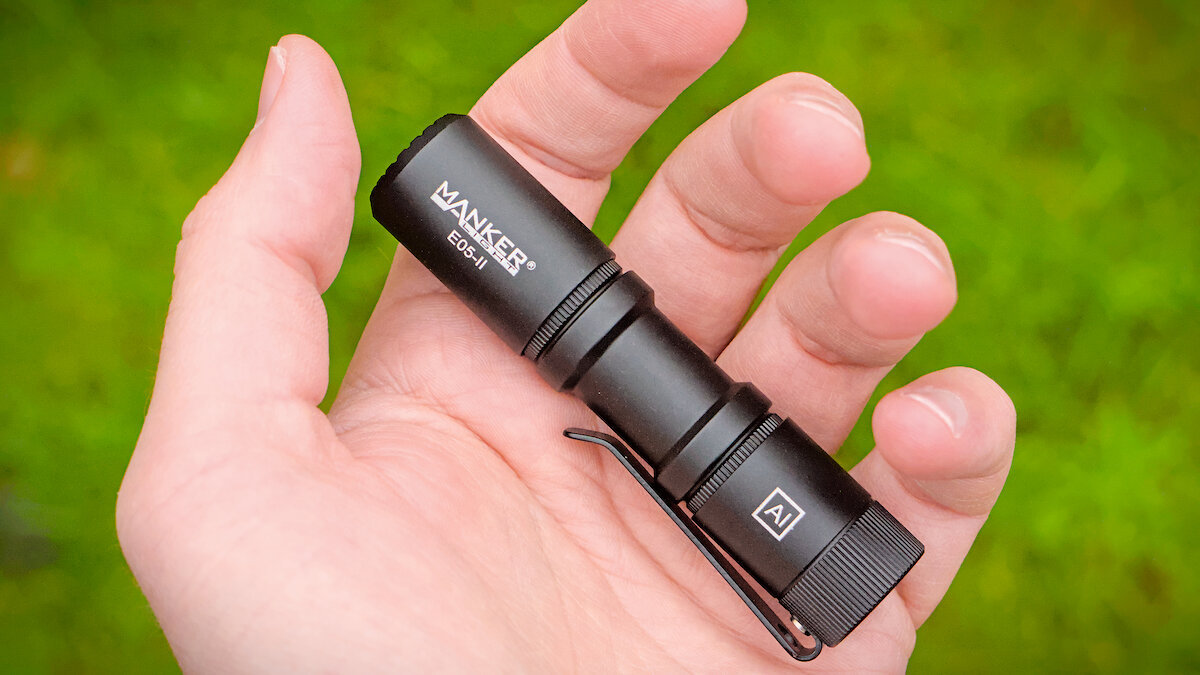
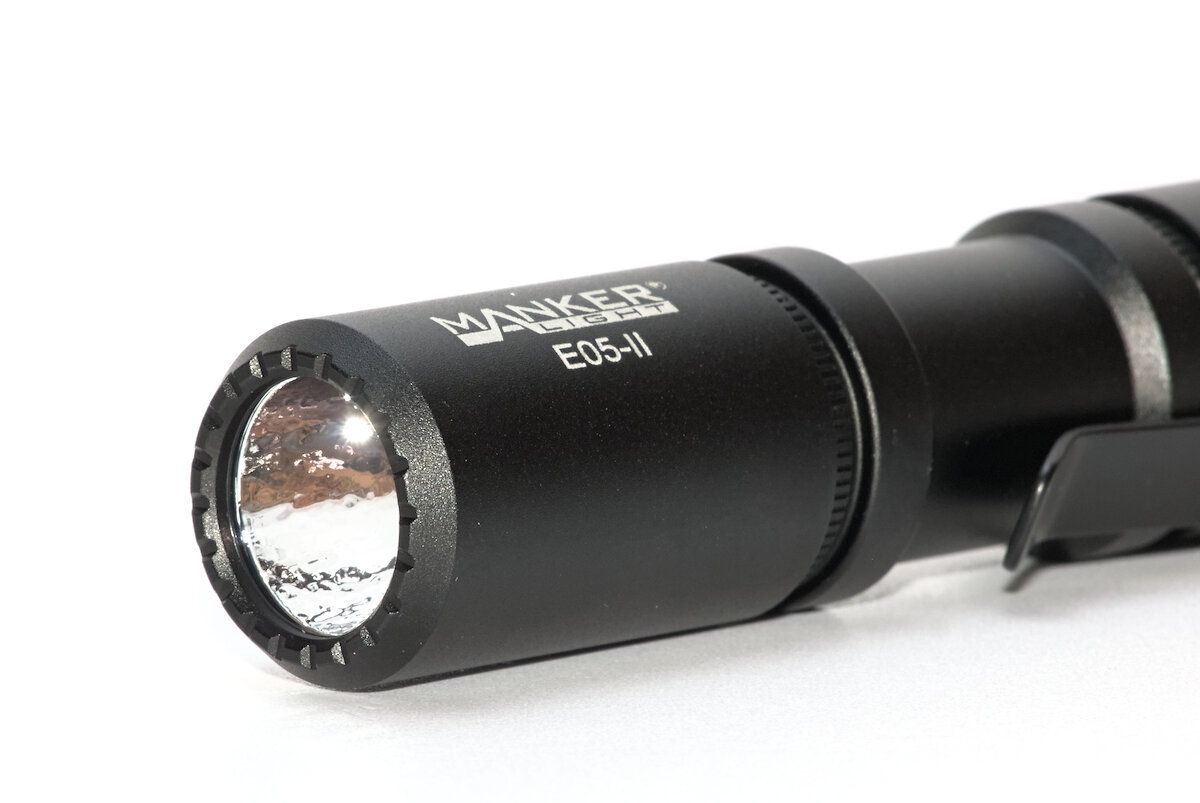
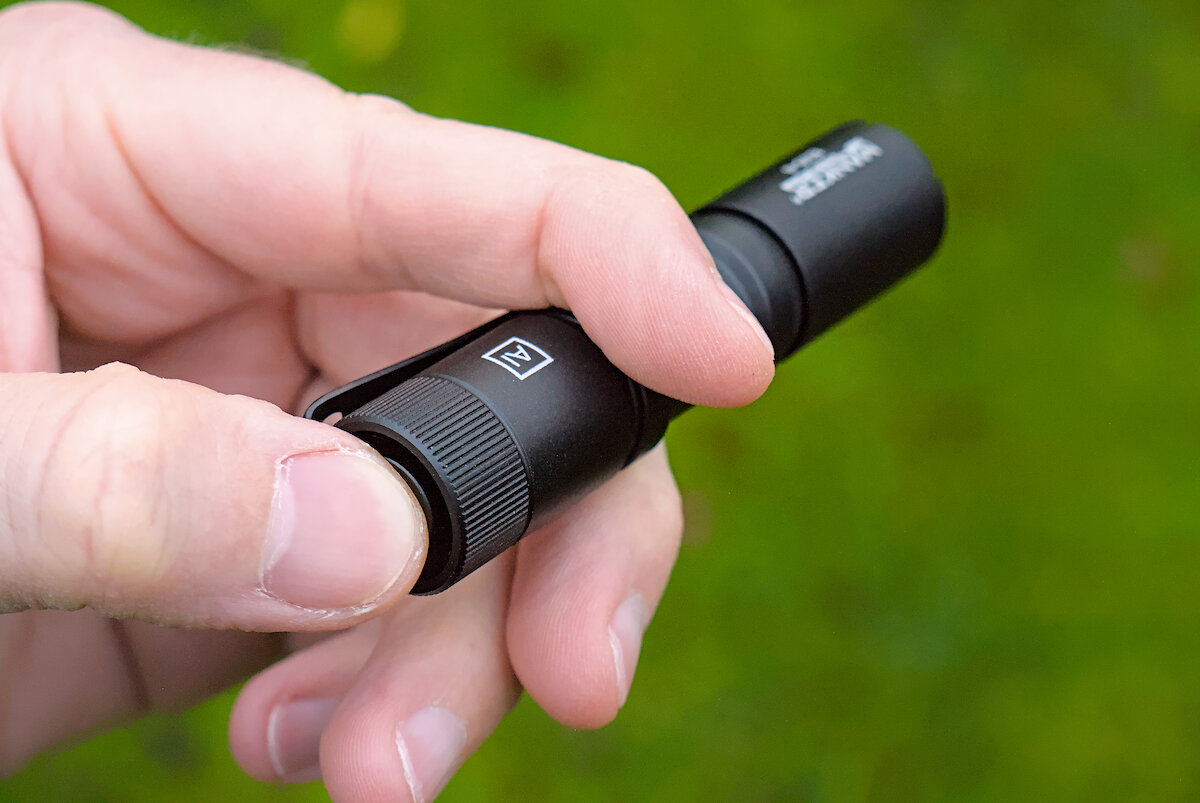
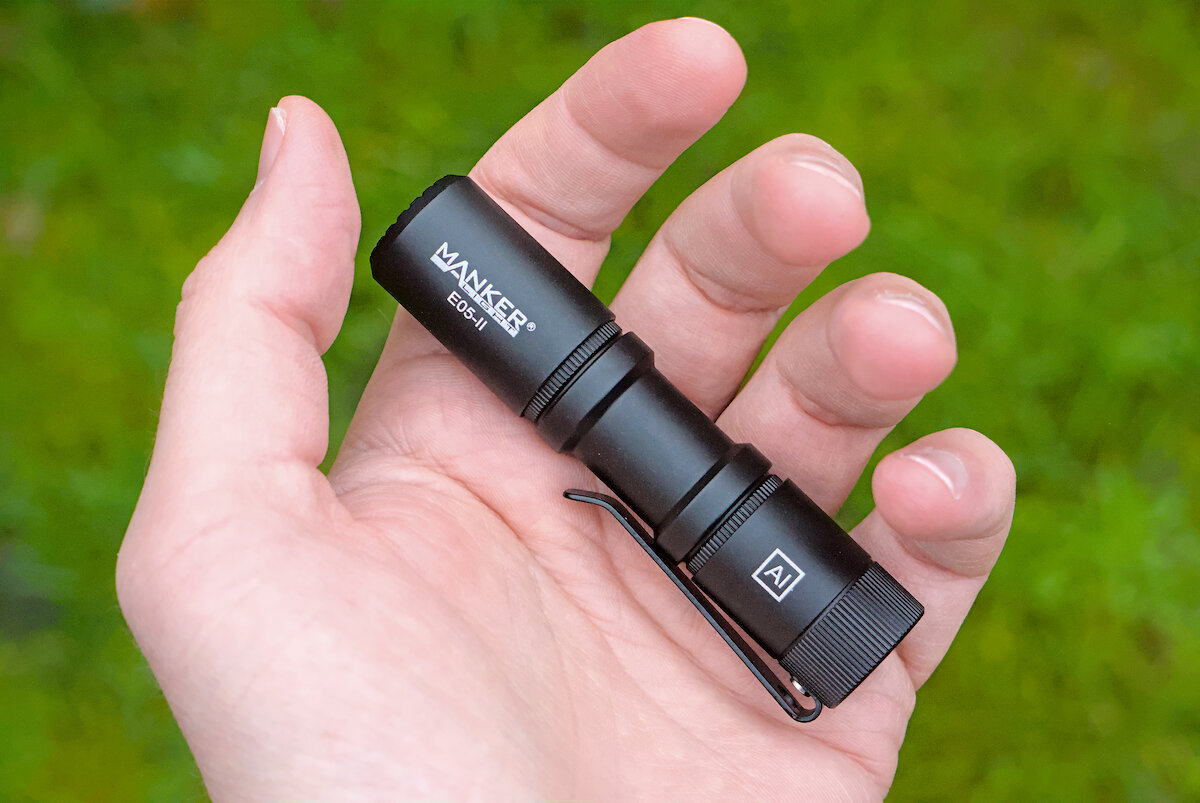
The minimal crenelation on the head is enough to see if the flashlight is turned on when standing on its head. The chamfer makes it easier to put into your pocket.
The recessed tail switch allows you to add a small tritium tube (1.5 × 6 mm).
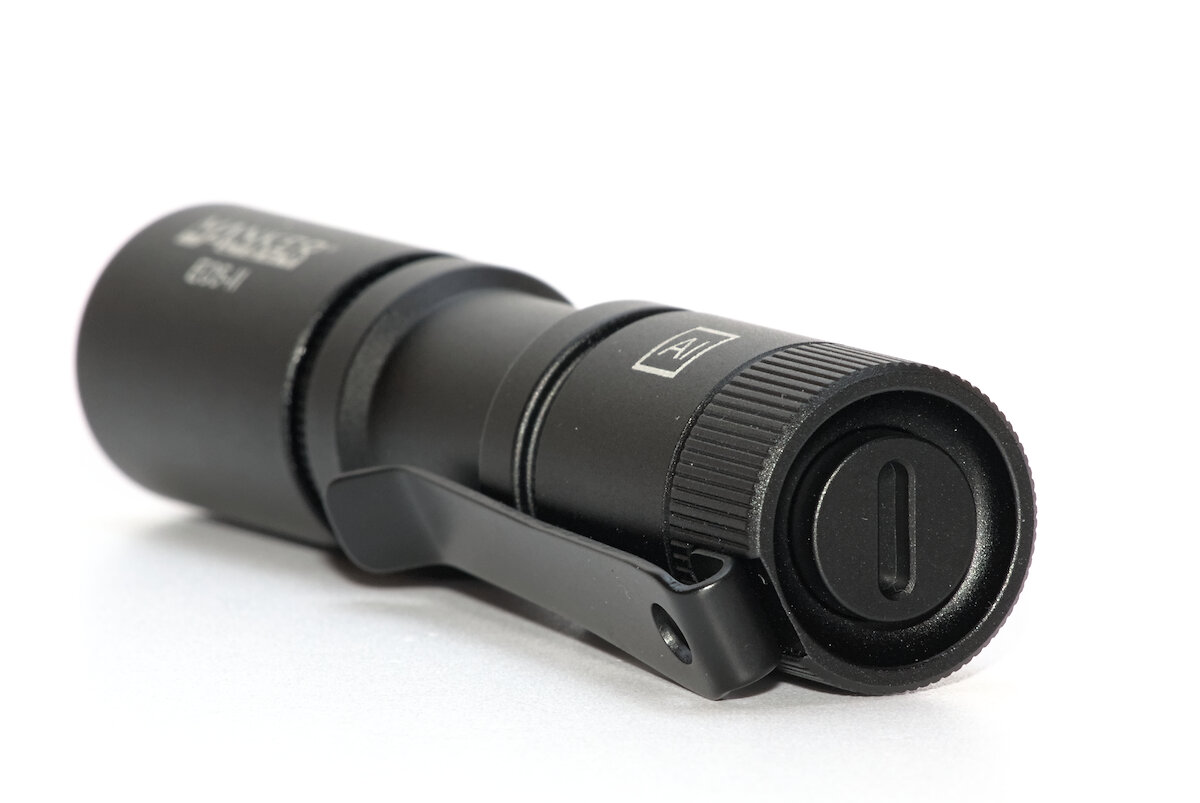
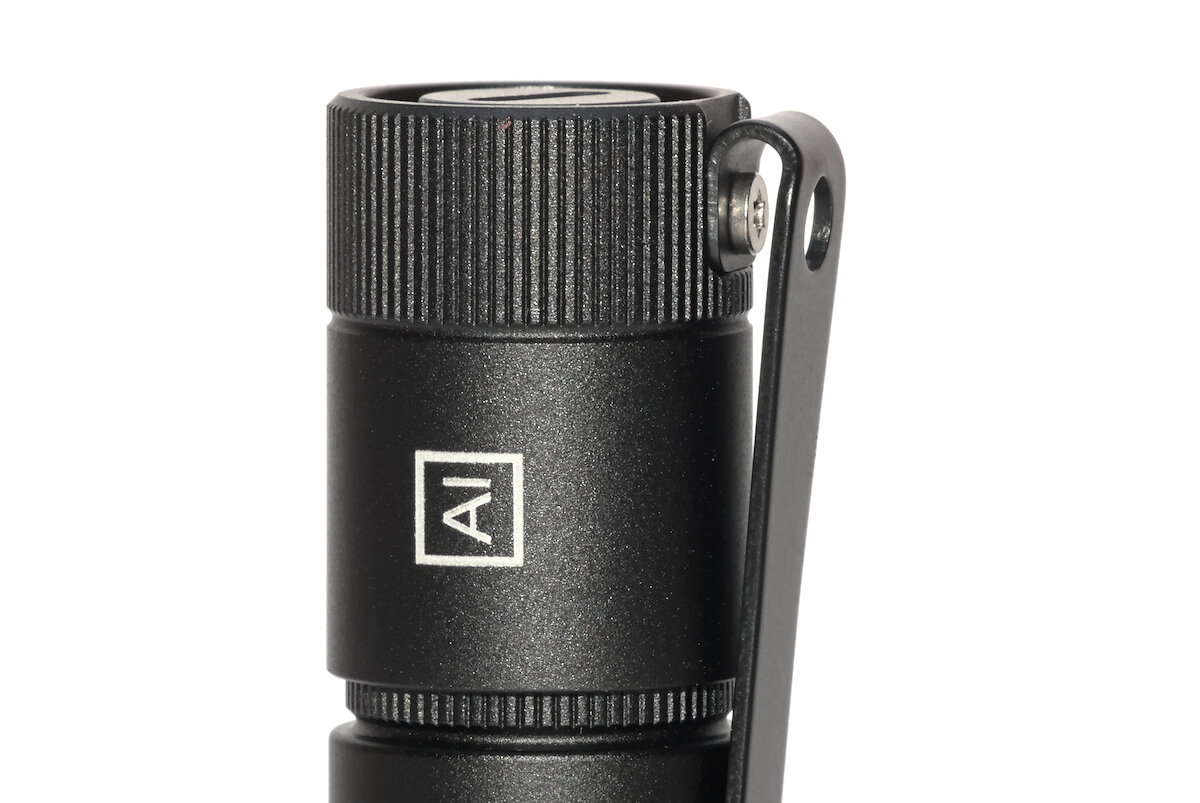
The clip is mounted with a single screw which is glued very well. You need some force to unscrew it and remove the clip. The hole in the clip for the screwdriver can be used to attach a lanyard.
I like the clip. It has a large opening, making it easy to insert the first centimeter of the fabric. Then a gentle push and it sits deep inside of your pocket. Very nice.
While the flashlight has no charging port itself, the battery can be charged directly via its USB-C port. I’m pretty sure it’s the same battery as the Acebeam ARC14500, which I reviewed recently.
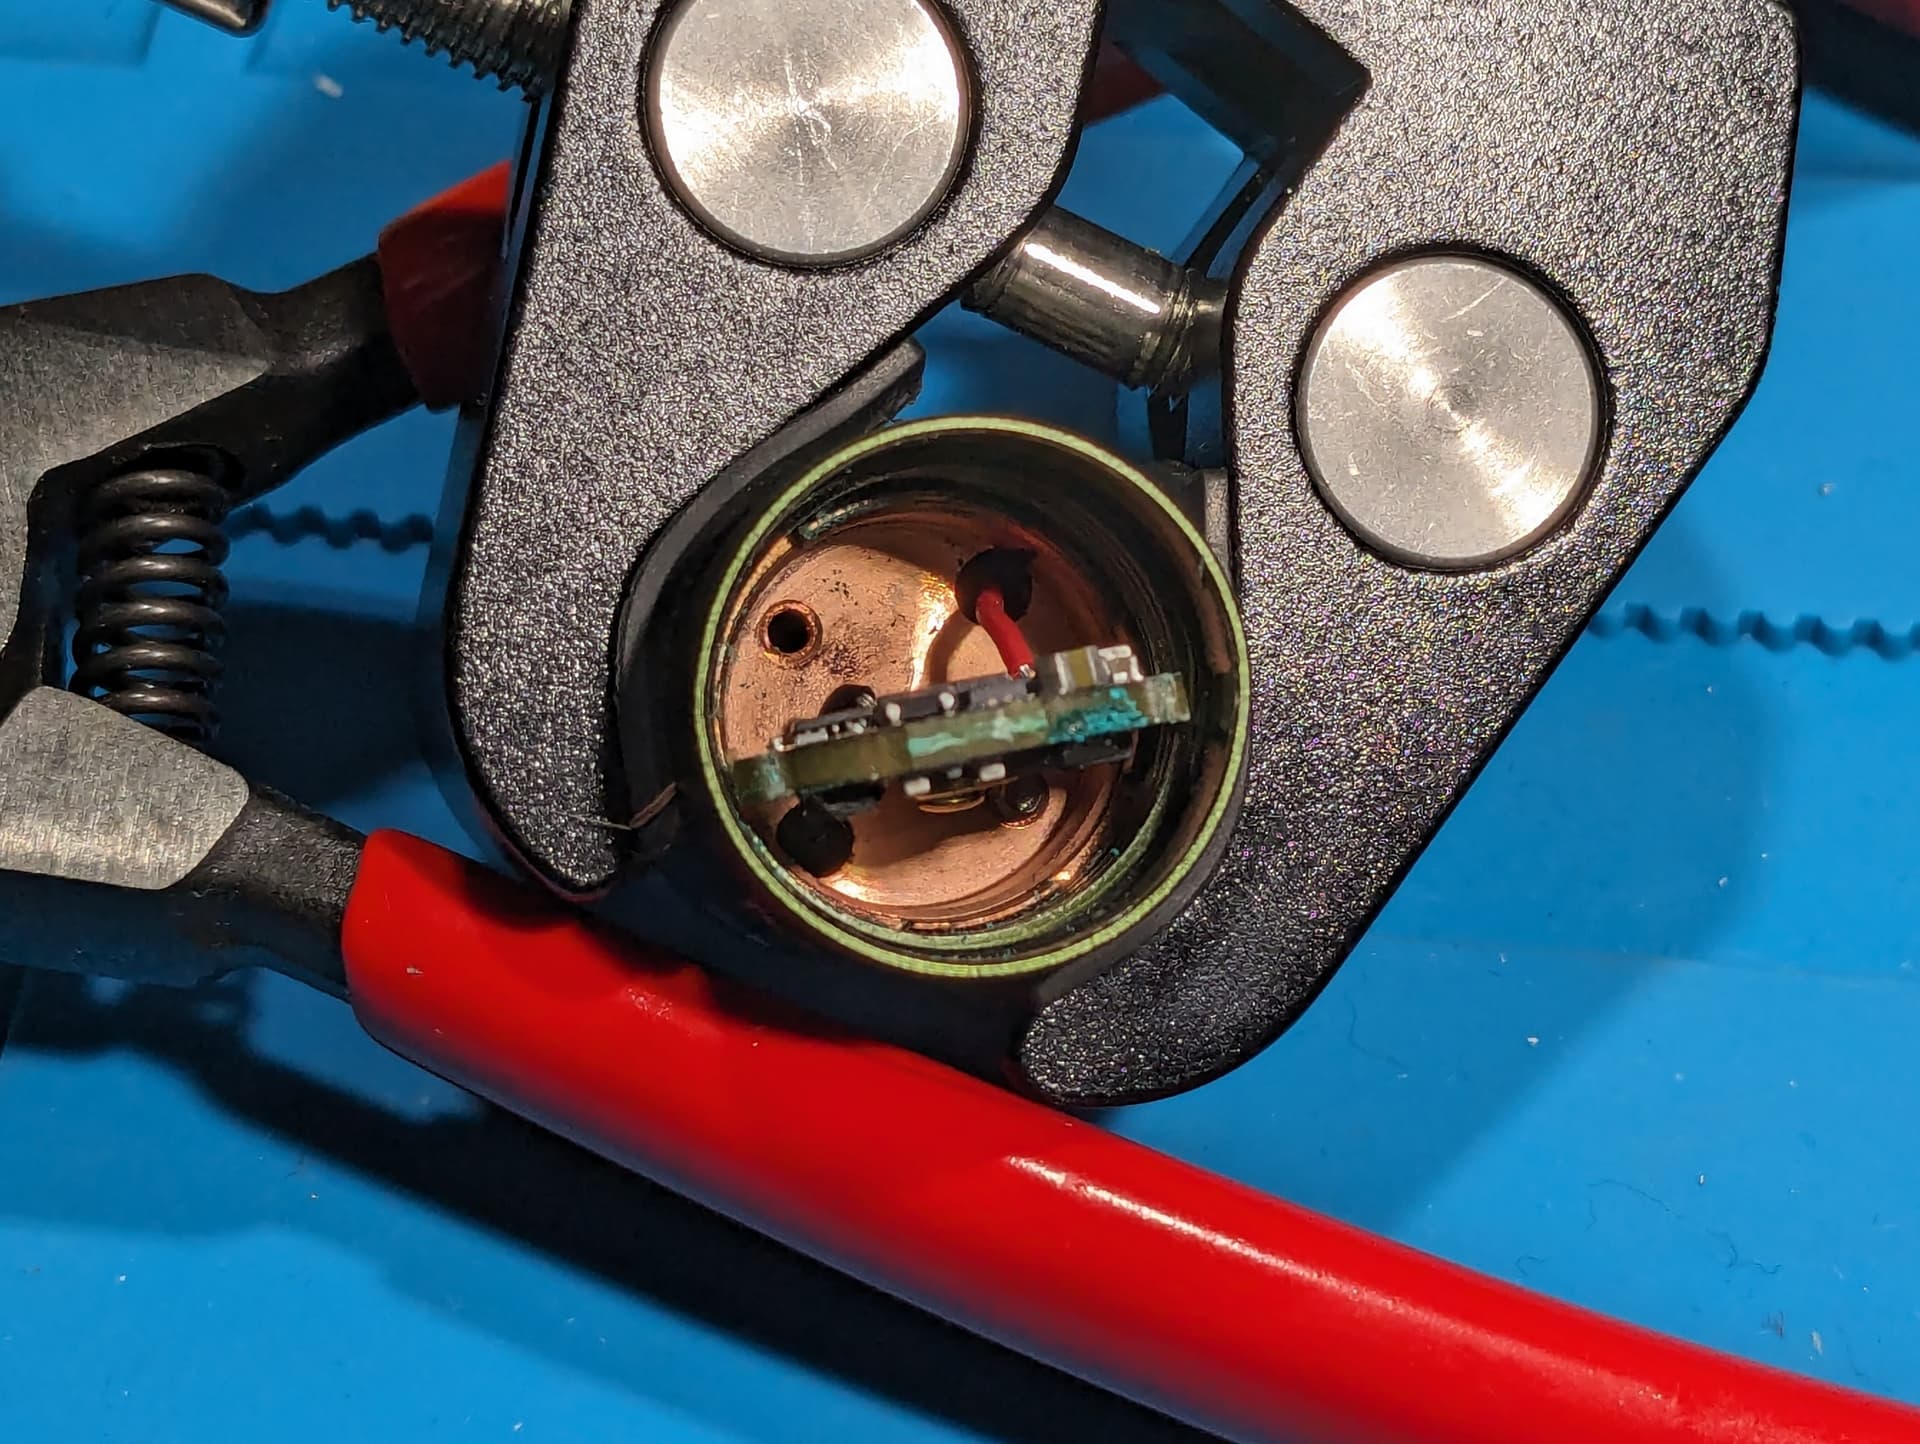
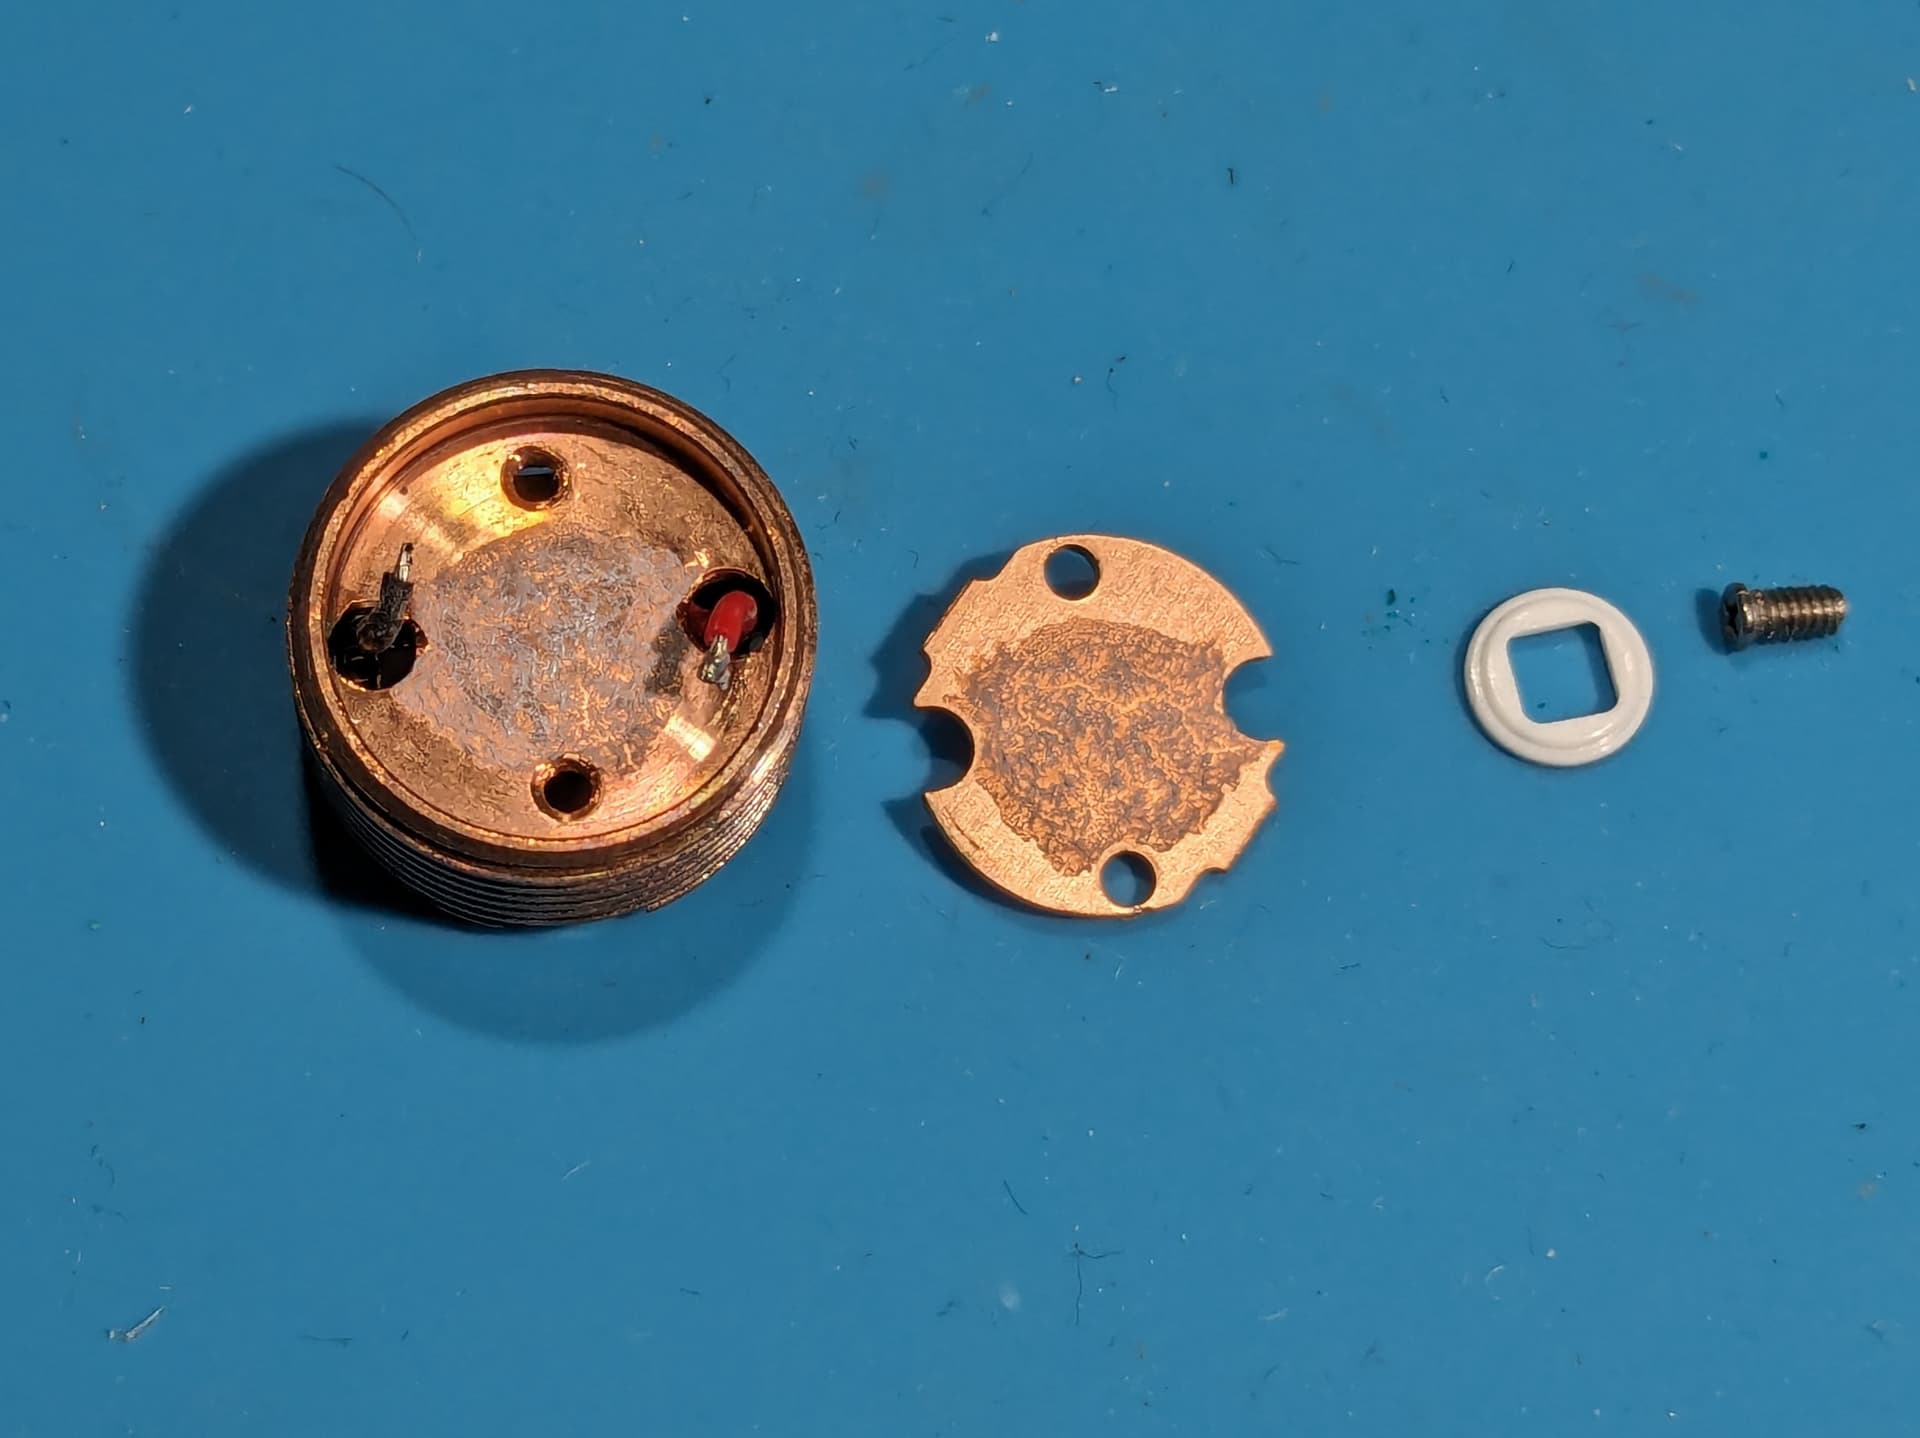
Small button at the driver side, with a mechanical reverse polarity protection pin next to it. This limits the battery choice to button top batteries. Either 14500 Li-ion or AA NiMH, alkaline or lithium primary.
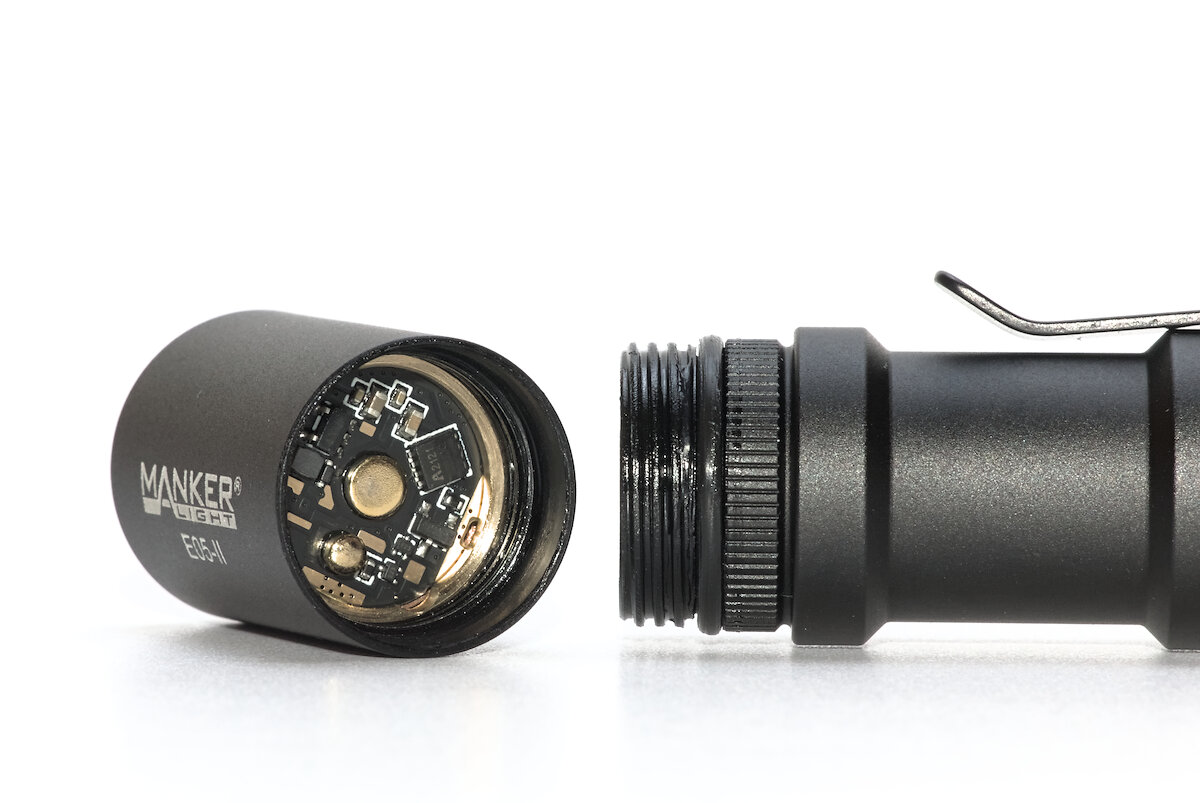
The other side has a spring.

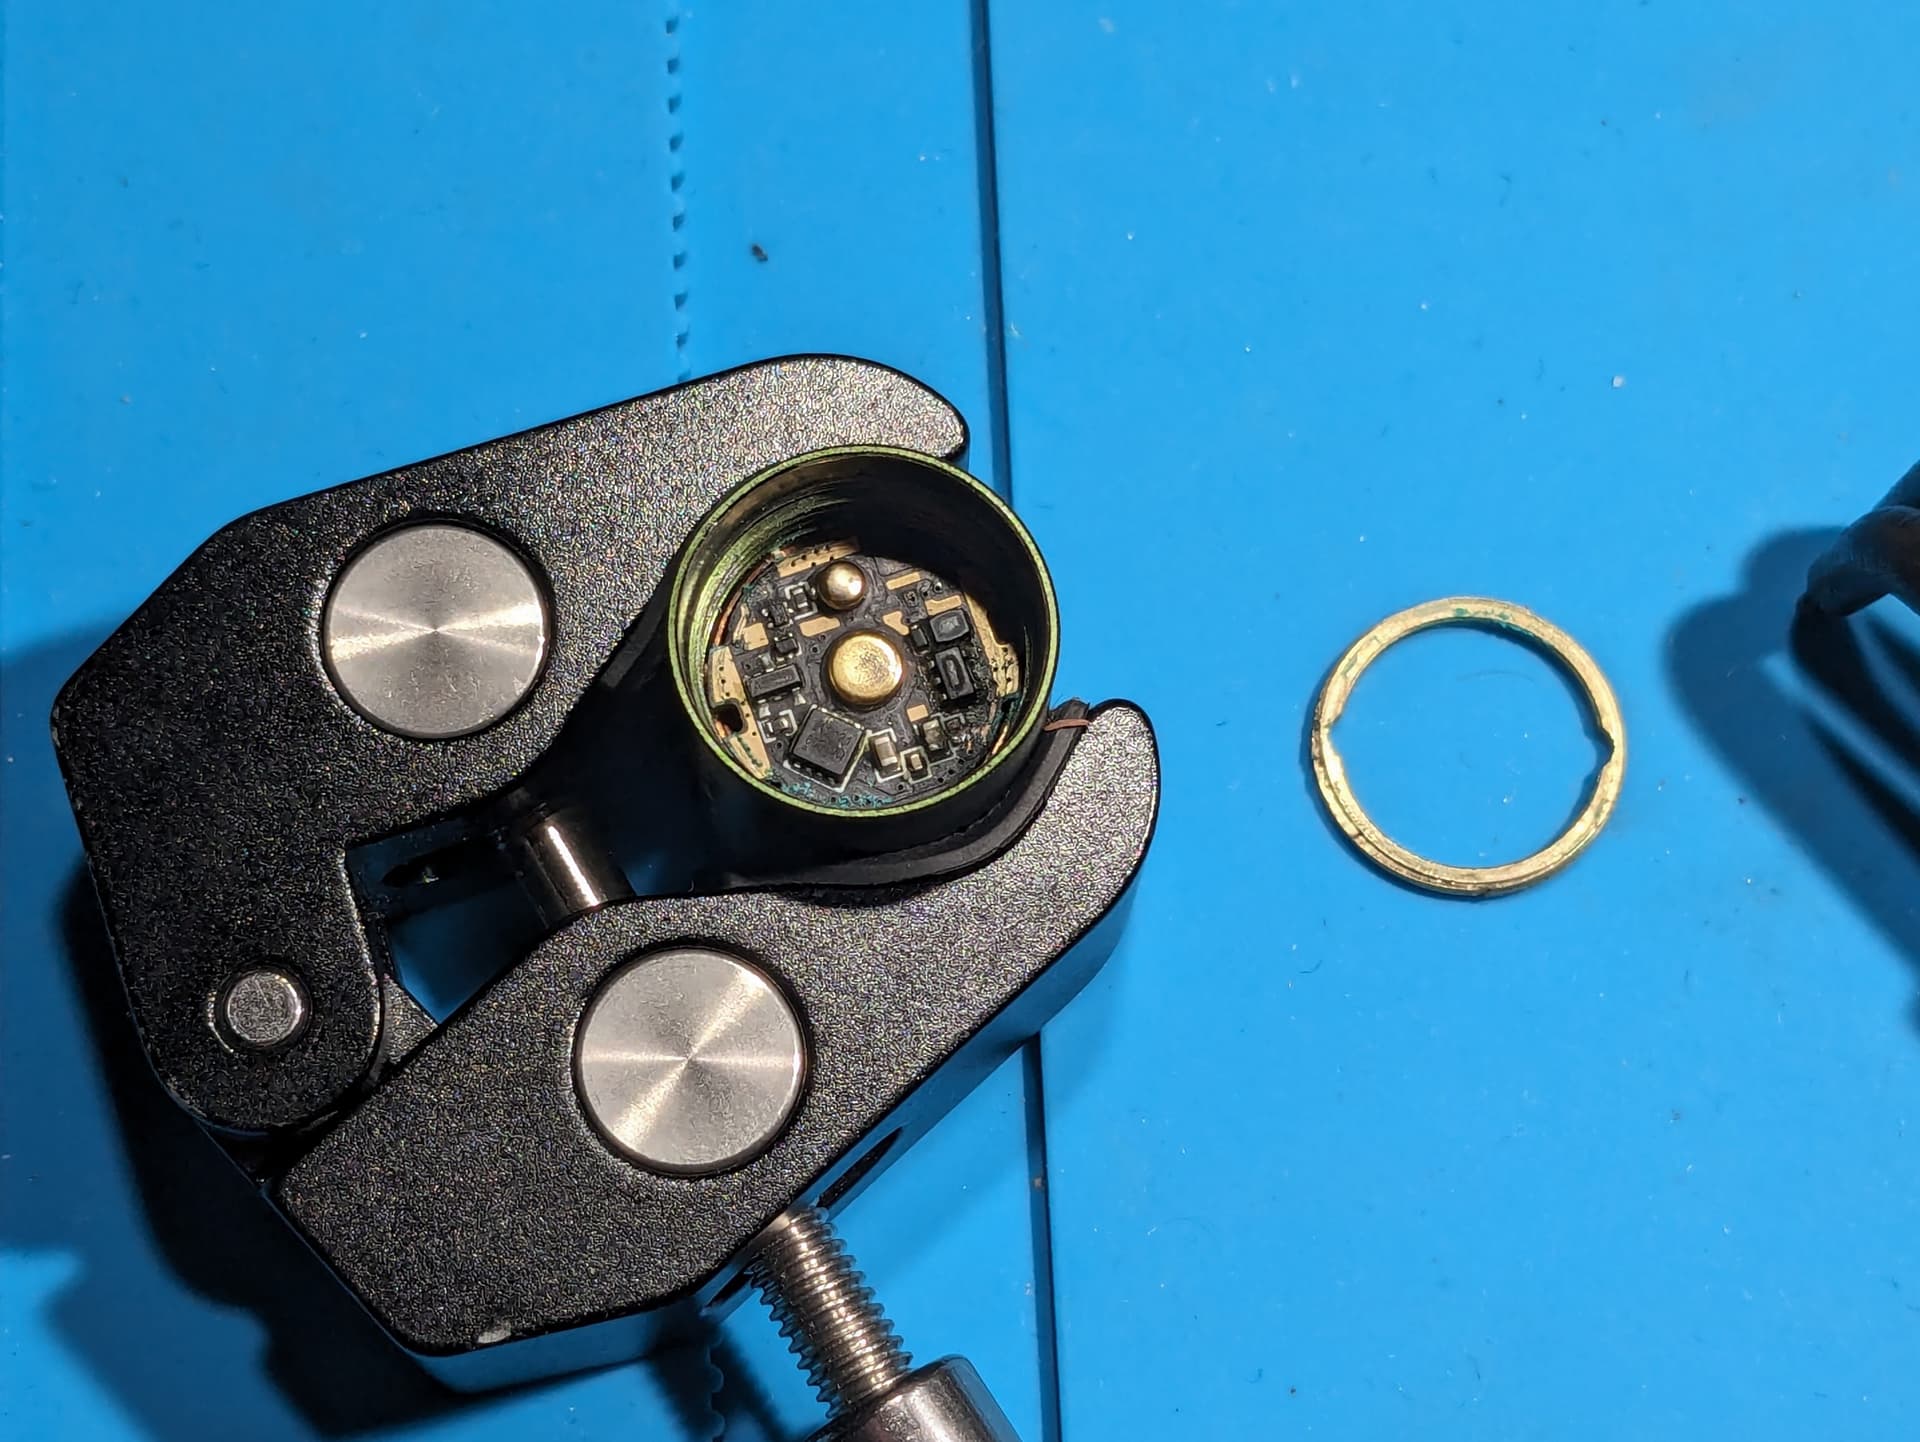
The tailcap is glued to the tube very well and required a lot of force to unscrew. This allowed me to get a closer look at the tail switch. It has a spring to tension the cap of the switch, so it doesn’t wiggle around when switched on.
I’m a little concerned about the waterproofing. There’s no silicone membrane, it relies on a little bit of oil around the cap. While this might work for a static scenario, actuating the switch under water or with a very wet light will pump water into the inside of the light. Still they rated it as IPX8.
Overall the manufacturing quality is very nice, except for the missing sealing around the switch.
User interface and features
There are three levels of brightness (low, medium and high) and a strobe (20 Hz with 50% duty cycle). This allows for a very simple UI with the mechanical tail switch. It’s a forward clicky, meaning that the light turns on when you half press it. This makes momentary light possible.
Tap the switch until you have the desired level, then fully press it. Or turn the light off and on quickly to advance the mode. After the light was off for two seconds or more, it starts in the previously used brightness again. A double tap gives you strobe.
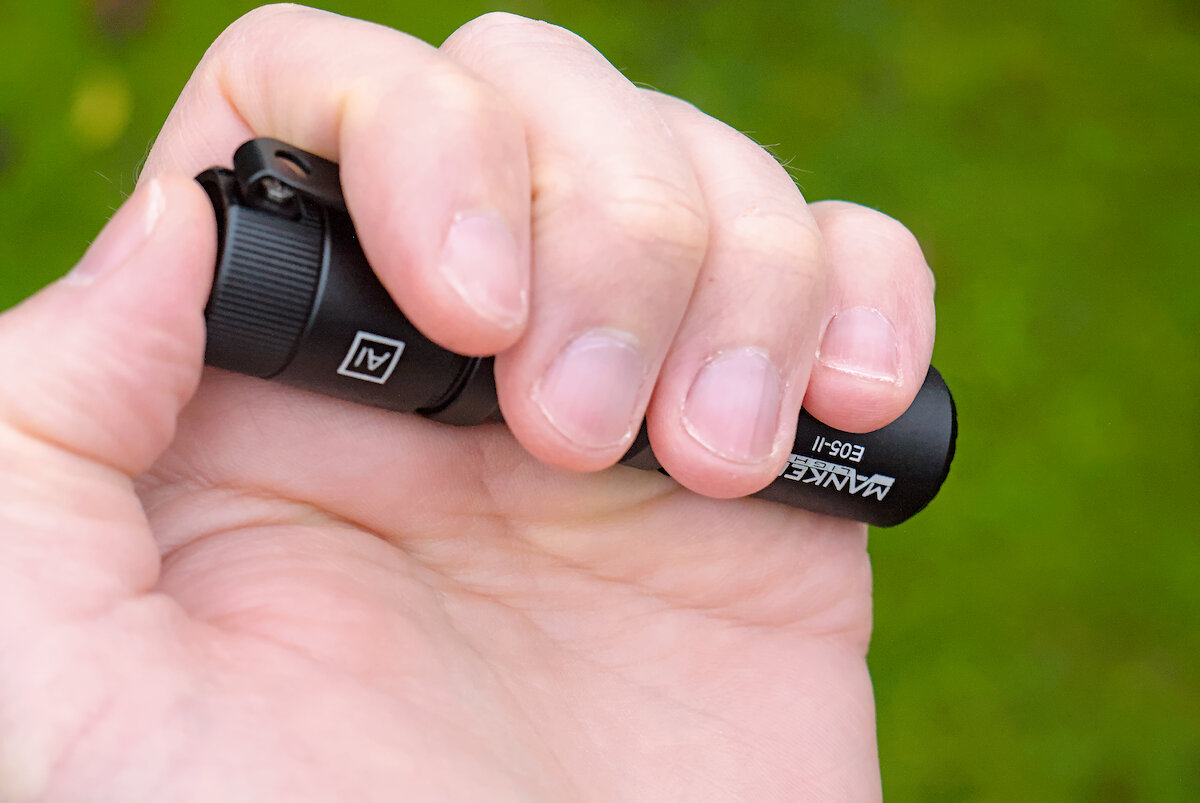
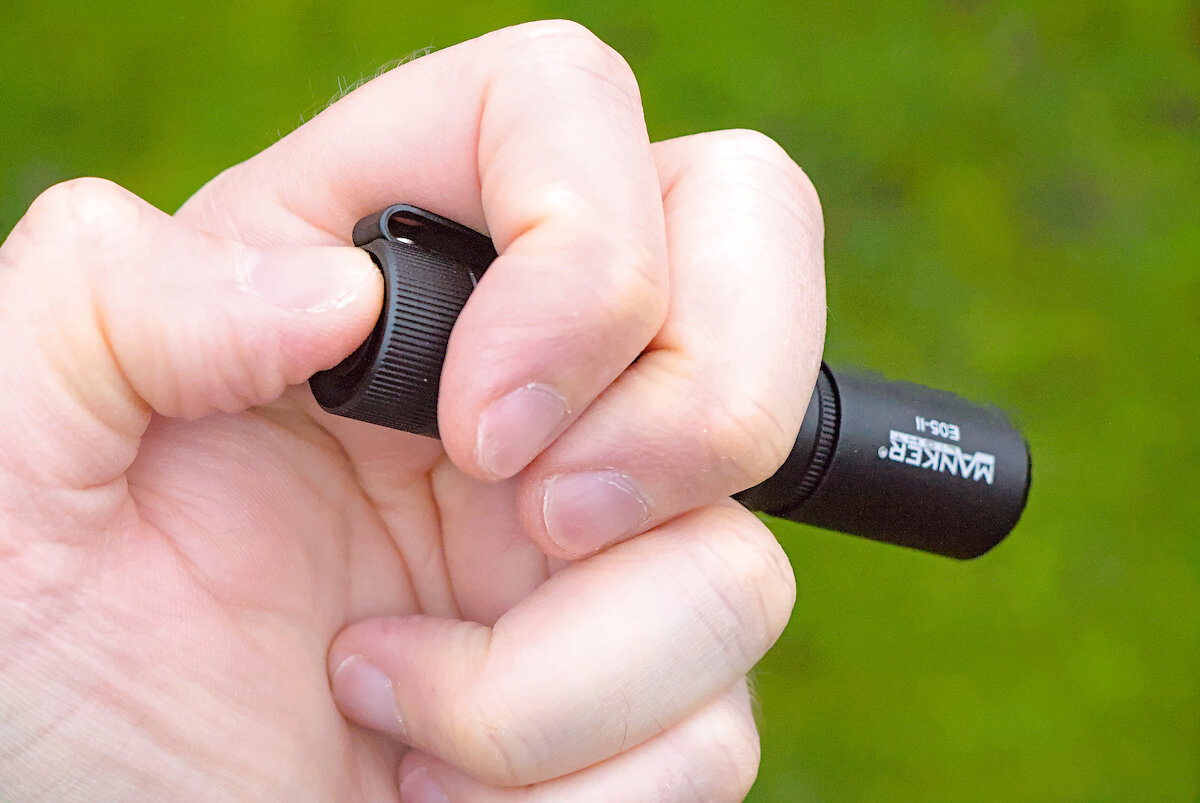
The high rim around the switch protects it well from accidental activation. It also has to be pressed deeply with some force. Nice! For another level of protection, slightly loosen the head for mechanical lockout. But be careful, the threads only have 1¾ turns.
Even without knurling the E05 II can be held securely due to it’s waist. Works great in tactical and cigar grip. Of course the position of the switch makes it easy to find.
I miss a battery indicator because with the good regulation you only notice the battery is empty when it is really empty and the light turns off.
Illumination
At the beginning the E05 II was available only with a not further specified cool white LED. I’m pretty sure it’s a San’an SFQ43. This is also the version I got for my review. Shortly after Manker introduced a version with Nichia 519A. Even without having tested it, just get the Nichia variant.
- Cool white (6500 K): Probably San’an SFQ43, low CRI. Maximum brightness specified with 1300 lm.
- Neutral white (4000 K): Nichia 519A, high CRI, very nice light, but specified only 800 instead of 1300 lm.
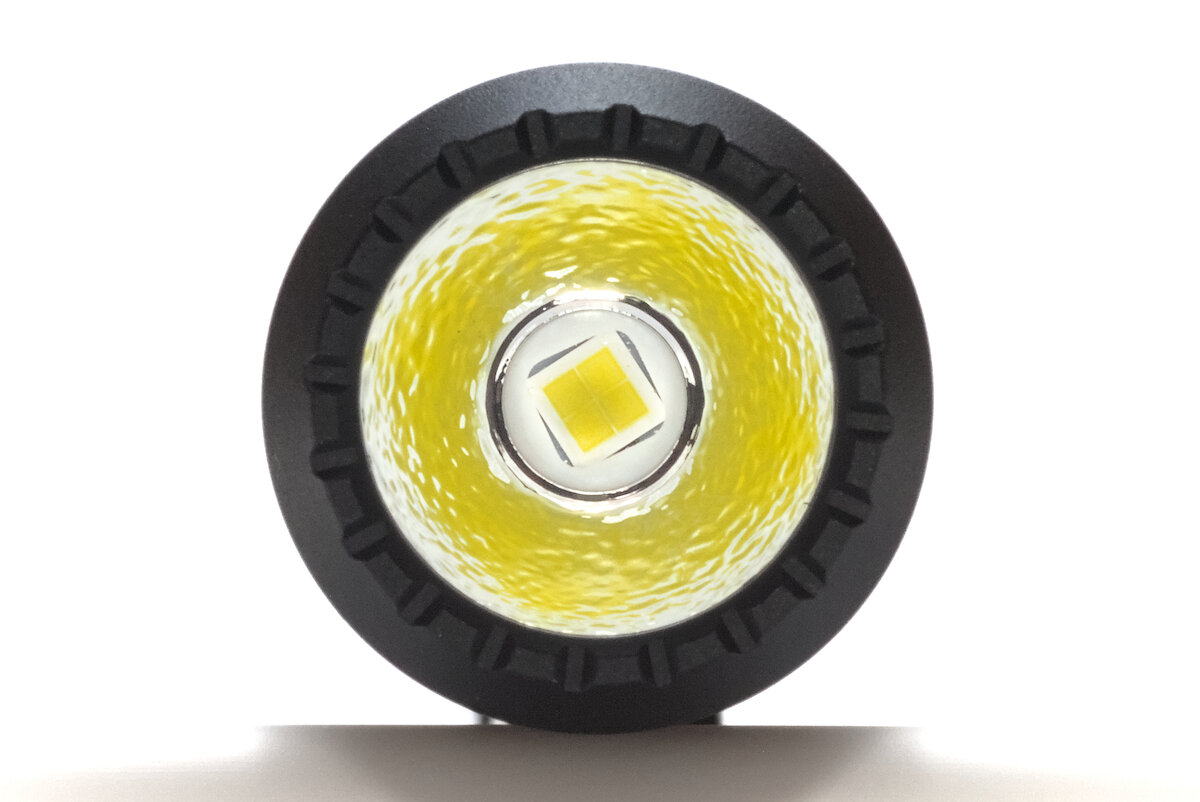
The light has a deep, orange peel textured reflector and creates a bright and large spot with a less pronounced spill. The glass has a “magenta” anti-reflective coating.

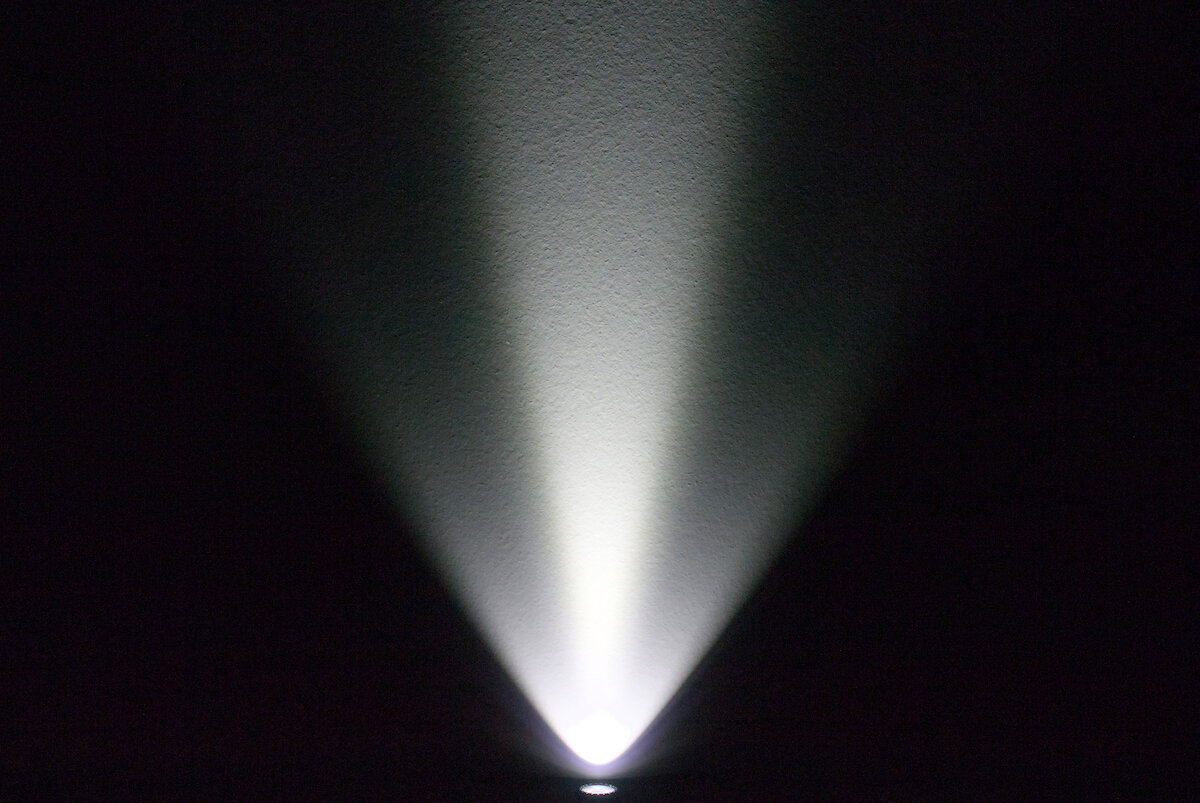
It’s a very nice universal beam, good for some distance, but also at short range indoors.
Driver and runtime
Of course the maximum brightness of 1300 lm (or 800 lm for the Nichia variant) is only achieved for a short time. But afterwards the brightness stays mostly constant – for NiMH and Li-ion batteries!
| Mode | Brightness¹ | Runtime¹ | Intensity¹ (Throw²) | Current³ |
|---|---|---|---|---|
| Li-Ion – High | 1300 / 300 / 8 lm | 2 min + 1 h + 4 h | 5476 cd (148 m) | 4.05 A |
| Li-Ion – Medium | 300 / 8 lm | 1:30 h + 3:50 h | 0.58 A | |
| Li-Ion – Low | 8 lm | 50 h | 0.06 A | |
| NiMH – High | 420 / 100 / 1.5 lm | 2 min + 2 h + 30 min | 1806 cd (85 m) | 4.20 A |
| NiMH – Medium | 100 / 1.5 lm | 1:50 h + 3:08 h | 0.72 A | |
| NiMH – Low | 1.5 lm | 27 h | 0.08 A |
¹ According to manufacturer ² ANSI FL1 ³ Measured
The difference between low and medium is perceived higher than from medium to high.
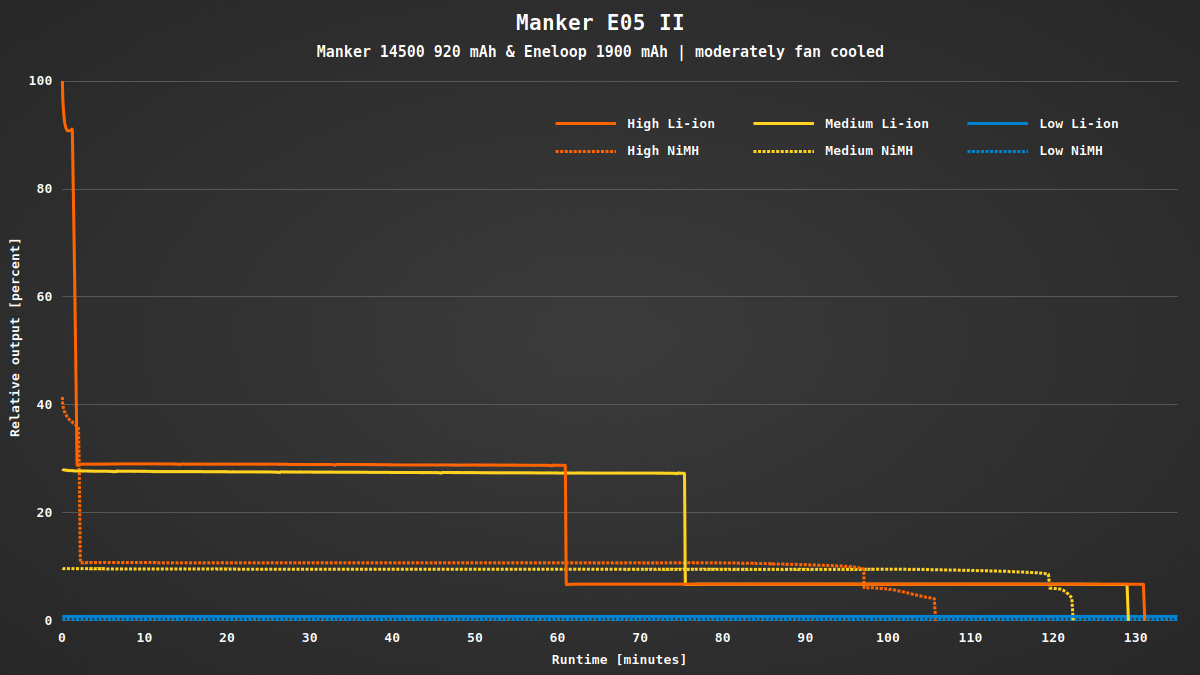
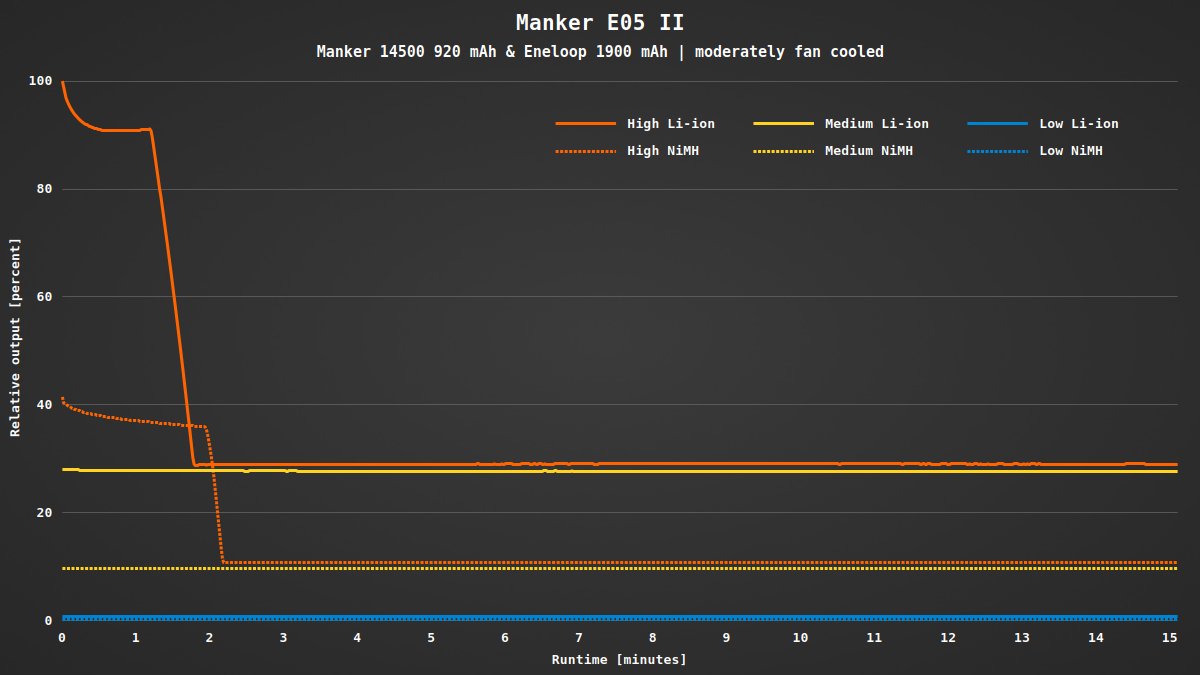
With a lab power supply the LVP kicked in at 2.69 V (Li-Ion) and 0.90 V (NiMH). Due to the voltage drop of the batteries under load the final voltage in my runtime tests was a little higher at 3.25 V and 1.14 V. Be careful with NiMH batteries because the light still draws 14 mA after it turned off automatically.
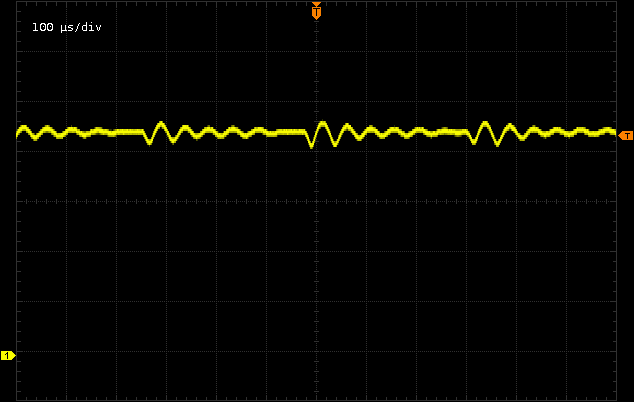
There’s no PWM, just some ripple. This means they likely use a switching regulator for both types of batteries. Here’s a measurement with Li-ion at medium level.
Conclusion
The Manker E05 II is a compact EDC flashlight, supporting Li-ion and NiMH batteries. It has three levels of brightness with constant output for most of the runtime. The mechanical tail switch makes it easy to use.
Waterproofing of the switch is a little questionable, though. Better don’t try to press it under water.
You can get the flashlight in various colors and materials. You even have the choice between different LEDs (get the Nichia 519A version).
Got curious? Get the Manker E05 II here at flashlightgo.


![[Li-ion only]](https://www.sammyshp.de/betablog/uploads/Manker_E05_II_runtime_Li-ion.png)
![[NiMH only]](https://www.sammyshp.de/betablog/uploads/Manker_E05_II_runtime_NiMH.png)