Hi gang,
I purchased this new 1 x 26650 about 12 days ago from LightMalls. Delivery was a bit faster than I thought it would have been, so they seem to be on the ball these days.
http://www.lightmalls.com/sky-ray-s4-cree-xm-l-u2-1300-lumen-5-modes-led-flashlight-1x18650-1x26650
Detailed photos for you are below.
Initially after opening the box and seeing the small size of this light, I really liked what I was seeing and actually got pretty excited to try it out. The threads were all very smooth, but not lubed. However, as I started to use it, I quickly became somewhat disappointed with it and not quite sure I’m going to recommend it, unless it’s purchased to modify. What may not be good for me, could very well be great for you. So read on and see what you think.
Here’s my basic rundown of this sweet looking 1x 18650/26650 flashlight, but I won’t be saying much more nice things about it.
SKY RAY S4 CREE XM-L U2 1300-Lumen 5 Modes LED Flashlight(1x18650/1x26650)
Brand: Sky Ray
Model: S4
Emitter Brand/Type: Cree
Emitter BIN: XM-L U2
Color Temperature: 6500K
Color BIN: White
Total Emitters: 1
Battery Configurations: 1 x 18650/26650 rechargeable battery (not included)
Voltage Input: 4.2V Max.
Switch Type: Clicky/Clickie
Switch Location: Side Switch
Modes: 5
Mode Arrangement: Hi>Mi>low>Strobe>SOS
Circuitry: Digital Regulated 3000mA Current Output
Brightness: 1300 lumens maximum brightness (manufacturer rated)
Runtime: 90 minutes(manufacturer rated)
Lens: Glass Lens
Reflector: Aluminum Textured/SMO Reflector
I had forgotten it had an XM-L U2 Led, and to my flashaholic eye, while testing it in the house, I clearly saw it was 6500k+ tint. After reviewing the specs, I found this to be exactly correct.
As for the driver, Skyray delivered on the power, but felt the need to use a 30mm diameter one. I was very surprised to see such a large driver in a little light like this. However, with a Trustfire 26650 5000mAh, you get a solid 2.80a at the tailcap. Using an MNKE 26650 unprotected cell, tail current increases to 3.15a. It should also be noted, if the battery tube is removed, and simply holding the MNKE onto the +B spring and taking the tailcap current that way, you get 3.30a and 3.15a with a Trustfire 5000mAh cell. The +B spring is the thinnest I’ve seen to date and likely would benefit from a better replacement, or at least some copper desoldering braid to help it with this very respectable amount of current.
A very small amount of PWM was detected only on LOW mode too.
The driver has the power, but that’s were the good ends for me. There is no mode memory, so it always starts on high, which is fine. But, in order to turn the light off, you must scroll through all 5 modes to get to Off each and every time. God, why do they do this???
I didn’t check for parasitic drain, but I’d have to assume there must be some because it has a digital On/Off switch and there is no lockout feature. The switch does feels as nice as the one on the Skyray KING.
The glass lens is 36.94mm, so I’m sure an AR coated lens can be found for it.

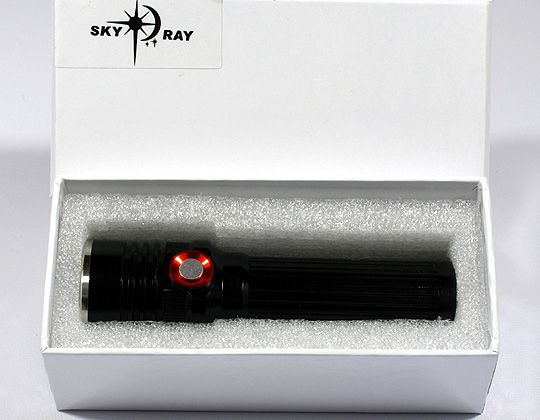
Light arrived in a decent cardboard box, and inside that was the typical crush-proof Skyray box with the light.
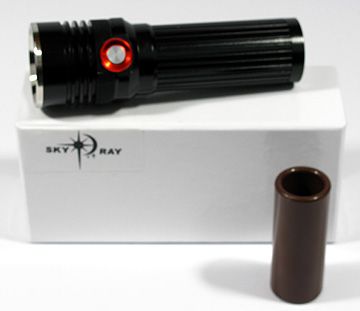
The included 18650 sleeve was inside the battery tube. Sorry for the slight blurriness.
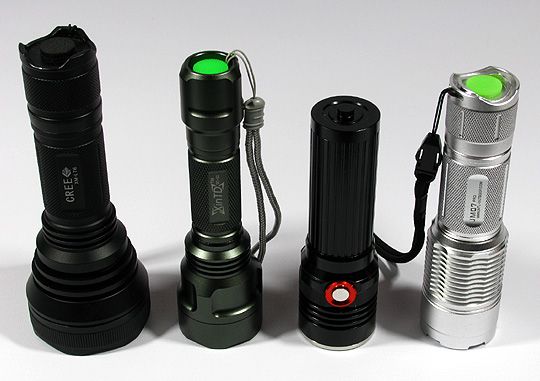
For size reference from Left to Right - Fandyfire HD-2010, IOS XinTD, Skyray S4, IOS JM07 Pro Special Edition
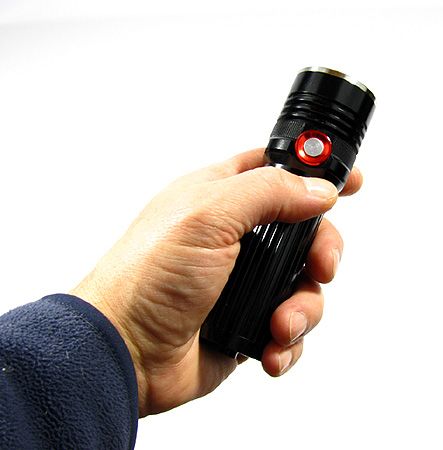
Hand-hold. Very compact and easy to pocket.
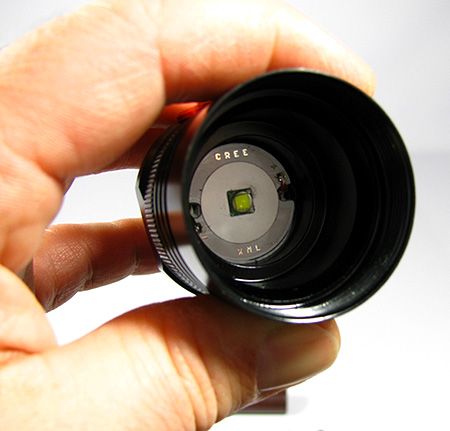
Shot down the pipe. Note a gasket surrounds the LED, more on this later.
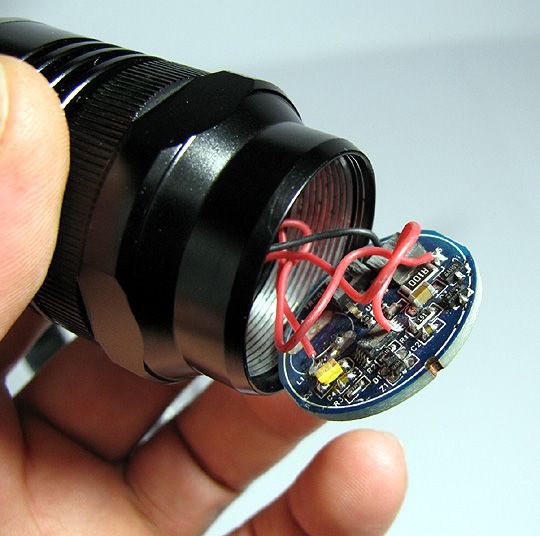
A shot of the 30mm driver partially removed. Issues may arise trying to upgrade the driver due to the electronic On/Off switch.
Also one of the first few drivers I’ve seen without the part numbers ground off.
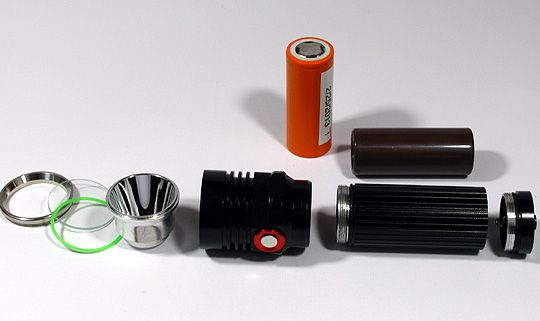
Having a sharp eye while looking the light over, I realized it has a hidden removable tail cap.
One would have thought the battery tube at the mid-point is how you’d replace the battery as some other lights are. But
this light you can actually switch batteries either way.
For the price paid, includes a deep SMO aluminum reflector, glass lens with a GITD O-ring up front and finished off with a very nice non-crenellated bezel. But don’t even think about trying to tail-stand this light with that little nipple protruding at the tail cap. It was the first thing that I didn’t like, but knew prior to purchasing the nipple would be the first thing to be ground off.
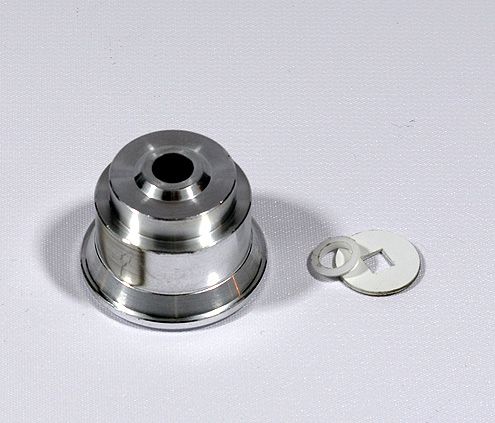
Here’s another issue I had with my example of this light. If you look at the photo, you’ll see a small diameter plastic
reflector centering ring and the other foam adhesive disc next to it. When first turned on, the beam was horrible and
the reflector was as mis-aligned as could be.
Basically, the beam on a wall looked like something completely out of focus
rather than a tight super well defined hot spot that it should have been. Spending some time on the reflector, I found the only
way to get very good focus out of this light, was to remove the reflector centering ring and reassemble the balance of components.
Still, after doing this, the light was a real pain to keep the reflector centered while tightening the bezel. But eventually I got
it right and the white-wall beam looked very nice. This situation reminded me of the same thing that happens with the FandyFire HD-2010.
While working on it, I got the impression the reflector wasn’t designed correctly for this specific light. I’d say Skyray decided it not only needed some space taken up with the plastic disc around the LED, but also needed the foam disc, plus the plastic centering ring. Much to many components for something that was needlessly made overly complex and may cost them sales.
This is a white wall shot of the beam after spending some time on the reflector. I’m sure I can get the beam even
more defined than this, but I’m going to leave it for now.