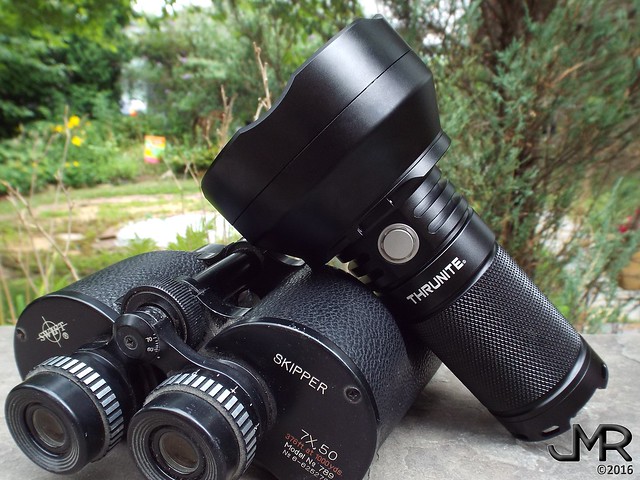
ThruNite TN40 Rechargeable LED Searchlight
When ThruNite's owner contacted me and asked me to review their latest mega-thrower I agreed without hesitation. It's been a while since I've reviewed a new ThruNite flashlight and they have consistently been one of my very favorite brands. A new SAR flashlight with 4400 lumens and well over a kilometer of throw? How could I resist? Little did I know all of my expectations would be exceeded. With a retail price of $259 there are a lot of promises to live up to. I think it did.
This review will be very photograph intensive so, for the sake of the few who are reading this and have a slow internet connection, I will start with the manufacturer's claimed specs, then offer my initial thoughts, performance test results and User Interface impressions on the TN40. After that I will show more detailed photos along with commentary on them when needed.
If you want to skip straight to my final thoughts and recommendation just scroll to the bottom of the review. Usually clicking on one of my photos will take you to the original full-sized photo but since this isn't always best for those on a limited/mobile internet feed I changed things up. This time I am simply going to give you a link to my full TN40 gallery where you can browse all the photos I've taken and view any of them in a variety of sizes including the original size. Ready? Here we go...
ThruNite's Product Description
Features
One of the most powerful long range lights on the market.
Uses four advanced CREE XP-L HI LEDs with a lifespan of 20 years
The high output reaches 4450 lumens and an ultra-long distance of 1151 meters.
Built in fast charging system (2.8hrs) and 7.2v 6800mAh high capacity battery pack.
ThruNite ITC technology to prevents possible damage from overheating.
Intelligent and ergonomic user-friendly interface.
Specifications
LED: 4xCREE XP-L HI LED with a lifespan of 20+ years of run time.
Runs on: ThruNite Li-ion battery pack (7.2V/6800mAh).
Working voltage: 5V-9V.
Charging current/voltage: 7.4V, 3.5A.
Output & Runtime (Tested with ThruNite 7.2V/6800mAh Li-ion battery pack and for CW. NW parameters is 10% off):
Strobe(1100 lumens /9hrs),
Turbo(4450 lumens/85mins),
High(1780 lumens /2.7hrs),
Medium(580 lumens /9.5hrs),
Low(90 lumens /2.5days),
Firefly (1.2 lumens /57days).
Peak beam intensity: 331200cd.
Max beam distance: 1151m.
Power interface: 1 * DC 5.5 charging port.
Waterproof to IPX-8 Standard (2 meters).
Impact resistant: 1.0 meter.
Working Temperature: -40 to 80 degrees Celcius
Dimensions: 173mm (length) x 100mm x 52mm.
Weight: 785g (including battery).
Accessories: Shoulder strap*1, Strap ring*1, AC/DC Adapter*1, Spare O-ring*2, Side switch Cap*1, Tail switch Cap*1, Anti-dust plug*1
Operation
Turn On/Off
Press the side switch to turn the light on/off.Change Mode
When the light is on, long press the side switch to cycle through low, medium and high.
Shortcut to firefly: When the light is off, long press the side switch to get firefly mode.
Double click to turn to turbo from any mode. Another double click to get strobe.
ITC Technology
The light will automatically lower the current when temperature in LED or driver rises to 80 degrees centigrade to protect the flashlight from overheating.
Thus to extend its lifespan.Memory Function
The light will turn on in the last mode accessed, except firefly, turbo and strobe.Charging and Indicator
Battery capacity: 1-20%, indicator is flashing red.
Battery capacity: 25%-50%, indicator is flashing purple.
Battery capacity: 50-95%, indicator is flashing blue.
Battery capacity: 96-100%, blue light will be on.
The total charging time is 2.8 hrs. Click the round tail switch, the indicator will be on for 5 seconds.
Discharging and Indicator
Battery capacity: 1-10%, indicator is red.
Battery capacity: 10%-25%, indicator is flashing red.
Battery capacity: 25-50%, indicator is purple.
Battery capacity: 50-100%, indicator is blue.
Click the round tail switch, the indicator will be on for 5 seconds.
MY FIRST IMPRESSIONS
My very first impression upon taking the TN40 from it's packaging was how much smaller it was than I expected. The TN40 shares the same battery tube and pill design as the very compact TN30 Mini, TN36, and TN36UT powerhouse lights. The super-wide head (100mm) remains quite short thanks to the 4 smaller reflector cups instead of one giant, deep reflector like most extreme throwers have. The lens, AR coated on both sides, is super clear and, as you can see in the pics, is all but invisible to the eye. Machining and finish is the same high quality I've come to expect from my other ThruNite lights and the knurling is fantastic!
While many enthusiasts don't care for proprietary cells and built in charging, I don't mind it one bit in this light. The laptop style charging brick feeds the cells at 3.5A and charges all 4 cells in just 2.8 hours thanks to a well designed charging circuit in the battery pack that monitors each of the cells in the 2S2P cell pack individually. It has a laptop type charging port (no delicate micro-USB ports to break in short time) which is another big plus. Sure, you can't use your own cells in it like the other large ThruNite models but after speaking with the owner of ThruNite I came to learn that they did it this way for safety above all. With the current the LEDs are fed they wanted to ensure that only high drain cells would be used and that all connections in the battery circuit were soldered (think laptop battery pack) for the least resistance possible. Contact surface connections and springs used in standard cell carriers can be a source of heat and resistance that can cause poor performance and other issues, especially if accidentally installed incorrectly. This new system uses a self contained battery pack that can easily be replaced should the cells wear out in time (more on that later).
The TN40 arrived with a roughly 50% charge. I was blown away by the brightness when I turned it on for the first time. A short time on the charger topped the cells at 100% and I knew fun times were ahead. "How fun", you ask? Extremely fun! Which is why I will go right into the performance next.
PERFORMANCE & UI
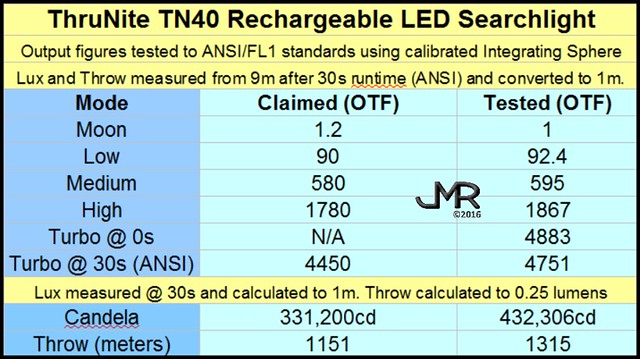
Let's skip to the chase. Everyone wants to see the numbers on this and the TN40 doesn't disappoint.
Look at those numbers! 432.3kcd and 1,315m of throw! One thing ThruNite does that understates their throw measurements is they measure from only 3m away. At that short distance the focus of a large thrower, especially one with multi-LEDs, is that the beam isn't even focused yet at that range. I test throwers at 9m distance for what I consider to be an even more accurate measurement of a light's ability to throw.
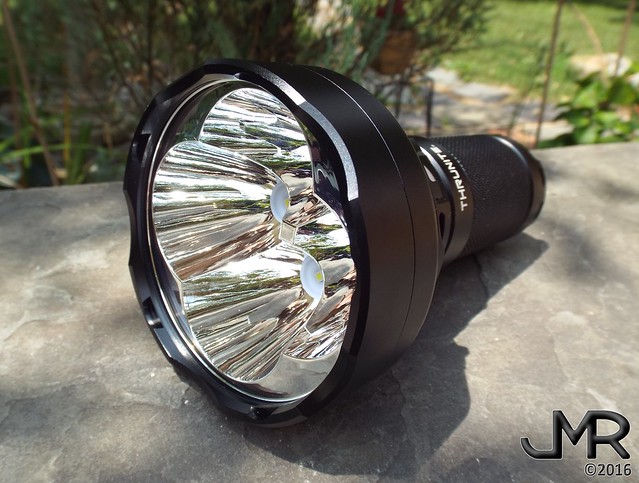
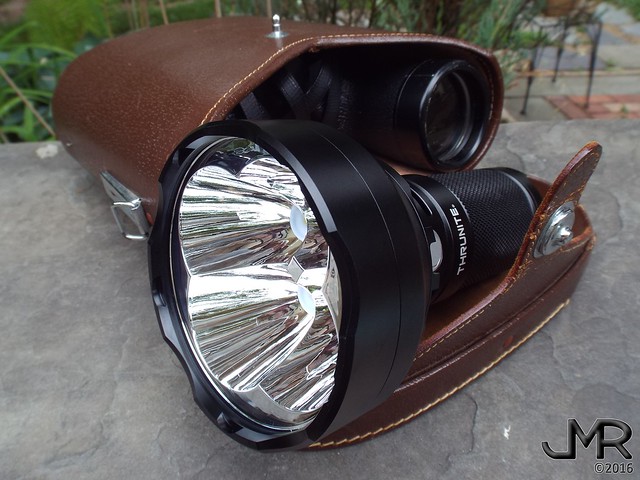
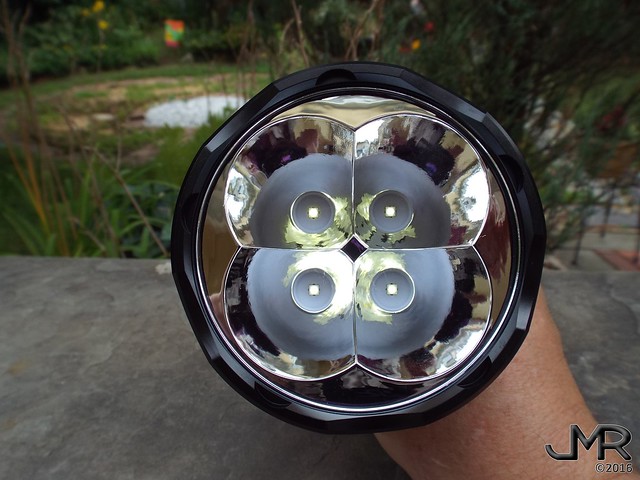
^ As you can see from the photo above, the TN40 based on looks alone means pure business and lots of it. Blue chip stock business. Destroy the competition and put them out of business kind of business.
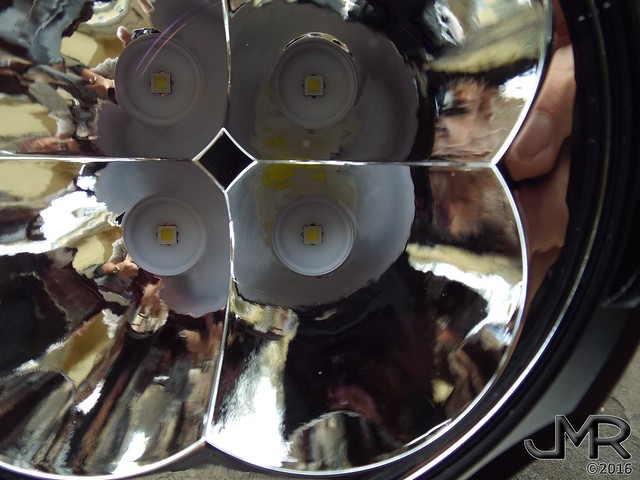
^ All thanks to this beautiful reflector and the four Cree XP-L HI emitters at the bottom of each reflector cup. I expected this to exceed the performance of it's closest rival, the Nitecore TM16GT but I had no idea just how much until I took it into the basement the other night and tested the output on my Lux meter from 9 meters away. I turned the light in Turbo, waited 30 seconds (ANSI/FL1 standard) then took my time finding the peak readout on my meter. When I calculated that back to candela at 1m I was stunned to see that it makes 432,306cd. That translated to 1,315 meters of throw. I don't know why ThruNite low balled the throw at 1150 meters but they had to be thinking very conservatively when they marketed it at that range. Think about that - 1.3km of throw from a stock, factory light. WOW!
As I noted above just under the performance chart...I had been discussing with the owner of ThruNite the low numbers they claim for the TN40. Turns out they only measured the Lux and throw figures from a distance of 3m. I explained to him that for a multi-LED thrower with this large a reflector 3 meters is not far enough to measure maximum throw. At that close distance the reflector hasn't even focused the beam to it's optimum and the reading will be inaccurate. Throw is rated at 1m but to get the true numbers you have to measure farther back and convert those results back to 1m. My numbers are much higher because I measure from 9m where the light is more properly focused. Then I convert that number back to 1m using a standard mathematical formula. When you see the beamshot photos below you will see what I mean.
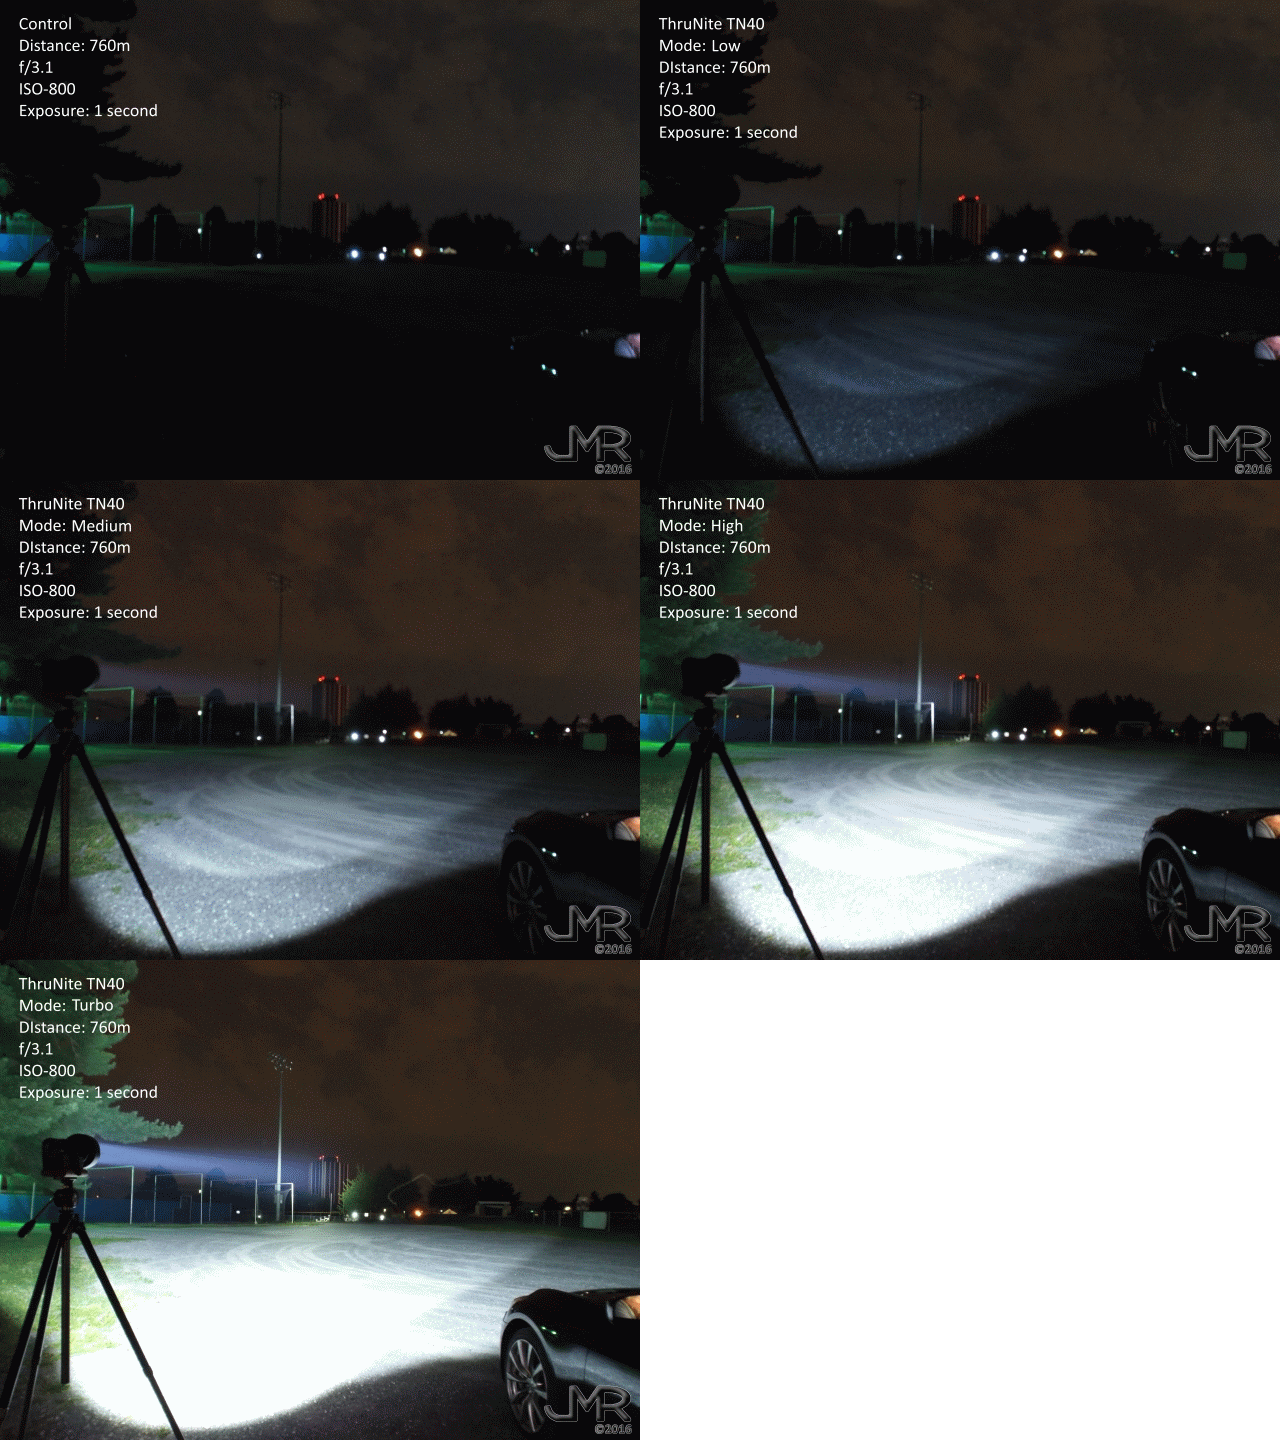
I had to wait a couple nights thanks to some rain and my own tiredness to take the beam shots but it was well worth the wait. It also took me a couple days to try and find a place where I could take shots aimed at a target over a kilometer away and it proved to be impossible for me. I settled on a spot that would give me 760 meters of clear line of sight to a local high rise building in town. When you see the results you will agree that my testing results were not overrated.
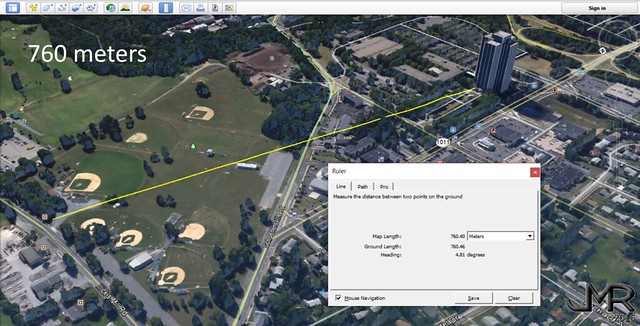
^ Here is where I took my shots I scoped it out with the wife yesterday before nightfall to make sure I had a clean view. Having confirmed all was a go I went back when it got as dark as it was going to get.
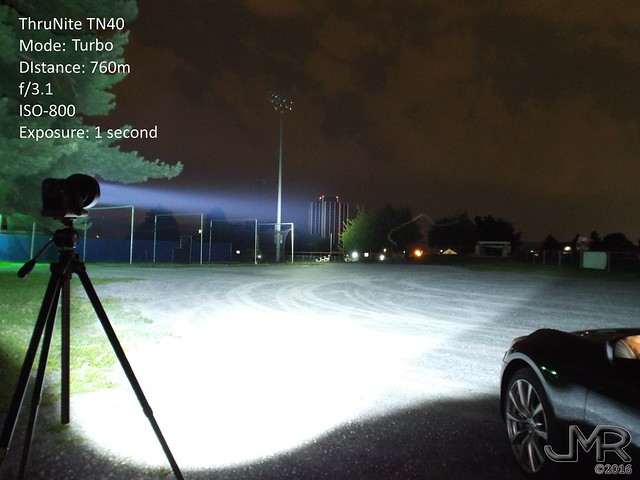
^ At 760 meters it lit up the sides of the building (all black except for white corners) like it was a cloudy day.
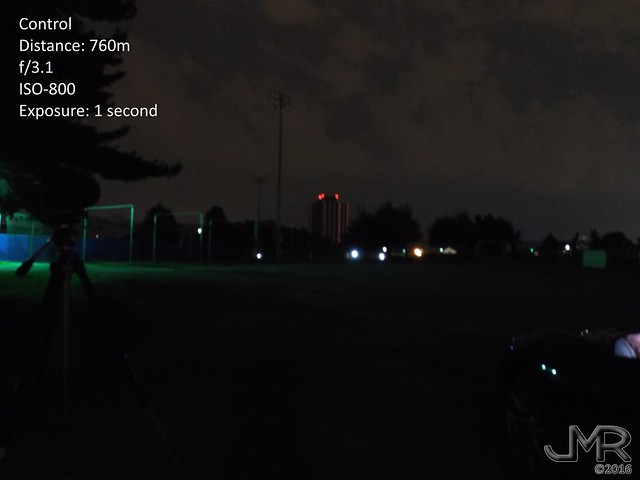
^ Here is the control shot to show the conditions.
^ As you can see, in all modes, except for Low, the TN40 had no problem lighting the building at that distance.
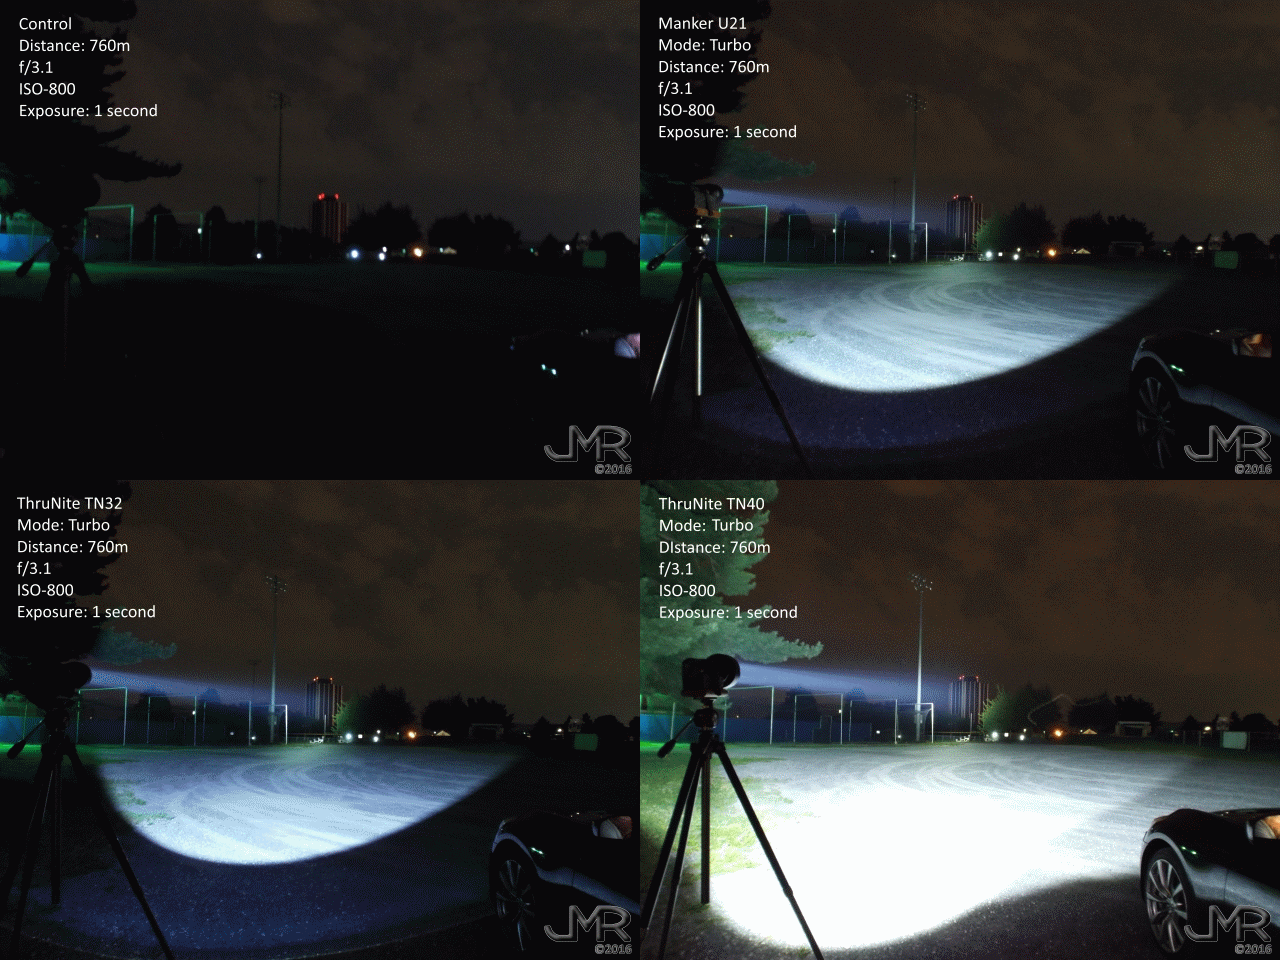
It would be senseless to take beamshots without anything else to compare it to so I took my previous best thrower, the venerable TN32, and my newest compact thrower, the Manker U21.
^ While the Manker U21 is rated as only good to 700m distance (my testing shows 722m) I figured I'd see if it could reach anyway and reach it did, with a bit to spare as well. Way to go, Manker! The TN32 I tested as well the other night and, with my best cells installed, I saw just over 979 meters of calculated throw. I fully expected it to make a good showing of itself in the beam shots and it didn't let me down. It easily lit the side of the building wit plenty to spare. The TN40, however, made it look like chump change in comparison. This light is easily the King of throw for factory stock lights!
OTF (Out The Front) testing data is below. All testing was done on my calibrated Integration Sphere to ANSI/FL1 standard of 30 second of On time.
USER INTERFACE (UI)
I've always been a fan of the UI that ThruNite uses in most of their lights and the TN40 is no exception. With one simple switch you get a range of options that is easy to remember.
From OFF
- A quick click starts the light in the last used regular mode (Low, Medium or High)
- Long press (@1s) to Start in Moon Low
- Double-click (2 quick clicks) to start in Turbo mode
From ON
- Press and hold to scroll through the 3 regular modes in succession: Low > Medium > High. Release button when in desired mode.
- Double-click from any mode to immediately switch to Turbo mode.
- From Turbo mode a second double-click will engage Strobe mode.
- Double-click from Strobe to return to Turbo
- From Turbo mode a second double-click will engage Strobe mode.
- Click from within any regular or special mode to turn Off.
CHARGING AND DISCHARGE
| Charging & Indicator | ||||
| Power Capacity | 1-25% | 26-50% | 51-95% | 96-100% |
| Indicator Color | Flashing Red | Flashing Purple | Flashing Blue | Solid Blue |
| Total Charging time: | 2.8 Hours | |||
| Discharging & Indictor | ||||
| Power Capacity | 1-10% | 11-25% | 26-50% | 51-100 |
| Indicator Color | Solid Red | Flashing Red | Solid Purple | Solid Blue |
| Note: To view the status you must click the button on the tail of the light. Light status will display for 5 seconds. While connected to the charger the indicator will stay lit once fully charged. |
^ As bright as the TN40 cam be, it also provides a wonderfully low Moon mode when maximum runtime or unobtrusive lighting is needed. Especially useful when navigating to a restroom or bush in the middle of the night without waking anyone near.
CLOSE-UPS AND DETAILS
Now that the important stuff is out of the way it's time to take a closer look at the light itself. Where to even begin? I guess the first place is to show what arrived at my door step.
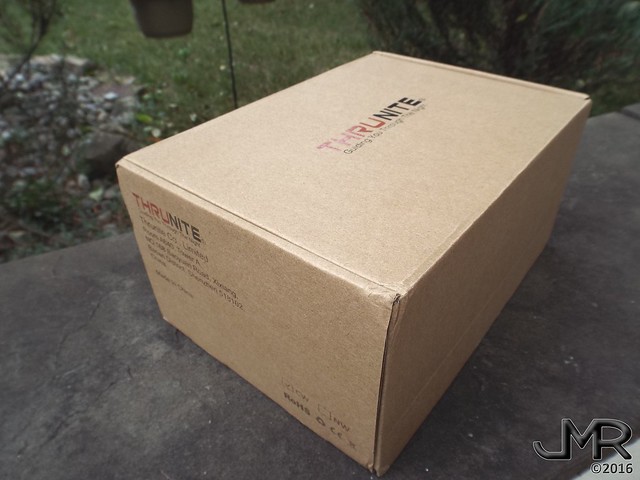
^ A large beige colored cardboard box with the ThruNite logo and some model information. Pretty large box but not as heavy as expected.
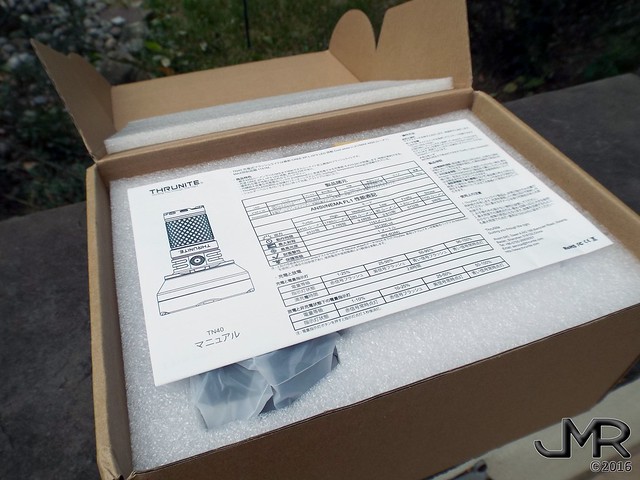
^ Inside the box is a fitted foam compartment that holds everything. Packaging is very solid and, even if the postal service drops or kicks it about, there is little change of any damage to the light or accessories inside.
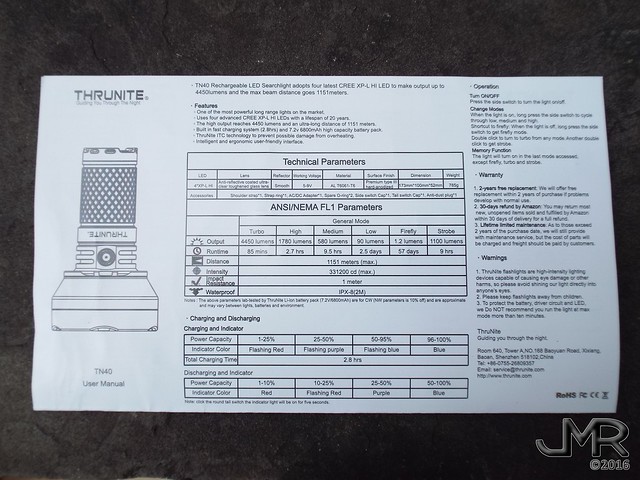
^ A detailed and simple to follow user pamphlet is included with English on one side and Chinese on the opposite. Full specs and operating instructions are found here.
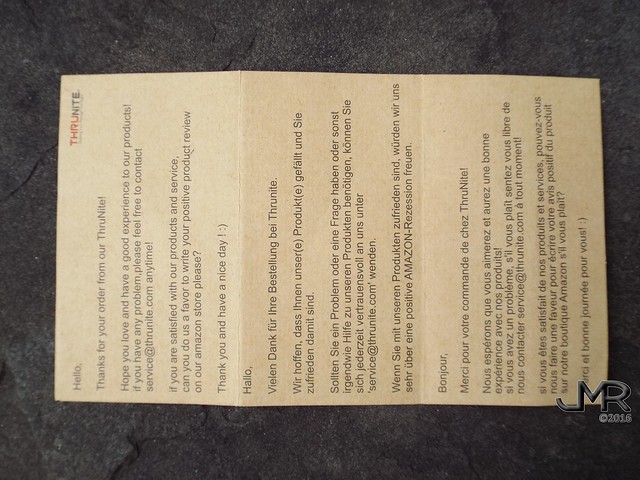
^ Also included is a friendly "Thank You" note written in six languages.
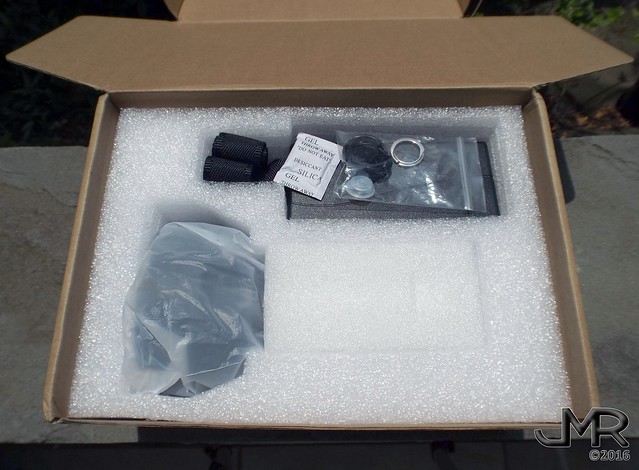
^ Now we can get into all the good stuff! I see an accessory bag, a bit of strap showing, what appears to be a charging brick and, of course, what looks like a bit of a giant flashlight bezel peeking out from under the foam.
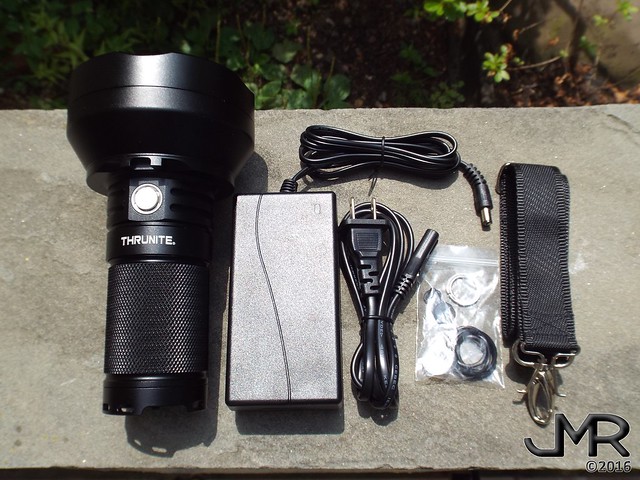
^ Above are all the goodies I found in the box. Nice! ThruNite doesn't offer many rechargeable flashlights. In fact there are only 3 rechargeable models and only one of them, the TN40 is a SAR (Search And Rescue) light.
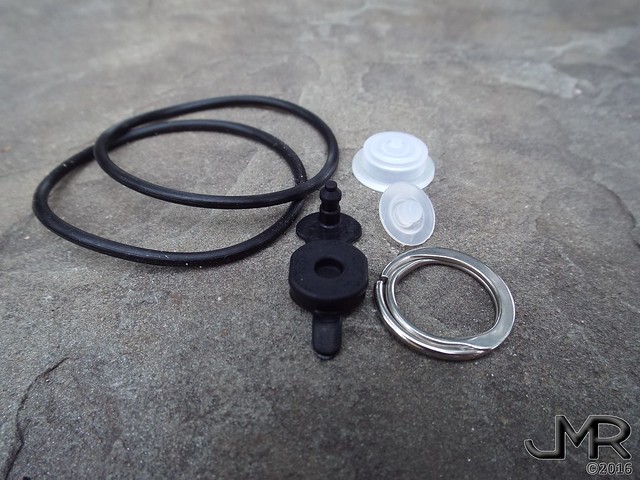
^ Two spare O-rings, a replacement charging port cover, a unique and very sturdy split-ring for attaching the included shoulder strap , and a clear silicone switch cover for those who prefer that over the metal button.
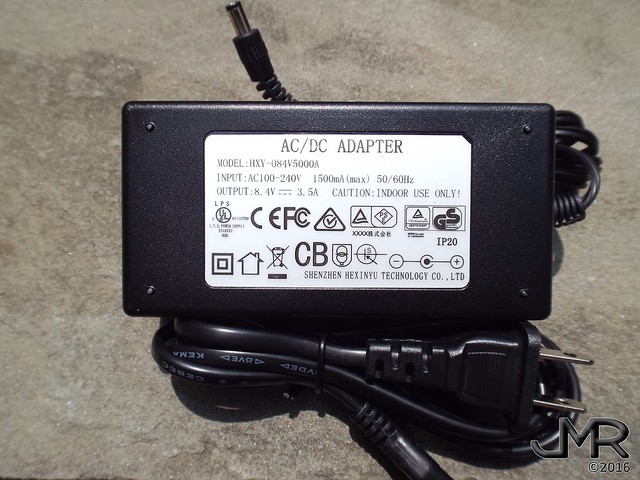
^ The charging brick is up next. Pretty much like any laptop charging brick except that it outputs at 3.5A and 8.4V.
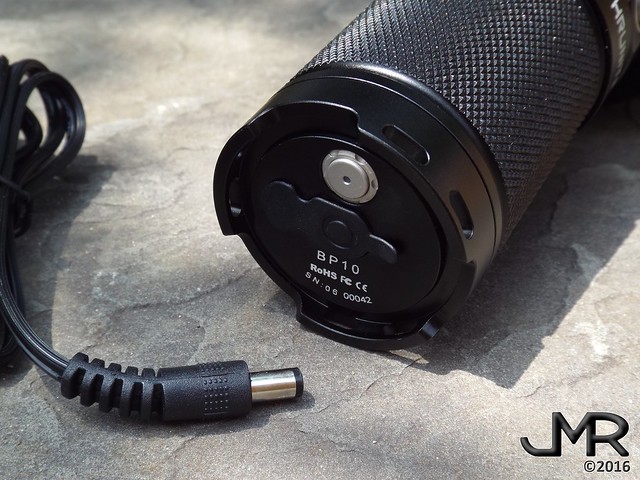
^ Since the charging circuit in the battery pack is at the base of the pack, the charging port is there as well.
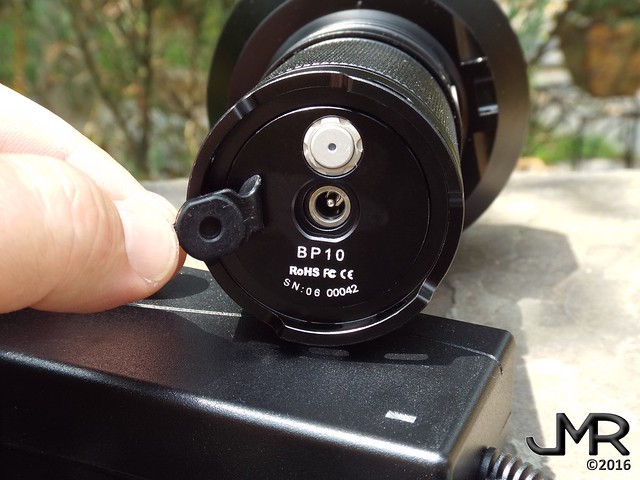
^ Pull out the port cover...
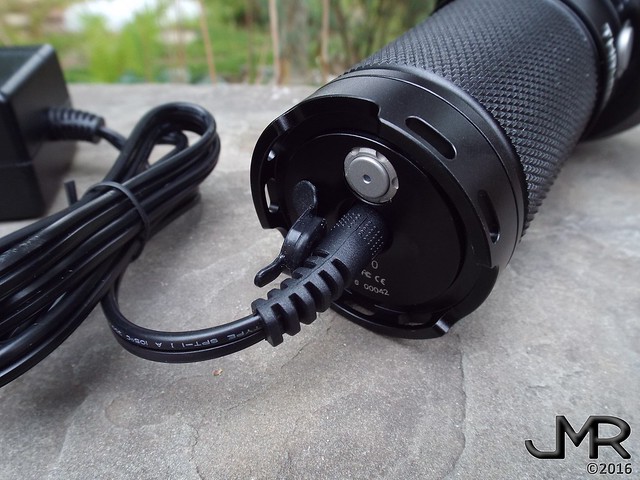
^ And plug in the charging cable. The button with the small RGB LED in the middle is only there to show the battery charge status. Press the button to check the rough voltage based on color. My only complaint with this system, and it's a very minor one, is that when charging the light I would prefer if the LED was lit at all times so I could see at a glance the charging status. As it is you must click the button to see how the charge is coming along at least until it is 96-100% charged. At that point the indicator will stay lit until the charger is disconnected. When the light is not charging and in use it makes sense to have to click the button.
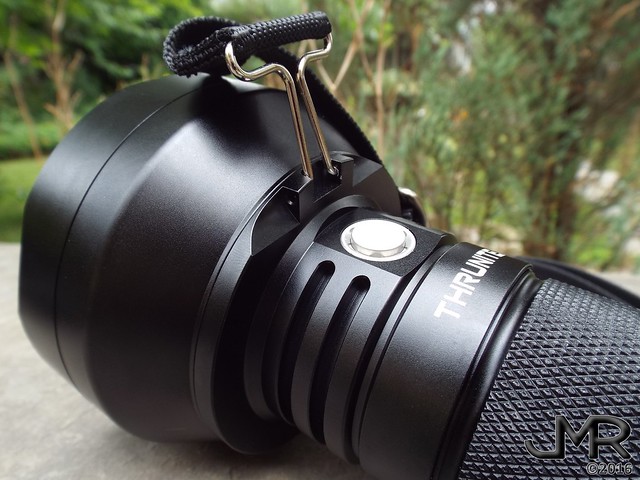
^ The carry strap has a unique method of attachment in the front. Squeeze the two legs together and insert into the attachment holes just in front of the switch. Release and they lock in securely. They were a bit tough to get in the first time due to exact tolerances so I don't think there is any need to fear it coming detached accidentally when in use.
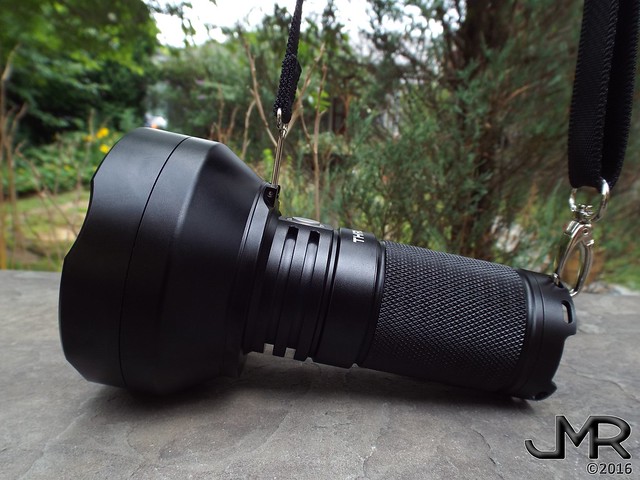
^ Attach the included split ring to one of the lanyard holes in the tail and attach the other end of the shoulder strap or just clip the lobster claw clip directly into one of the lanyard holes without the split ring.
With the accessories covered, let's move deeper into the light itself, starting with the head where all the magic happens.

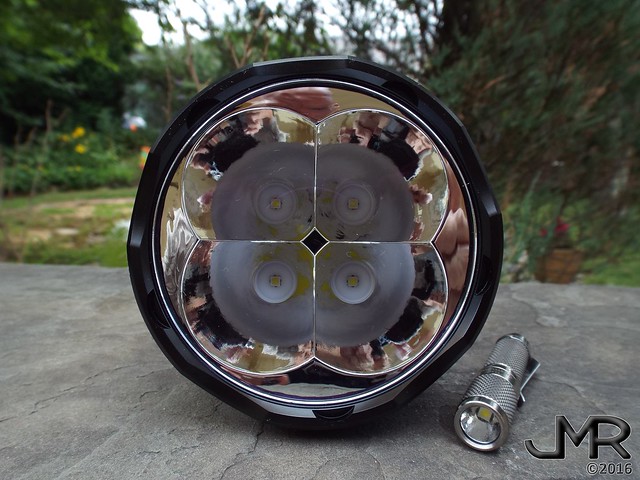
^ That 100mm wide head focuses all those lumens into one mean beam of light. Next to the TN40 is a ThruNite Ti HI (ThruNite's smallest XP-L HI flashlight) which I purchased last week (great little light BTW). Also of note, there was no visible dust or fingerprints inside the glass or on the reflector. Not even any on the outside of the lens at least not until I put some there.
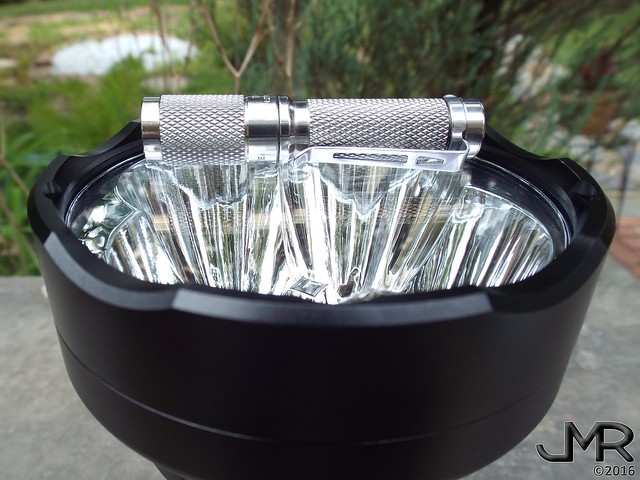
^ Another shot of the two lights together.
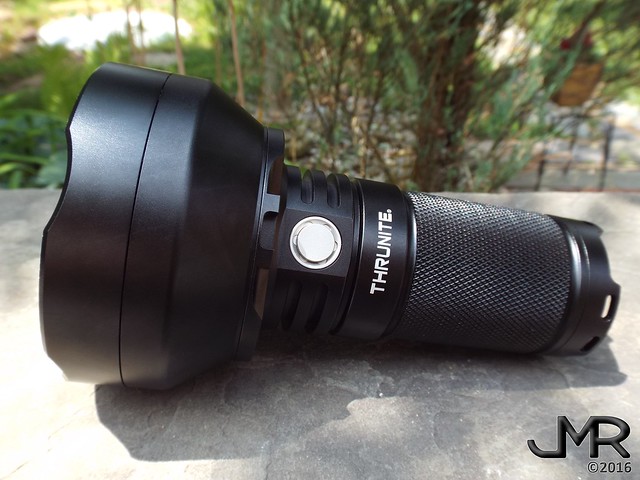
^ The flat, metal electronic switch button is mounted just behind the head where it is found very easily. Thick fins cut into the center section where the LEDs are located helps shed the heat this light can produce. I was very impressed with how well the TN40 manages heat. Thermal regulation built in the driver monitors heat and steps down the light when temperature gets too high.
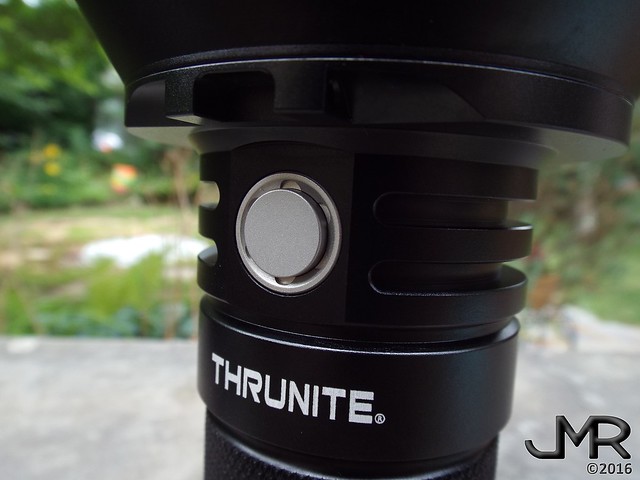
^ The button has a good tactile feel when clicked. There is no electronic lockout but power to the light can be disable via mechanical lockout with a simple twist of the battery tube. This makes it safe to carry or stow without fear of the light accidentally turning on. The ThruNite logo is laser etched very cleanly and bright.
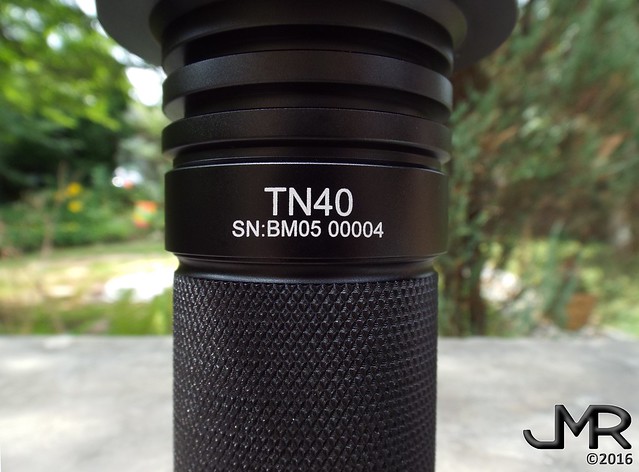
^ On the opposite side of the switch you will find the light's model and serial number. Each light has a unique serial number to identify it.
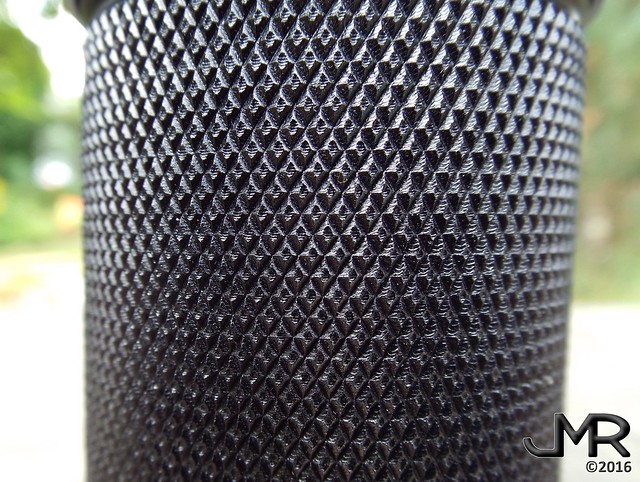
^ Knurling on the TN40 is exceptional. The grip it affords is outstanding and arguably the best in the business. The thick battery tube is easy to maintain a hold on even with smaller hands. Even my wife was impressed by how solidly she could hold onto this light.
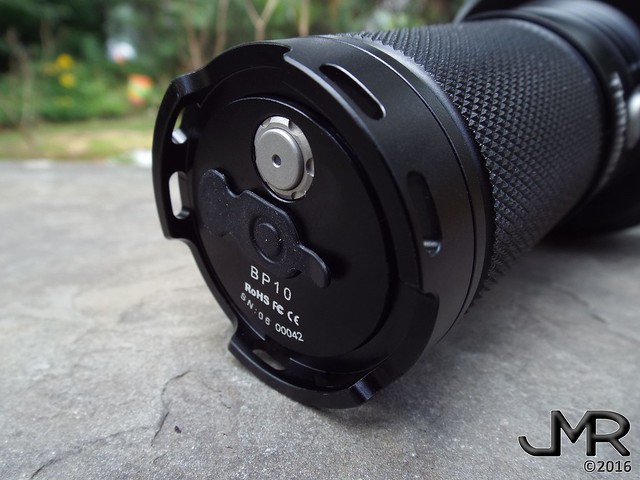
^ At the tail of the light we find 3 large triangulated crenellations with large lanyard holes machined into them. All edges are chamfered perfectly for both comfort and to ensure lanyards, if used, will not be cut as they slide about in the holes. The triangular arrangement of the crenellations ensures stable tail standing on rough or uneven surfaces. Battery charge status and charging port are located on the very base of the light.
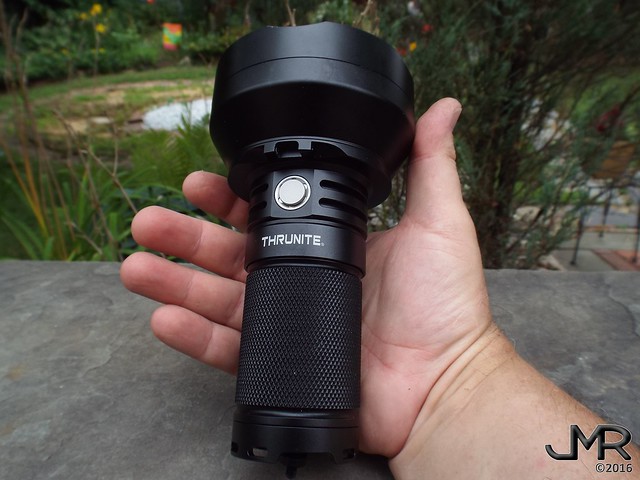
^ In the hand the TN40 feels very nice. As you can see it's not even as large as many people expected. Yes, the head is very wide and I agree with ThruNite that a holster for something this wide would not be comfortable to wear.
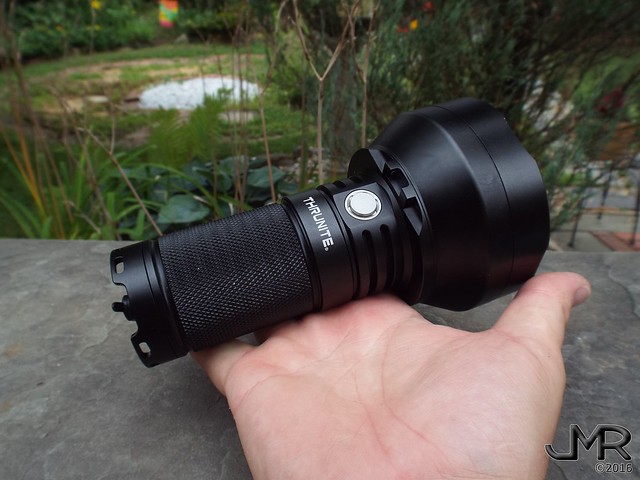
^ Many critics also expected the TN40 to be very top/front heavy with that huge head. I'm telling you right now that it is not at all. The head and reflector are very light. Most of the mass and balance is centered where my index finger is right below the switch. The pill and battery tube contain most of the weight and it is very comfortable to hold and carry.
DECONSTRUCTION
Now that we've looked at the exterior of the light, let's have a look at what makes it tick.
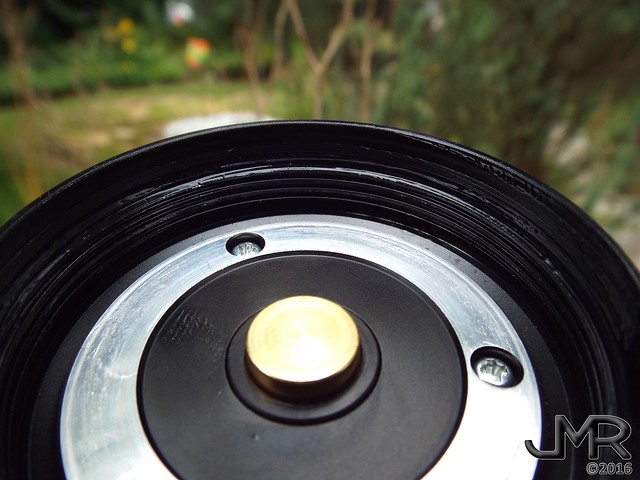
^ Here we have removed the battery tube and are looking at the contact plate that covers the driver. The center brass button is the anode (positive) connection and the flat, machined ring on the outside of the plate is the cathode (ground) connection. Both are large and smooth, ensuring maximum current flow with little resistance. The spring behind the center brass contact is extremely stiff and the button is hard to depress. This provides a solid connection for battery +.
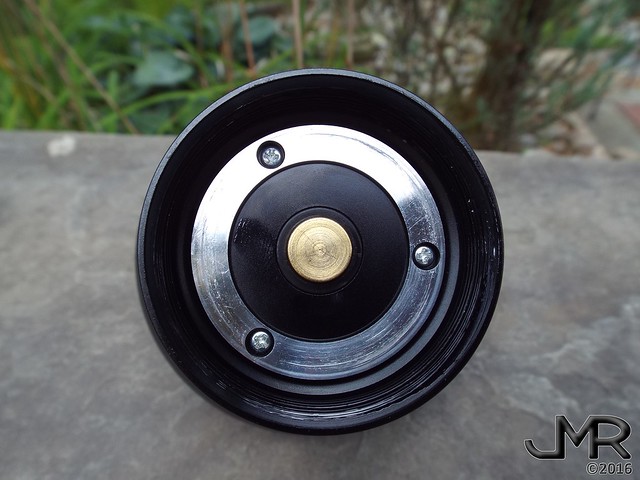
^ The negative contact ring is wide and flat and mates tightly against a matching ring on the battery tube. Three screws secure the driver contact/retaining board to the back of the head.
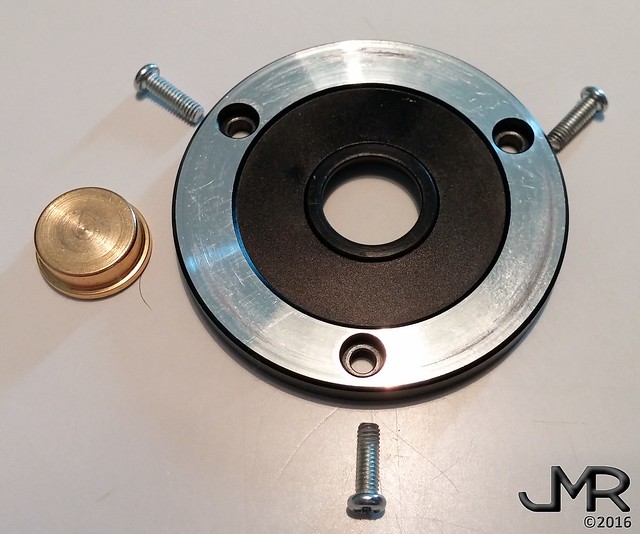
^ Removing the three screws reveals the aluminum contact/retaining plate. A plastic/nylon insulator ring is press fit into the center of the outer ring with a hole in the middle for the brass anode contact
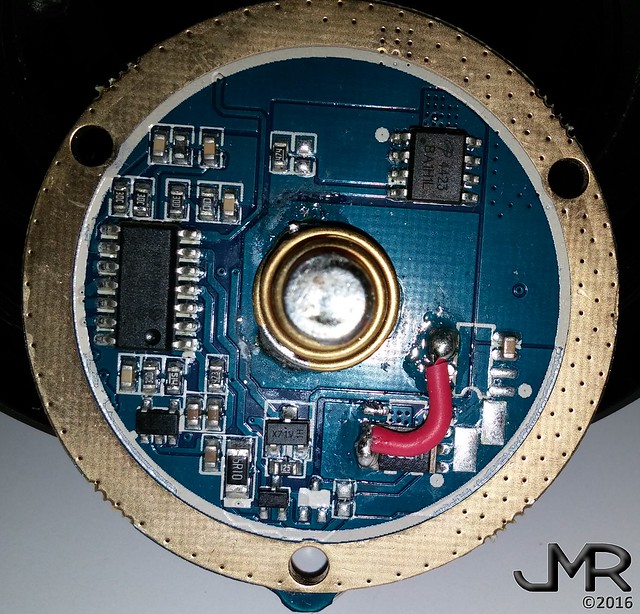
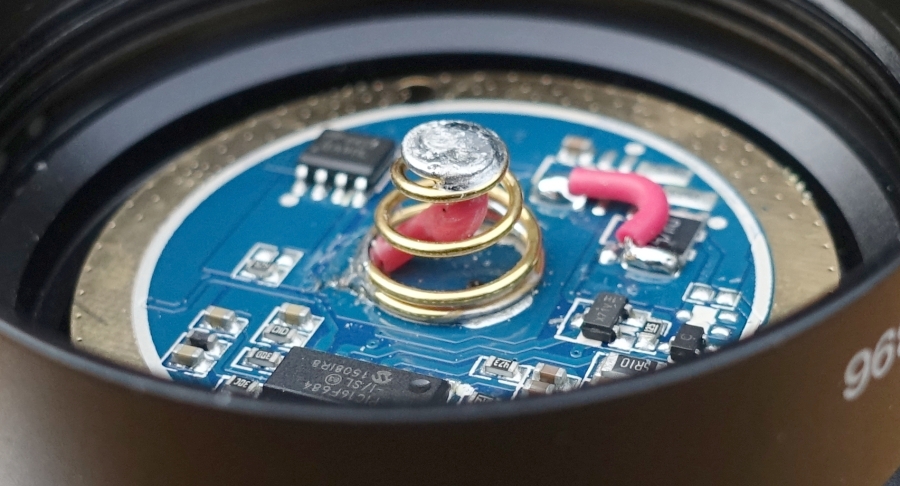
^ With the retaining plate removed we can easily get to the driver, the heart of the beast. The positive (anode) spring is extremely thick and stiff for maximum current conduction. The top of the spring where it presses against the brass contact button has a flat contact plate soldered to it. This also ensures maximum contact surface for better current conduction. All solder joints are well done and properly flowed.
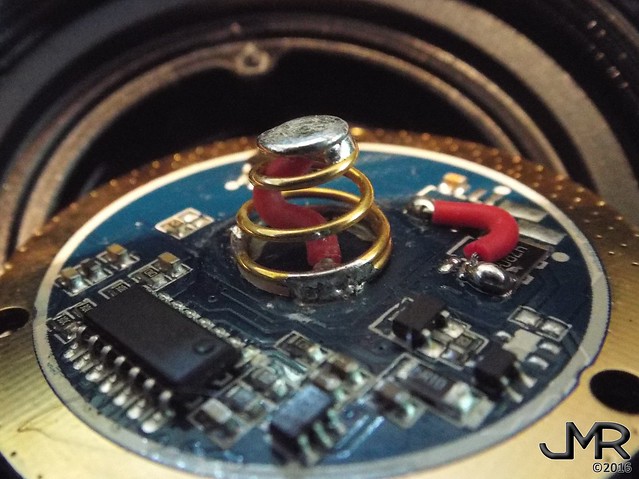
^ Even the driver spring is pre "hot rodded" for you from the factory for maximum current to the driver.
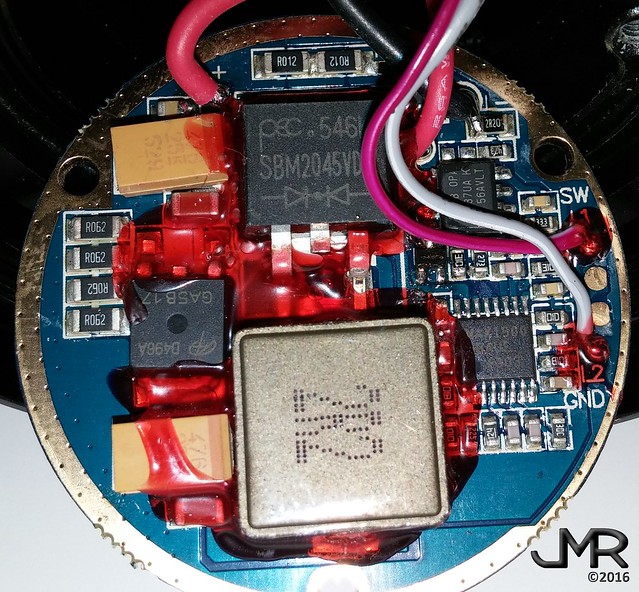
^ There is just enough wire length available for me to pull the driver out enough to expose the rear of the driver. Very nice solder joints continue on this side as well and heavy gauge wires carry the current to the LEDs. All larger components and connections are potted for increased impact resistance and durability for hard use. Also of note, none of the components have had identifiers sanded off like most drivers I've seen.
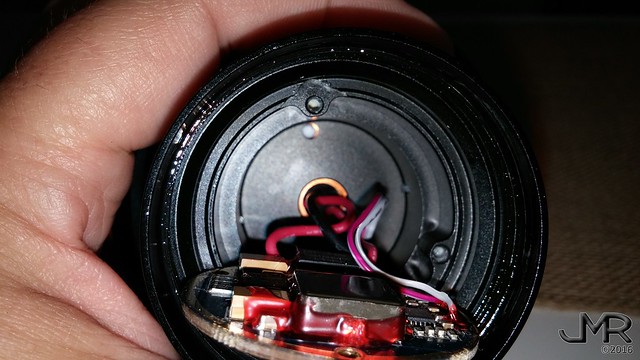
^ Looking into the driver cavity itself we see a solid emitter shelf and the just enough of the MCPCB to tell that it is solid copper.
Unfortunately I was unable to remove the bezel to get a look at the LEDs and MCPCB directly. It is either too tight (so wide it's hard to get a grip on it) or it is glued.
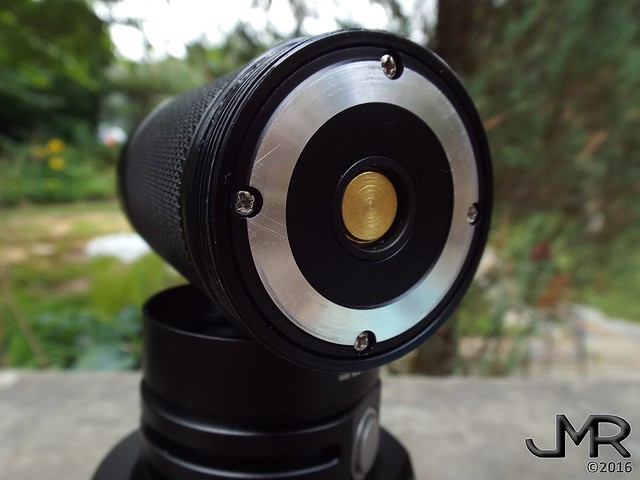
^ With the front of the light covered, let's take a look at the battery tube and it's proprietary battery pack. The contact plate of the battery tube is the mirror image of the retaining plate on the head of the light except that it has four screws attaching it.
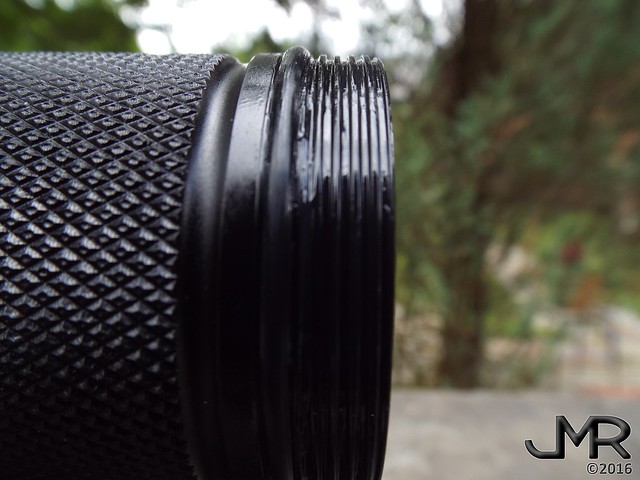
^ The threads on the TN40 are extremely well machined with little to no play felt when connecting the head and battery tube. The threads are fully anodized and square cut. The O-ring fits perfectly to keep out dust and water - very snug and tight. Ample silicon thread grease was applied at the factory for a super smooth threading experience.
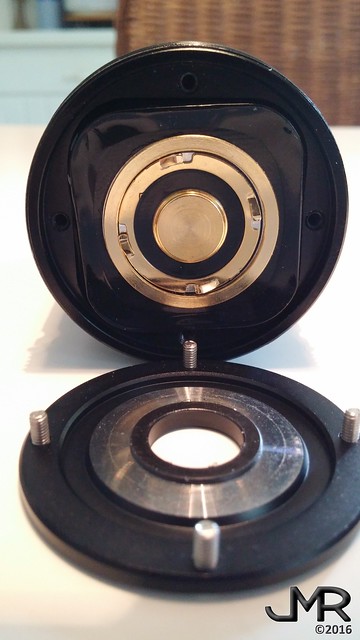
^ Unscrewing the battery contact/retaining plate exposes the top of the removable battery pack. The center contact is not a spring loaded button but a solid direct connection.
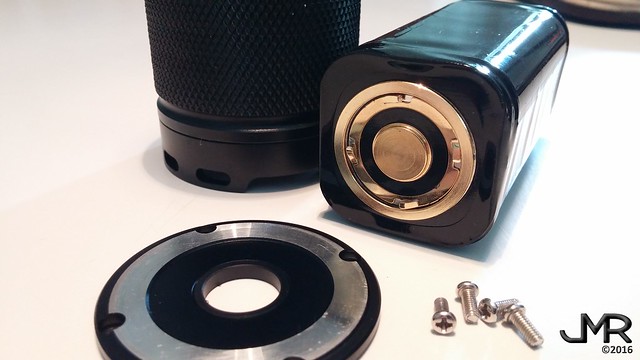
^ Tip the battery tube upside down and the battery pack slides out easily. Inside is a charging circuit and four 3400mAh 18650 high draw cells arranged in 2S2P for a total of 6800mAh @ 8.4V. The outer cathode (negative) contact ring is gold plated for maximum current conduction to the retaining plate.
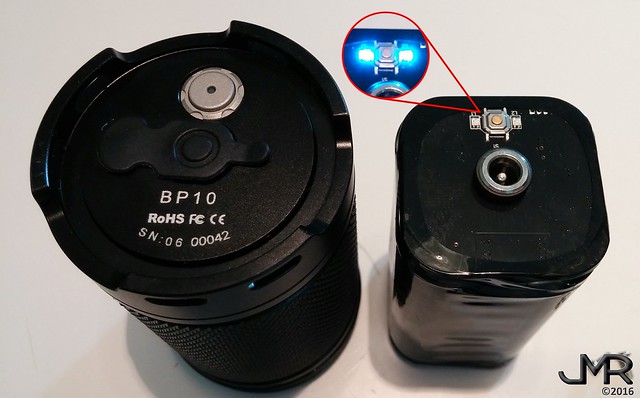
^ The back of the battery tube contains the charging port and electronic micro switch that shows charge state of the battery pack. Two RGB LEDs sit on opposite sides of the micro switch. Also note that the rechargeable battery tube of the TN40 is actually a separate product with it's own model name - BP10 (Battery Pack 10) and it's own unique serial number. I'm sure that the battery pack itself could be easily ordered in the future when it's time to replace it.
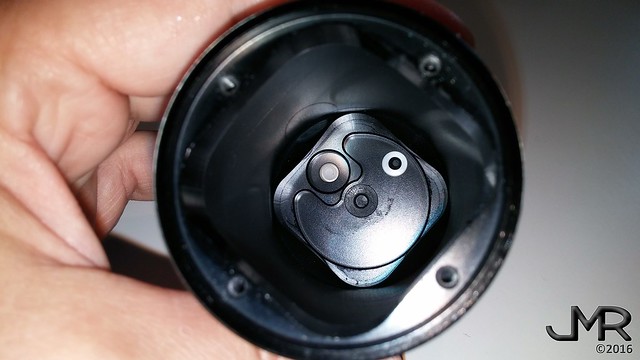
^ With the battery pack removed we can look down into the battery tube and see the connection points for the charging port and status switch.
SIZE COMPARISONS
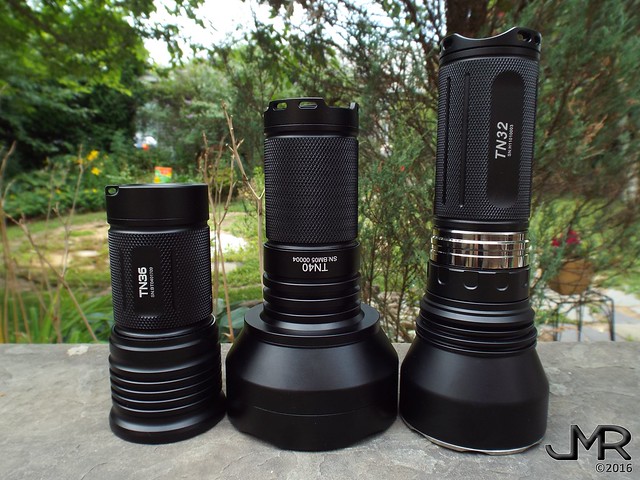
^ I decided to compare the TN40 to a couple of other popular ThruNite monsters known for their high output. On the left is the TN36, a triple Cree MK-R LED flood monster which I've tested at over 7000 lumens. In the middle is the TN40. On the right is the TN32, ThruNite's previous throw king which I've measured to have 1100m of throw on my sample.
The TN36 is deceptively tiny and compact. The TN40 shares the same battery tube dimensions as the TN36. Coupled with the wide, shorter head (compared to the deep single reflector of the TN32) it makes for a very short, wide thrower that is surprisingly compact and much smaller than I expected. The TN32 is pretty much the standard length for most single LED throwers.
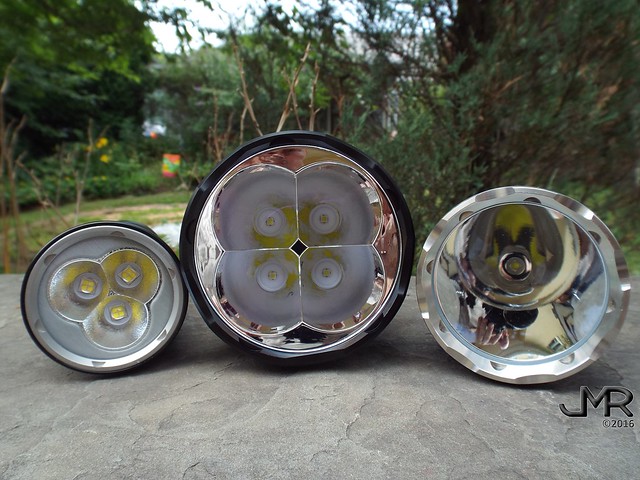
^ From the front we can see the difference between these three lights, all tops in their categories. The TN36 (left) has 3 very shallow reflectors with heavy orange peel finish for massive amounts of smooth, floody light. The TN32 (right) has a single Cree XM-L2 U2 NW in a very deep, wide, smooth reflector for excellent throw. The TN40 (middle) has a massively wide and smooth reflector with lots of reflective surface area from it's four reflector cups. This wonderful reflector does a fantastic job of focusing the sheer brute force of the four Cree XP-L HI emitters. It gives lots of smooth spill and the mode ridiculous focused throw I've ever seen to date.
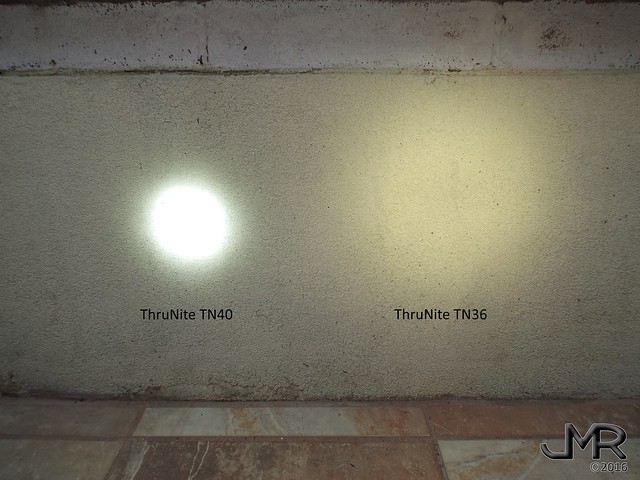
^ Comparing beam center spots you would never guess that the TN36 on the right puts out far more overall lumens than the TN40. The reflector on the TN40 does such a fantastic job of focusing the light from it's emitters that the TN36 looks like candle light next to it.
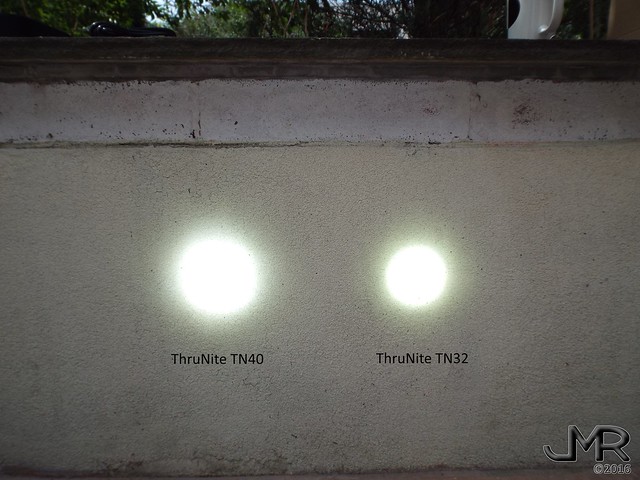
^ Comparing the TN40 to the TN32 from 1m we see a more competitive center spot comparison. The TN32 has a super-tight and well focused center spot while the slightly wider center spot of the TN40 is nearly as focused but visibly more intense and brighter. This photo and the one above were taken in broad afternoon daylight. It looks like dusk with the camera tying to adjust for the intense light both of these torches provide.
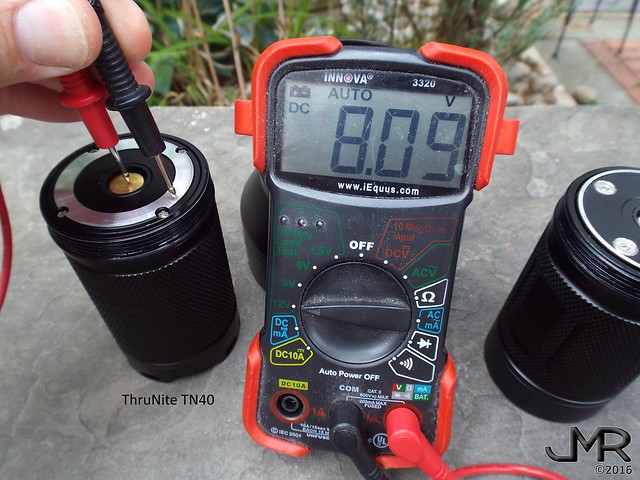
^ This next point is very important. I saw a review of the TN40 on Youtube where the reviewer shows that the battery tube from the TN30Mini, TN36, and TN36UT will thread onto the TN40 and work fine. While they will indeed thread Lego onto each other, do NOT use the bodies of the TN30 Mini/TN36/TN36UT on the head of the TN40. The TN40 battery pack provides 8.4V maximum to the TN40. The other battery tubes are designed with their 4 cells in series (4S) for as high as 17.2V maximum. This will damage your beautiful TN40 by providing twice the voltage to it. It is not designed to run this and will void your warranty.
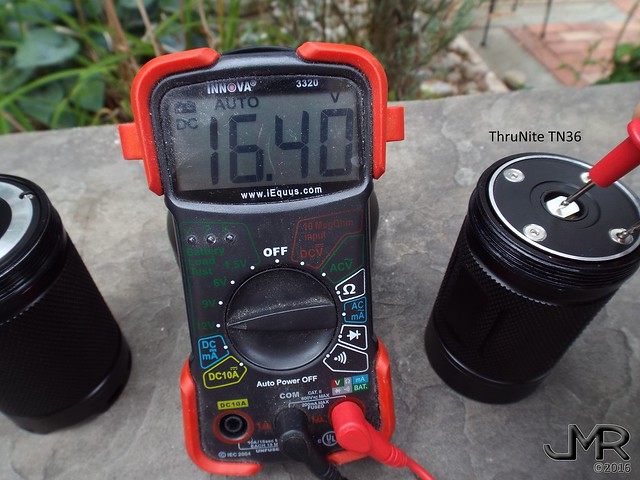
^ On the other hand, since the battery pack from the TN40 provides just 8.4V max, you could use the TN40 battery pack in any of those other three lights but you will not get the maximum output since you will be providing only half the required voltage.
CONCLUSION
Pros & Cons
Pros
* Competition killing performance
* Exceptional build quality
* Arguably the best knurling in the business
* Very compact for it's level of performance
* Quality built-in charging for use on the go
* Fast charging time of 2.8 hrs
* Perfect fit and finish throughout the light
* Competitively priced with battery pack and charger
* Did I mention 1.3km of throw?
Cons
* I'd like to see the charging status indicator
lights on at all times when charging
* Some potential buyers may be put off by the proprietary battery pack but ThruNite informs me that they will honor the pack with a 2yr replacement warranty
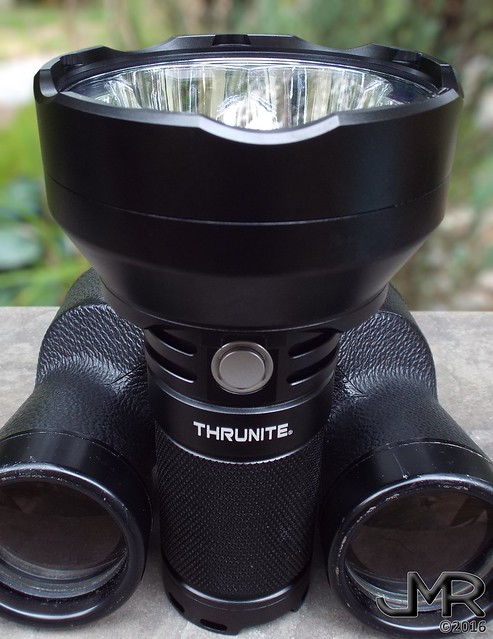
I love this light! Massive amounts of throw and OTF lumens. It beats it's closest competitor, the Nitecore TN16GT, hands down! For the time being, this is the best thrower of 2016. Build quality is superb, finish is superb, performance is superb...it was designed to be king of its class and it succeeds in that role. For LEO, SAR, and drivers, the built in charging makes it convenient to charge and go. This is not a budget light by any stretch but the fact that it is competitively priced plus has the battery pack and charger makes it even more appealing for both first time high-performance light buyers and seasoned pros alike.
There will, of course, be those put off by its proprietary battery pack due to not being able to run their favorite cells. Concerns of having to replace the entire pack if just one of the cells goes bad will hold some off. Keeping in mind that ThruNite will be offering a 2 yr replacement warranty on the battery pack, I feel that more than negates concerns of pack replacement. They put a lot of time and thought into the charging circuitry so my usual fears of charging cells inside a light don't worry me too much with this light. There are only a few lights I would consider in-light charging and this is one of them.
If you aren't bothered by the proprietary battery pack then you won't regret this light. The TN40 will murder any other factory light you or your friends/co-workers might have and, after all, that alone might be worth getting it. ;)
