Earlier this year, Wurkkos released their first “flat” flashlight with a floody sidelight and a green laser. Now they added a variant with UV instead of the laser: the Wurkkos HD01 UV.
You can find the German version of this review on my website: SammysHP Blog › Wurkkos HD01 UV
The flashlight was provided by the manufacturer for this review. Thank you very much!
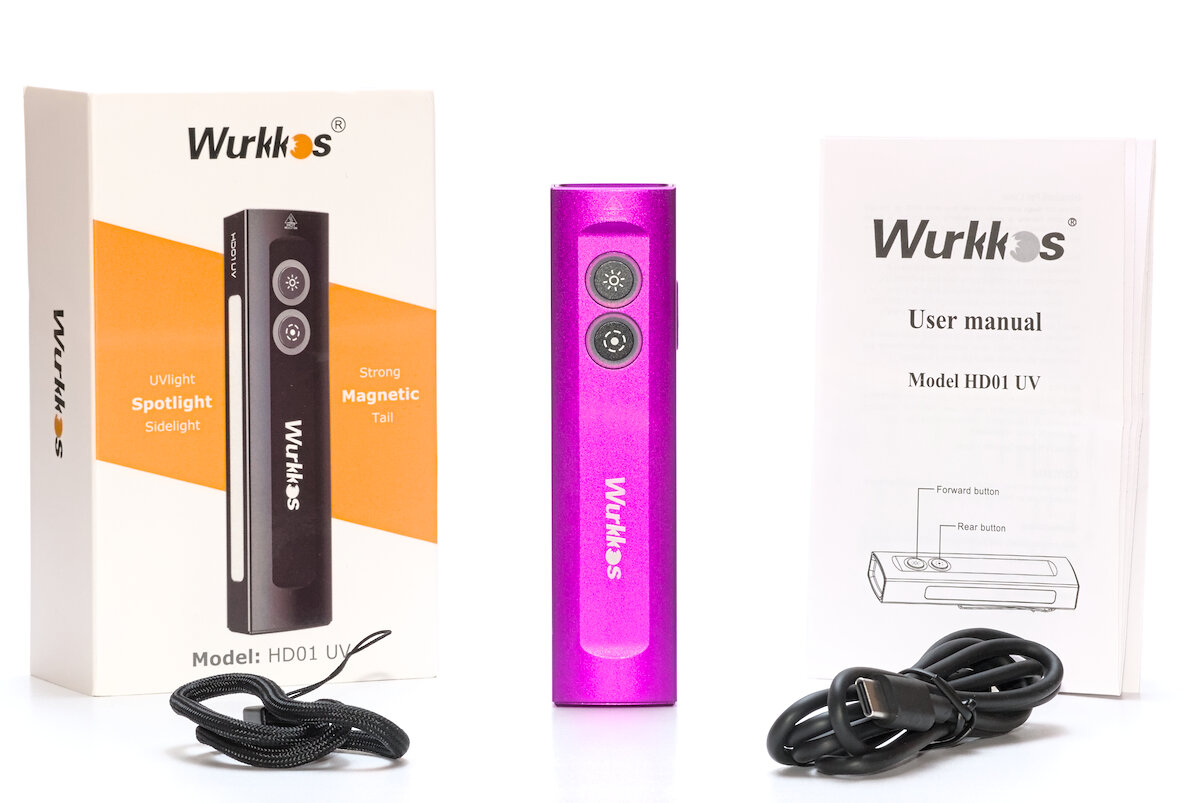
Overview of hardware
Due to the monolithic design, there are only a few accessories in the box:
- Lanyard
- USB-C charging cable
- Manual (EN, DE, FR, ES, IT, JP, RU)
The battery is integrated, the clip already attached and there is no need for replacement seals as everything is permanently sealed. The instructions are shown in form of a diagram and easy to understand.
One advantage of “flat” flashlights is that they are not as bulky in the pockets of your pants as round models. But it also shouldn’t be too long, otherwise it might be uncomfortable in the pocket.
With dimensions of 17 × 27 × 111 mm the HD01 has a nice size for an EDC flashlight. It perfectly fits into the smallest pocket of my pants. It weights only 95 g, which makes it lighter than most smartphones.
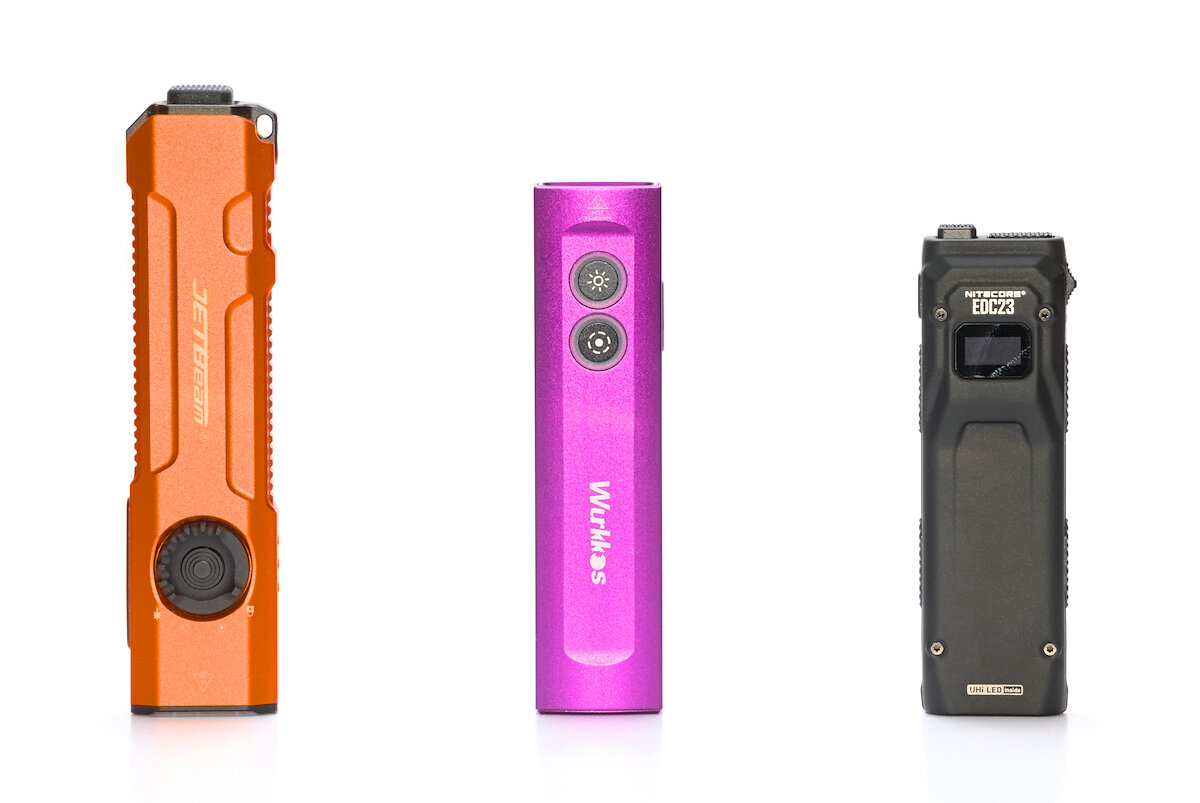
JETBeam E26 | Wurkkos HD01 UV | Nitecore EDC23
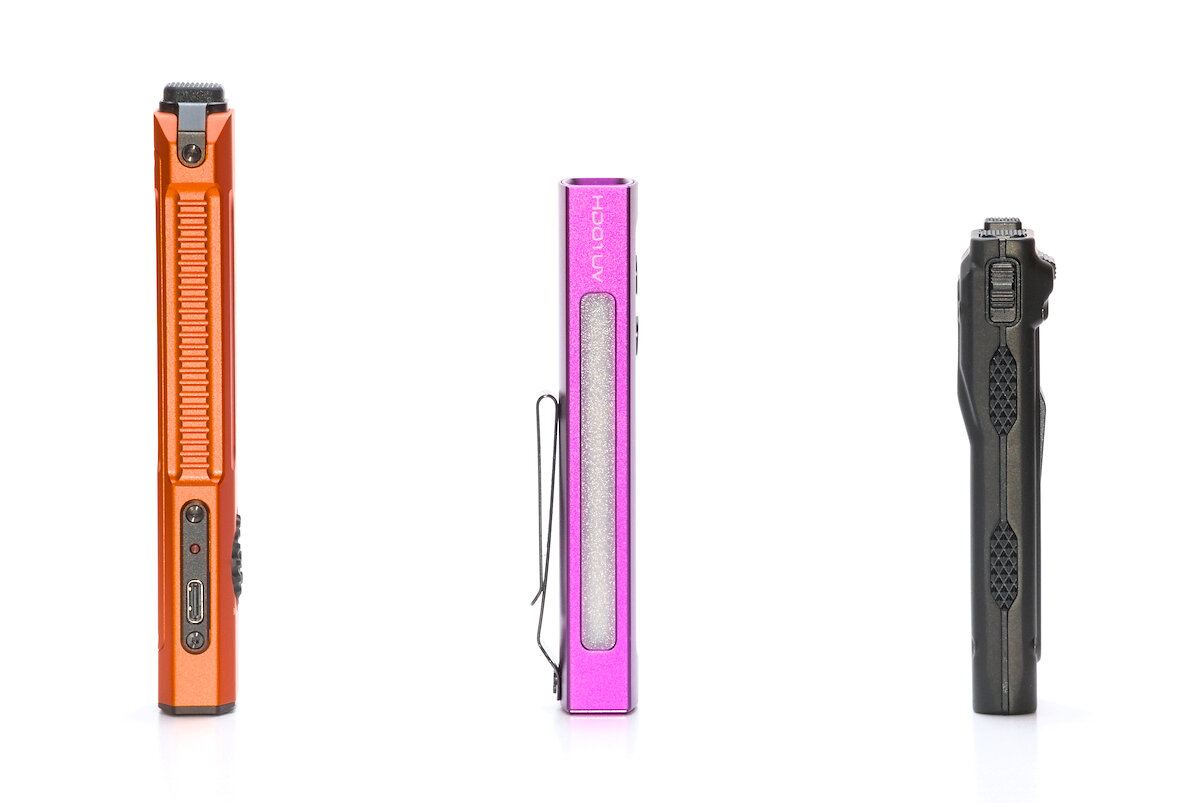
JETBeam E26 | Wurkkos HD01 UV | Nitecore EDC23
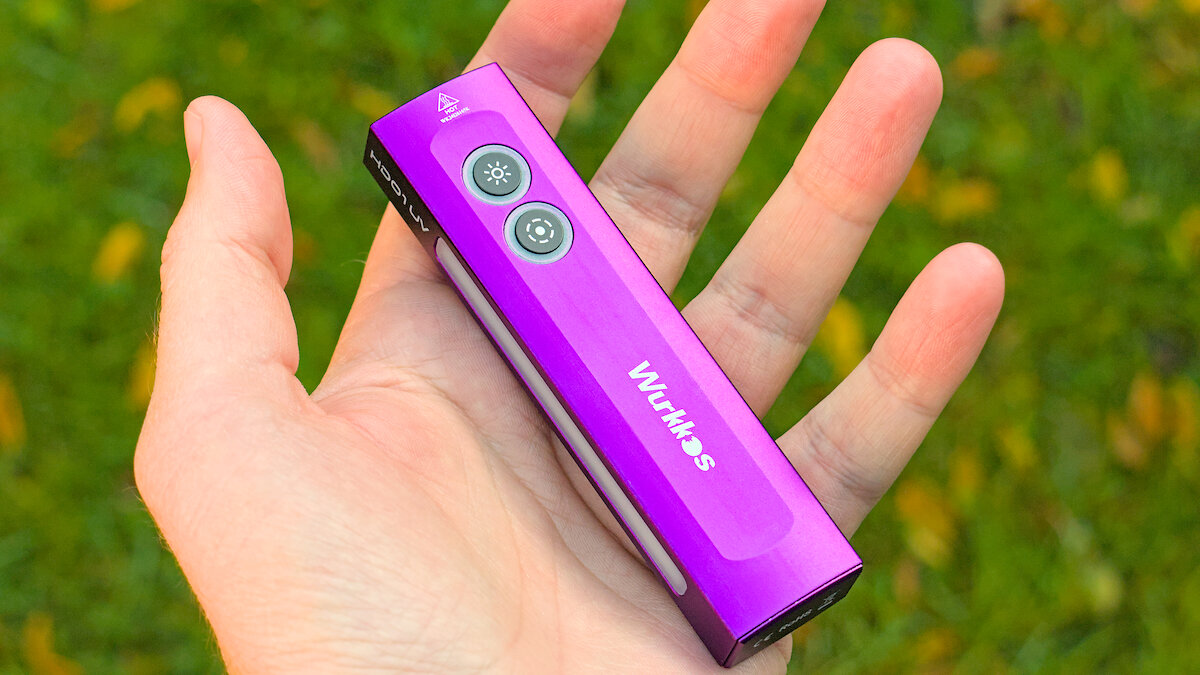
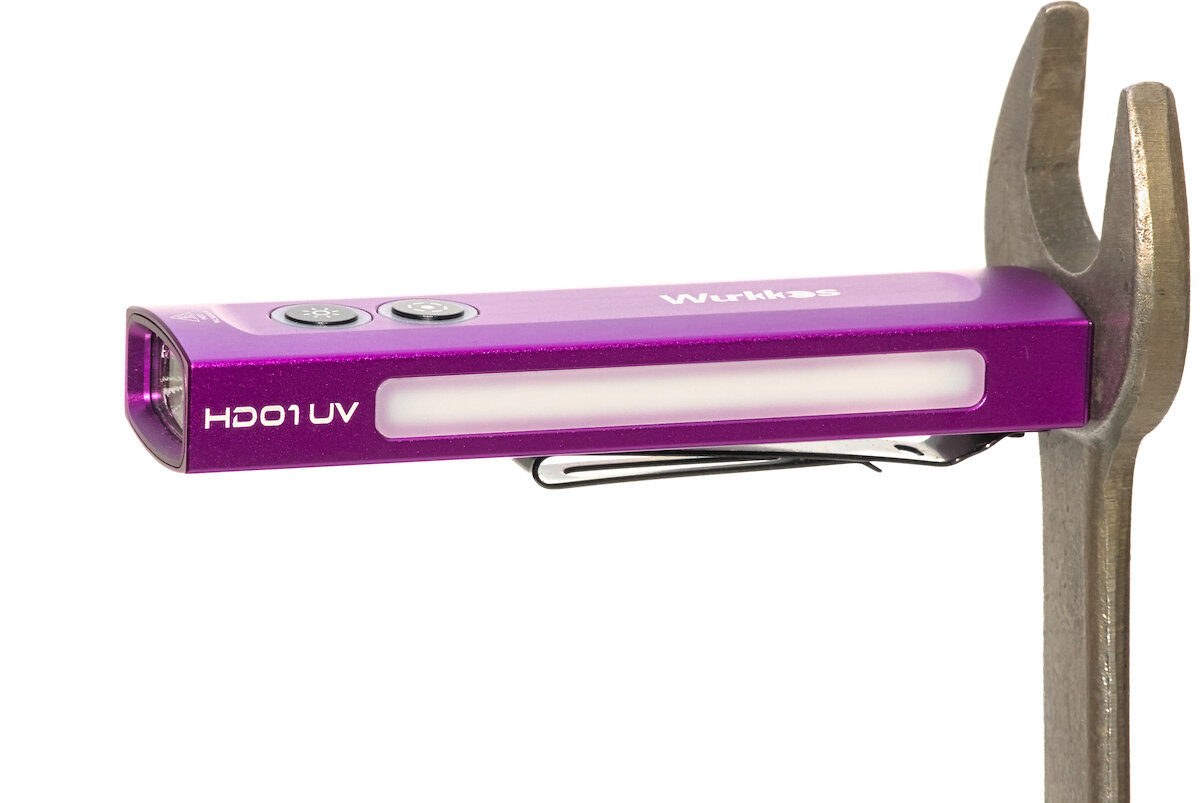
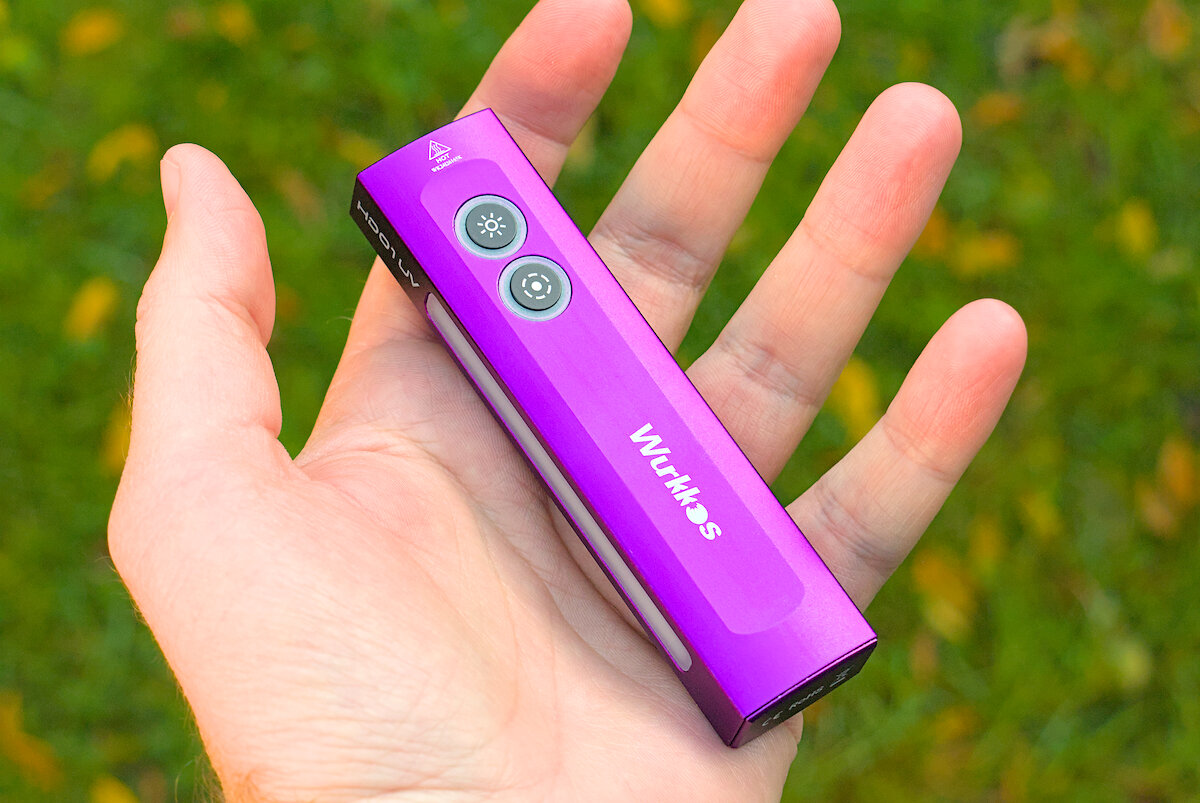
The HD01 is available in black and purple. The anodization has a beautiful, rich color with slight irregularities along the long axis. However, the flashlight will receive scratches over time anyway.
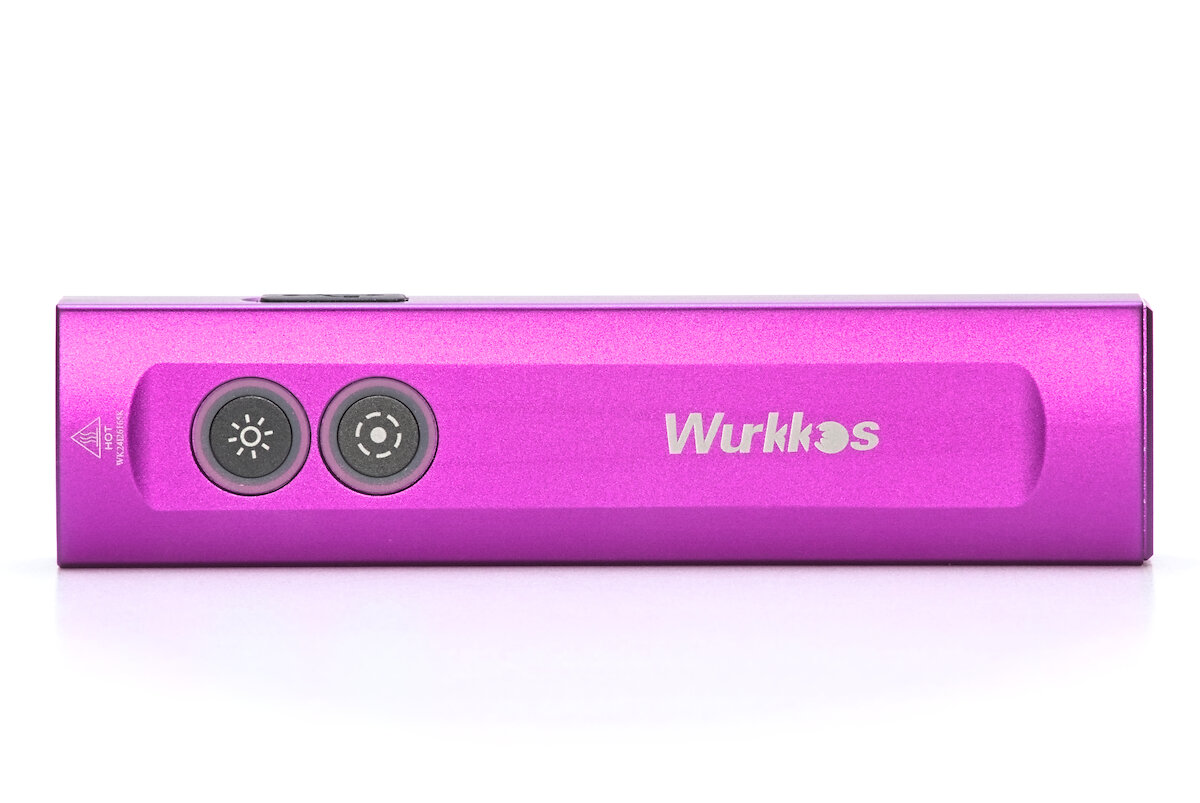
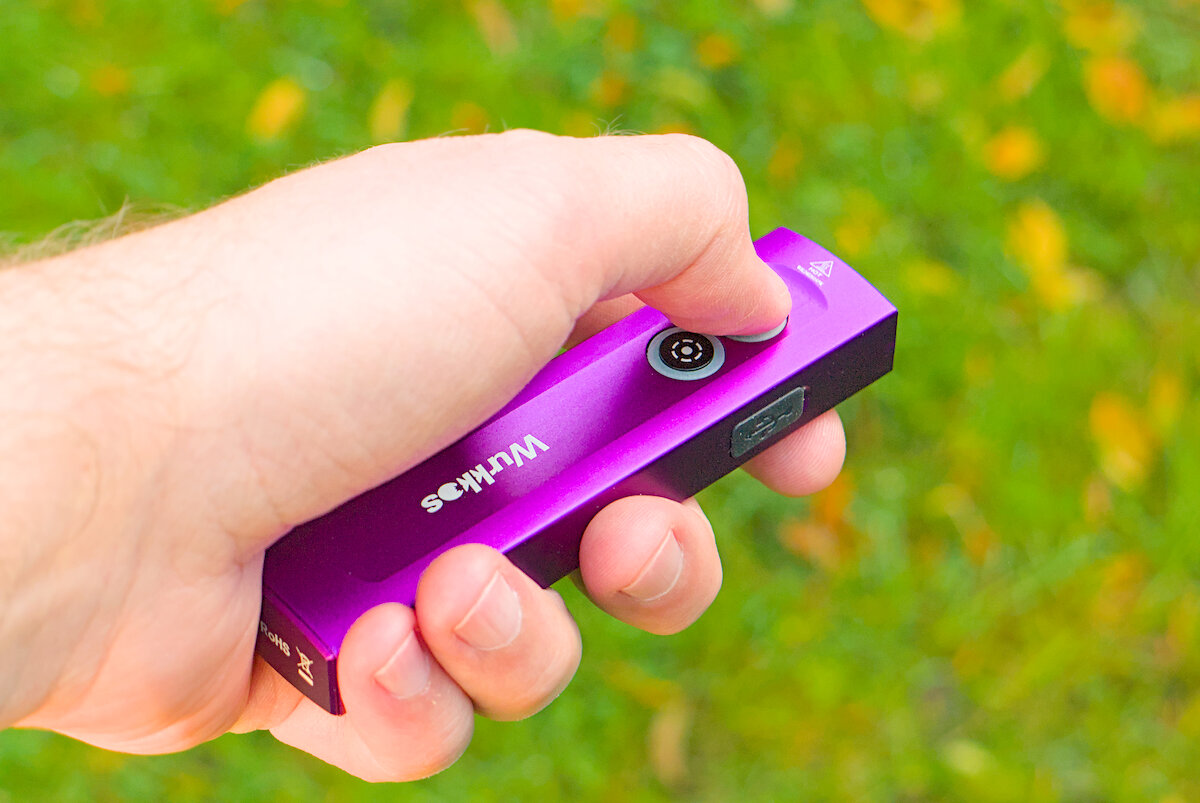
There are two large buttons on the top in a slightly recessed area. The floodlight is located on the left side.
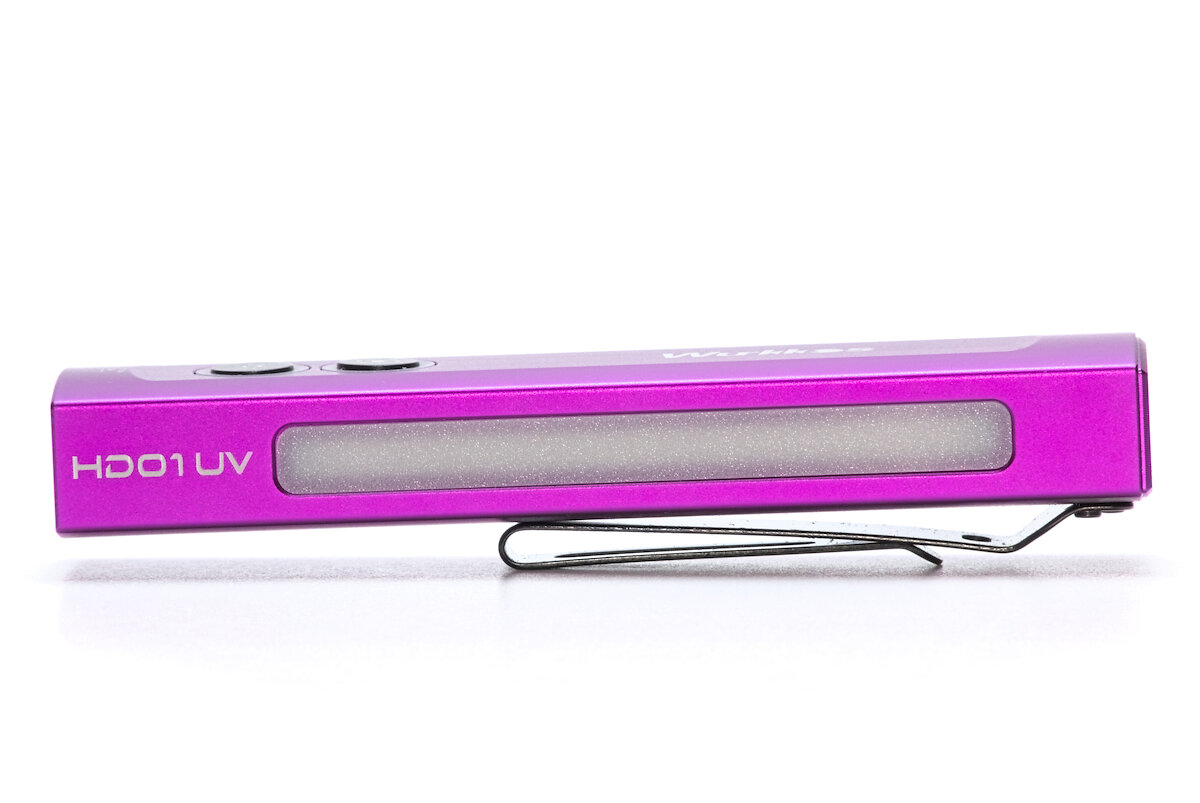
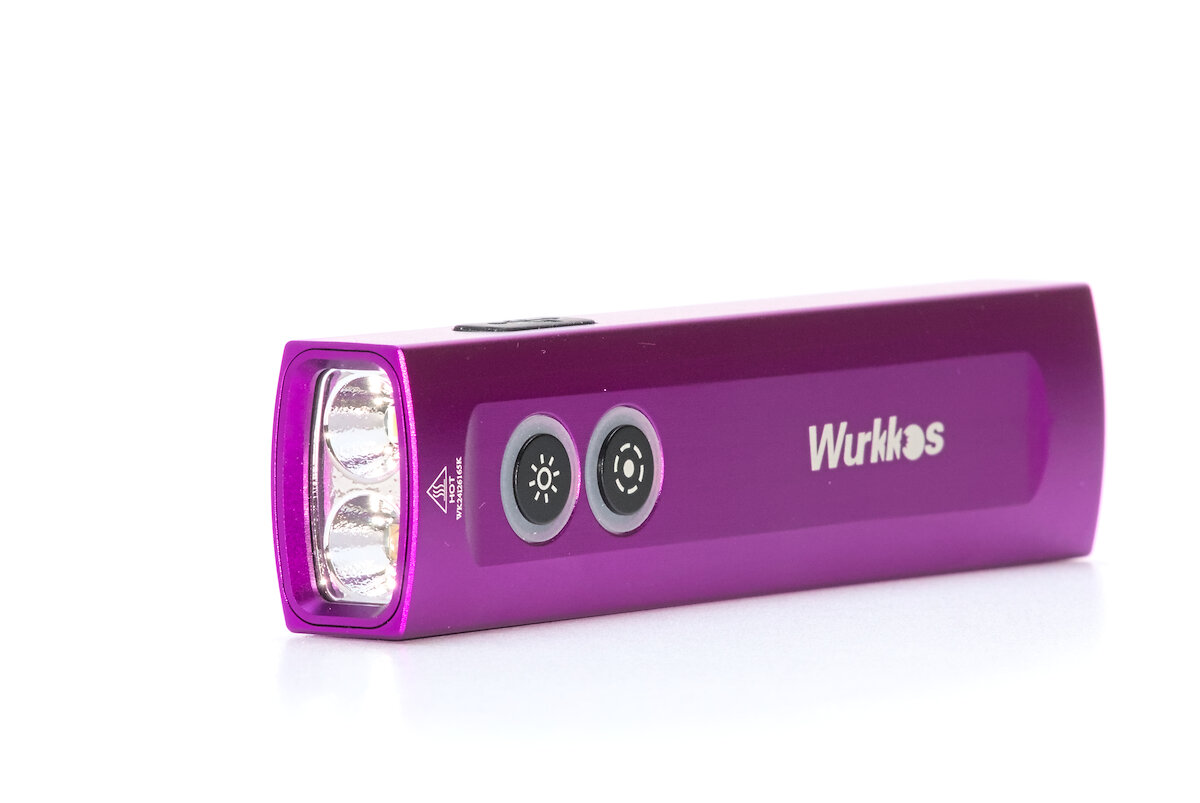
At the front, the bezel is pressed into the body and holds the reflector and the LEDs in position. This makes modding difficult.
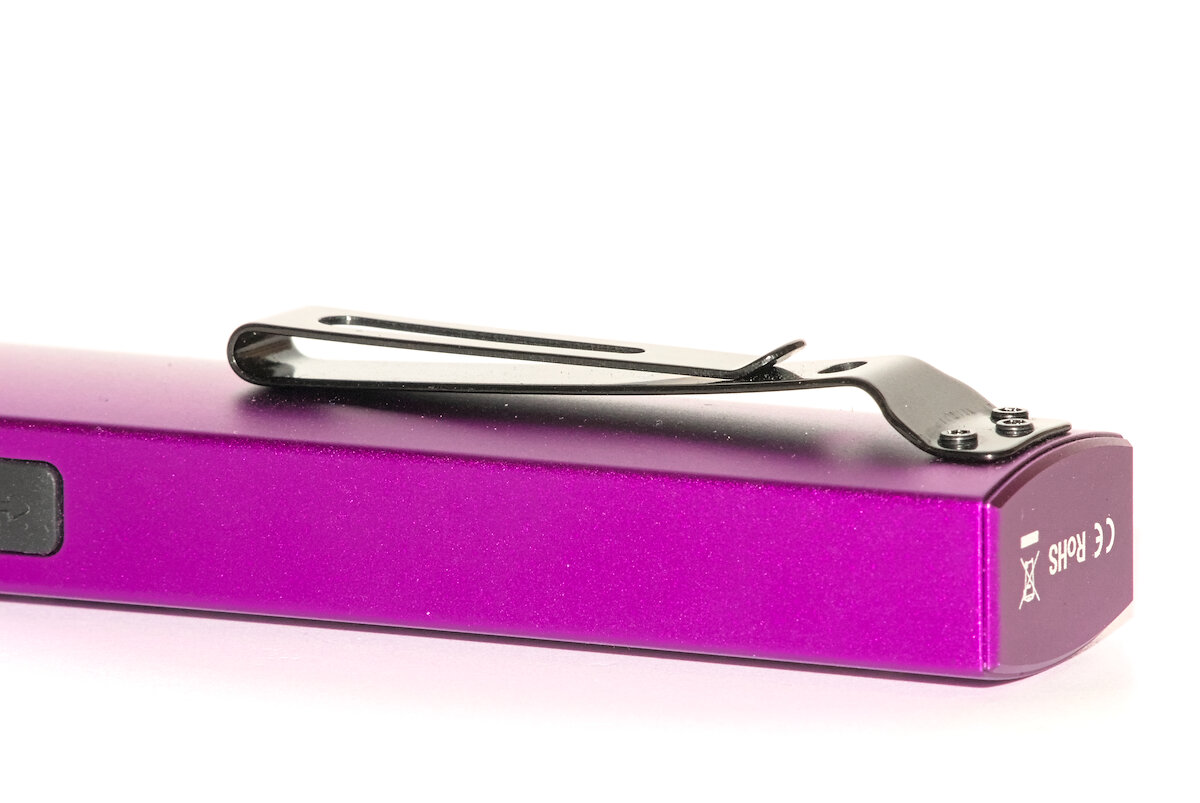
The dual-way clip is secured with three T6 screws. These also serve to secure the rear cap. If you want to remove the clip, you have to screw the screws back in to keep it closed. The flashlight can be carried deep with the clip and only protrudes about one centimeter.
A magnet is integrated at the end of the flashlight, allowing the flashlight to be attached to magnetic surfaces. It is strong enough to hold the flashlight securely in a horizontal position.
The flashlight is charged via a USB-C port on the front right-hand side. It is protected from dirt and water by a silicone cover. When closed, the cover is flush, but can still be opened easily with a fingernail.
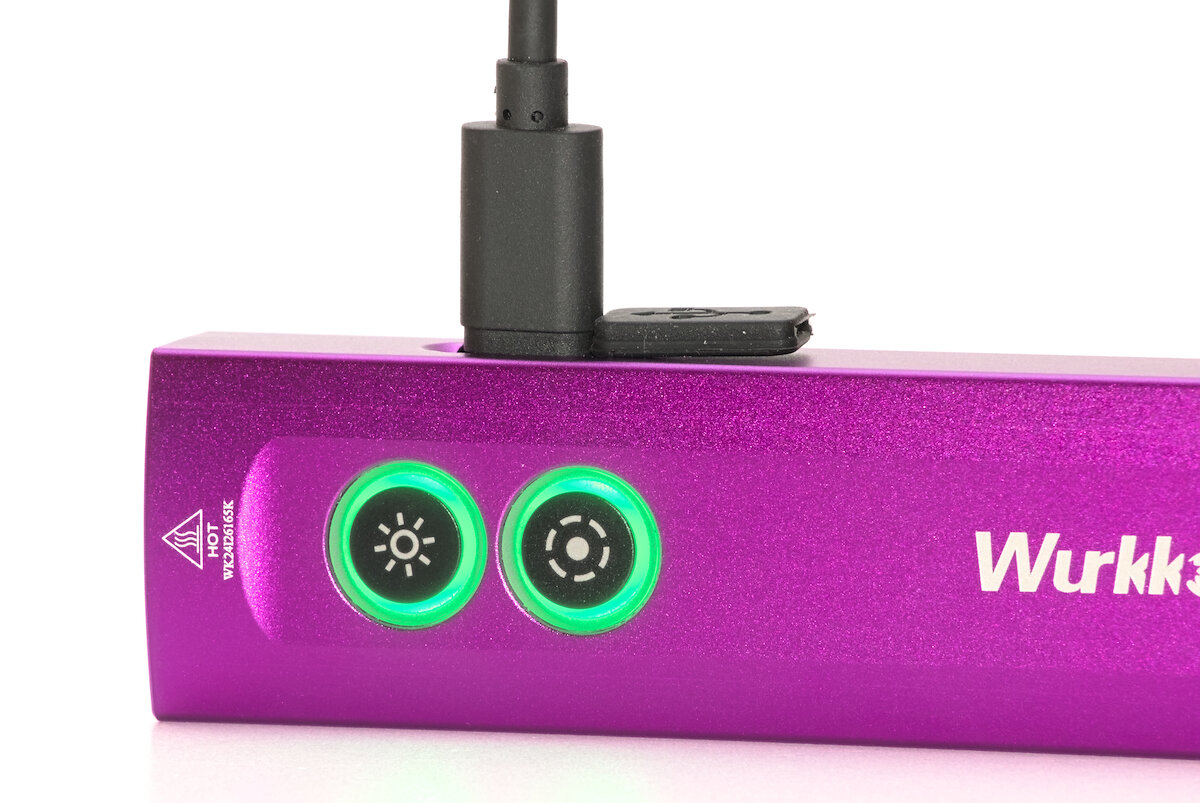
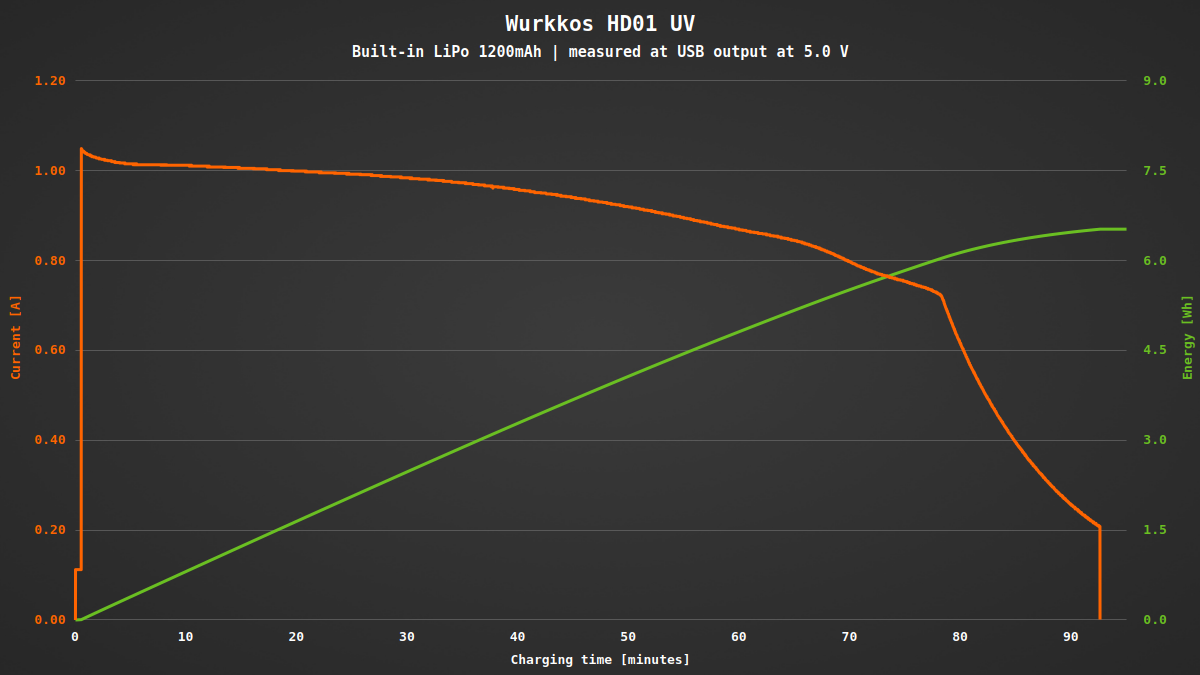
The charging process is indicated by a red backlight on the two buttons, which changes to green when finished. The permanently installed LiPo battery with a capacity of 1200 mAh is charged at around 1 A. The flashlight can be used normally during charging.
The build quality appears to be good. With IP65, the flashlight is sufficiently protected against water. However, it should not be submerged.
At some point, the performance of the battery will start to drop. As it is permanently integrated and cannot be replaced, this also means the end for the flashlight. However, this is a problem that affects most flashlights of this design.
User interface
The HD01 is controlled via two buttons in the front area of the flashlight. They consist of an 8.5 mm plastic disc embedded in a soft, translucent material, which allows for a ring-shaped backlight. It has a nice crisp click with a short travel and an actuating force of around 700 g*.
* I would also prefer to specify the force in newtons, but grams seems to be the more common unit for keys, even if it is not a force.
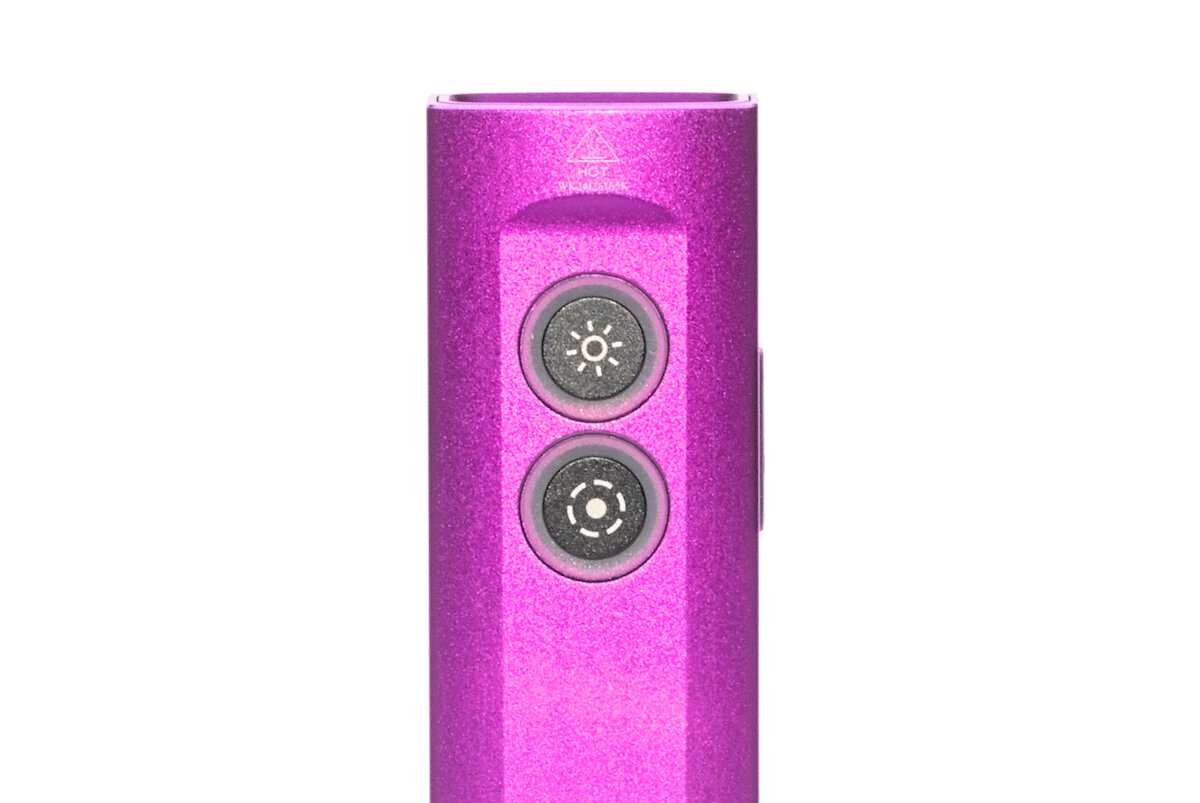
The front button only operates the white spot light. If you press this button, you will always get white light, regardless of which mode the flashlight was previously in.
Front button:
| State | Action | Function |
|---|---|---|
| Off | 1 click | Turn on (previous brightness, except Moon and Turbo) |
| Off | 2 click | Turbo |
| Off | 3 click | Strobe |
| Off | 4 click | Lockout |
| Off | Hold | Moon |
| On | 1 click | Turn off |
| On | 2 click | Turbo |
| On | 3 click | Strobe |
| On | 1H | Increase brightness (Low → Medium → High) |
| Lockout | 4 click | Unlock |
The rear button is used to control all other functions, i.e. the UV light, the white floodlight and the multi-colored side light.
Rear button:
| State | Action | Function |
|---|---|---|
| Off | 1 click | Turn on UV |
| Off | 2 click | Turn on white floodlight |
| Off | 3 click | Turn on RGB effects mode |
| Off | 4 click | Lockout |
| Off | 5 click | Turn on/off locator LED |
| Off | Hold | Turn on RGB light |
| UV | 1 click | Turn off |
| UV | 2 click | Turn on white floodlight |
| UV | 3 click | Turn on RGB effects mode |
| White floodlight | 1 click | Turn off |
| White floodlight | 3 click | Turn on RGB effects mode |
| White floodlight | Hold | Increase brightness (Low → Medium → High) |
| RGB light | 1 click | Turn off |
| RGB light | 2 click | RGB blink mode |
| RGB light | 3 click | Turn on RGB effects mode |
| RGB light | Hold | Smooth color change |
| RGB effects mode | 1 click | Turn off |
| RGB effects mode | 2 click | Switch RGB effect (Police Strobe, RGB chase, Meteor) |
| Lockout | 4 click | Unlock |
Thanks to this separation, you can switch relatively freely between the four main operating modes (white spotlight, white floodlight, UV light, RGB light) without having to switch the flashlight off. It is even possible to use the white spotlight together with the white floodlight or the RGB light.
Even if the buttons barely stick out, you should lock the flashlight to prevent accidental activation when carrying it in your pocket. Unfortunately, there is no momentary light when the flashlight is locked. It would have been a good idea to enable momentary access to the white spotlight and the white floodlight at the lowest level when holding the buttons.
The RGB light on the side is a nice gimmick, but can also be put to good use, for example as a position marker. The color change is smooth and a complete cycle takes around 16 seconds. If you miss the desired color, you have to run through all the colors again. It would be nice to be able to switch directly between the six colors red, yellow, green, cyan, blue and magenta.
After switching on the flashlight, the backlight of the two buttons indicates the approximate state of charge for five seconds. If the battery voltage is low, the LED blinks red continuously when the flashlight is switched on.
| Color | State of charge |
|---|---|
| Green | 50% – 100% |
| Red | 10% – 50% |
| Red blinking | < 10% |
The button backlight can also be activated permanently (in the form of a breathing animation) to make it easier to find the flashlight in the dark. However, you should keep in mind that this function drains the battery quickly within 14 days (many thanks to “Schulti” from the TLF for testing it).
Illumination
The Wurkkos HD01 contains a wide variety of LEDs. It as a total of 33 LEDs, divided into four channels:
- LatticePower HM: white spotlight
- Luminus SST-10 UV: 365 nm UV light
- 16x LatticePower CSP1313: white floodlight
- 15x RGB: floody RGB light
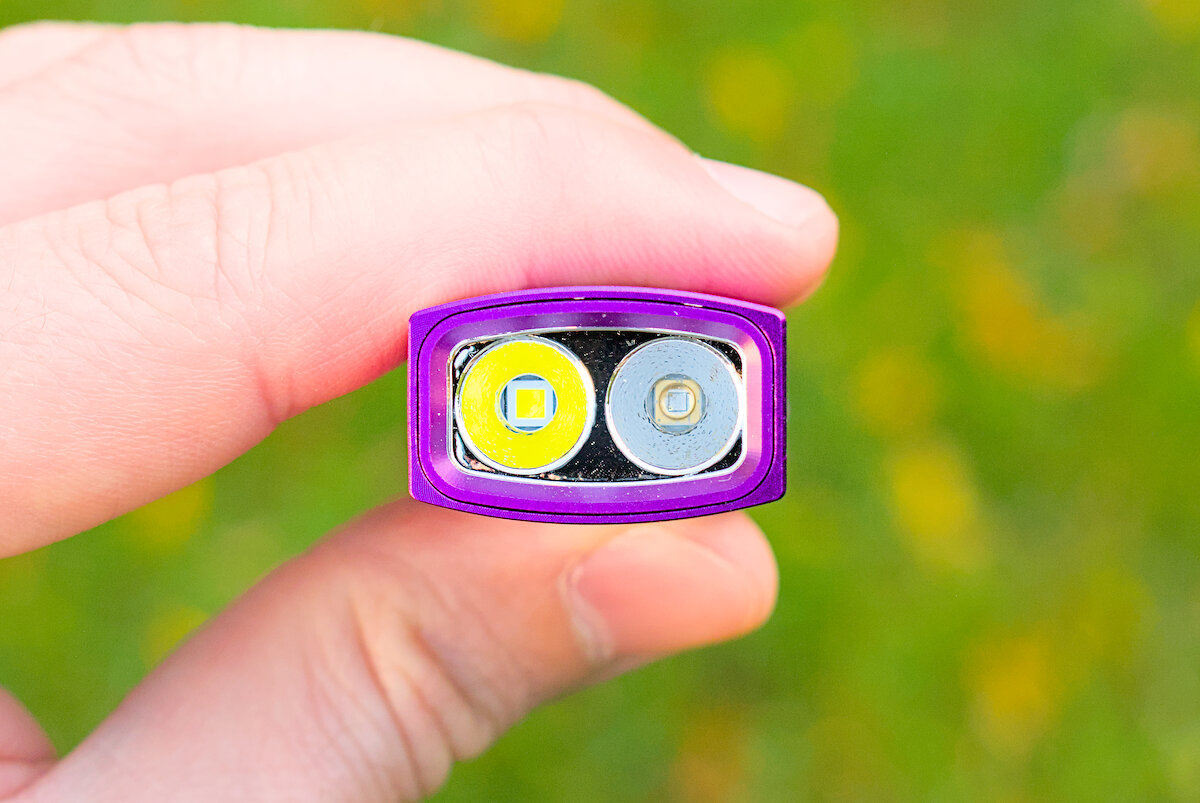
The white LED for the spotlight and the UV LED are located in a reflector at the front, protected by glass without anti-reflective coating.
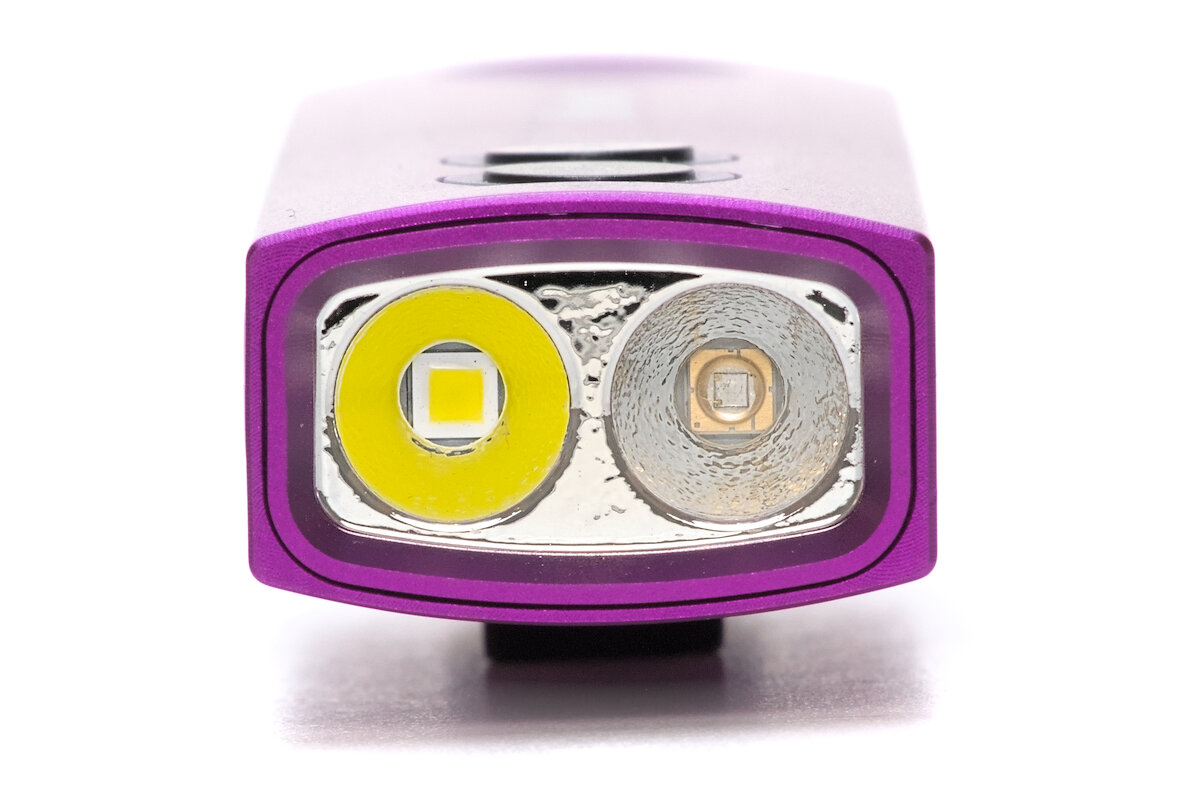
LatticePower HM and Luminus SST-10 UV
The white spotlight is produced by a LatticePower HM. This is a cool white version around 6000 K and a rather moderate color rendering of around CRI 70, but the light otherwise makes a good impression and has only a minimal difference in color between spot and spill and a mostly pleasant tint.
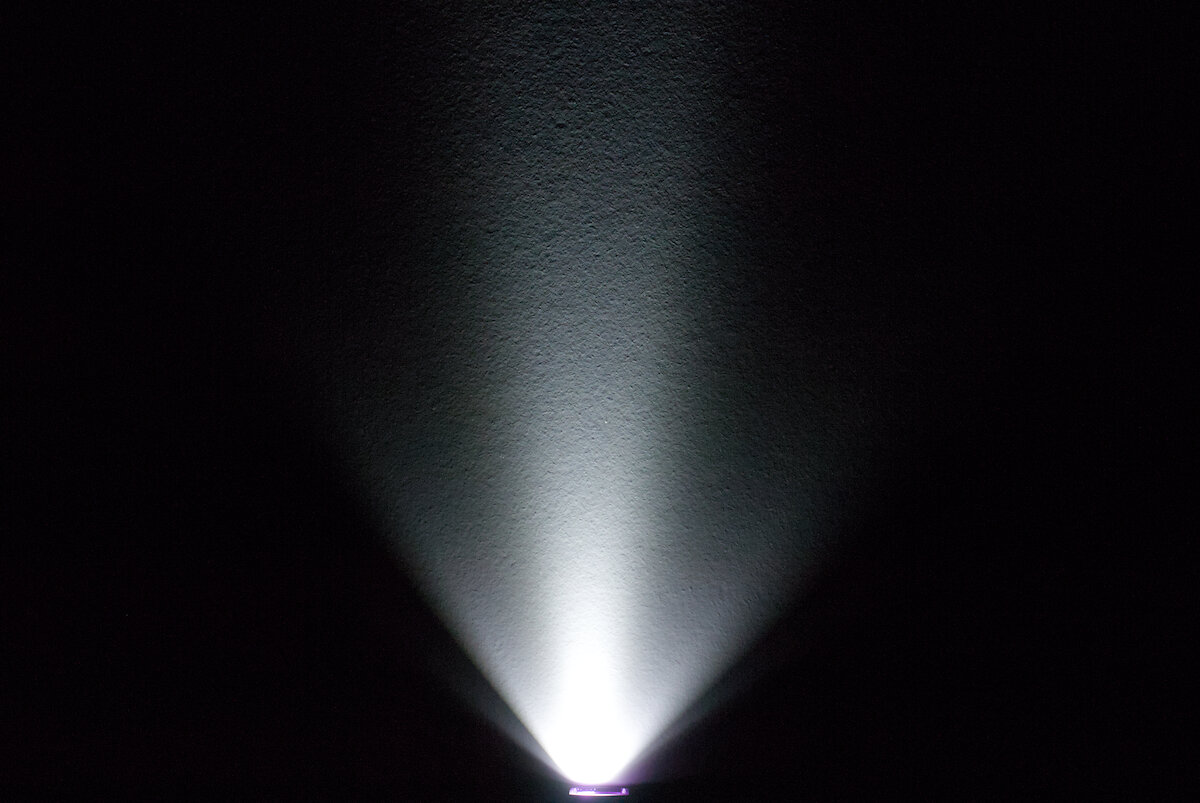
White spot
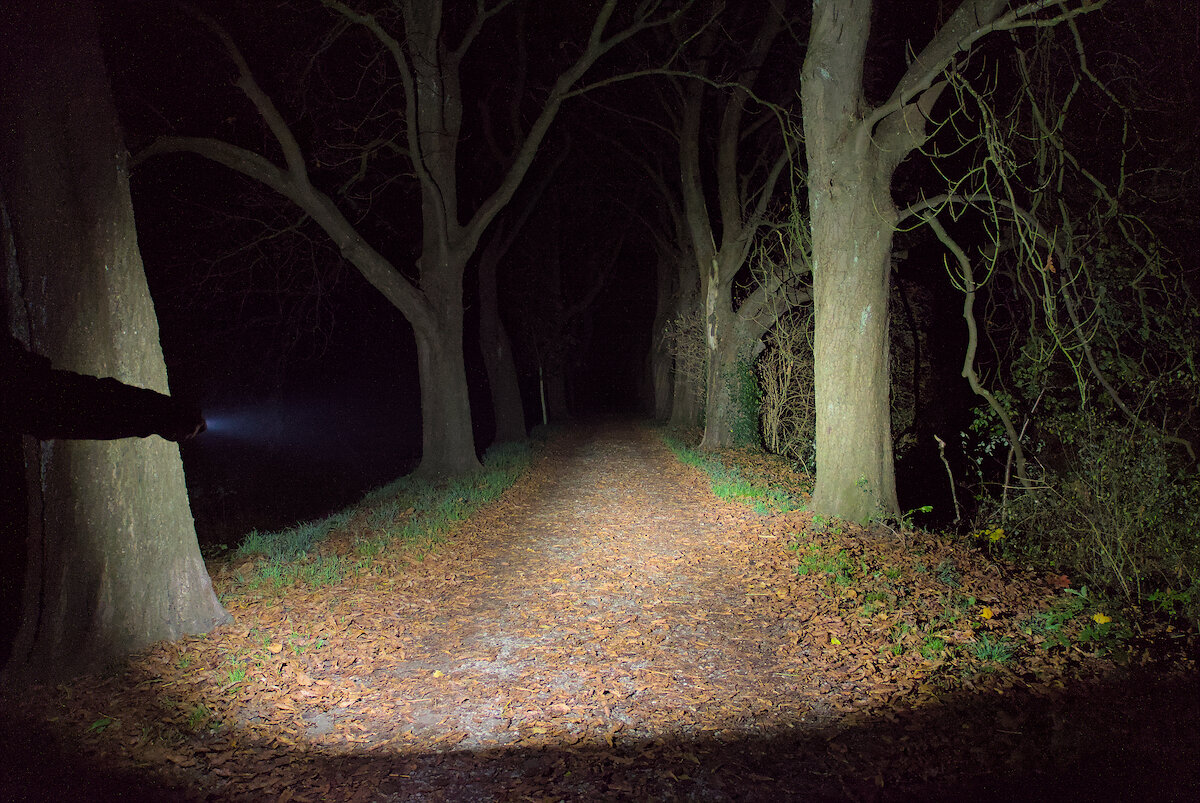
The small reflector produces a narrow but diffuse spot with a soft corona. In the bright spill, the bezel creates slightly asymmetrical shadows, but these are hardly noticeable in practice.
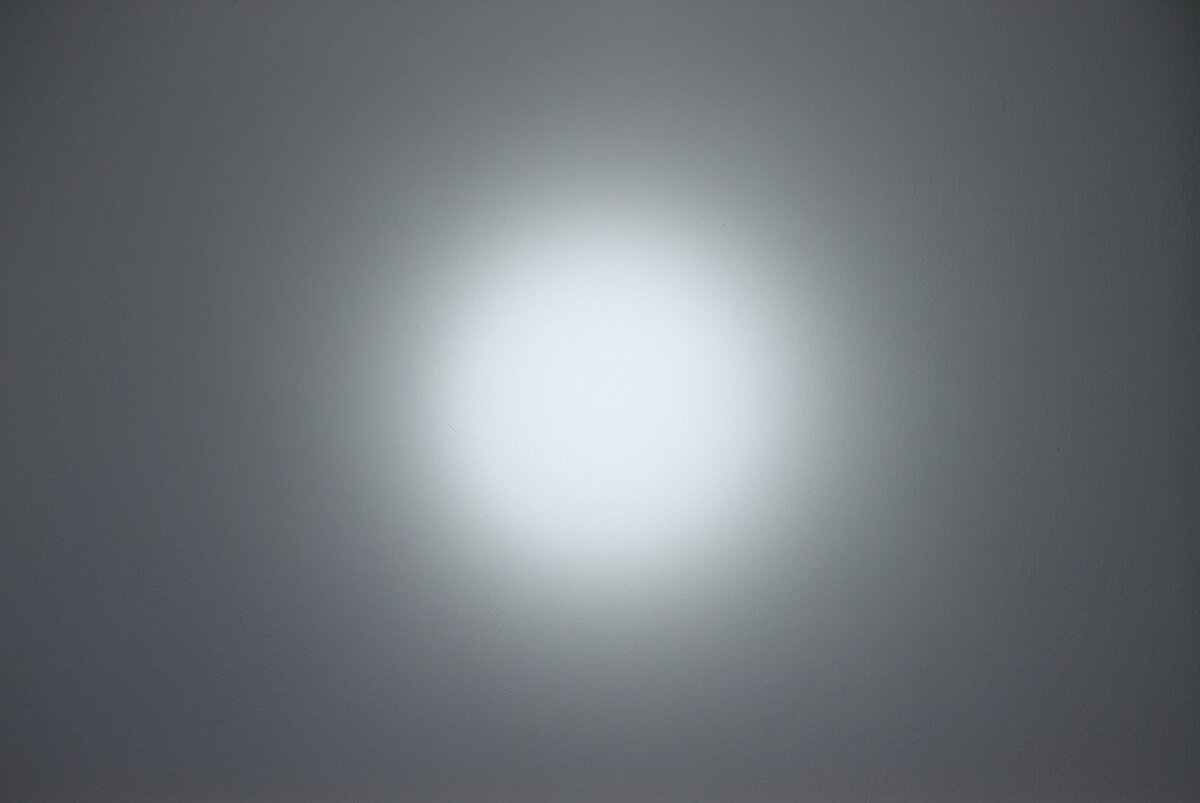
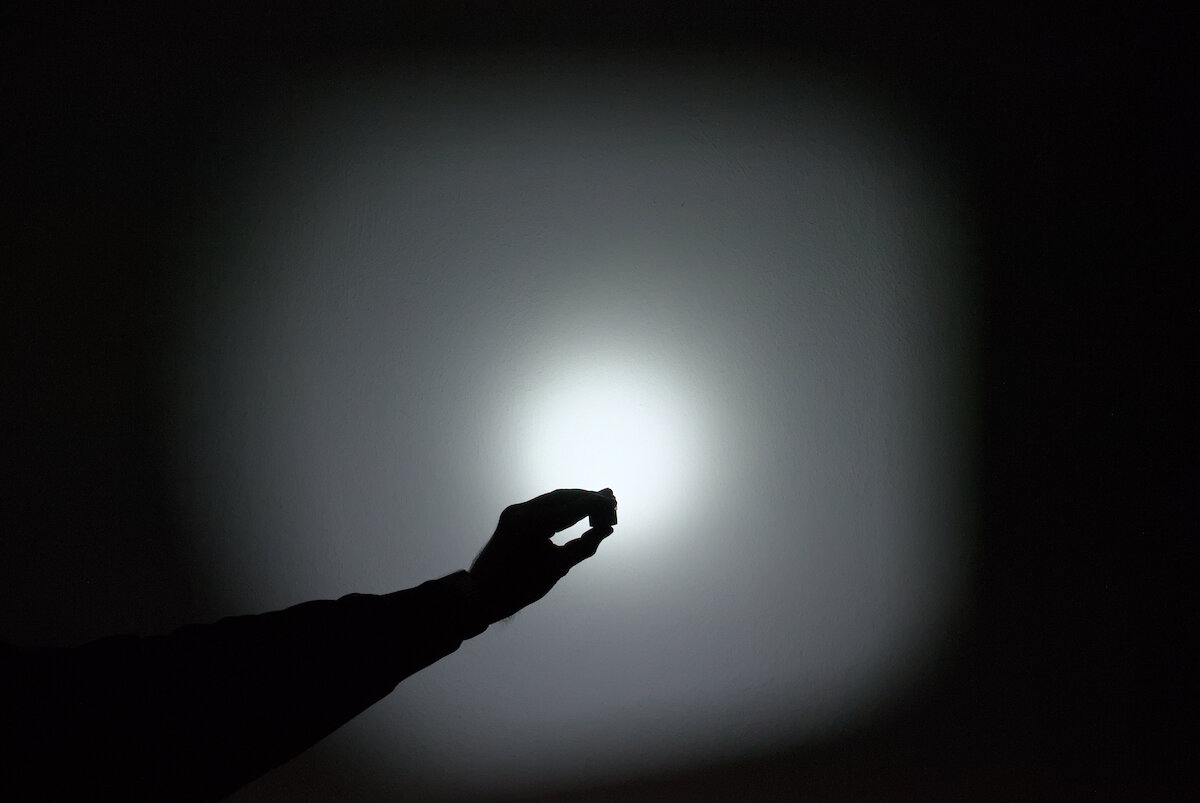
The beam of the spot LED is nicely universal. Thanks to the spot, the HD01 achieves a usable range of around 50 m, while the wide corona and bright spill allow it to be used at short distances.
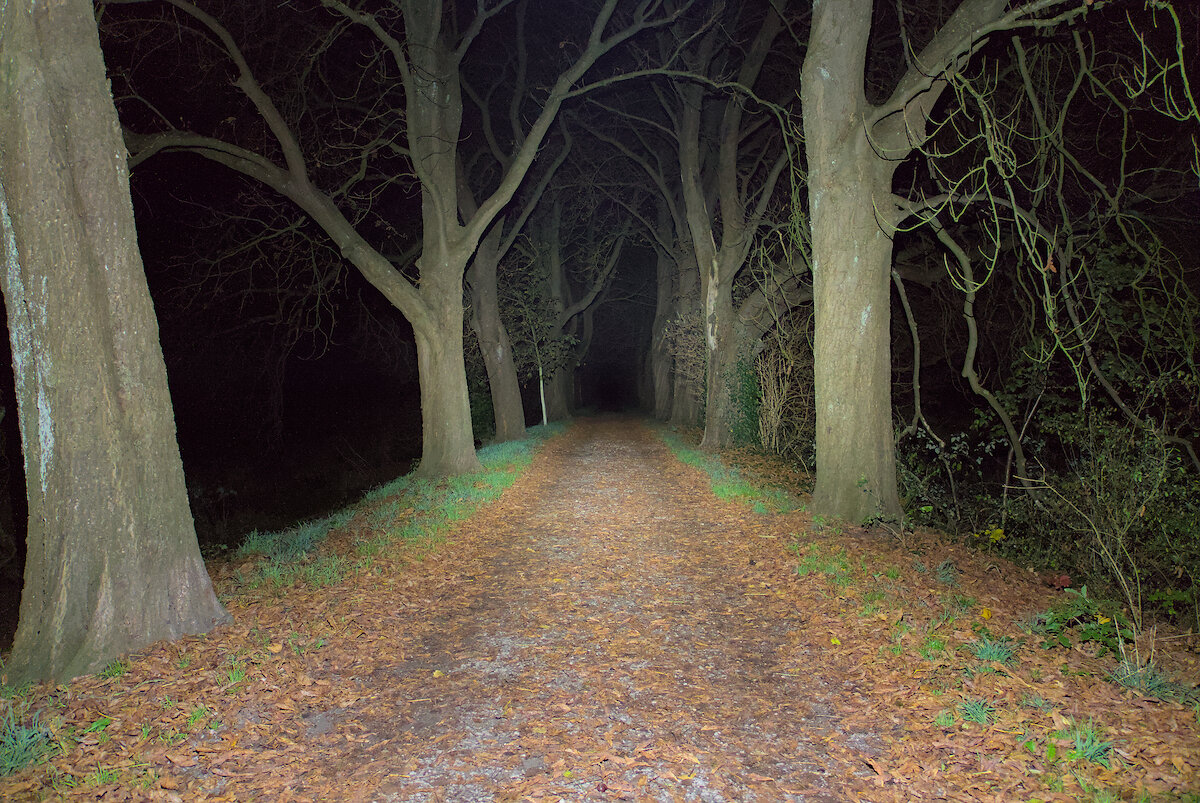
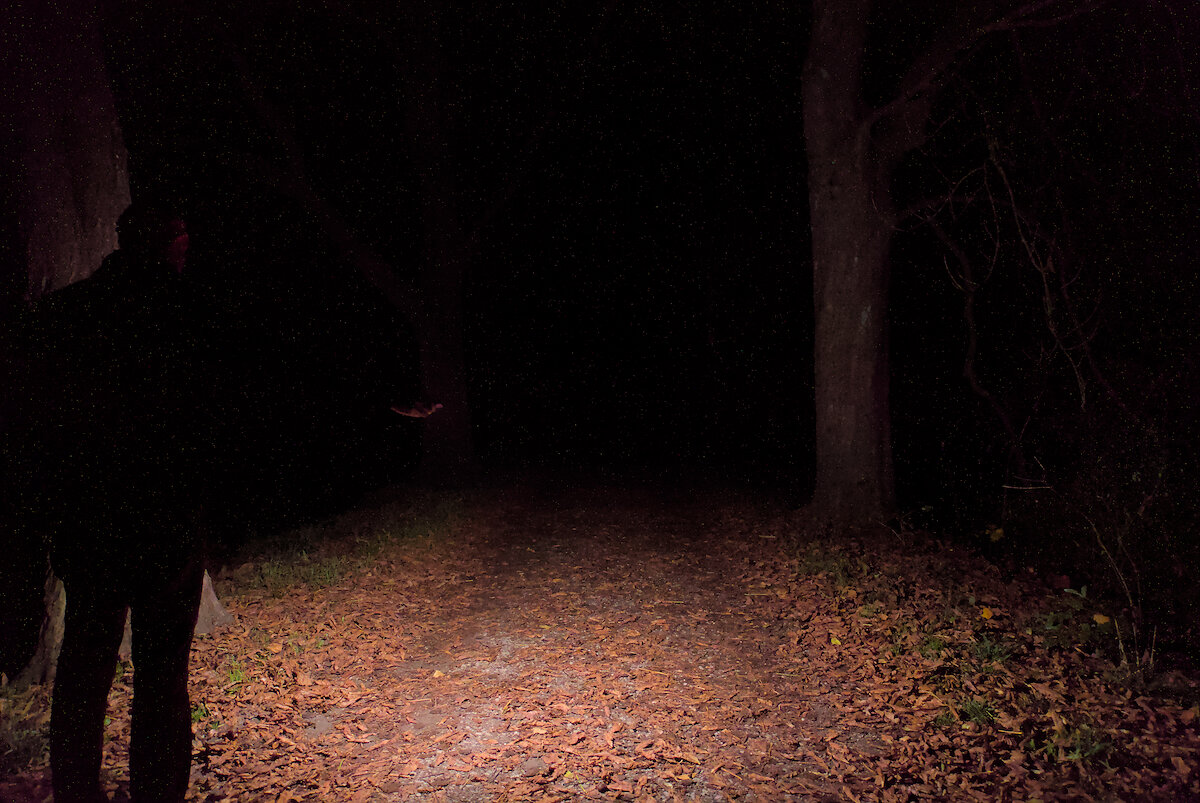
However, the white floodlight on the side is much better suited for close range. There are 16 neutral white LatticePower CSP1313 LEDs behind a frosted plastic window, which diffuses the light and thus covers almost 180°. The white side light also offers high color rendering (CRI 90 according to the data sheet).
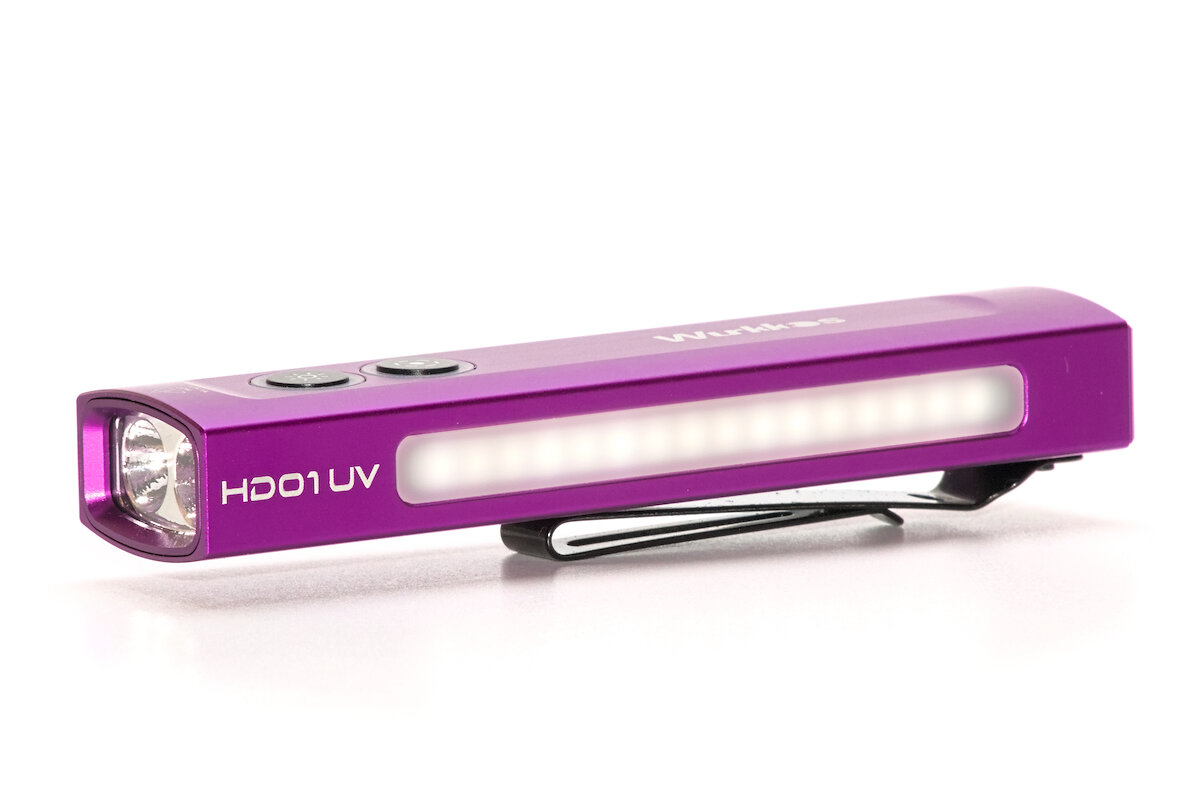
White floodlight with 16 LatticePower CSP1313
Due to the wide diffusion, it is really only suitable for short distances, as you can see in this outdoor beamshot. However, it works perfectly for reading, in confined spaces or for marking your own position. In conjunction with the magnet, the side light can also be used very well for lighting inside electrical cabinets.
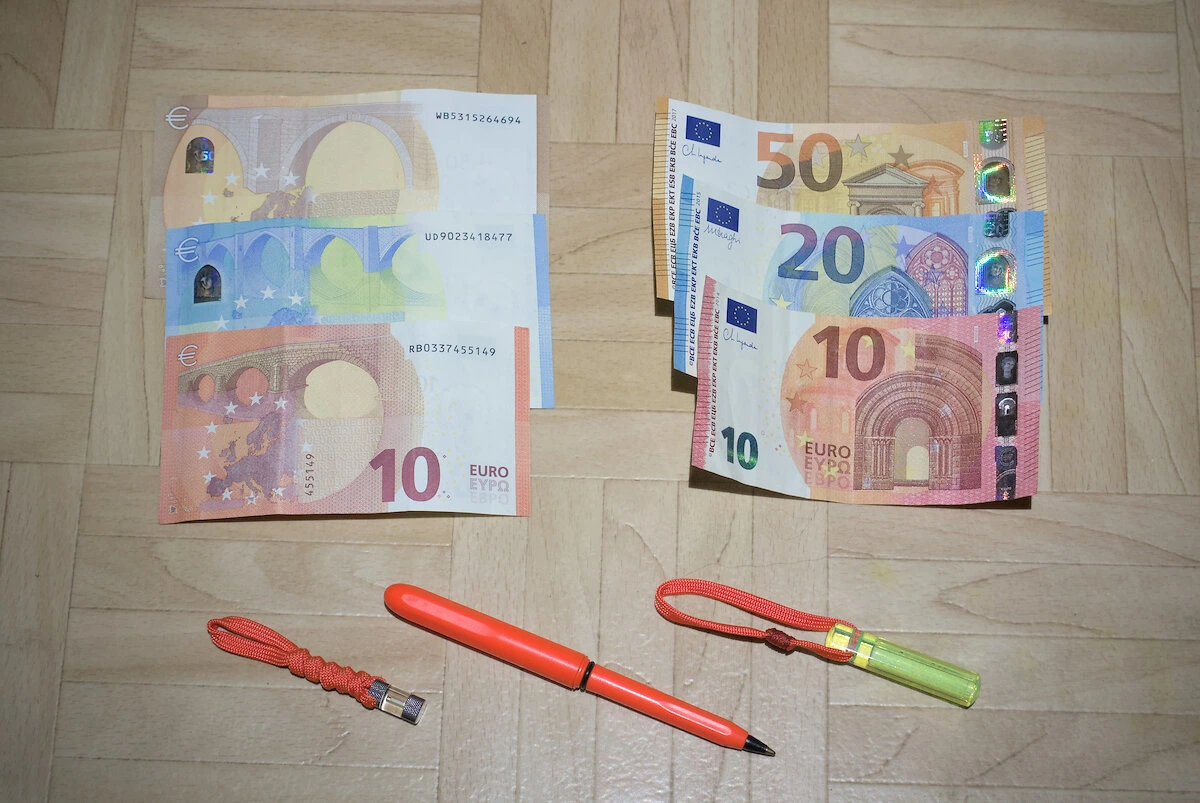
The UV light from the Luminus SST-10 UV is tightly focused by the reflector (here in the photo on a white wall with optical brightener). Of all the flashlights in my collection with a single UV LED, the HD01 is the brightest and most intense. As there is only one brightness level, it can even be a little too bright in some situations.
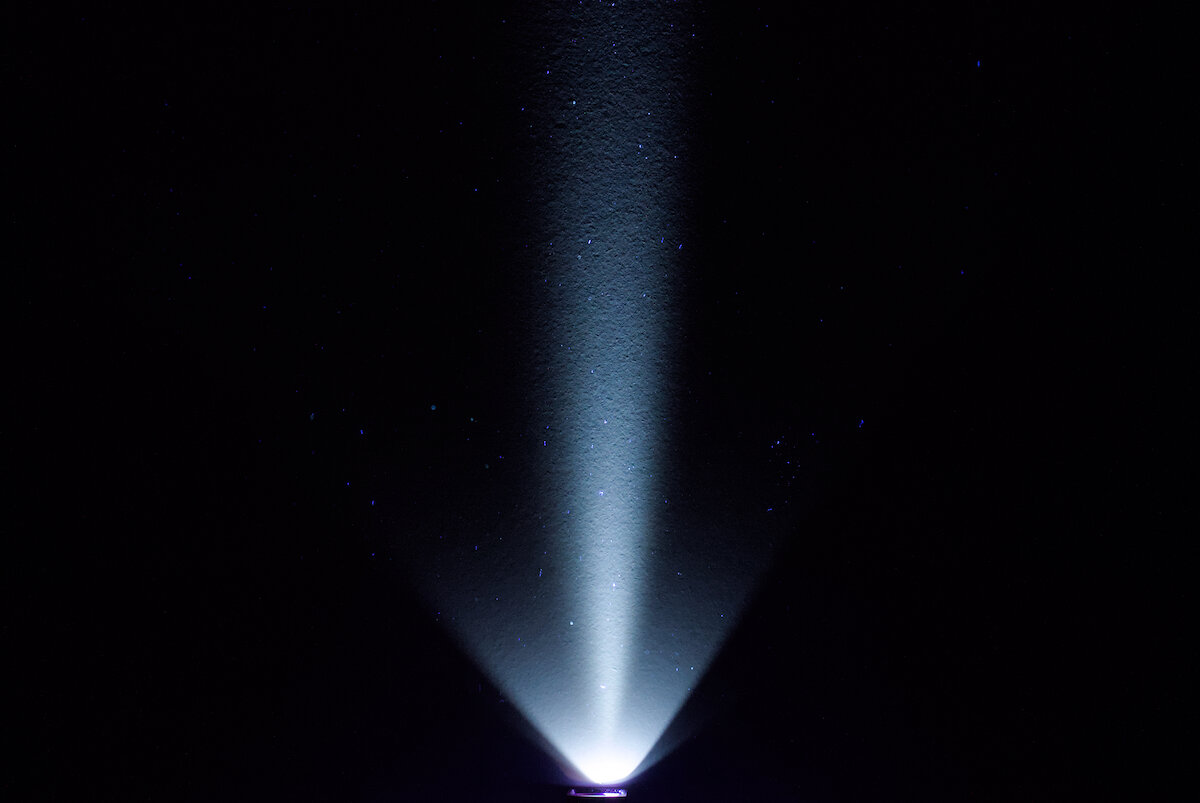
UV light
UV light is an exciting topic, as we cannot see it directly by eye, but only through the fluorescence of illuminated objects. It is divided into three categories, of which only UV-A is relevant for flashlights. Inexpensive UV flashlights in particular use LEDs with a fairly long wavelength (around 400 nm) and a high amount of visible light. As a result, the effect of fluorescence is partially hidden by the visible light.
Better UV flashlights use LEDs with a wavelength of 365 nm, such as the HD01. Many minerals, security features on money and ID cards or “organic residues” in the bathroom or on the carpet fluoresce in this range. These LEDs also have a small amount of visible light, which can be eliminated with a ZWB2 filter (which is not installed in the HD01).
In practice, I use the UV light to check the even application of certain lubricants with a UV indicator or to detect dirt (including dust). And finally, it often opens up a completely different perspective on the surroundings, as you can see in this example:
Finally, there is the RGB sidelight consisting of 15 RGB LEDs. This is a nice gimmick, but on the other hand it has practical uses. For example, it can be used as a position marker, as an improvised bicycle rear light or for mood lighting. These LEDs are also diffused by the frosted glass.
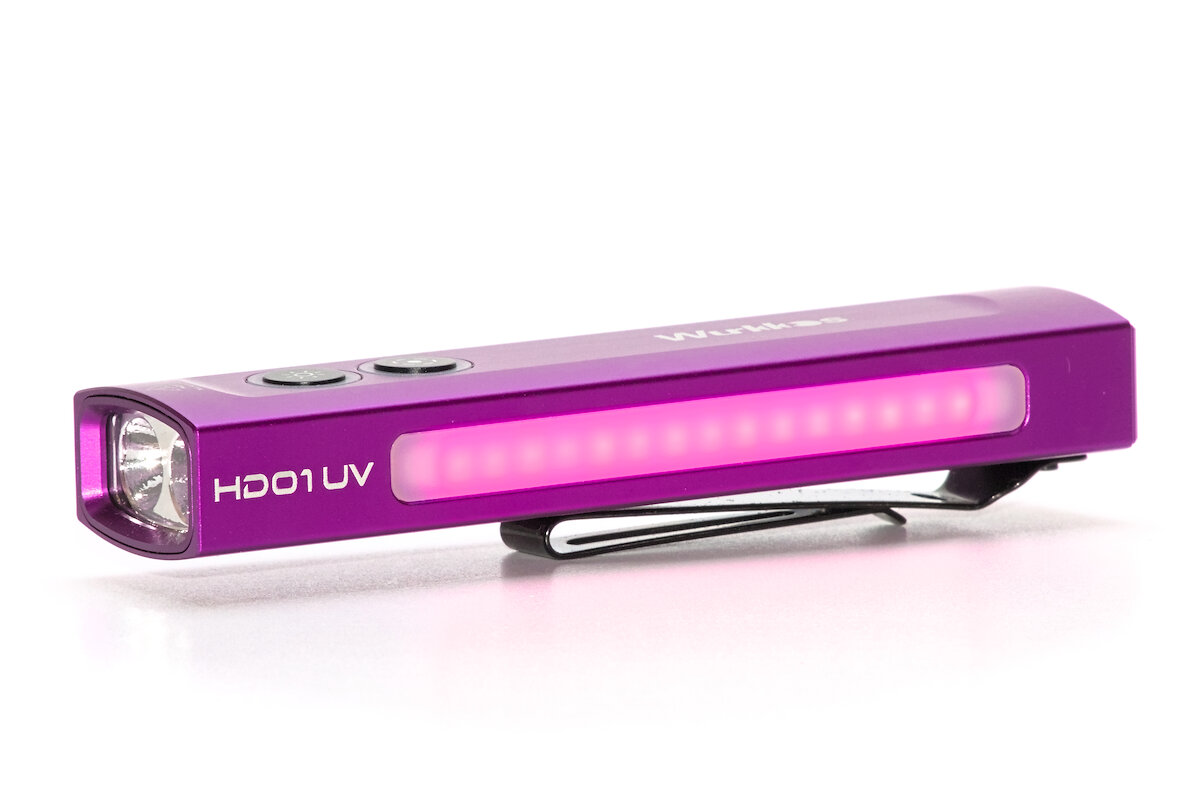
RGB floodlight with 15 LEDs
The color can be smoothly adjusted, but it requires some skill and patience to achieve the desired color. The biggest limitation is the restriction to just one brightness level - not particularly bright, but sometimes too bright. Nevertheless, it is still a useful function.
Driver and runtime
In order to achieve the low price, slight compromises had to be made with the driver. This is results in the brightness not to remain constant over the runtime, but to gradually decrease as the battery discharges. Such a direct-drive driver is simple and inexpensive to make, but also quite robust. However, the decrease in brightness is very minimal and should hardly be noticeable.
| Mode | Brightness¹ | Runtime¹ | Intensity¹ (Throw²) |
|---|---|---|---|
| Spot: Turbo | 1200 lm | 1 h | 6175 cd (157 m) |
| Spot: High | 450 lm | 1:18 h | 2348 cd (97 m) |
| Spot: Medium | 100 lm | 4 h | 656 cd (51 m) |
| Spot: Low | 20 lm | 24 h | 94 cd (19 m) |
| Spot: Moon | 1 lm | 70 h | 9 cd (6 m) |
| UV 365 nm | 975 mW | 3 h | |
| Flood: High | 180 lm | 2 h | 98 cd (20 m) |
| Flood: Medium | 25 lm | 6:30 h | 30 cd (11 m) |
| Flood: Low | 1 lm | 70 h | 0.5 cd (1 m) |
| RGB | 8 h |
¹ According to manufacturer ² ANSI FL1
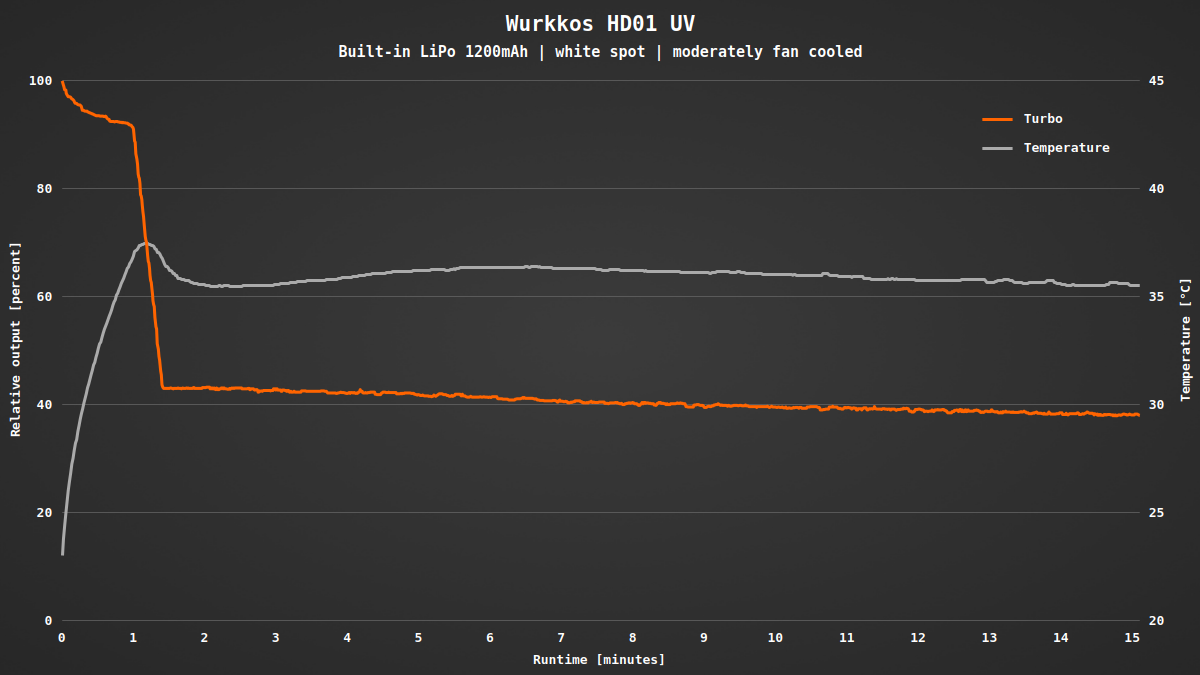
In Turbo, the brightness is reduced after one minute to protect the flashlight from overheating. At around 37 °C, however, the temperature still remains in a low range. With an appropriate temperature regulation, the flashlight could perform a little better.
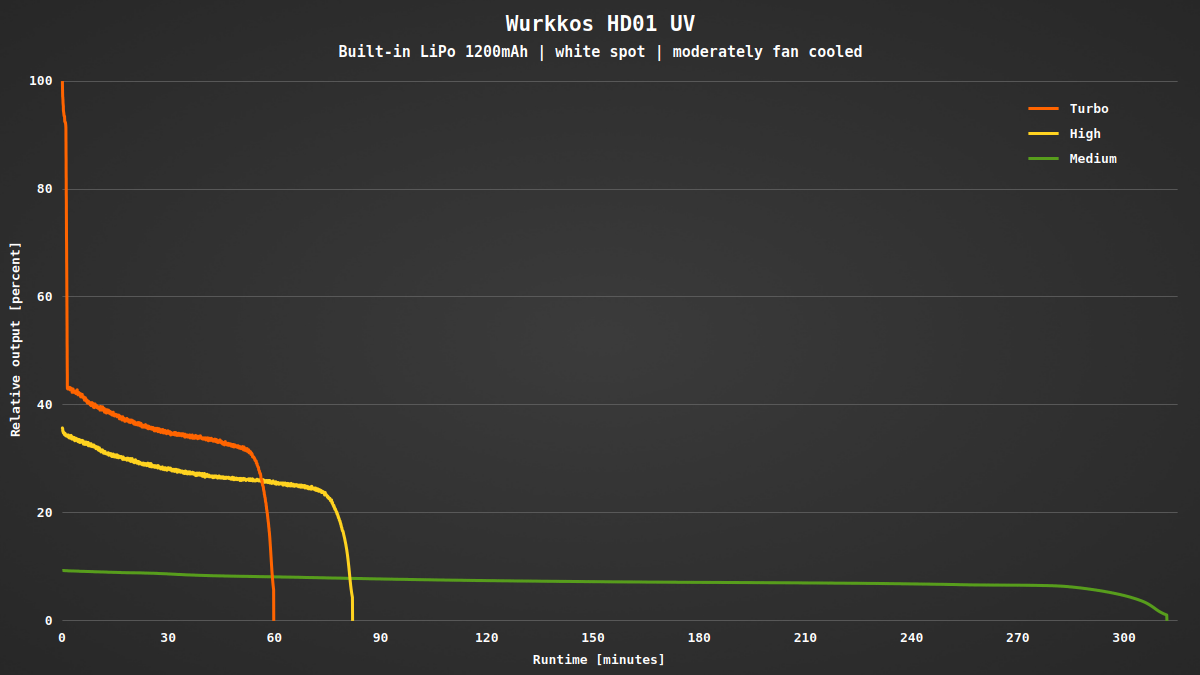
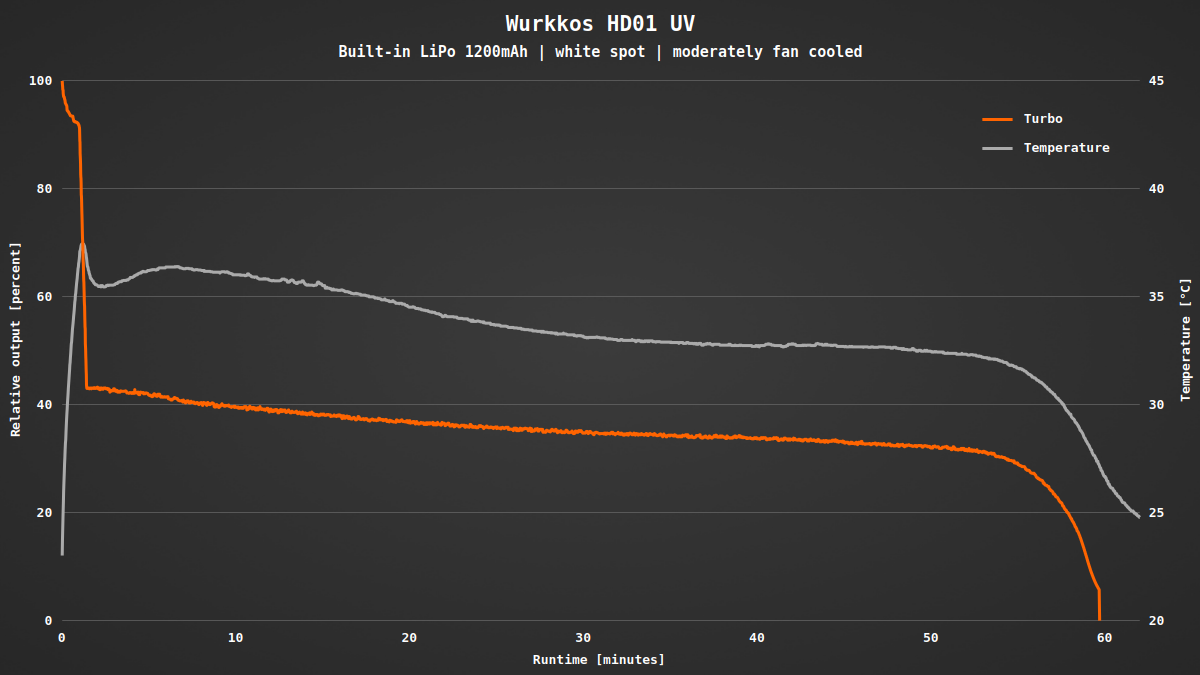
The situation is similar with the floodlight. Again, the brightness is reduced after one minute, although the maximum temperature of around 38 °C is not reached until much later.
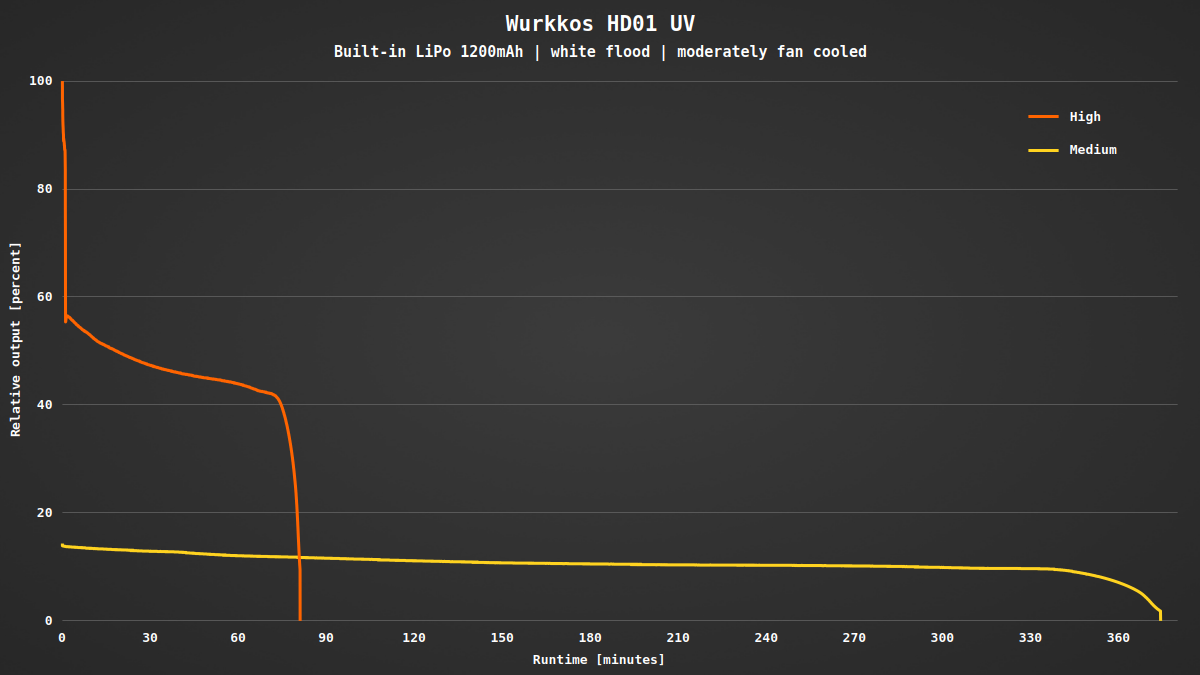
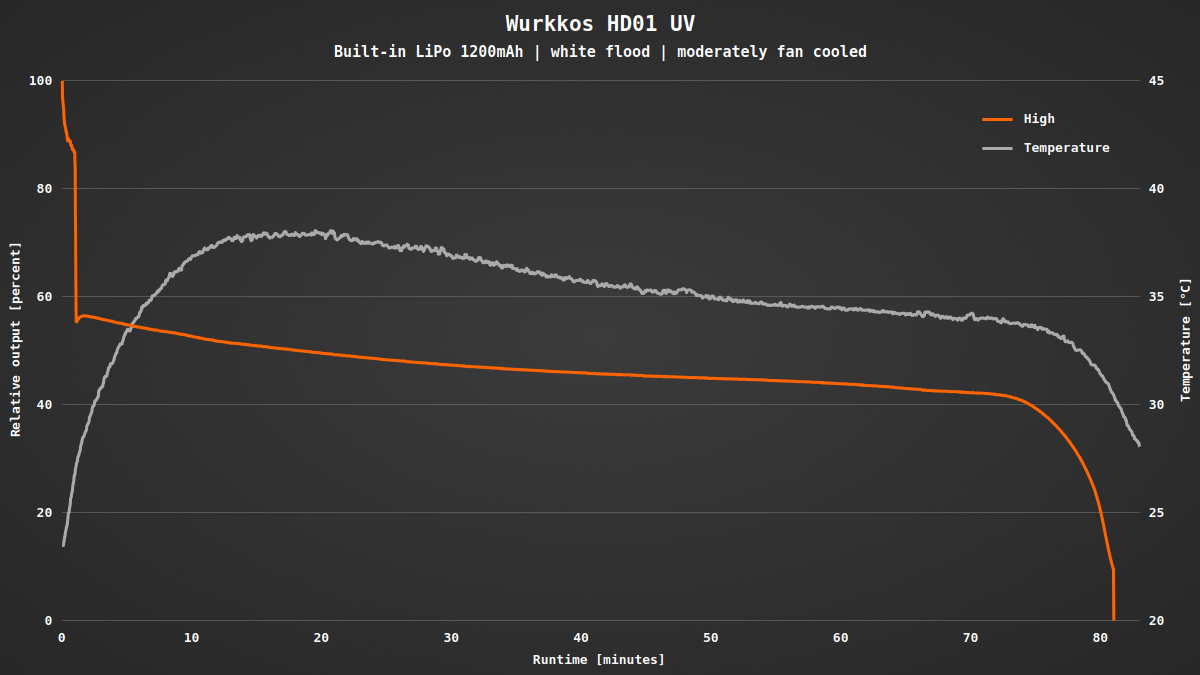
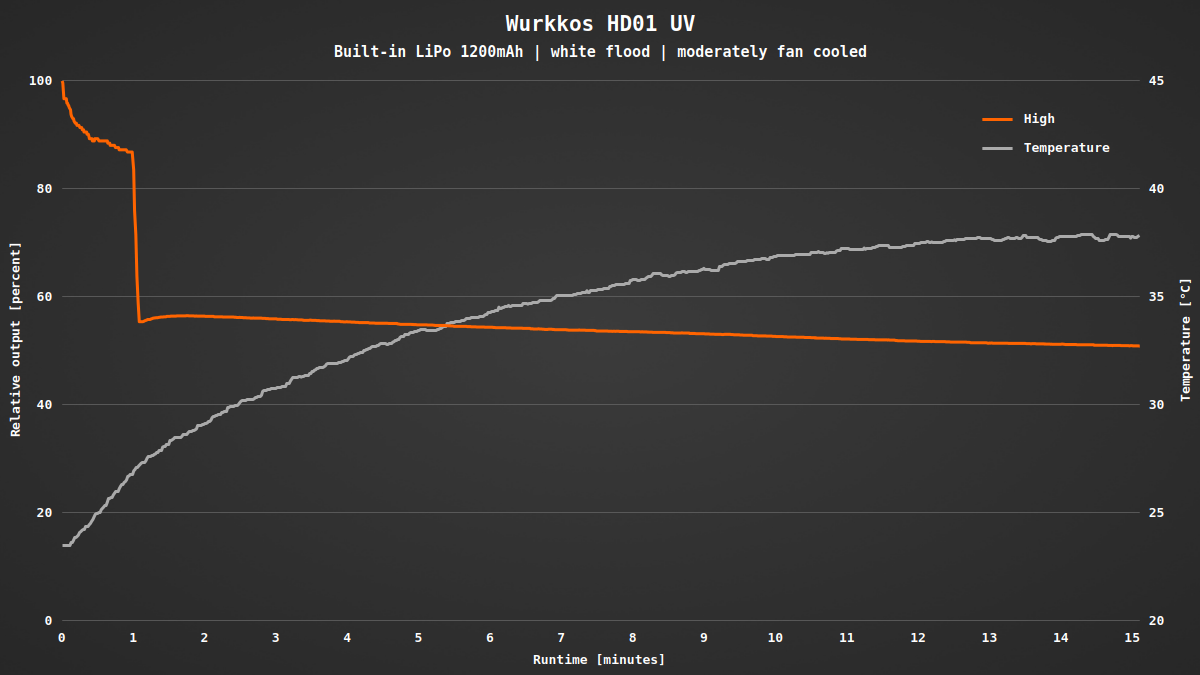
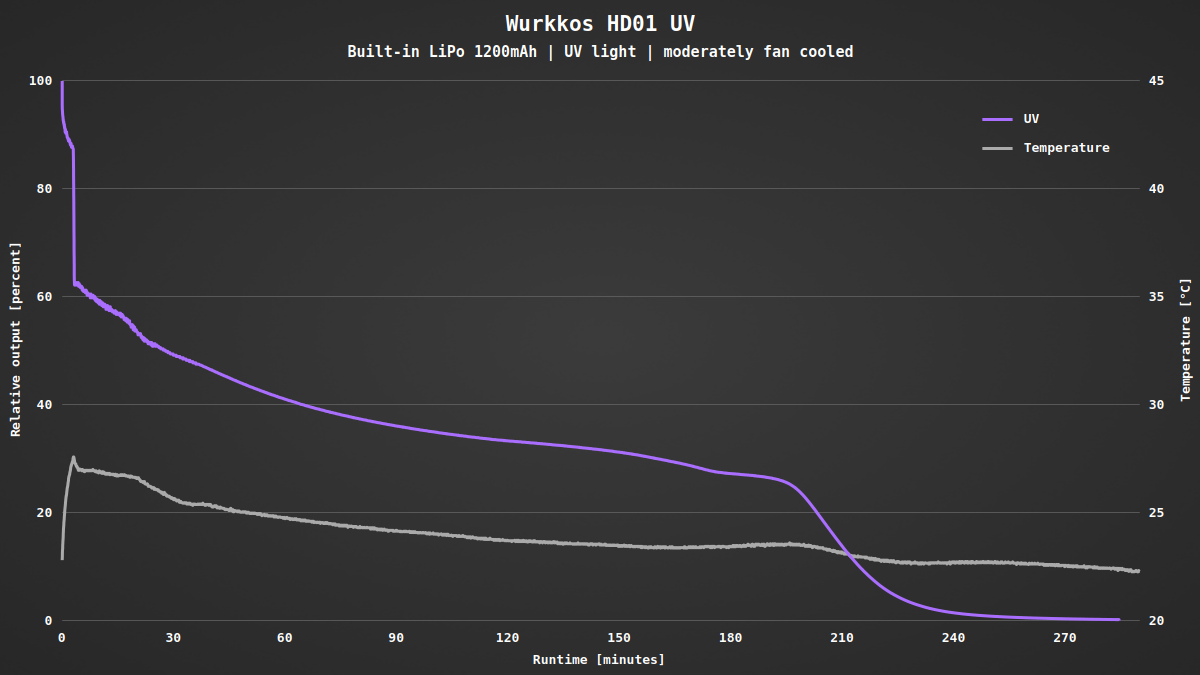
Same with the UV LED. Here the temperature rises only by a few degrees. Due to the higher forward voltage of the UV LED, the brightness curve looks slightly different towards the end.
In all levels the brightness is controlled by PWM at 20 kHz. This also applies to turbo, possibly to limit the maximum current. The only exception is the lowest level, where I was unable to measure PWM. Due to the high frequency, the modulation is not visible to the human eye.

I was unable to measure the power consumption due to the permanently installed battery. I can’t give any further details about protection against deep discharge either, except that the flashlight switches off at some point.
Conclusion
White spotlight and UV light, plus white and colored floodlight, combined with an elegant, flat design – the Wurkkos HD01 UV has a lot to offer. It is rare to find such a variety of light sources in a single flashlight.
Although the driver is simple, this should be acceptable considering the low price. With the HD01, you get a versatile companion for EDC use.
Got curious? Here you can find the Wurkkos HD01 UV on Amazon.
Use the code NVE875YS to get an extra discount!
