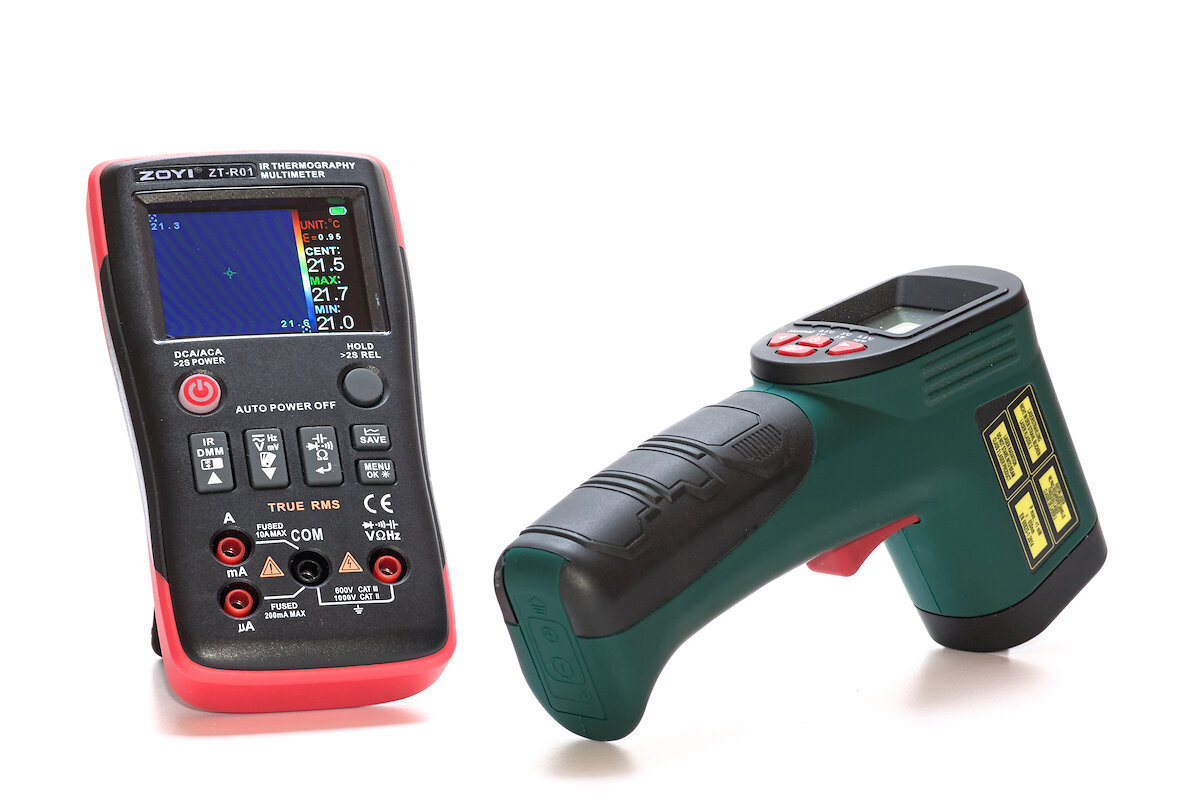
As part of my flashlight reviews, I measure the temperature of the flashlights during operation. In early times I used a temperature probe for this, but attaching it reliably was difficult. Later, I switched to an infrared thermometer, which allows for contactless measurement. However, with such a device, the temperature can only be measured at a single point, making it difficult to determine where the flashlight gets hottest. A thermal imaging camera provides a solution here, like the one integrated into the Zoyi ZT-R01 multimeter.
You can find the German version of this review on my website: SammysHP Blog › Zoyi ZT-R01
The device was provided by the manufacturer for this review. Thank you very much!
Overview
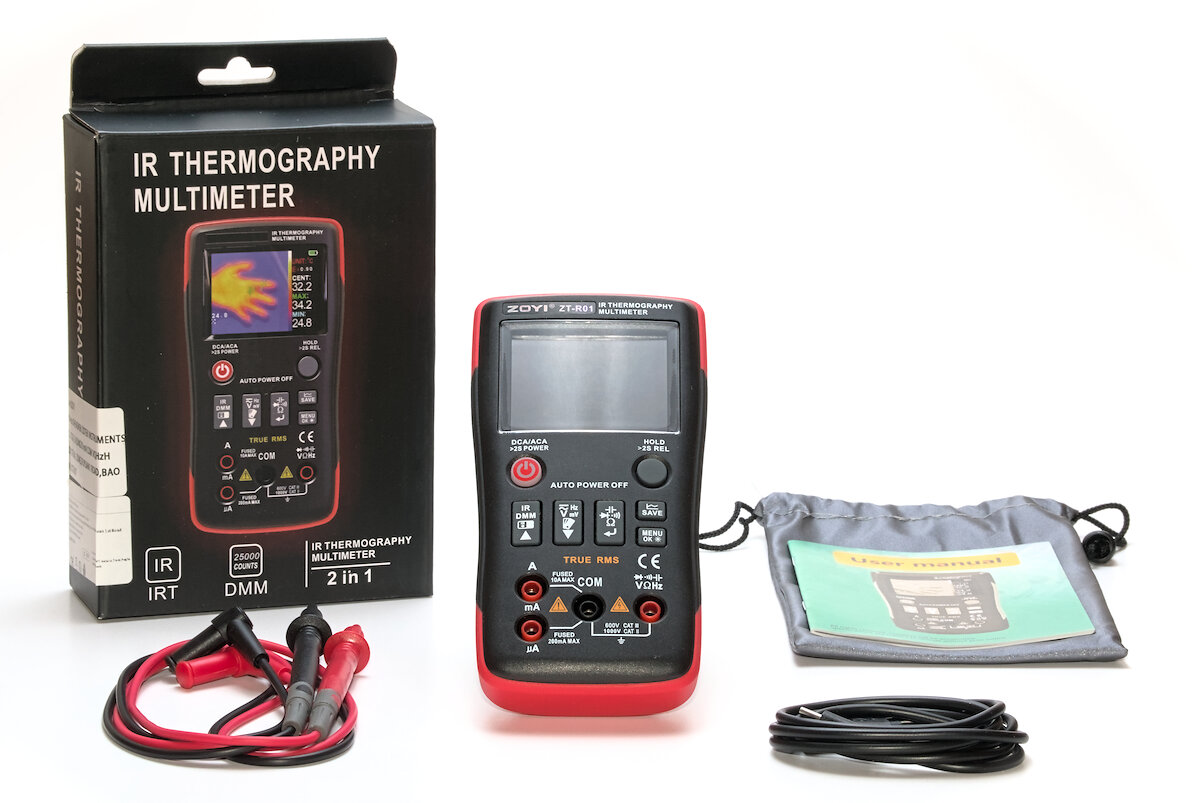
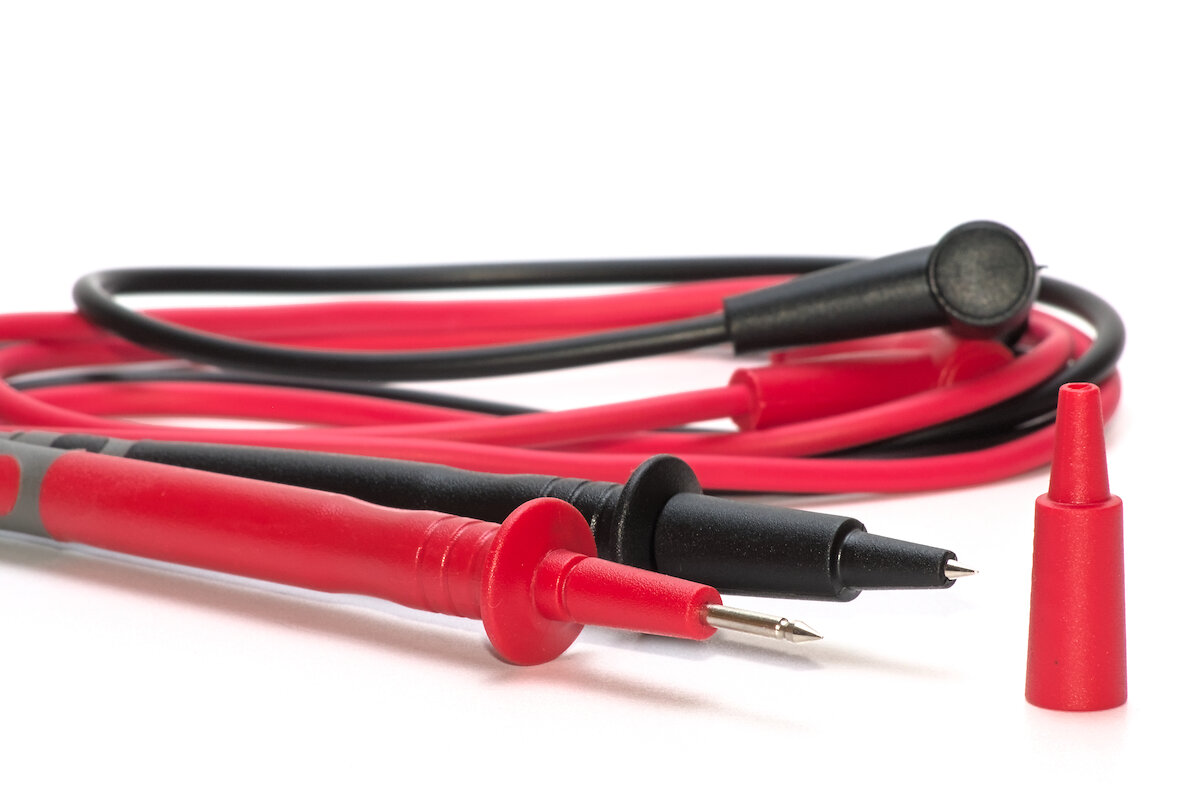
A few accessories are included in the packaging together with the multimeter:
- Test leads
- USB-C charging cable
- Manual
- Pouch
Most of the functions can be discovered even without instructions thanks to the clear UI. The pouch is of simple quality with a glossy rubberized surface.
The housing is made up of two components: a solid plastic (ABS) in black, which is partly overmoulded with a slightly softer, red plastic (TPE). The quality makes a good impression. Only the display is quite scratch-sensitive.
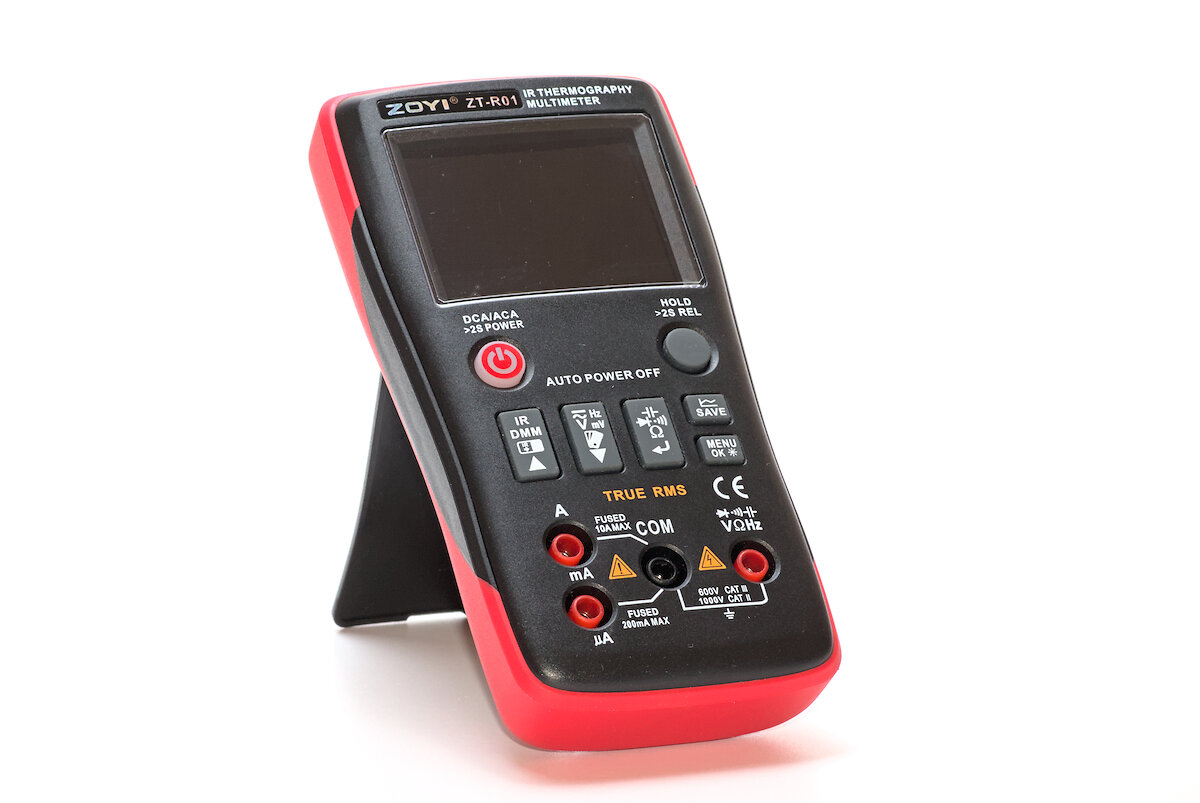
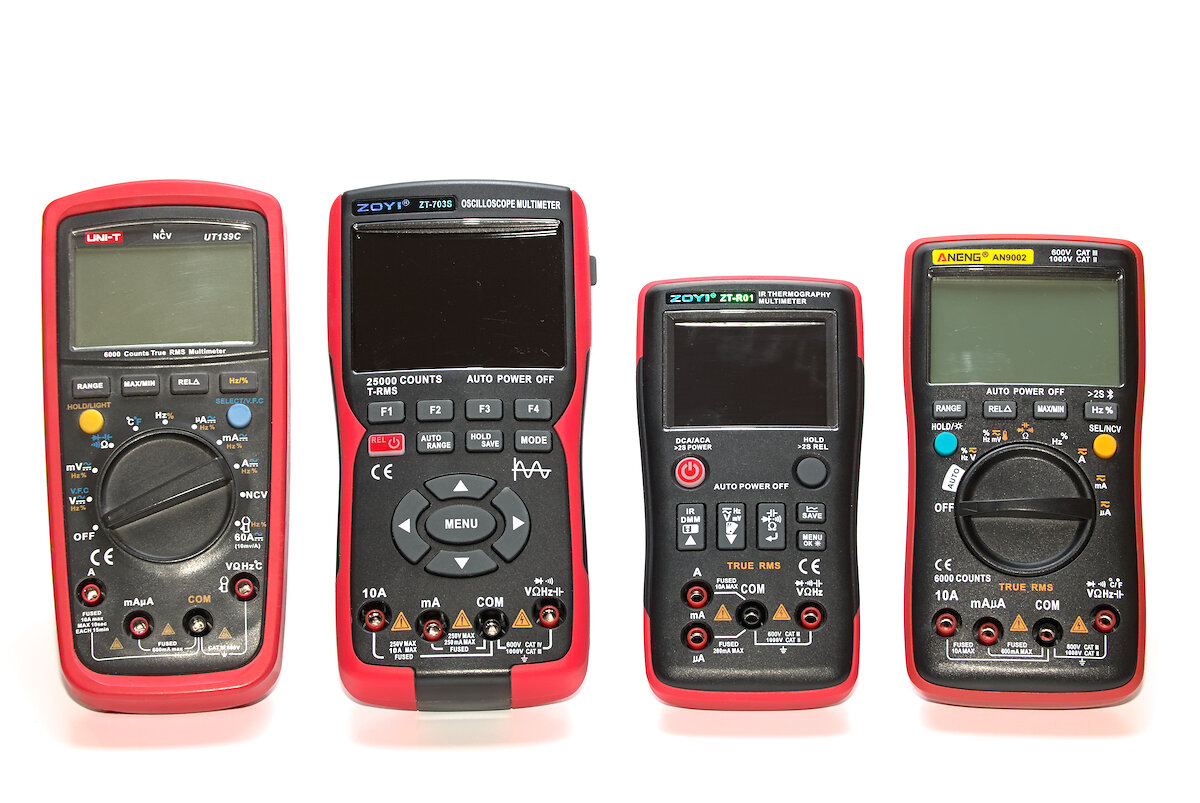
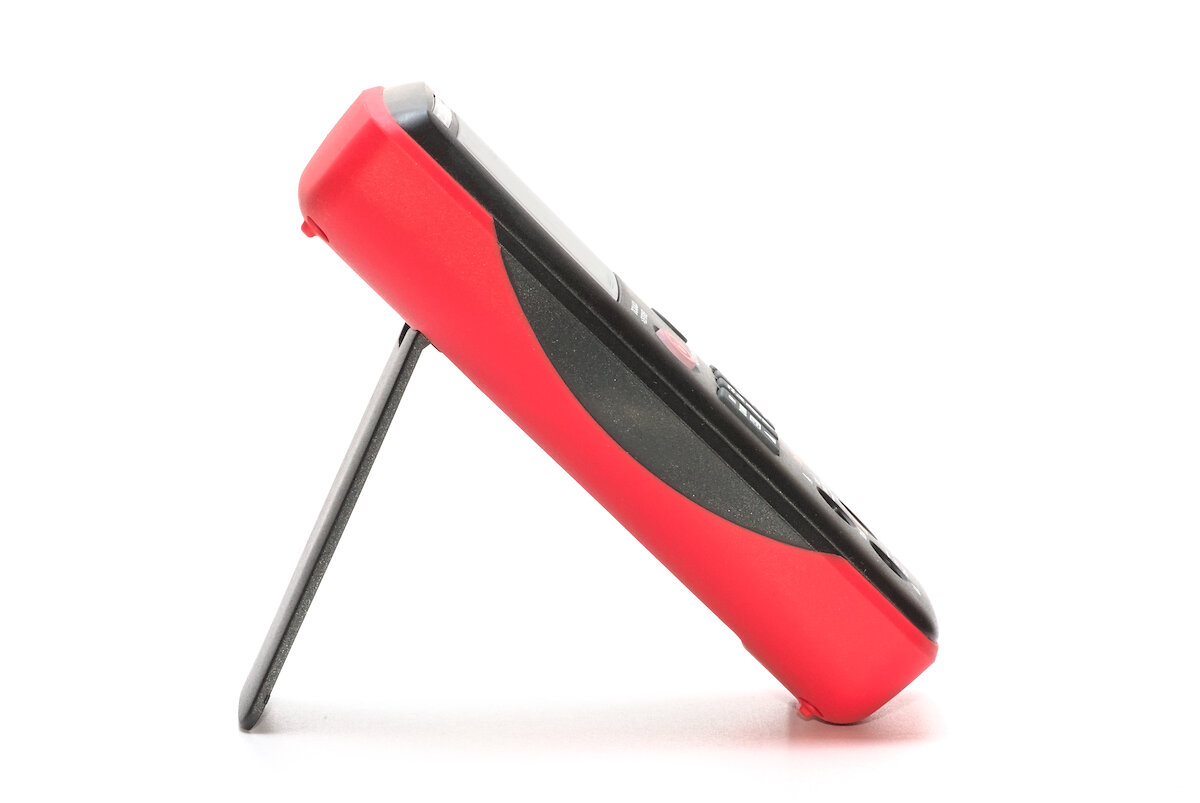
At just 149 × 76 × 33 mm, the ZT-R01 is smaller than I had expected. It also weighs just 200 g. That makes it perfect for a small tool bag, so you always have it at hand when you need it.
There is a folding stand on the back of the multimeter that allows the device to be tilted at an angle of approximately 45°. In some situations, this allows a better view of the display. In most cases, however, this is not necessary as the 320 × 240 pixel display is easy to read from any direction.
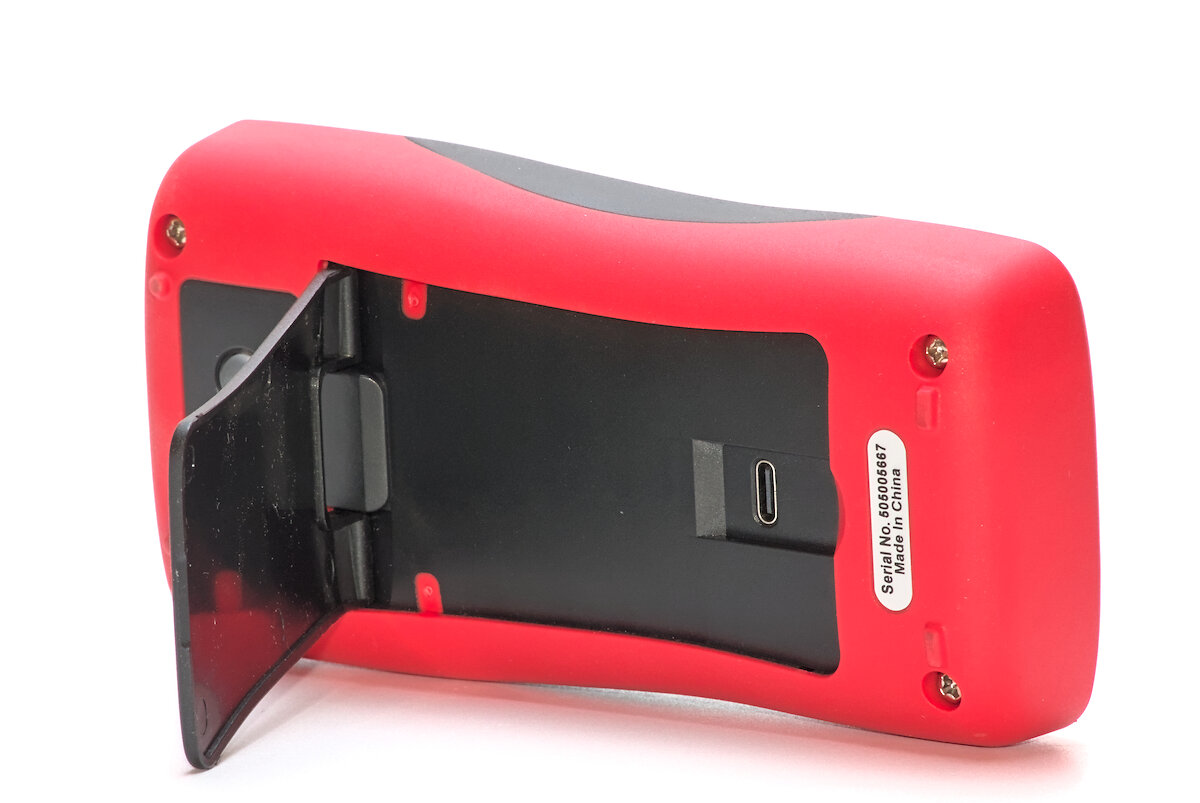
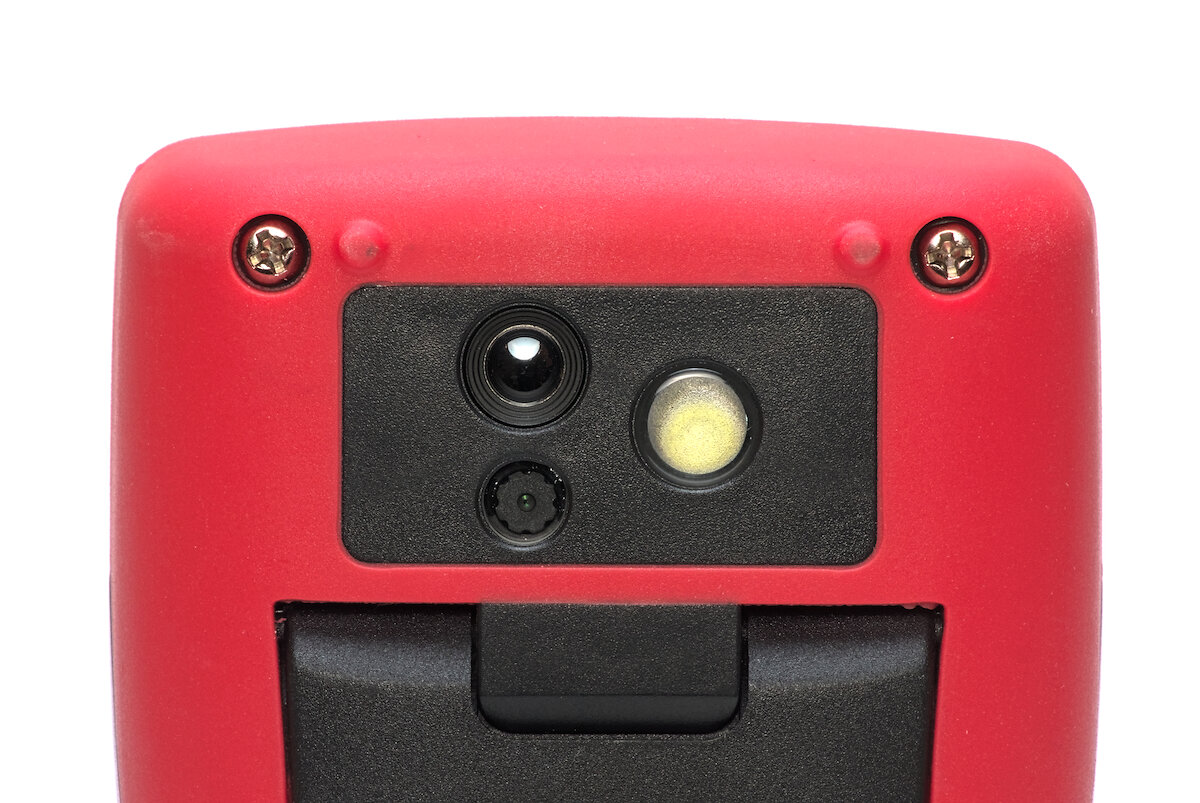
There is a USB-C port behind the stand. This is not only used to charge the built-in battery (2000 mAh LiPo), but also to perform firmware updates and download screenshots.
Seven large buttons are used for controlling the device. Their size and position do not necessarily say anything about their function. Only the red illuminated power button stands out.
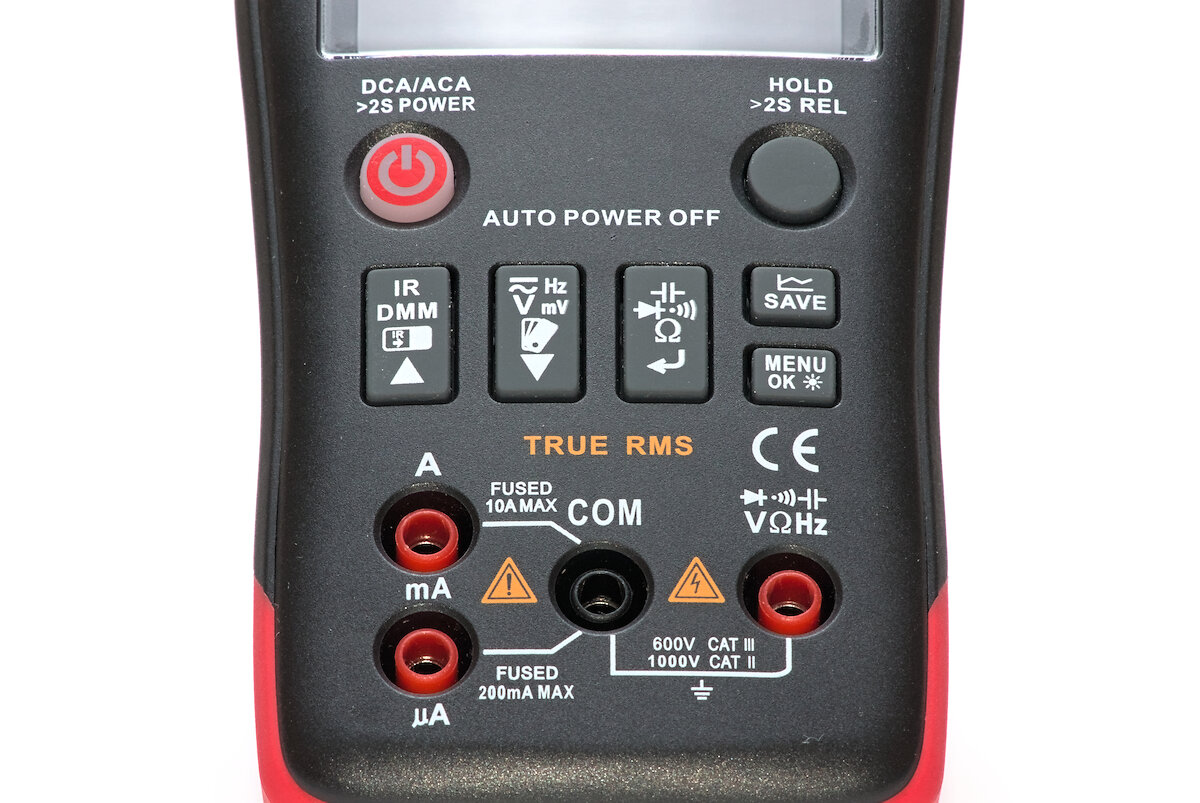
The four 4 mm sockets for the test leads are located below the buttons. They have the usual spacing of 19 mm and are therefore compatible with accessories from other manufacturers.
Thermal camera
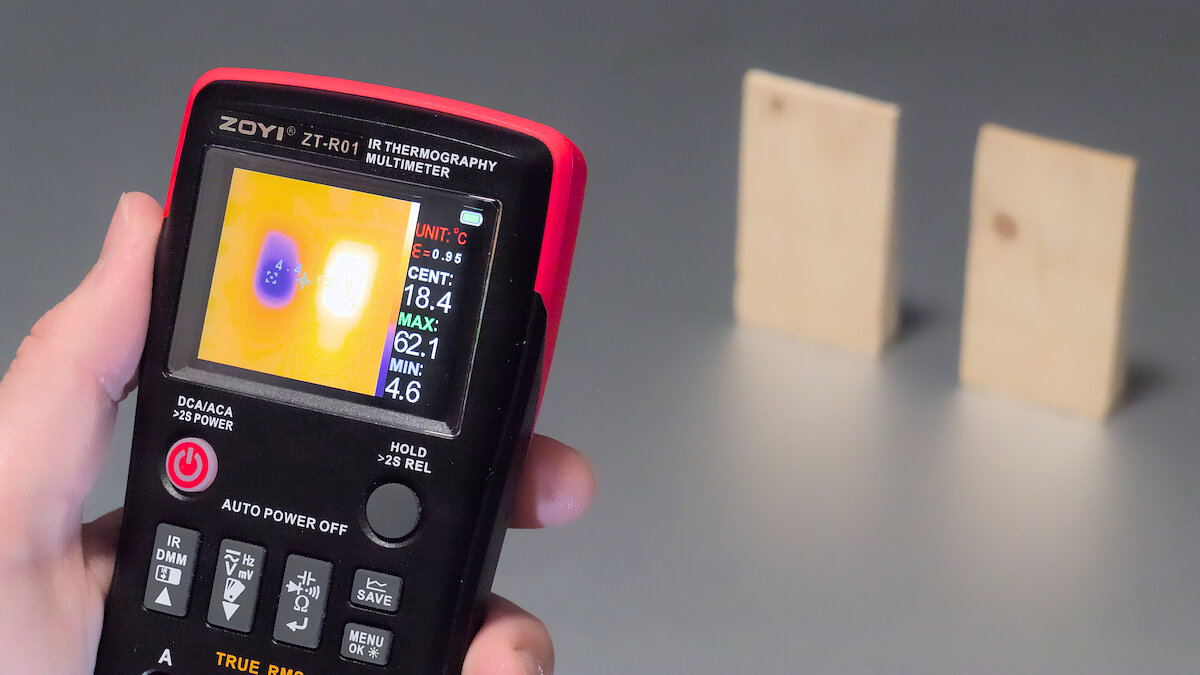
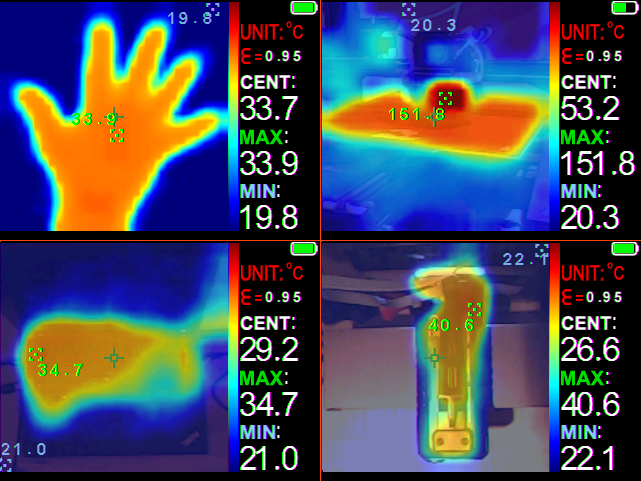
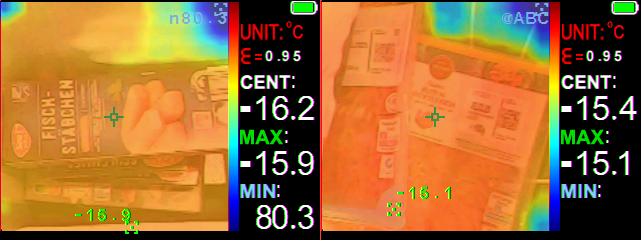
The main feature of the ZT-R01 is the built-in thermal camera. Put simply, it can be used to display the temperature of objects as a 2D image. This gives a better impression of the heat distribution.
The thermal image sensor has a resolution of 32 × 32 pixels with 7 fps. Although this is not really impressive, it is certainly appropriate given the low price of the ZT-R01. The thermal image is augmented with a camera image, which makes it easier to identify the heat source. Next to it is a small LED that can be switched on for better illumination.
The overlay of the camera image with the thermal image can be set in six levels. In addition, four color palettes are available for displaying the temperature distribution. A total of 24 combinations are therefore possible. The parallax between the two cameras can be compensated for via the settings.
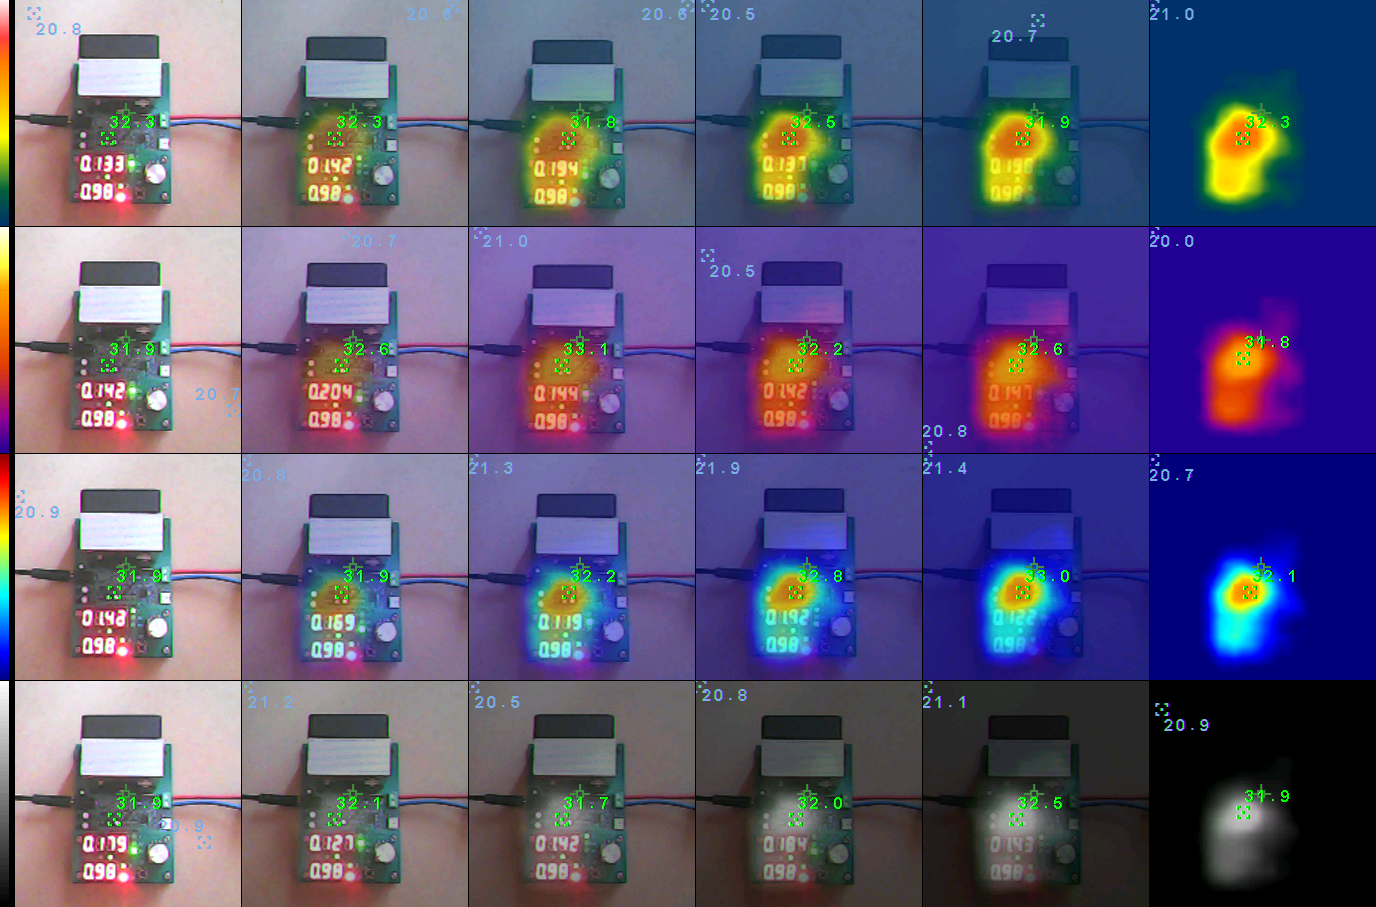
The heat emission of measured objects differs depending on the material. This emissivity can be set from 0.10 to 1.00 in 0.01 steps in the menu. Tables with corresponding values can be found in the manual and on the internet. Nevertheless, there are all sorts of surprises when measuring with a thermal imaging camera that need to be taken into account.
Using a thermal camera is not only extremely practical, it is also – especially at the beginning – a lot of fun! You can suddenly perceive your surroundings in a completely different way and discover many new aspects. At the moment, I mainly use the ZT-R01 for my flashlight reviews and to identify heat sources in (possibly faulty) electronics.
Occasionally I find it annoying that the range of the temperature scale is adjusted automatically and cannot be set manually. As a result, the the colors can change abruptly when a warm or cold object enters or leaves the image area.
I have also noticed a few times that temperatures are displayed incorrectly (minimum higher than maximum or even values such as “@ABC”). It is possible that invalid measurements are not being processed correctly.
As you can see from the previous images, screenshots can be taken and saved to the 16 MB internal memory. All you have to do is hold down the “SAVE” button for a moment. They can then be displayed using the built-in file browser. The images in bitmap format can also be transferred to the computer via the USB port.
Multimeter
The ZT-R01 is not only a compact thermal camera, but also a full-featured digital multimeter (DMM). A long press of the left button switches to DMM mode. The selection is retained after a restart.
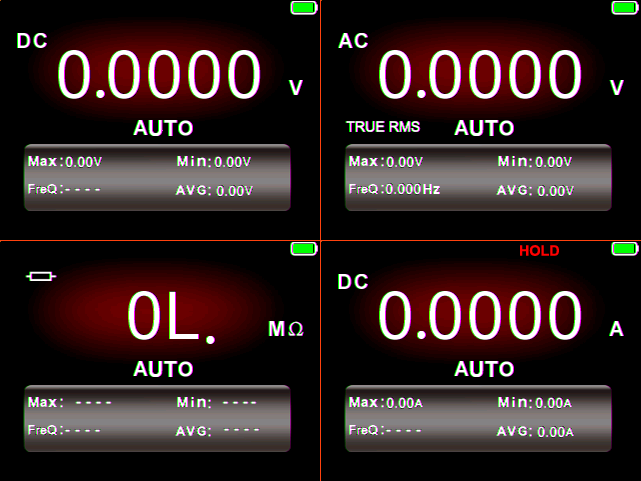
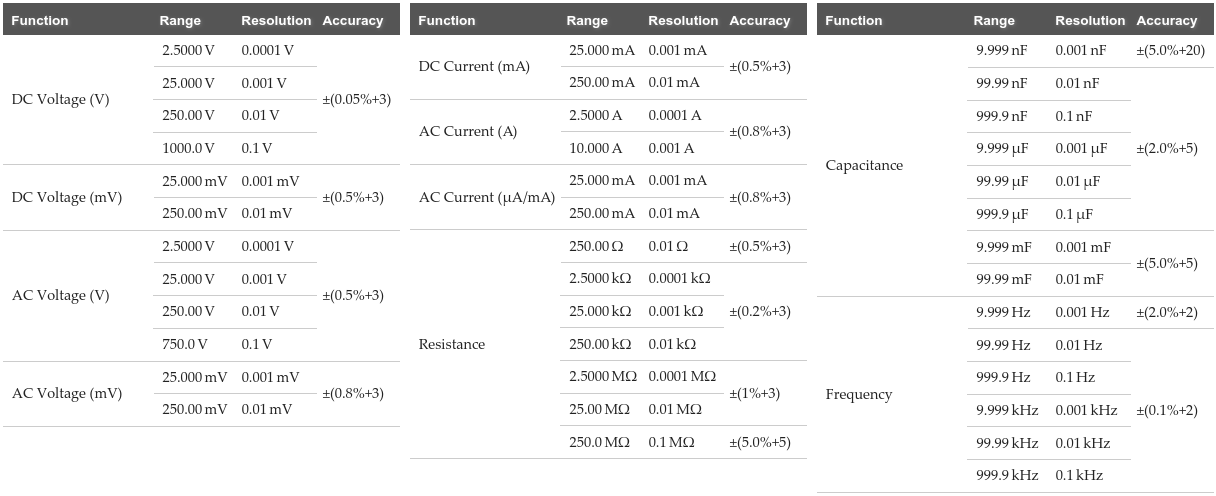
Voltage, current, resistance, capacitance and frequency can be measured – mostly with 25,000 counts! A continuity tester with fast response (latched) and a diode measurement are also available. Below the large display of the currently measured value, the minimum, maximum, average and, if applicable, the frequency of a changing signal are displayed. A relative measurement and hold function are also possible.
As far as I could judge with my means, the measurement results seem to be within the specification.
Surprisingly it is not possible to set the measuring range manually – or I just didn’t find the right option. Sometimes it can therefore take a moment for the display to stabilize when the voltage changes.
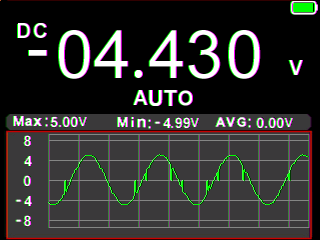
By briefly pressing the “SAVE” button, the lower half of the display changes to a graphical representation of the measured values over the last 90 seconds. This practical function makes it easy to see changes in the measured values and their trend. The small spikes in the following picture are due to the automatic selection of the measuring range.
The supplied test leads are of the inexpensive type. The 65 cm long cable with an outer diameter of 3 mm is a little stiff. The tips (12 × 2 mm) are OK.
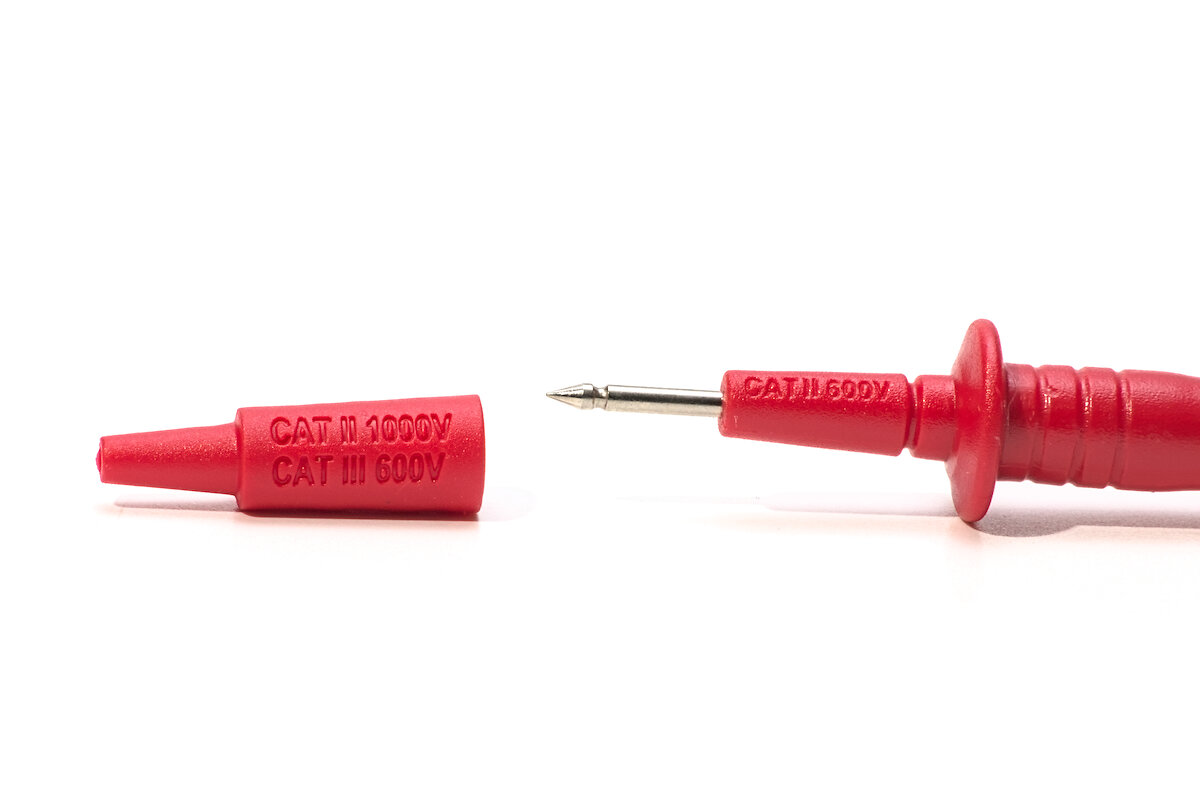
Attachable caps extend the CAT rating from “CAT II 600V” to “CAT II 1000V / CAT III 600V”. Nevertheless, I will only use the device for extra-low voltages (ELV).
Look inside
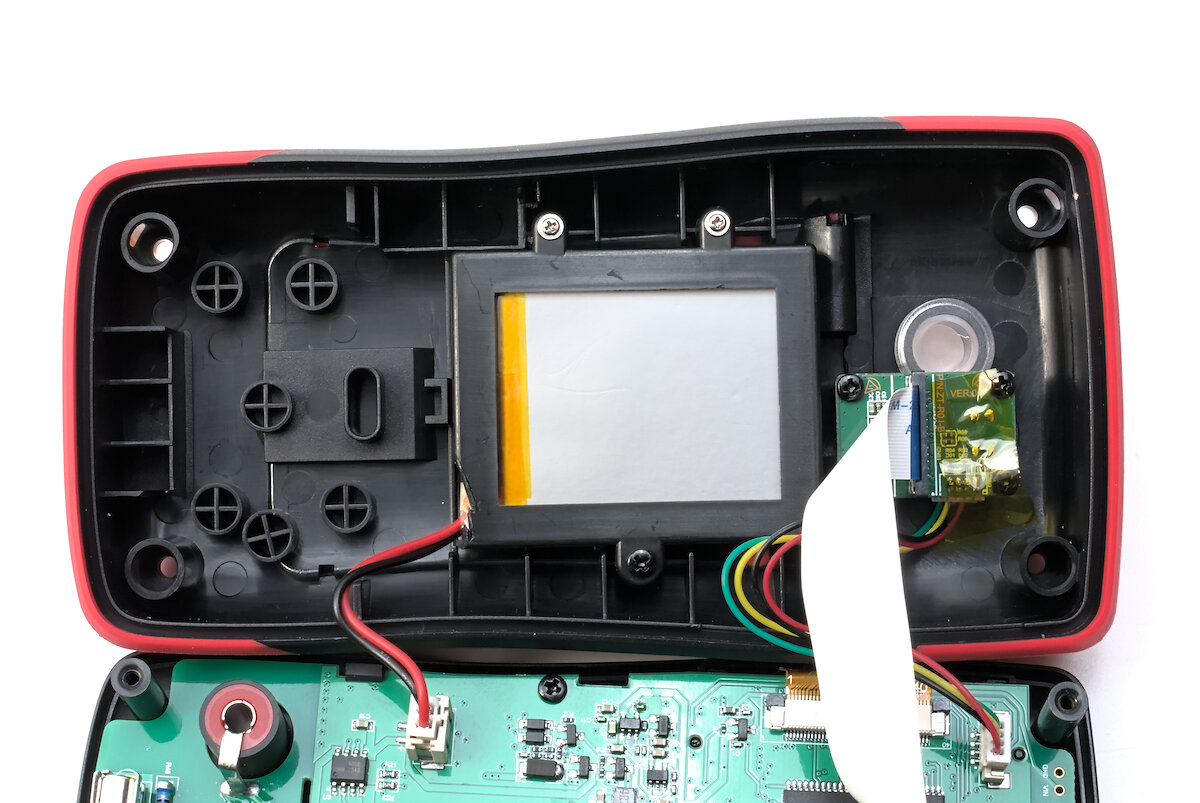
A quick look inside the ZT-R01: there’s not much to see. Rather too little, because the input protection is designed in a minimal way.
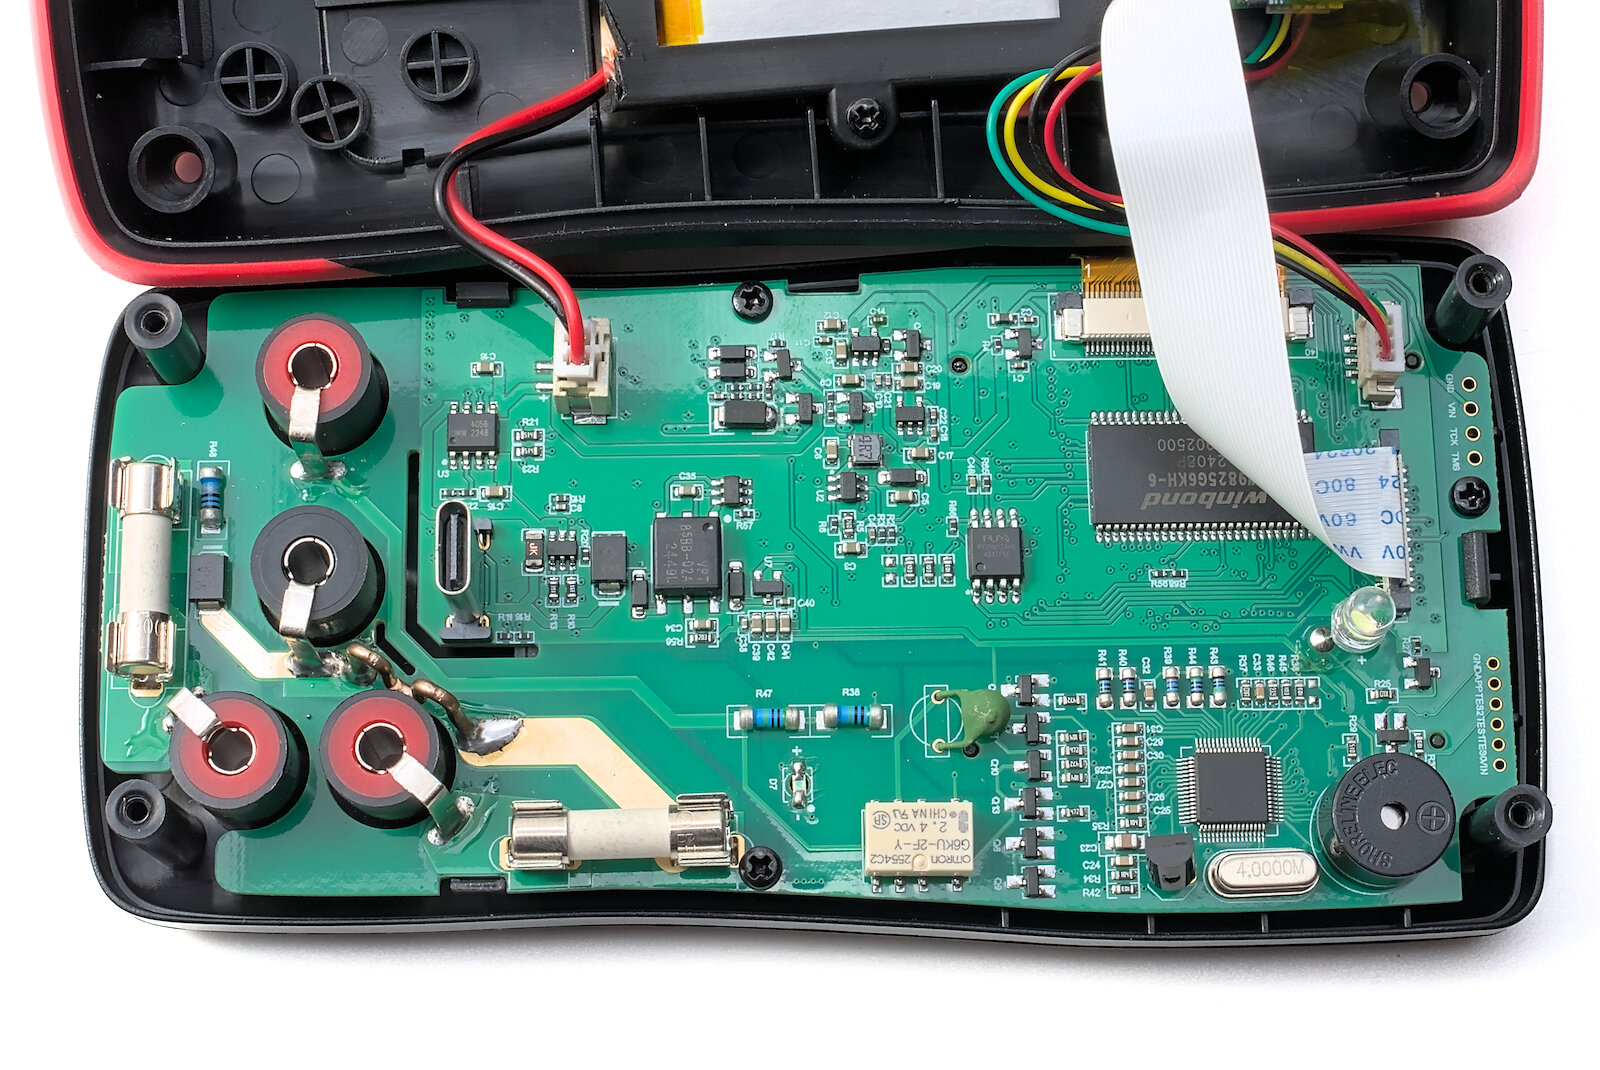
The camera and thermal sensor are located on a separate circuit board. The LiPo battery is held in place by a screwed frame and is connected to the main PCB via a plug-in connector. Although this does not make replacing the battery trivial, it is still quite simple.
Conclusion
The Zoyi ZT-R01 is an inexpensive thermal camera in combination with a digital multimeter. Although it is not a high-end device, the resolution of 32 × 32 pixels is absolutely sufficient for many applications. The overlay of the thermal image with a higher-resolution camera image is practical.
The multimeter with 25,000 counts works good. I particularly like the large display and the graphical representation of the measured values. Unfortunately, the measuring range cannot be set manually.