One word, Marvelous!
Thanks. :laughing:
Do you know if a FWAA Bezel would be a direct swap onto a TS10, without any other mods?
came up in regard to this post that discusses adding a silver colored bezel to a TS10
I cannot test myself, because I have no TS10 today… I have some on order, but sold the ones I had reflashed.
fwiw, TS10 are in stock in Red atm… I ordered another 4000k Red host w Red aux…
I agree the LEDs are very nice… similar to E21a
 .
.
Yes. It swaps perfectly. The TS10 can wear an FWAA bezel and visa-versa. No mods needed to any of the parts. Even the o-ring fits perfectly.
Thank you ![]()
fwiw, Lumintoplighting has FWAA Ti Stonewashed bezels for $8… ordered a couple…
and, TS10 in Red host now in stock, and factory firmware updated
I am just amazed at all the people that managed to get the bezel off the TS10. I’ve been trying to get the bezel off mine since the first day I got it and it just won’t budge. I’ve tried using the rubber sole of a boot as well as a pair of gloves. I even tried a pair of pliers but I’m afraid of applying too much pressure and deforming the aluminum. Is there some sort of tool that can get the bezel off?
Most of the threadlock compounds and glues that manufacturers use will soften up nicely with a little heat. You could try running it on turbo for awhile, bump it up a few times, then immediately try to unscrew the bezel. It usually won’t break loose immediately but if you maintain strong pressure it might just let go. If not then you could try longer/higher heat with a hair dryer or heat gun on a lower setting (don’t want toooo much heat and you don’t want to discolor the anodizing either). There are some clever slotted bezel clamp wrench things (I think it was HDS that made some for their models) that you could make easily…slab of material that can flex a little, hole drilled to match the bezel size, and a v-slot cut into it so that when squeezed the bezel hole will shrink a little and provide even clamping pressure. Similarly you could cut some wood v-blocks to use in a vise but then you also need something to twist the head with…and they make some good polyurethane vise pads these days, too, usually with a 1/2” or 5/8” hole that will grip this light nicely (position it in the center of the jaws). On the TS10 there isn’t anything to provide purchase like flats or a hump, so it’s more difficult and popular strap wrenches are a bit too wide. Just be cautious with clamping because it’s surprisingly easy to bend the thin aluminum in most lights and there’s no good way to make it round again (which can be fine, but it could also make it where you can’t screw the bezel on again or even not be able to fit the lens in there (or could break the lens)). But try some gentle or medium heat first. Don’t try any solvents…if they even get down there you run the risk of vapors affecting the emitters (or the aluminized surface in reflector lights). Also, when it budges, go carefully and be sure that the optic isn’t going to twist with the bezel and shear off the emitters from the board…can press down on the lens a time or two as you unscrew to help there if needed.
I may have been wrong about HDS and those wrenches…they don’t show them on their site now anyway. Here’s the same thing from Four Sevens/Prometheus/Dark Sucks……easy to make.
this is how the OP does it What did you mod today? - #11294 by Firelight2
Why do you want to take the bezel off? ![]()
Regardless what tool I use, the secret to My success is heat.
Put the light in the sun for an hour, or put boiling hot water in a cup, then dip half the bezel into the water for a few seconds. If you do not trust the O ring, put the light in a plastic bag first.
You are right to be afraid of turning a circle into an oval using pliers. I leave the body installed when clamping, precisely to help prevent crushing the head tube.
these vise grips are my weapon of last resort:
 .
.
fwiw, the bezel tools that darksucks and Oveready sell, are too big for TS10:


You could try Strap Wrenches:
 .
.
Harbofreight has strap wrenches for very little money. Tip: wipe down the rubber straps with alcohol, otherwise theys tend to slip… they are a fiddly tool, but its good to have options.
3 Thanks
I’m trying to possibly do an emitter swap. I’ll definitely try adding heat, perhaps with the heat gun I have in my house. Also, I never knew strap wrenches existed until now. Just bought one on Amazon. Even if it doesn’t work for the TS10, there’s quite a few other things in the house that it will be useful for, thanks for the tip!
cool, Nichia E21a works
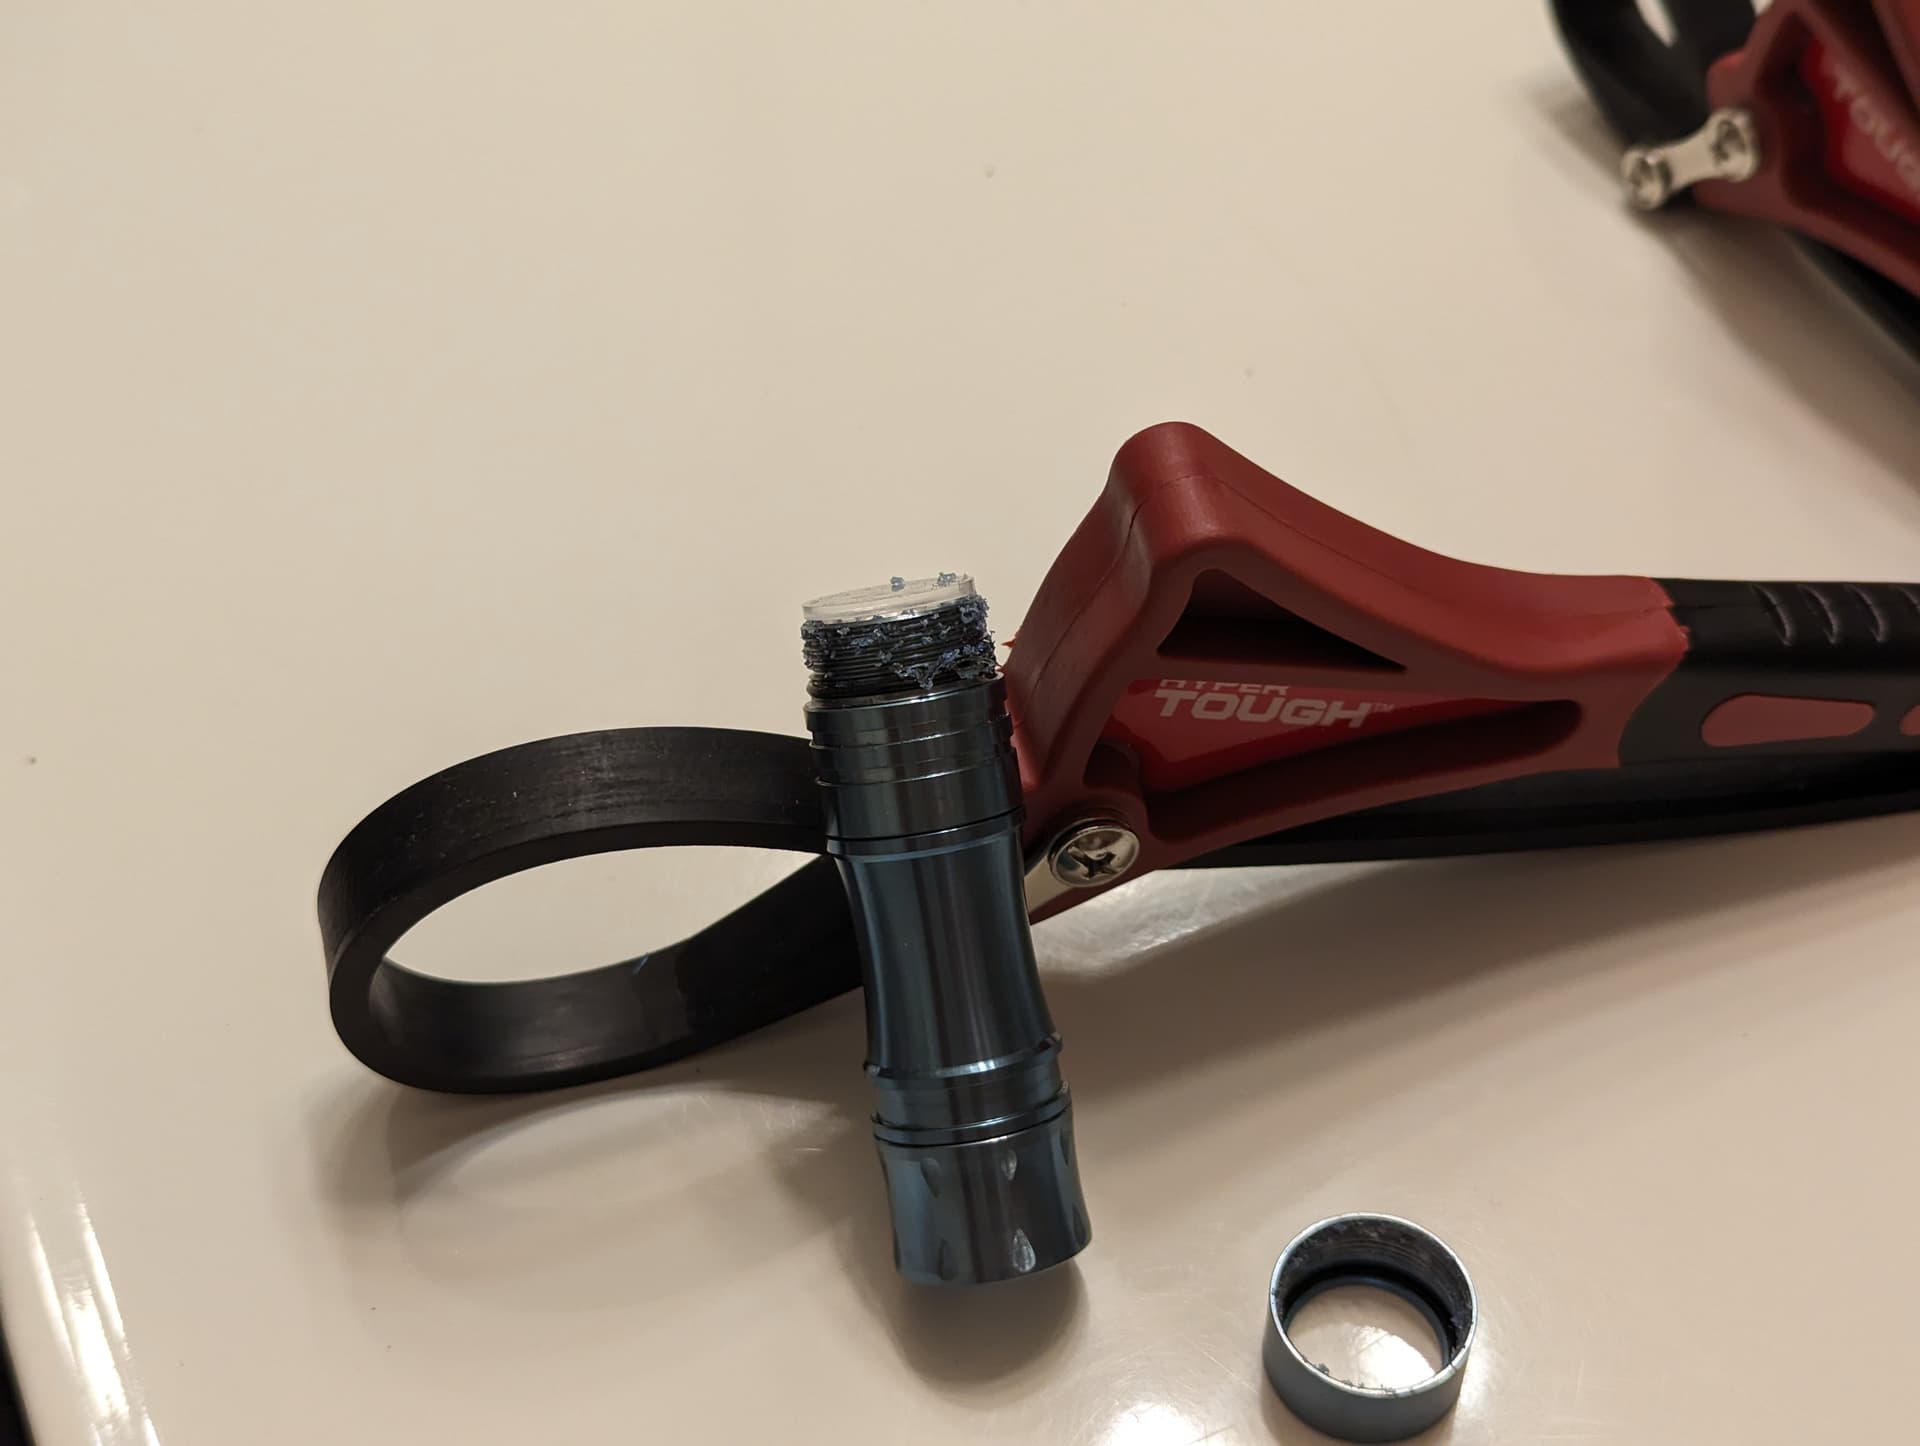
Walmart has them too. Much safer (for the light) than with slip-joint or visegrips. And look at all that glue!
1 Thank
congratulations!
why did you open it?
Hey @Firelight2 !
Sorry, but do you happen to have any photo of this set-up?
I am trying to mod one of my FWAA with a TS10 V2 (slightly different from V1) driver but something is off.
I can’t get to make the connection work and I’m running out of ideas of what may be wrong.
Also, when the driver is installed and I make contact with the - negative wire on the mcpcb, it is giving some kind of short ![]()
Any help from you or from anyone that modded an FWAA with a TS10 driver is welcome ![]()
Thanks in advance!!!
I think that might be a double typo, and driver should say mcpcb
“Because the TS10’s driver mcpcb is substantially thinner than the FWAA’s driver mcpcb,”
I dont think anybody has put a TS10 driver in a FWAA…
afaik the TS10 driver does not work w the FWAA tailswitch and body tubes, they are wired backwards…
iow, the Fwaa inner outer body tube is negative, but the TS10 inner body tube is positive negative
edit: thanks to INeedMoreLumens for the corrected body tube polarity details
2 Thanks
I’m not sure if this was changed in the TS10 v2 but on the TS10 v1 the inner tube is negative and on the FWAA the outer tube is negative.
4 Thanks
This is correct. I wrote “driver” when I meant to write “star”.
The TS10 and FWAA’s drivers are not easily swapped. My vague recollection is this is because the FWAA uses the interior tube for the switch and the exterior switch for main current. The TS10 is wired the opposite with the inner tube used for main current and the outer body for the switch.
1 Thank
![]()
![]()
![]()
![]()
![]()
This means that
a) I missed some crucial information along the time, regarding the incompatibility of these components of both flashlights
b) I ordered drivers to make a mod that won’t happen
c) Firelight2’s post needs to be corrected to avoid further mistakes.
@jon_slider
Thank you very much for the clarification and explanation !! Always on spot my friend ![]()
@INeedMoreLumens
Thanks for confirming/correcting the information! ![]()
@Firelight2
Thanks for confirming the information above too.
As for your post, can you please correct it and name it accordingly so that other (unwary) people follow the same mistake? It would be much appreciated. ![]()
And for your words I assume that it is really almost impossible to use that driver on the FWAA host, right?
This said, is there any place or someone that sells “ready to use” drivers for the FWAA that can be flashed (3 pins) without having to do a circus of programming wires and devices everywhere?
Thanks again for the help folks ![]()
3 Thanks
not that Im aware of
maybe ask thefreeman if he can find the time to build you one of his FWAA drivers ![]()
while you are waiting, consider buying a Wurkkos TS10 ![]()
Zwerglein02 offers an mcpcb w RGB and 519a capability… you might also be able to buy a modded TS10 from him.
1 Thank
Corrected the erroneous wording in my post to replace “driver” with “star”.
Using the TS10 driver on an FWAA host can probably be done, but I think the switch board would need to be rewired as you need the switch button to close the circuit on the outer channel not the inner one.
It might be possible to do this by using a TS10 switch board instead of an FWAA switch board, but I can’t be sure as I haven’t looked into this myself.