I think it would be very cool, before media-blasting the titanium, get some pinstriping tape at the auto paint supply and mask the grooves off, this way they gleam against the matte surface. Would really set it off… Or, after spraying, re-cut and polish the grooves…
Oooh that bit sounds real interesting. Hope it gets started one day…… and show us ![]()
Sure… I’ll be using a Harmonic Drive with a 100W servo. What’s nice about the Harmonic Drive, aside from the 101:1 ratio, is that it’s a fully built unit complete with cross-roller bearings at the load end and deep-groove ball at the drive end, so I can mount an adapter plate for a chuck directly onto it…
I missed this post at first. When I saw it I thought that’s a great idea… except I have to re-set the lathe. I pondered for a bit and came to the conclusion that this light has been the experimental piece so why not??
It was a bit of a pita setting the compound slide. Also I have more than one ball end router bit so ,of course, I picked the wrong one :person_facepalming: it has a marginally different profile so it’s not a quick skim to freshen up the titanium grooves, I need to re-cut them :weary: I got flashbacks of how much winding I did on the compound slide last time so rigged up my cordless drill to make it easier. The light is still in the lathe. Will try finish the grooves tomorrow but not holding my breath.
With your skills I’m sure it’ll come out amazing…
Louie, interesting the work you do, I used to work with my cousin building custom cabinets. When he moved back to Virginia he started building Mandolin’s and Acoustic guitars. He has had multiple of his instruments played by famous artists at the Grand Ol Opry. Challenging but rewarding work…
After re-cutting the grooves I realize it really does need to be polished as well. I’m not sure how to go about that without affecting the bead blasted area, and conversely protecting the grooves while bead blasting the rest of it. So the results are less than desirable. I think this might work better for aluminium but it was good to learn for future reference.

I’d polish the grooves then mask it off. They have thin masking tape of different sizes at an auto paint supplumy store like Sherwin Williams. You can then use alcohil afrmterwards to soften the adhesive and remove any residue.
This is so interesting to me because I have had thoughts to make a small flashlight from the two pieces I got as a birthday present back in the summer. The thought was to use the tougher timascus bar to make a bezel and tail cap with the copper/nickel mokume gane as the body of the light. Since both of my pieces are only about 40mm in length (from memory) the light would have to be pretty small by default.
I would sure hate to mess up on either piece! ![]()
Seeing these again I realize the mokume gane is copper/brass/nickel silver.
Cotton bud and Mothers?
Another thought - you can cut strips of silicon carbide paper and floss each groove starting at 800 and working up to 2500…
Would be interested to know the name of your cousin!
Looking forward to seeing what you come up with Dale! If you end up trying to highlight some grooves on the timascus it should show up better than this. It does give me an idea to blue the ti then polish the grooves again but meh, I’ll do it later if it plagues my mind.
Are you saying to polish the recessed part of the fins? I don’t think I’ll try that, not after the results of trying to polish the grooves.
I got out the Dremel (and metal polish) to have a go at polishing the grooves. It came up better but it’s still not really prominent. I think it doesn’t stand out because the lines are broken up a lot by the cooling fins. I’m half thinking of going back to a bead blasted finish.

I took lots of pics to try and get the right angle of catching the light.
BEFORE

AFTER

BEFORE

AFTER

All the rest are after polishing


This next pic shows the difference between the head grooves and unpolished tail grooves.

I like the matt finish of the tail.
I do think the grooves stand out a bit better… Looks like tiny jewels. It’s subtle but I think subtle can be better, because it’s not something noticed at first glance. That to me separate s special from ordinary.
![]()
After losing this light to my brother for a week or two (to have the bead blasting touched up from me scratching it) I got it back and have finished the build completely. I added a metal button to the switch that was salvaged from a previous boxmod conversion. The switch is much easier to push now. The led is also a salvage I only remember it being a dedomed xml2. The quick phone beamshot gives a rough indication of colour temp.


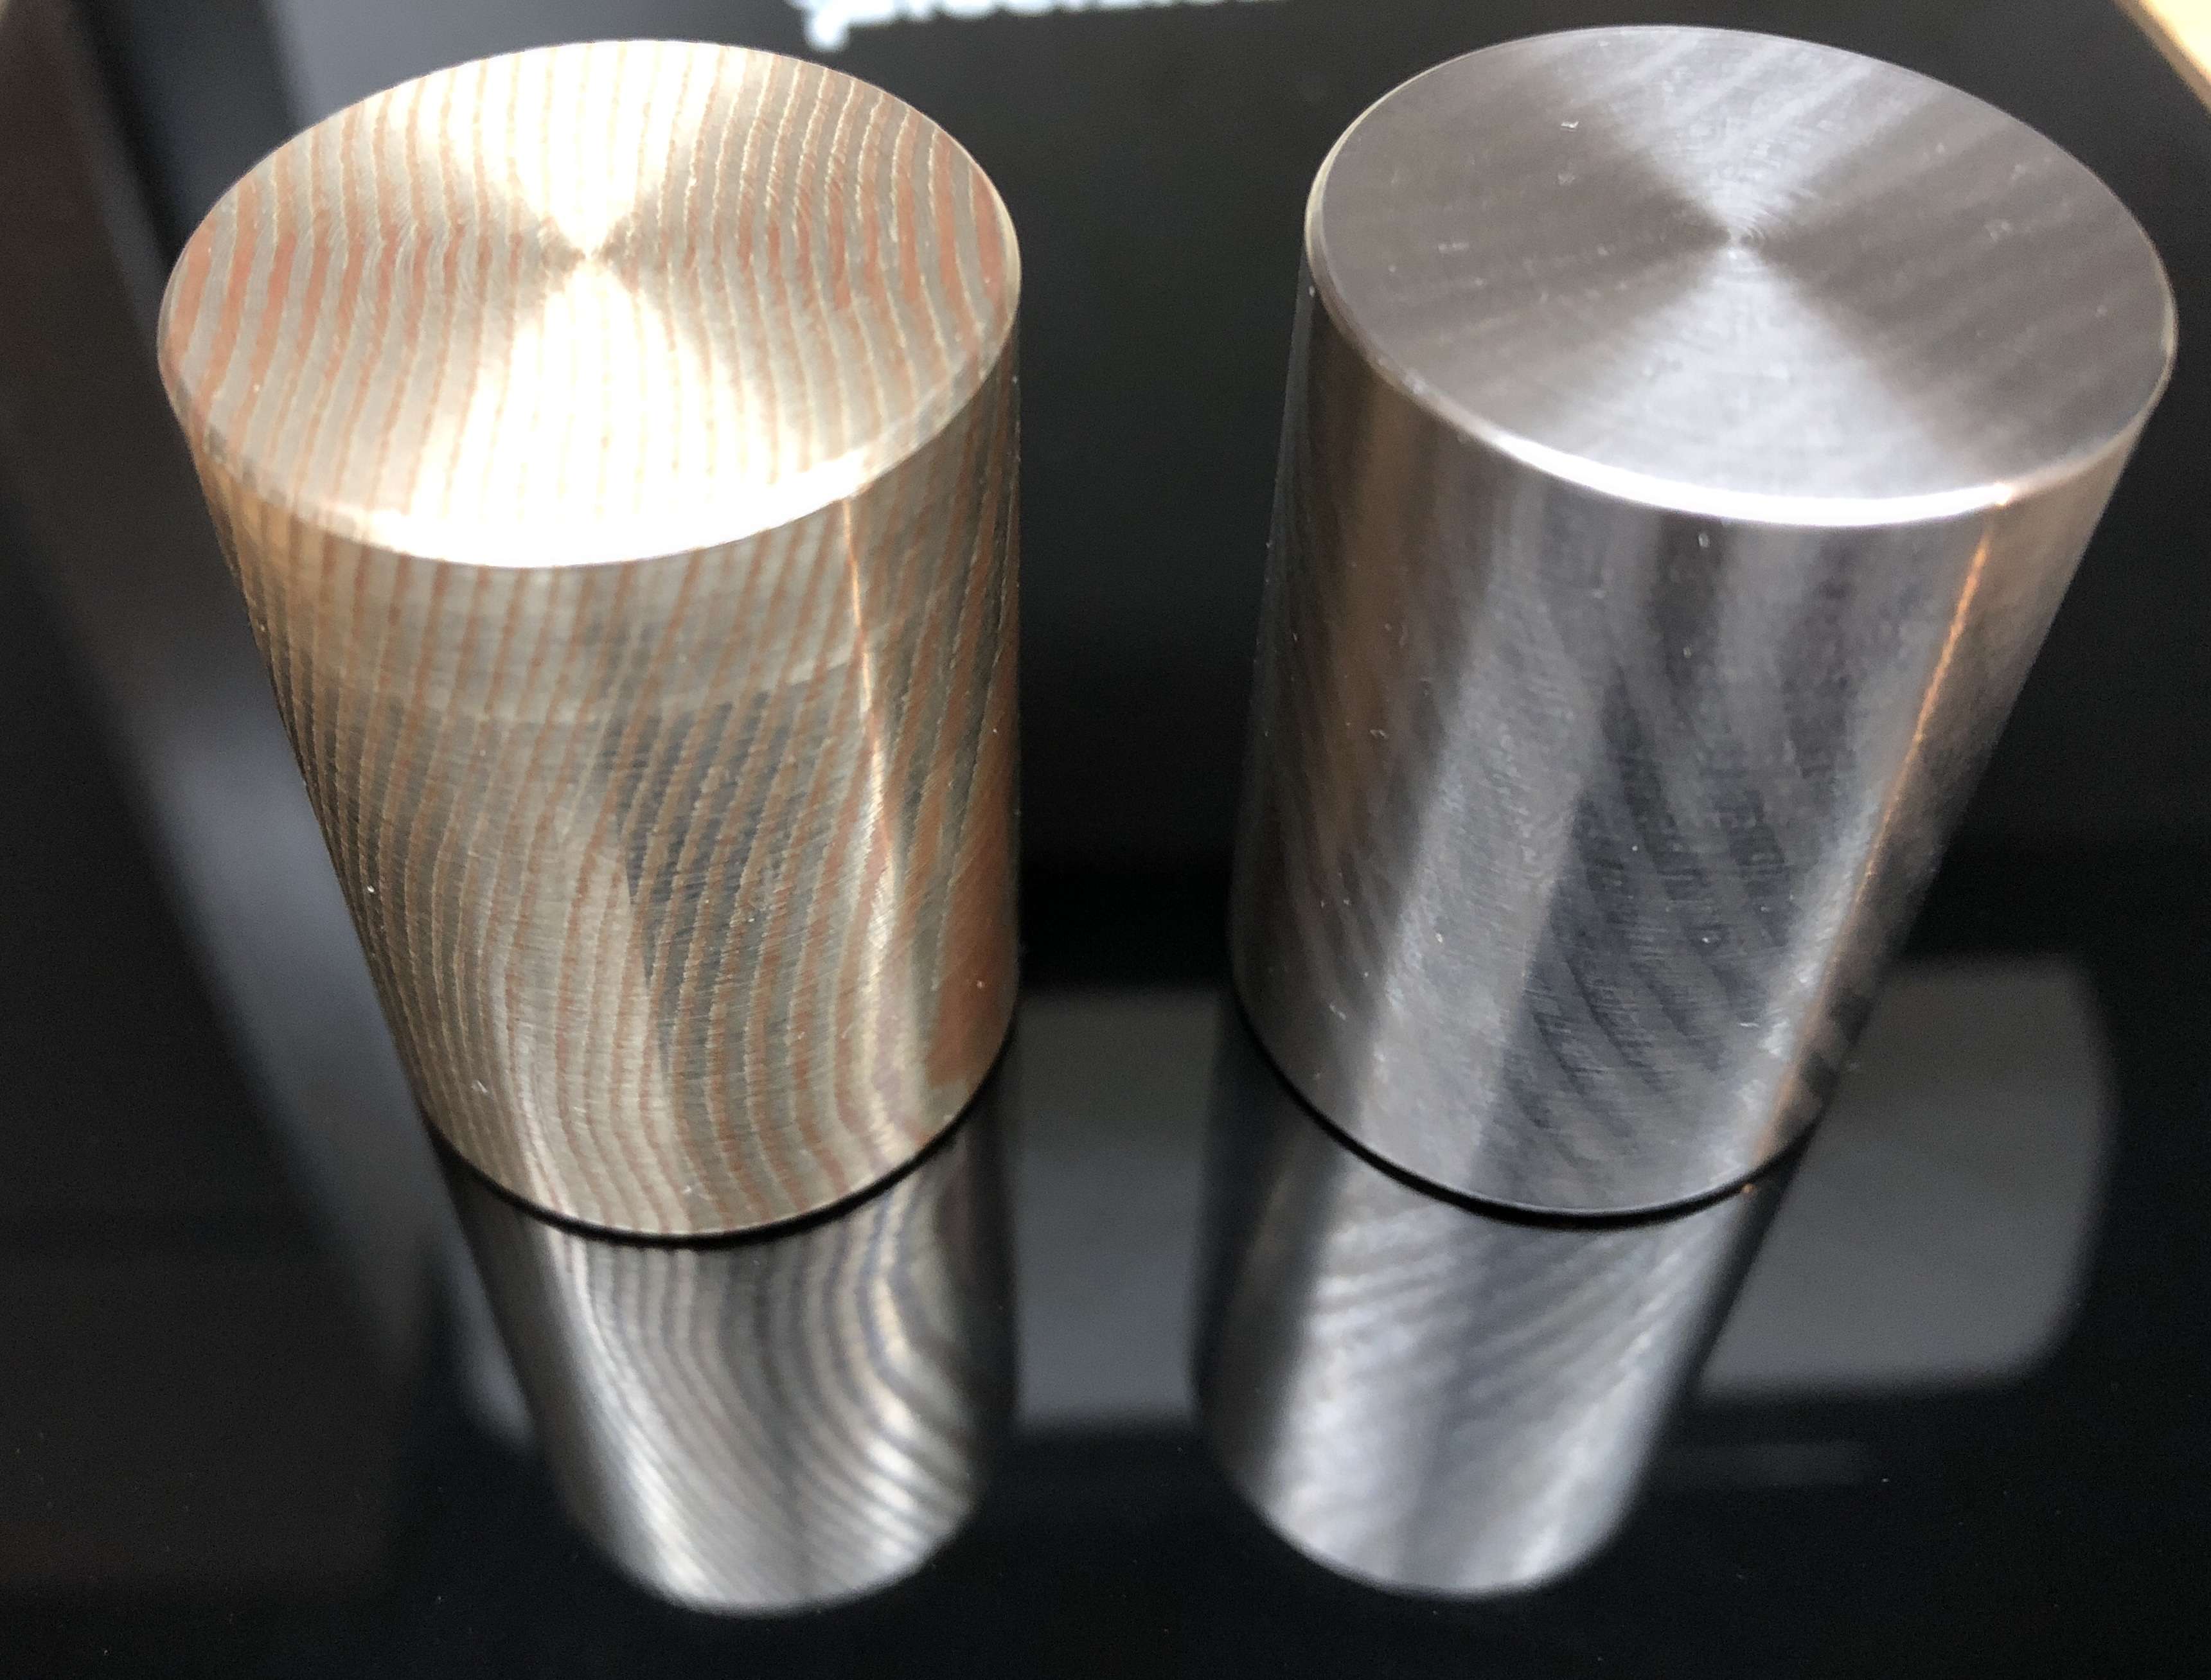
Left is timo right is amutorch AT40

![]()
Damn, bamboozled again. I came here all gung-ho about a new titanium-molybdenium alloy for hosts.
Is the TiMo that warm, or does the Amutorch really have the angry purple tint of an old Fenix E01?
Yeh, I think someone mentioned the same thing about the alloy. Sorry, didn’t mean to mislead.
I think the colours are just slightly exaggerated in the pic but it’s relatively close to what I see. The at40 is a pretty ugly colour.