That (edited #13) was awesome Don! This thread is really going to be helpful for newbies like me. Don't you wish you had an extra pair of hands? LOL
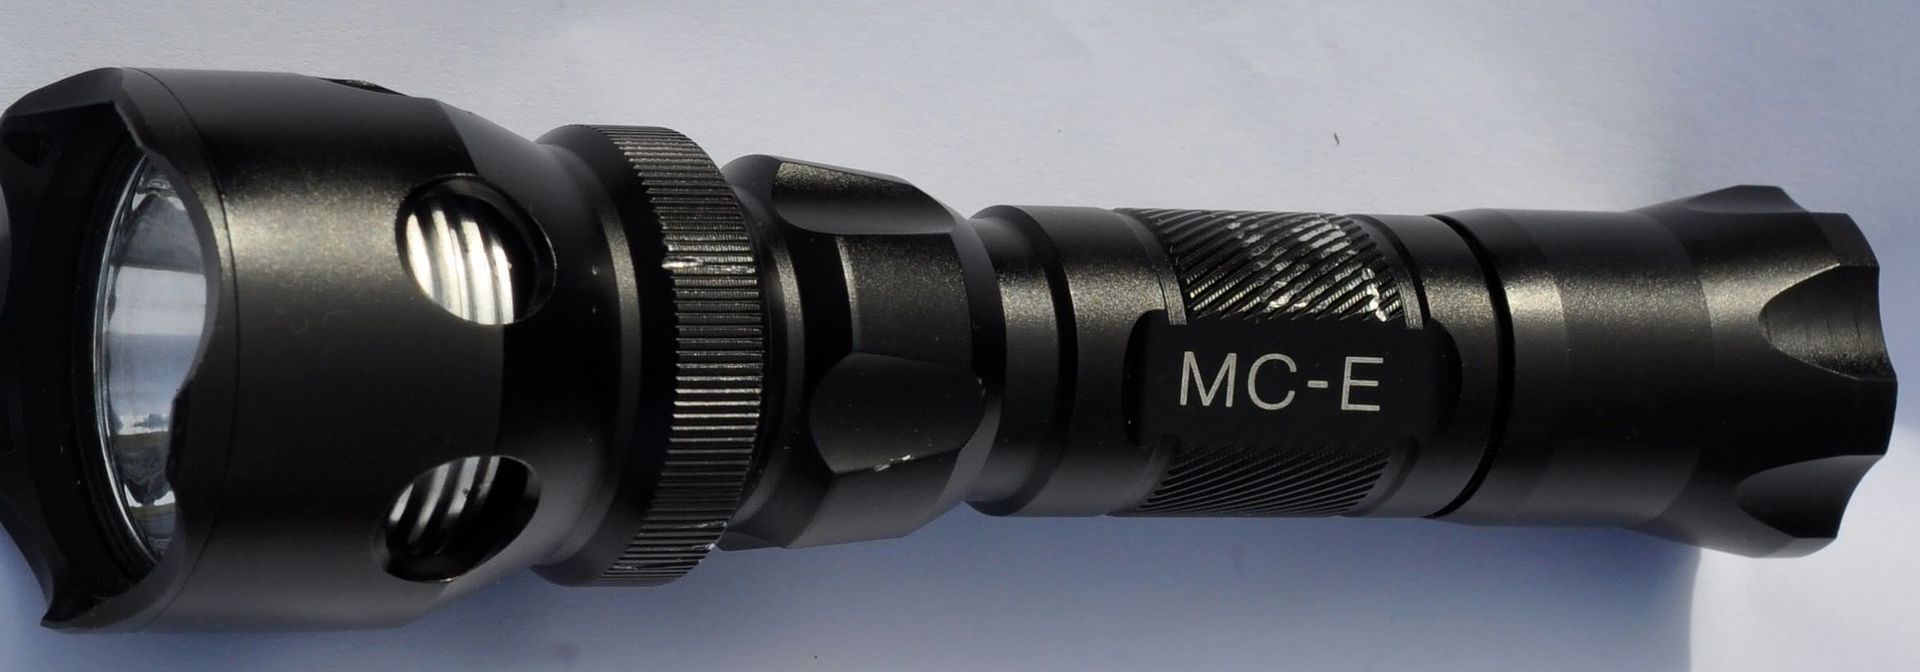
A while back I ordered one of these but what I got was one of these. One does wonder why someone thought it was a good idea to put a quad die LED into a reflector designed for a single die. But never mind, one would hope that the sheer power output would be enough to make it throw.

But there was a small problem. Well, actually several of them. When it worked (which was not often) then it was, as expected, a compromised thrower that put out a lot of light. But a lot of the time it wouldn't work.
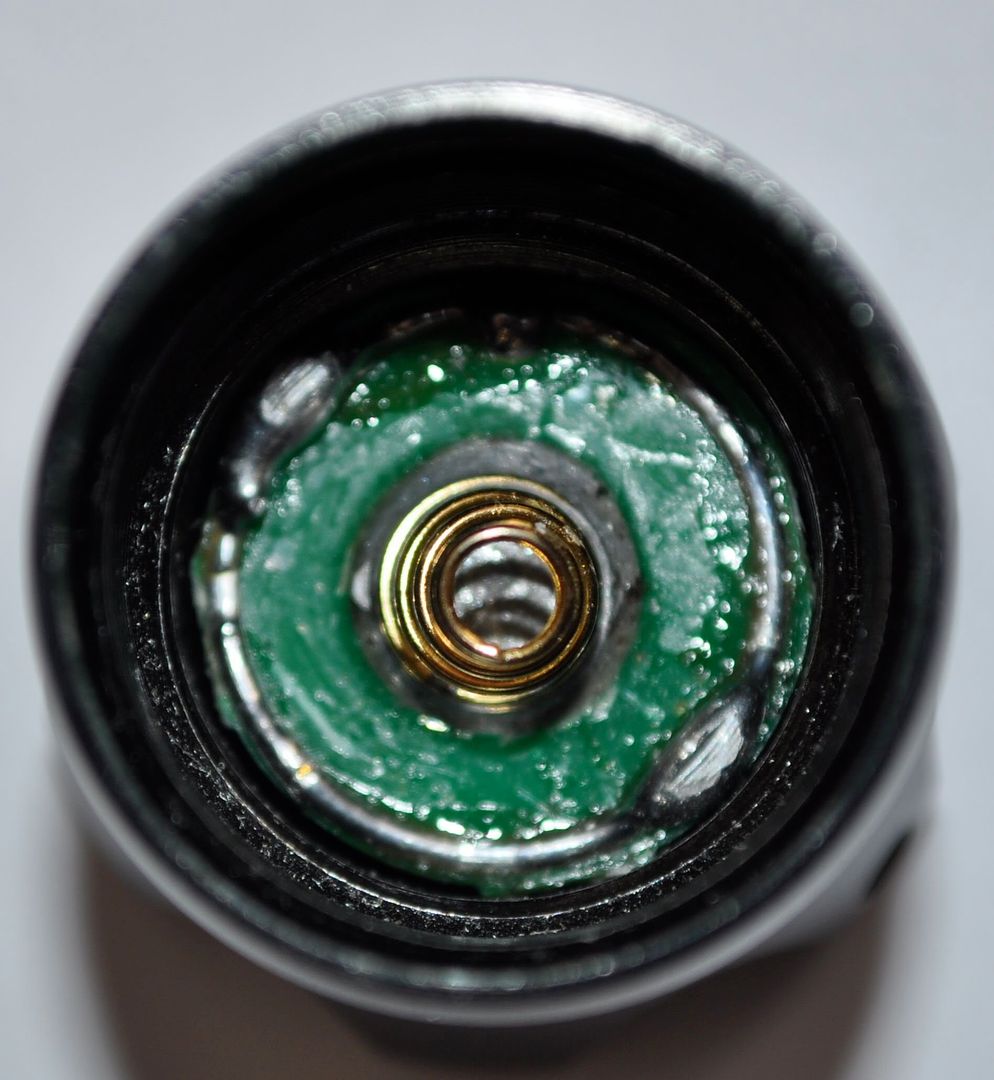
As you can see from this view down the body tube there's a spring down there.
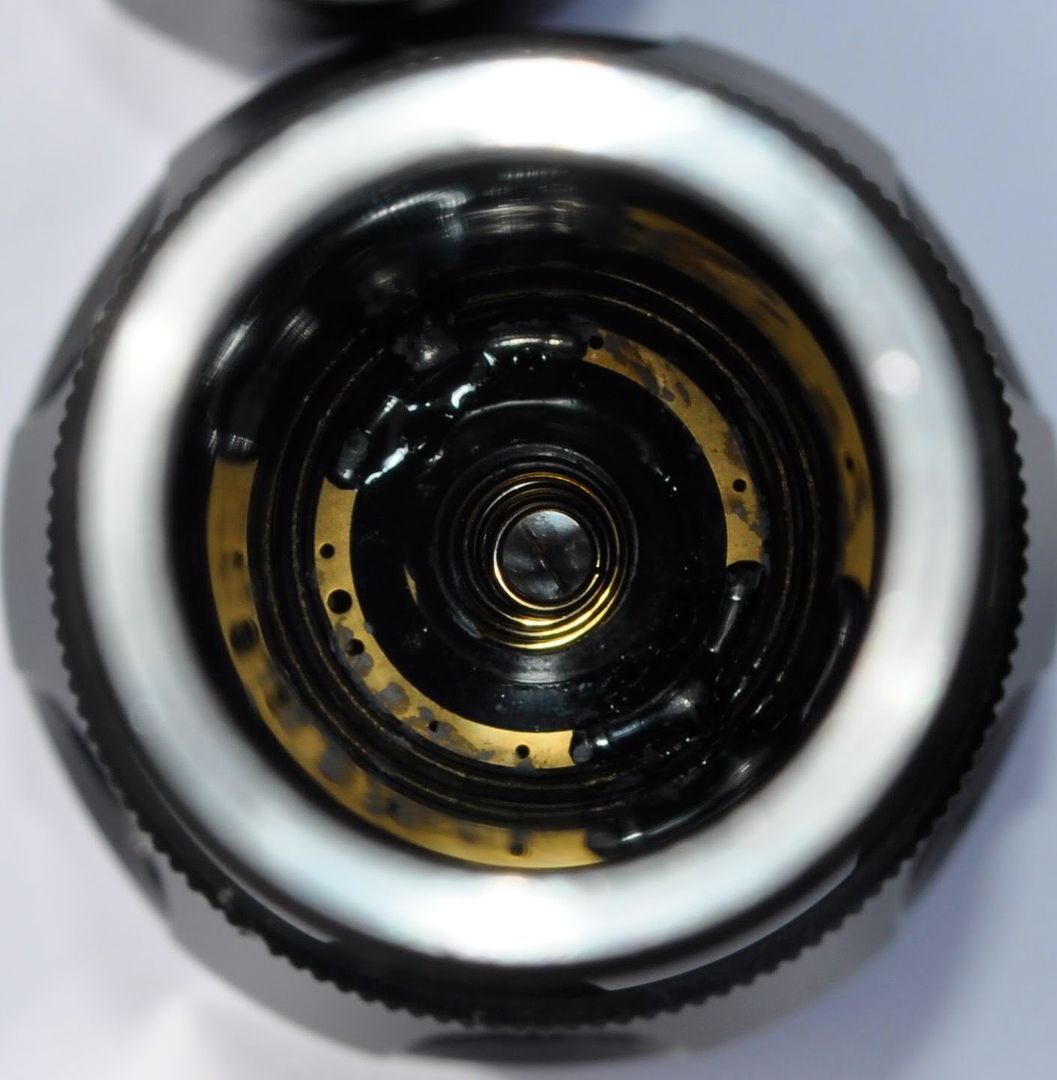
In fact I could push an 18650 down about a centimetre in there. Maybe it wasn't making contact well enough with the spring to allow the thing to conduct electricity -despite a centimetre of travel in the head spring, there was only about 4mm of travel in the tail spring - maybe it isn't extending enough. It worked well enough with the cell pushed in and a bit of wire taking the place of the switch.
Several attempts to braze some coins together to make a spacer were given up on when i ran out of gas for the torch. After a spot more thought, I put a big blob of solder on the switch end button
Now the $£%^&%^&$%^ thing wouldn't work at all. Checked the switch with a multimeter. Contact dodgy. So back to the wire trick.
No light.....
Thinking thoughts about dumpsters at this point.
There may be a problem in the head as well. So take the head off. It turns out that is easier said than done. The scarring on the body you can see in the first two pictures shows how well the head resisted my attempts to remove it - it is very comprehensively glued in place. The vice I used wasn't up to the job either. So it got put aside while I scratched my head about what to do next. Dumpsters are still foremost in my thoughts. Old4570 on Jayki.com was having the same problem - he wanted to mod his one - I just wanted to make mine work. Then a kind soul pointed us to a CPF thread where someone had got the head apart.
http://www.candlepowerforums.com/vb/showpost.php?p=3189126&postcount=264
Hooray!. So, having removed the bezel ring, lens and O ring (fortunately my bezel ring was not glued, some are) I could prise out the reflector which is held in with four O rings, two at the top and two at the bottom. Fortunately there was nothing wrong with the electronic guts once I'd screwed the pill firmly into place and it was now happily pulling 3.2A from an 18650 meaning that it is most likely driving the MC-E LED at the spec of 2.8A. Short of desoldering the LED and wearing welder's goggles to check, it is hard to measure the current to the LED. Whee! It's bright.
Pity about the switch though.
Eventually lost patience with the switch - I'd ordered a stack of switches from DX when I thought the switch was the only problem.
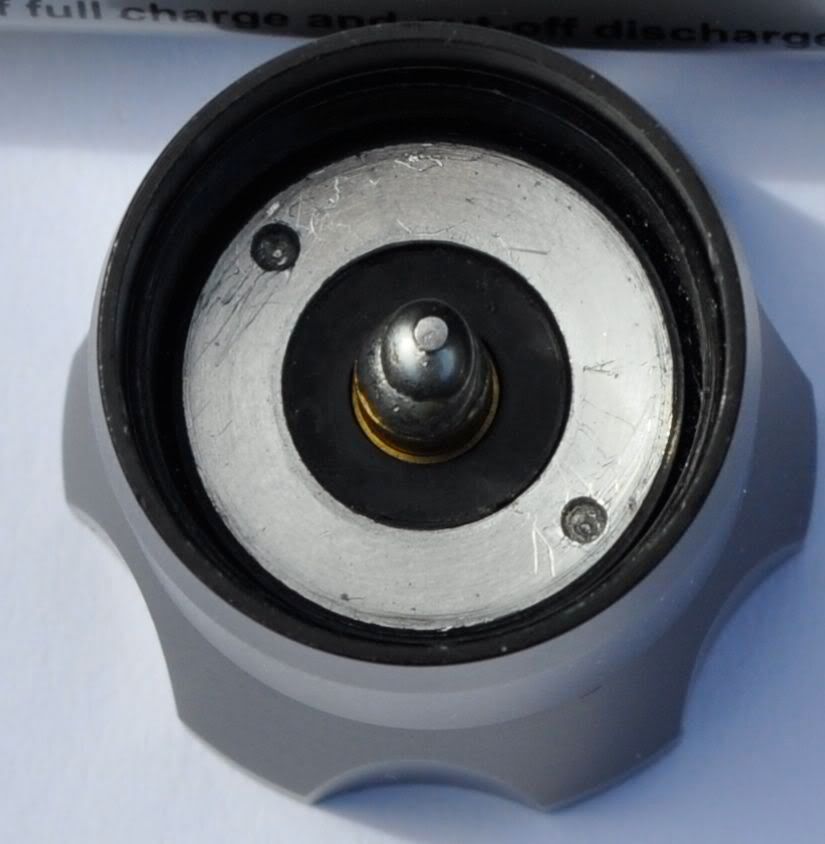
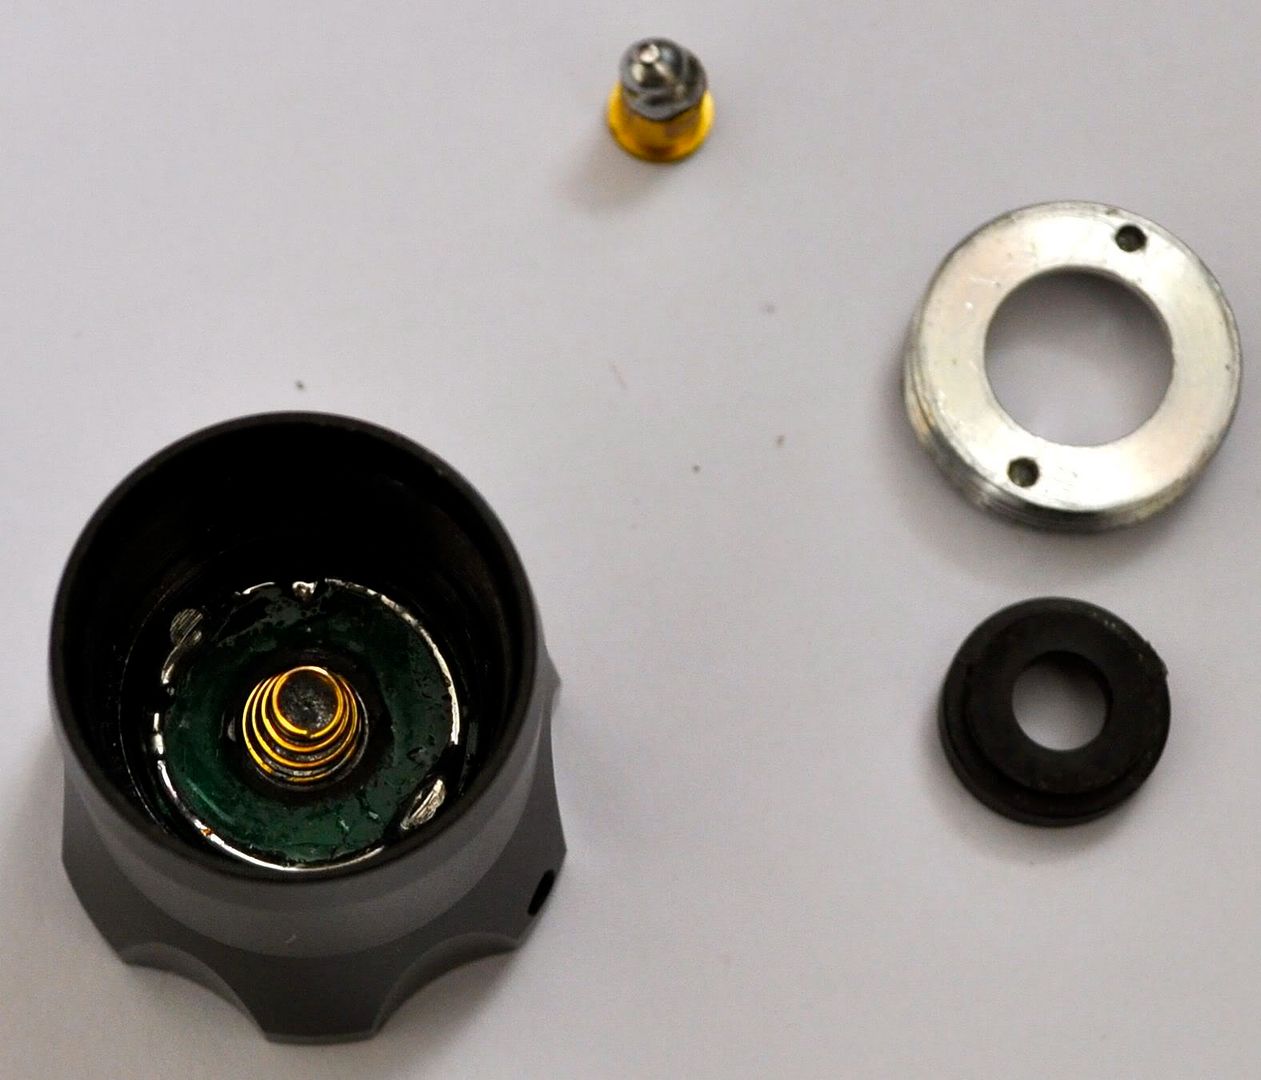
Dismantled the tailcap found the switch assembly soldered to a PCB that made contact with the body through a ring of solder on its outside. After adding enough solder it now works just fine. Here's what's in the tailcap.
The bright ring round the PCB is the extra solder I added. The actual switch is soldered to the other side of this PCB - I tried to remove it, but it is well jammed in there now and doesn't want to come out.
In this picture you can see where the switch retaining ring has bitten into the extra solder at about 4 o'clock and 11 o'clock.
I also added a blob of solder to the end of the brass pin that contacts the negative of the battery in order for it to make more reliable contact with the battery.
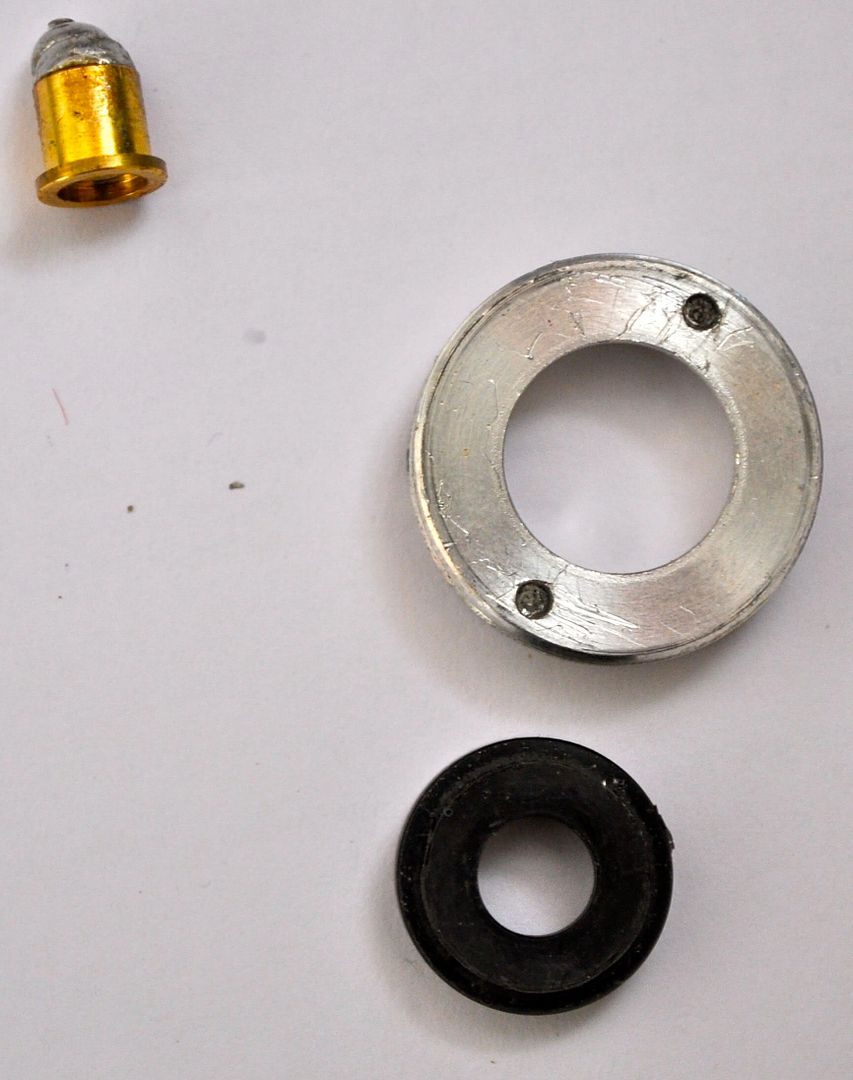
The brass pin engages with the spring on the switch PCB and is insulated from the positive end by the plastic ring which goes into the centre of the retaining ring.
When I grow up (I'm 50 this year), I think I want to be an octopus. Or at least have more than two hands 
Glad you got the light to work bud.......did you ever install a new switch.
Didn't need to in the end. The problem was the PCB that the switch was mounted on didn't contact the body of the tailcap so current couldn't flow. It was clear that the original solder had got squashed out of the way when I first tightened the retaining ring.
Put up some pictures now to explain.
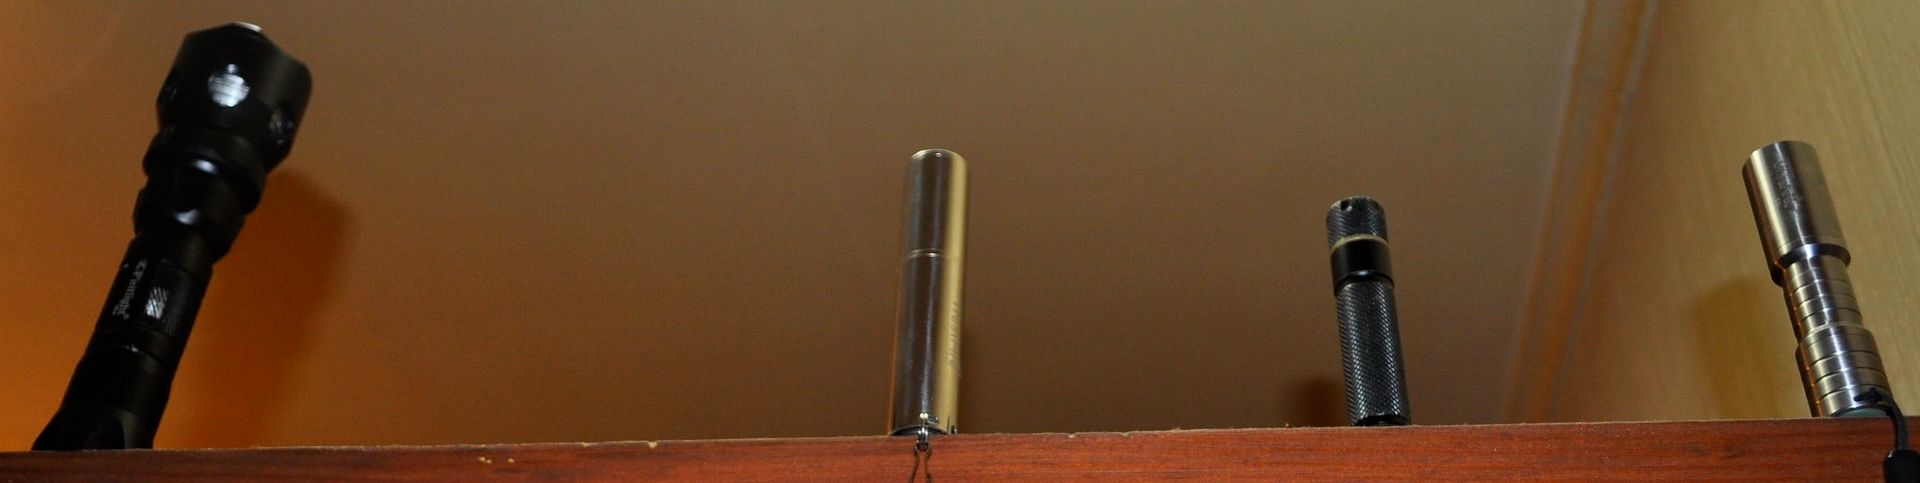
Won't be dark for another hour or so so here's a beamshot comparison on my ceiling - the lights are tail-standing on top of the door so the lights are about 60cm (2') from the ceiling. The four lights are, the Piritlight, a Trustfire F22, a Tank007 E07 and an Ultrafire C3 Q5 SS
The beams
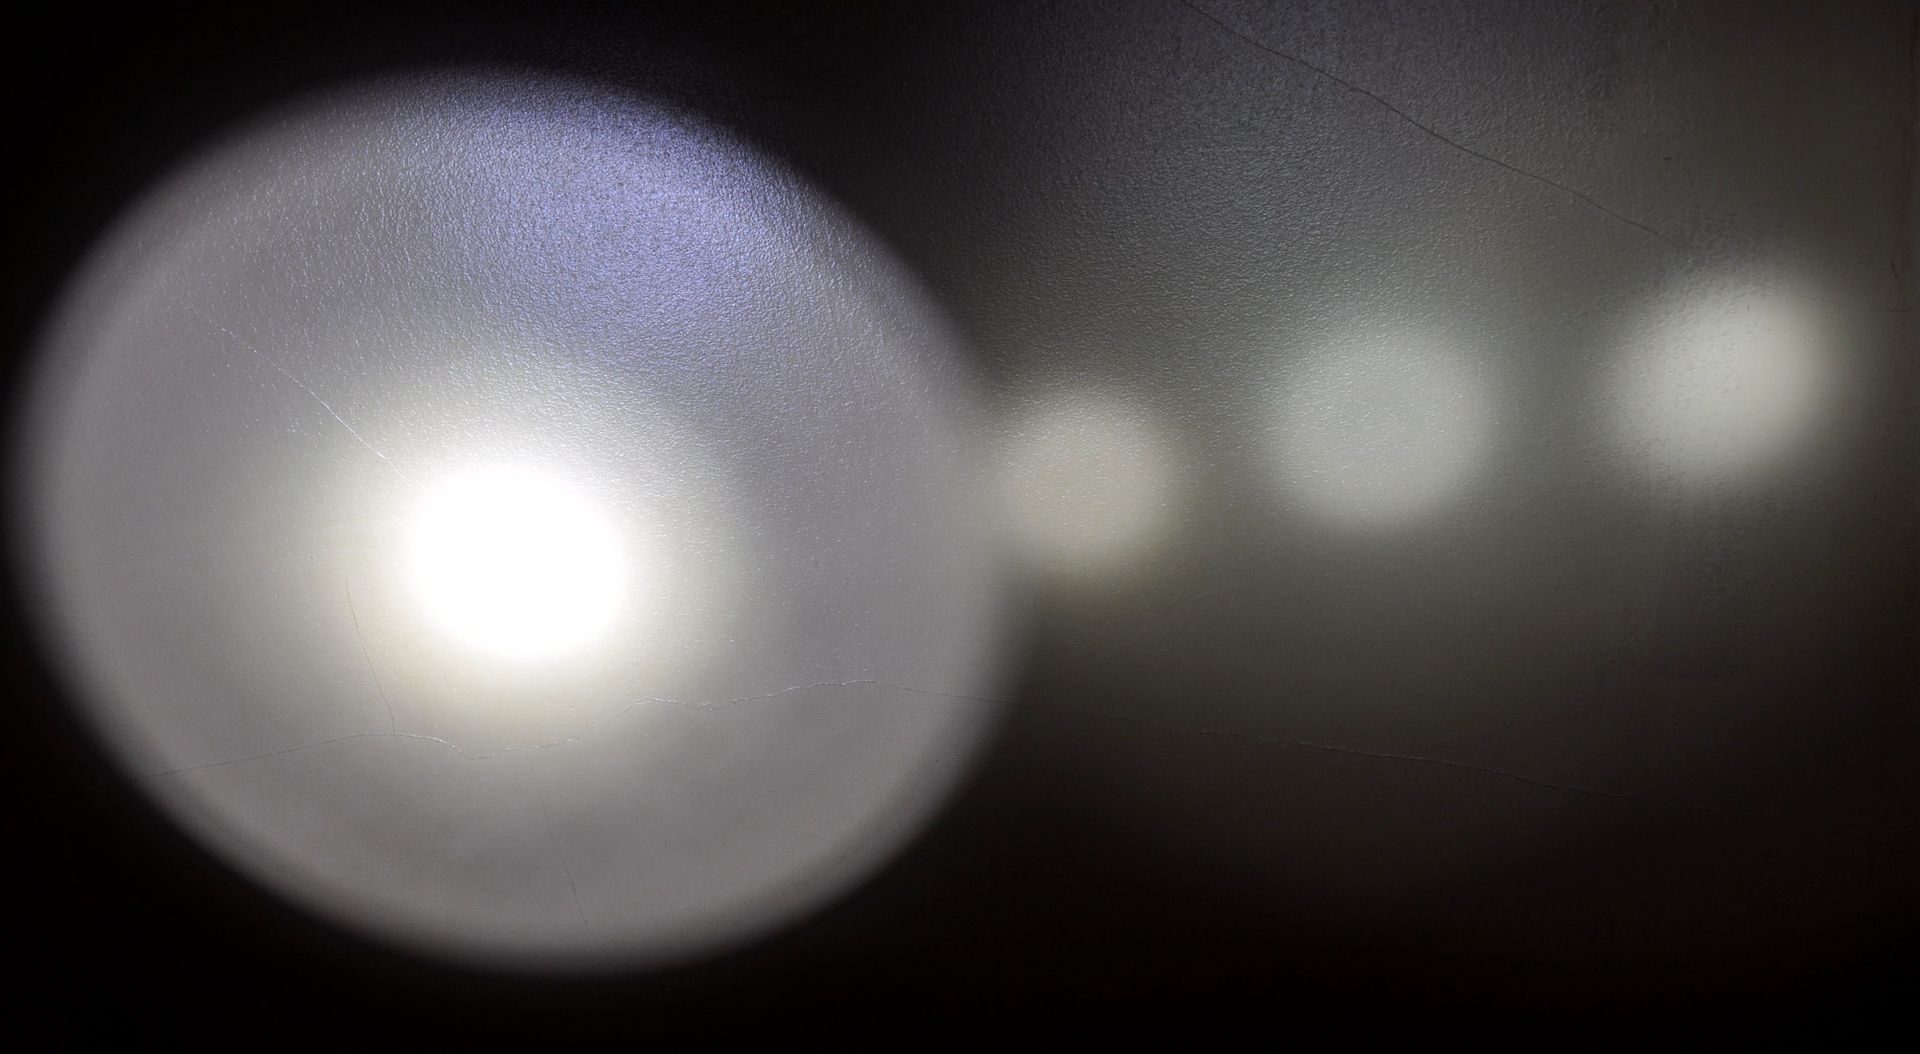
Just noticed that the Trustfire was on low which is why it seems so wimpy in this shot. That Piritlight is bright.