...we just have happy accidents.
(I dedicate this mod to the late Bob Ross, who after all these years still thrives on Amsterdam local tv  . "this is your bravery test" )
I had one xpg2 3D tint on 16mm board left and decided that my only 18650 XML-thrower had to be sacrified (I am not much of a thrower person, but there is one camping trip in spring I can't appear without a new impressive light,  ) It is the famous 'Designer's A10-1'
  (the names are getting better over time at dx), that I recently had enriched with a NANJG 2.8A driver. Head diameter is 5.7cm, I had measured throw (after 1 minute on high at 1m, with uncalibrated meter) at 40Klux, but what would that light do with the xpg2? So it had to go
  . This is how an easy mod became one full of surprises:
1) Here it is, still in working order, soon to be victimised
2) large smooth reflector, it is a good thrower!
3) internals spread out. (top right: hey, does that light come with this driver??  )
)
4) the original led is on a 20mm star, the new one is 16mm, but I think I can get away with that. 2.8A is rather much for the xpg2, so this nice new 2A current controlled driver is going in as well!
5) this driver needs a spring
6) ah, there it is.
7) new driver and led soldered in. I screw the pil in for a quick test: yes! the led lights up nicely, and the three modes work too 

Dear reader, I am afraid this is the end of the smooth and tidy part of this mod. People who only like pictures of a clean job properly done better stop reading right now!
Ok then, still there I see. I added some arctic silver, screwed the pill in, placed the led containment ring and tried to position the reflector in place. Nothing fitted, the ring was xml size, so the hole was too wide, the reflector wobbled about and could not be gotten close enough to the led because it touched the solder blobs of the wires, so I hammered the solder flat, then some short occurred, I cut some solder away with a knife, Led worked again but the reflector still wasn't close enough, so I screwed it too tight against the led-board, it shorted again, resoldered the wires, still short, new cuts with the knife to clear solder away, etc.etc.etc. The end of this long story: I totally #*%# the led board (8,9), led stopped working and still the reflector still was not close enough to the led.
At this point I decided that it was never going to work with the 16mm board, I needed the led on a 20mm star, I almost gave up. But suddenly I remembered reading about the Old Lumens reflowing technique (thanks for that O.L.). No experience at all, but I could try to remove the led and put it on the 20mm-star. So I heated up the xpg2-board with my 15W solder iron and tried to remove the led with a forceps, not surprisingly the iron was not nearly powerfull enough to meld the solder. Got frustated and tried again with a gas lighter under the board, the led still wouldn't get off. And then the forceps slipped away and chipped the dome off the led, *ouch*, end of project!
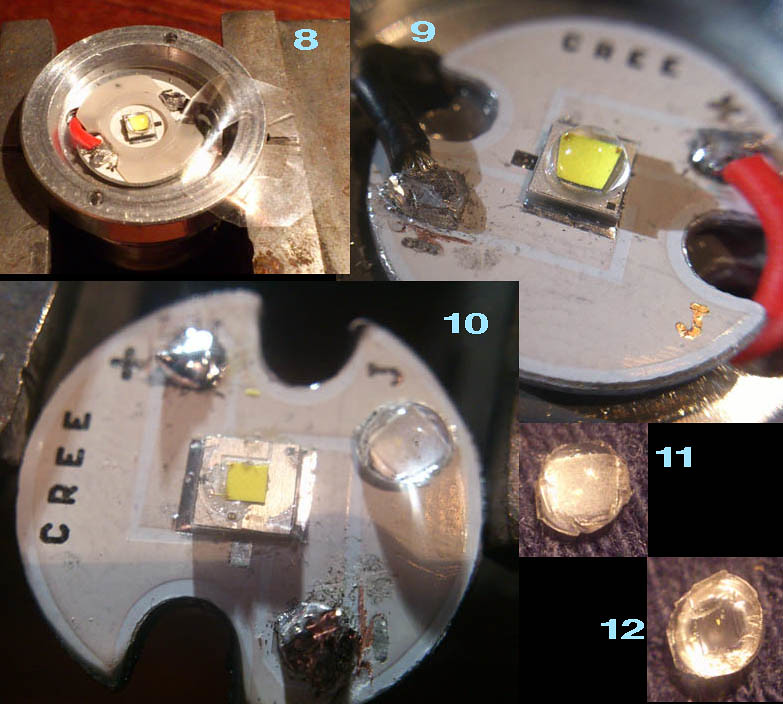
10, 11, 12) But is it? Hey!, that doesn't look too bad, some phosfor chips are spreaded out, but the dome looks phosfor-free, who knows, can that led still work? I have a go, scrape and clean the led-board as good as it goes and re-solder the wires. And the led lights up!, I have a working dedomed xpg2!! Makes me wonder if the new line of Cree leds can be dedomed more easy than the old ones  .
.
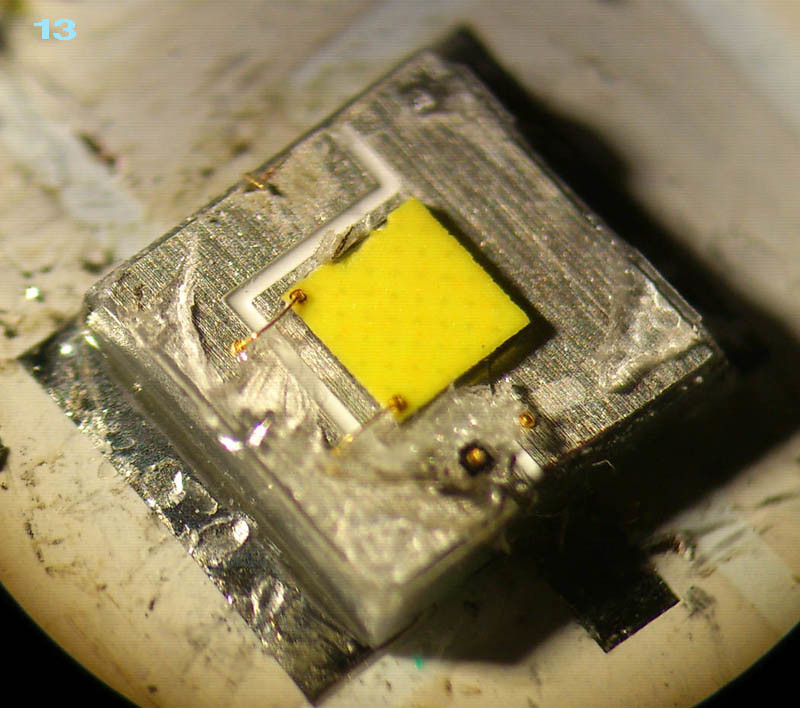
13) here's the dedomed disaster in close-up, bits of silicone everywhere, but the die is clean:
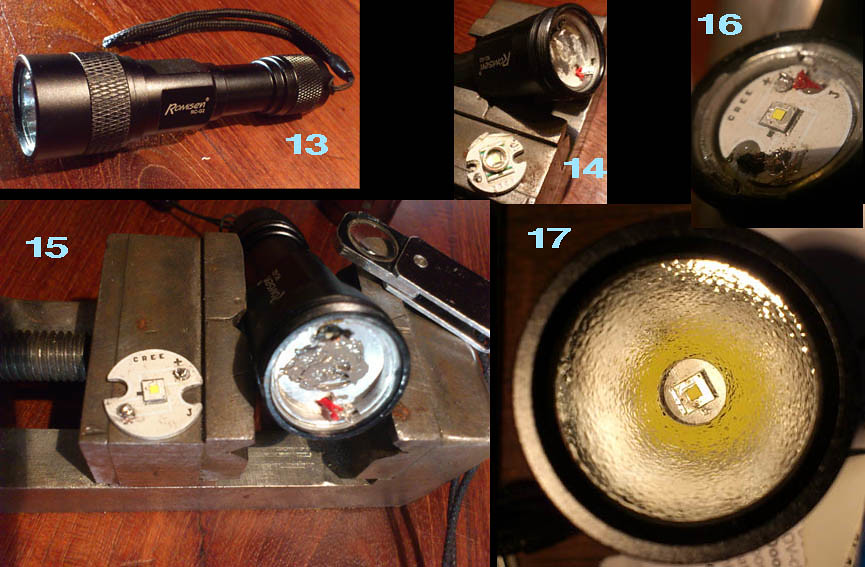
Can't use this led anymore for the (former  ) xml-thrower, so what next? Hmm, my Romisen RC-G2 has gotten a driver update this spring (SKU: 25505 from dx, I was lucky: it draws 2A from a 14500 and the XRE still rocks!). I like the light as it is but with the 2A it delivers, it is tempting to put this new dedomed led in that .
I'l do it:
13) here's the good ol' Romisen
14) got the trusty XRE out (I will keep it for some future use, this is one with the small die and it has proven to handle large amps). Cleaned the pill from thermal glue.
15) some arctic silver added
16) there it is in place
The pill is a bit wobbly when in place, difficult to center under the reflector now the XRE-ring is missing, so I put a tiny rubber band around the upper side of the pill so that it centers itself when fully screwed in the body.
17) Ready. Well not definite, I haven't attached the led-board to the pill with anything else than arctic silver, so at some point I have to drill some holes and screw the led onto the pill. But for now it will do.
I hope it works and that the Romisen performs at least a bit better than with the XRE. And it does! Some observations and measurements:
-tailcapdraw with freshly charged TF flames 14500: 2.2A (!, because of the lower Vf?), not so freshly charged anymore: 1.7A
-lux after 1 minute at 1 meter: 15 Klux. (I am sorry, forgot to measure the lux before the mod, with the XRE at 2amps, it was already a hell of a small thrower, and it is now at least as good -maybe better-, but with more total output)
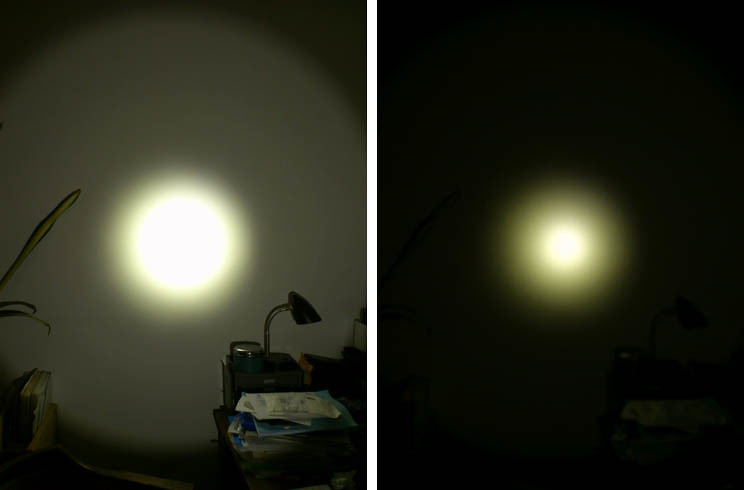
-white wall hunt: see pictures (phone camera, so no settings; on the left on automatic exposure and white balance on tl-light, on the right same beam but amplification on '-2 eV' to see the contrast in the spot better)
-the tint has changed by dedoming, tint 3D is supposed to be just under 5000K, dedomed it has shifted to around 4000K, actually quite near the tint of the xml T4 4000K I have in another mod, still far from ww, but a friendly color . I love this tint, especially for outside!!!
Finally some outdoor-shots. Sorry guys, I have no thrower left for comparison, just some rainy pics in the park (top left=control shot, error:tint is not 3C but 3D). My phone camera makes it a bit brighter and greener than in reality, but I must say this light is a really nice little thrower (usefull light to I would say 60 meters) with (for me) great tint. I hope it will prove to be robust as well.

So this is the end of a simple swap going wild. I had fun doing it and writing it down for you (though it costed me a few late night sessions). Hope you enjoyed reading!
djozz
 ) test outside from the balcony and I can say that the throw was promising!