WARNING: Cometa – read/fix BEFORE inserting battery

Is anyone besides me unable to access the 17track.net site to track packages from BangGood?
It had been working just fine for me anyway till a couple of days ago, but now I can’t even connect to it. :cry: … :wink:

He must have super skills……… :wink:

Works OK, but mostly I check at the website of the carrier as it’s usually more up to date :wink:

Thanks for the reply ‘Rick-’. I can’t connect to it anymore for some reason??? I have no idea why.

Hi.
How many mm is the Noctigon diameter?

Another wrinkle, possibly using the same hardware I suggested to protect the spring from shorting — a “shoulder washer” or “top hat washer”

Has anyone seen “shoulder washers” the right size to put into the notch in the emitter board, with a cylindrical part that would extend down through the hole in the backing plate?
That would both protect the wire insulation from sharp edges, and also keep the two pieces aligned by pinning them together.

If doable, simpler than drilling and tapping for screws after the fact.

I’ve seen them somewhat larger, sized for protecting small electrical cable going through a panel or wall.

“A shoulder washer is a plain washer type with integral cylindrical sleeve; they are used to keep separate different metal types, and as seals.[14] This term is also used for electrically insulating grommets”
http://everything.explained.today/Washer\_(hardware)/

Search finds some small ones:

http://s860.photobucket.com/user/doobedoobedo2/media/Dont%20try%20this%20at%20home/20140217_173728_zps3e31904d.jpg.html

I just swapped in a brand new XP-L HI V2-3D from Richard to see if it was any less splotchy. It is exactly the same. So, the lens in this light is most excellent. What you have is what you will see, projected perfectly out the front of this light. And I will once again nation using a thick o-ring to make is so a battery can’t get far enough in the tube to short, but it does allow the spring to contact wit no problem.

Thick Oring….now thats a plan. I’m grabbing all this advise before mine arrive. Thank you everyone! No poof for me. I hate that!

And I will once again nation using a thick o-ring to make is so a battery can’t get far enough in the tube to short, but it does allow the spring to contact wit no problem.
[/quote]

could you please explain this? What do you mean use a thick O-ring, and where? Thanks.

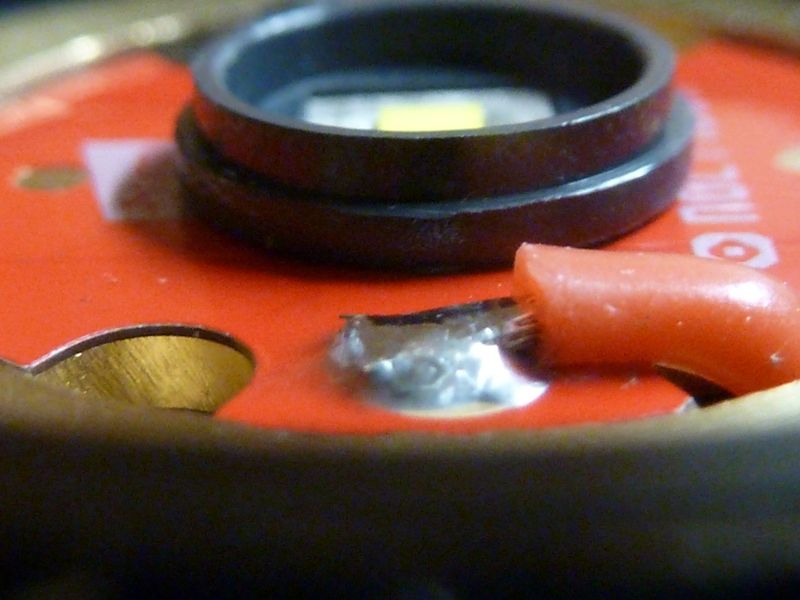
Oh boy, not really super, maybe super slo-mo . I thought I might be asked this after I posted, and now, of course, I can't remember! I'll try almost every trick I know and don't know, so probably used a flat tool or my bent head needlenose pliers - these come in really handy, and this is what I typically use to hold down the wire in place when I solder to the MCPCB pads. If you pin the wire down just past the insulator, then press hard down with the iron tip, it works pretty good - this is what I probably did. I ALWAYS use a flat tip on my iron, never use a pointy tip. For tight spots, use a smaller flat tip. You need a flat tip because you get more heat to the solder joint. I use a pretty small flat tip pretty much always, even for fine work like on piggybacking 7135's pins, or soldering direct to MCU pins, etc. In the beginning I used a pointy tip and it never worked out well, I mean ever. Using a Hakko and the stock Hakko flat tip, I started soldering like a pro!

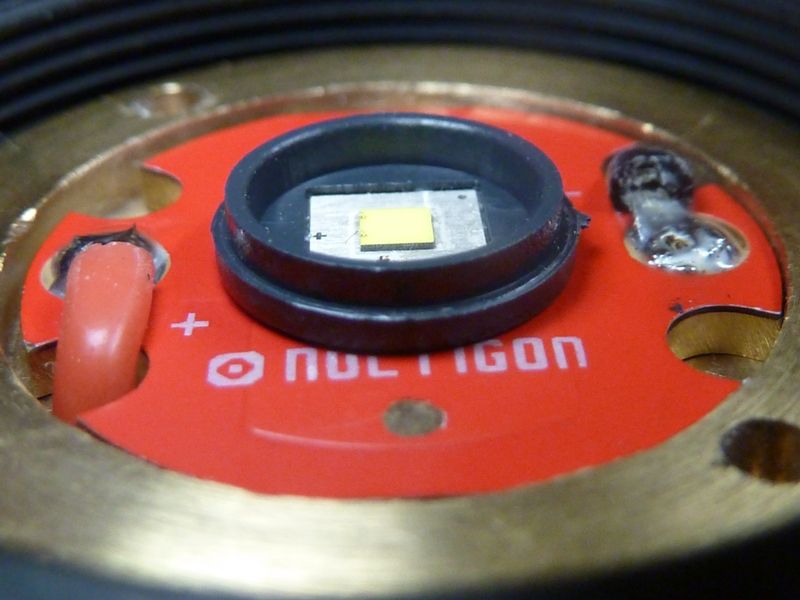
That's a 20mm Noctigon in the pics, btw...

+1, that is exactly correct! I've thought neutrals look more funky that cools. Aspherics are just too darn revealing.

Unbelievable, I just logged in to mention or alert folks that I had for the first time ever tripped the PCB on a KK 26650 couldn’t figure out what was wrong at first never have had a protected protect me, I’ve vented a few 650’s but haven’t had this happen before, got lucky today I guess, and so came here looking to see if others are having any issues and the first post I see is Saypat mentioning using a a washer, yes most definitely, just glad I didn’t go with my first thought and put in the Efest which is unprotected, well that was the first surprise, guess I’ll be doing a bunch of reading here since there’s a few problems with the two I bought and really feeling rather disappointed so far and thinking that calm is the word of the day in this house right about now.

Anybody have access to various sizes of this kind of shoulder washer?
http://www.mouser.com/ProductDetail/Keystone-Electronics/3049/

This is just guesswork on all measurements as my light hasn’t left China yet, its ‘notification of intent to send’ went out days ago.

I’m thinking — one with a big enough ID opening to allow the insulated wire through, protecting it from the sharp edges
and long enough for the cylinder to fit down in the notch on the board and into the hole on the backing, to lock the board from turning

Received my light today. After all my note taking on what to do, I made a perfect washer to go around the driver spring. Used plastic from a Sparkletts water jug. I did not take the light apart. Popped the adapter in with an Efest 35A cell, tightened the tailcap all the while keeping a close eye on things, and smells :slight_smile: Tailcap light came on. So far so good. Now what. Oh yeah, press the switch. I honestly felt like I had a bomb in my hands. Light came on, modes worked, played with the zoomie as I never had one before. This is a gorgeous light! Love everything about the fit and finish, quality, engraving. Mine appears to be a good one and I’m very grateful! Not sure if I’ll attempt to take it apart. I would like to just to check out the solder joints and the underside of that anodized ring thingy. But why fix it if it ain’t broke.

… must be honest here and say I do not feel confident in this light. If I was a modder, I would. Reading all the issues, I thought I had made a mistake in buying this Cometa. Not any more, really HAPPY with it.

KAPOWIE!

To explain the o-ring. It has an OD of about 27mm, a snug fit in the battery tube, and it is about 1.5-2mm thick. I inserted it in to the battery tube before putting the battery in. It is basically a bumper. The edge of the battery comes in contact with it, and can not touch anything except the spring.

super slo-mo”…. I can relate to that for sure ‘Tom E’. :wink:
All kidding aside, that is some nice looking soldering! And thanks for the pointers on the “flat tips” too. :slight_smile:

Ok, here’s my story and I’m sticking to it. :wink:

Order placed 4-19-2016. Arrived 5-2-2016. Shipped Air Parcel Register.

I ordered 4 COMETA’s, 1 for me 3 for friends and family.
They were packaged well and arrived in one piece with no visible damage to boxes. Each light is packaged in a cardboard box with foam cutout insert. Very good protection.

3 lights arrived with no problems and in working order.
1 light had a bad silicon switch boot, probably ripped in initial installation. About 1 inch of the O-ring in front of the lens was not in it’s groove. The light will light but jumps back and forth to different modes. [ I’ll try to diagnose this tomorrow.]

I completely disassembled each light, took the pill out, took out the driver retaining ring where driver was loose, checked the wires for cuts or abrasions and none were found so I did not unsolder the wires.

I lifted each MCPCB and thermal compound did not seem to be enough so I applied Artic Silver 5 under each MCPCB. I then reassembled the pill by installing the driver retainer ring.

I disassembled the tail cap, that is when I found the compromised Silicon switch boot.

I cleaned everything good making sure to remove the few aluminum chips that were left from the machining process. lubed the appropriate places and reassembled.
Tailcap reassembled also with new switch boot.

I also put Kapton tape over the solder points on the LED board.

Then made plastic washers from a milk jug and covered the bottom of the pill.
Installed battery, 3 lights worked properly, 1 did not…. yet. :wink:

Observations:

Wire: All had 24 AGW wire

MCPCBs: 3 had KRONOS BLF _ 1 had Noctigon

A few things were loose & not tightened completely also.

I did cover the + & - solder points in the front with Kapton tape & from what I saw … why not? It is easy to do.

I also added one of these:

XP - Plastic Butterfly Style Emitter Spacer / Insulator
It makes centering the LED simple and makes no difference on focus that I can tell.

I would recommend that each person take their light apart and check it and clean it up good. Re-lube it and put it back together.

It is easy, just take it slow and don’t force anything when reassembling.

Put the bezel end face down on a magazine or mouse pad when you unscrew it. Leave the lens in the bezel right there. When you reassemble just screw the light right back in the bezel.

Oh yeah, somebody mentioned earlier in a post that the tail switch was real sensitive. All mine were to the extreme.
You can fix that by taking the tailcap apart, turning the silicon boot inside out and cutting about 1mm off the little silicon “plug” that will be sticking out when it is inside out.

It is so sensitive because the switch already had some ‘pre load’ on it from the tight fitting boot. This will solve that.

Someone posted a video somewhere in this thread that showed how to disassemble the COMETA. For those that need it it shows each step.
If you can use a knife & fork… you can do this. :wink:

Just take your time and DO NOT force anything. Then all will be well & you should have a harmonious outcome. :wink:

Oh yeah, I just took this thing outside…. IT IS A BEAST!!! :open_mouth: :slight_smile:

thanks for this post. Didn’t say if u got the 4th light working or not?

XP – Plastic Butterfly Style Emitter Spacer / Insulator
It makes centering the LED simple and makes no difference on focus that I can tell.

any chance someone could show or tell where this spacer goes?

thanks!

Here is the video I mentioned in the post above……

Your welcome. Yep, it just fits around the LED die.

I have not messed with the 4th light any more, probably will tomorrow though. :wink: