Very good!
1 Thank
Thanks guys! The weight bearing frame is made of 2x4 pine and then I used 1x4 premium pine to make it pretty. Stained it with Semi Transparent Minwax and then 3 coats of Semigloss Minwax Polycrylic topcoat. That polycrylic was the hardest part of the whole experience as it likes to bubble up when being brushed on, but I got it to work. I learned how to make the frame by watching video’s from “The King of DIY” https://www.youtube.com/c/Thekingofdiyjoey
My favorite part is the self-soft closing hinges, those are just cool.
I find the trick with polycrylic is to use a premium synthetic brush and apply thin coats well brushed out. That eliminates bubbles for me. I will say I hated the stuff when I first tried it but I persevered and adjusted my technique. I have done small to large projects including ceilings, walls and floors (floors with the floor version). I use four coats minimum.
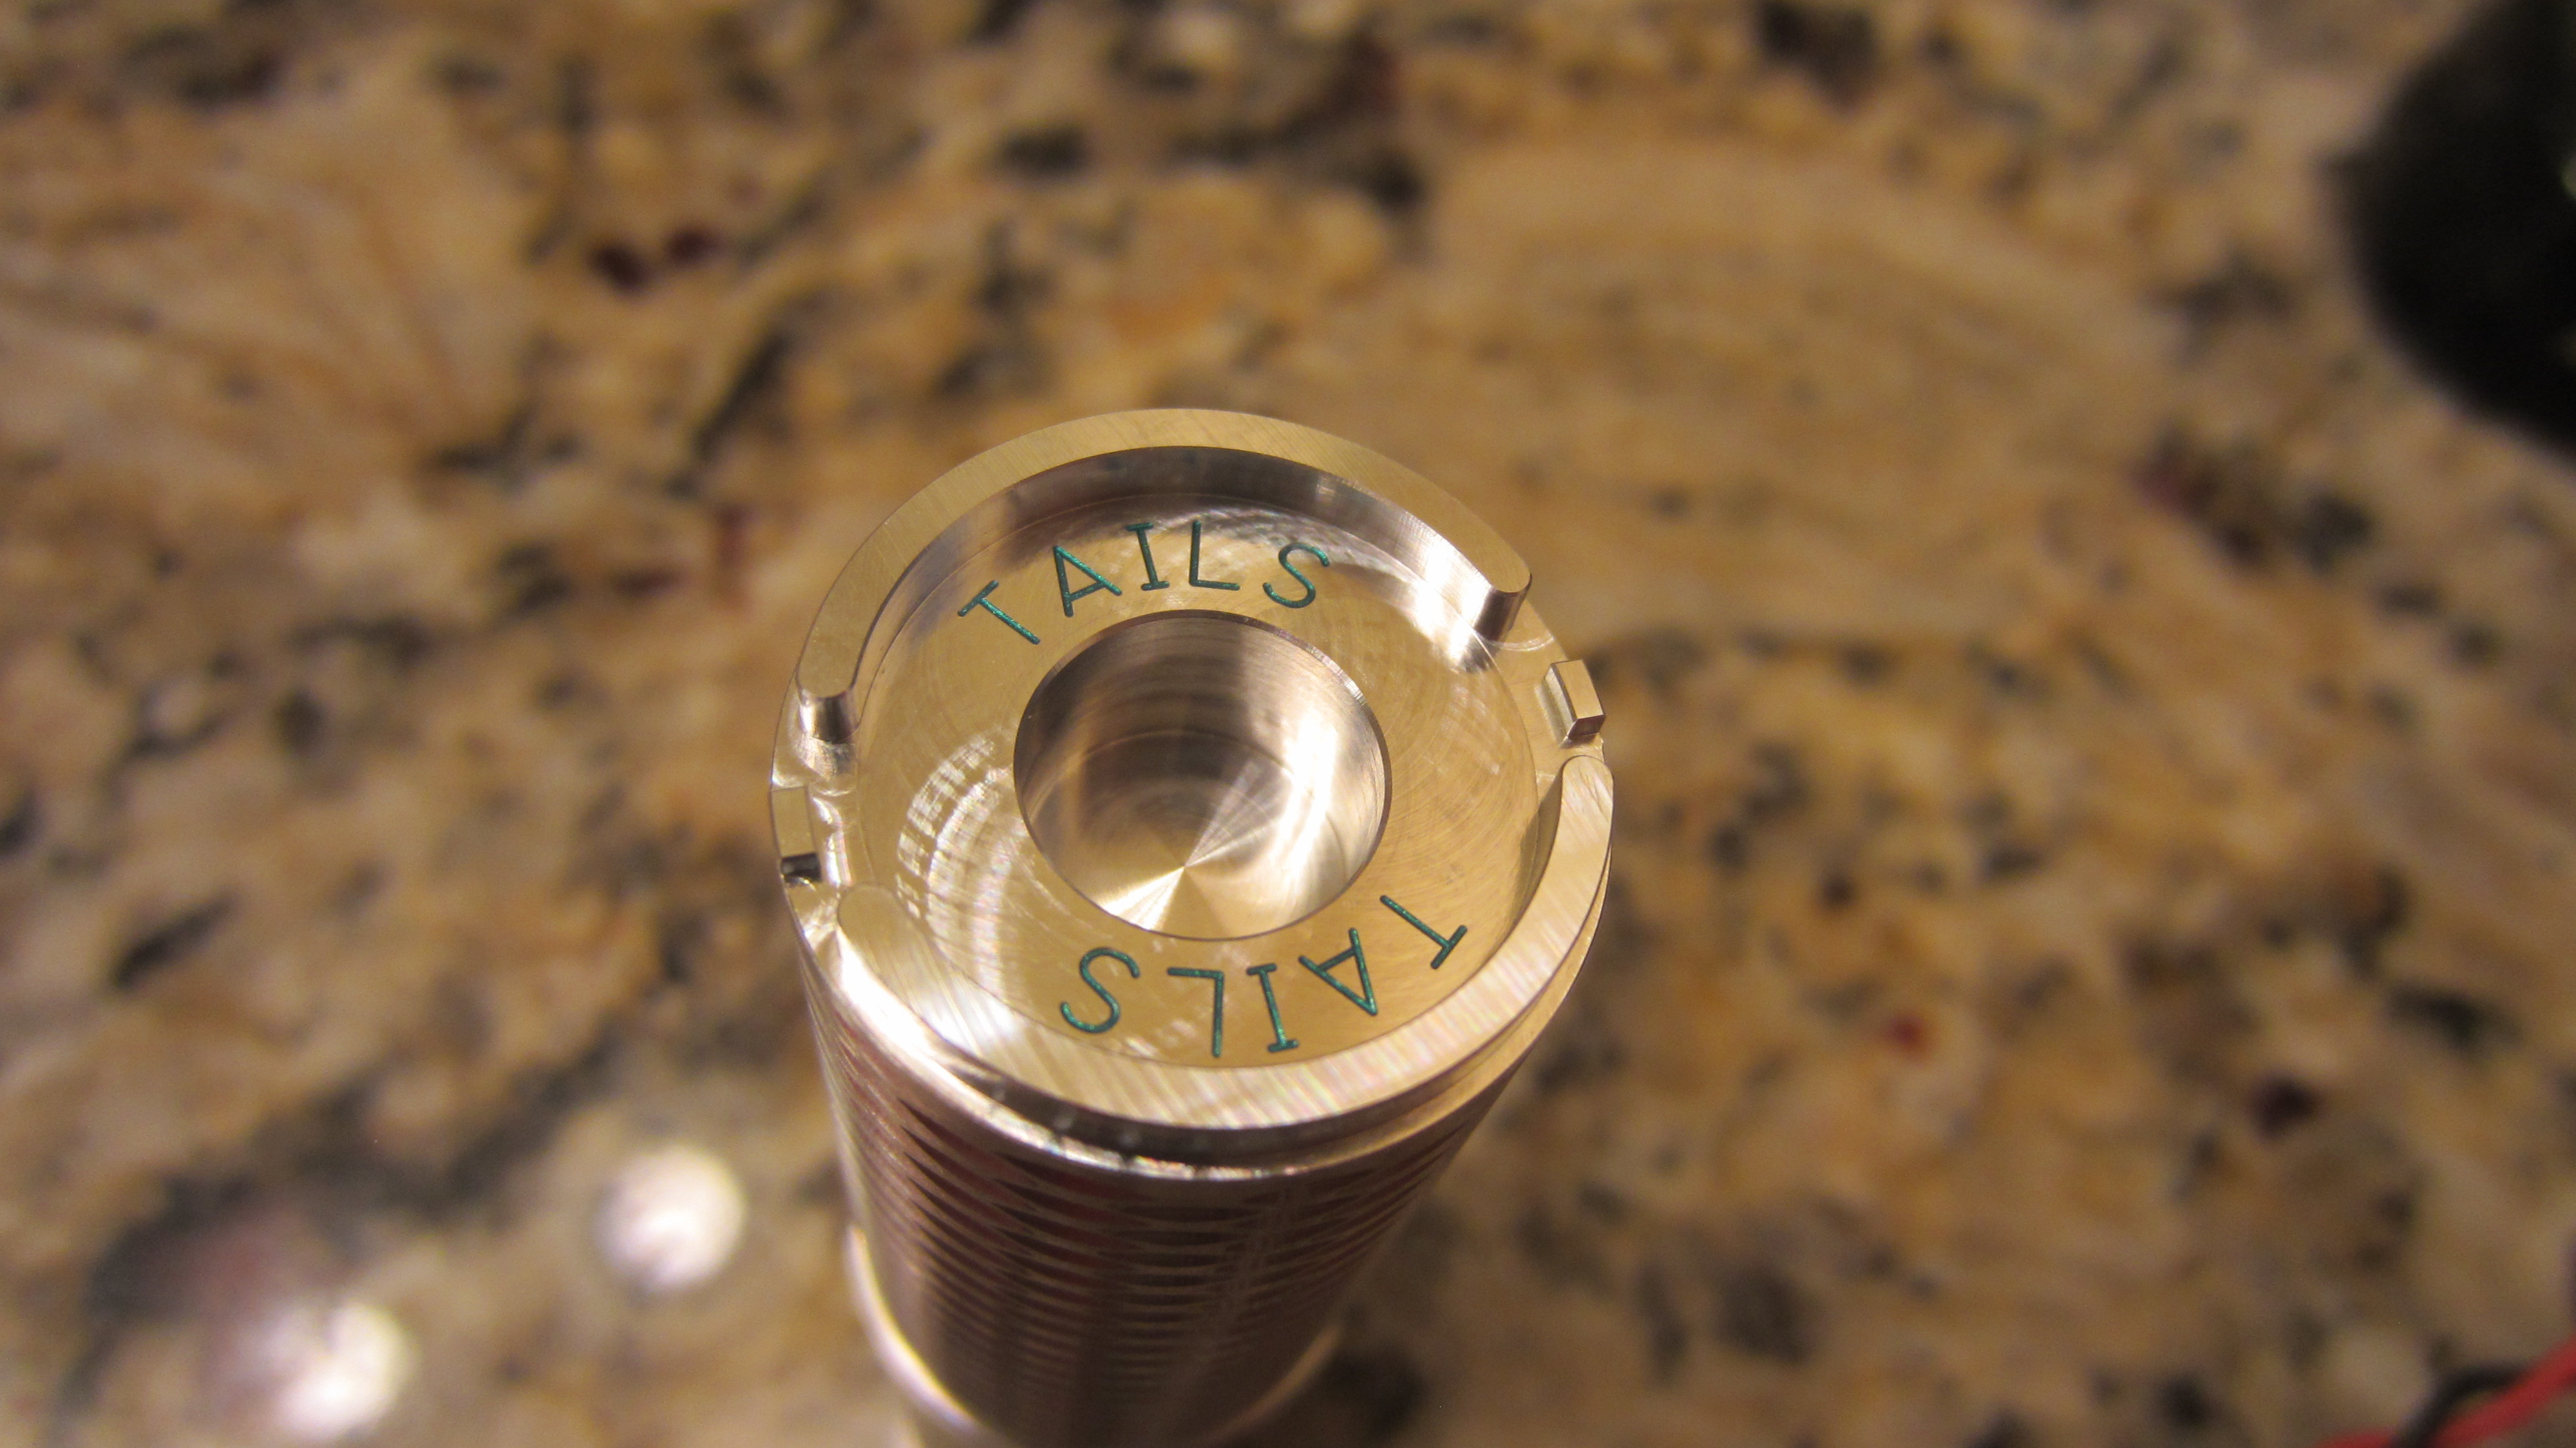
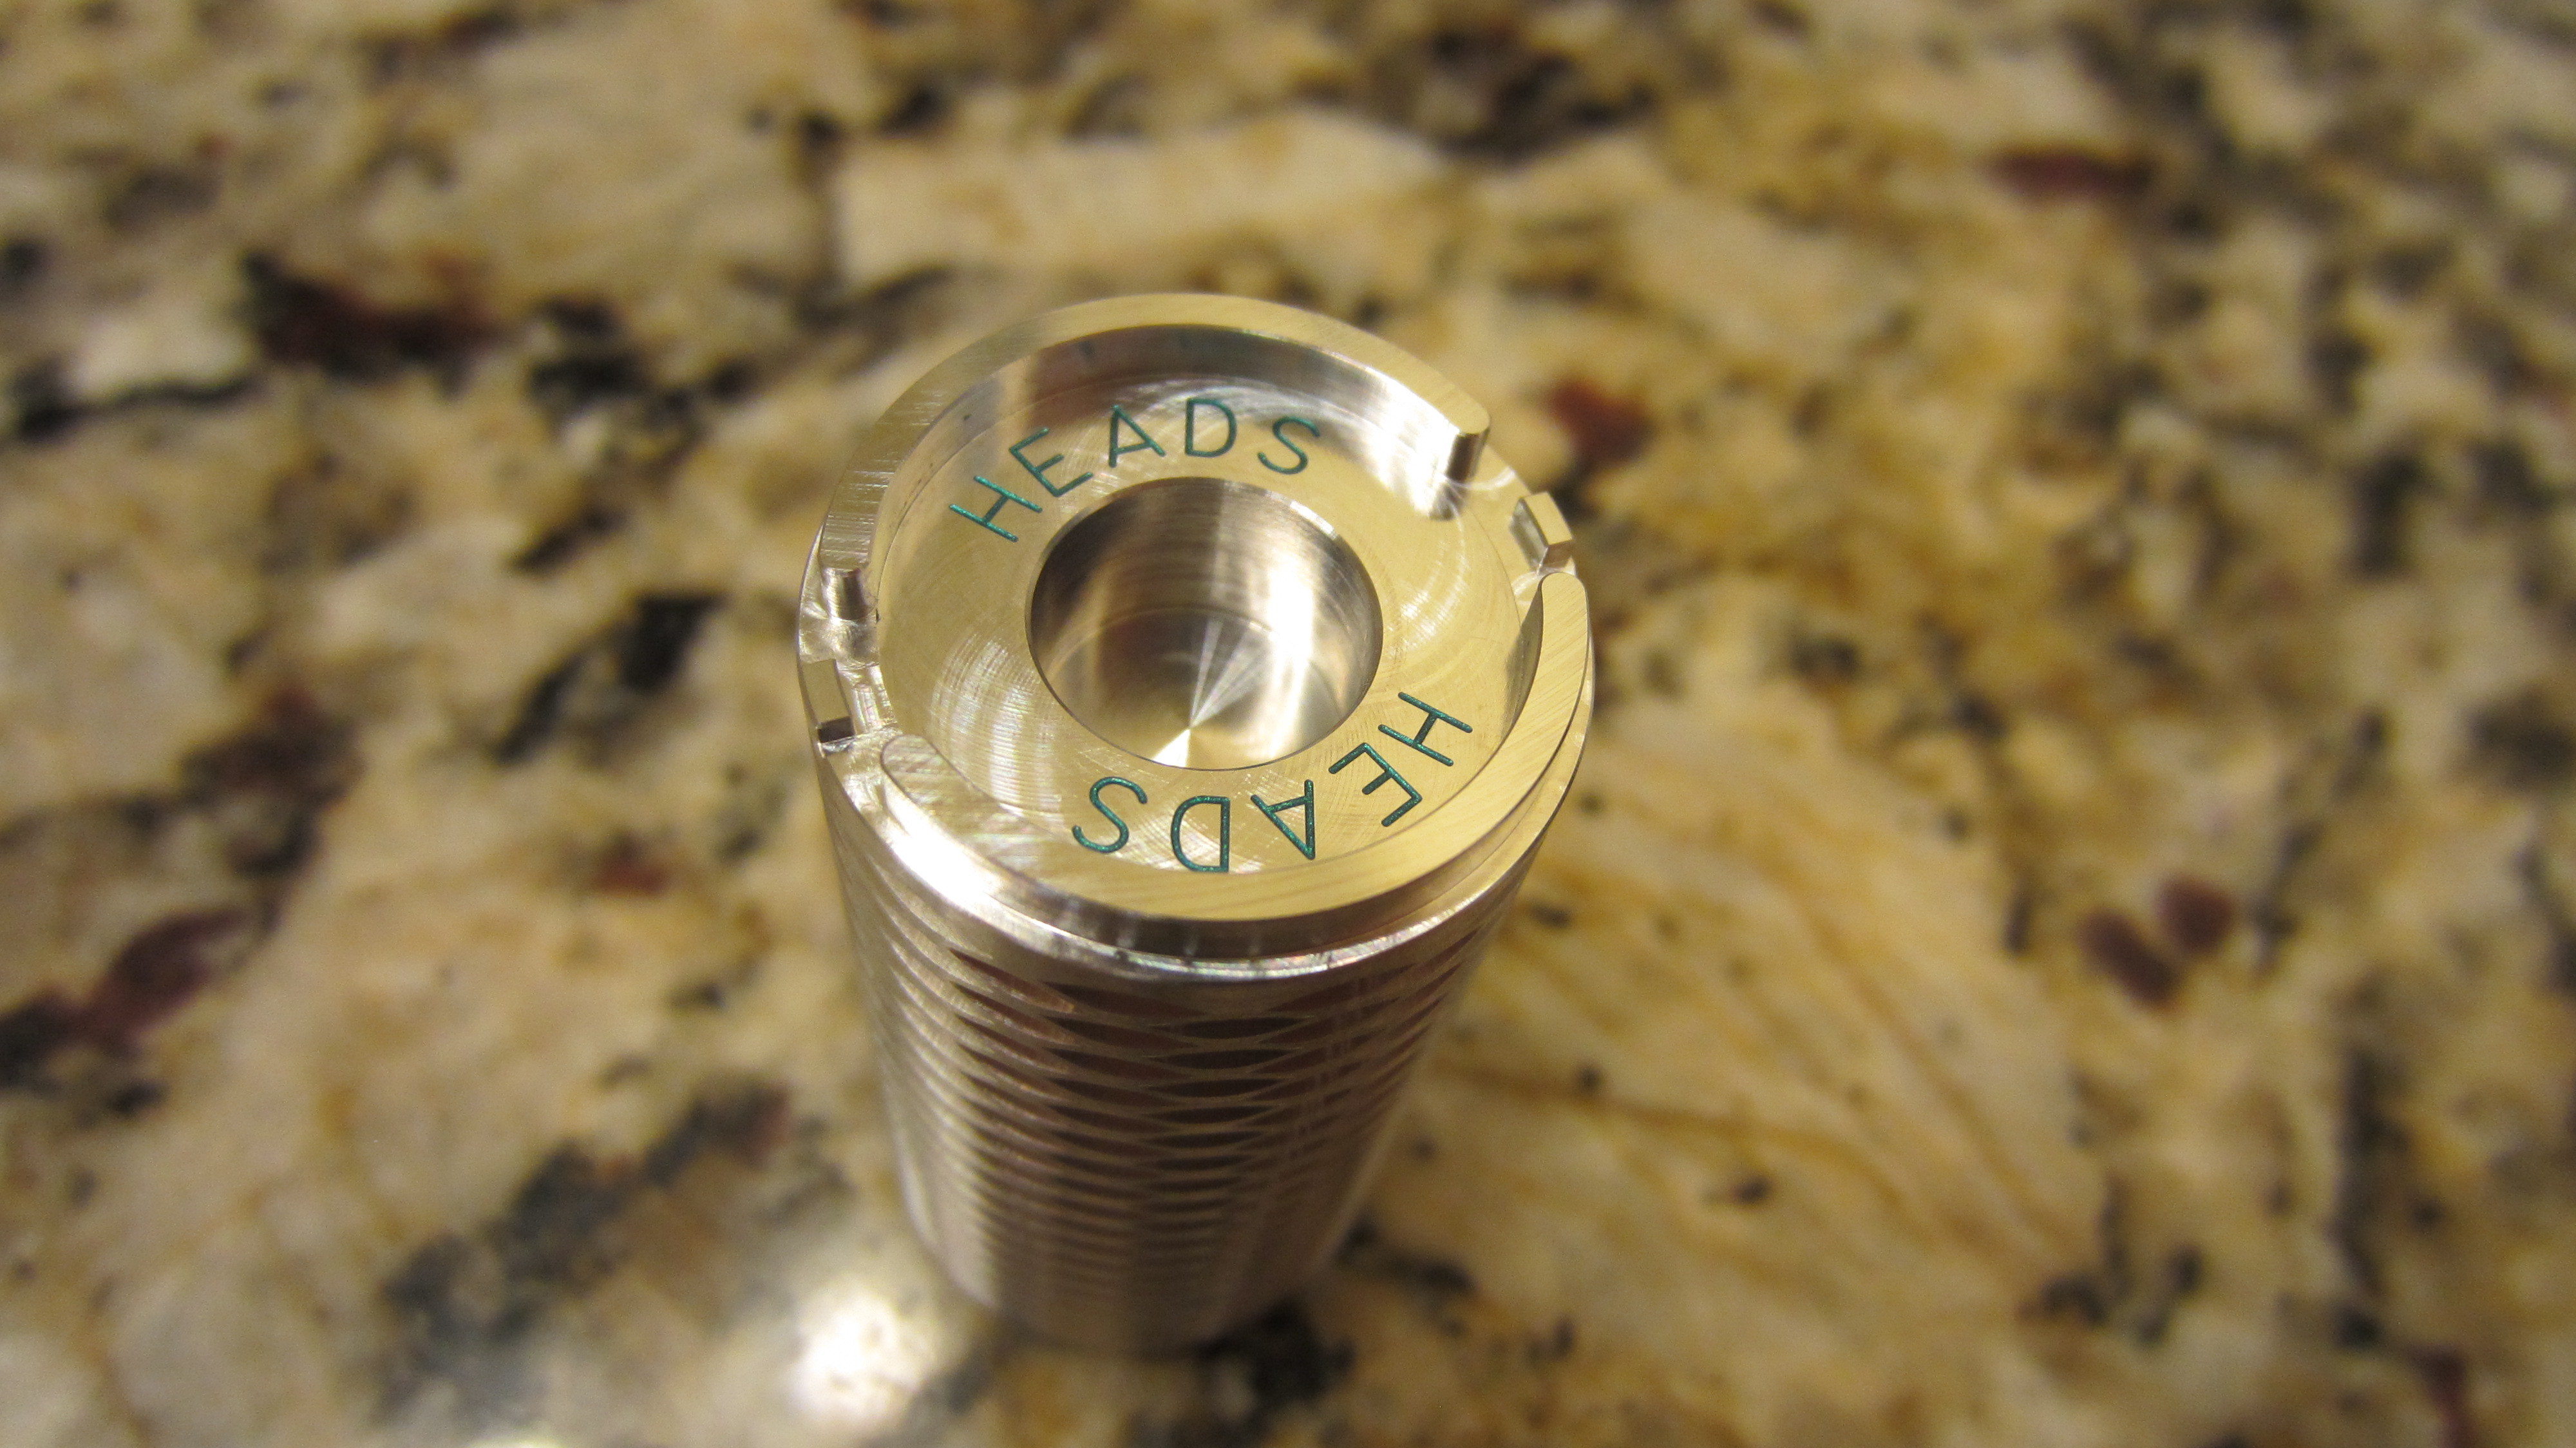
Designed a retaining ring tool for FW3A / FW1A.
I used nail polish for the lettering. Enamel paint is probably the way to go. Enamel paint would be easier than using a two part black epoxy, which is another option. I don’t know much about paints.
4 Thanks
Heads & Tails! Looks like a tough coin to flip, though ![]()
1 Thank
Piece of Art Hoop! Exceptional!
1 Thank
No pictures at this time, but I finally got around to putting Skiff ceramic bearings in a top 5 favorite pocket knife. Sounds simple enough.
I used a carbide 5 flute end mill at 7/16” to counterbore the inner Titanium scales 0.0245” on my Medford Praetorian Genesis T 3V, with the glass breaker rear spacer replaced by a carbon fiber non-protruding version of my make.
Flips open relatively easily and has fall shut action with a slight bit of encouragement. No more super stiff deployment and aching thumb!
The bronze washers are outta there!
Had already done this mod to my FUK flipper and it’s solid and quick! Love it!
Edit: photo added

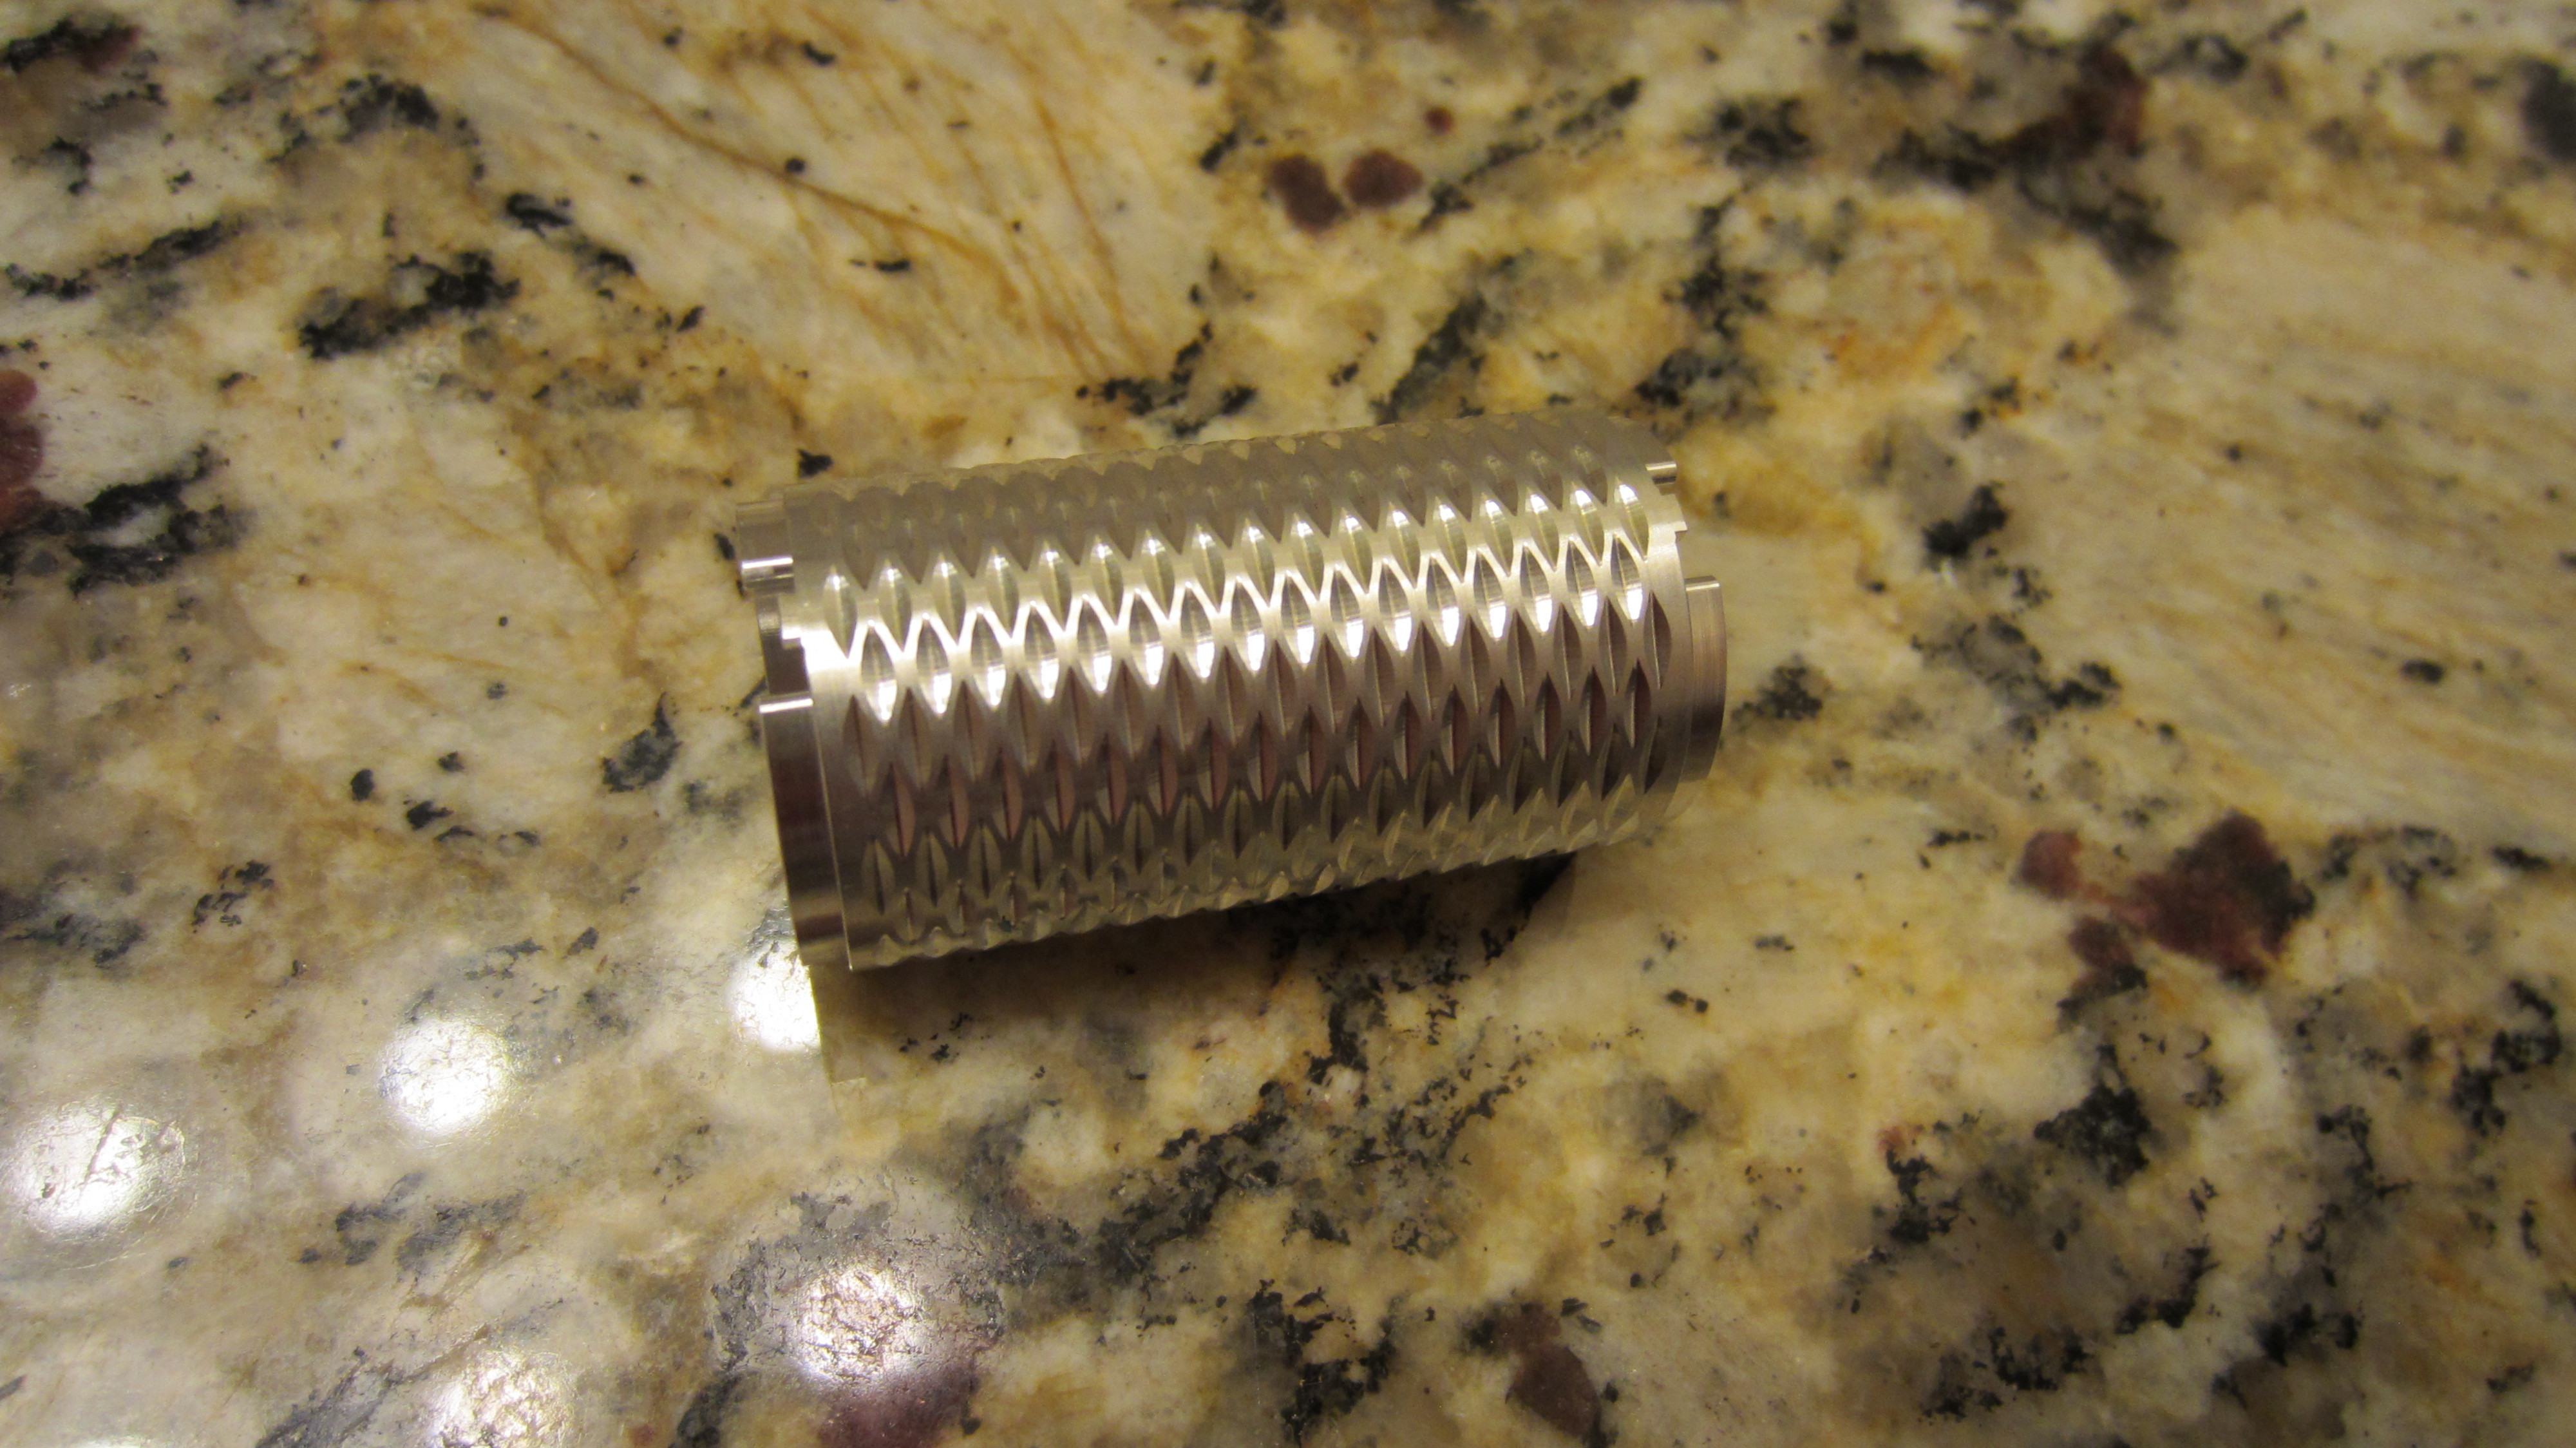
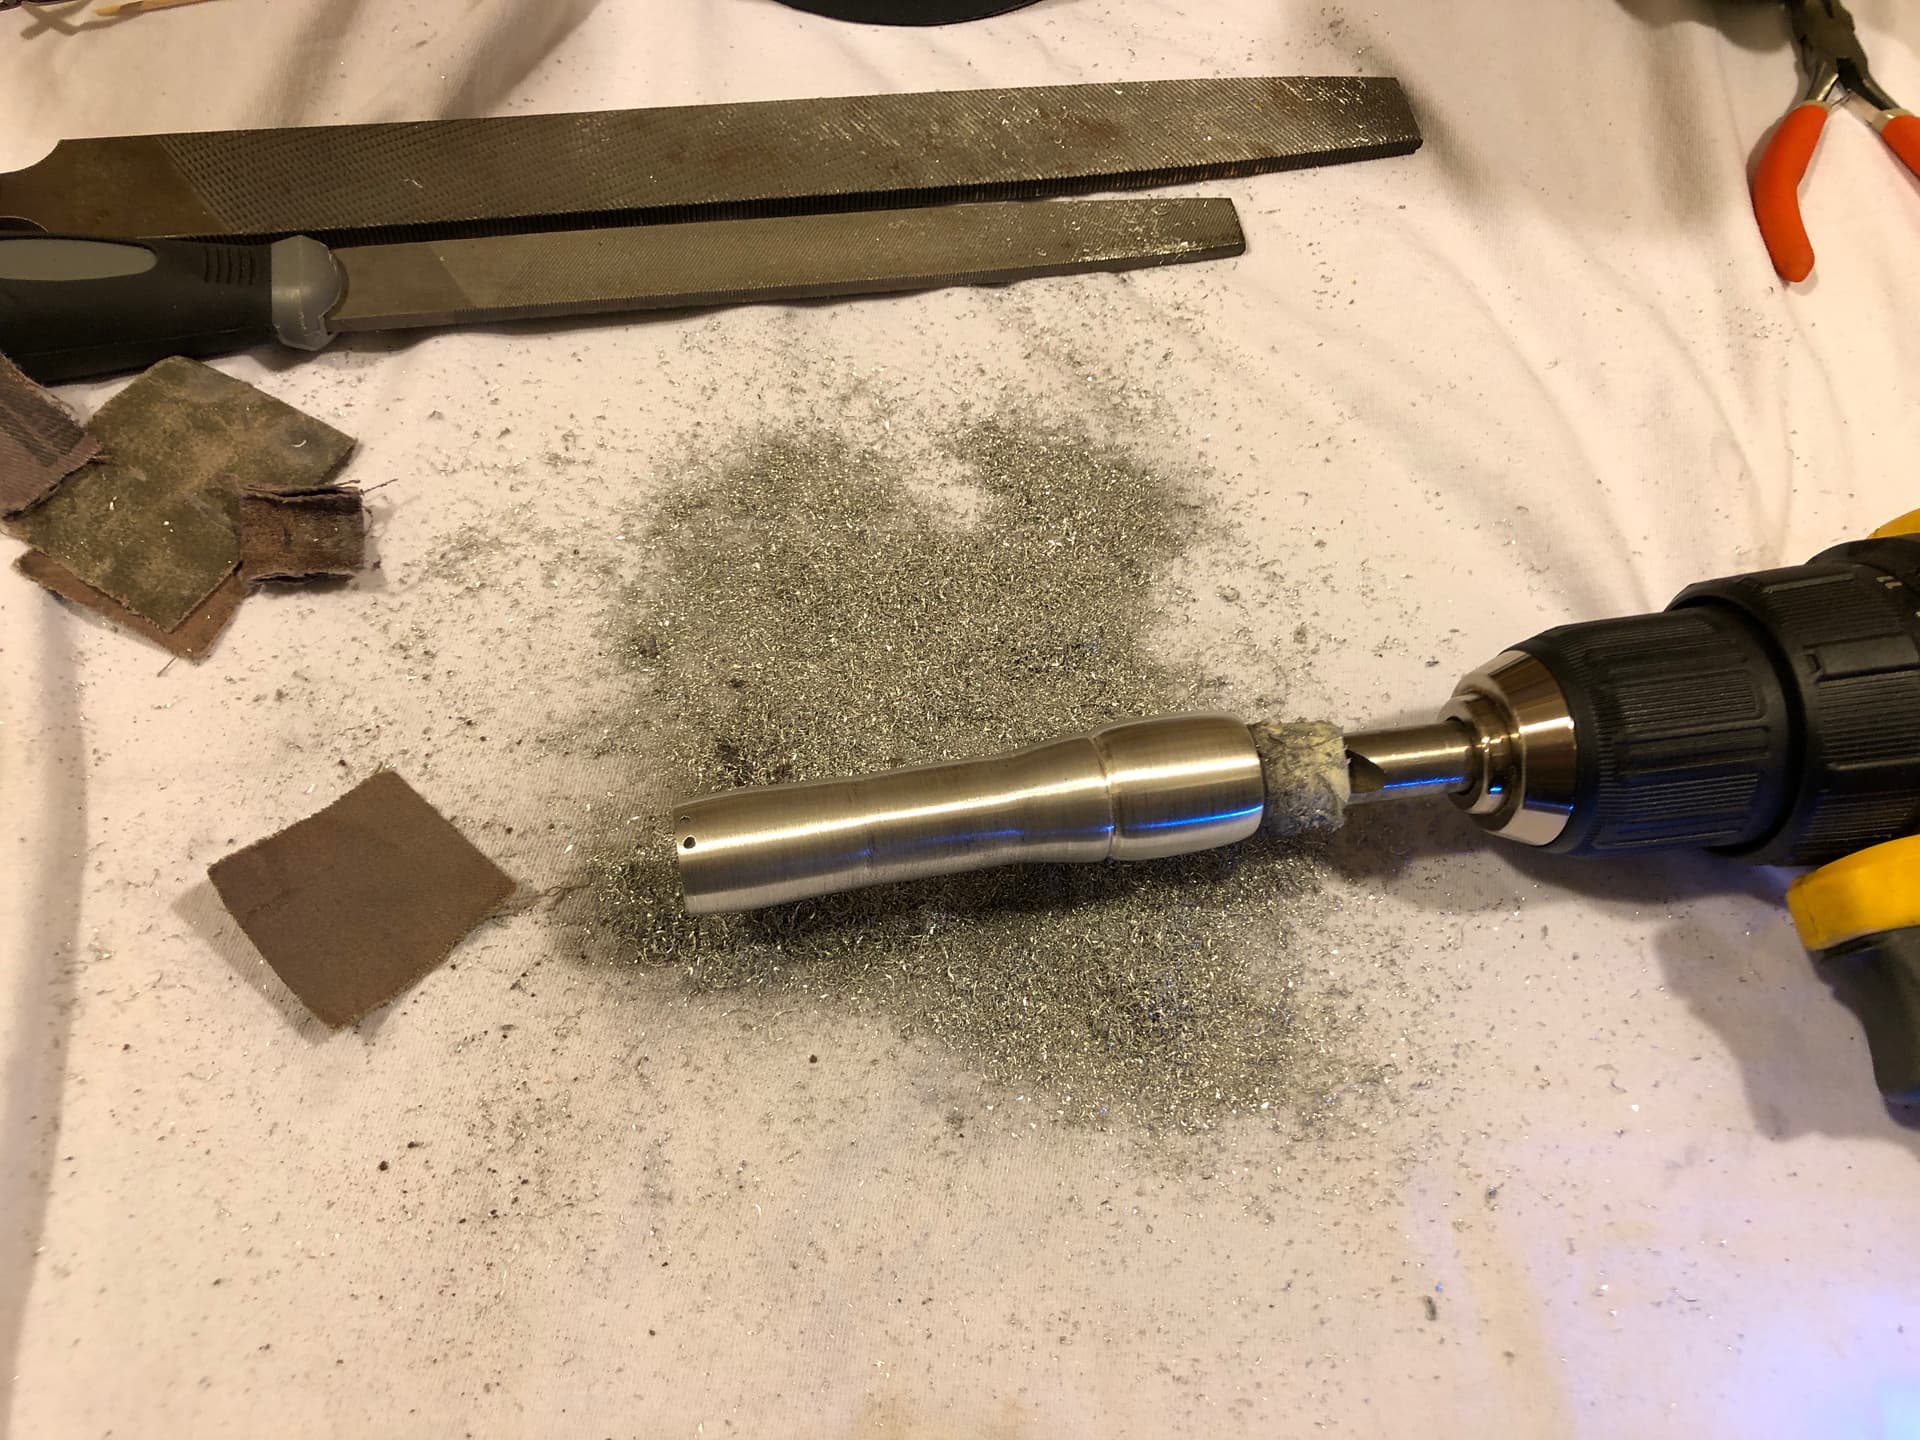
Made another AA/14500 host from a cheapo flashlight.
I think the original flashlight design is ugly, so I take out the internals and put it onto a big drill bit with some tape for a makeshift lathe. I start with a pretty aggressive file, then sandpaper, and end with some rubbing compound. I also add another hole in the tail for the lanyard.
I’ve done this several times in the past and it requires a lot of manual labor to make the new flashlight. At some point I’ll detail the steps involved with making them. I reuse leftover drivers and LEDs from other flashlights so the costs are low.
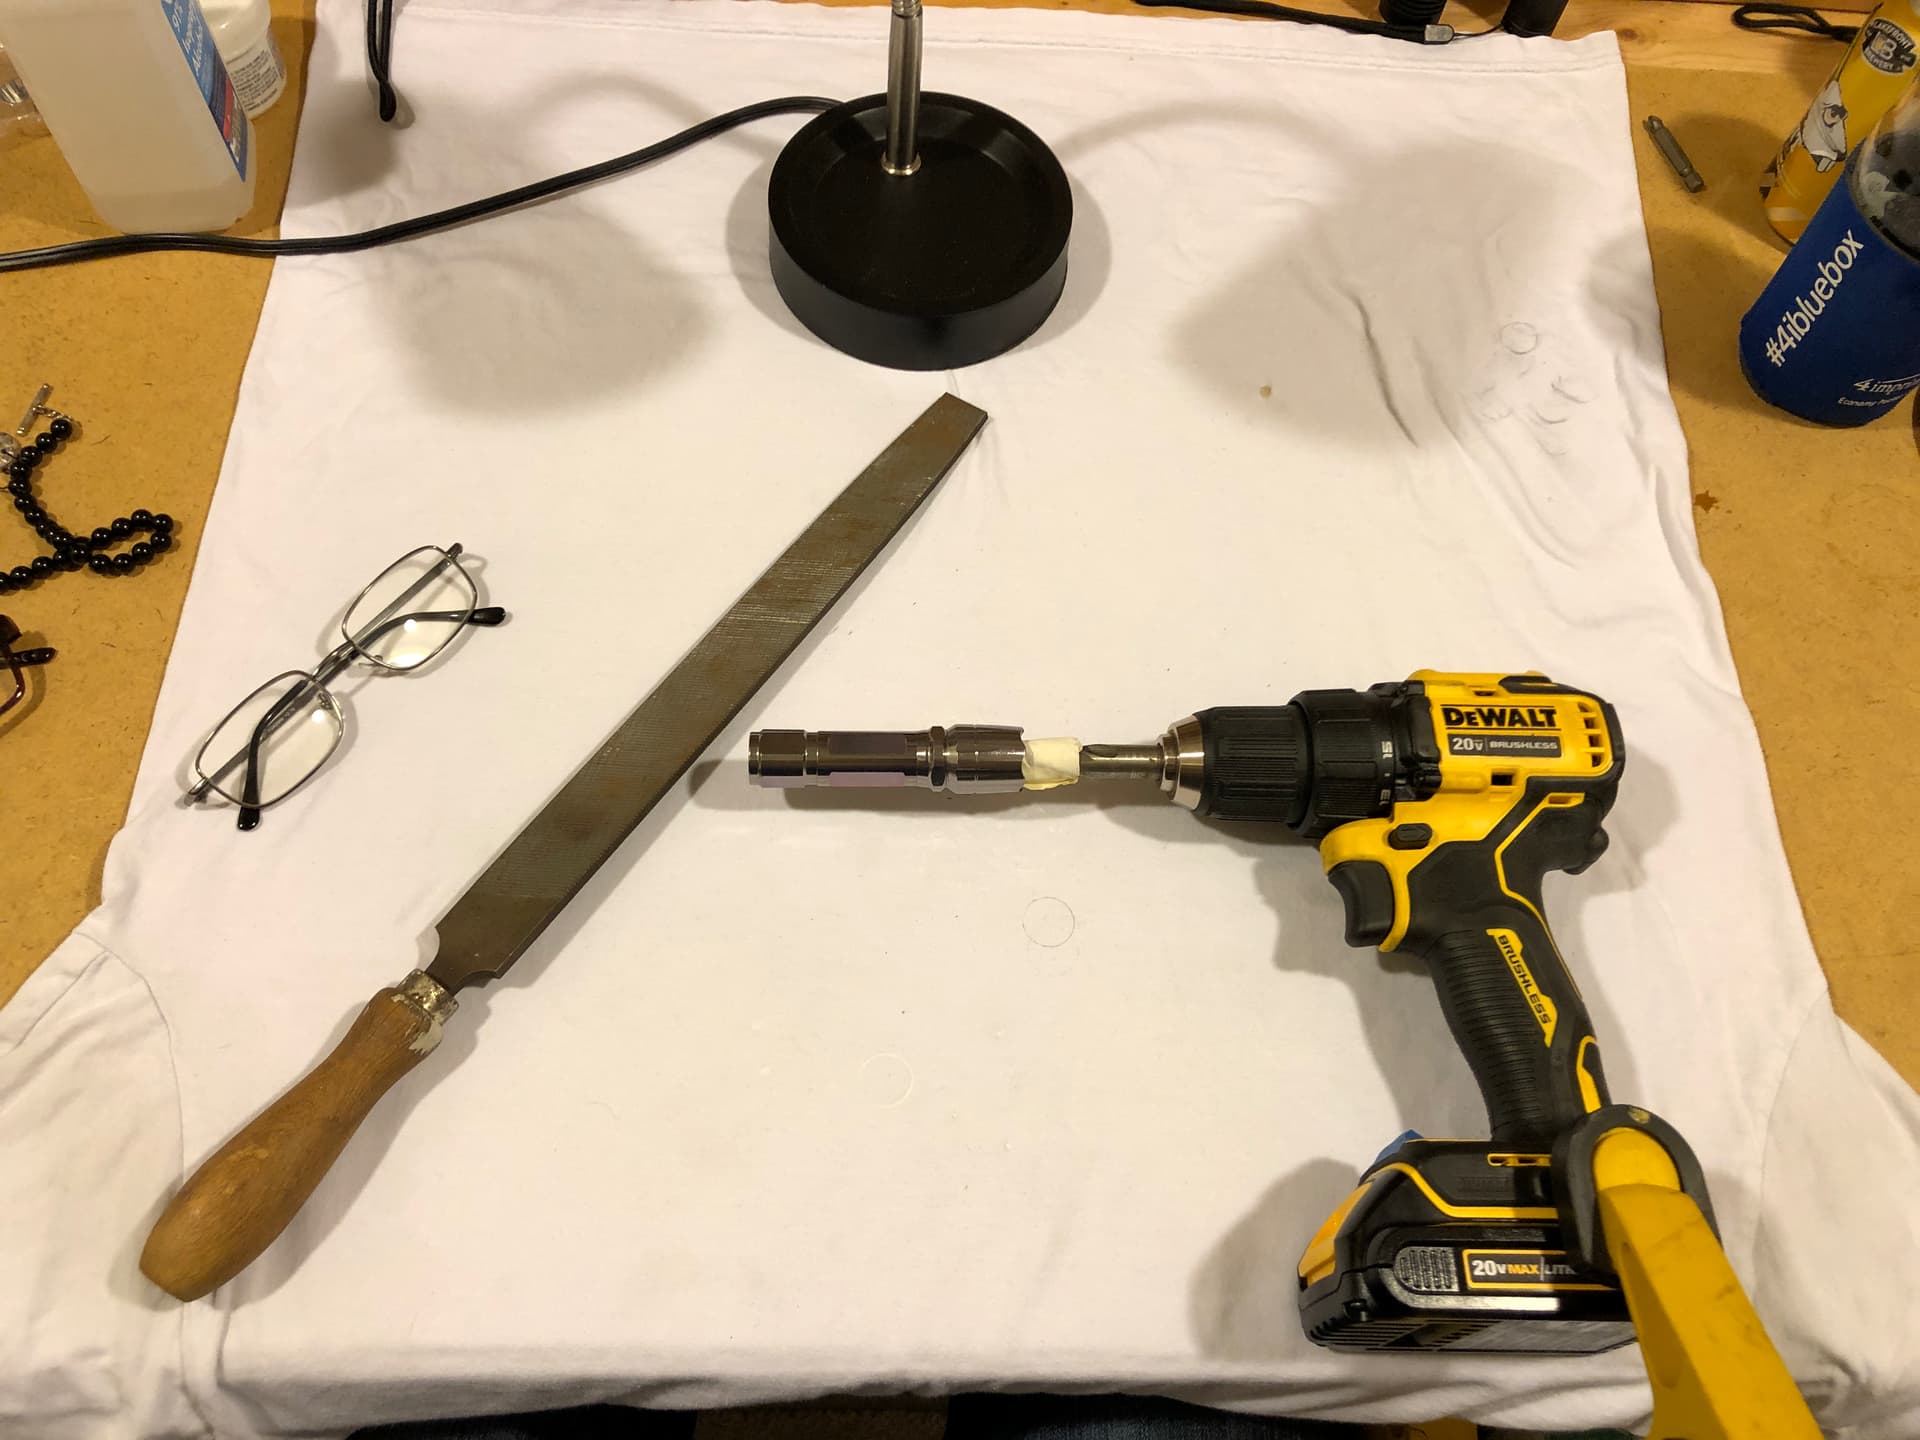
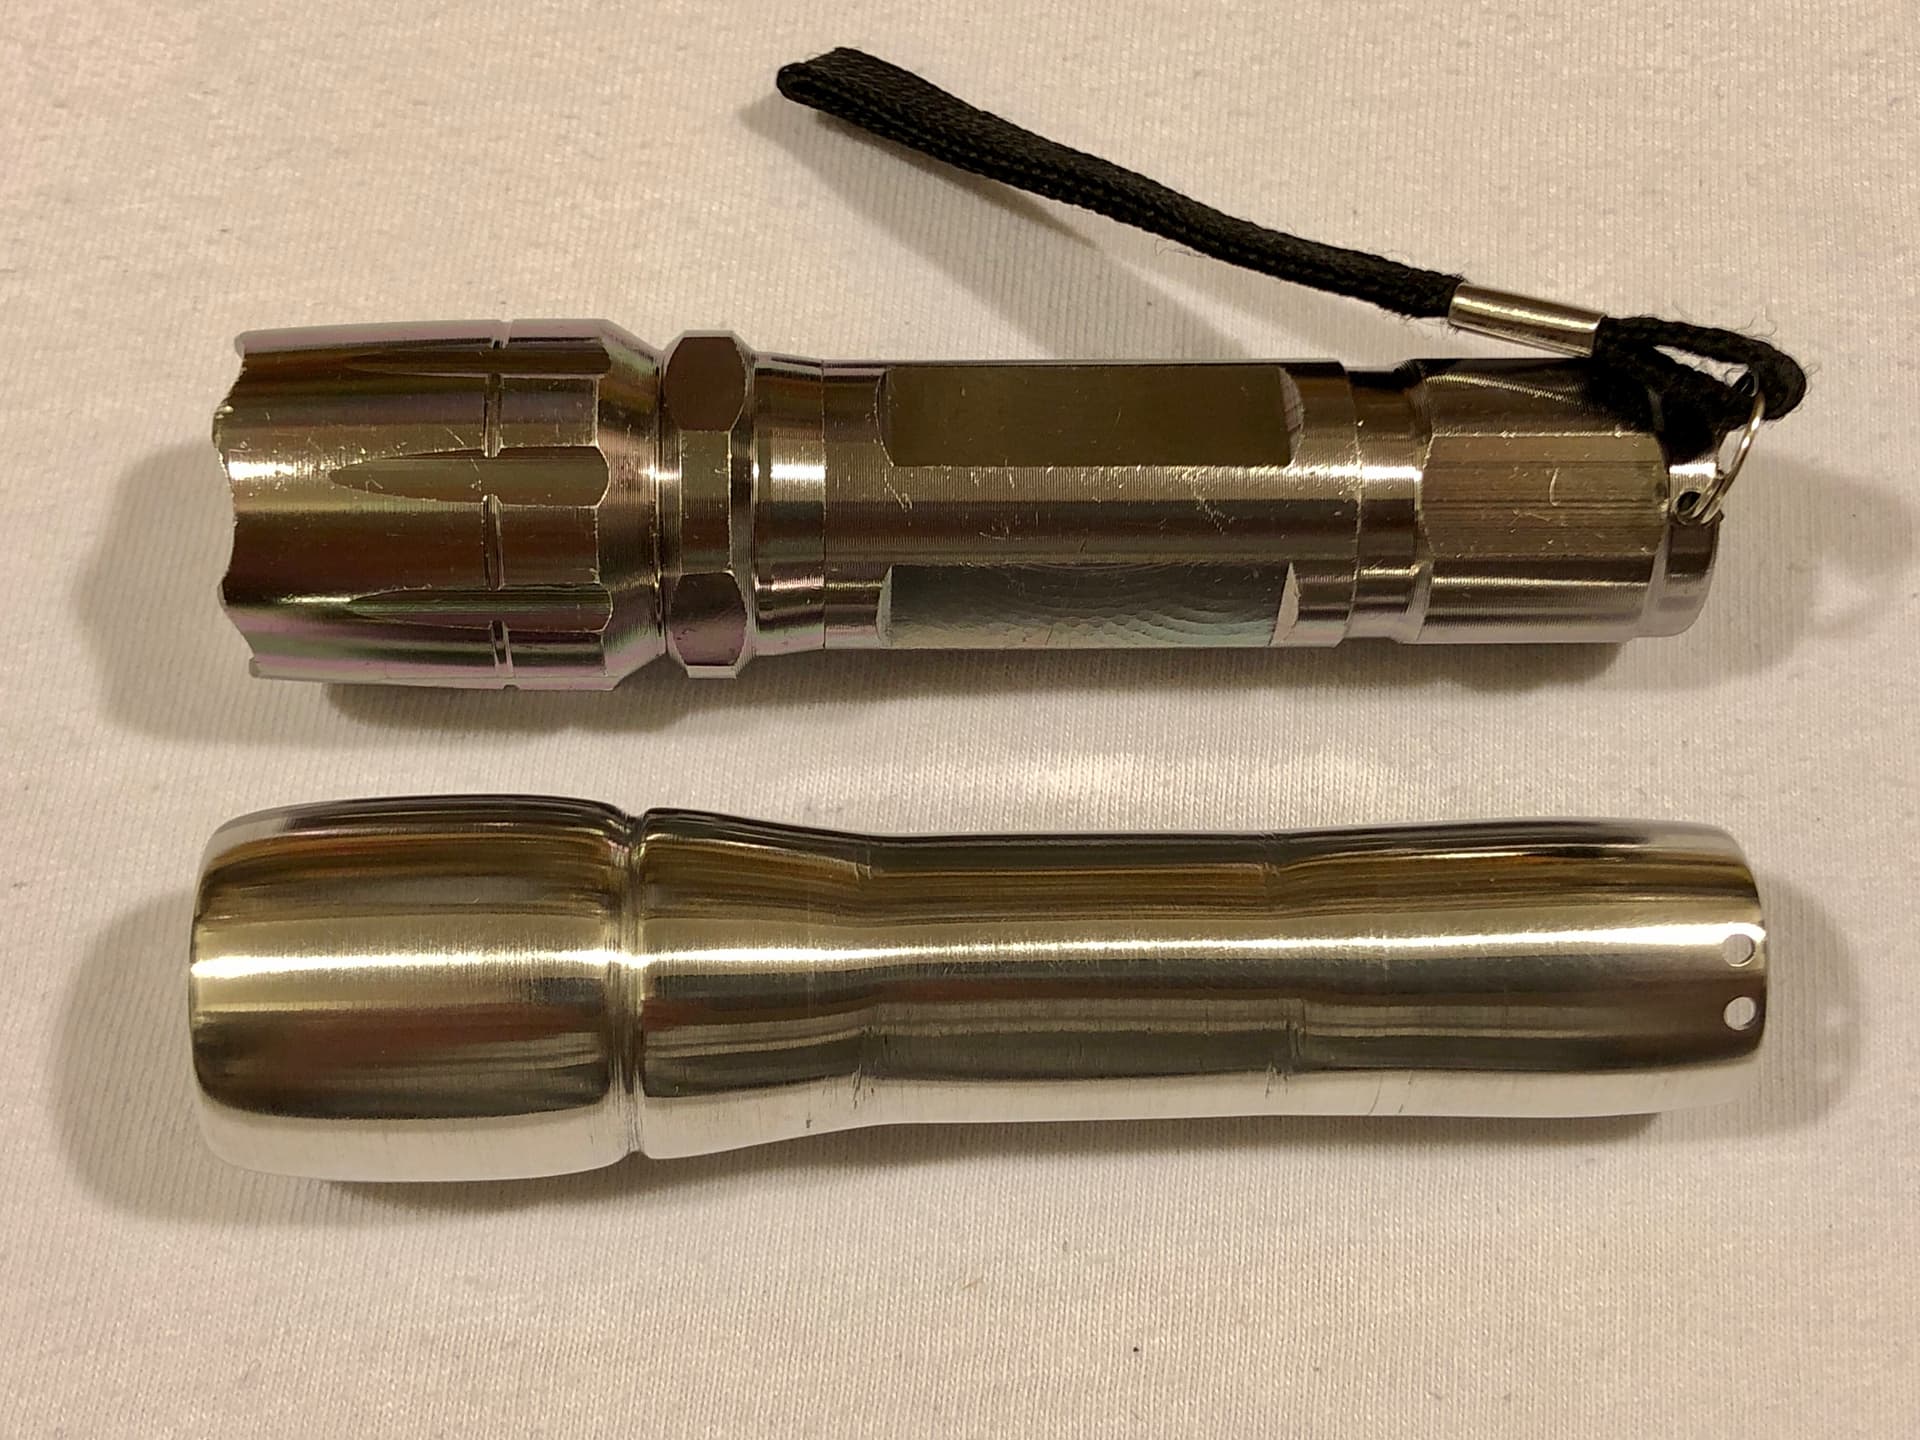
Top is stock and bottom is modified:
5 Thanks
Looks very good. That is a lot of work!
Slick little light after you’ve had your fun with it! ![]()
That came out nice!
Built another X6 today. This one a quad W2 using the D4 board and optics, married to an MTN 22mm FET+1. 20 ga leads and bypass.
On a fresh P28A it shows 4090 lumens at start.
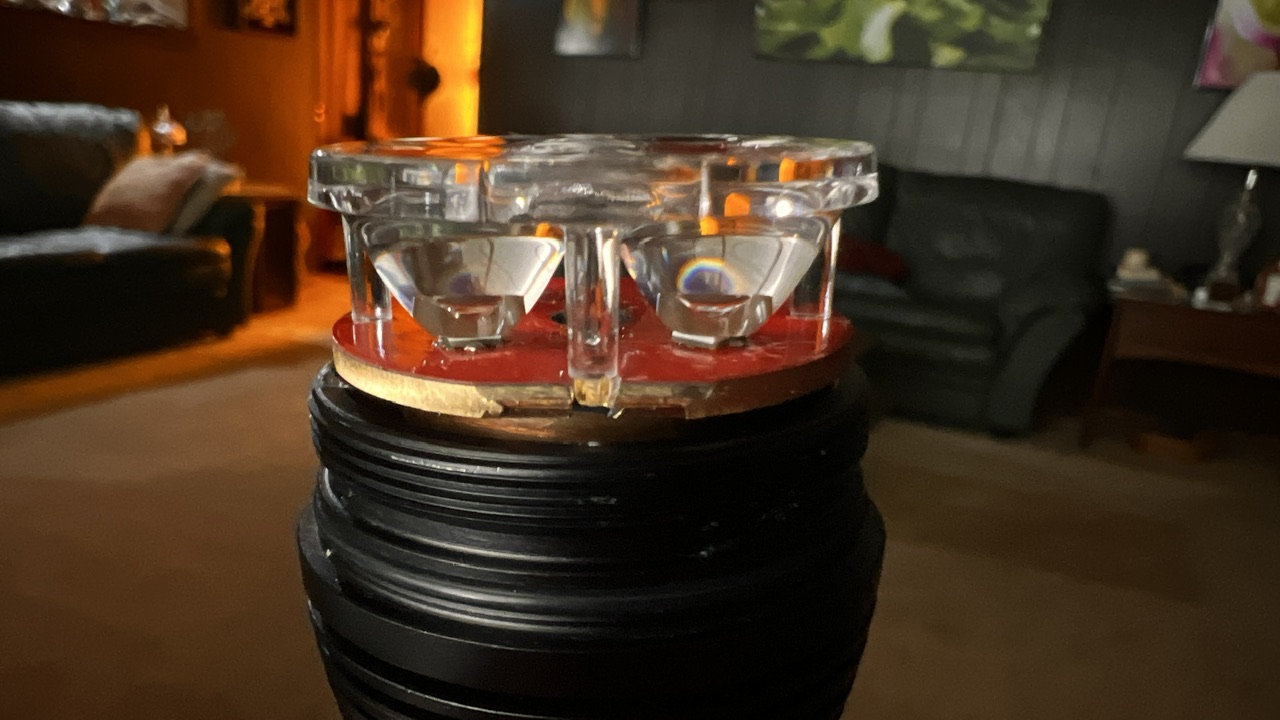
Nice piece of copper fitted to the lights emitter shelf and spaced to place the quad optics in the right position to utilize the oring flipped onto the top side of the glass lens. MG Thermal Epoxy locking the spacer into the light and the large copper MCPCB onto the spacer.
Edit: Photo added…Just shy of 400 yds to the empty house across the road…

2 Thanks
I guess it’s worth mentioning that the copper spacer was originally made for another light, years ago. It was in my kit and I fitted it out and it fit so I repurposed it.
There was a recess cut into the top but this application needed the full height, so I took it out to the lathe and opened the recess to press fit a 20mm round Noctigon MCPCB into it, then machined off the pads and dielectric layer.
Back inside, I filled the wire slots with solder paste and heated it til if flowed and joined the Noctigon to the spacer. The Noctigon itself had been previously used so this whole endeavor made use of secondary bits from the parts bag.
Cool!
Which MG epoxy? The 8329TCM or 8329TFF or ???
I am soon going to need some new thermal epoxy…
So freaking close. Still smokes on high, Low and medium are fine. This was a swap of a previous swap, when the emitter smokes itself to death. Maybe a resistor?
Don, I found the 8329TCM checked my boxes best. It’s pretty thick, takes forever to set up unless you can heat it up good.
My favorite… Arctic Alumina Thermal Epoxy, is no longer being sold to mere mortals. ![]()
I want to try this but at $55 for the 10g each two part kit, it’s pricey!
G6 Epoxy 1K Silver-Graphene Electrically Conductive Epoxy (10g, Jar, G6E-9KMSG) https://a.co/d/gp8pzLw
Yep. That was my fave too. I have been working my way through my last pair of tubes. I think I bought the last ones Richard had. I found that when refrigerated at 34 F its life was extended for years. But I have only a gram or so left. I’ve been eying the 8329TCM as the best likely replacement.
Low temp solder like BiSnAG is a good way to mount copper MCPCBs to copper or brass heatsinks and spacers but I rarely see it used around here.
I’ve been using MG 8329TCS, which works, but I’m less than pleased with the fact I have to use a heat gun to get it to cure. I do miss my Arctic Silver epoxy from my PC Overclocking days.
I’ve used Arctic Alumina as potting compound. And I loved how fast it cured! Many times I held parts together for three minutes and then continued my build.
Also found that my heat gun would allow me to separate parts glued together with it. Arctic Silver? Forget about undoing it!
1 Thank