How’s the beam in a reflector? I worry that the separated dies will cause a dark hole in the middle of the hotspot.
I have the same config but SFT70, and even that has a very slight darkness with OP reflector.
How’s the beam in a reflector? I worry that the separated dies will cause a dark hole in the middle of the hotspot.
I have the same config but SFT70, and even that has a very slight darkness with OP reflector.
To not scratch i used a cotton rag and some needle nose vise grips. Needle nose pliers would work also.
Its was a bit risky. Next time i will use some thin rubber fron a cut up old bike tube on the jaws, or bump strip or something. Ome slip, i would have damaged it. Rubber would prevent that risk.
The NGT emitters are directly from hank at emisar: https://intl-outdoor.com/led/noctigon.html
Ive tried to take a beamshot cor you. About 4ft from the ceiling in 35% mode locked at 5000k. Its really bad. But my phone is the cheapest Samsung money can buy, but it is a good beam. That rosy halo isnt actually there. Thats my camera. I havent tried smooth reflector. There is the faintest possible trace of a donut on a plain white surface up close at lowest modes. The hotspot is clean and fades nice and usefully. Ther is some pics of two s21a a few posts up with same emitters and reflector.
I can post some more terribe shots comparing it with a da1k and other stuff outside once its dark. with stock tir and same emitter if you’reinterested. Im very happy with this vor a pocket light. Its not an sft40. But its a megaton more throwy than a 519a.
Ive simce put a 25 deg bead in the s21a. Smooths everything out. But for this s2+ shorty, i wanted a bit more throw. I will play with some tir at some point. But its great as it is.
I dont have a multi meter unfortunately. Its behaving strange with all but the blue one. It also works fine with all other s21a tails regardless of switch colour. So i suspect there is an issue with either the brass ring, or the end cap.
Do your other s21a copies have the same driver? The lighted switch issue is driver dependent, and even among blue switches, different drivers produce different brightness and display different behaviors.
Another issue I sometimes encounter is different batches of tailcap retaining rings and different batches of switch PCBs have different diameters, sometimes more than 1mm. Sometimes the retaining ring underside inner diameter is too small and the PCB diameter is too large, and the two parts refuse to go together and cause poor contact. To check this, just hold them together to see if the two parts fit outside the tailcap.
They all 17mm 5amp boost driver. Except one. An lhp531 with 10amp buck. The tail doesnt work on the one either.
Several of the old switches i have were too tight in the retaining ring. I filed a couple down to fit. But they still wont work.
So i suspect its actually the retaining ring thats a fault. I might make aluminium foil spacer/washer. See if that cures it.
Swapped the 10A buck driver in my L21A for a 12A fet driver and it makes quite a difference running on an EVE 50PL.
I’ve tried NTG50 emitters in M1, S21G and S3 all with OP reflectors, and they all had a dark spot. I’ve taken to only using them TIRs.
It still puzzles me how Hank manages to not have the dark spot in his D1/D1K.
Is this at all levels, especially at low while white wall hunting?
It’s more noticeable on low levels, and really isn’t that bad. Outside I’m sure I wouldn’t really notice it. I also didn’t play around with gasket heights, which could definitely make a difference.
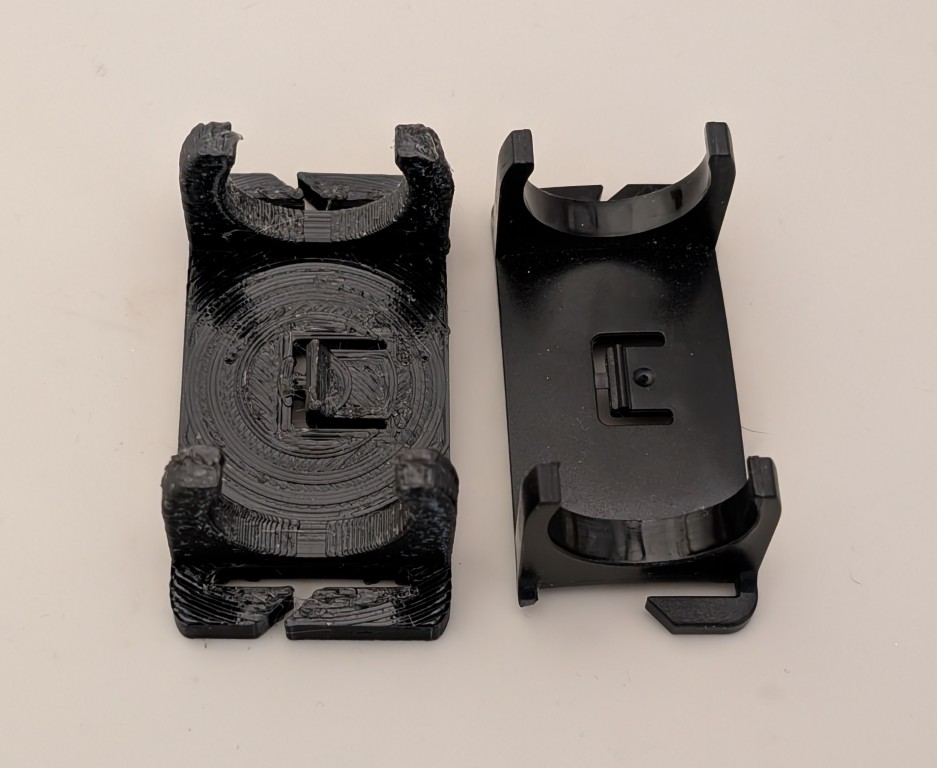
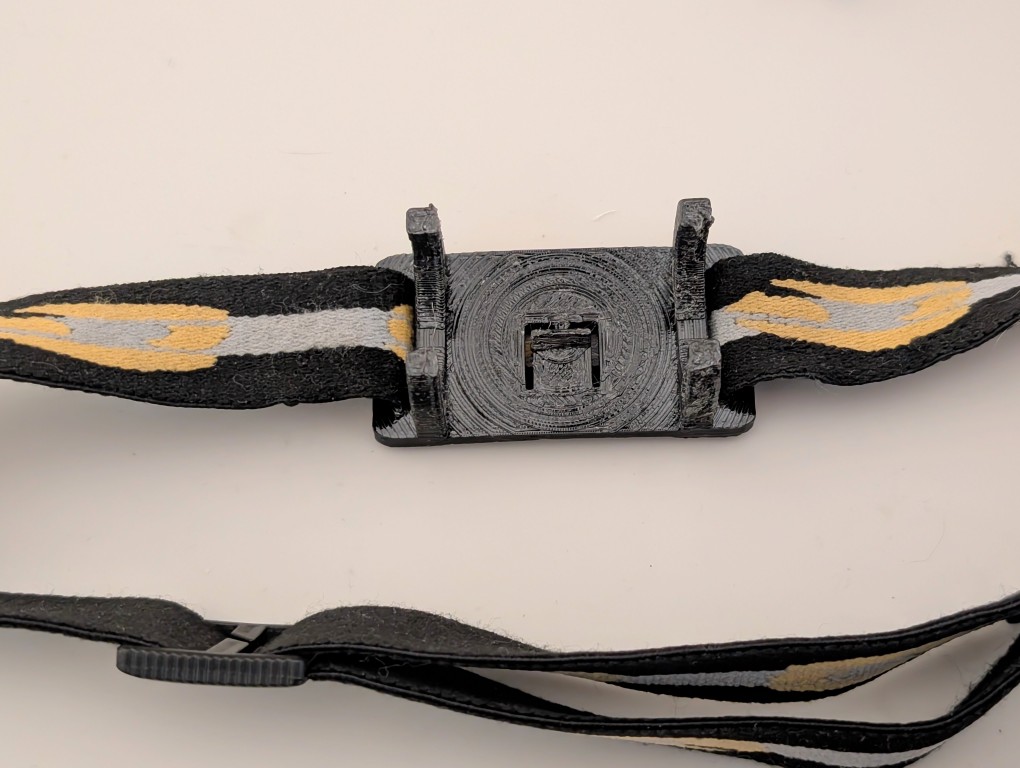
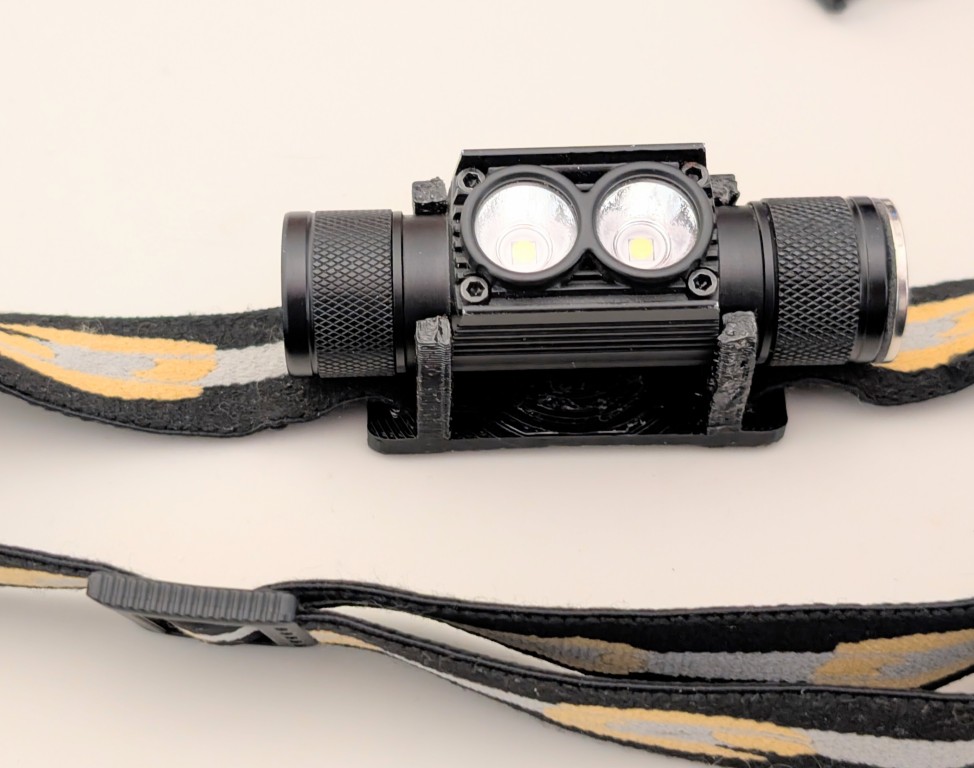
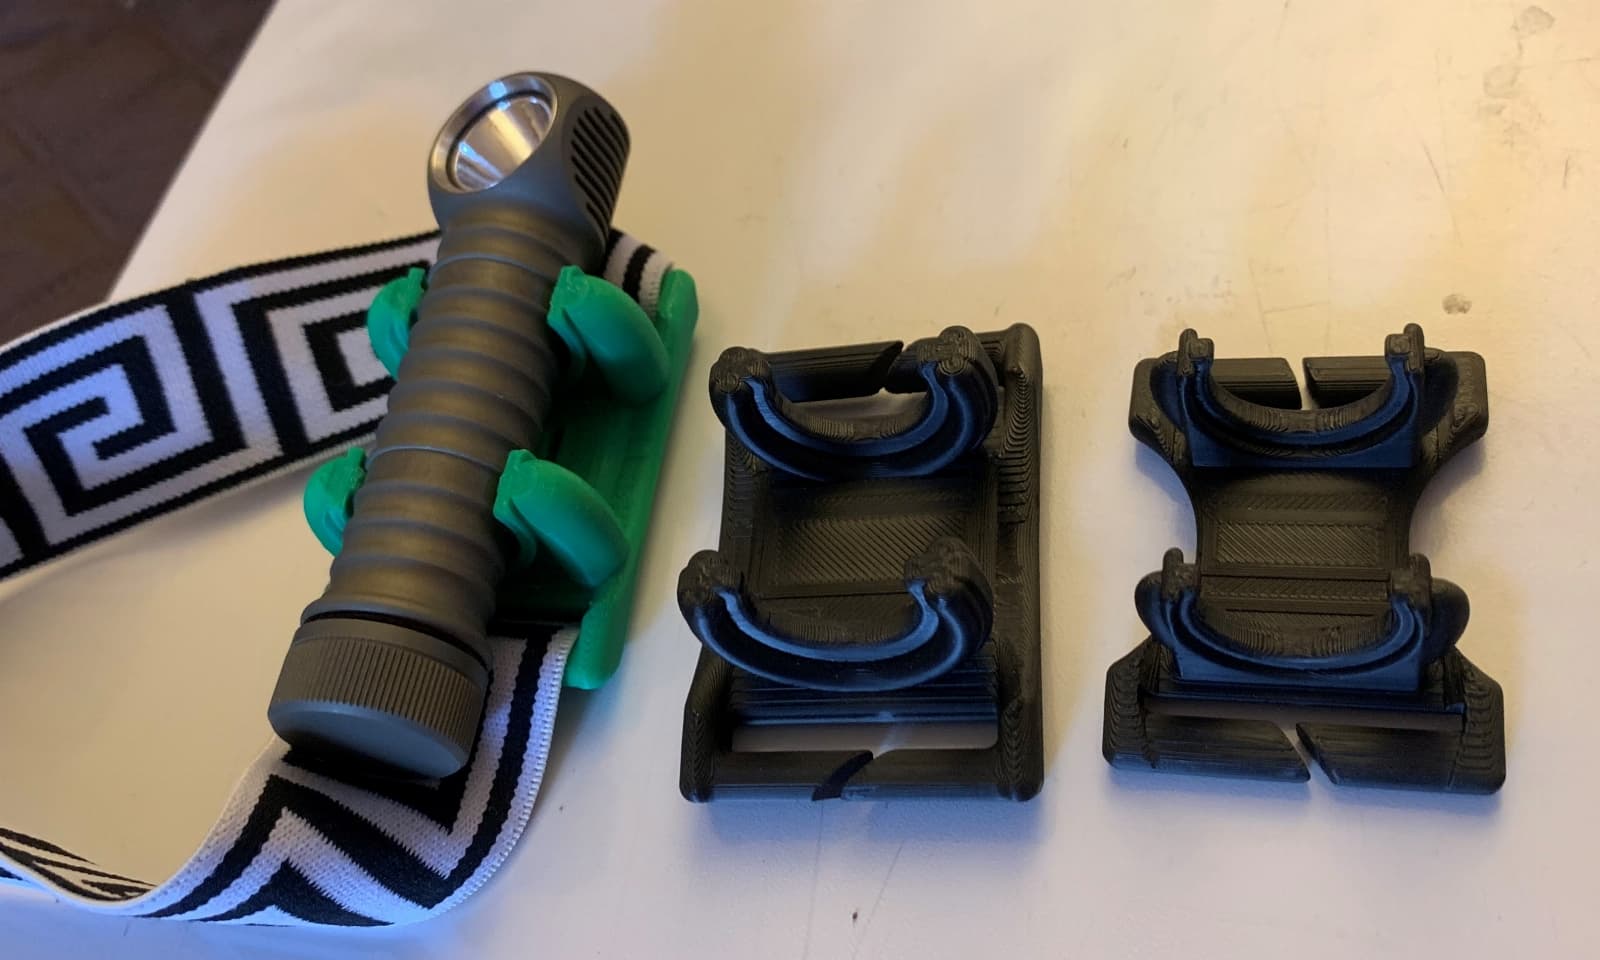
My “workhorse” headlamp (a Sofirn H25L - with dual high CRI LH351D LEDs) had the plastic clip break off that secures the elastic head strap to the headlamp mount.
I decide to make an indestructible replacement by 3D printing one out of some 72D TPU (from CC3D.) I’m not too good with any of the decent 3D modelling programs so did it all in Tinkercad. Due to the TPU having some flex I made a lot of the areas thicker to compensate.
The print isn’t the cleanest, as TPU can be a pain to calibrate perfectly for printing smaller sections. But the new mount works perfectly and functions the same as the original plastic version- including still having the detent to secure the up/ down angle adjustment.
There’s no way this one will be breaking!
Did my first Noctigon mod. My KR4 hybrid mule had NTG35 1800k emitters that I just couldn’t “warm” up to so swapped em out for 4200k. Much better. Hardest part was threading all the wires through the center of the mcbcp.
Shrink Tube is helpful with this task.
I thought of that actually but didn’t have the correct size! Boooo
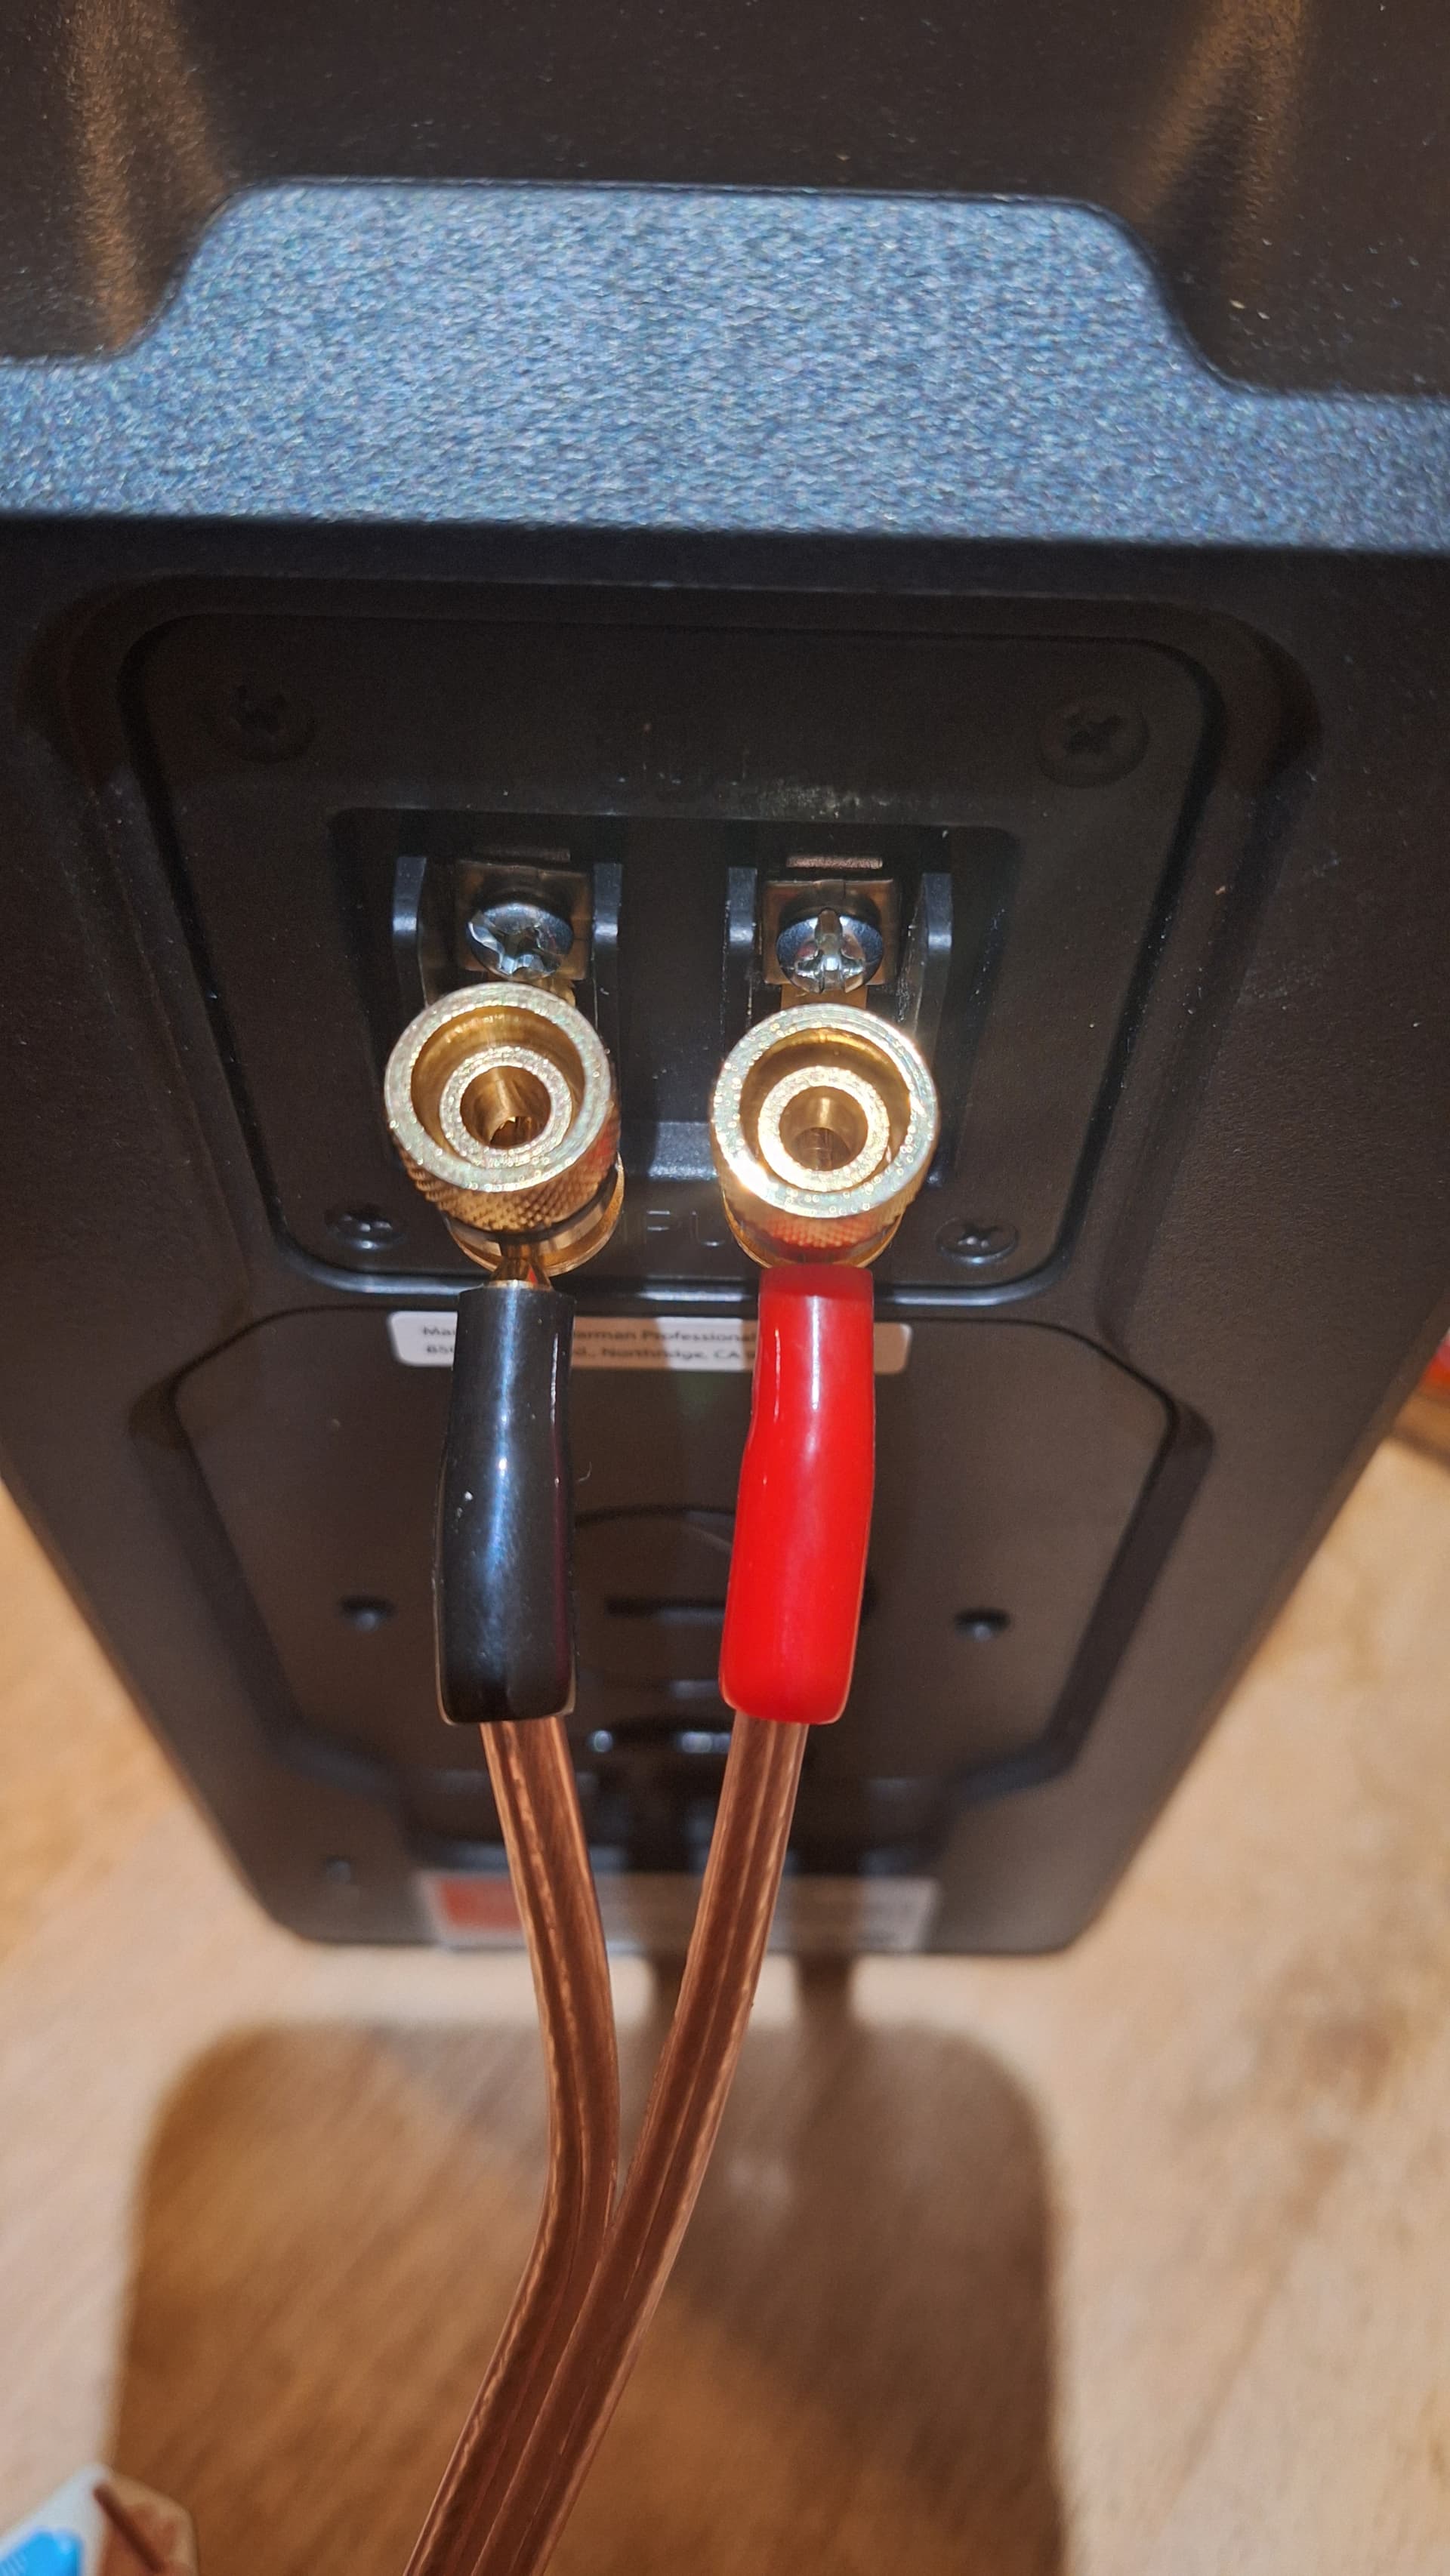
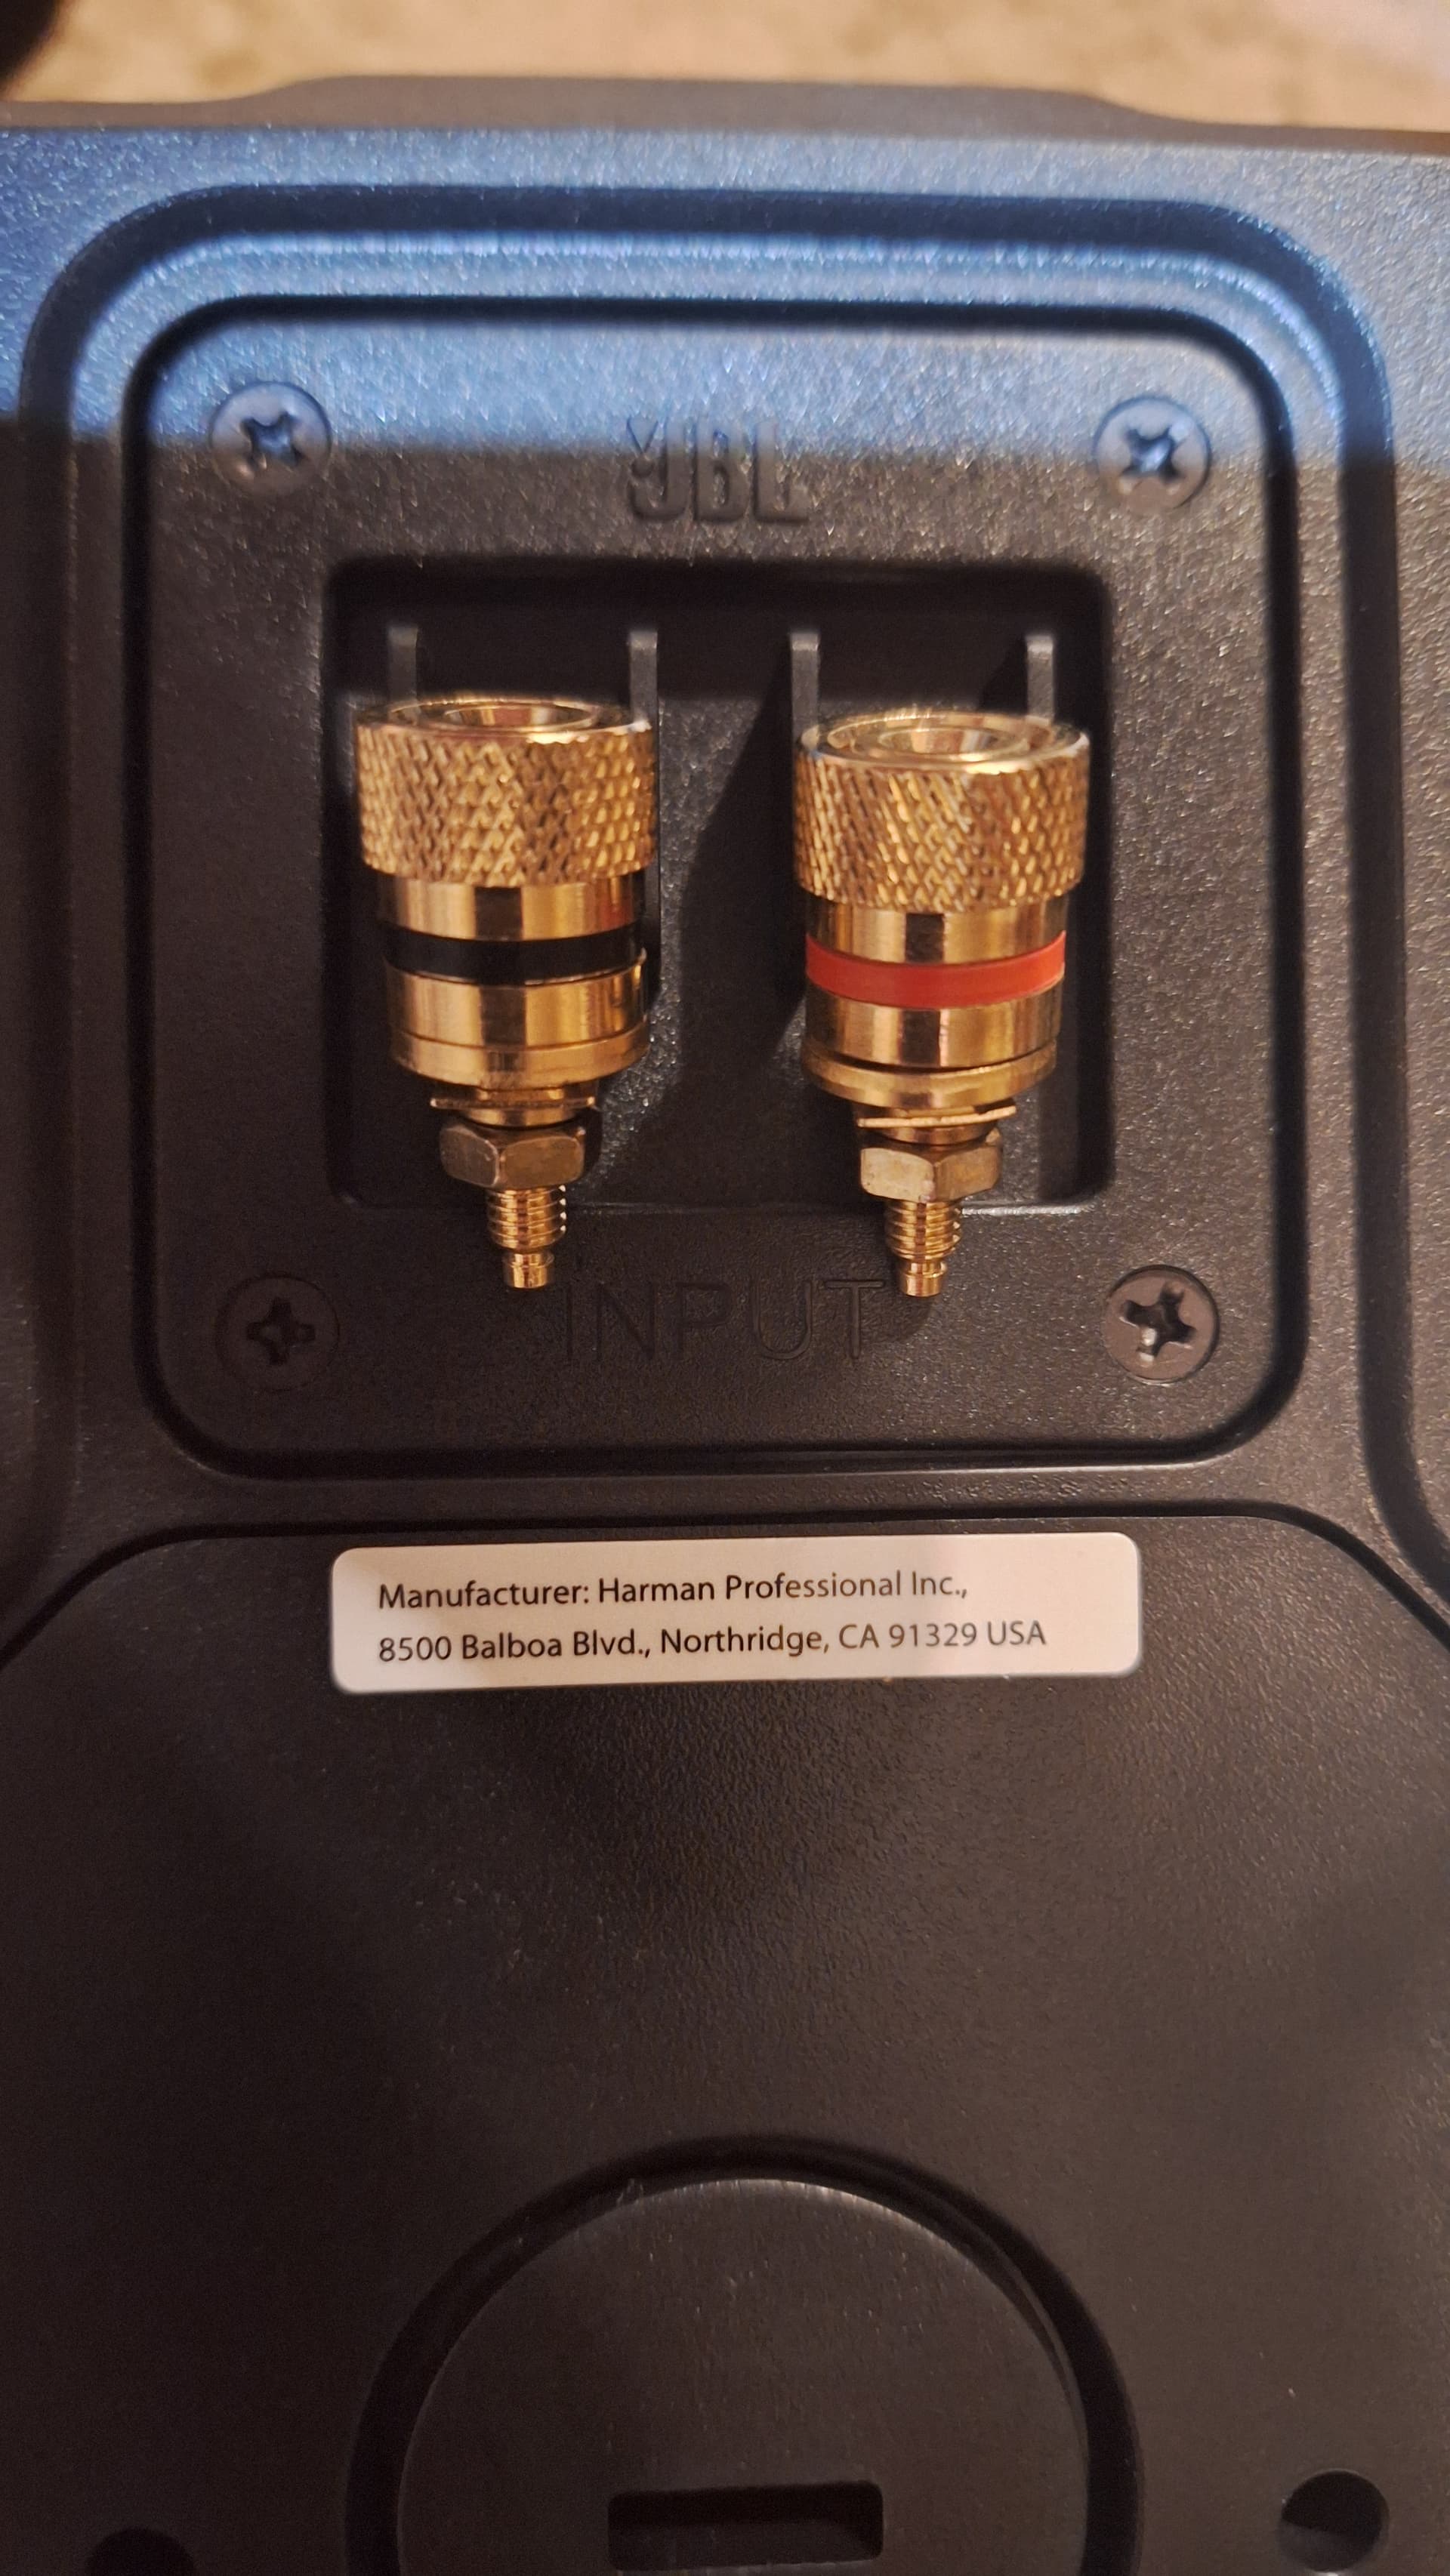
Got a deal on some indoor/outdoor professional speakers but plan to move them around so needed to adapt the screw-down terminal strip to accept various connectors.
I’ve found the best way to thread all the little wires is to solder leadwires to each of them.
Use thin wire for the leadwires. Each leadwire can be a few inches long. Once all 6 leadwires are attached, thread them through the hole in the star and then pull on them to pull all the driver wires through. Once all wires are through the hole and in position, desolder and remove the leadwires.
This method is a bit tedious, but makes the reinstall after emitter swapping Emisar/Noctigon lights fairly easy.
So obvious I would have never thought of that! Thanks for the tip. Noted for sure!
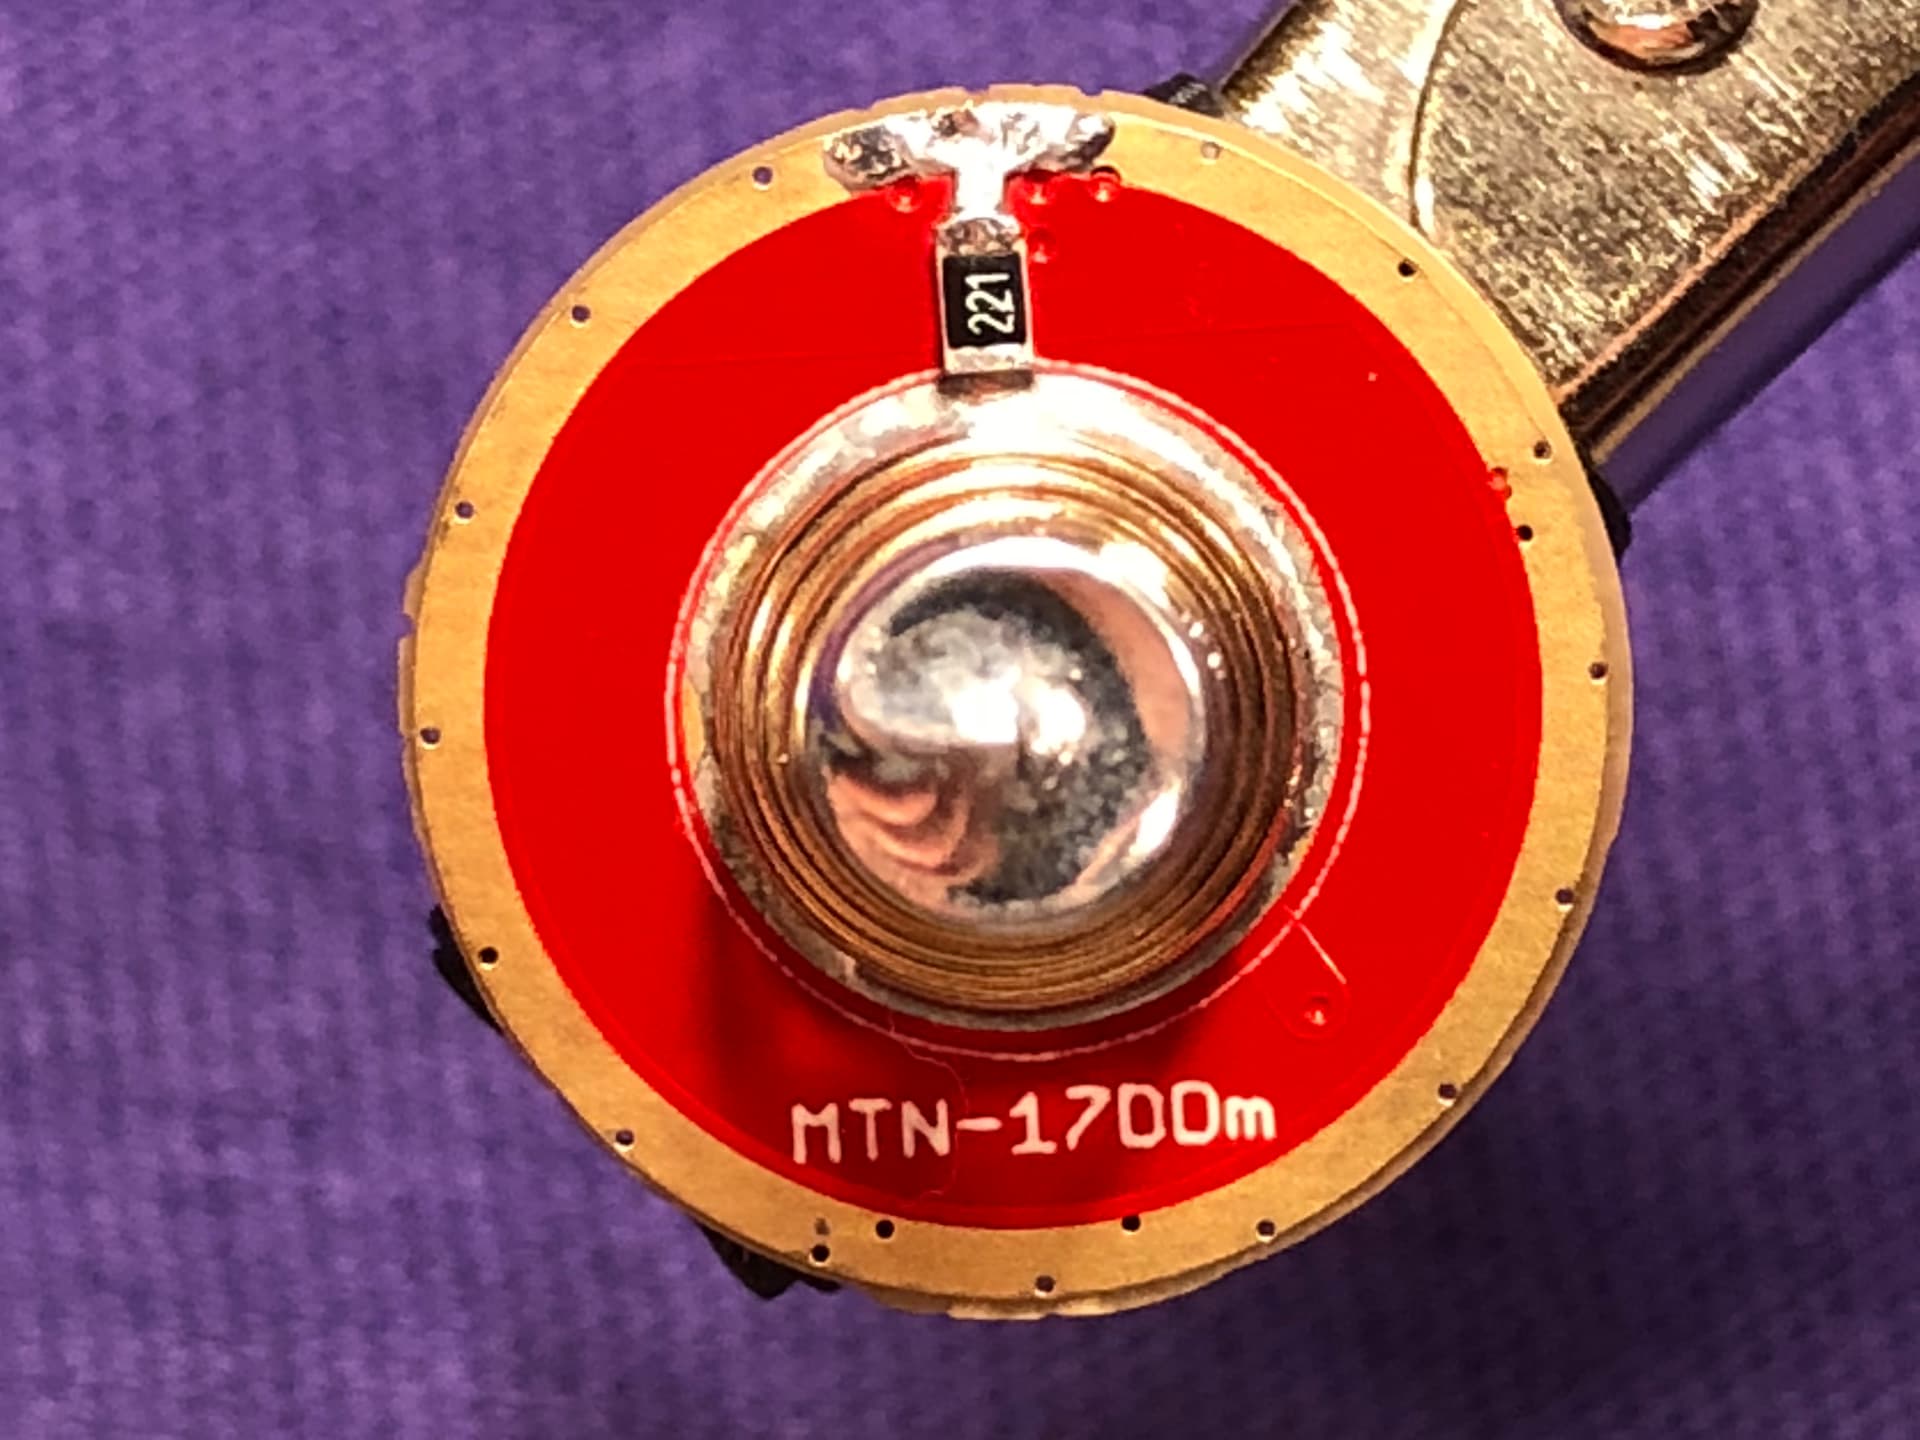
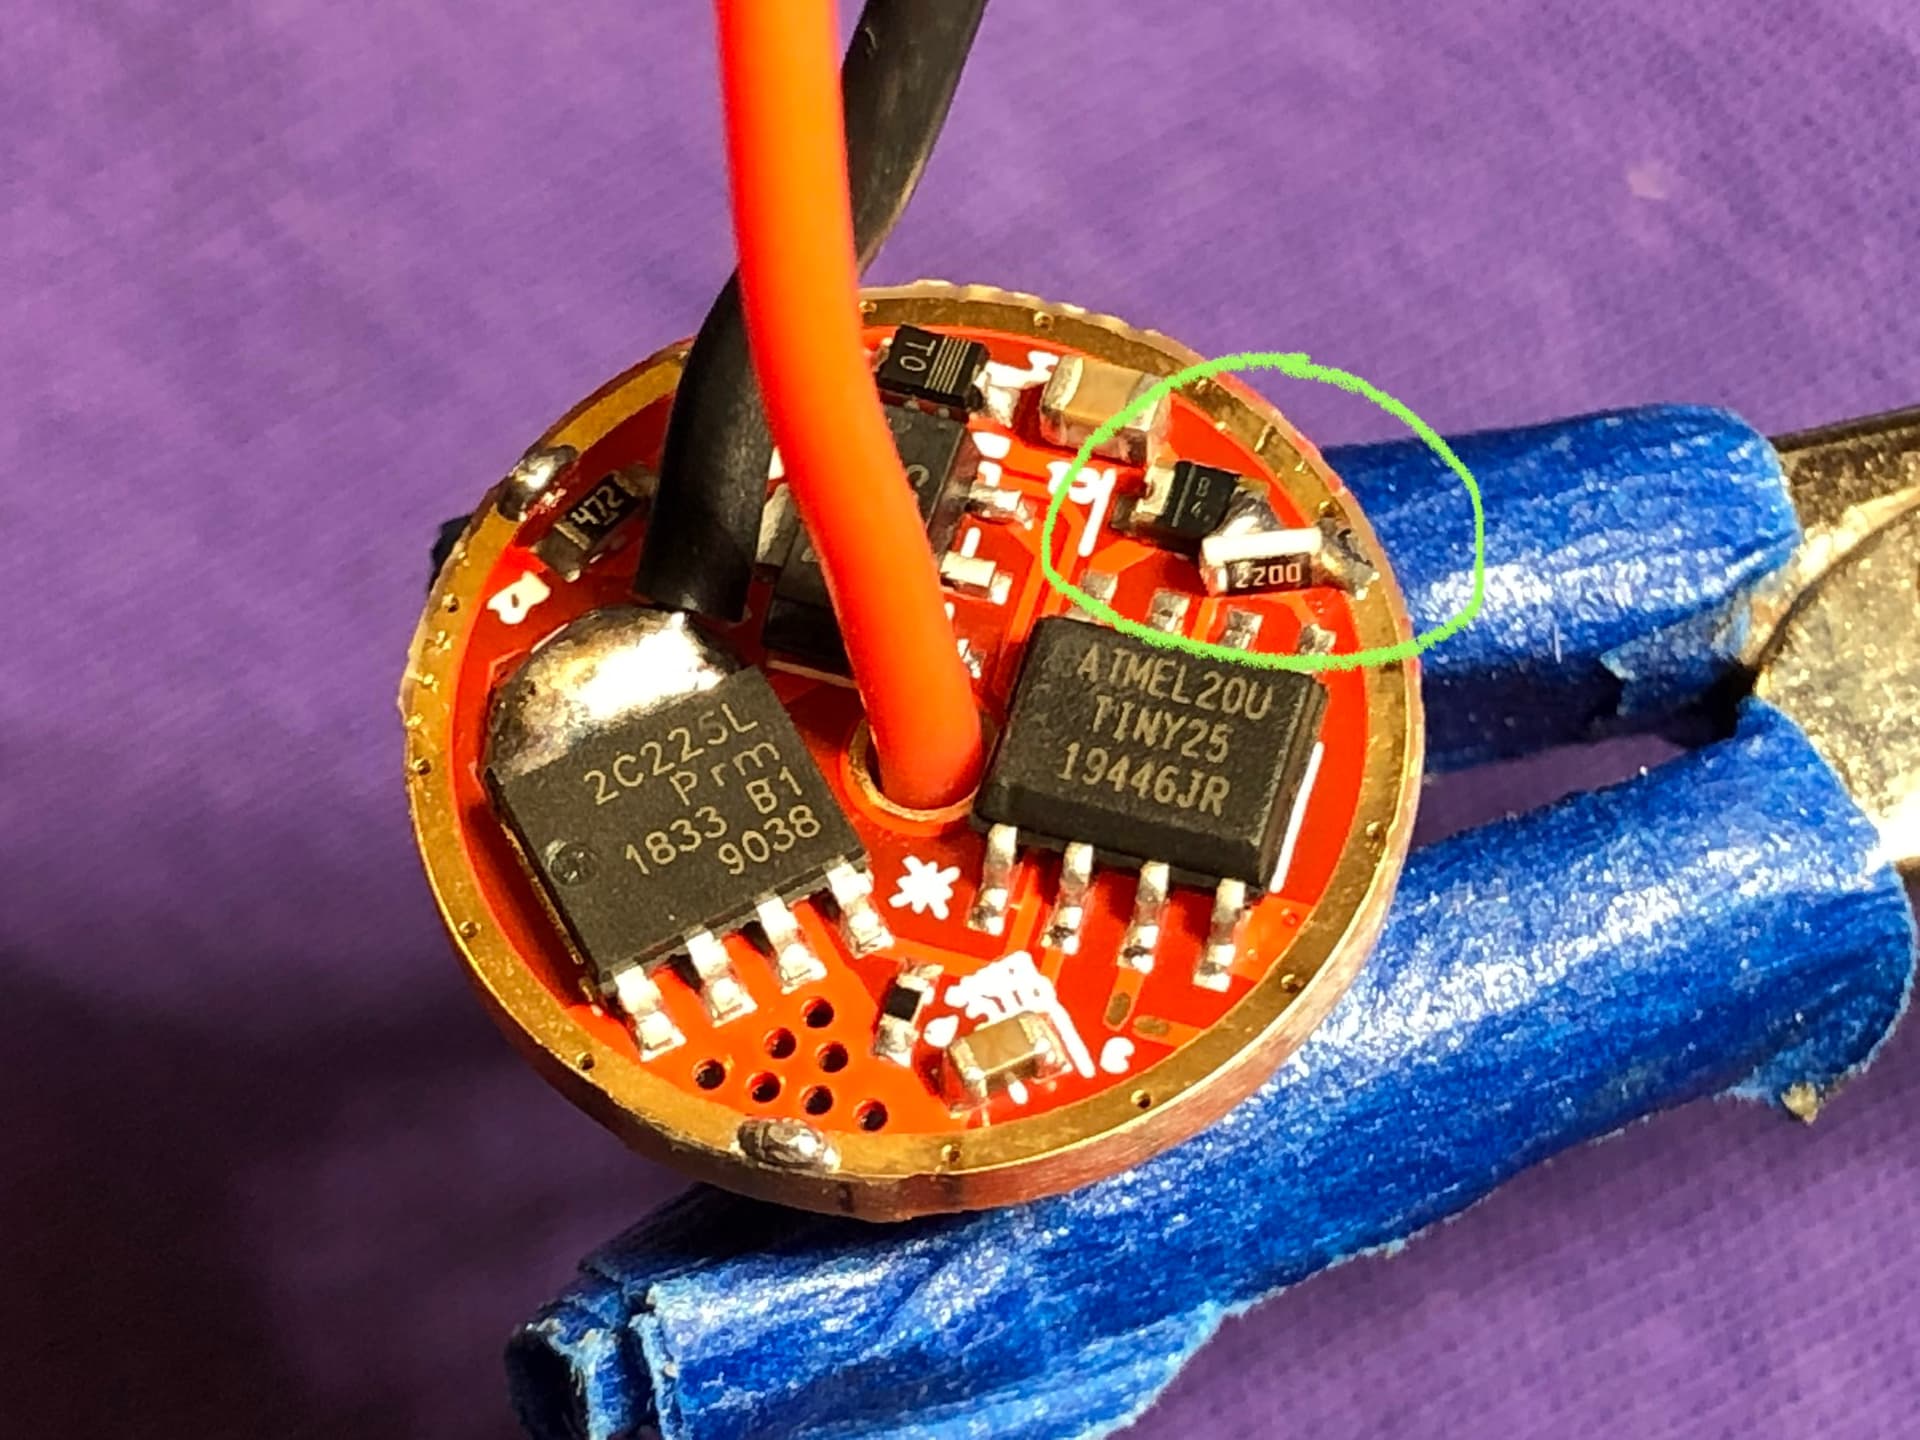
You will need to add a bleeder resistor to the MTN-17DDm driver for the modes to work properly. I experimented with a bunch of values many years ago and found that 220 ohms worked the best.
You can put them either on the front or back, see the pics below. The last several that I did I put them on the back since it looks cleaner, but more difficult to solder.
When did body color metal switches come out? is it only on the S2+ models that come stock with a metal button?
That looks really good, and very nice emitter choice. I have that same one in my KR1AA and it’s real nice, very similar to FL351A 4000k rosy bin.
I need to get more 17mm boost drivers. A 6V S2+ shorty is an absolute great light IMO. That in grey and XHP50.3 was one of my first mods.
Thanks, I’ll have to get some resistors and try that. maybe I could pull one off a broken Hank quad aux board, although I don’t think they have a 220Ω one