Found a useful guide to troubleshooting lights over on CPF. Thought this one was good and deserved wider circulation.
Found a useful guide to troubleshooting lights over on CPF. Thought this one was good and deserved wider circulation.
That's pretty good. I was just thinking this weekend that they need something like that for troubleshooting and breaking in a new light. He should have something about cleaning the threads and end of the tube and lubing the o-rings too.
Please, if anyone has any more comments, put them up in here and we'll do a troubleshooting guide.
So we've got
Inspection
Dismantling
Cleaning
Lubing
Contact fixing
And then the bits that might need tools
Voltage measurements
Current measurements
Soldering
Resoldering
Any more suggestions? The more the merrier, then I can get some pics and put up a guide. Probably in more than one part.
I think there's a certain order to it, too. You don't want to go disassembling the tail clicky before you try some simpler stuff. And before resoldering anything, you probably want to do an RMA to the dealer, otherwise they might be able to say you voided the warranty (ha ha, as if).
That makes sense.
How about?
Setting up
Inspection
Cleaning
Lubrication
Voltage and current measurements
Fault isolation
Tail
Head
Threads - if they are dud it is an immediate RMA as they are not fixable easily - I'm thinking of visual inspection here.
Basic fault repair
Tail
Head
Cleaning Lenses
Body
Making contacts more reliable
Beyond that we're into stuff that you aren't going to be able to return. However, given the costs to return stuff from here even to the US, let alone China I work on the assumption that return isn't possible anyway. Besides, I like fiddling with stuff.
Warranty busting stuff
Major dissassembly
Replacing lenses/reflectors
Breaking glued joints apart - non-destructively when possible.
Resoldering - probably a basic tutorial on soldering.
Switch replacement
Driver replacement - these are harder
LED replacement - heatsink goo and more advanced soldering
Improving heatsinking
Does that make more sense as an order of doing things?
How about
Cleaning lenses glas and plastic (very different if using any cleaning agent or solvent).
Replacing lenses
Makes sense, added to the list above.
Now this is nice....should make it easy for anyone to follow the steps......great find Don.
It seems like with DX that they usually ask you to repair it locally or get advice in the forums, so once you place an RMA, I think you would generally get a green light to repair the light by whatever means and they will just be glad if you can get it to work. In that same vein, if you find any flaw that looks like it could be the culprit, you should probably take a picture before going any further. DX likes pictures.
Indeed! In fact their system seems to be rather inflexible. I have heard of someone whose order had not arrived being asked to provide pictures - so the pictures of no order on the background of carpet were duly sent.
Lol now that is a funny......i will only do an rma if im still having issues....more then likely dirt is the cause of the light malfunctioning.
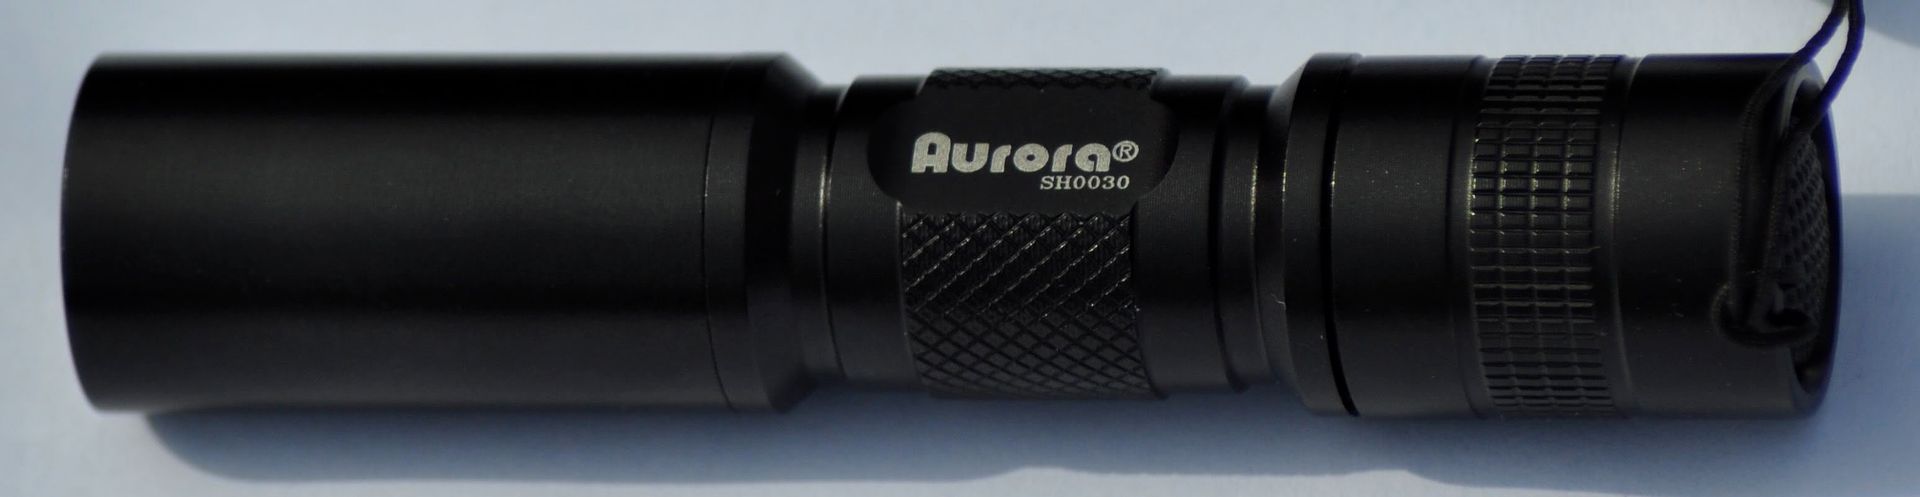
Thinking I'll use one of my Ultrafire C3s as they aren't the most reliable lights in the world, if very, very bright. I can afford to pull one of those completely apart - I have more of them even if I can't get it back together again. Or, better still, one of my non-working Aruora SH0030s - these things make Ultrafire C3's look good. And in fact the main difference is that they are Ultrafire C3s with an Aurora logo and added nastiness.
You should have no problems putting them back together.....mine used to flicker a lot and i found out that it was the pill not being screwed in all the way.
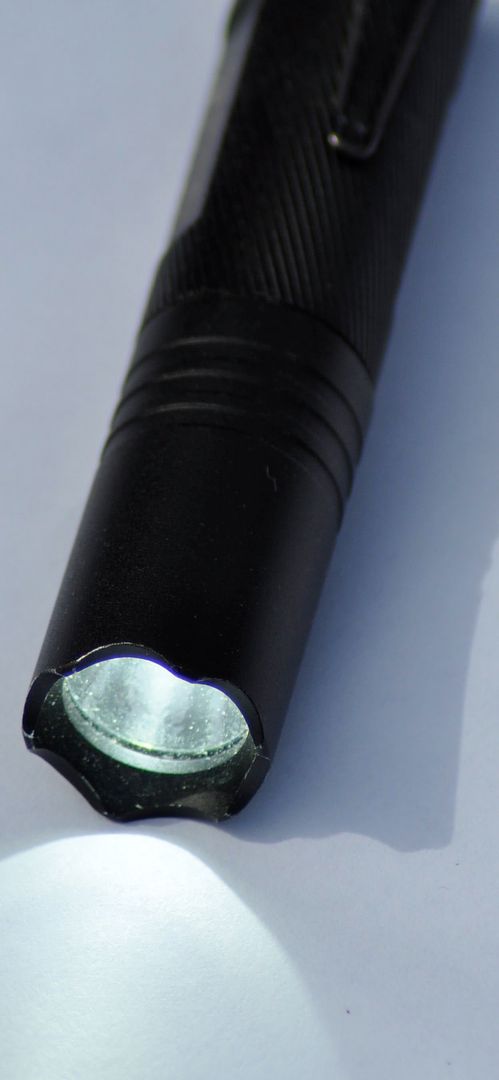
So - I have a non-working light.
This is actually a geniune example of my pulling a non-working light out and trying to get it to work.
Step 1 Does it have a battery in it? No? Then insert one. Do we get light? No? Then go to 2
Step 2 Is the battery the right way round? I know this is a stupid one, but I've done this (and killed a light doing it) We'll assume that I've not done this this time. Battery is the right way round. Still no light. In the case of my two Aurora SH0030s one of them has a minimum voltage of 2V and both a maximum voltage of 4.2. They are indistinguishable till they turn on - but neither of them will.So I have to use a 14500 which is not what I'd normally do.
Step 3 Does the battery have any charge in it? No? then get another one that you know works in another light. Checked battery in another light, checked it is the right way round, screwed on tailcap, switched on. No light. Brief stop to say some rude words.
Step 4 Pull battery back out and give a GENTLE shake. Is anything rattling in there? It shouldn't be. No rattles.
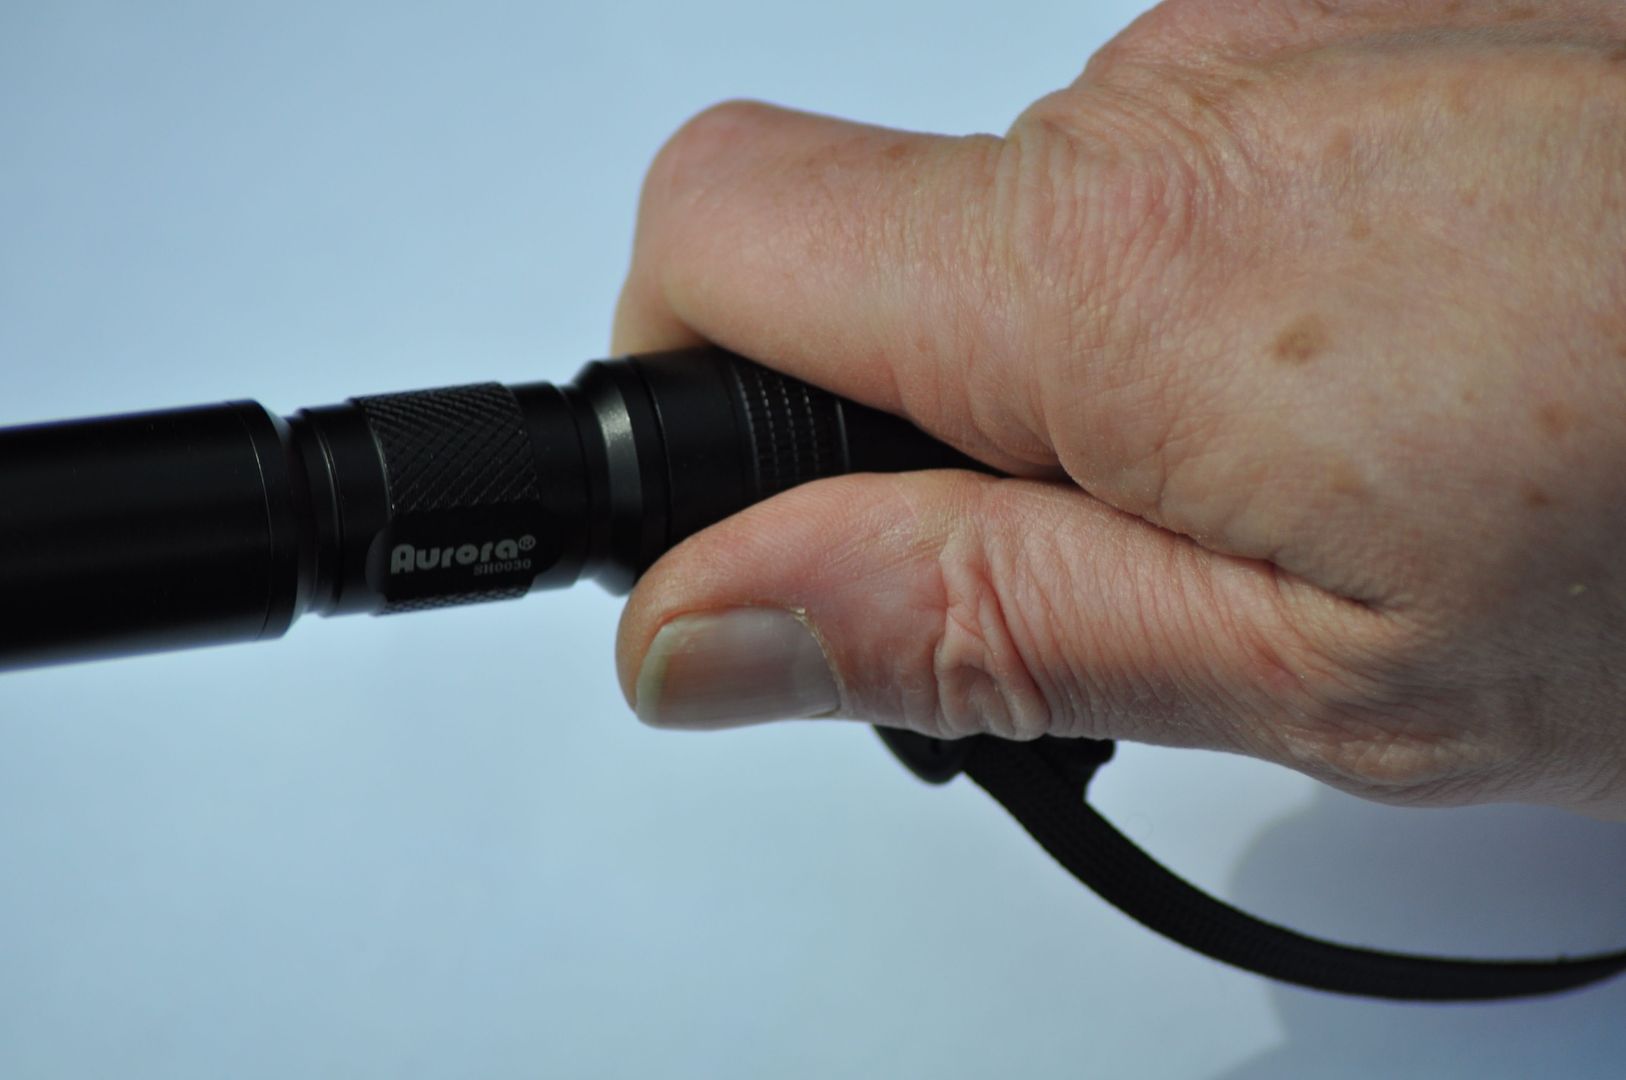
Step 5 Does it work with a known good cell and a bit of copper connecting the negative end of the battery to an un-anodised bit of the light's body. A paper clip works fine for this but I happen to have some copper desolder braid lying around. Do I get light? Yes, I do. So we have a problem with the switch or the connection between the switch and the body tube. BTW this is the single mode Aurora - or at least I couldn't get it to change modes.
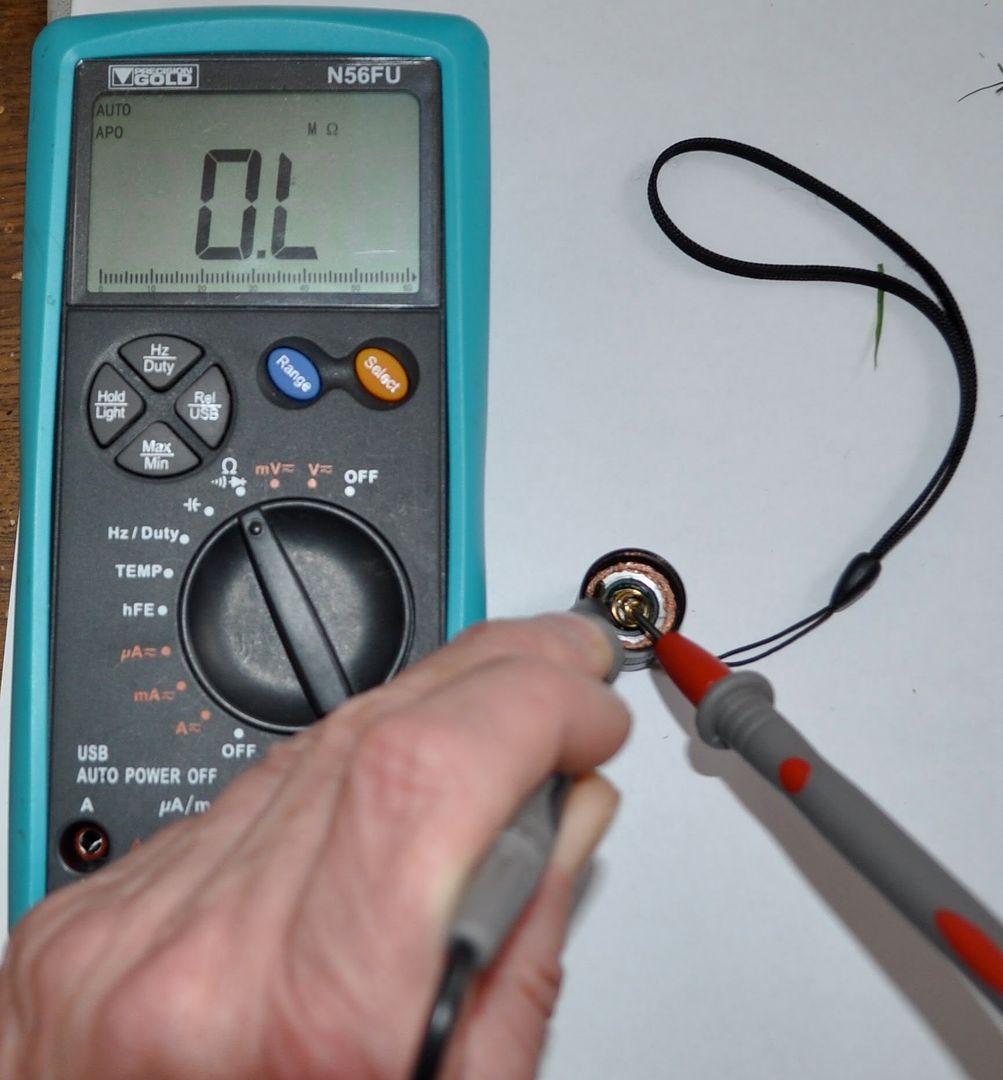
Step 6 As we know we have a light that is capable of working at this point I could do the easy thing and pull a known good switch off another Aurora or Ultrafire C3 and see if it'll work. Instead what I'm going to do is the first thing that requires any tools. First I'm going to check that the switch retaining ring is adequately tight, then I'm going to measure the resistance of the switch in the on and off states as most people don't have 7 identical lights lying around to cannibalise. The switch retaining ring was a little loose so I have tightened it. Is this a cure? Reinstall the tailcap and try. Nope - no light. So we have a problem with the tailcap end. We'll check the resistance of the switch. After all, a cheap multimeter is only about $5 and will be just fine for what I'm doing here. Even a battery, a bulb and some bits of wire can be used here but I have a few multimeters so that's what we'll do.
Remember that when you tighten the switch ring you are moving it farther back into the tailcap and it may not make contact with the unanodised part of the body tube so no current flow can take place. Tightening the tailcap can turn flickering into not working unless you put in something conductive to fill up the gap.
Step 7 Check resistance of switch in on and off states. Set the multimeter to resistance - usually marked with the Greek letter Omega ( Ω ). Check that the leads are in the right places. For this purpose polarity is not an issue so the leads can go either way. Apply one lead to the retaining ring - the dimple we used to tighten up the retaining ring is a good place as you can press on it to hold the tailcap in place and give a good contact. Connect the two meter probes together to ensure the meter is working. It is? Good. So one probe into the retaining ring and one touching the spring. I get a resistance of 0.7 ohms which must be the on state and is rather high on the old resistance. Now operate the switch and check the resistance in the off state. No circuit. Good, the switch works though we may want to lower its resistance. Meanwhile we'll stick to the simple stuff.
Off state. High resistance
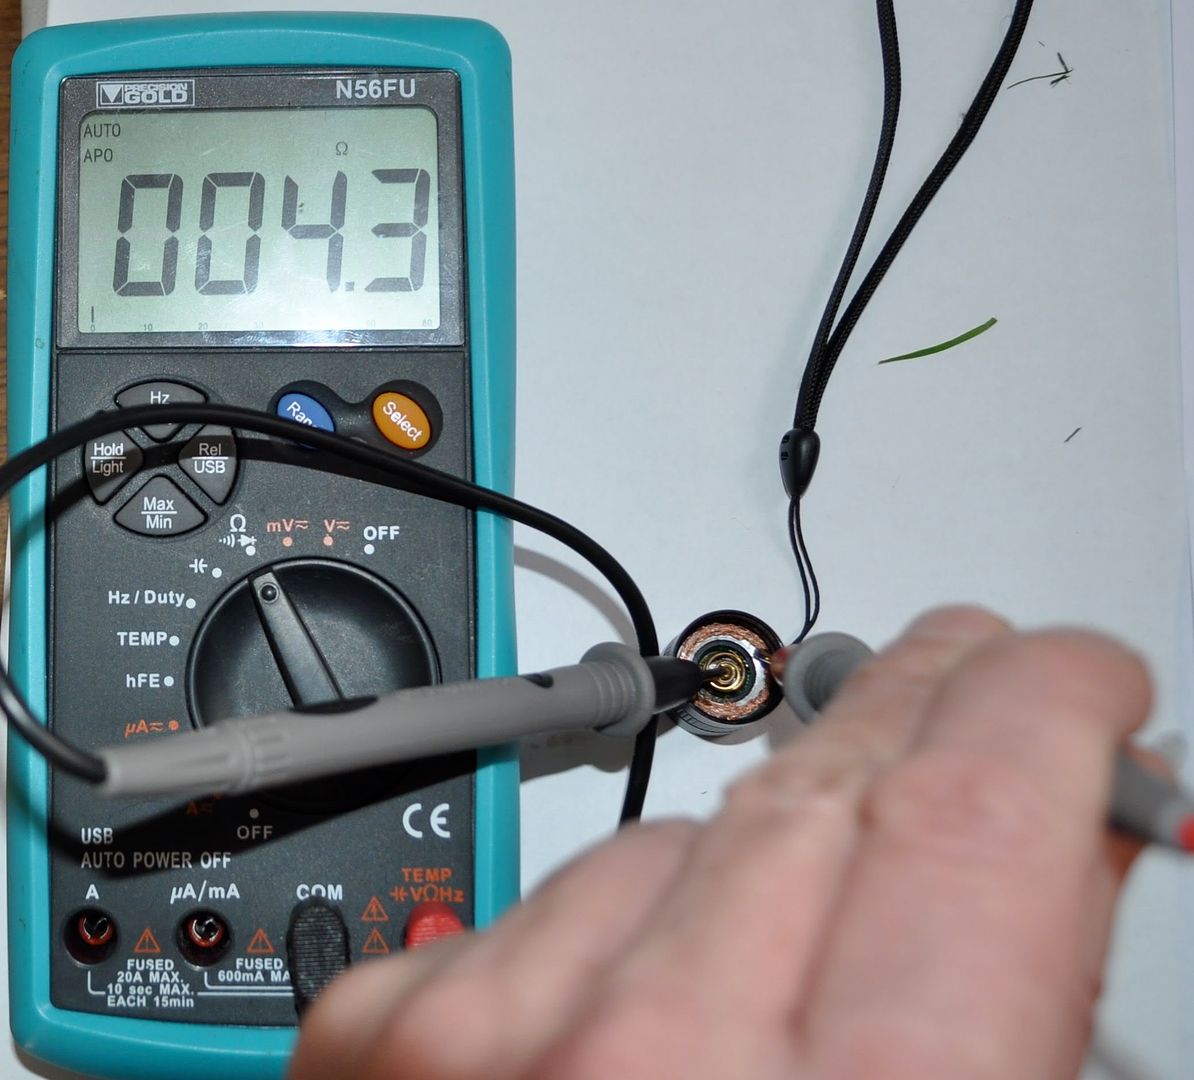
That's more resistance than I'd like but at least some of it is down to the probes not being firmly held as I needed a hand to operate the camera.
Step 8 We now know that the switch works and that the light is capable of emitting light. So the problem is most likely the connection between the switch retaining ring and the un-anodised part of the torch body. What can we do about that?
Step 9 Clean the un-anodised part of the body. I use 1200 grit wet and dry paper or a very fine diamond file. Remember, you are not trying to remove metal here, just clean things up. So a quick scrub with a diamond file - the end is clean. Remember to get rid of the aluminium dust otherwise it will get somewhere you don't want it to and short stuff out. Guess how I know that? I could pull out the switch ring and do the same but that's more advanced disassembly. Does that sort it? Nope.
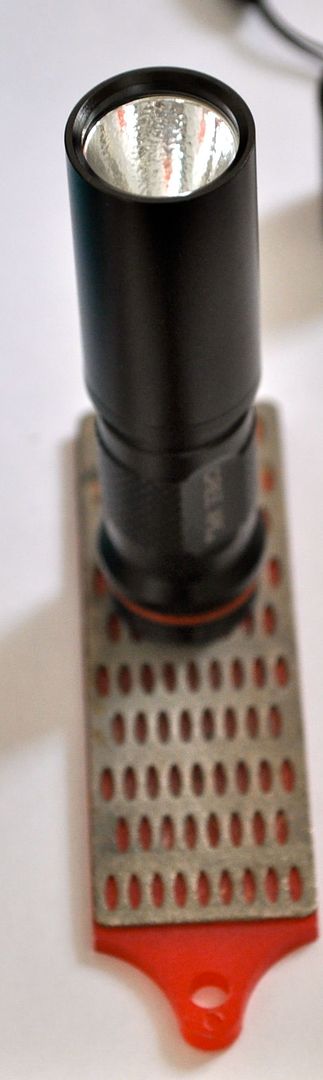
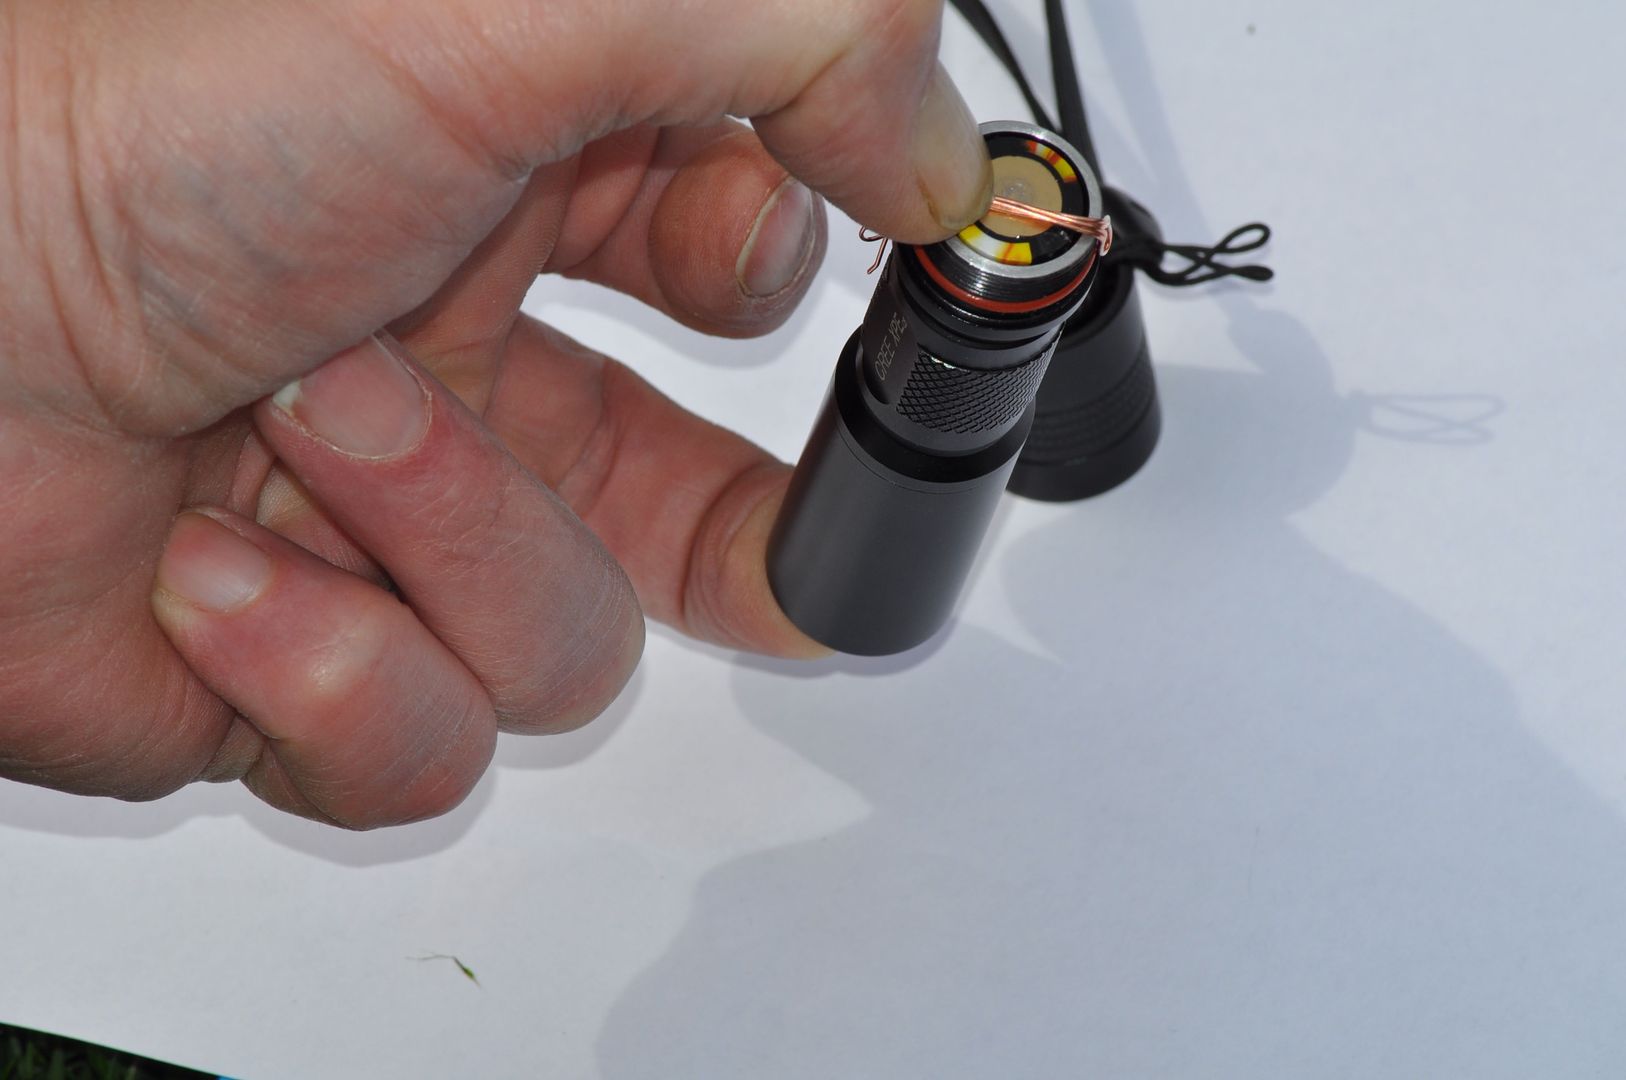
Using a cheap ($3 AFAIR) diamond file to clean end of body tube. Be gentle - we aren't trying to remove metal. If you can find a glass-fibre pencil, these are great for cleaning switch retaining rings and the like. (http://www.maplin.co.uk/Module.aspx?ModuleNo=3932)
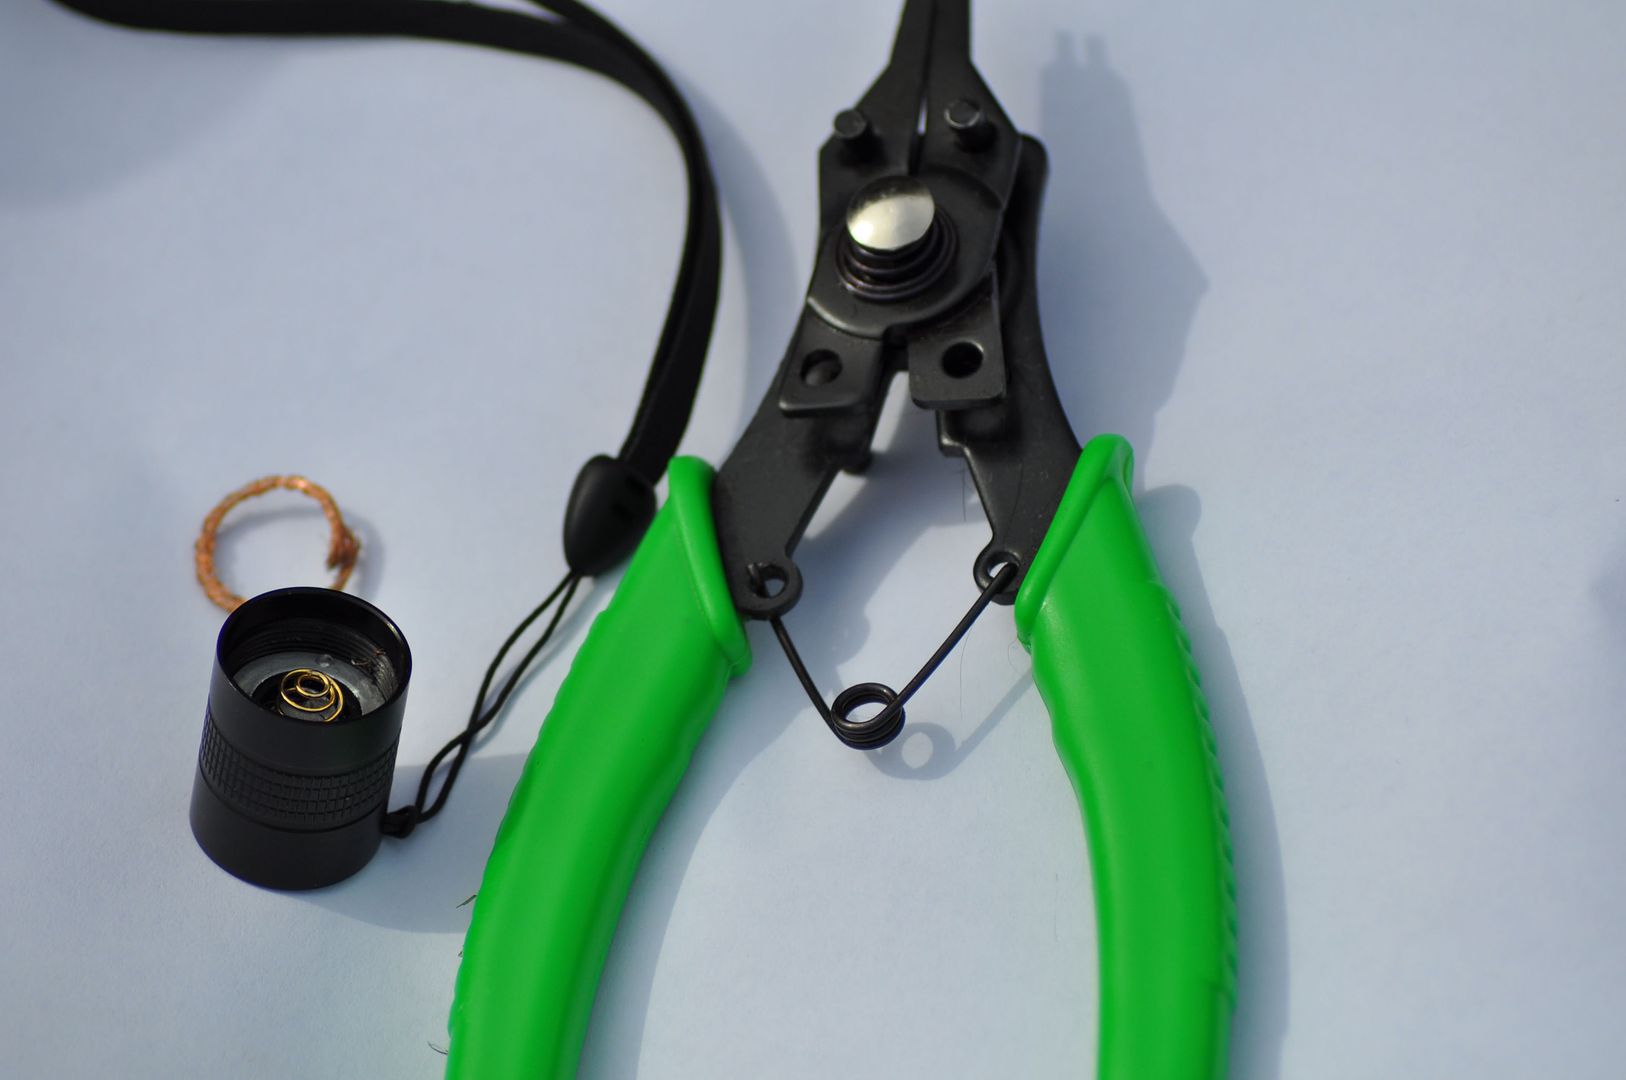
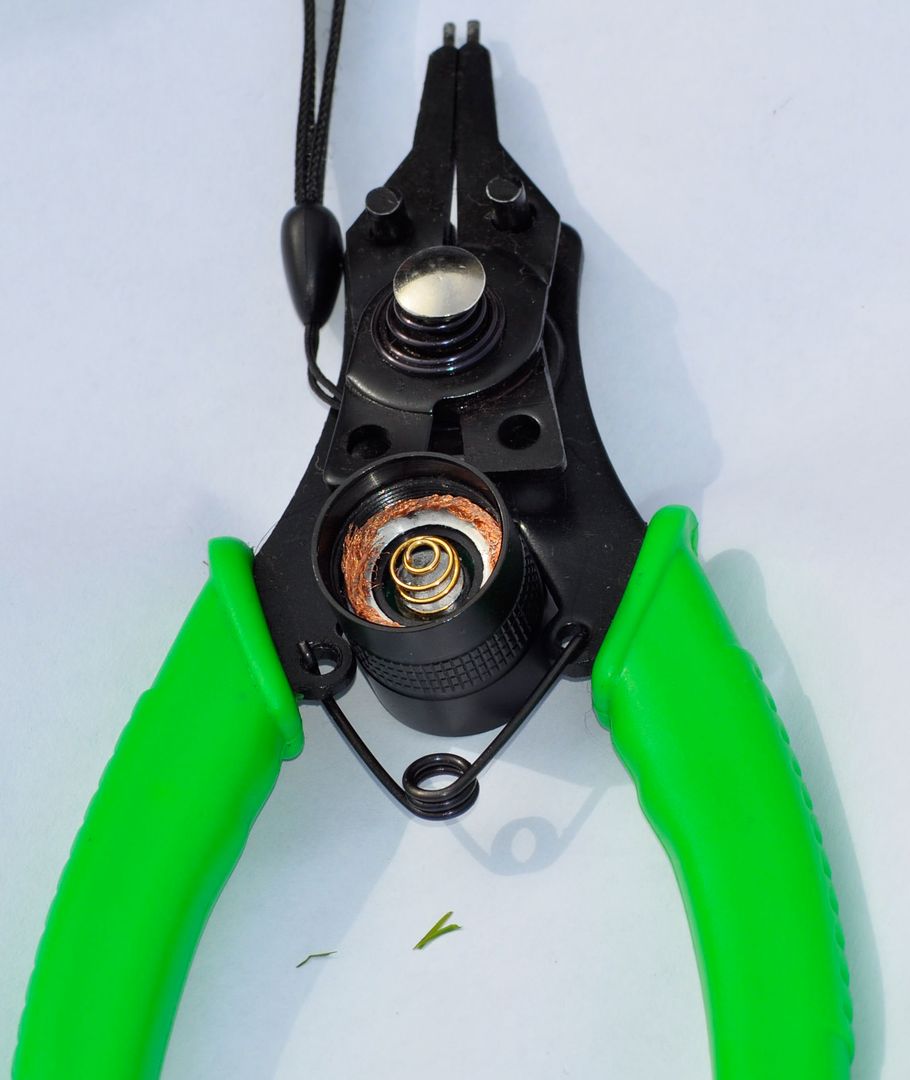
Step 10 Is the body tube contacting the switch ring when it's screwed together? My guess is it isn't. So I take the piece of copper braid I was using before and wind it into a circle round the switch retaining ring. It must not make contact with the centre spring or you won't be able to turn the light off.
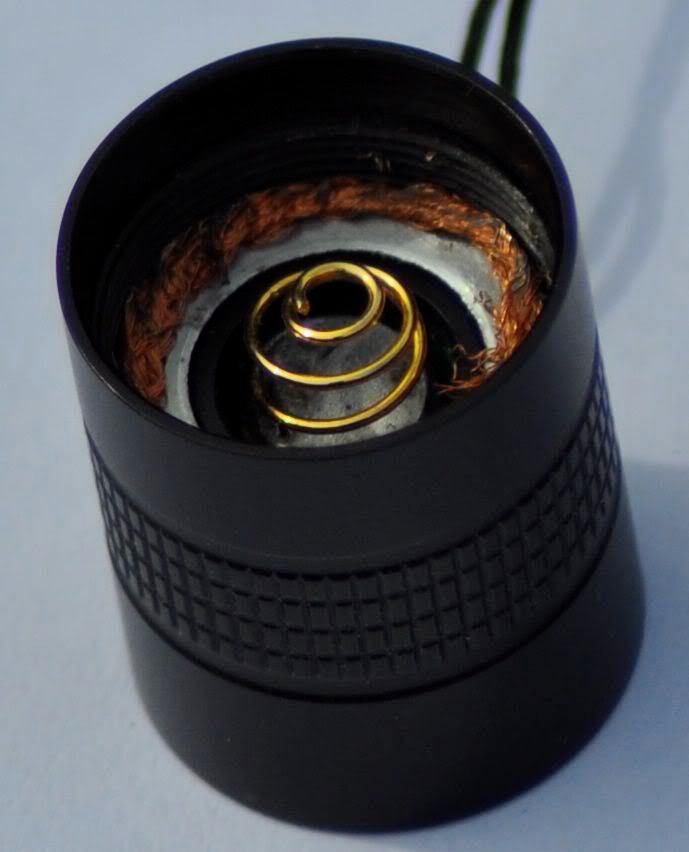
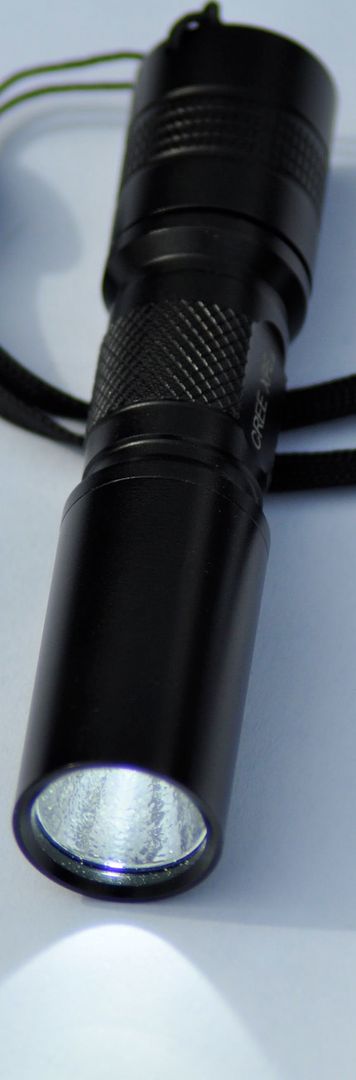
Step 11 Reattach tailcap and turn on. We have light!!!!
I'll need to take some more photos yet.
This is going to be really good.
That was quite literally done as I ran through the process which has the advantage of actually forcing me to think through what I was doing as I did it. I thought I'd already tried that with this light. I'll also try to do it with the no tools and equipment as far as possible as not everyone has spent thousands on tools and parts. Field expedients can usually be found. I usually end up doing stuff like this when my tools aren't with me. Photographing all this clearly will be the trickiest bit - but I'll get there. Just don't hold your breath - I have to work this weekend and have stuff to prepare for that.
Now all Mr Admin needs to do is make this a sticky....hey Don please check your PM.
So when a light isn't working you don't bang it with a hammer or against the wall first? LOL
I'll probably be using that LED Troubleshooting Guide A LOT. Thanks for the link Don.
Last night I bought some NyoGel 760G and NyoGel 779ZC from Lighthound after reading these:
http://www.candlepowerforums.com/vb/showthread.php?t=242414
http://www.cpfreviews.com/Flashlight-Care-Nyogel-Lubricants.php
You really have to have something like that. A little bit will last you a long time. Use as little as possible to get the results you want. I found Super Lube at an Ace Hardware near me and I'll probably never need any more.
Sticky'd. Great, Thanks for the tips!