The light was supplied by Niwalker, no compensation other than the light itself was received for this review
The website is still in progress so there are some errors and missing parts

The light might be also available in NW and other LEDs in the future
The light was supplied by Niwalker for a review, I am honest and will judge the light as it is with its pros and cons
Specification:
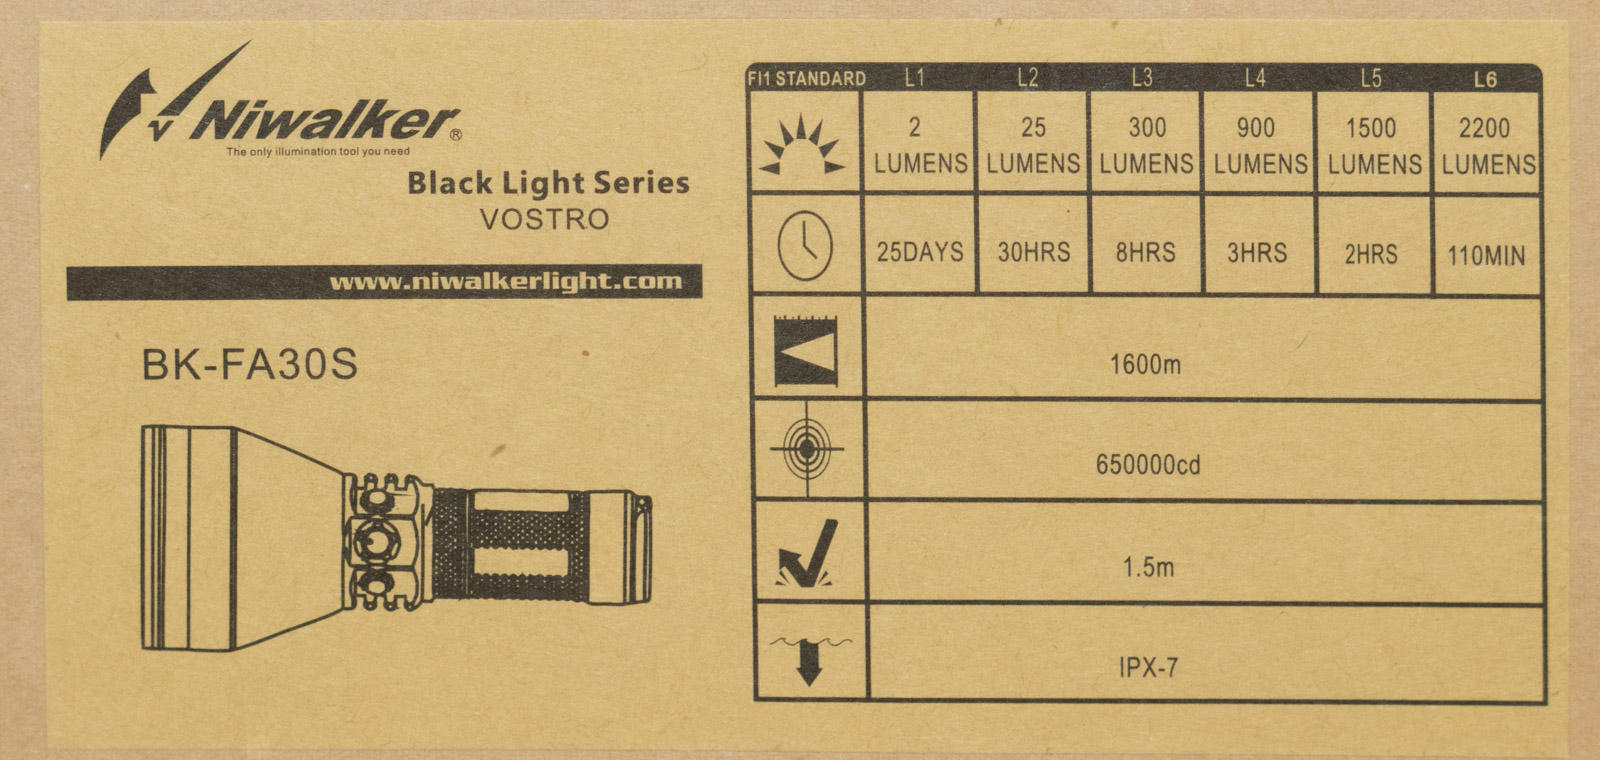
Product name: Niwalker Black Light Series Vostro BK-FA30S
Brand: Niwalker
Model: BK-FA30S
Emitter Type: XHP35 HI
Light temperature: 6500K
Light color: Cool white
Material: Aircraft grade aluminum, mil-spec hard anodized for maximum wear
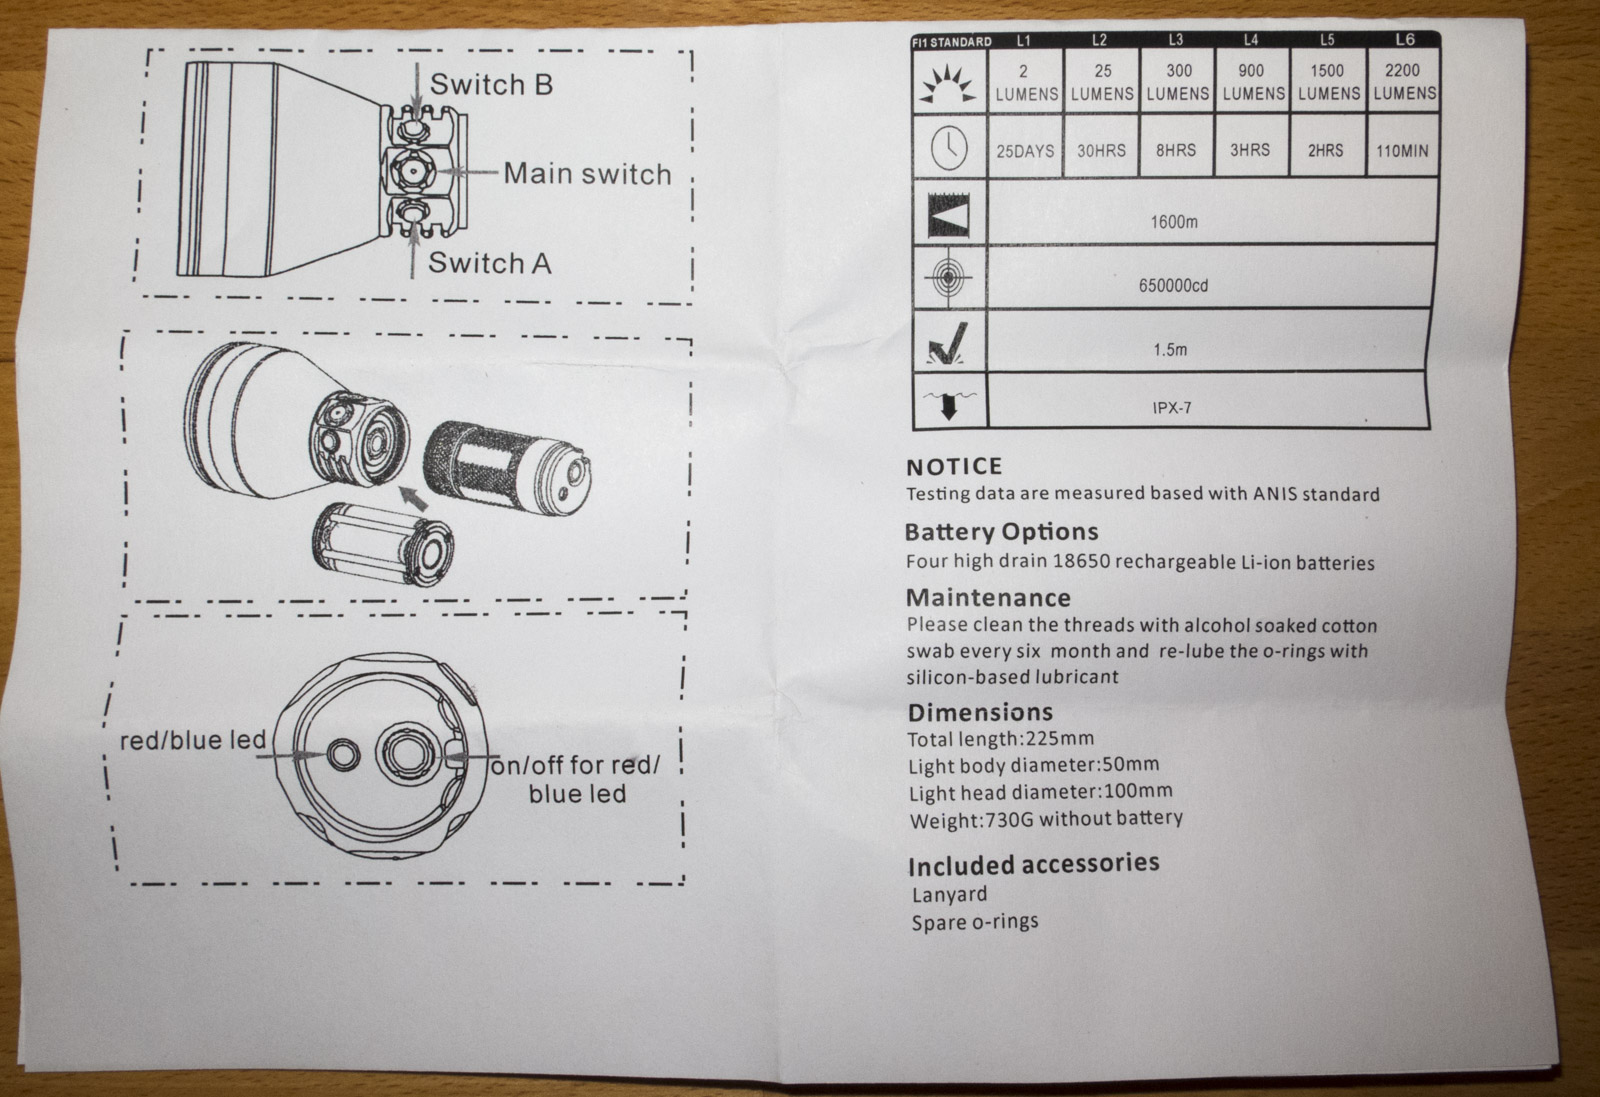
Mode: L1 Moon, L2, L3, L4, L5, L6 Turbo
Lumens: 0.2, 25, 300, 900, 1500, 2200
Runtime: 25d, 30h, 8h, 3h, 110min
Battery Configurations: 4 x 18650 battery (not included)
Switch Type: 3 separate e-switches, tail switch for auxillry LEDs
Switch Location: Body side of the flashlight, tail of the light
Peak Beam Intensity: 650000cd
Impact Resistant 1.5m
Max Output: 2200 Lumens
Range: 1600meters
Lens: Toughened ultra-clear tempered glass lens with anti-reflective coating
Reflector: Unique smooth reflector design provides great throw beam distance and beam pattern
Waterproof: IPX-7 waterproof
Color: Black
Weight: 730g without battery
Size: 225mm x 100mm x x 60mm 50,5mm(length x head x body diameter x tube diameter)
The light is not overrated from my judgment, Lumens and throw correlate very well to my measurements
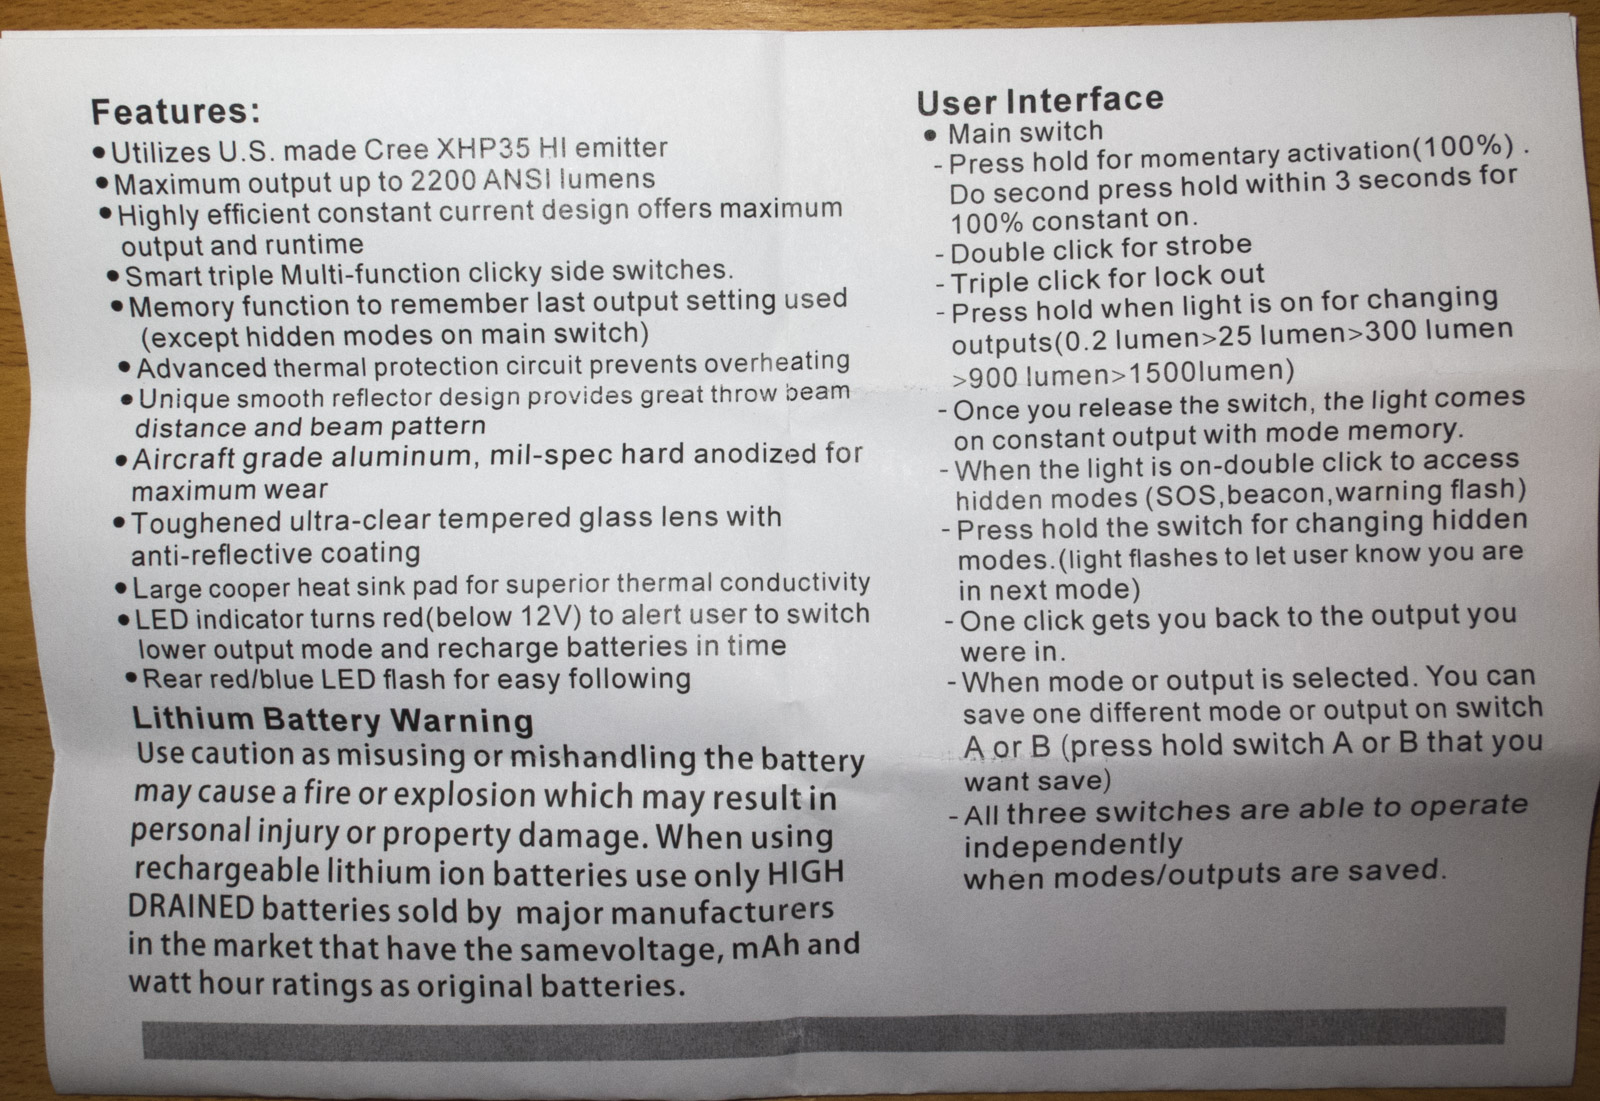
Features:
Highly efficient constant current design offers maximum output and runtime
Smart triple Multi-function clicky side switches.
Memory function to remember last output setting used (except hidden modes on main switch)
Advanced thermal protection circuit prevents overheating
Large cooper heat sink pad for superior thermal conductivity
LED indicator turns red(below 12V) to alert user to switch lower output mode and
recharge batteries in time
Tail red/blue LED for easy following.
User Interface
-Press hold the main switch for momentary activation (100% output). Do second -press hold within 3 seconds for 100% constant on.
-Double click the switch for instant strobe.
-Triple click the main switch for lock out.
-Press hold the main switch when light is on for changing outputs (0.2 lumen>25 lumen>300 lumen>900 lumen>1500lumen).
-Once you release the switch, the light comes on constant output with mode memory.
-When the light is on-double click to access hidden modes (SOS, beacon, warning flash).
-Press hold the switch for changing hidden modes.(light flashes to let user know you are in next mode). One click gets you back to the output you were in.
You can save one different mode or output on each switch next to main switch. (Press hold the switch that you want to save led indicator on main switch flashes means its saved.
-All three switches are able to operate independently when modes/outputs are saved.
My model got Red/Greem tail LEDs, I inserted my lights dimensions as on the website it’s still from its smaller brother with wrong listing.
There are some minor inconsistencies in the manual and on the lights box, for example 2 Lumens instead the 0.2lumens the light has in moon mode.
The parcel arrived after 3 working days shipping with DHL Express to Germany
.
Package and content:
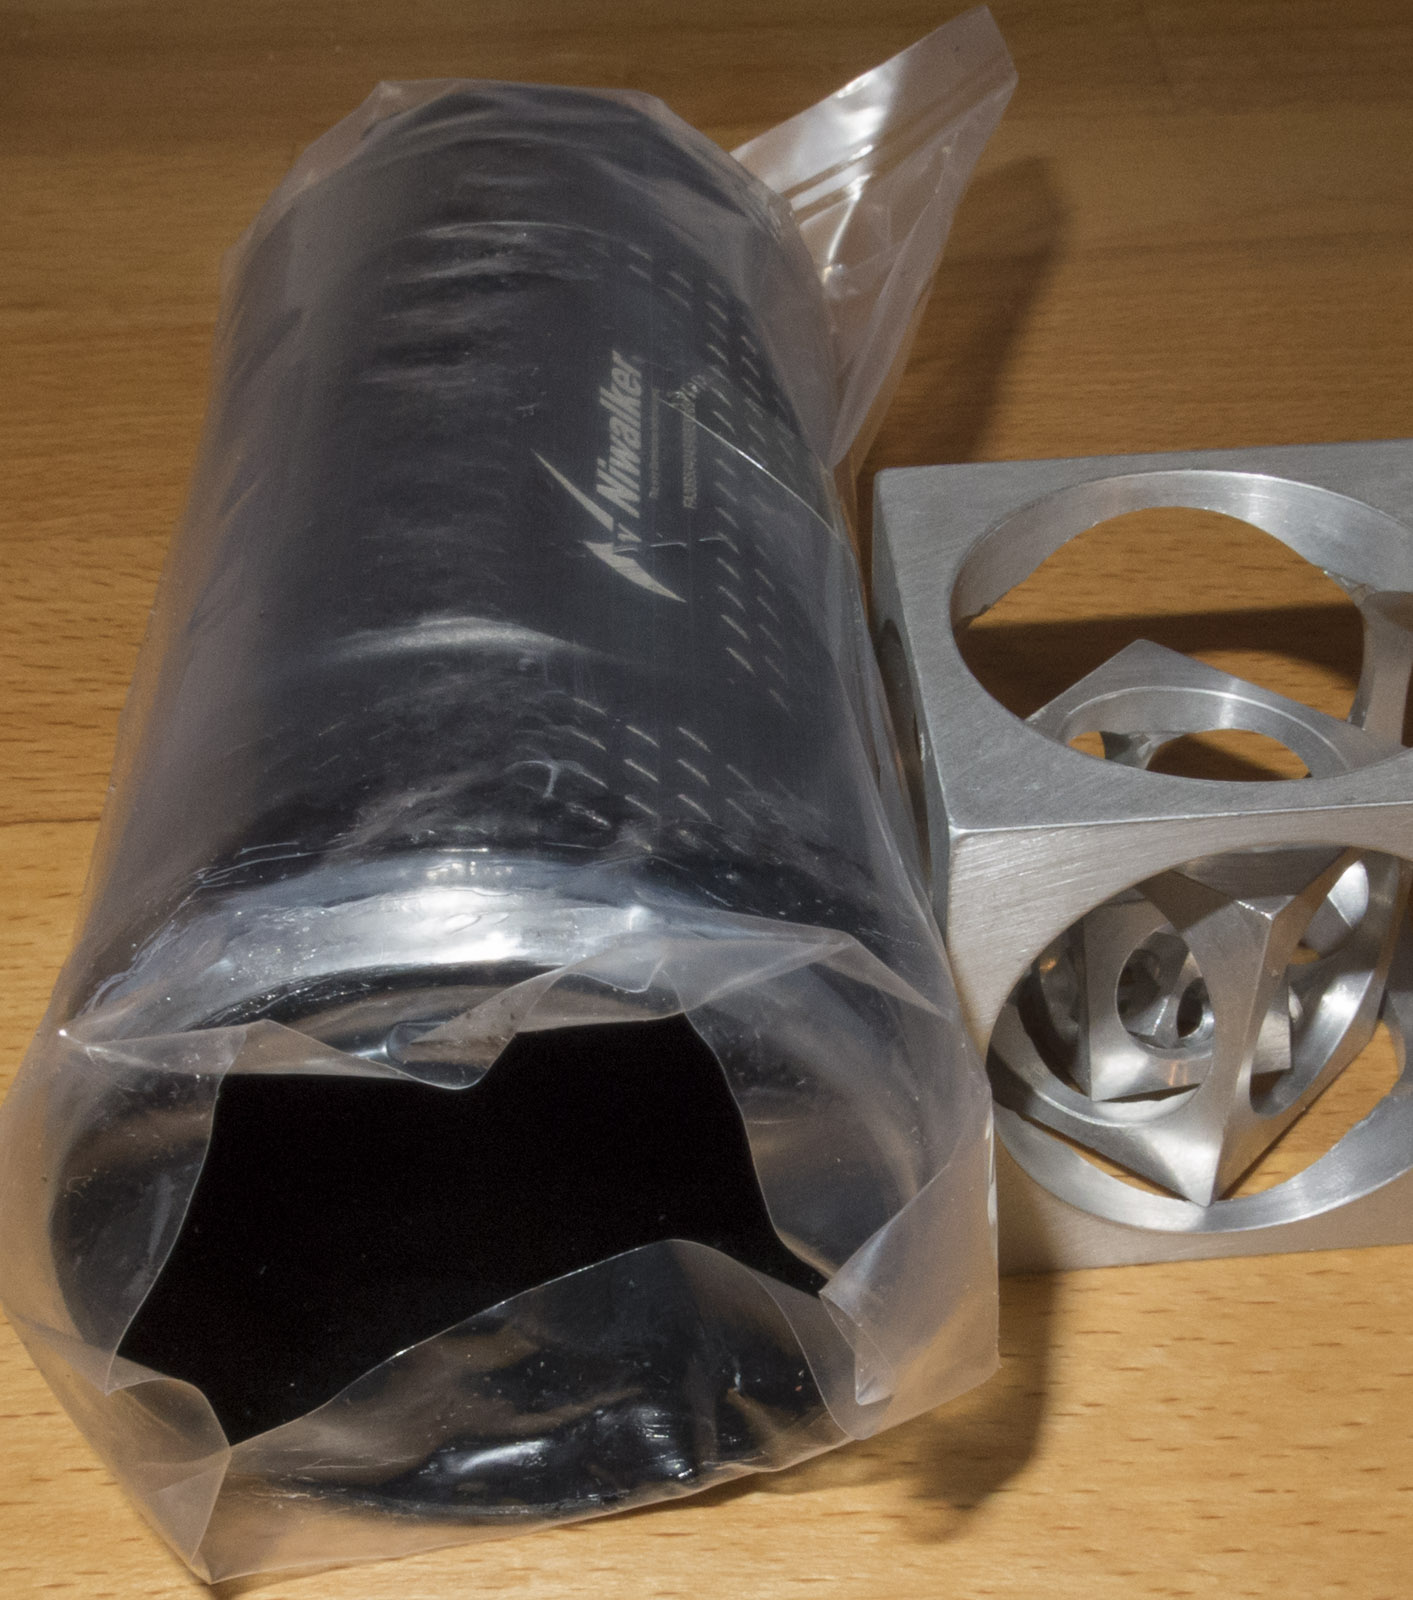
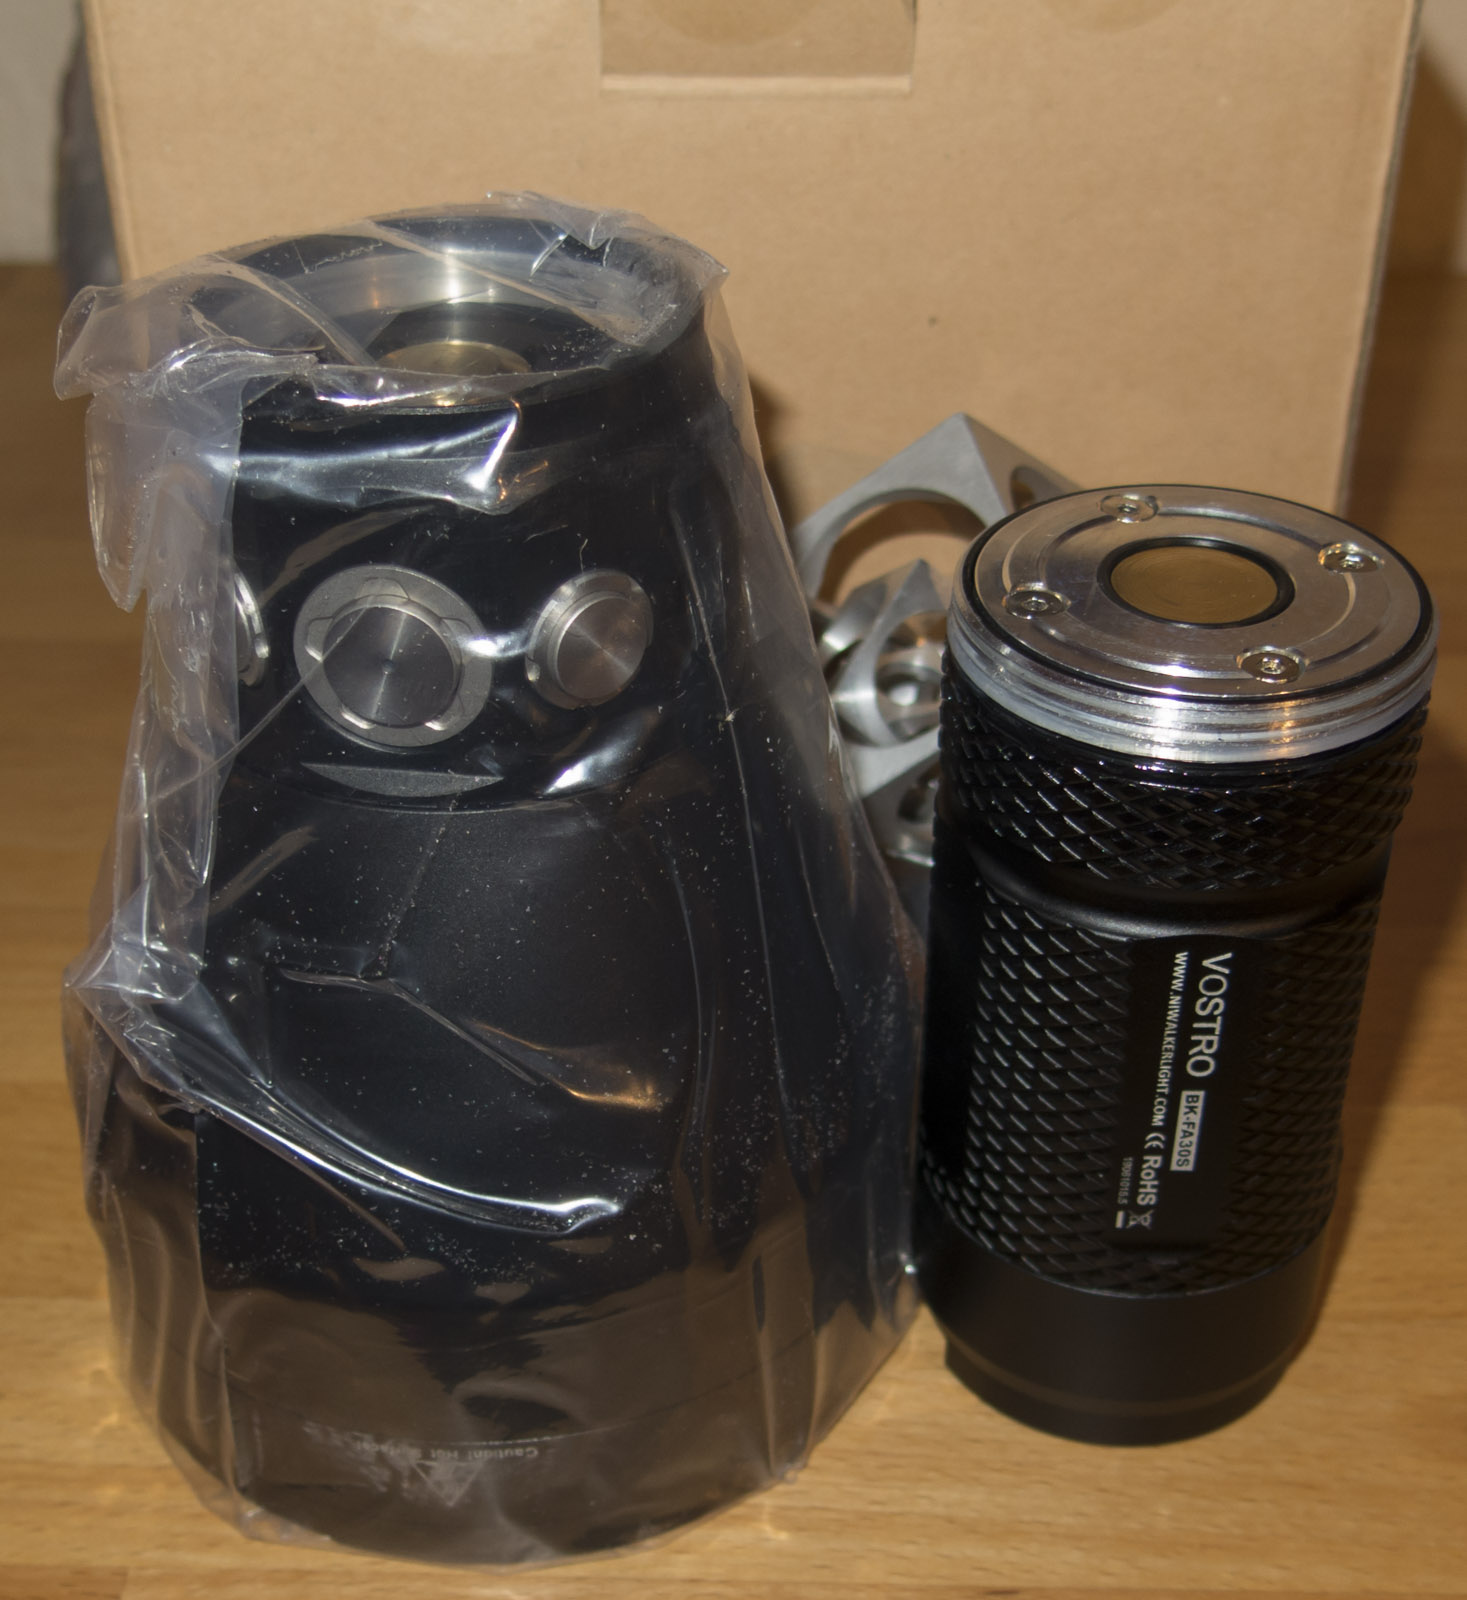
The lights box came packed in a DHL Express plastic bag

The light comes in a package around the box of the light
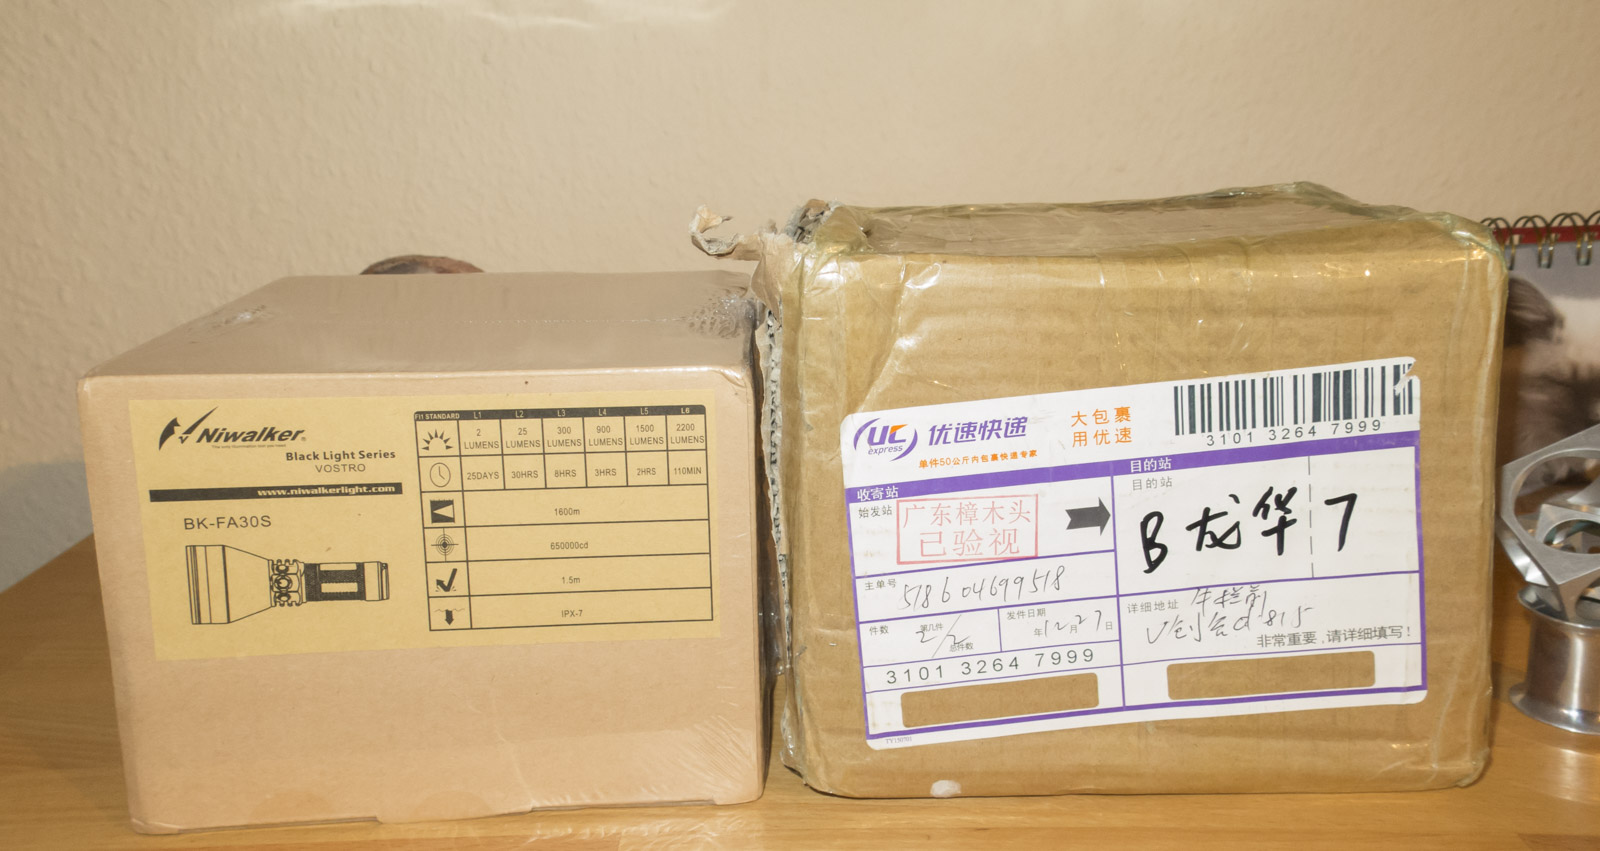
Main light specs printed on the box
Box is sealed with plasic, so even if the whole parcel should get wet the light should stay dry

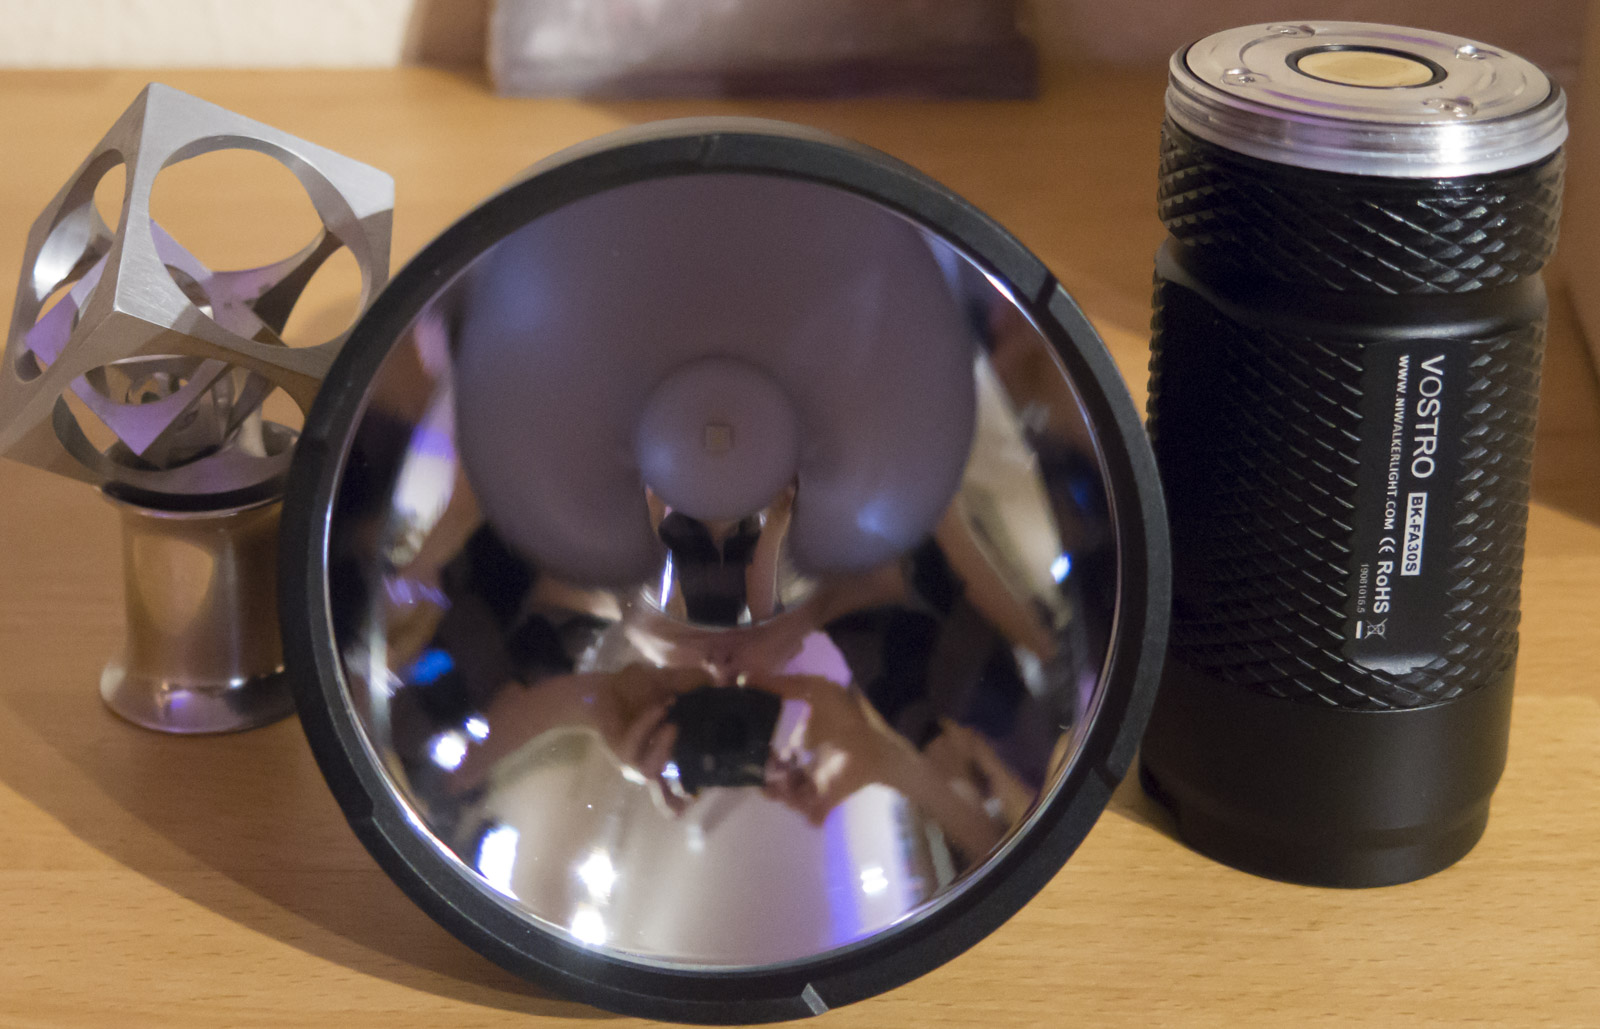
Size compared to MF02 box, the bigger light in smaller volume box
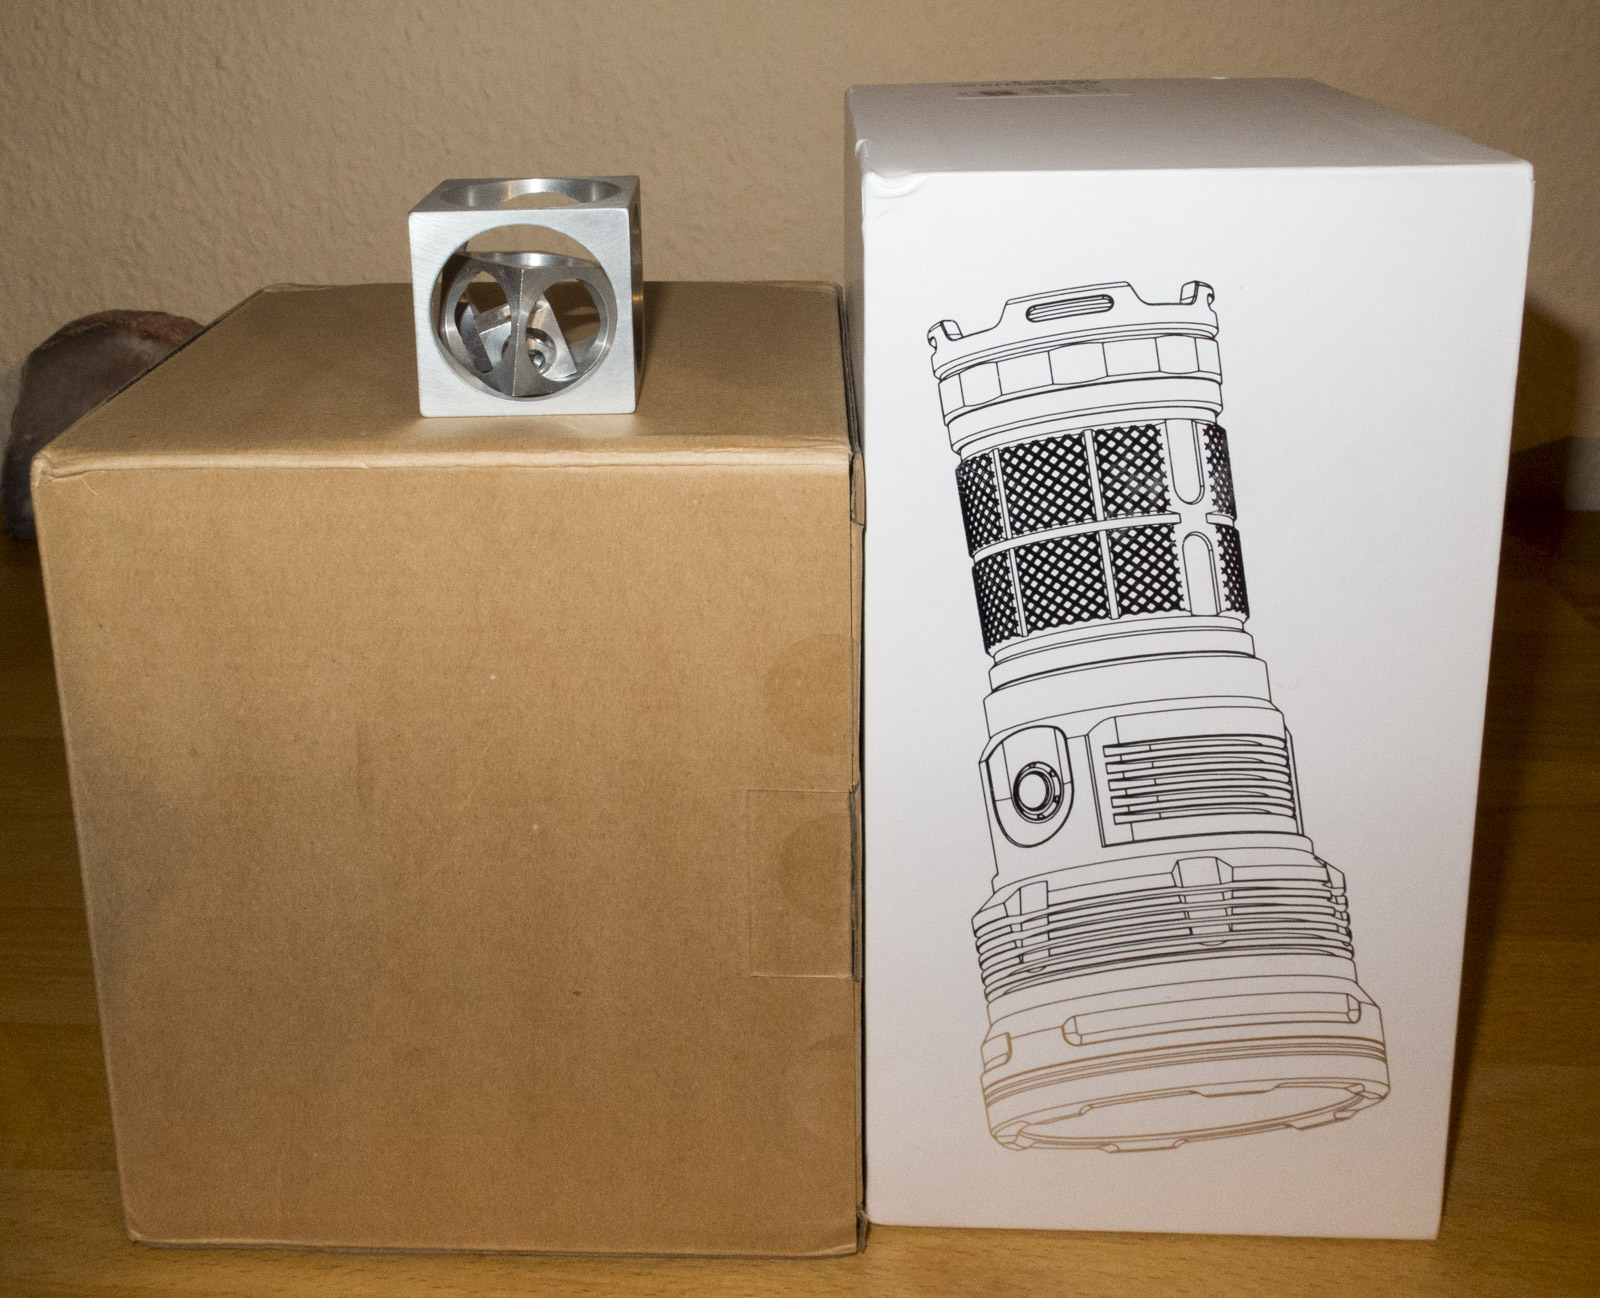
First impression of the thrower
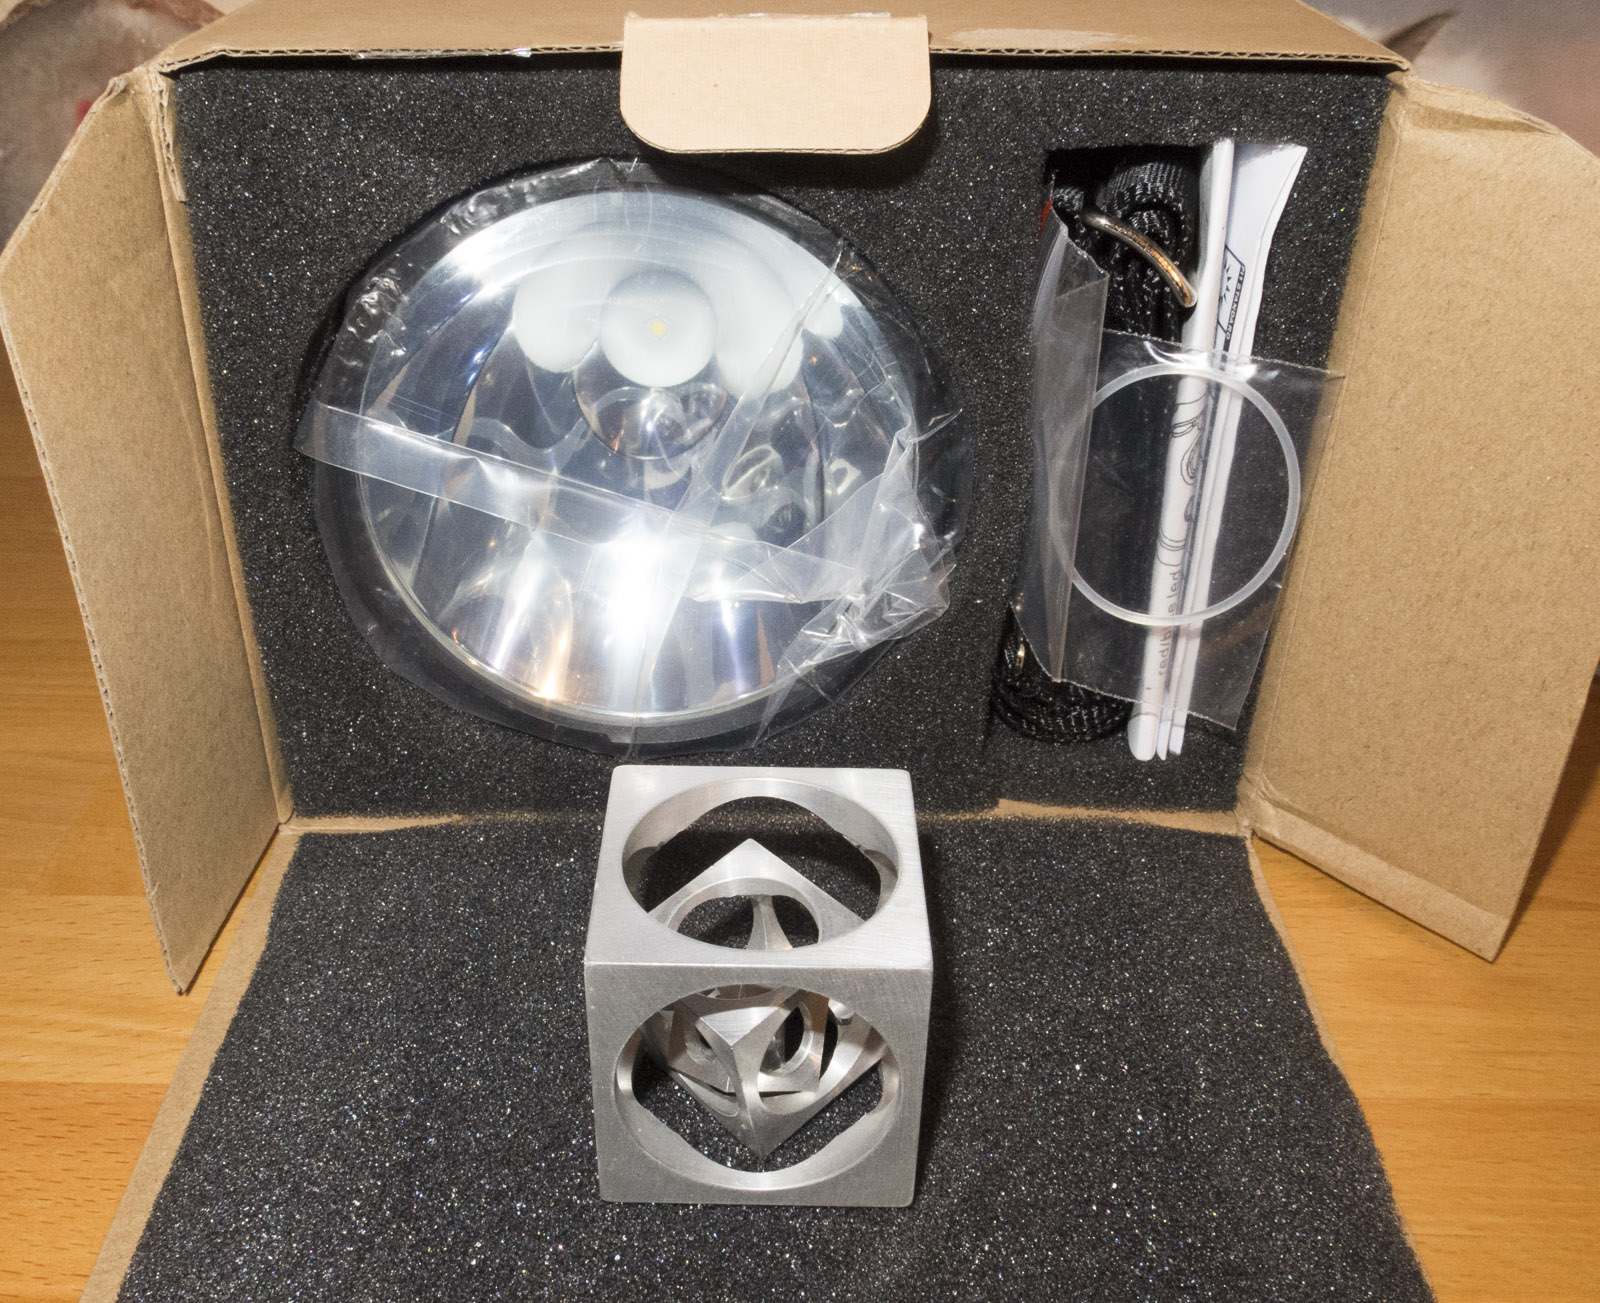
Accessories spare o-ring, manual and heavy duty lanyard you can clip on the tail, I would have liked an option to clip the lanyard to the head
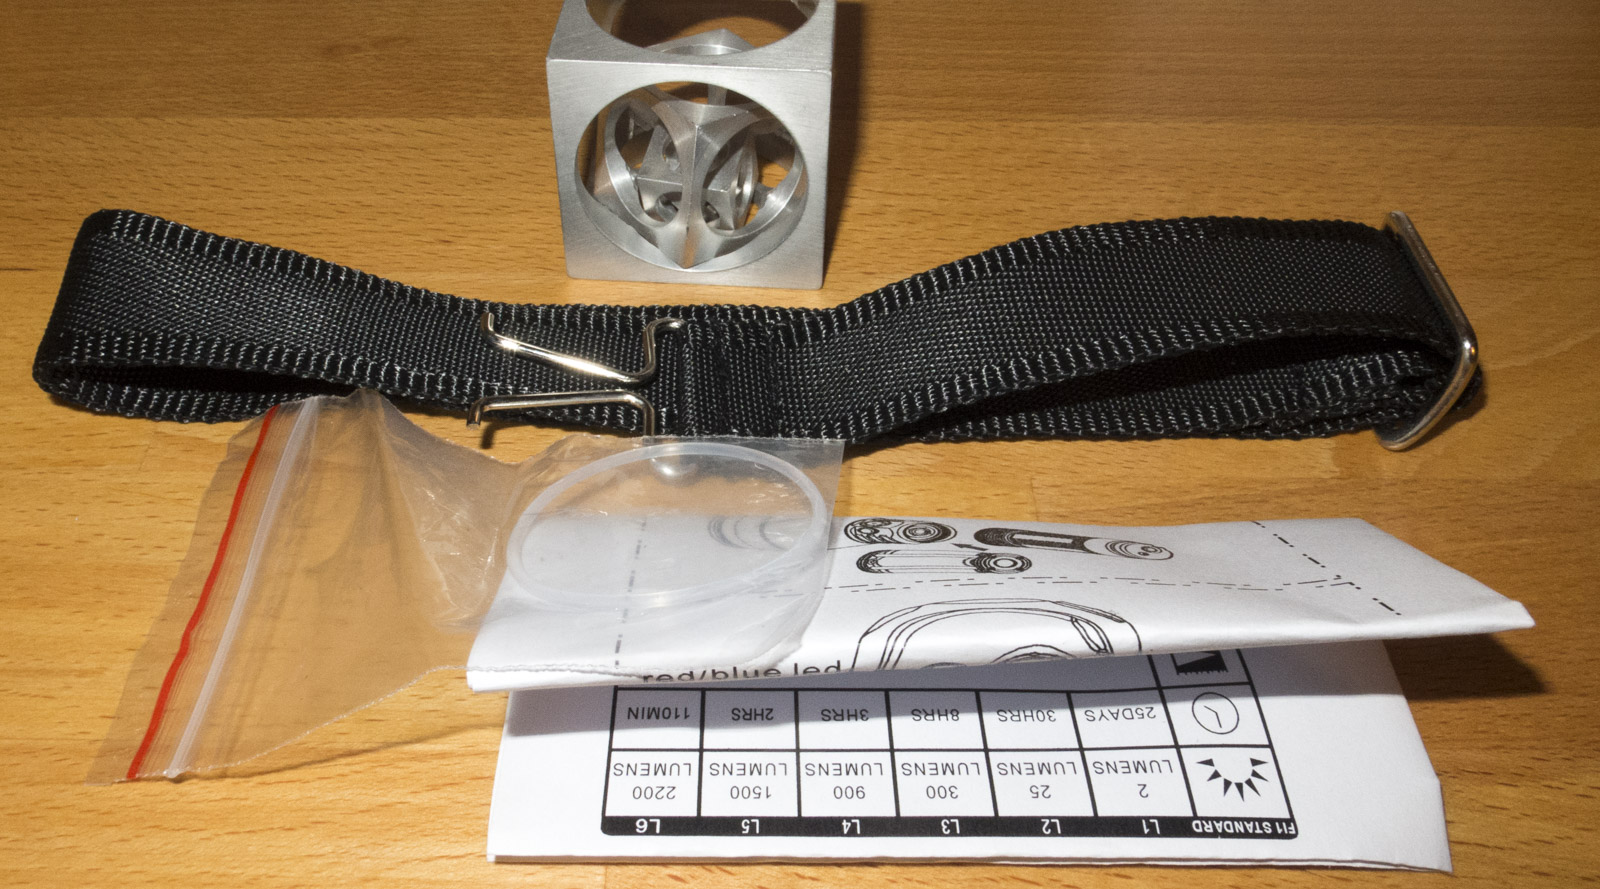
Manual
.
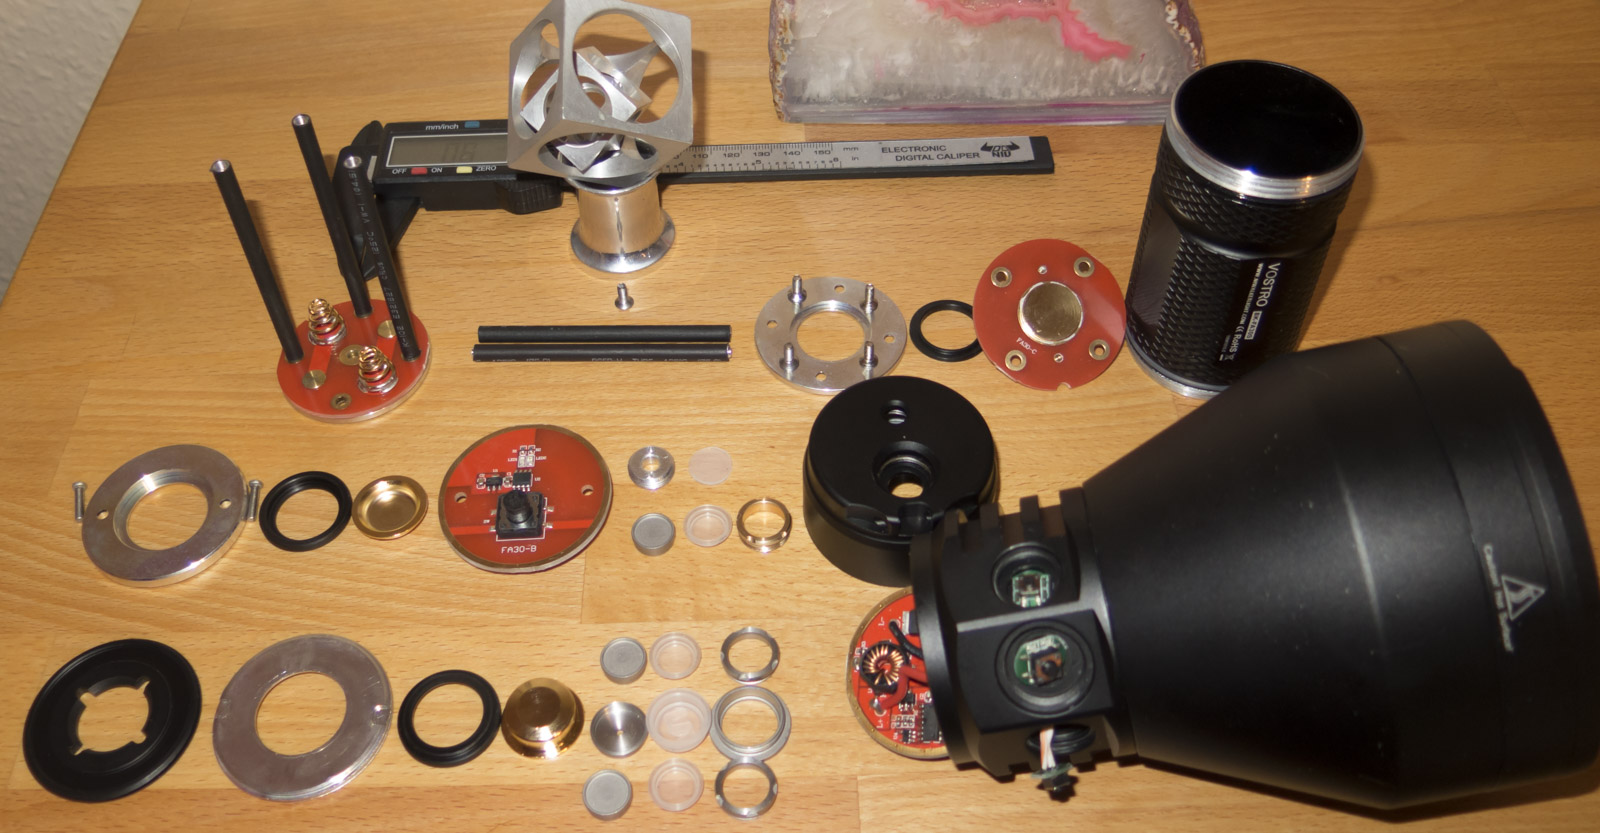
Photos of the light
.
Unboxing and first impressions
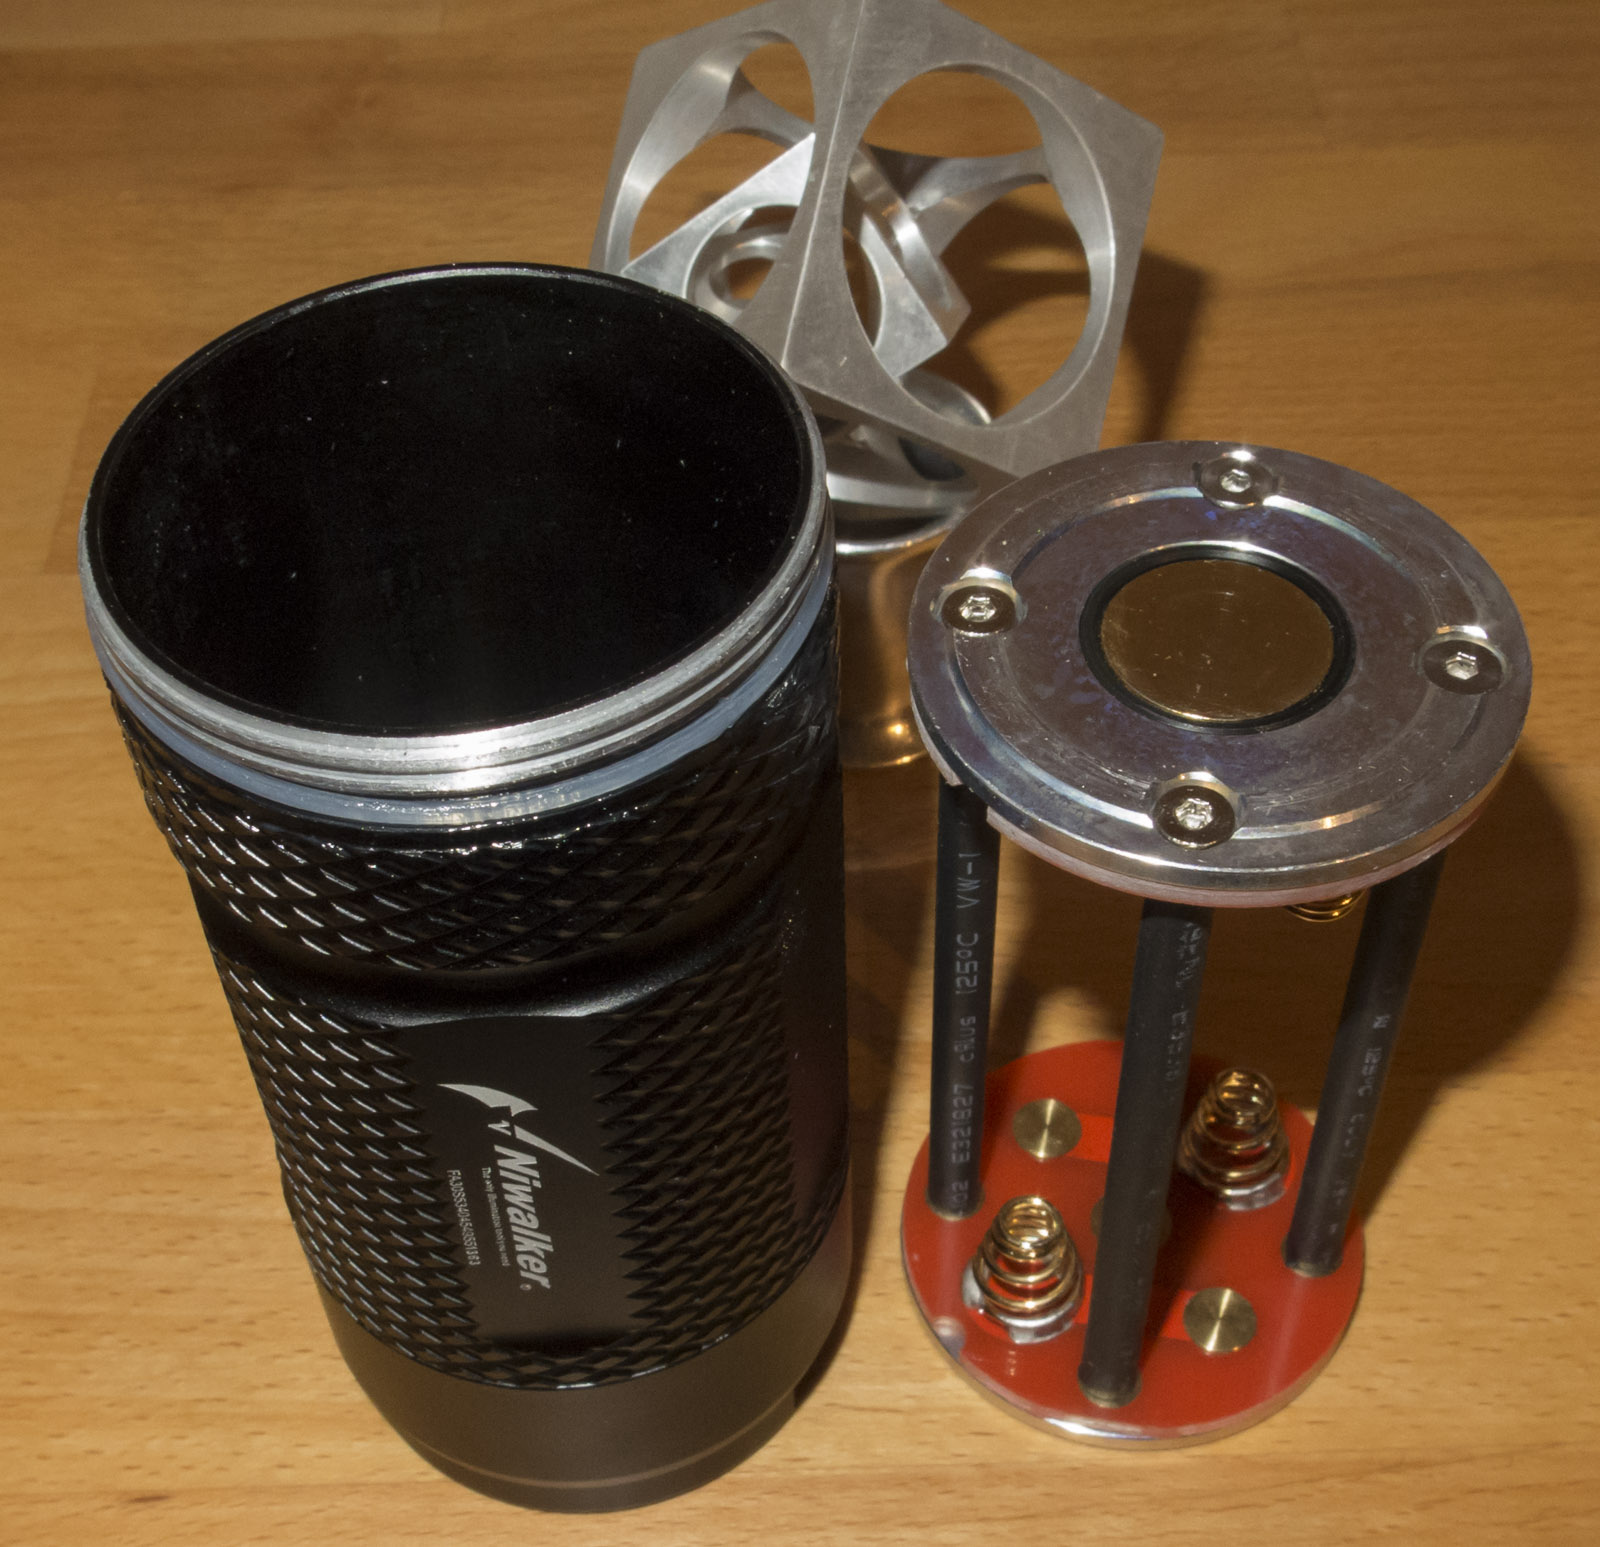
The battery carrier is surprisingly light compared to other lights with brass ones
The battery tube medium weight, not build like a tank, but also not fragile
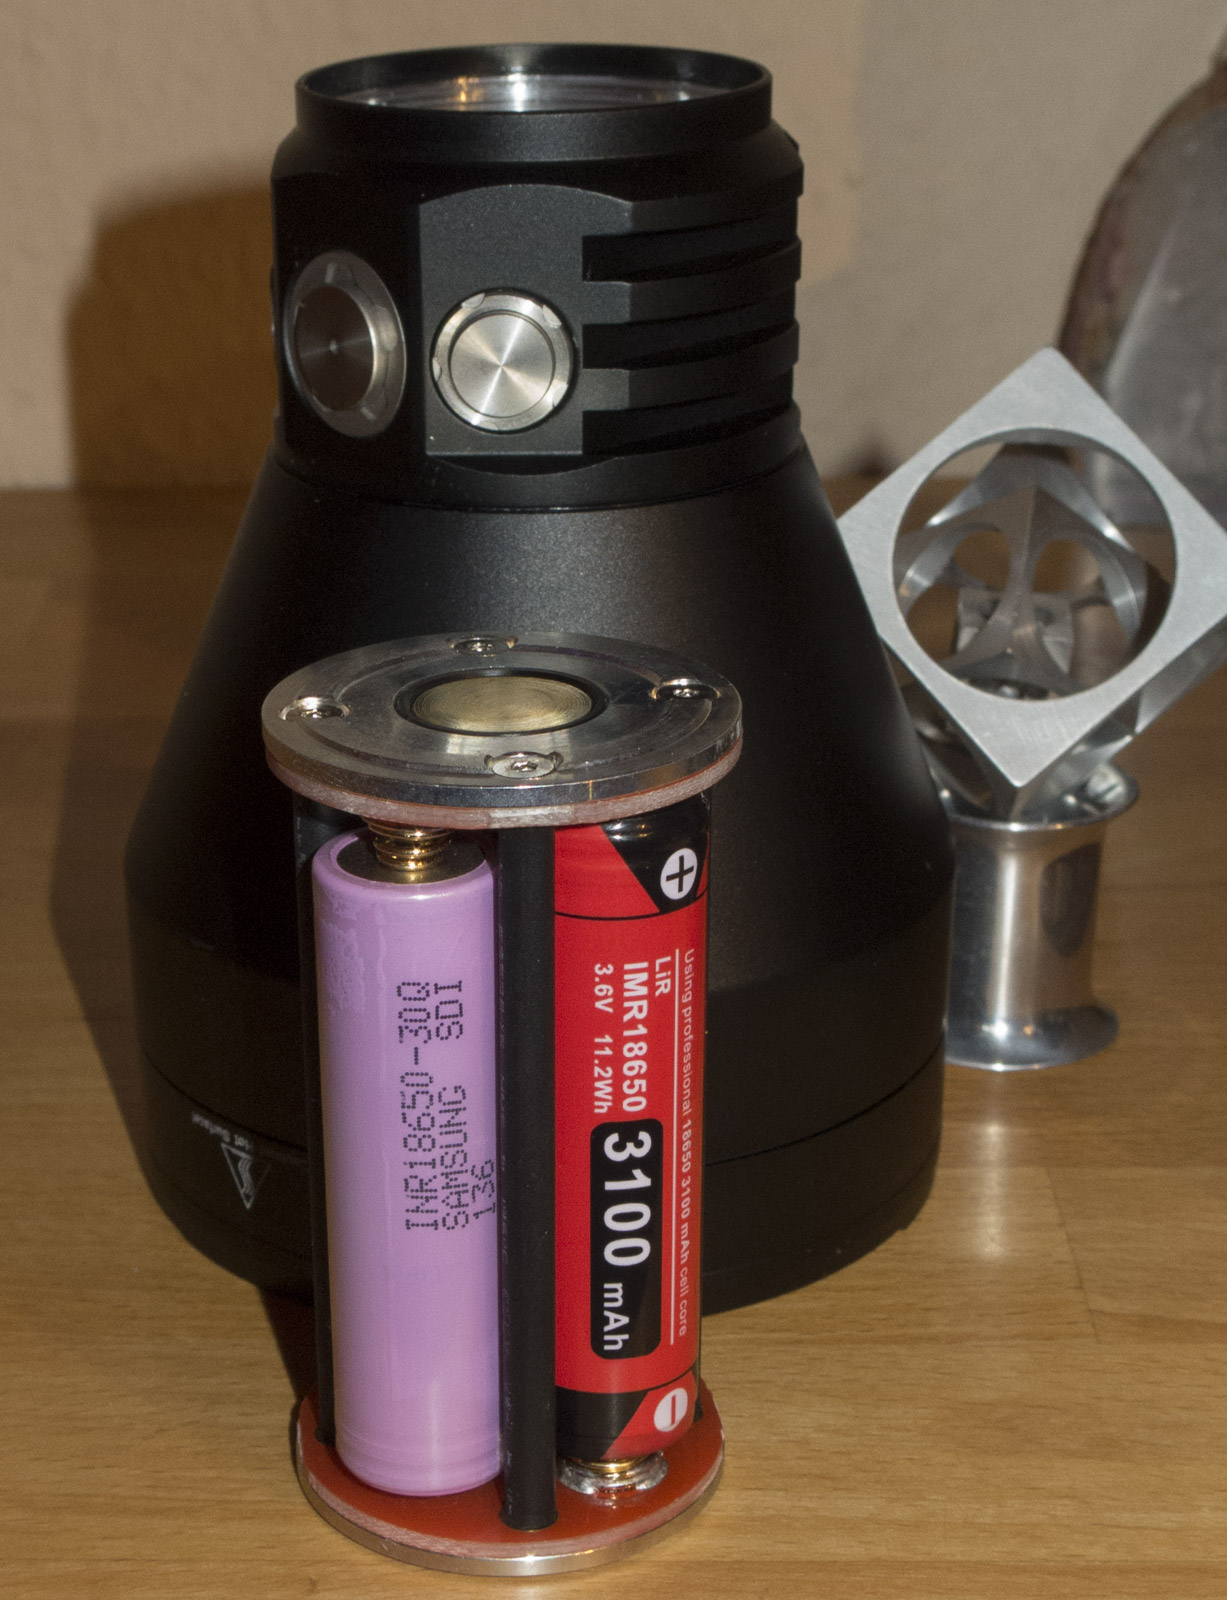
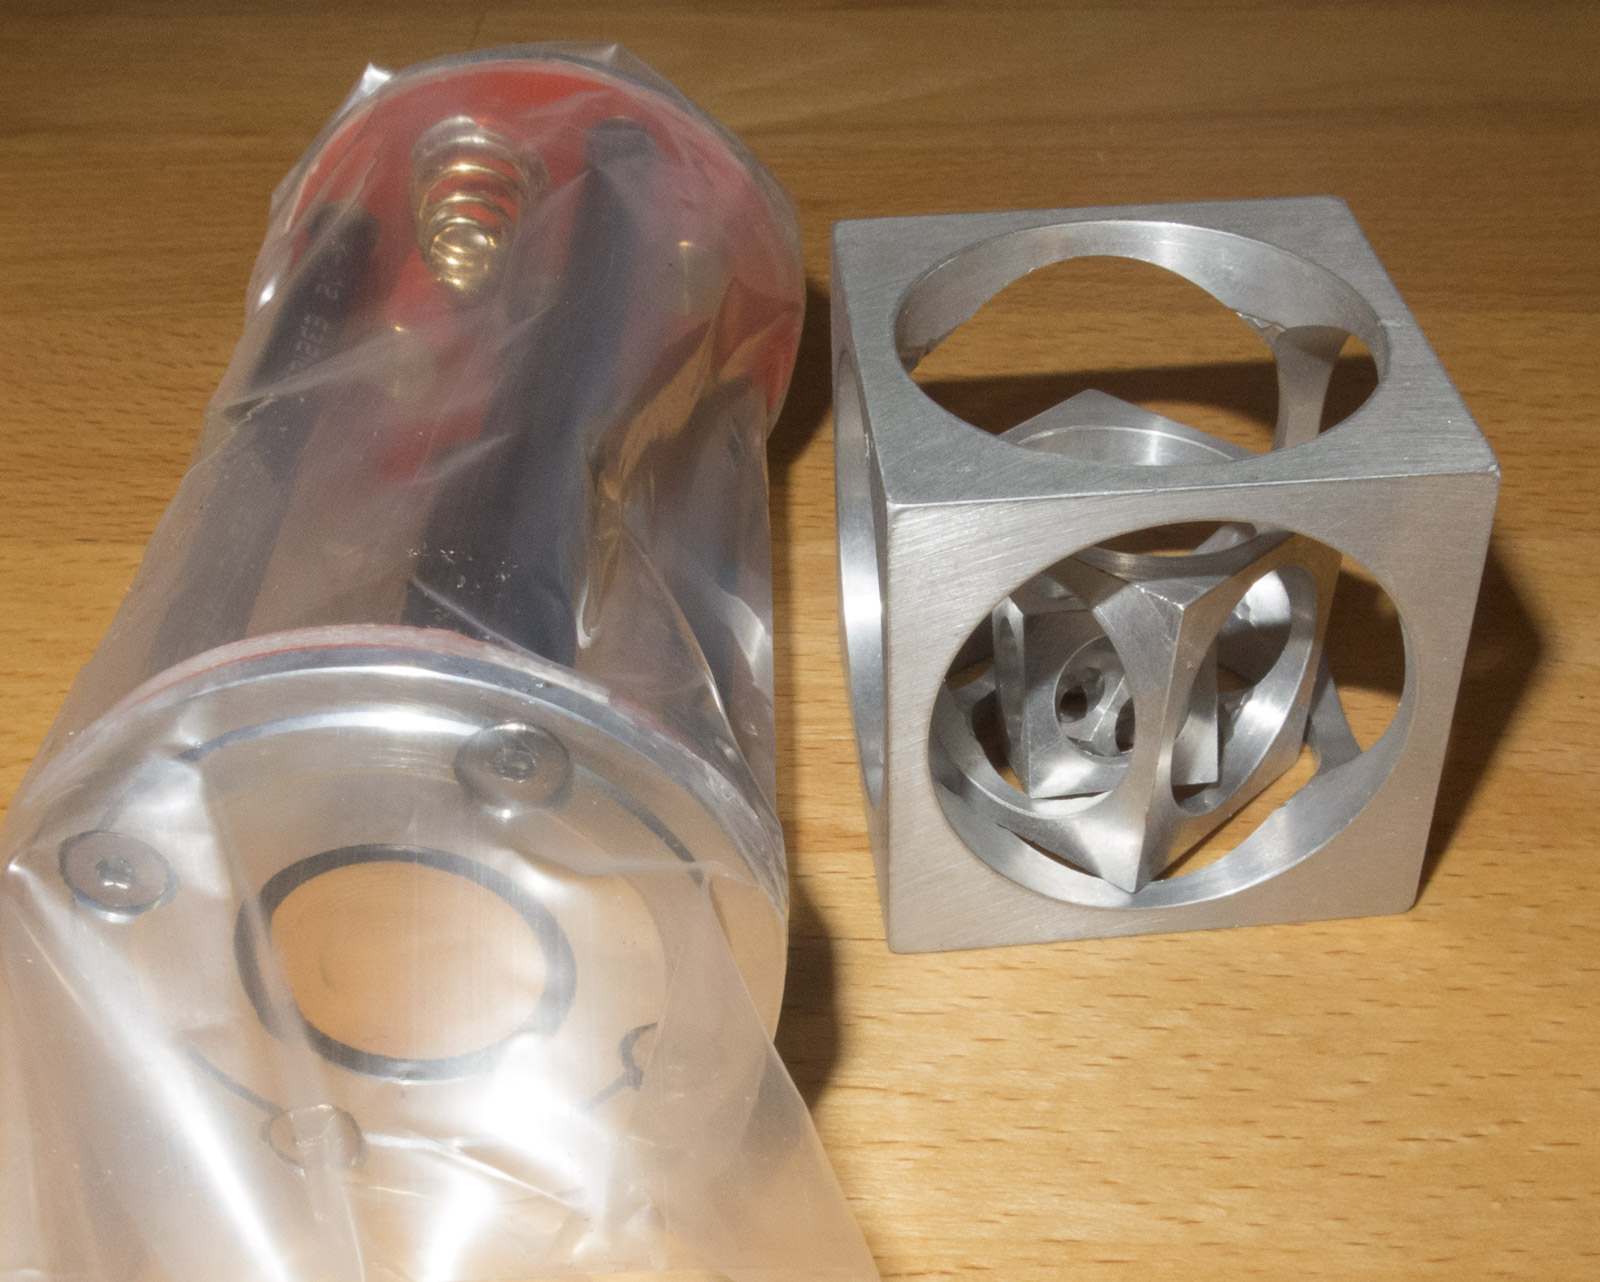
Man I love the those huge square cut threads, the battery carrier fits all 18650 battery types button or flat top, protected and unprotected
The lights anodisation has no defects and a low texture
the knurling has good grip
Battery carrier is wired 4S
Tail cap
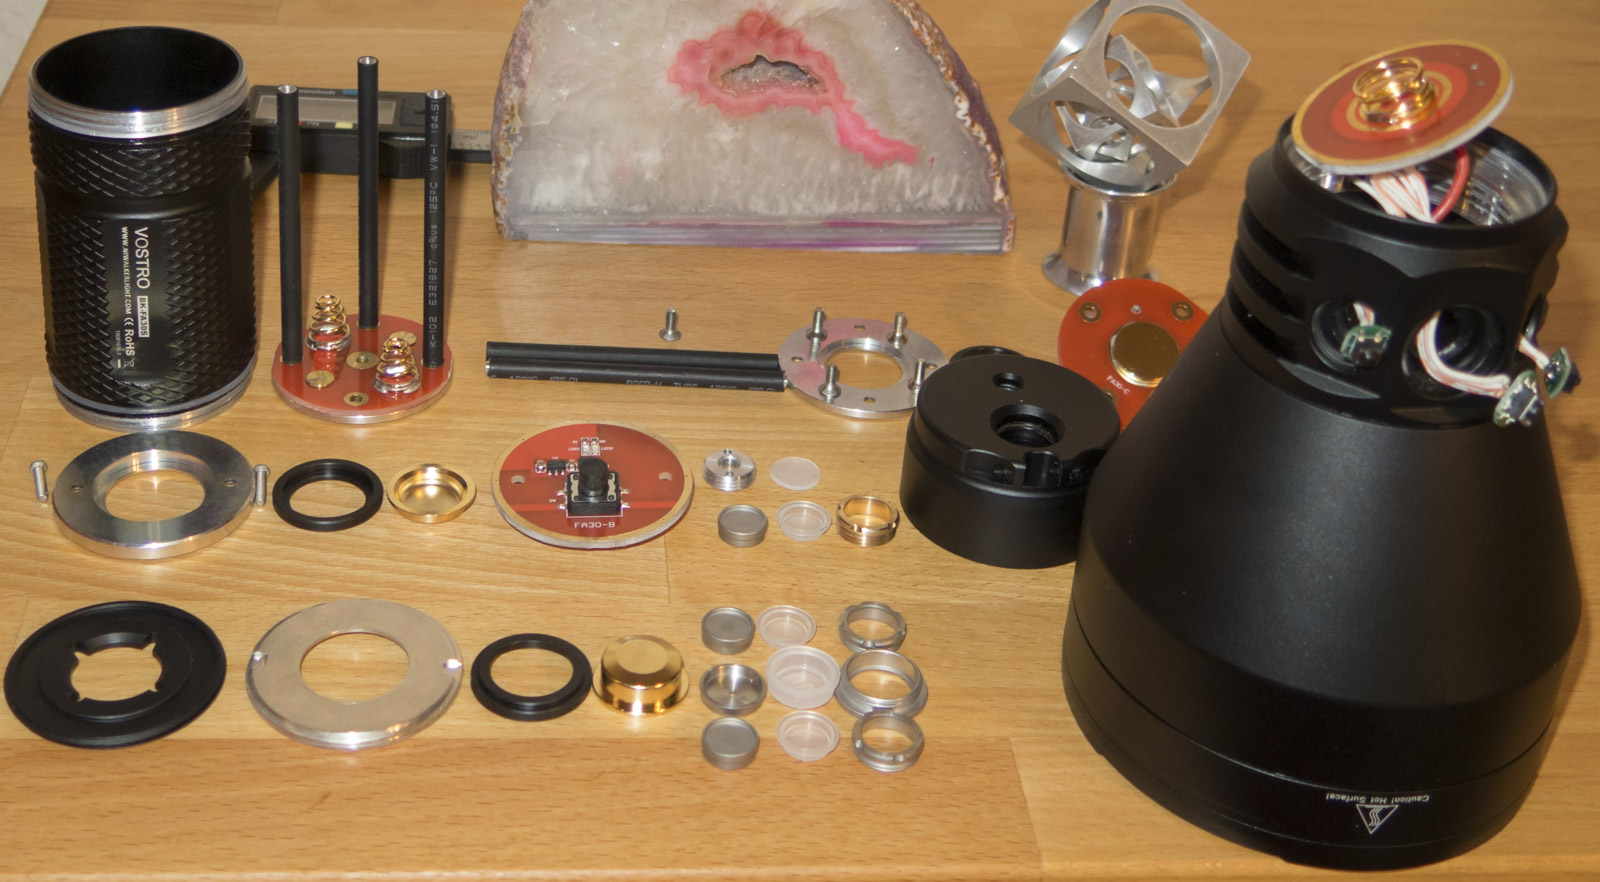
Now assembling those parts
Now I grabbed the most important part of this light

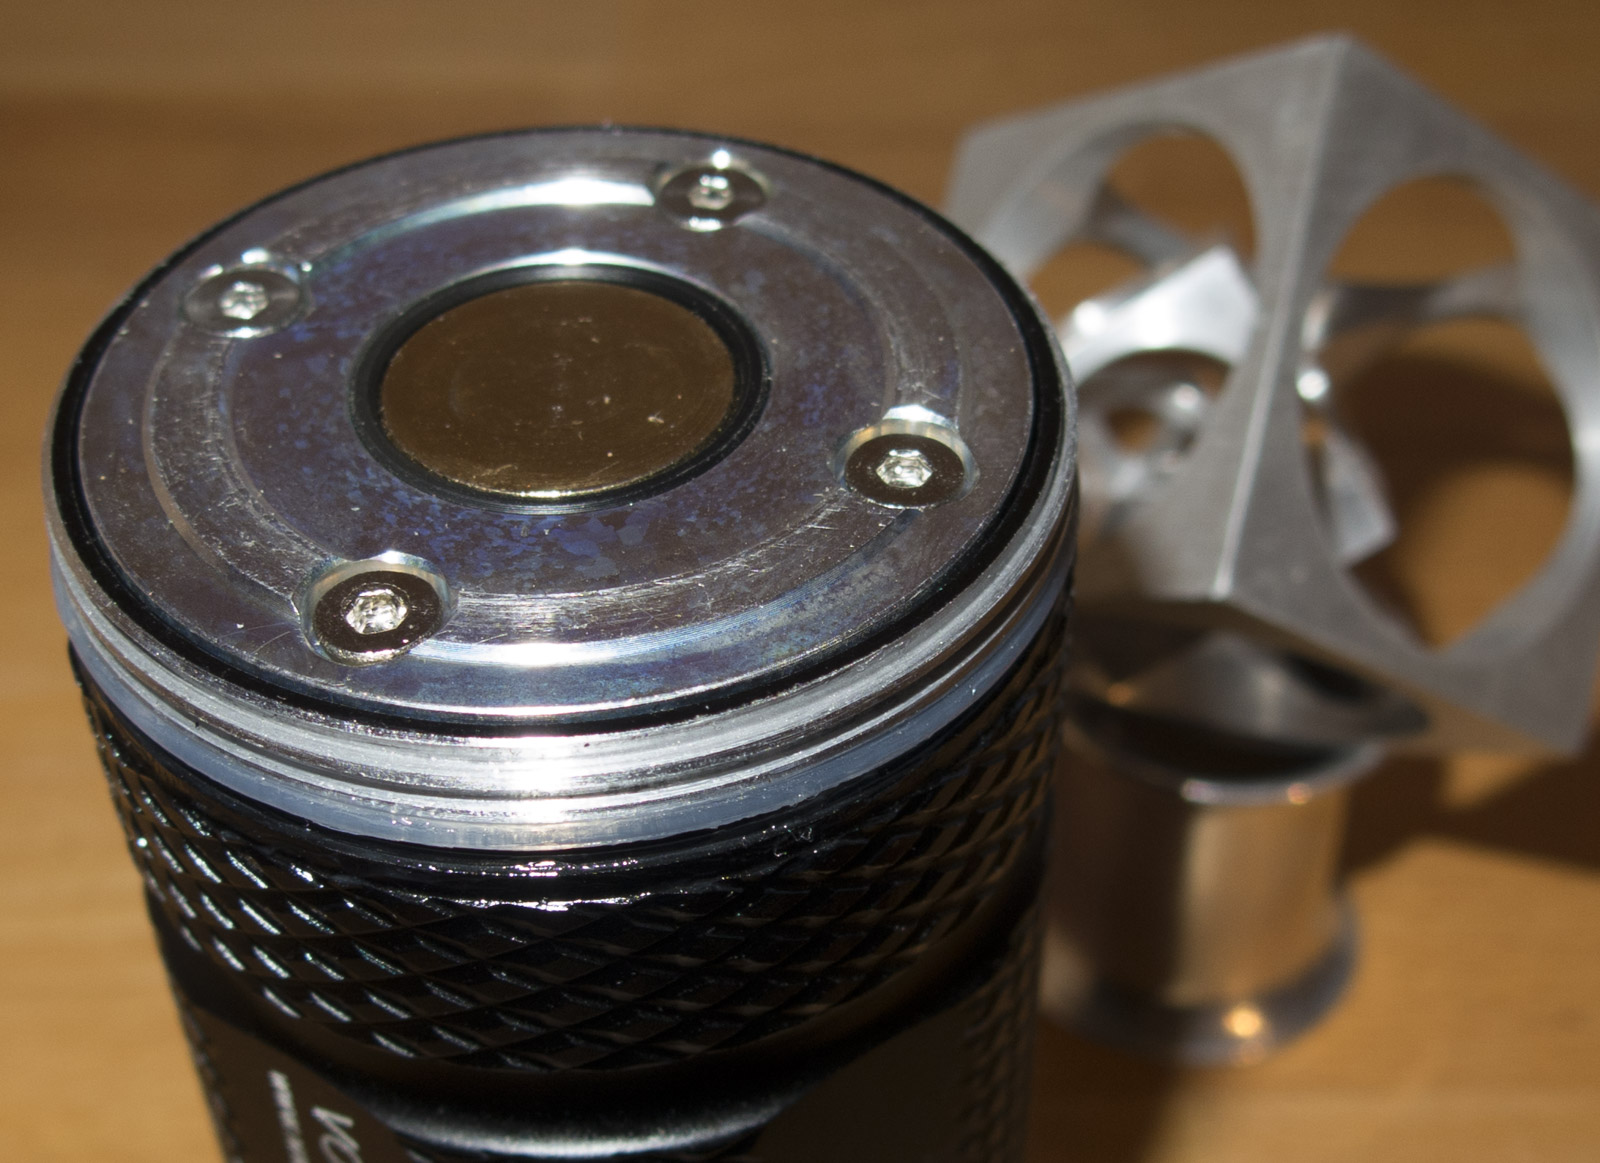
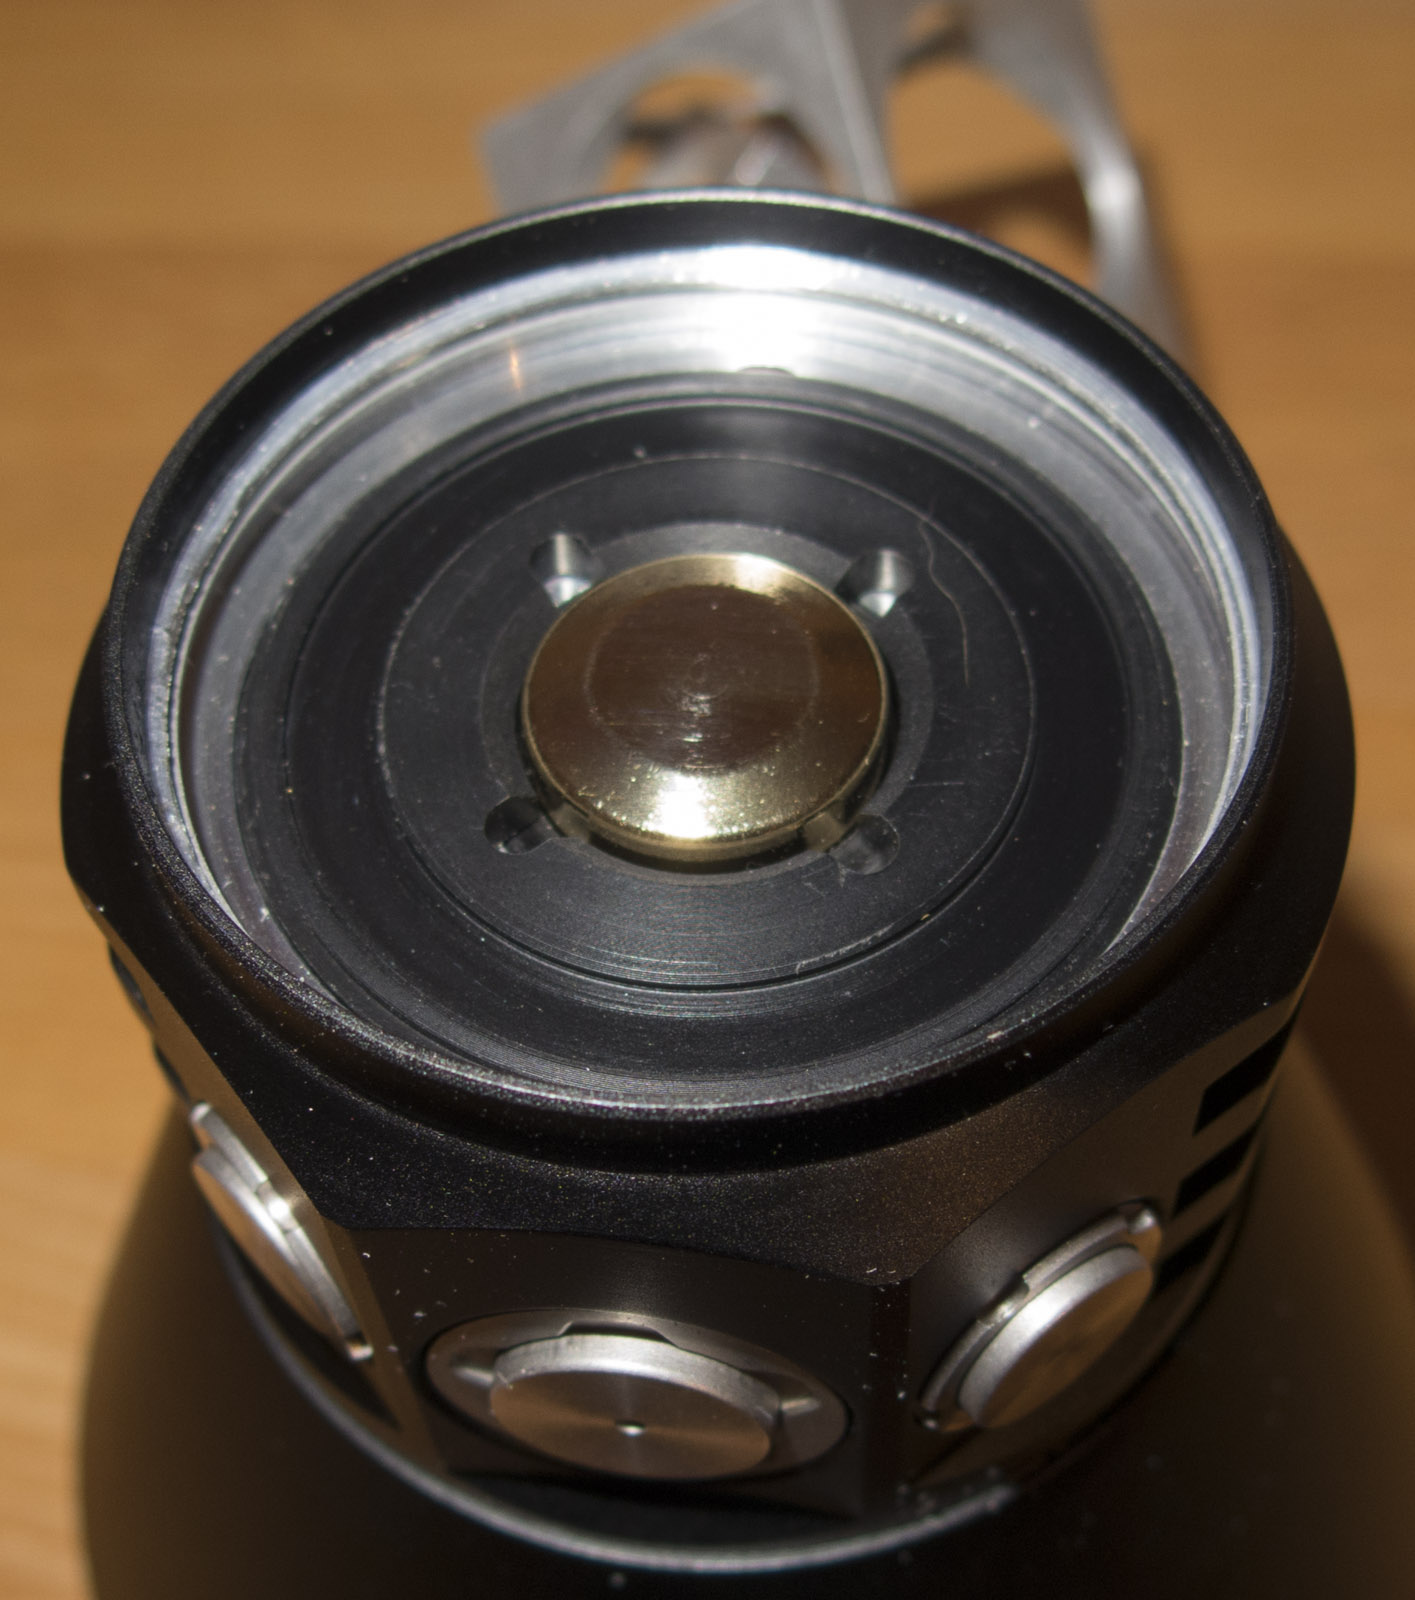
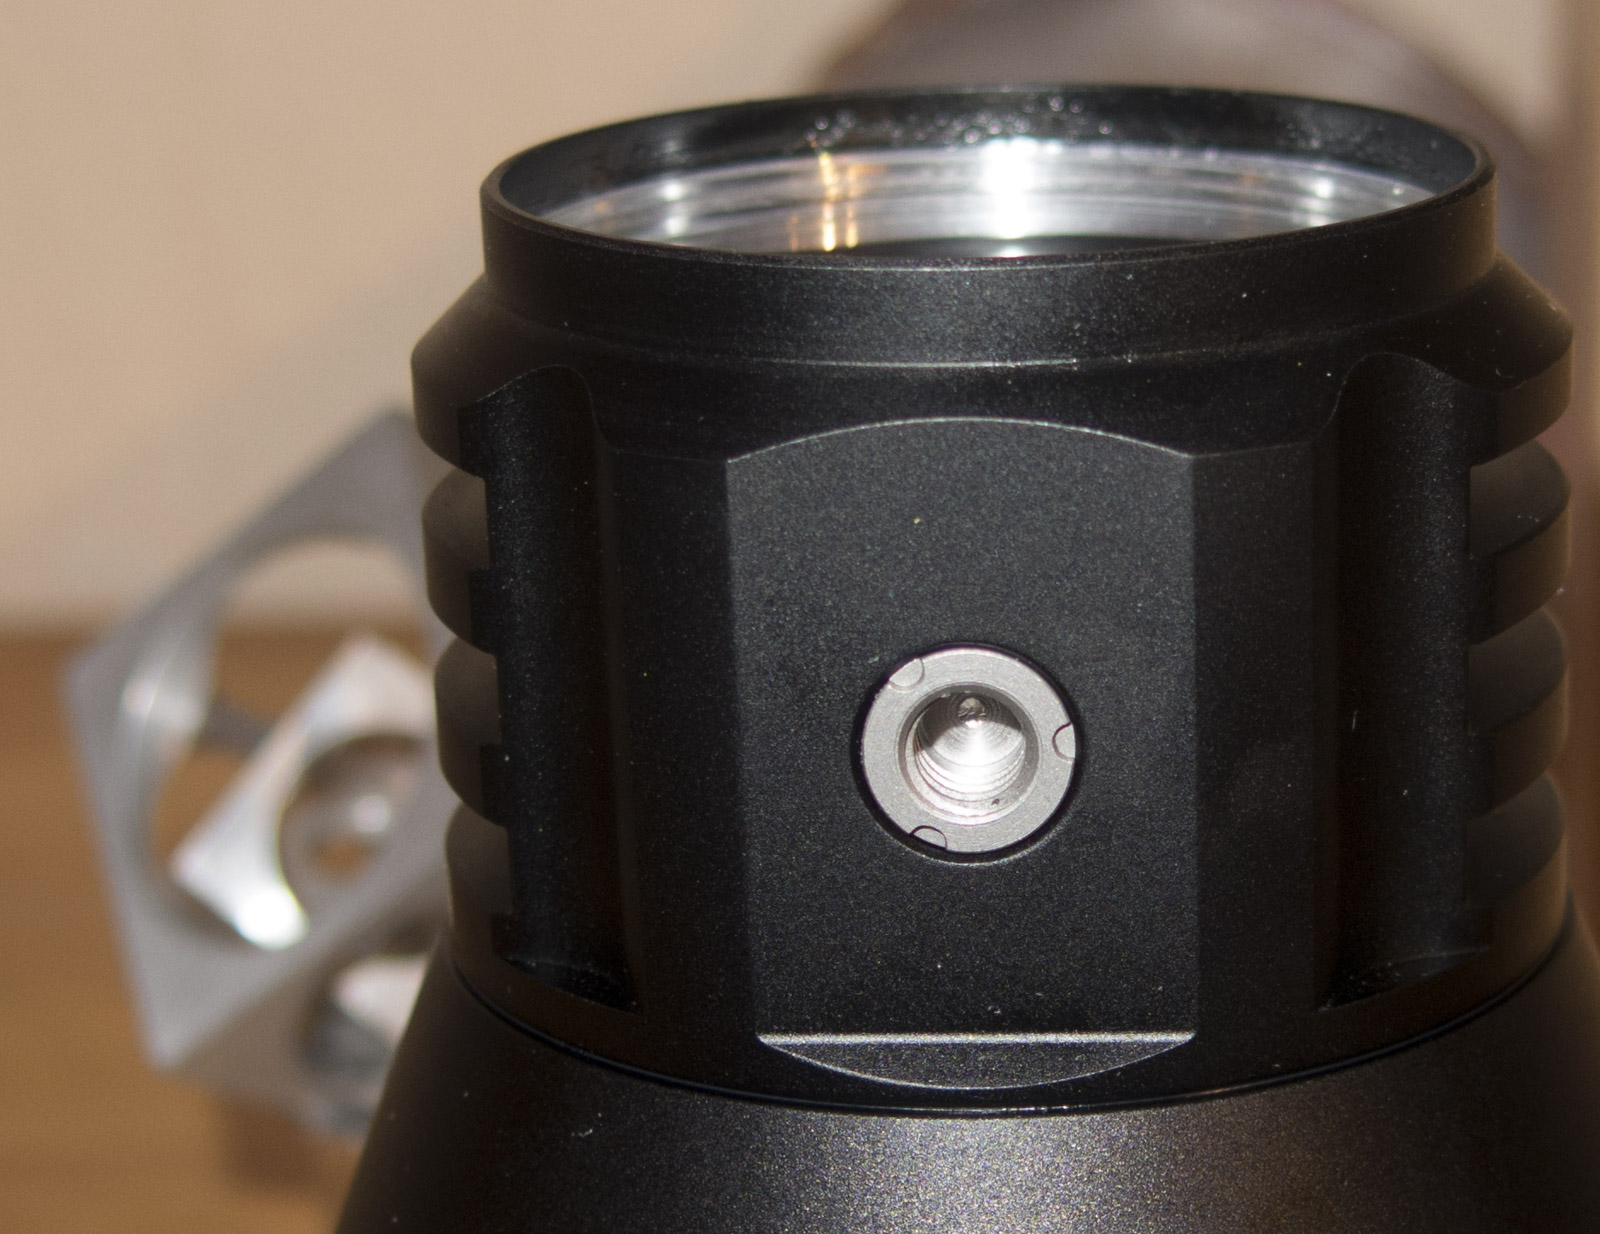
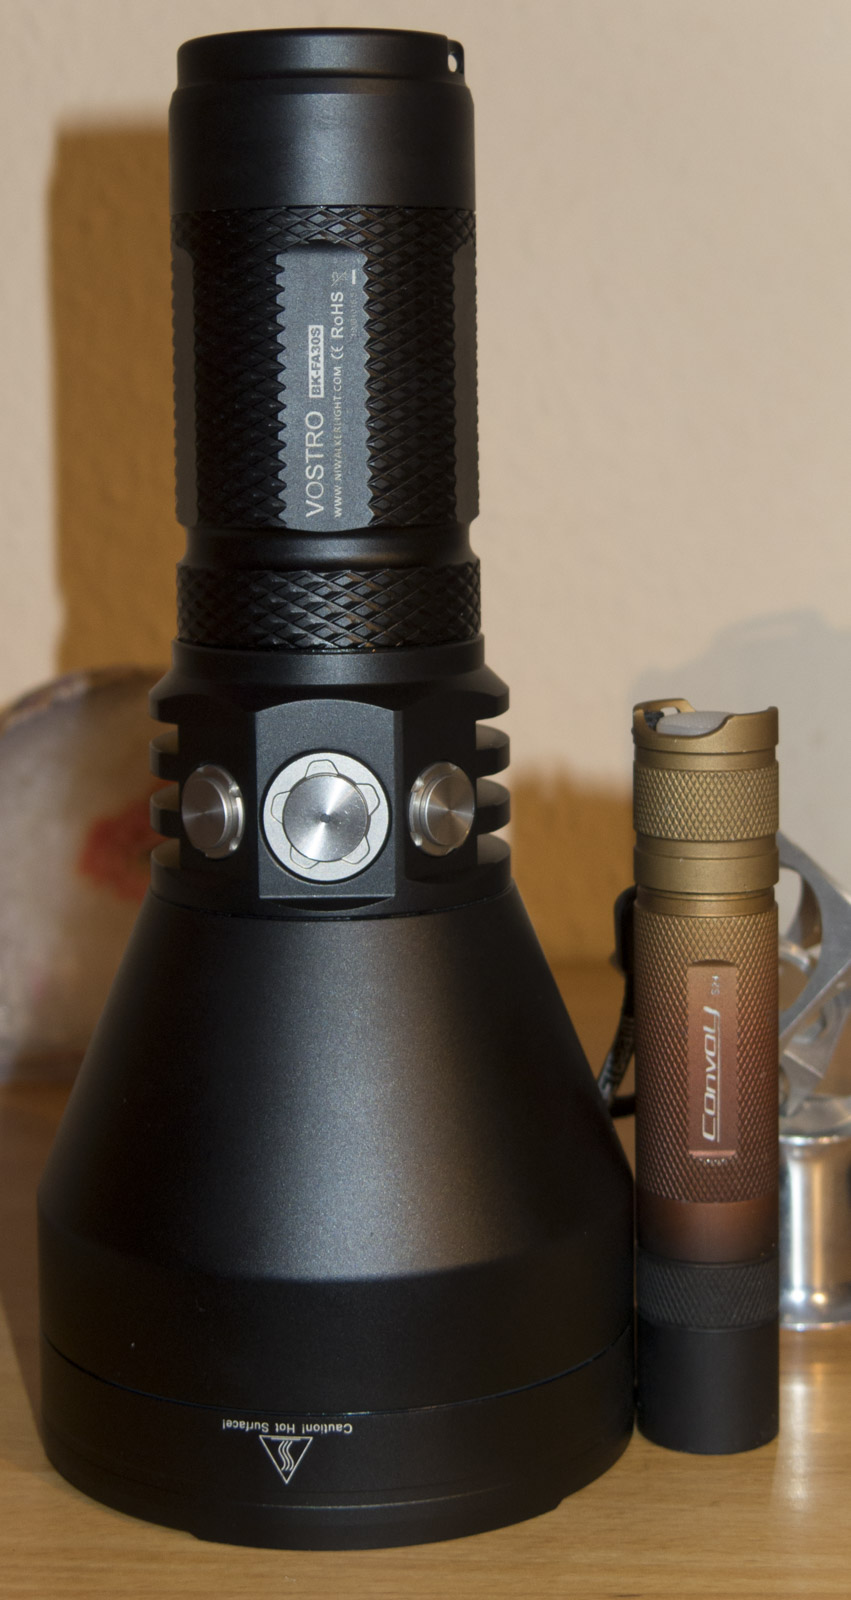
Here it is, a nice 100mm wide head
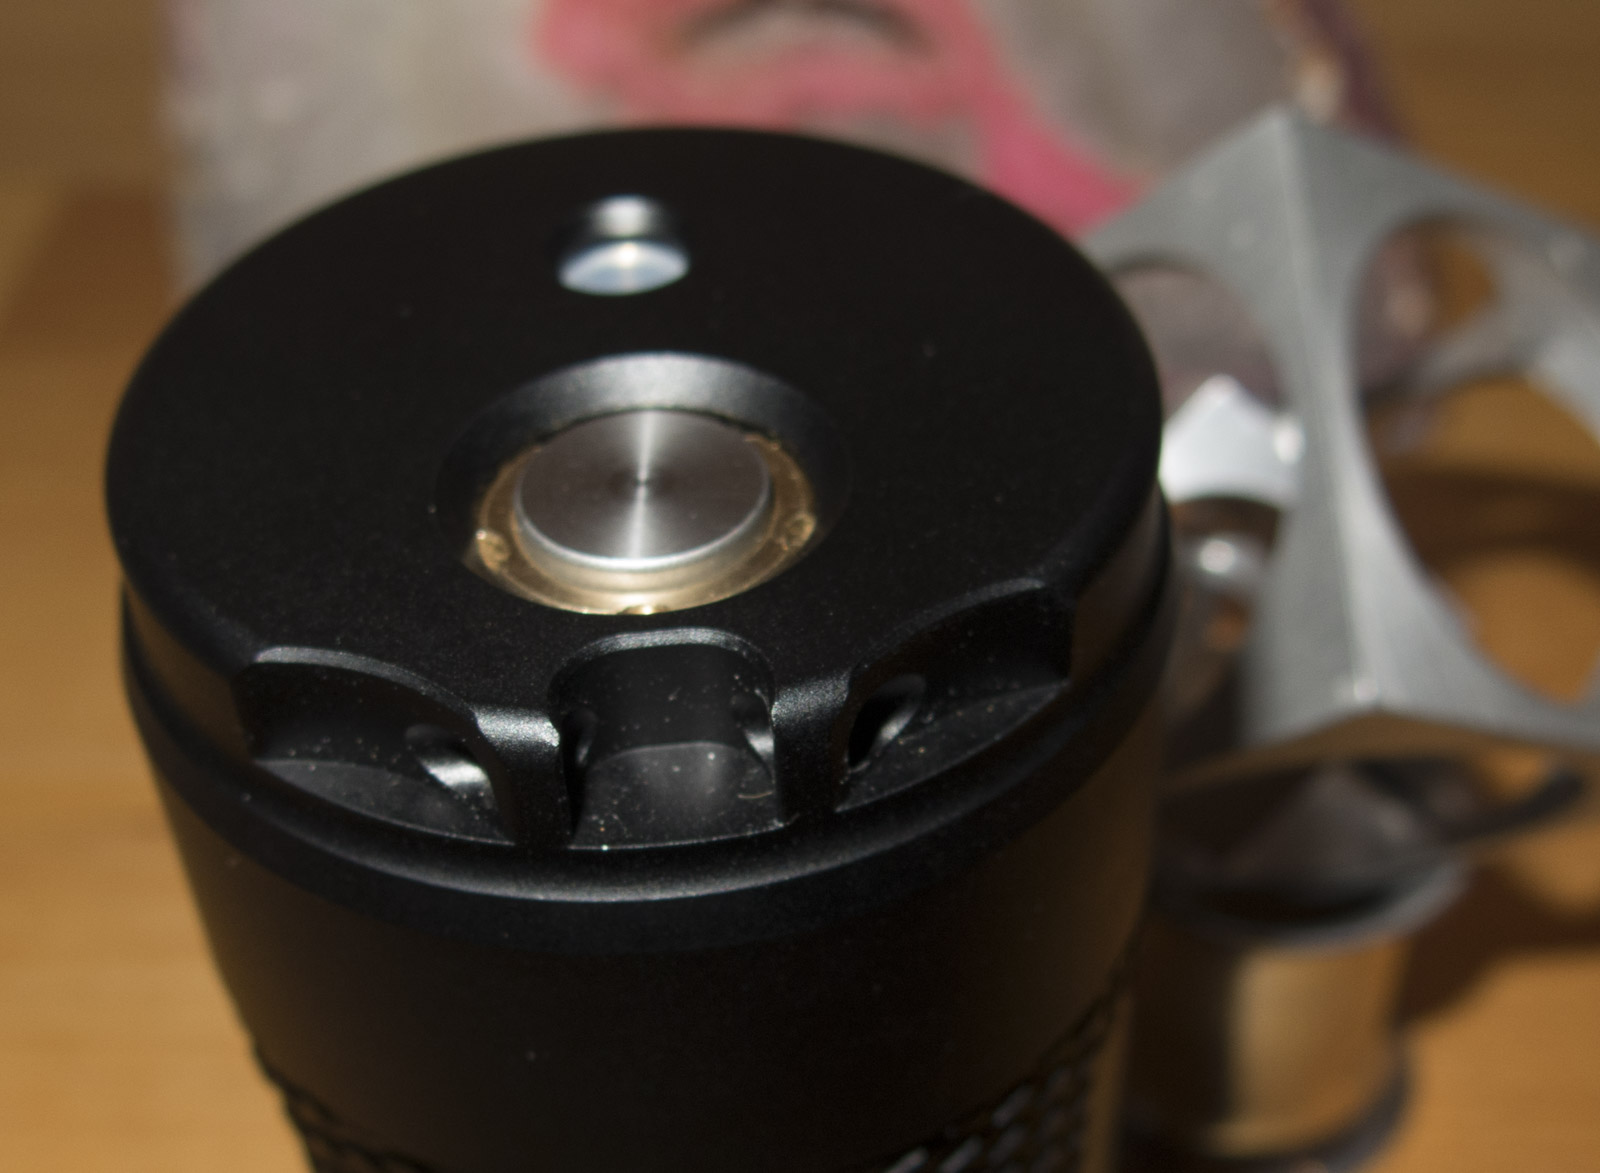
It has 3 buttons, one was not assembled right and that has damaged the switch inside it’s not as stiff as the other one, CQ will make sure this does not happen again
Tripod mount with reduction adapter, I do not like the design that needs a special tool with 3 points to unscrew it, just 2 cut outs for screwdriver would be perfect
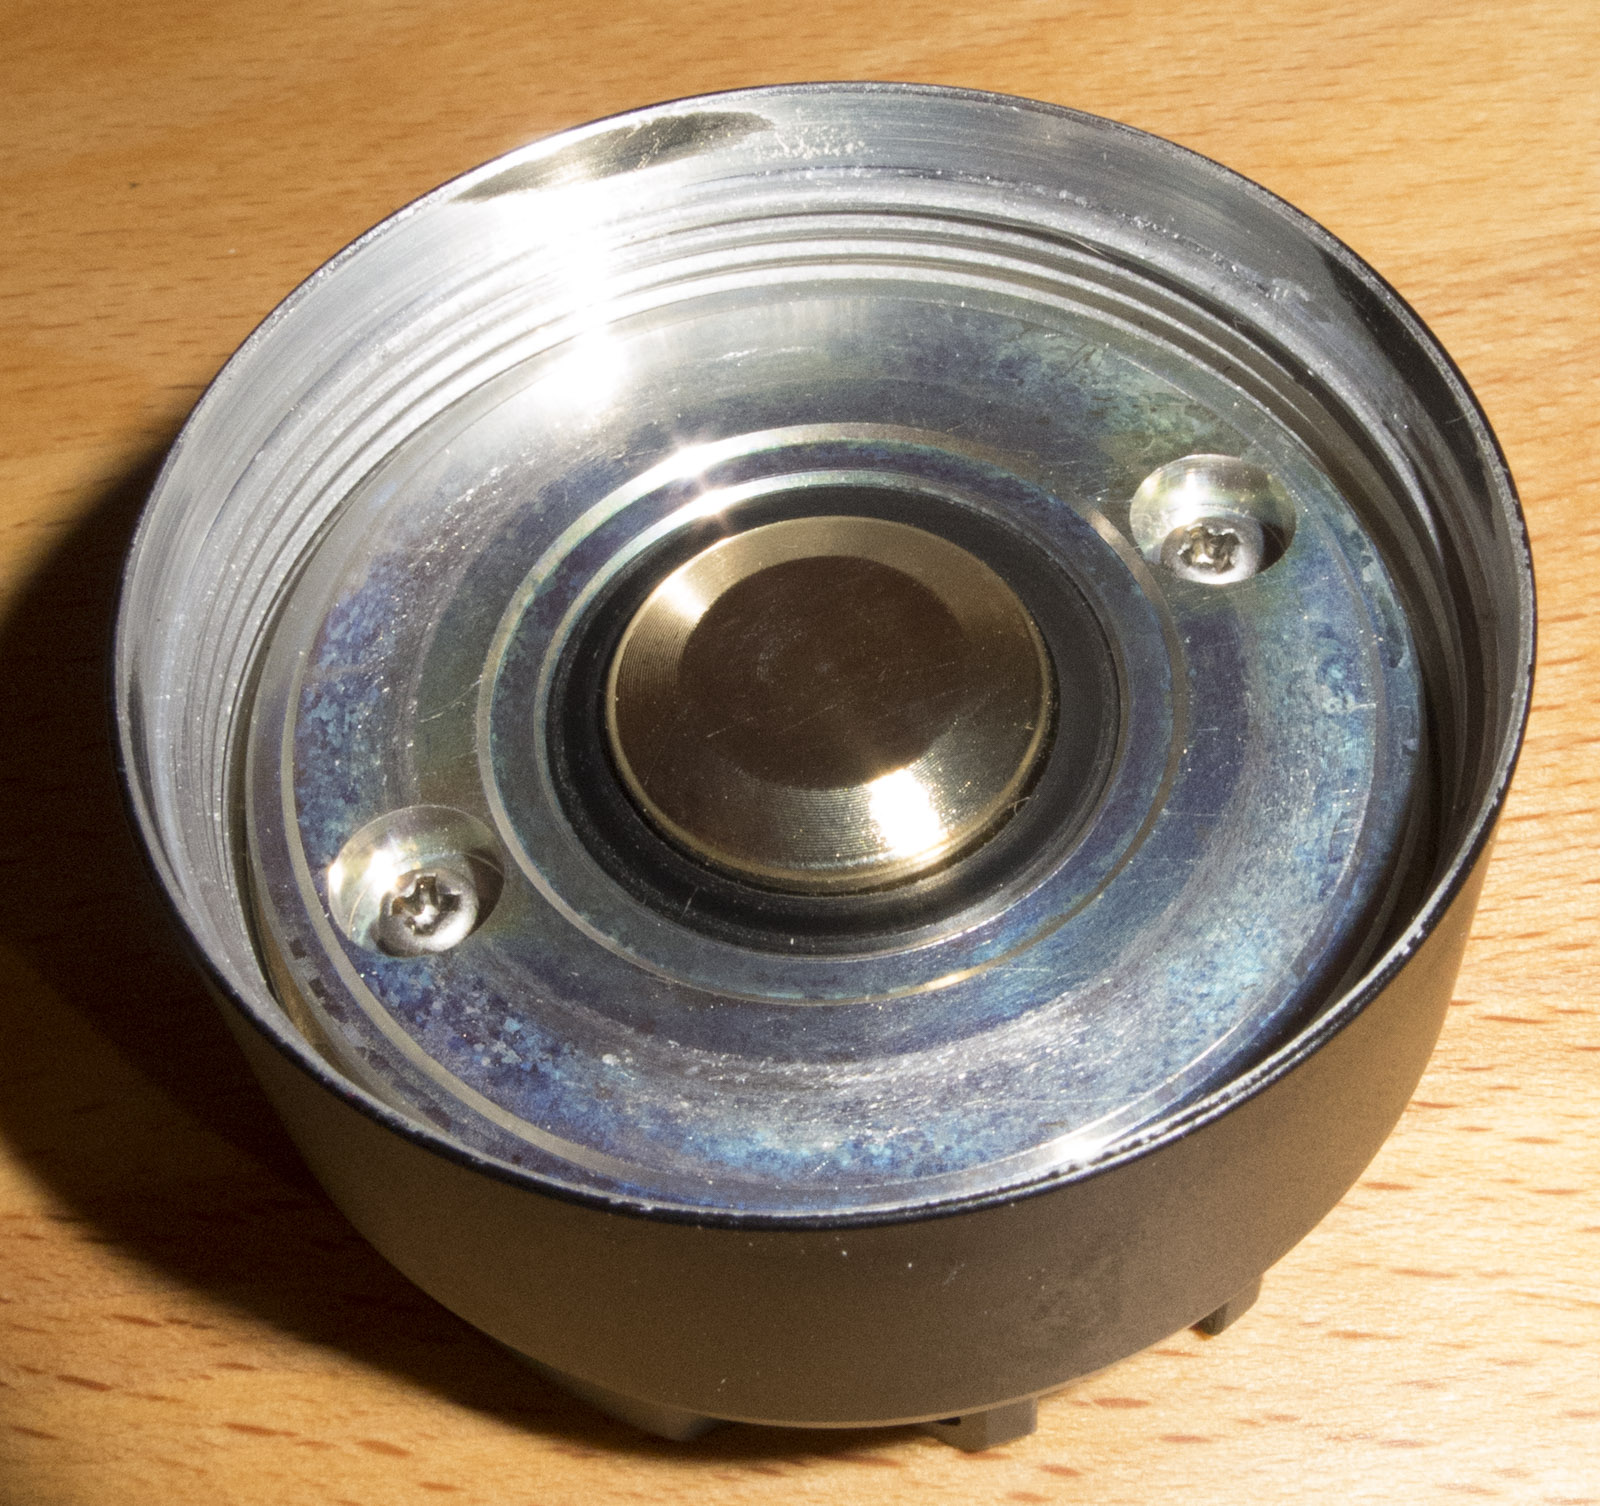
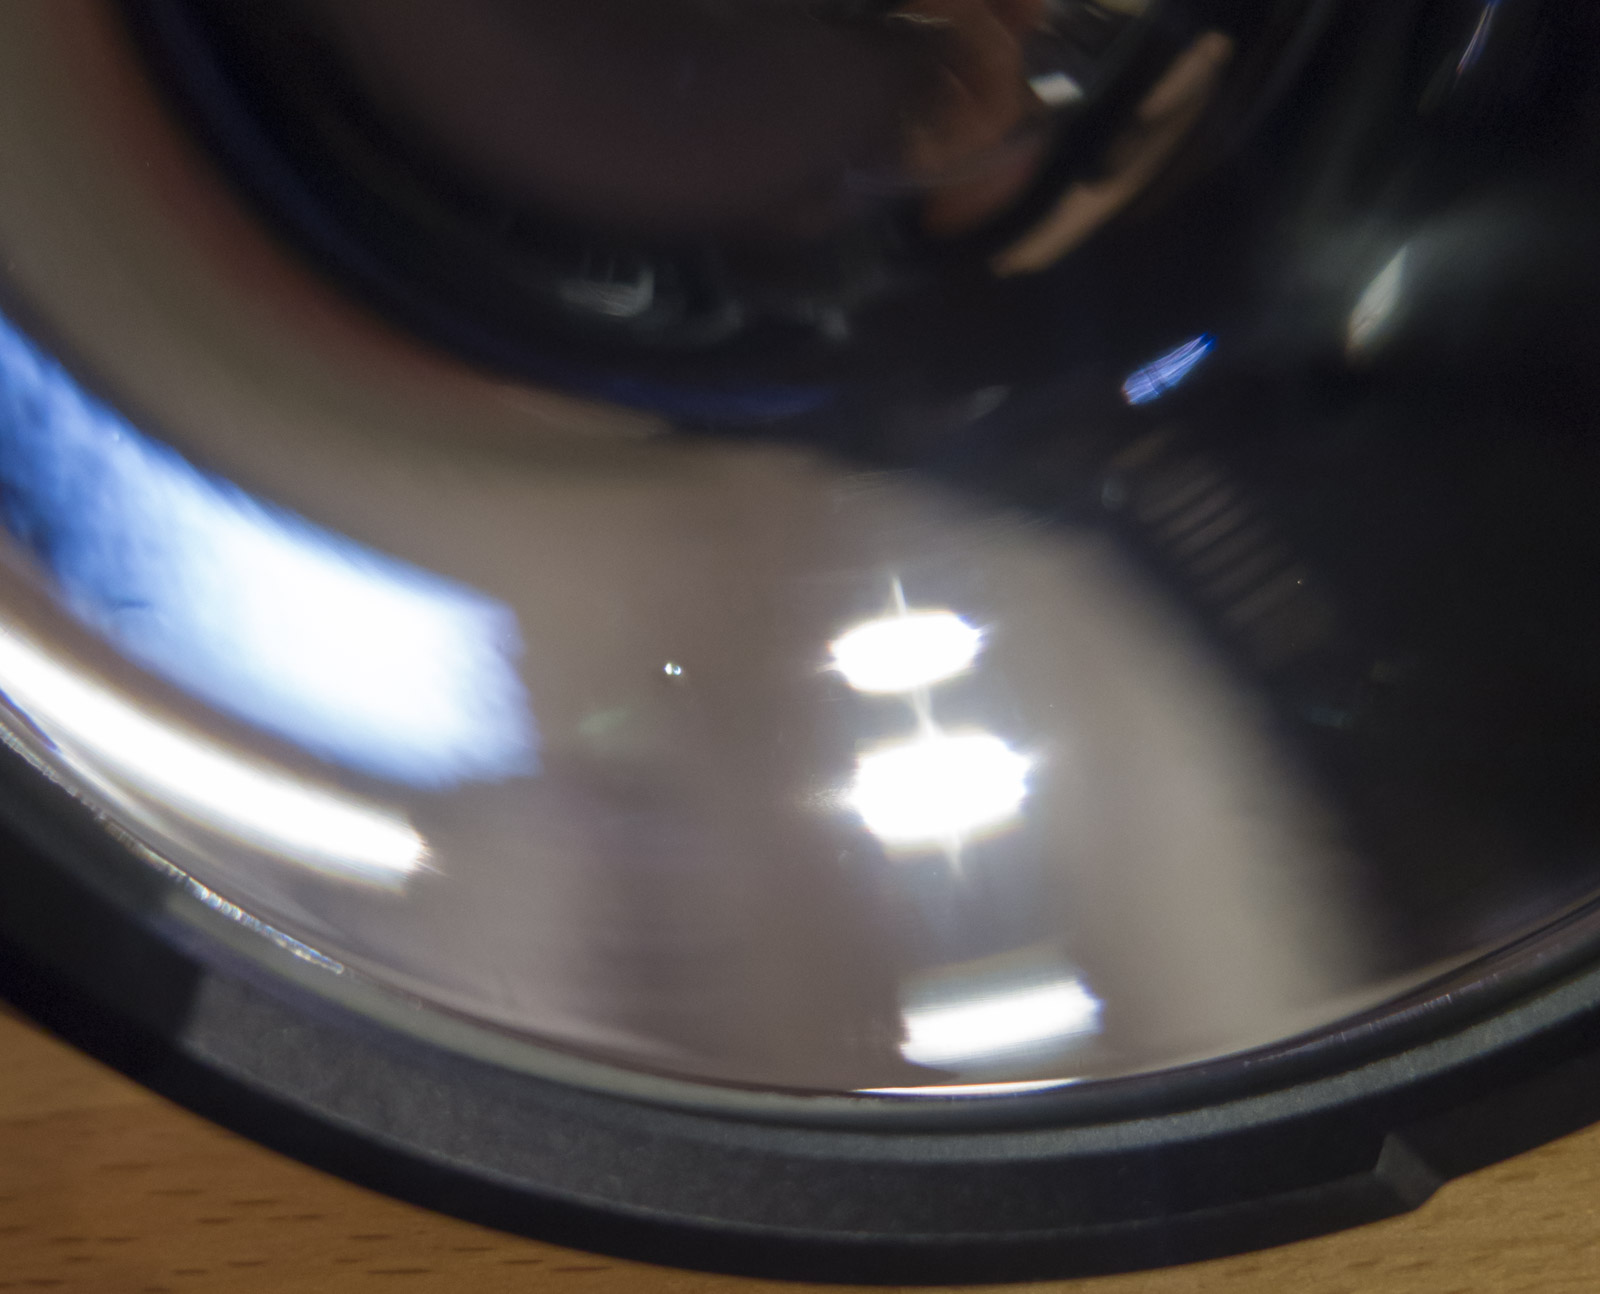
Now inspect the reflector, is it perfect? Almost just one tiny spot has a dent
Center mass of the light is 109mm from the head, so just 4mm from the switch center towards the battery tube
I consider this a good balance for a light with such a large head
.
Comparism and teardown:
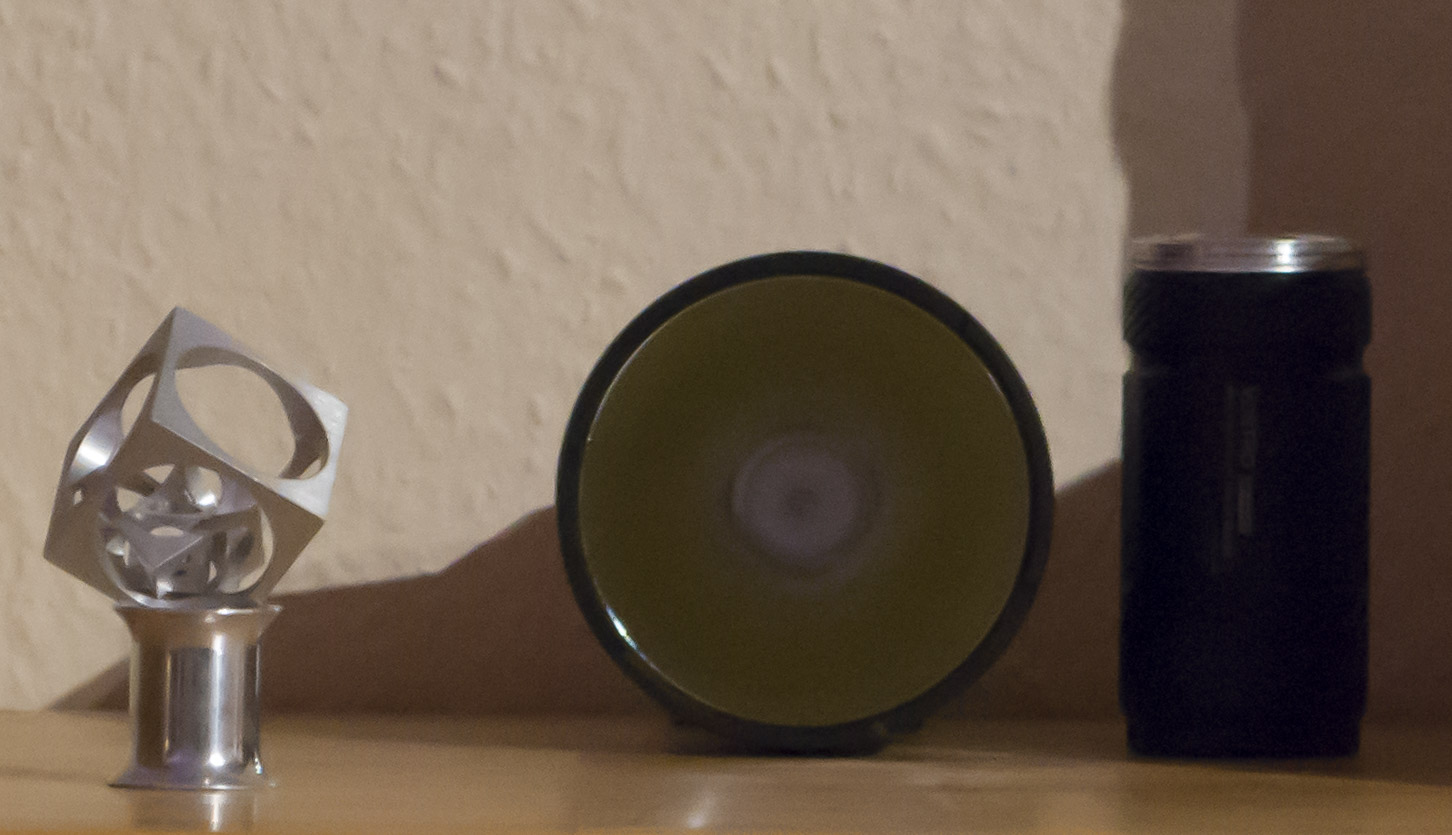
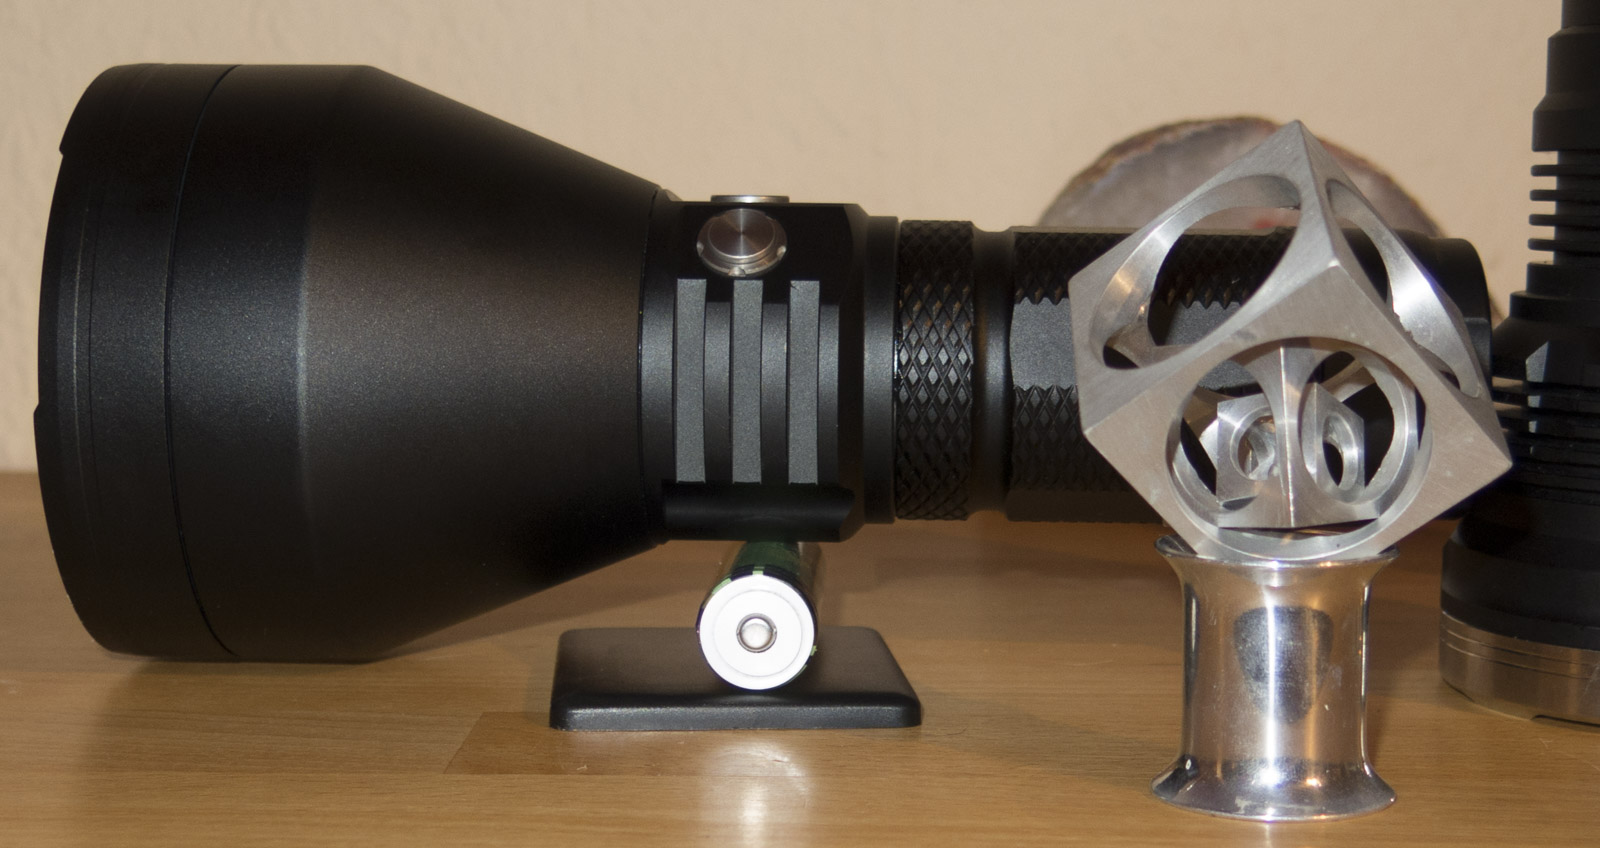
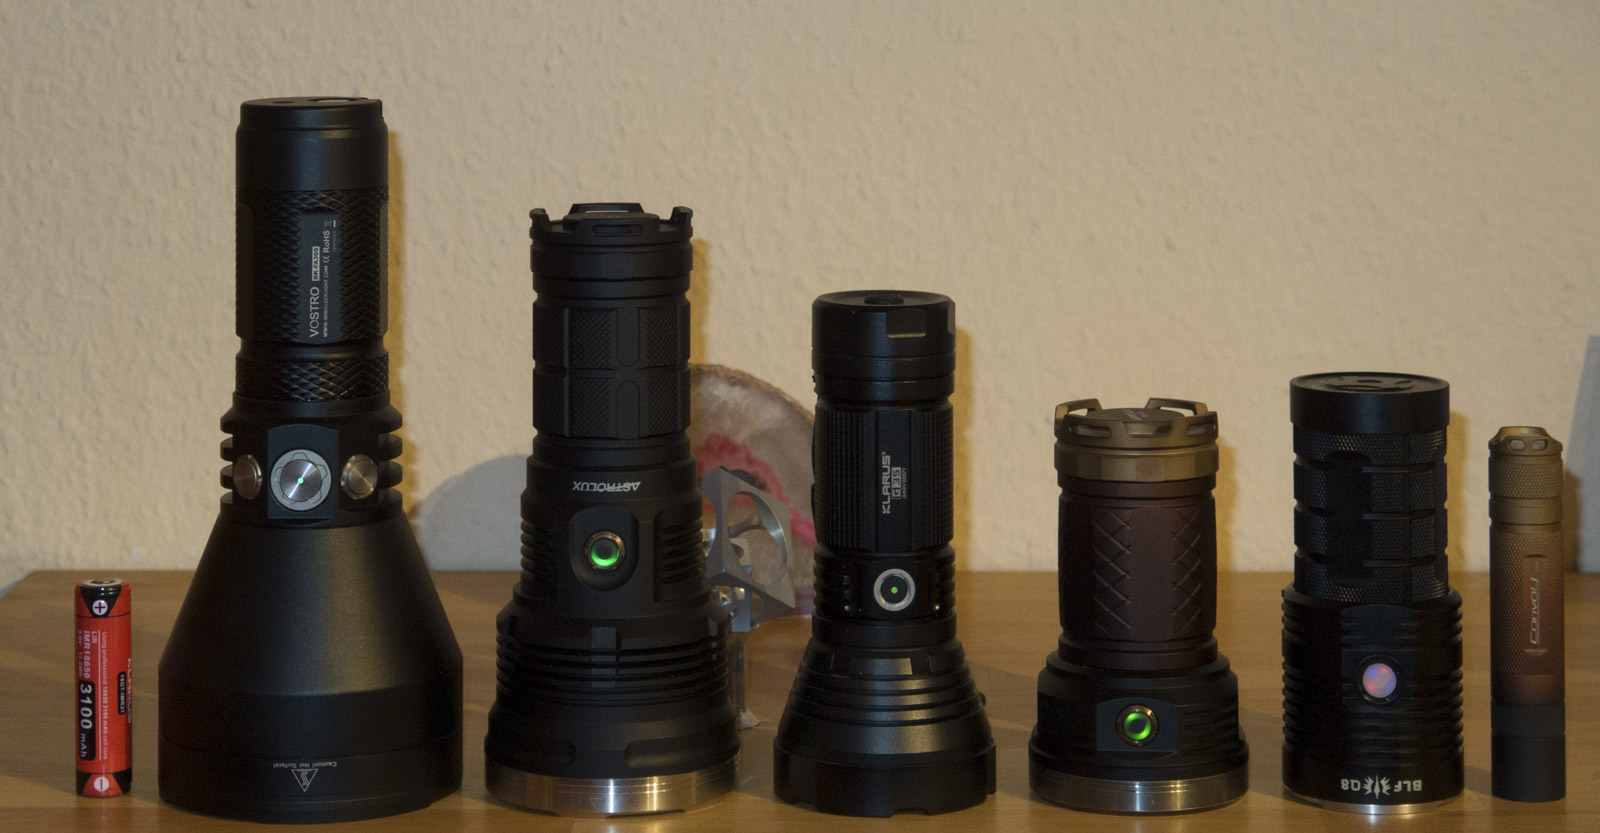
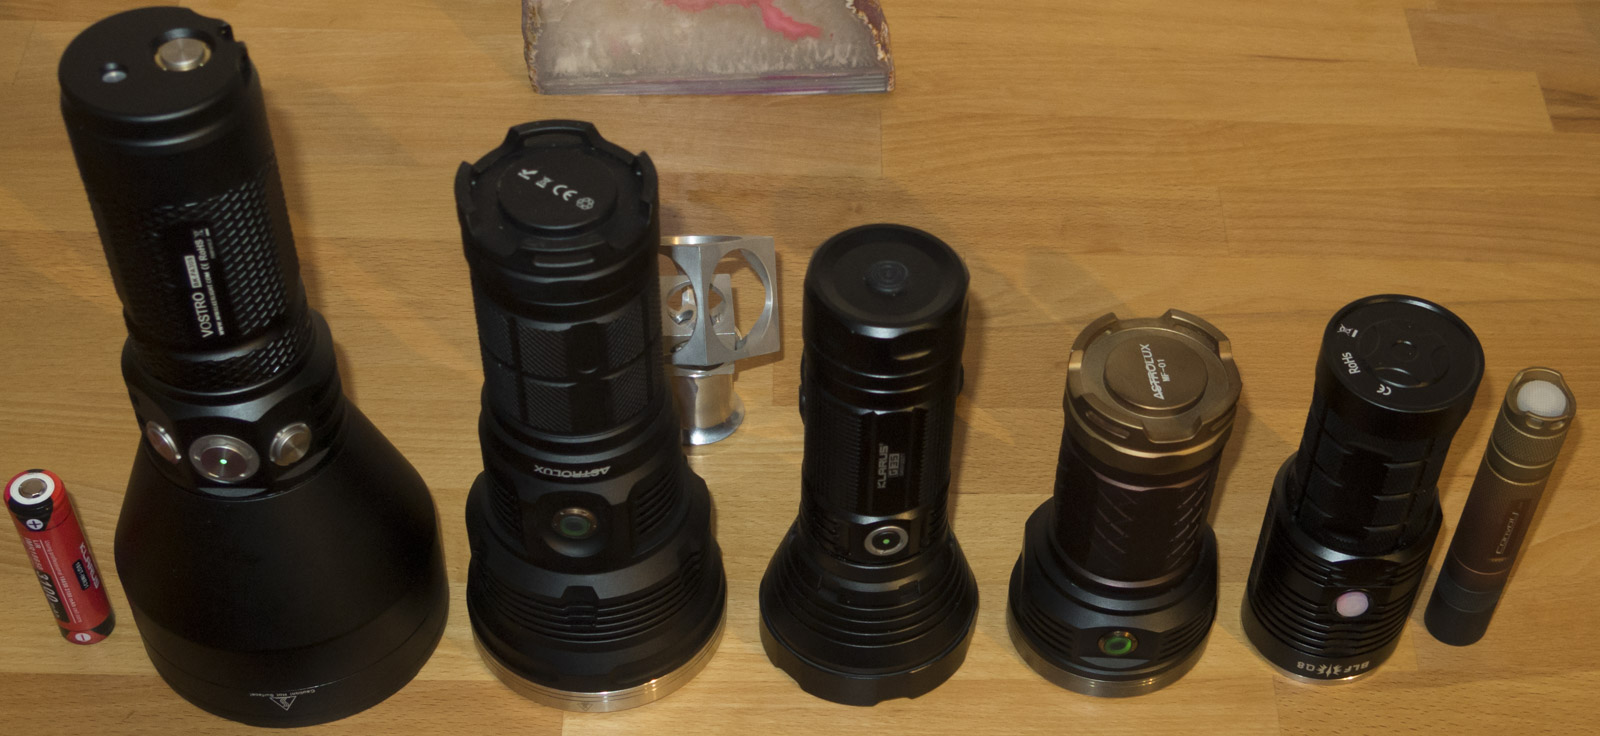
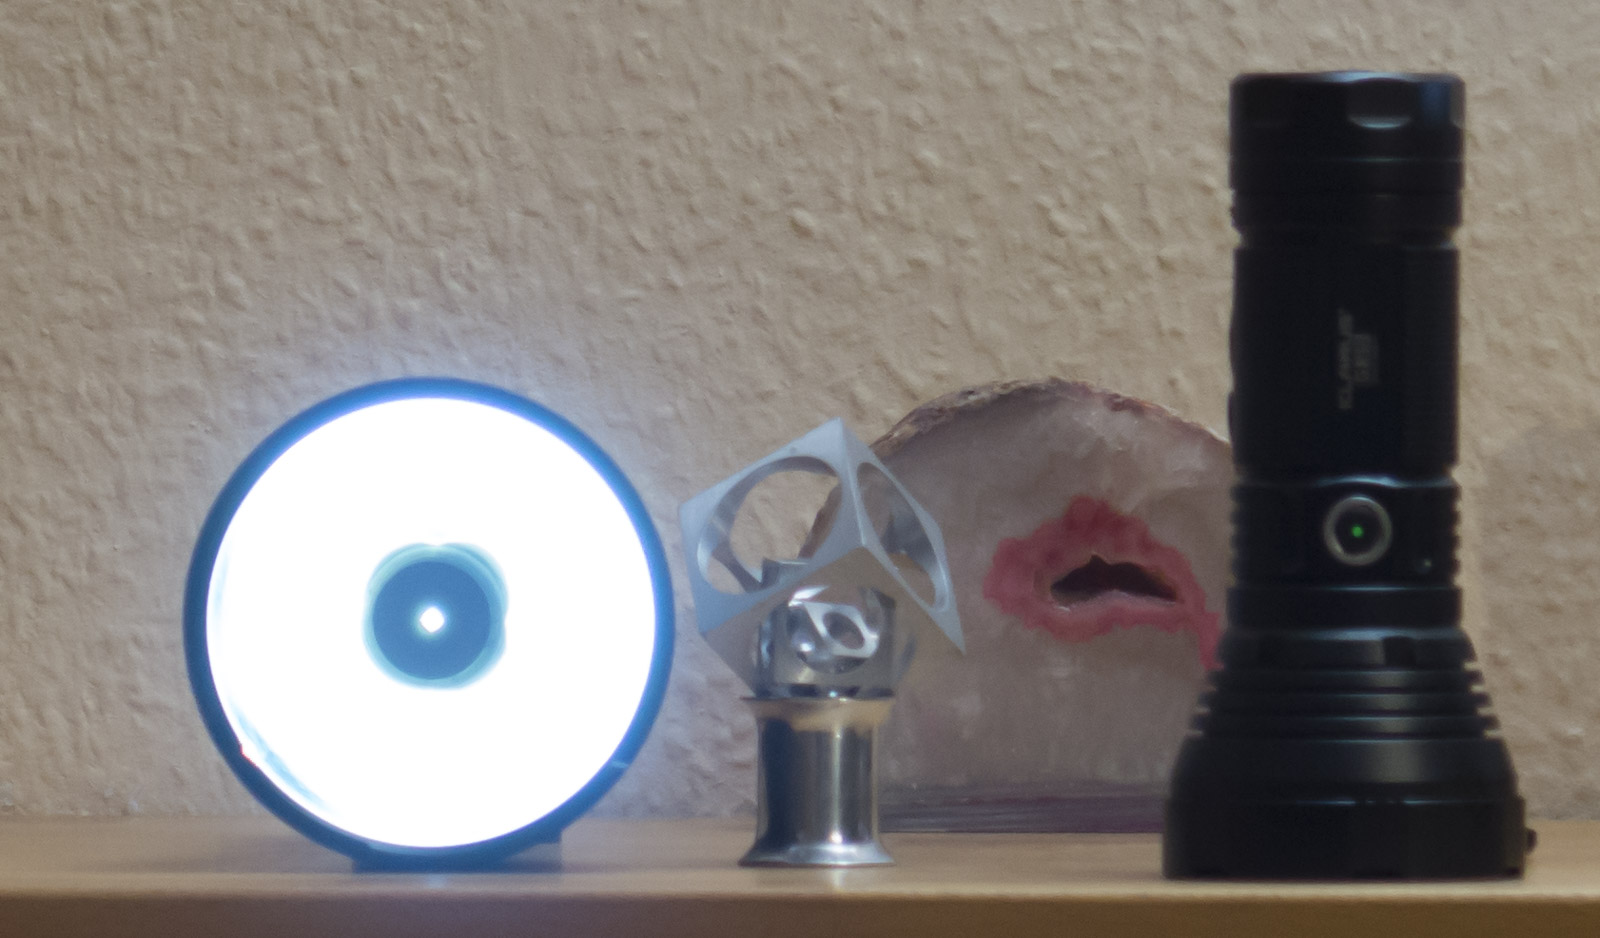
Size compared to other common 18650 lights the Niwalker is compared to my other lights by far the biggest but not the heaviest
Beam color is cold around 6500K with a Cree XHP35 LED, the beam is very focused without artifacts

Light color is CW 6500K in medium modes, on High and Turbo it gets a bit colder
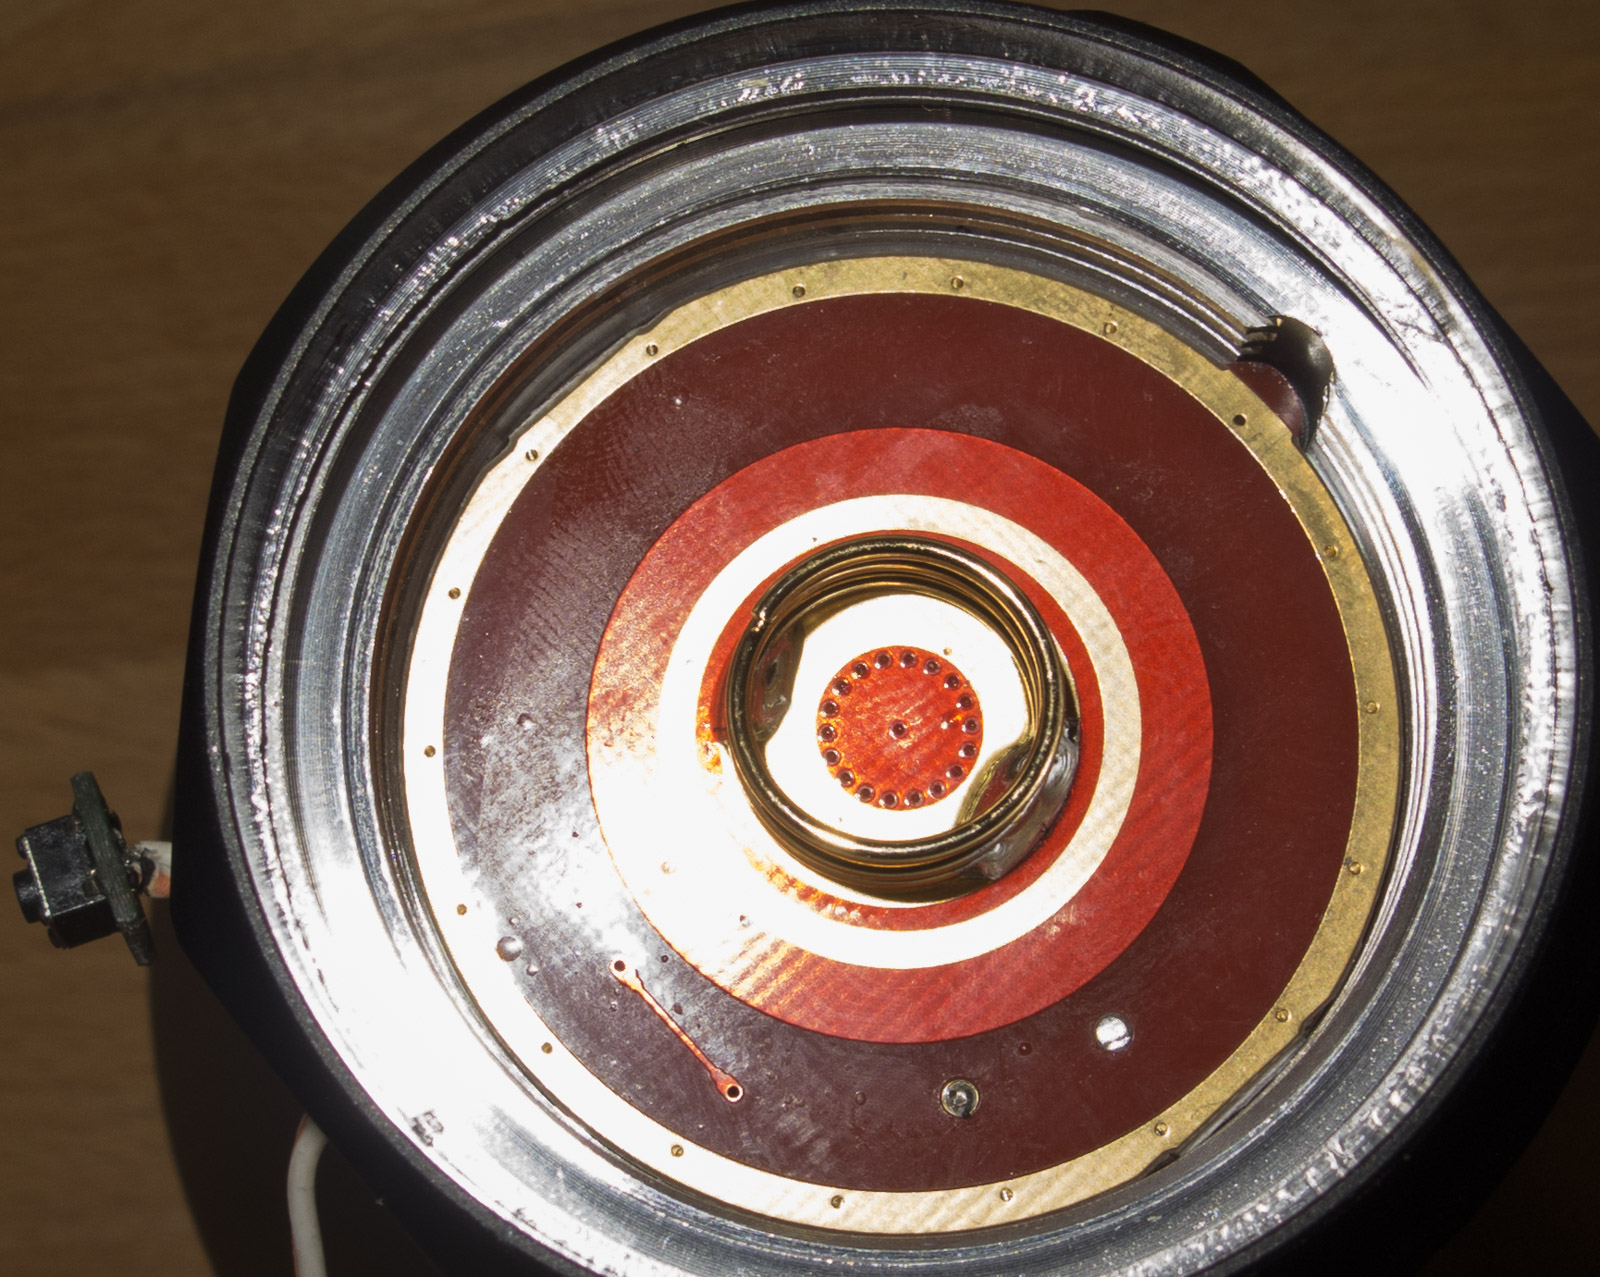
The reflector looks perfect and is free of dust particles that can be seen when the light is turned off
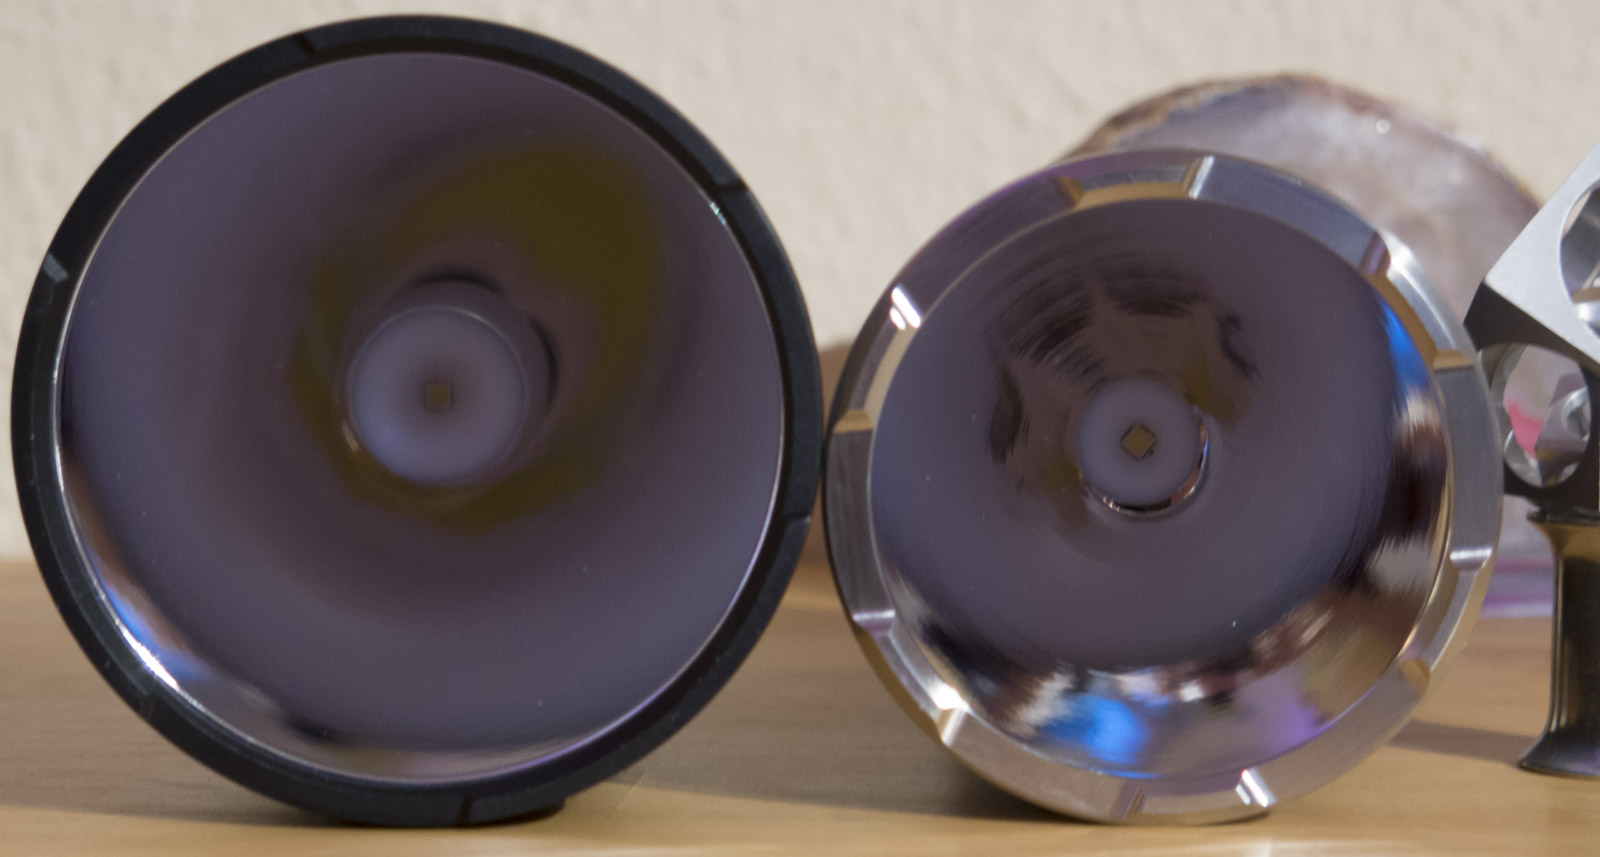
The visible dirt is on the lens from first testing, it came in almost perfect clean condition
The lights bezel is not glued, so it is easy to get to the LED
The light has a tail cap with two holes for the lanyard
The light stands on the tail

The lens is really big and thick, and is AR coated
the coating has the typical cheap blue color than most Chinese lights have

The head has a diameter of 100mm and 89mm visible reflector
To cover the whole outer diameter you have to go almost 3 meters away
The light has to be run with 4 18650 batteries, they dont need to be high drain
The driver is 42mm in diameter with one notch it is held with a retaining washer, on top of that is a plastic ring screwed in

The light can be physical locked out by twisting the head or tail about 1 turn
The markings on the tube can be lined up with the switches
.
The Head
The big reflector with a single LED gives a lot of throw with a pretty small hotspot and some very useful corona and spill
Size compared to a 18650 tube EDC to get a feeling how big this one is
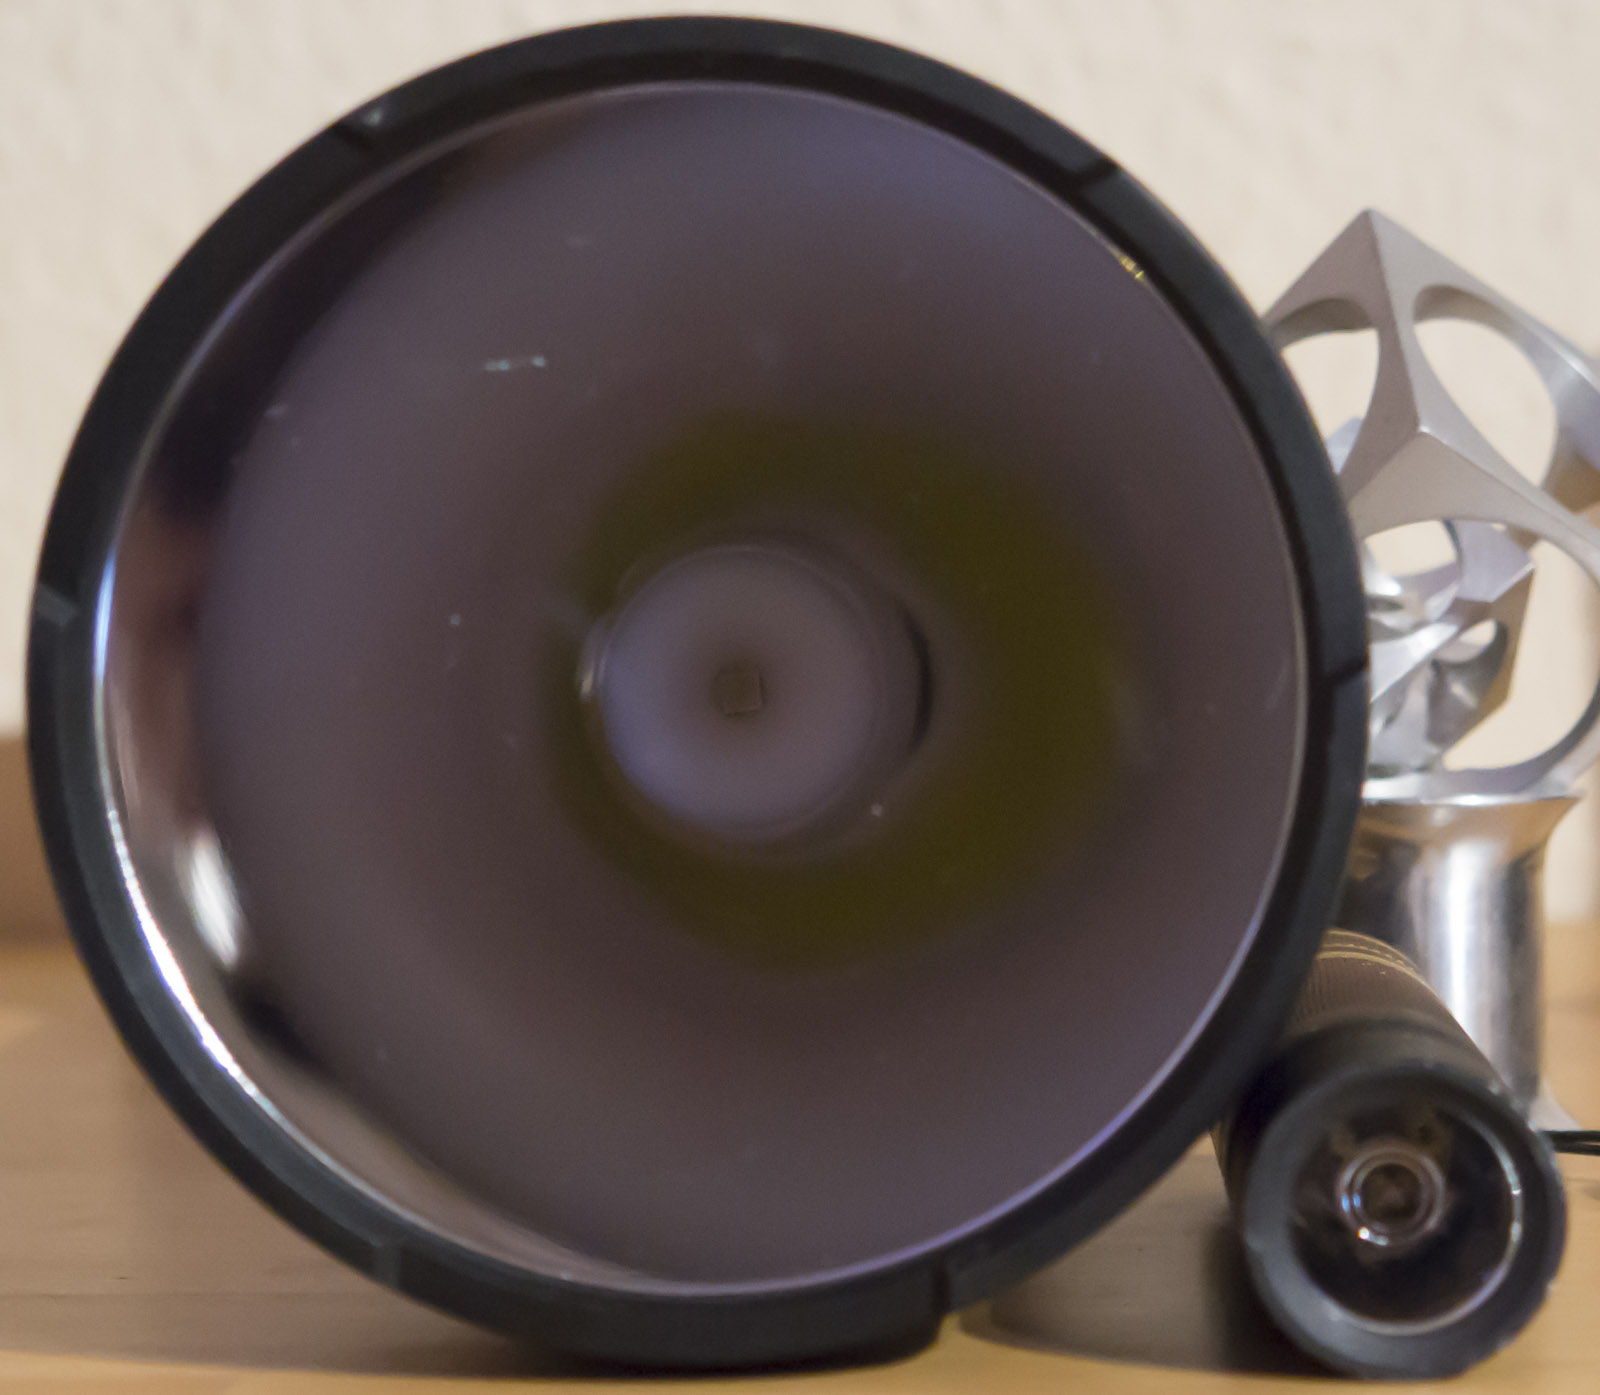
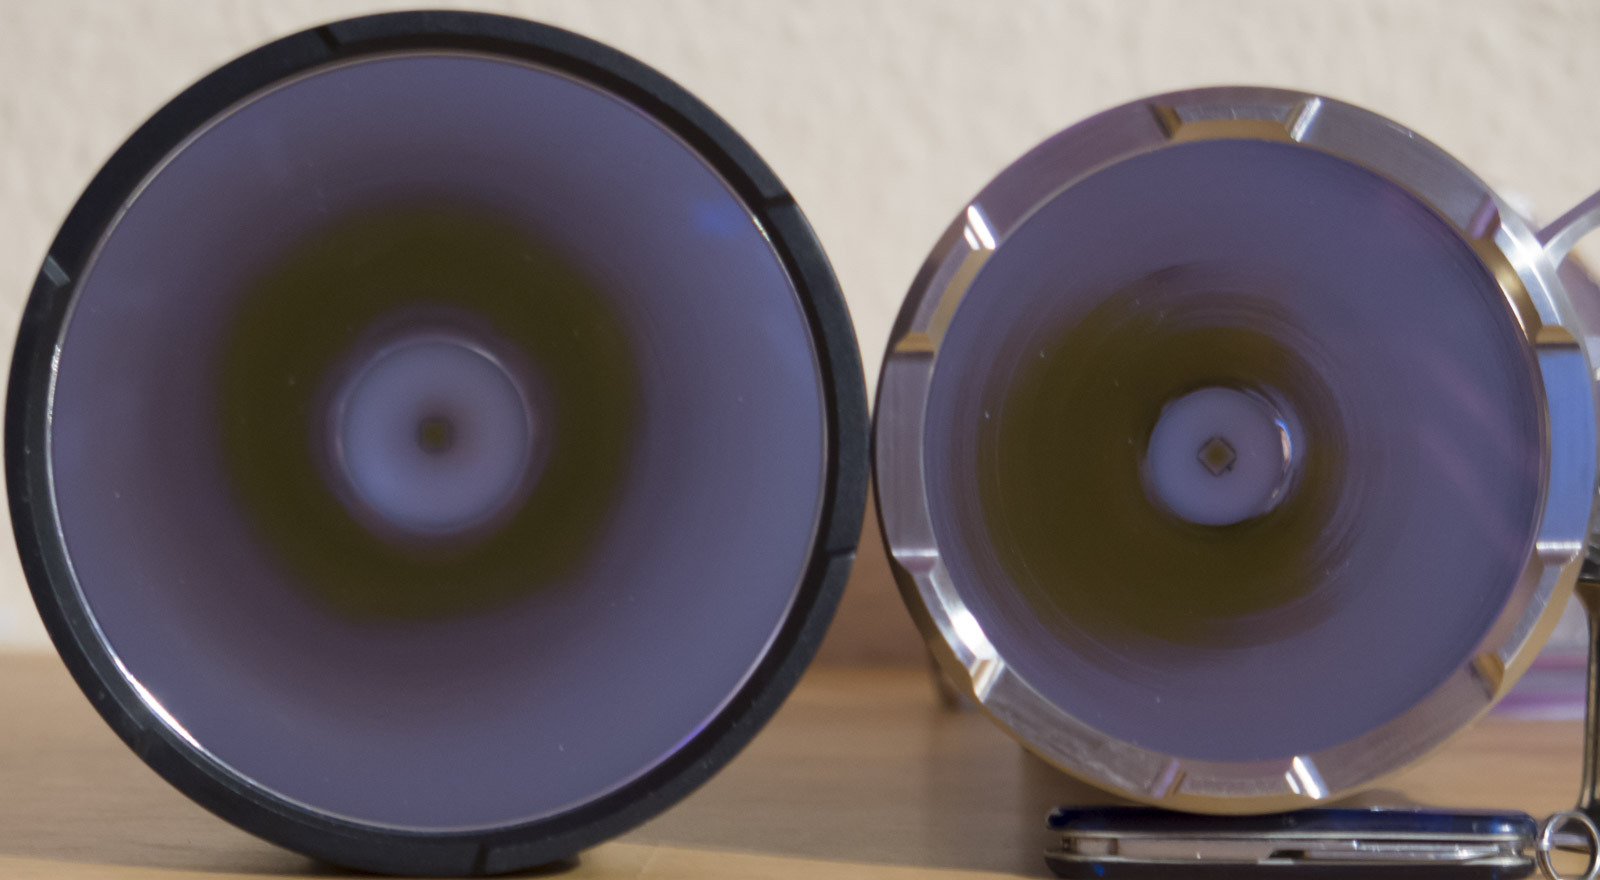
The LED is perfectly centered, the reflector has very little texture from production,
compared to the Astrolux MF02 it looks a lot smoother
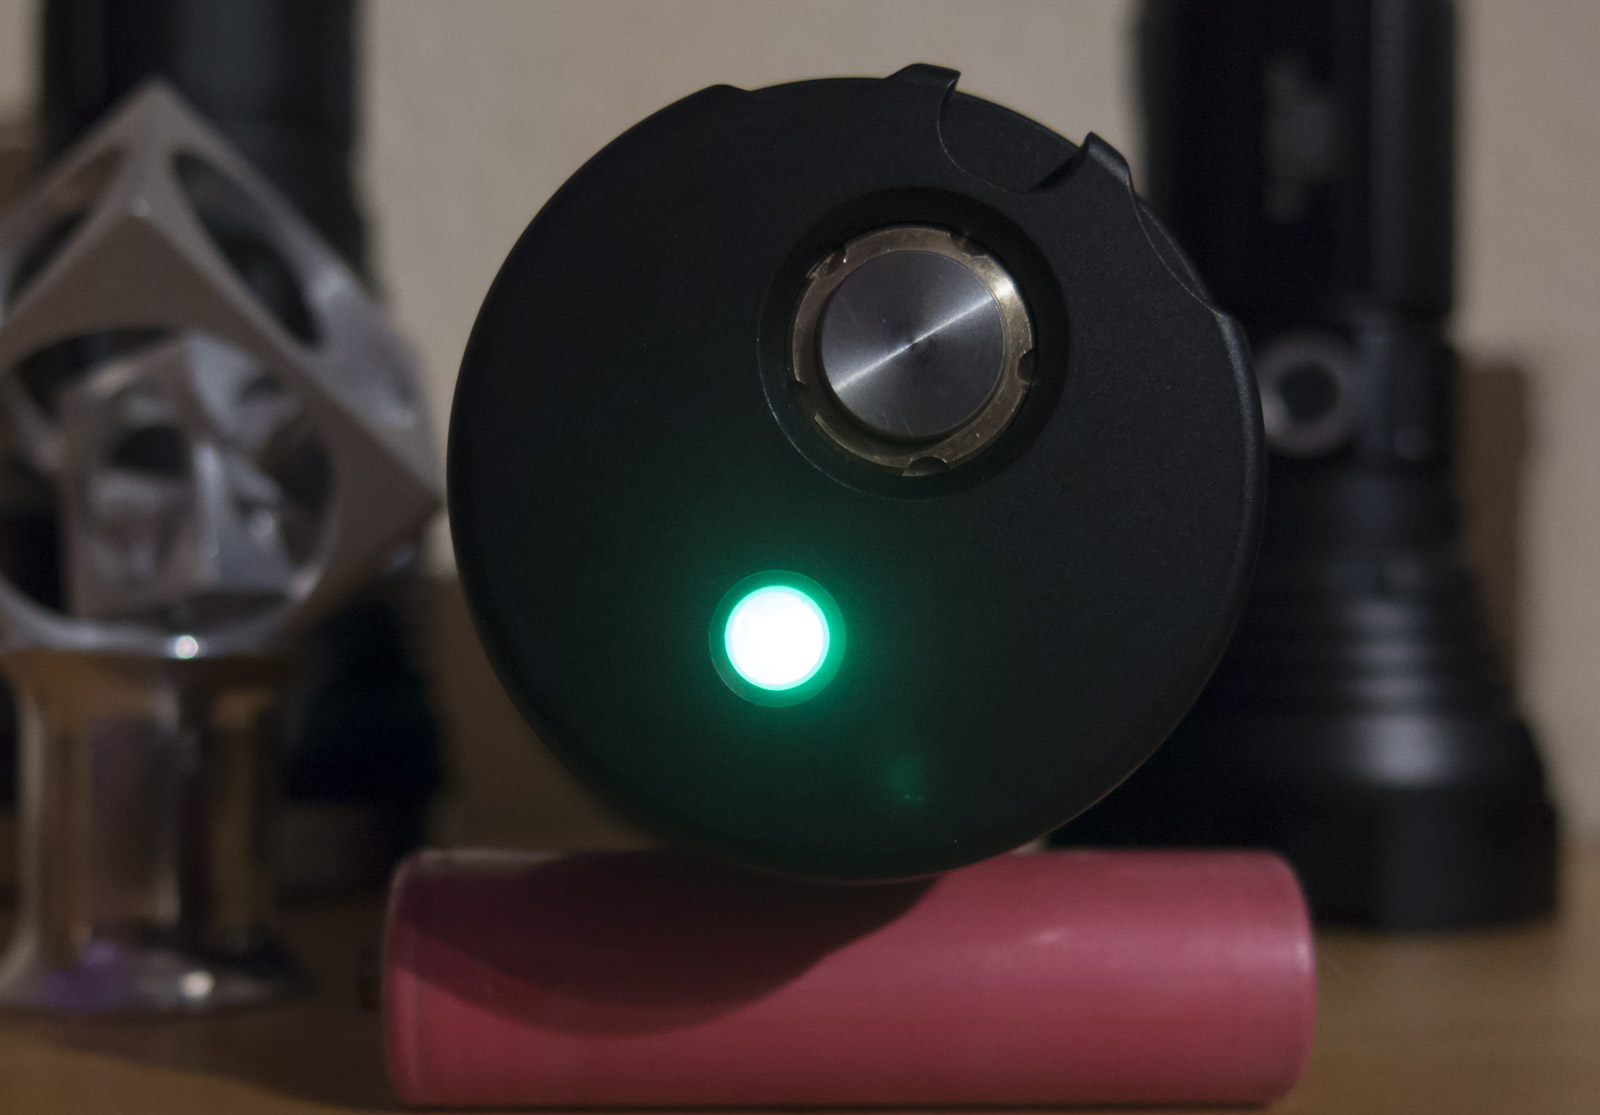
The switch board has green and red status LEDs, the green is lit when the light is running it turnes red at 3V per cell to indicate low battery charge
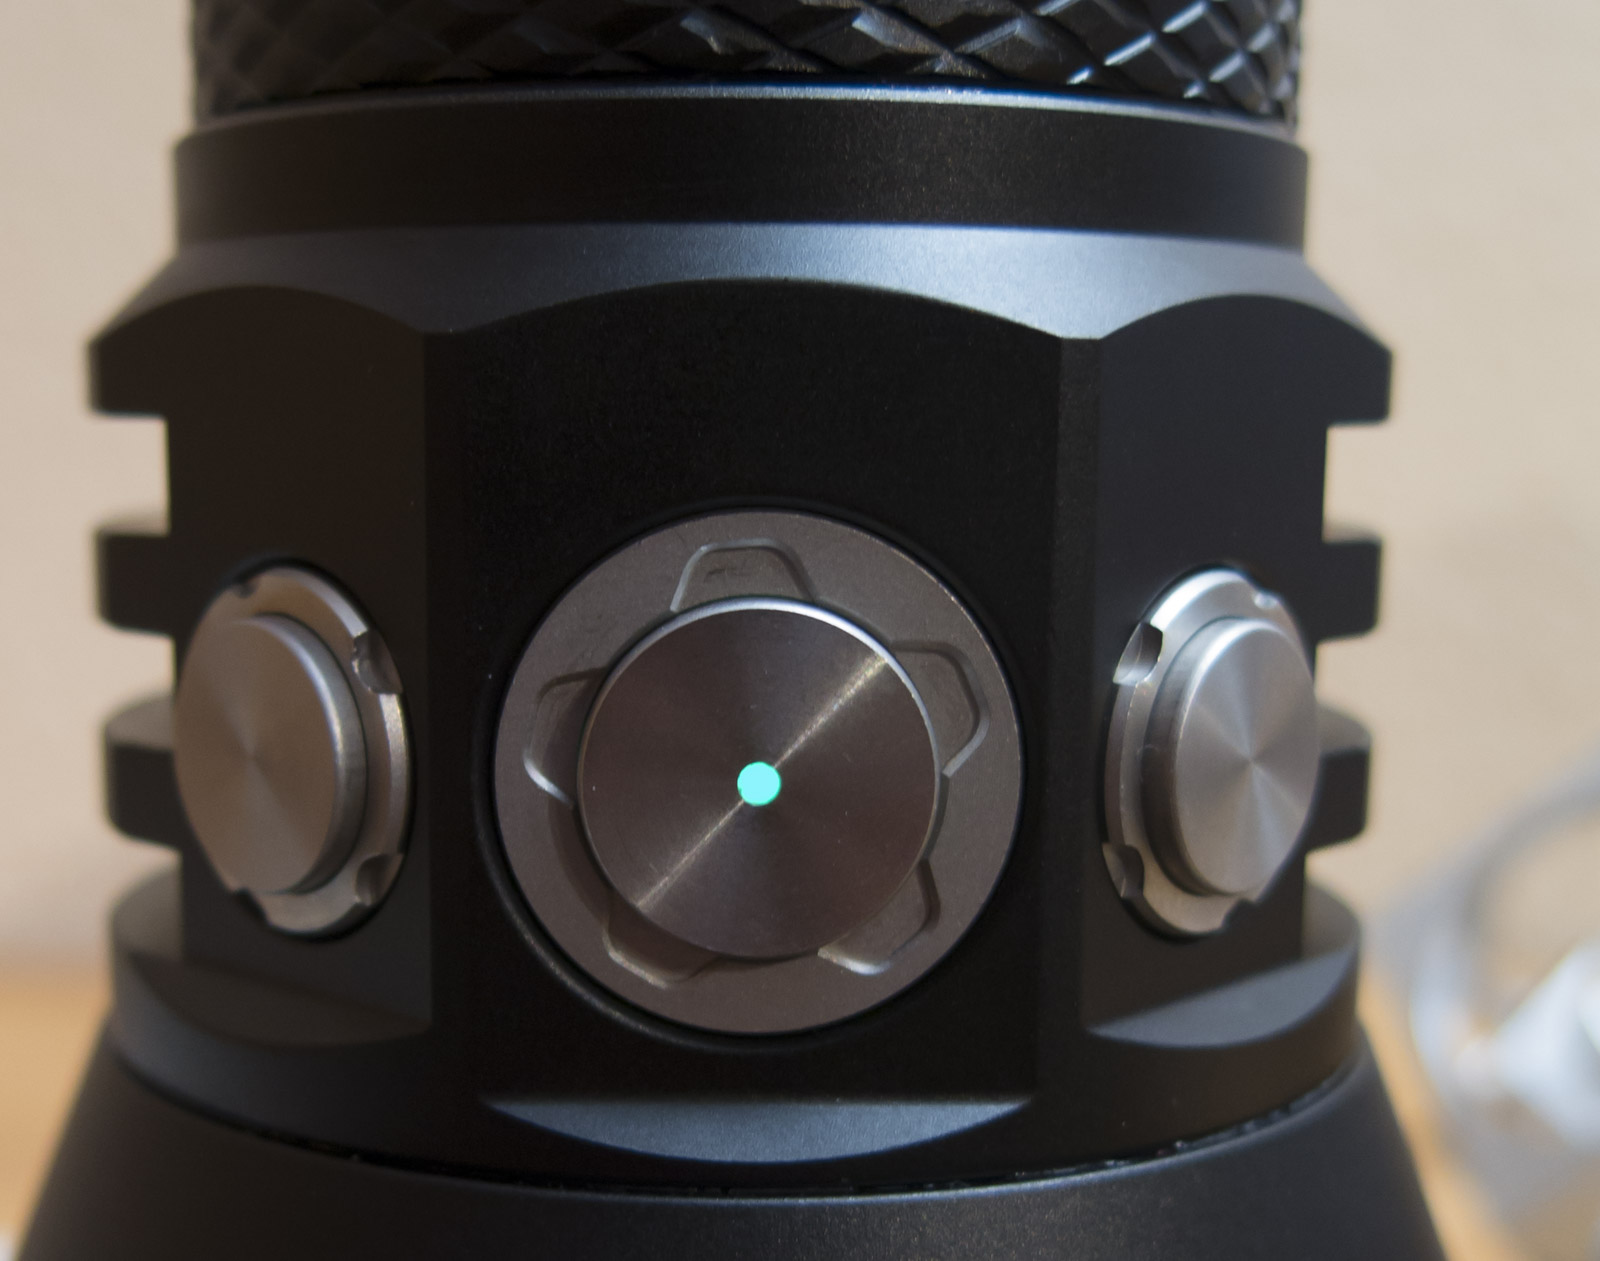
The switch has a decent feeling but not as good as other lights, I would like more direct feeling of the press
The Waterproofing on this light looks good is has o-rings and silicone switch covers are clamped between the body parts and the retaining rings
The head has a hot symbol and warning on the bezel, but stays relative cool, never gets hot

The shelf is thick and the big copper DTP MCPCB does a good job spreading the heat
I will make photos when I switch the LED to NW

The lens is hardened AR coated glass, the coating has no defects
.
Tube and Tail
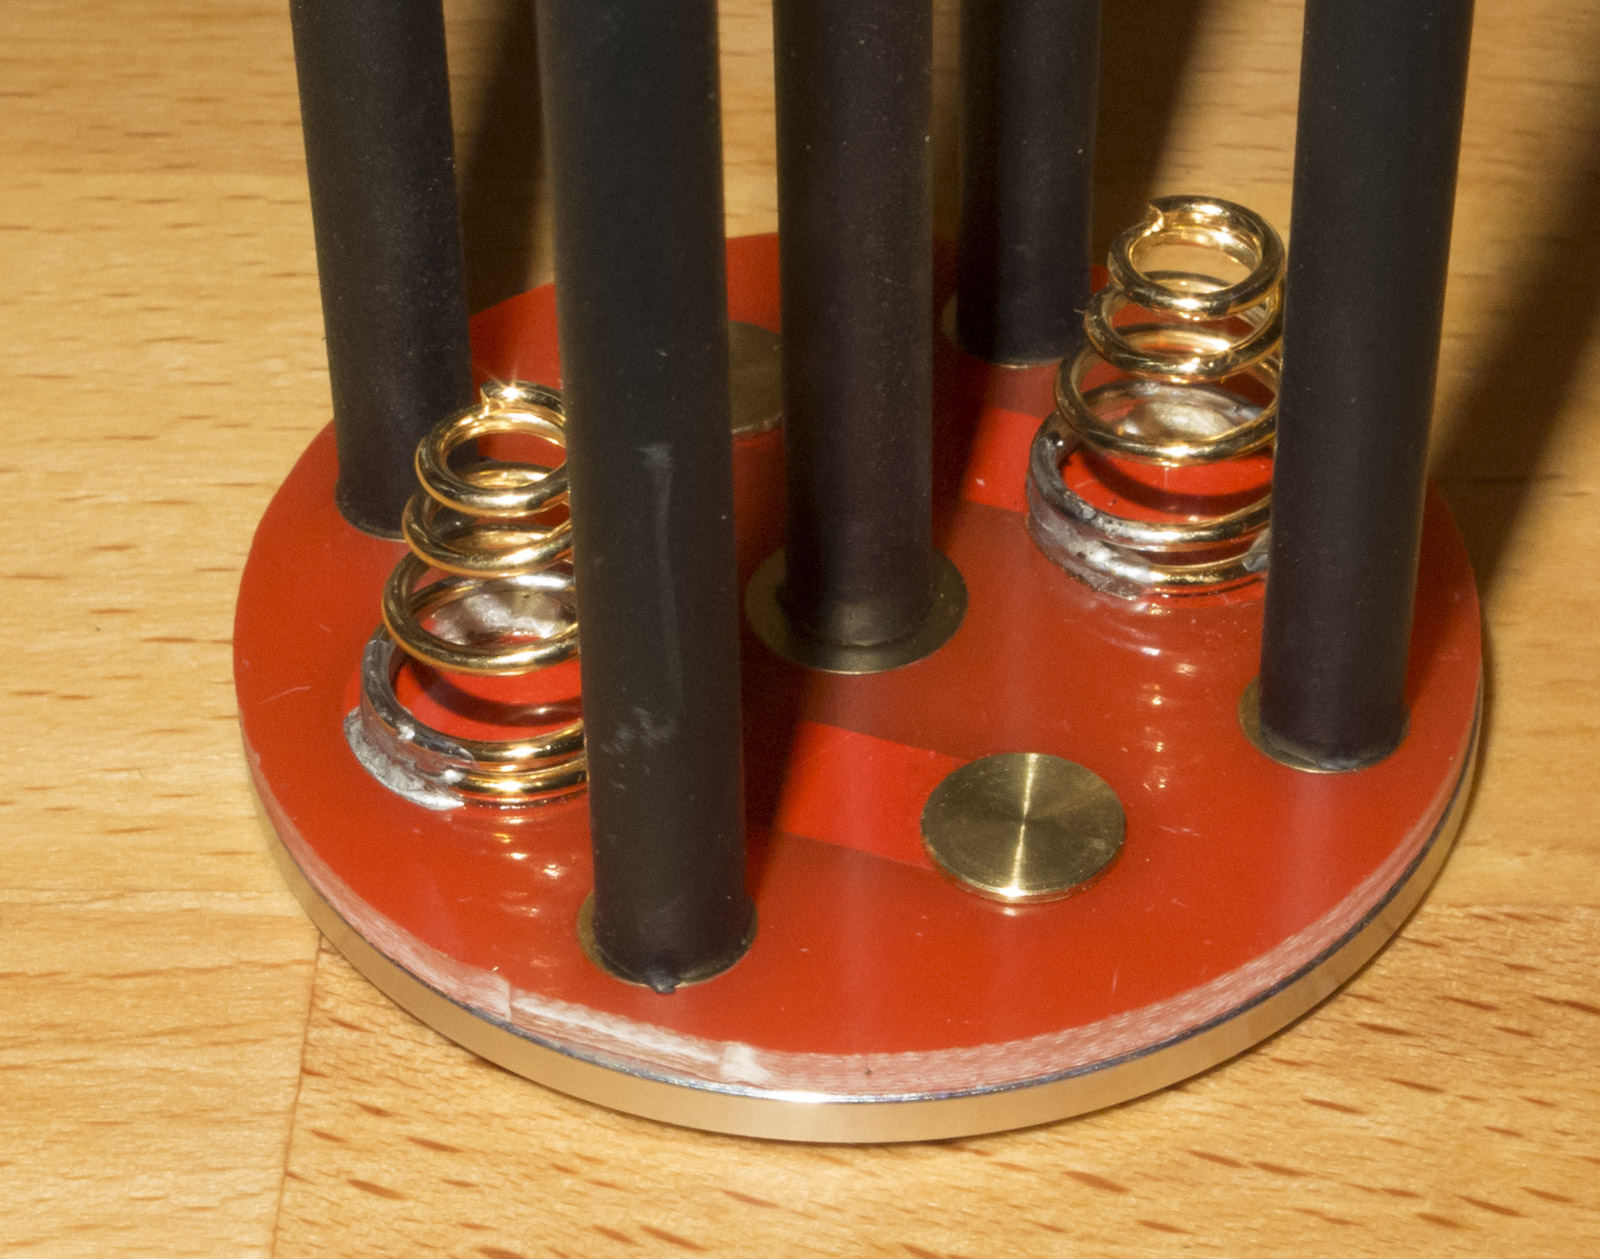
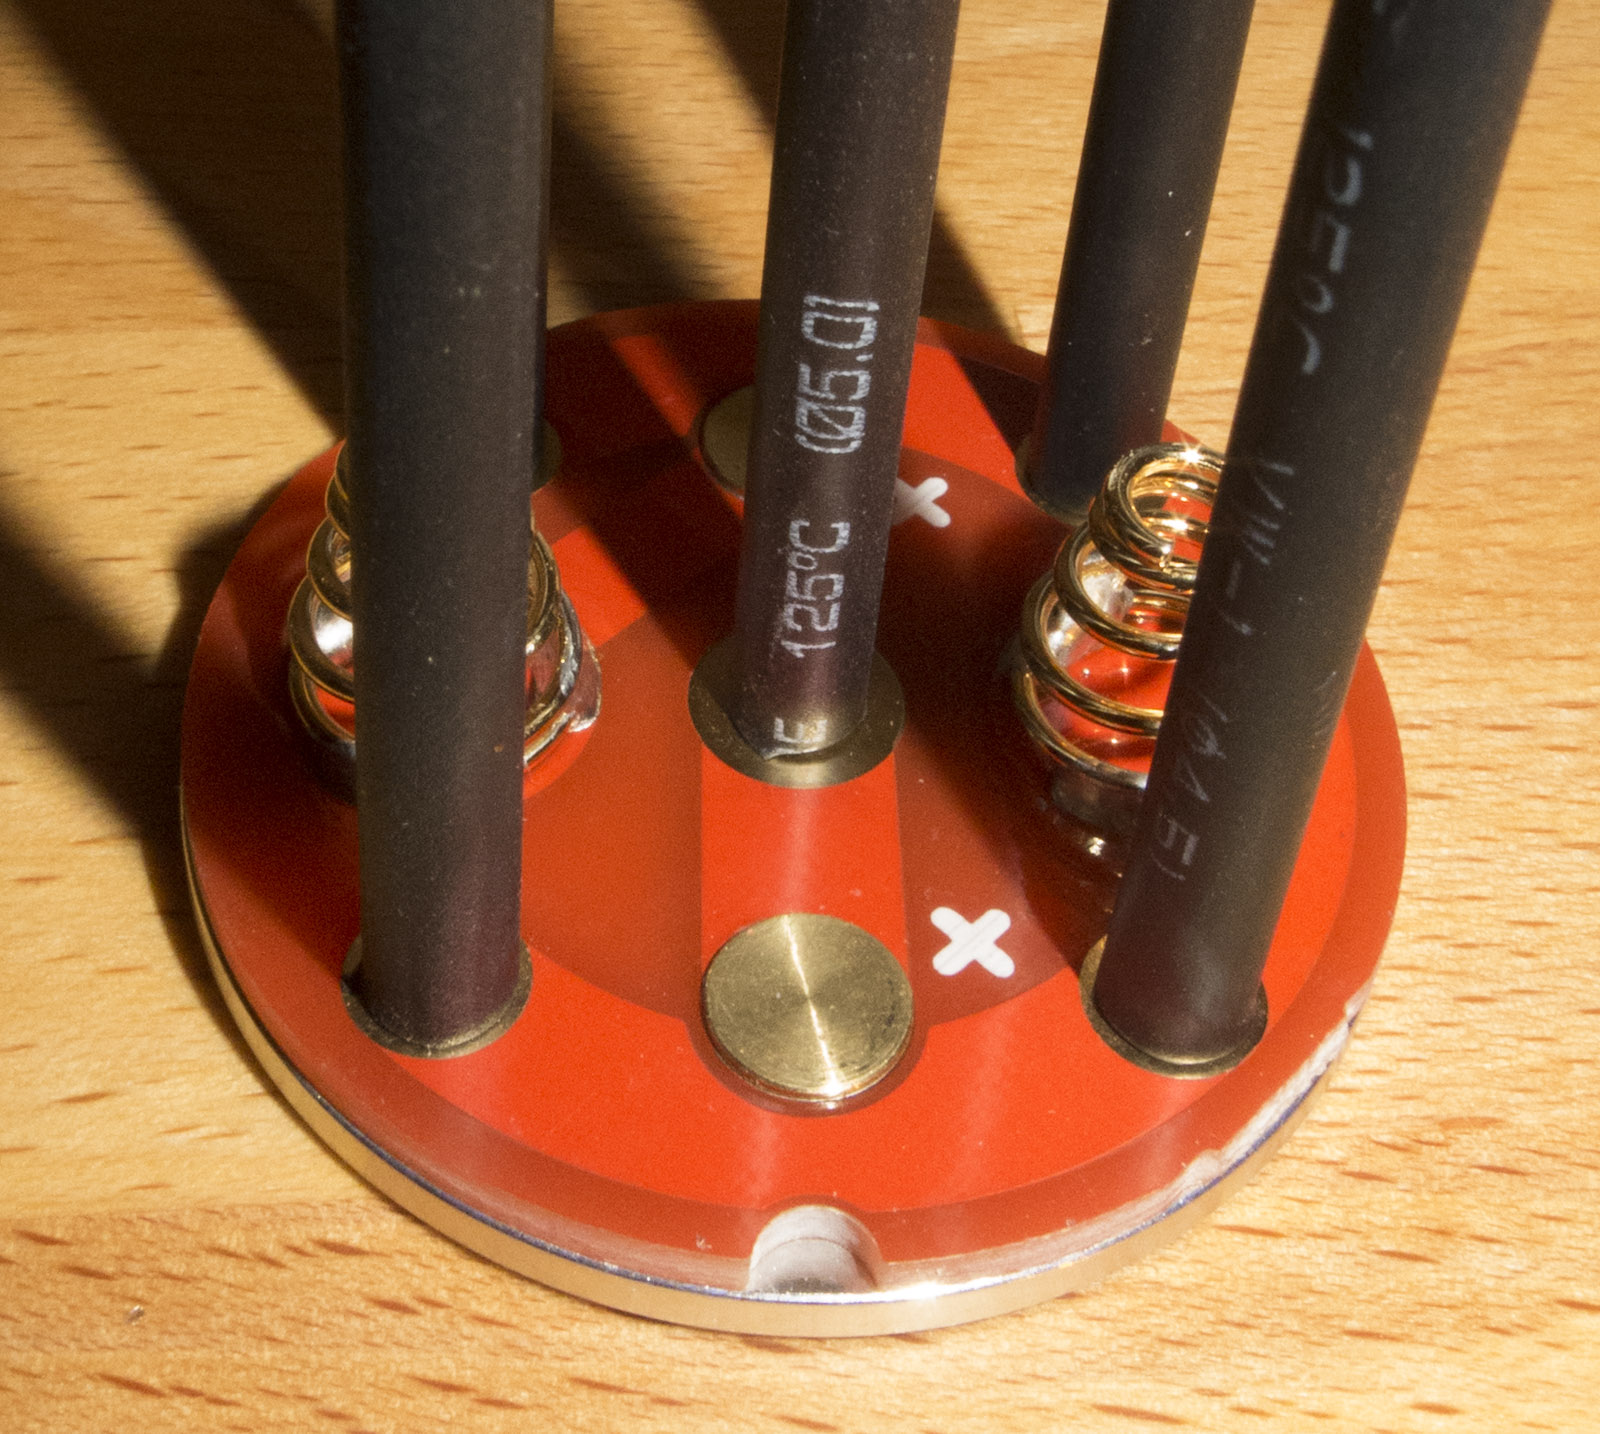
The tail cap is anodized the inner part is machined blank again to conduct the current through the tube
The light is build for protected and unprotected batteries, unprotected flat tops fit, the springs are thick and press on the batteries with a good amount of force
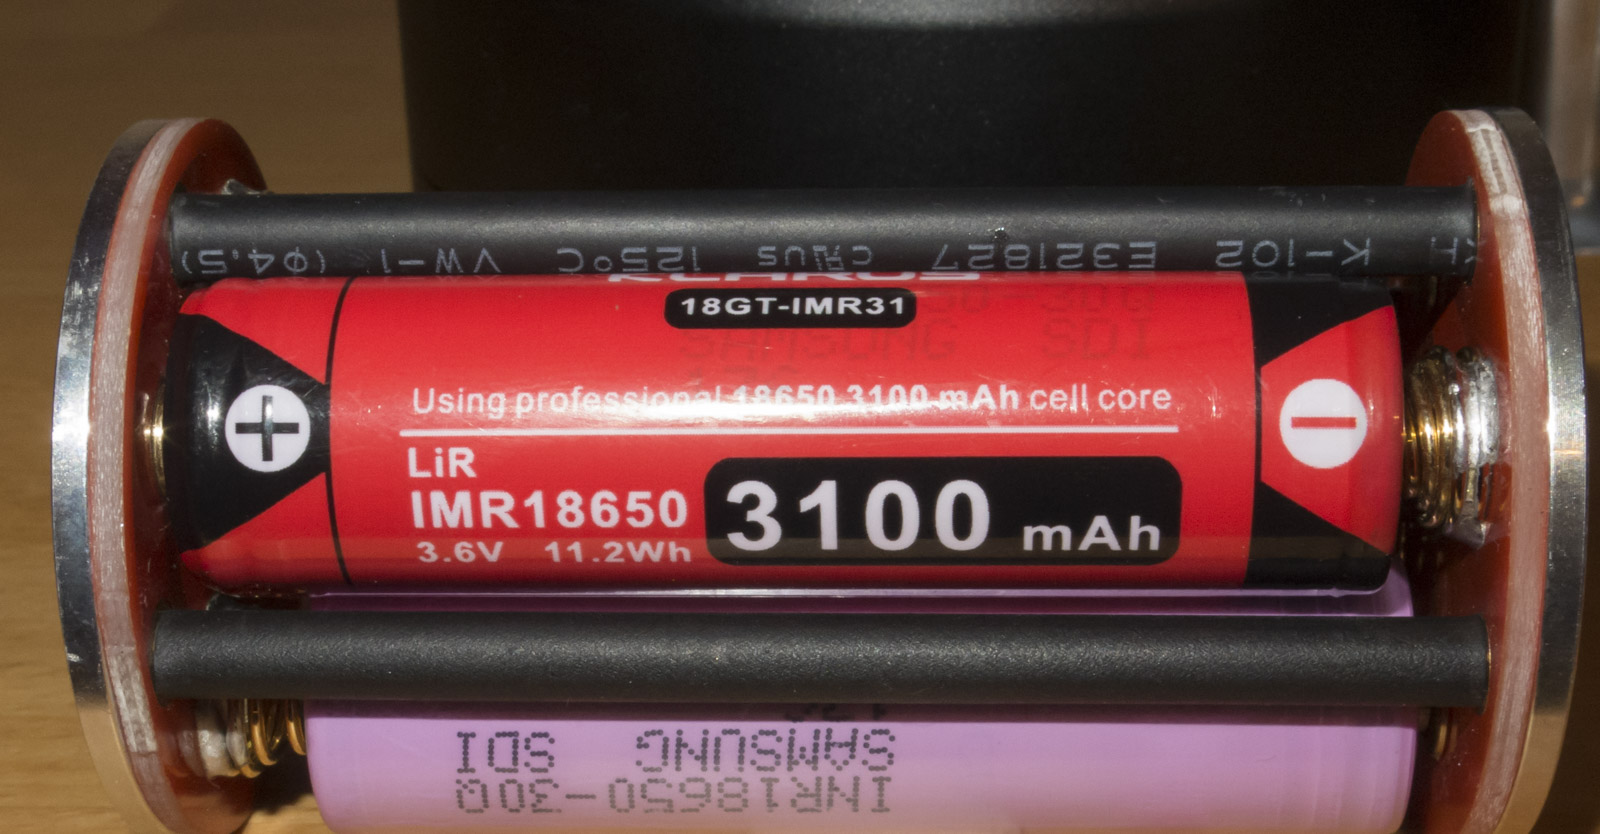
The battery carrier is in 4S/1P configuration and fits protected and unprotected batteries
the light uses thick springs from a non magnetic material like phosphor bronze
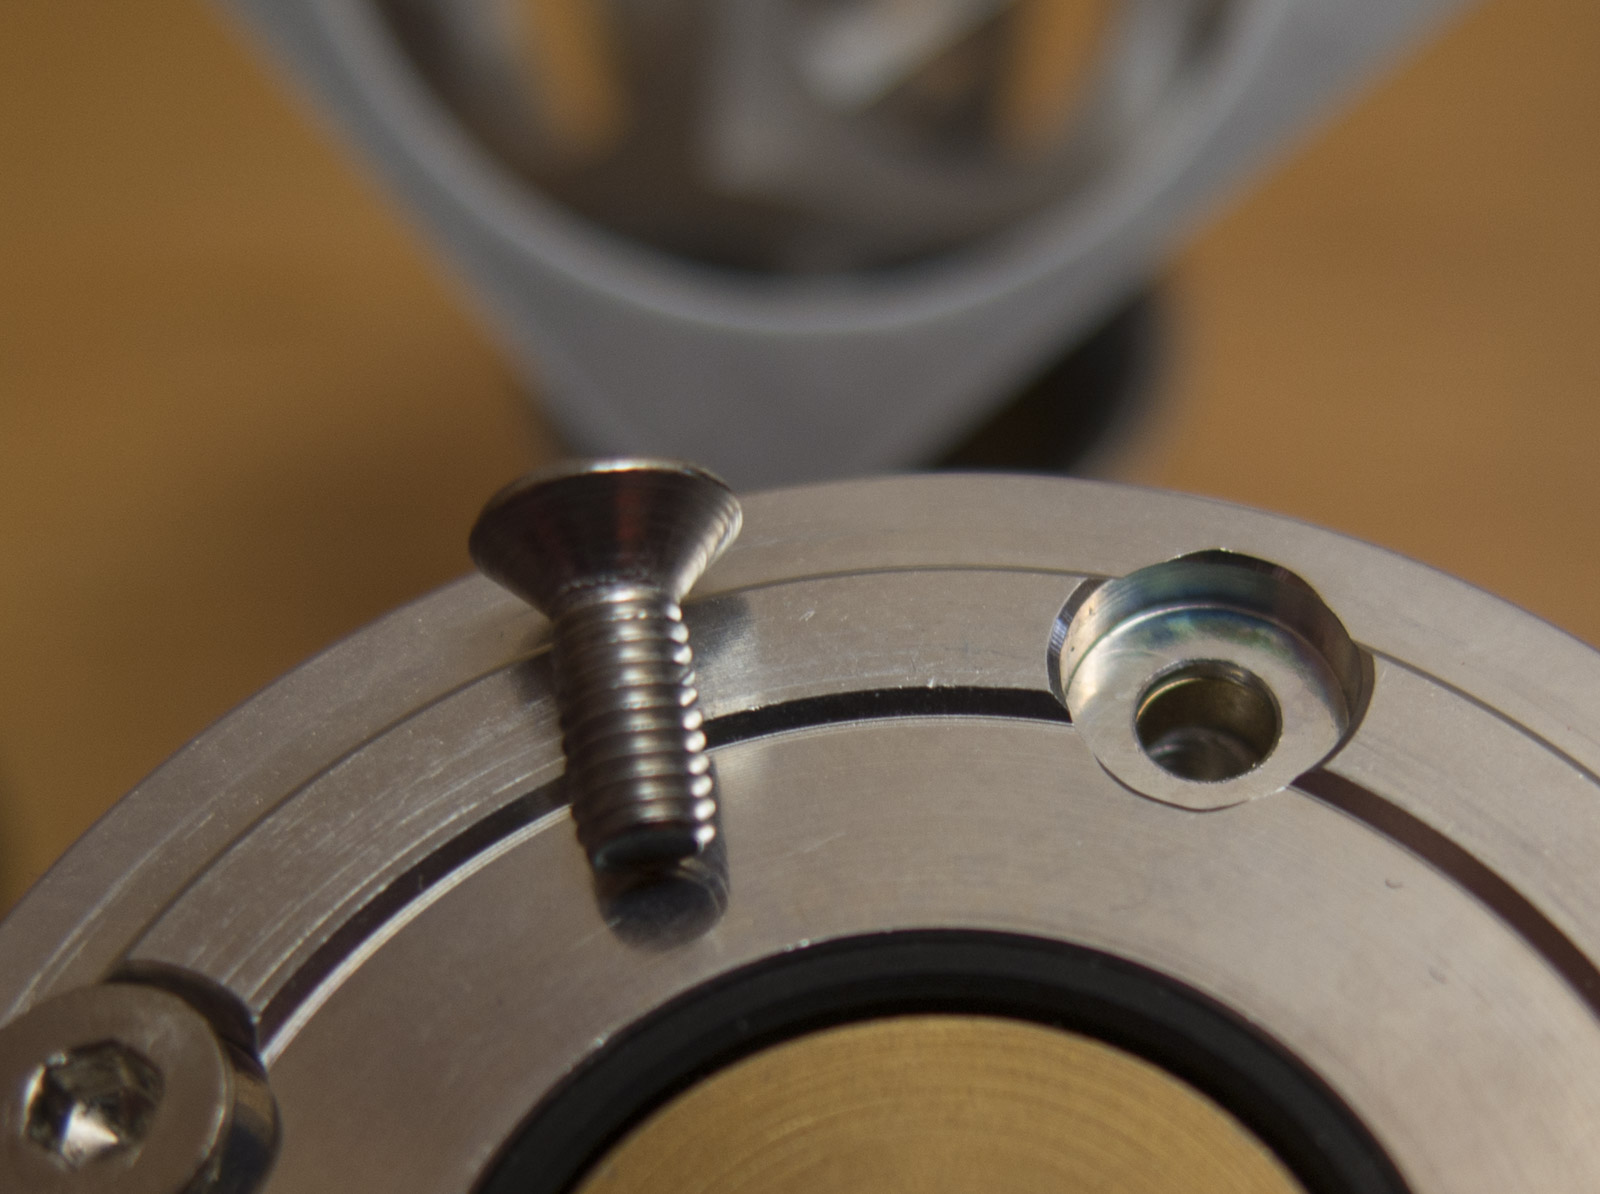
I do not understand why they use wrong screw head typed on flat sunk holes or do not sink 90 degree, of course it works but it’s not the way to design things
The light is waterproof, the tail cap threads are lubed, the amount is OK, both ends have an O-ring
The threads have a huge size and square cut, this is perfect
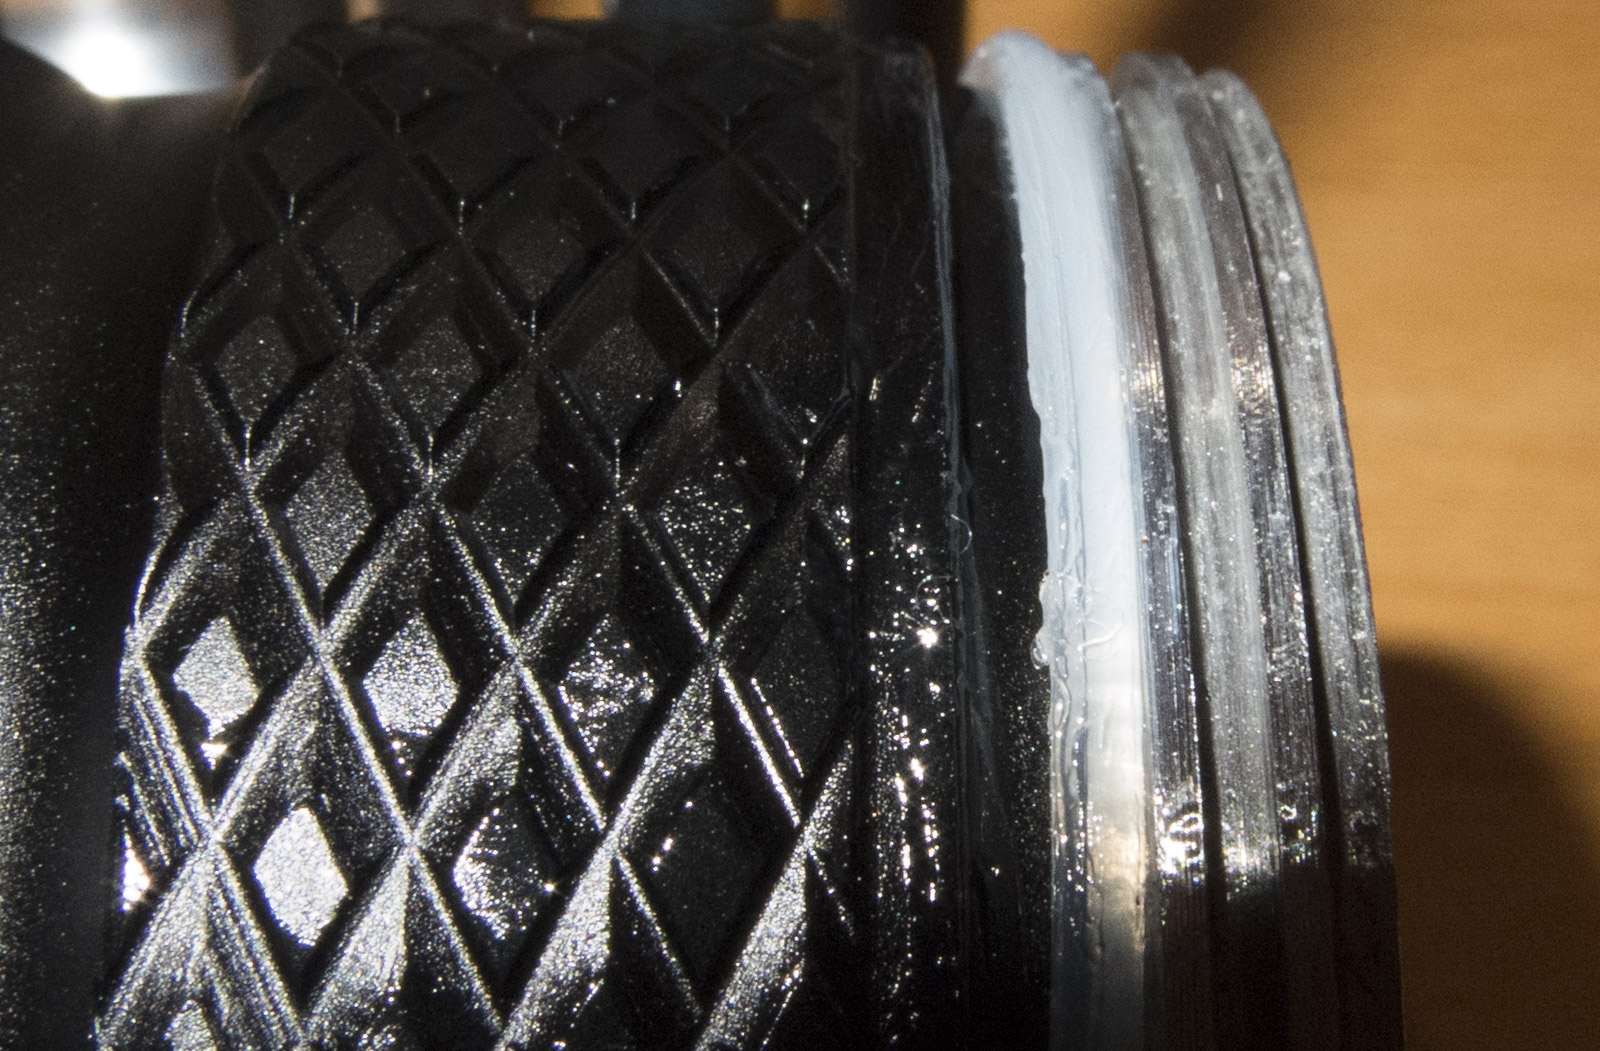
On this side the lubricant is also on the tube better if its just in the threads and on the o-ring
The tail cap is build from more parts than expected

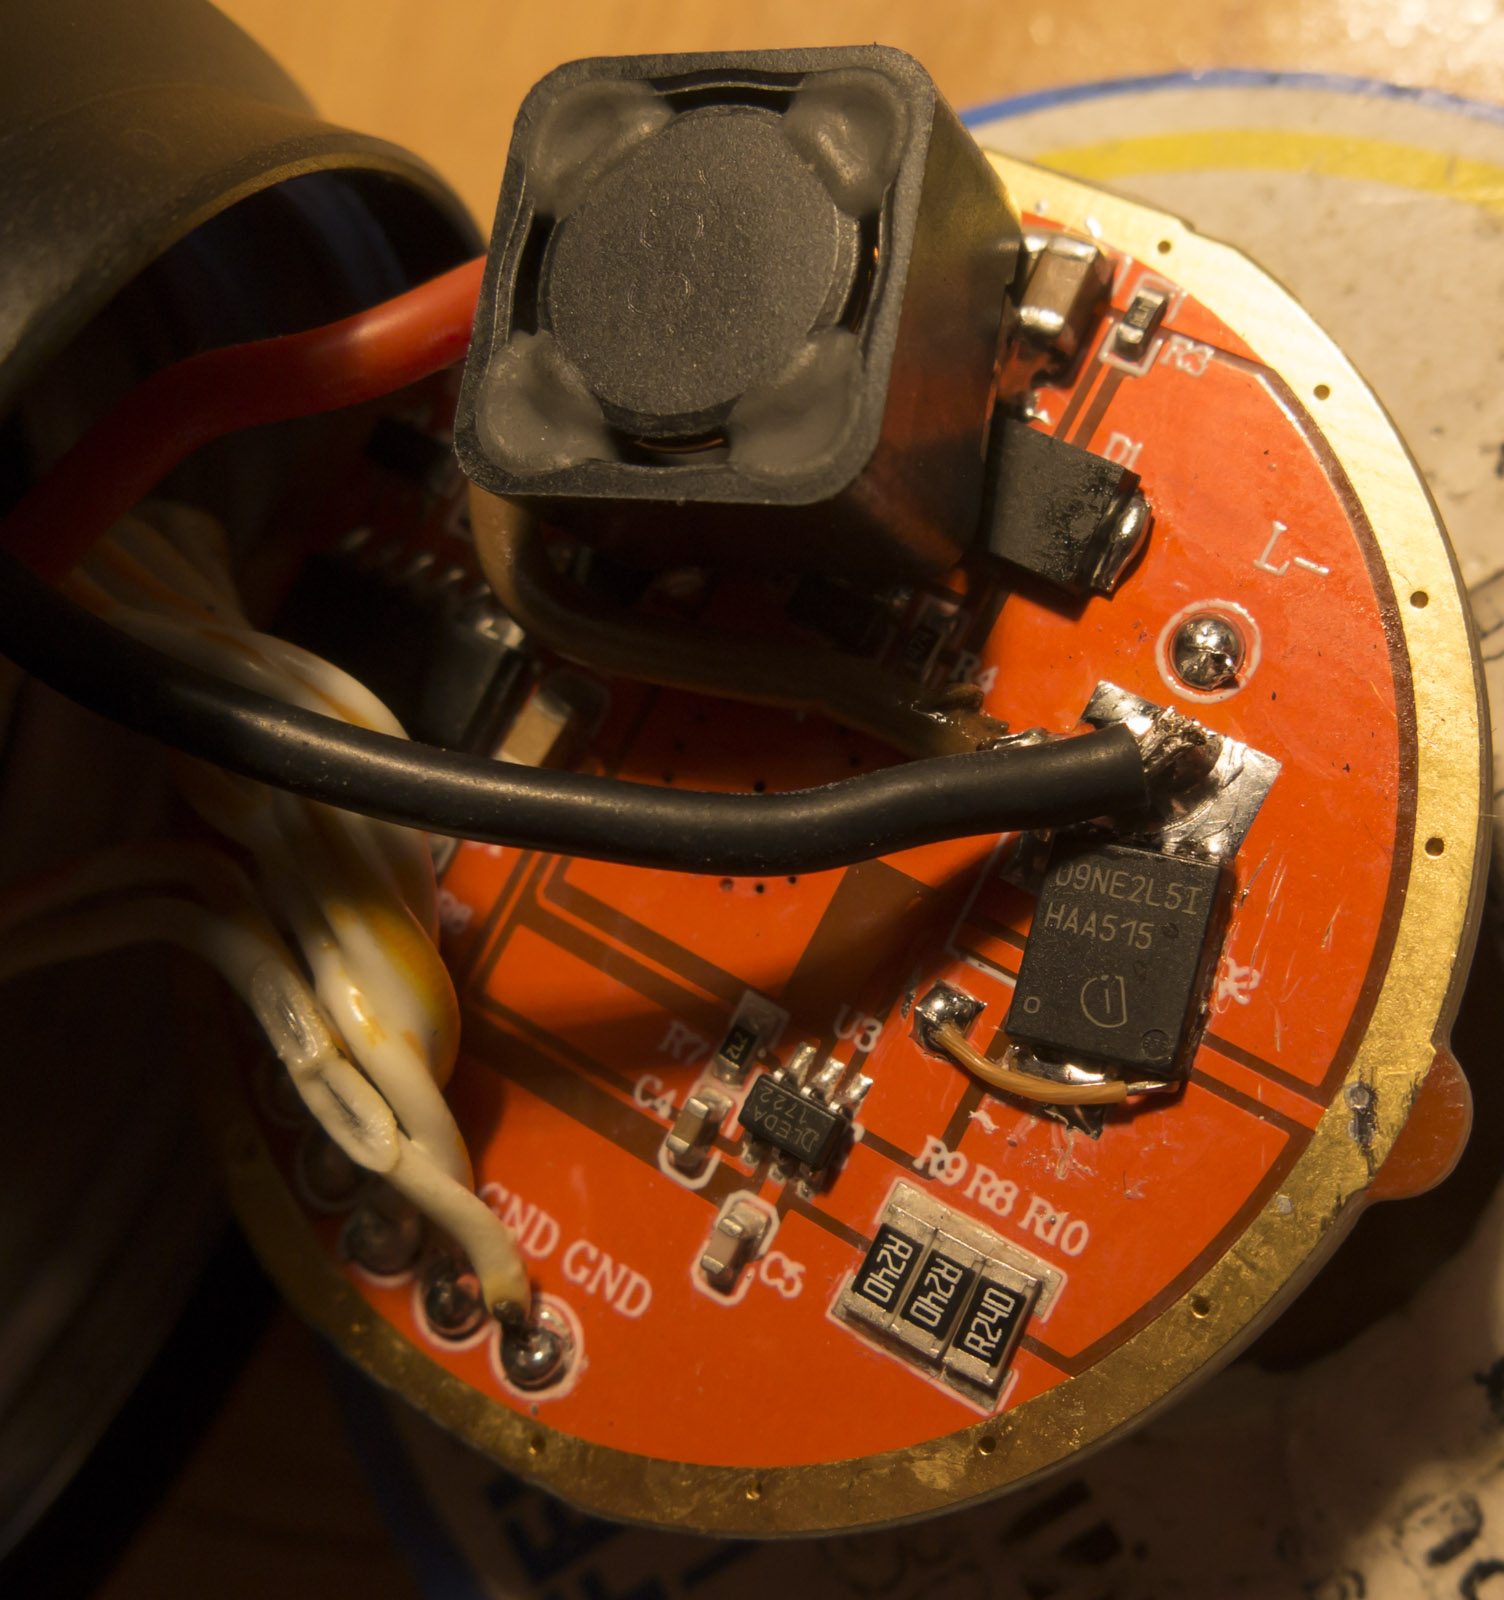
It contains a separate board with a MCU controlling the blink LEDs on the tail, the switch is only to activate or shut down those LEDs
I would have liked here an electronic switch like in the Acebeam K60 to lock out the light and have this switch to control the light on the tail in addition to the head switches
The tail cap is waterproof with silicone covers held by retaining rings
Tail blink LED has about 3Hz

.
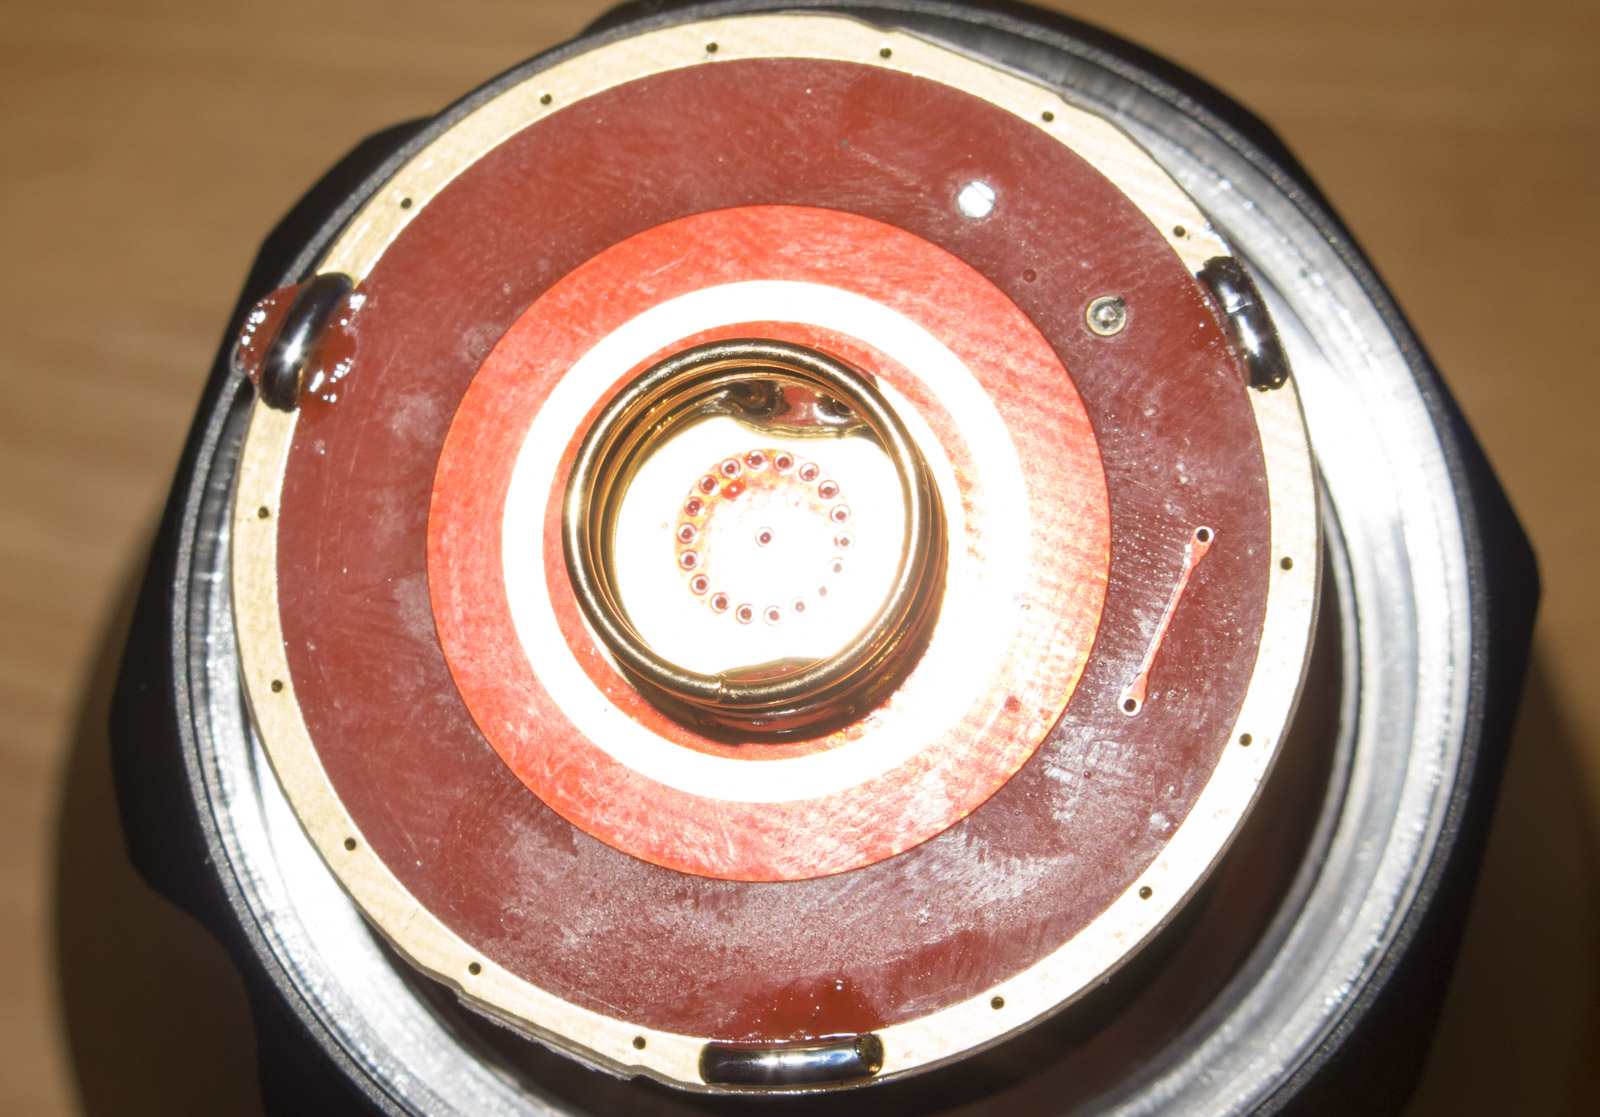
Driver and Battery
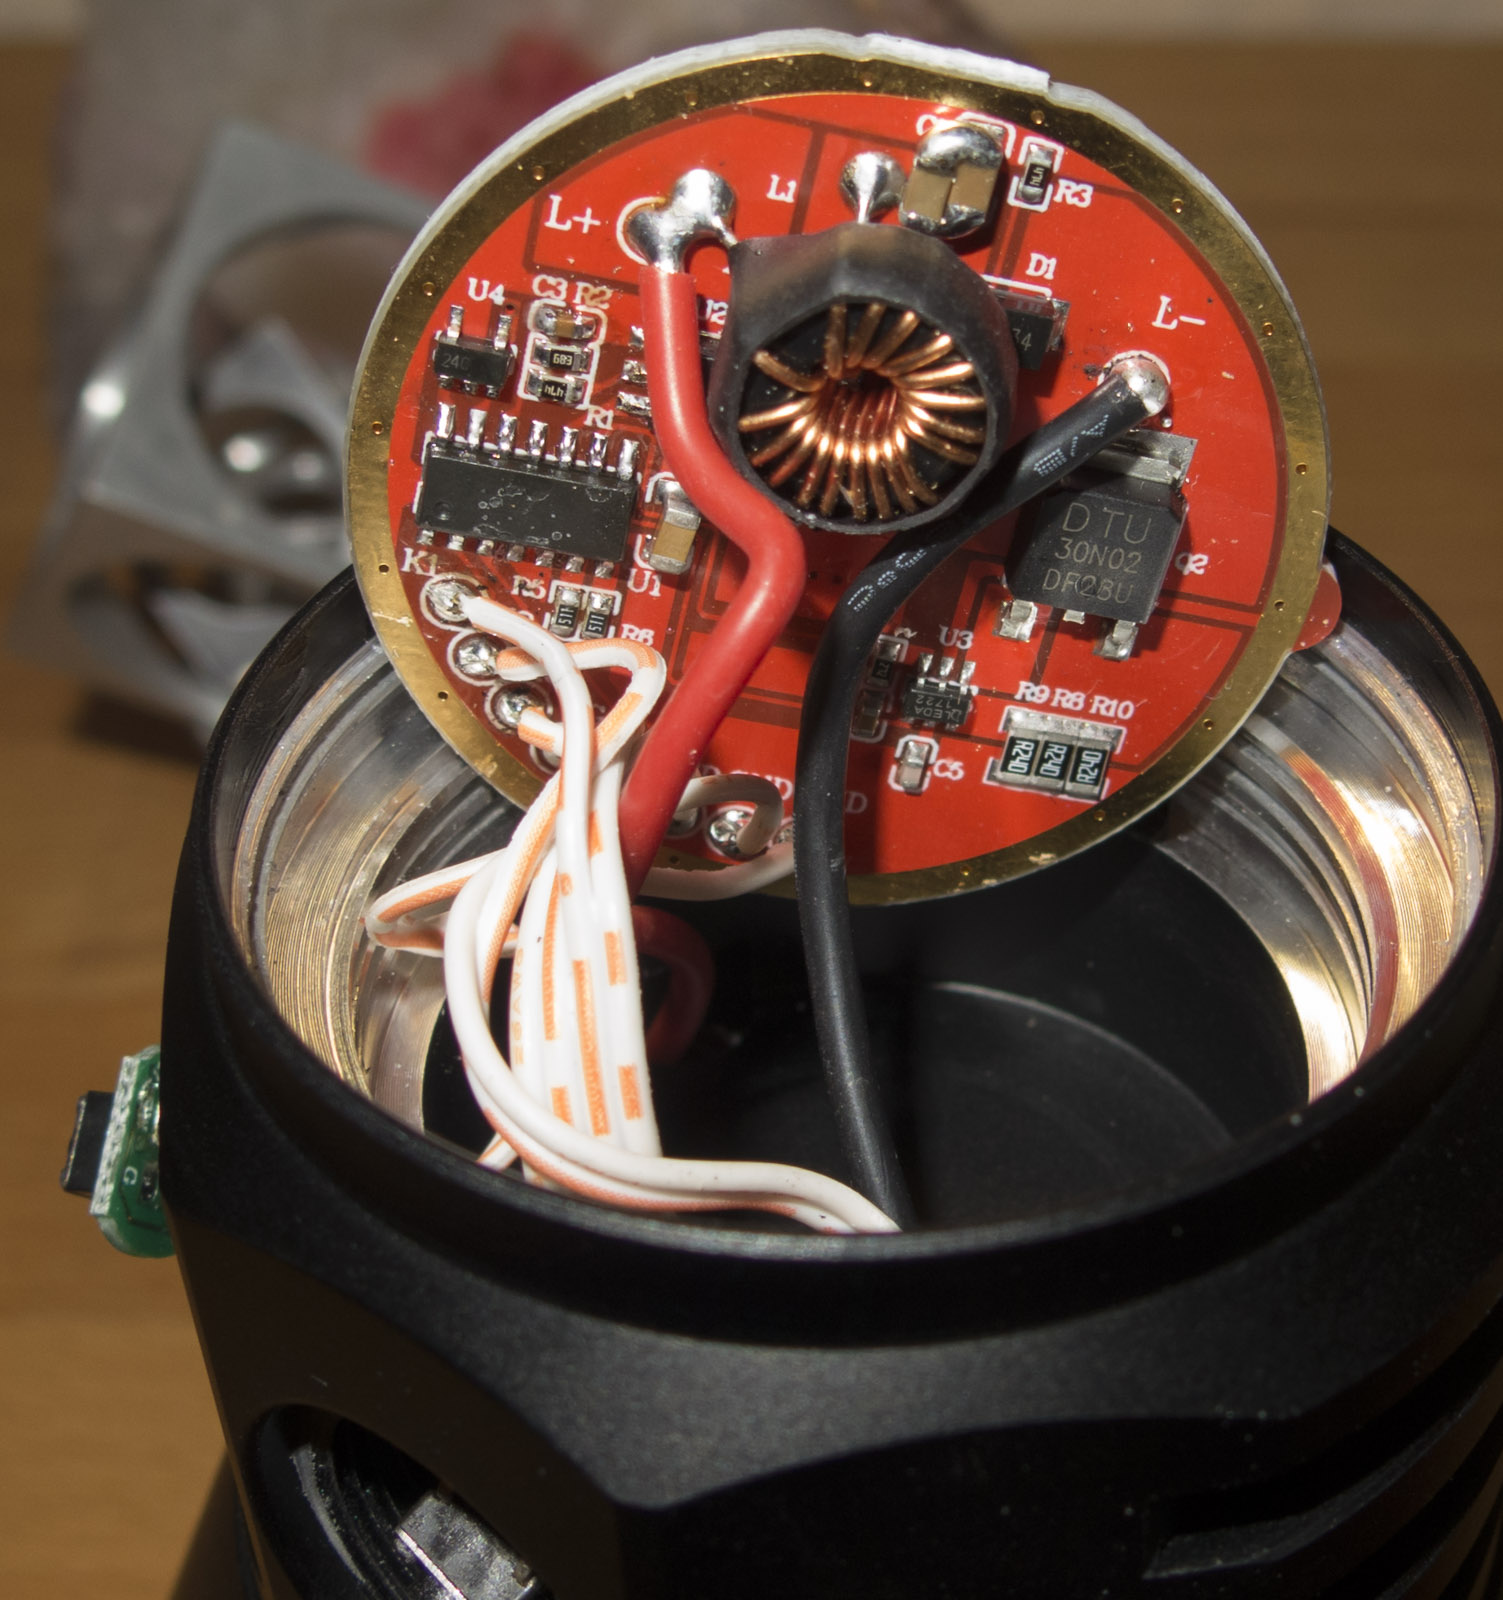
The driver is gold plated
The driver has a thick spring from a magnetic metal like steel covered with a contact plate
The driver is build very cheap and simple, 1 buck chip with an inductor and 3 0.24Ohm resistors in parallel
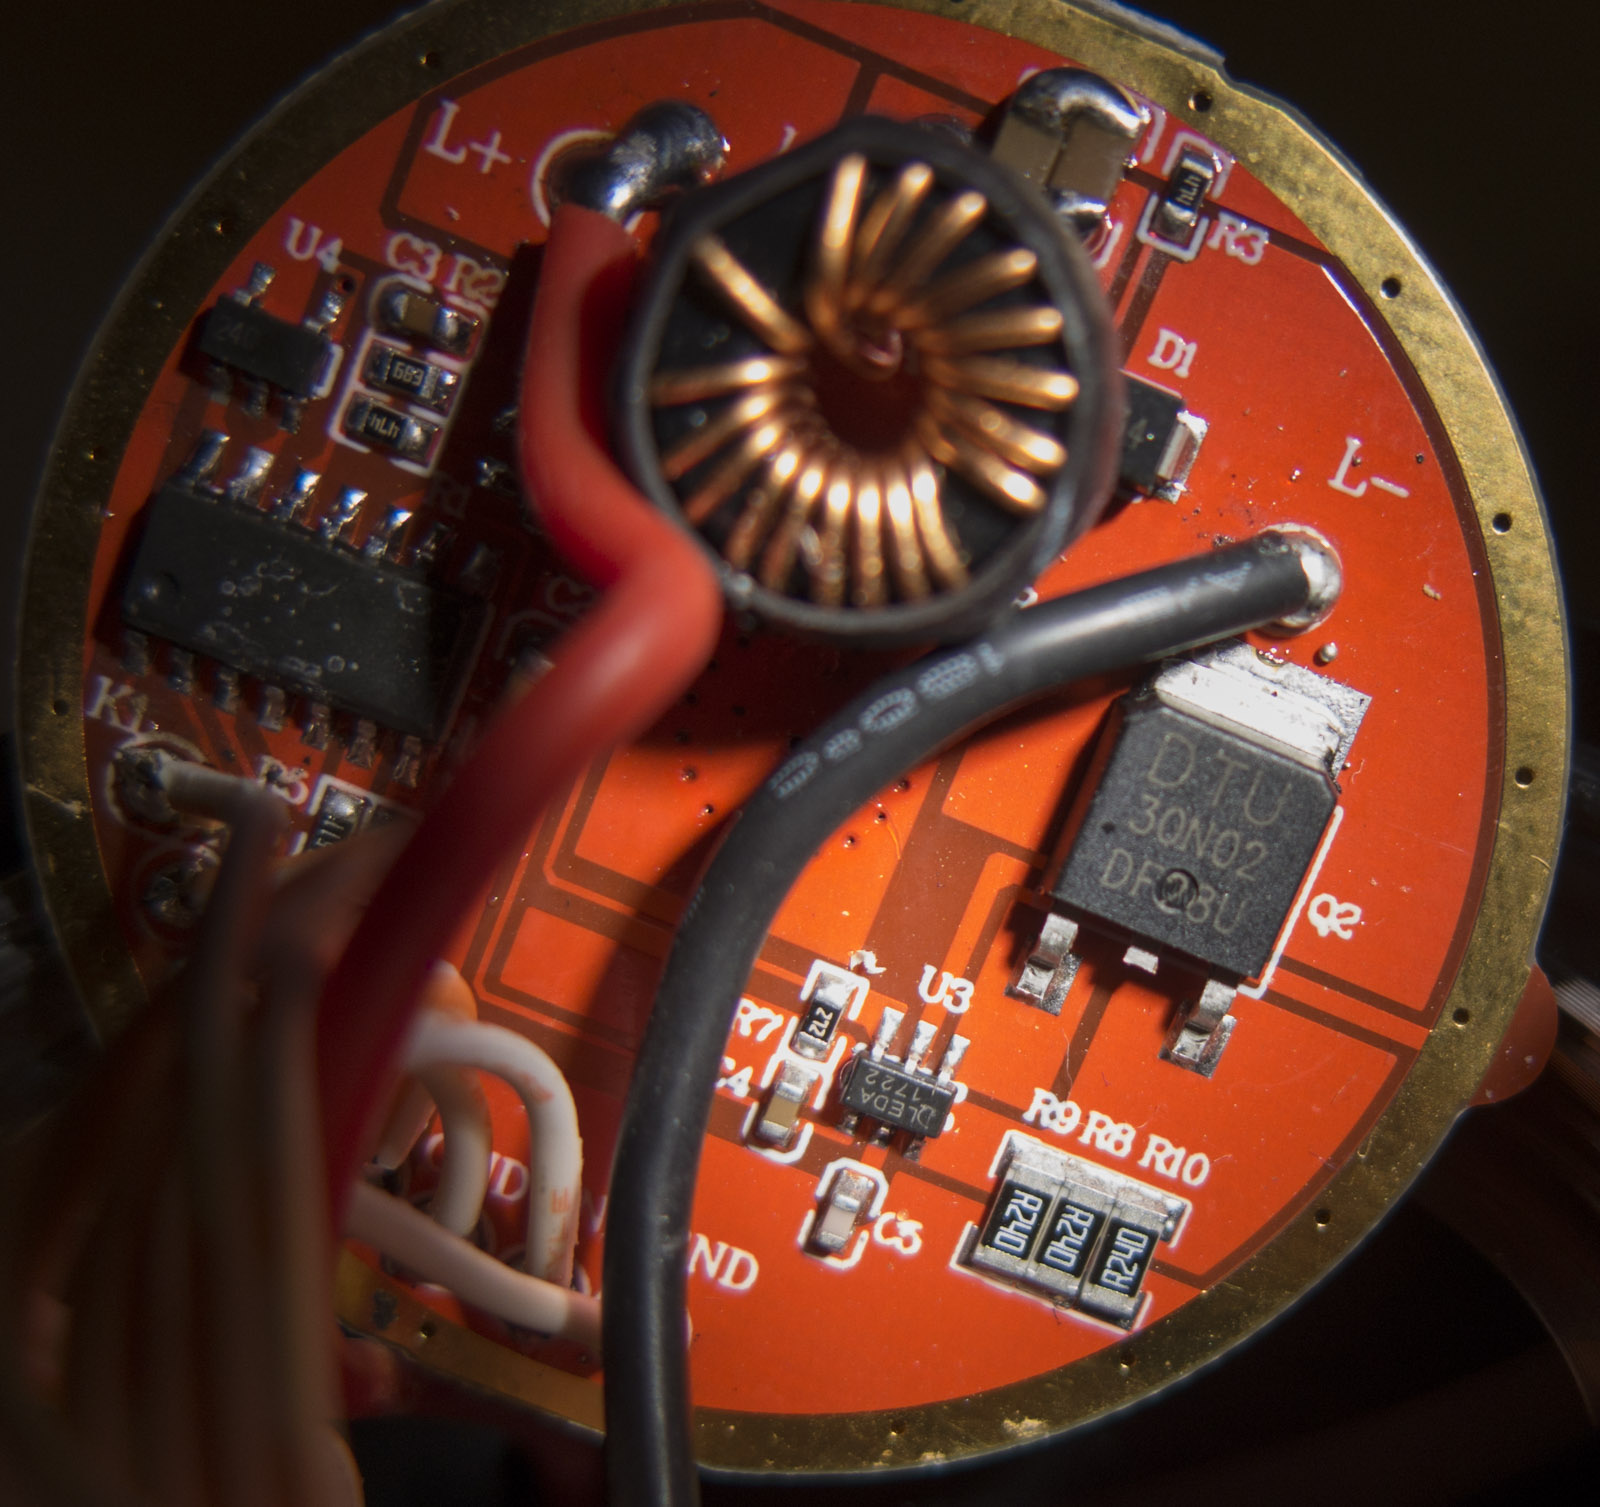
The light has visible PWM in output, falling water drops make almost a straight line, but tiny interruptions can be seen, a bigger output cap could fix this
the PWM frequency seems to be close to 50kHz, but practical this does not affect the light in a negative way at this high frequency
The light has some mass to absorb heat and the big head spreads the heat away from the LED
The surface has no fins to keep the weight low, the amount is enough to deal with the generated heat well
The mode spacing is good, the moonlight has with 0.2 Lumens a good level to read maps in the dark without damaging night vision
The side switch status LED shows the battery level, turning red when the battery voltage gets too low
The switch cover has a sort of Z-shape to collect the light from the LEDs, but I got the feeling it will rotate in assembly
There is one thing I do not like, the driver is not clamped by the retaining ring it has little play and is only pushed against the shelf by little force of the driver spring against the carrier, this can be fixed adding 3 solder blobs on the ground ring (a picture in modding section)
.
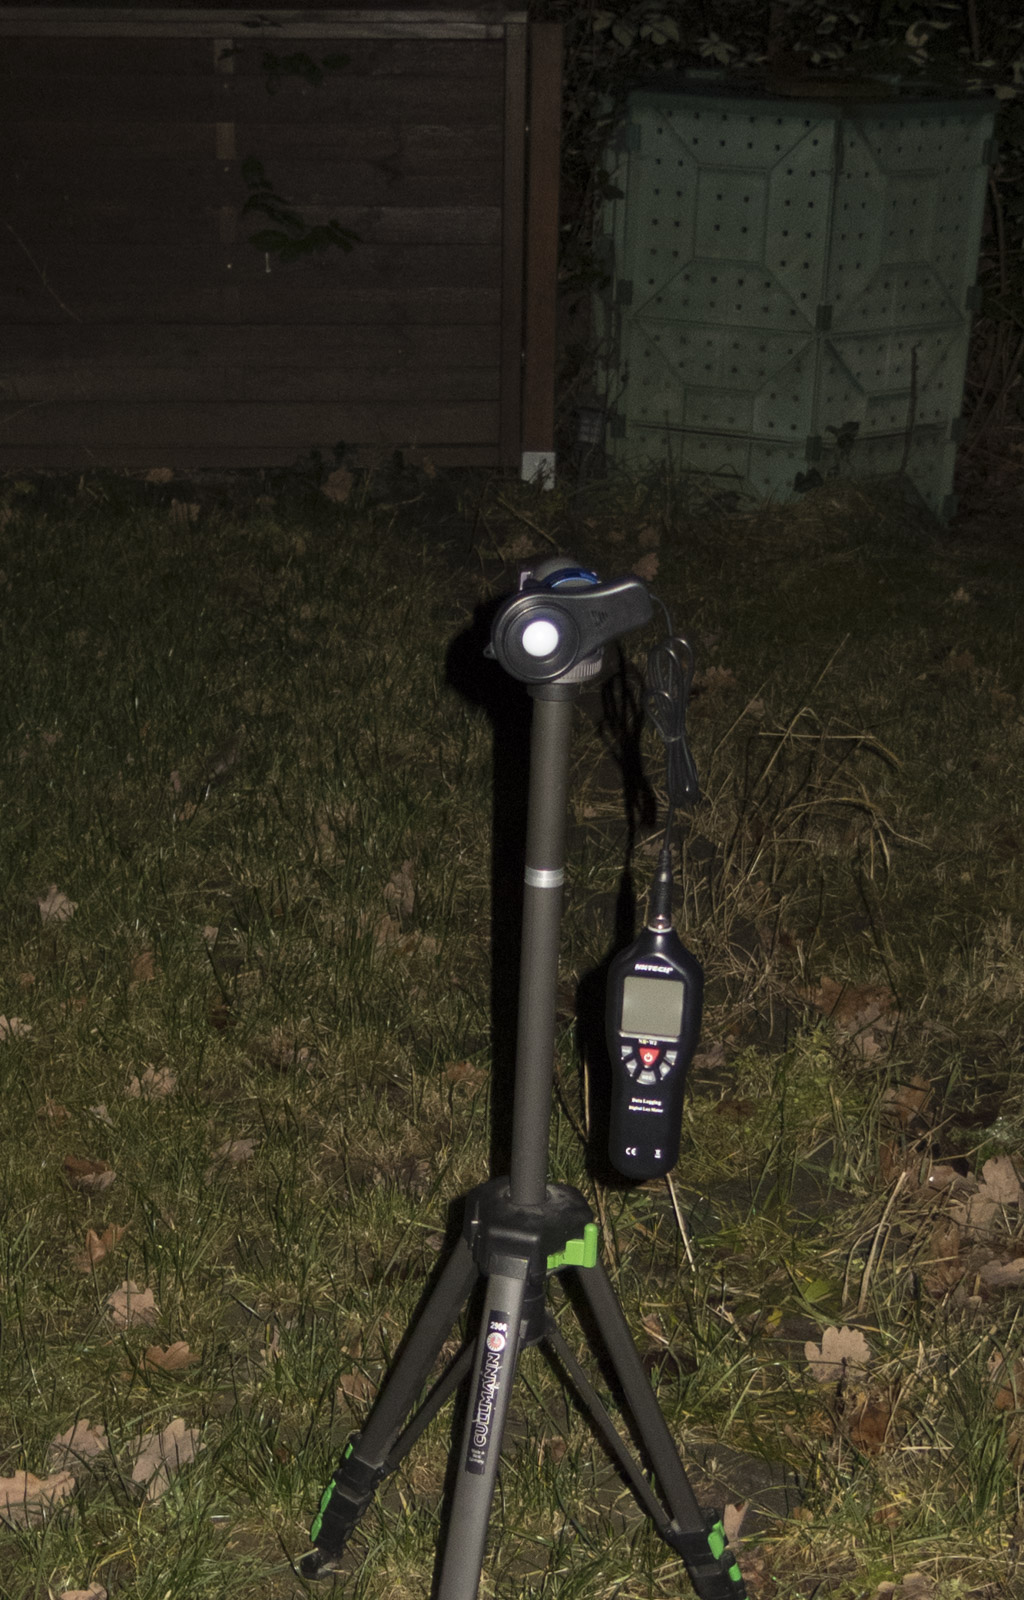
Measurements
First the most important
It has 685kcd @1m
I measured 6850lux at 10m with my cheap lux meter

The light reaches full output even with drained battery a test with 3.7V showed same brightness as with full cells brightness
Relative output:
measured between the modes
I did multiple this value with the rated 2200Lumens
Moon
0.0037% 0.09 Lumens
L1
1.01% 23,8 Lumens
M
11.62% 260 Lumens
H1
34.55% 960 Lumens
H2
79.42% 1750 Lumens
Turbo
100% 2200 Lumens
LED currents:
Moon
like 2mA, the measurement on this amount is very inaccurate
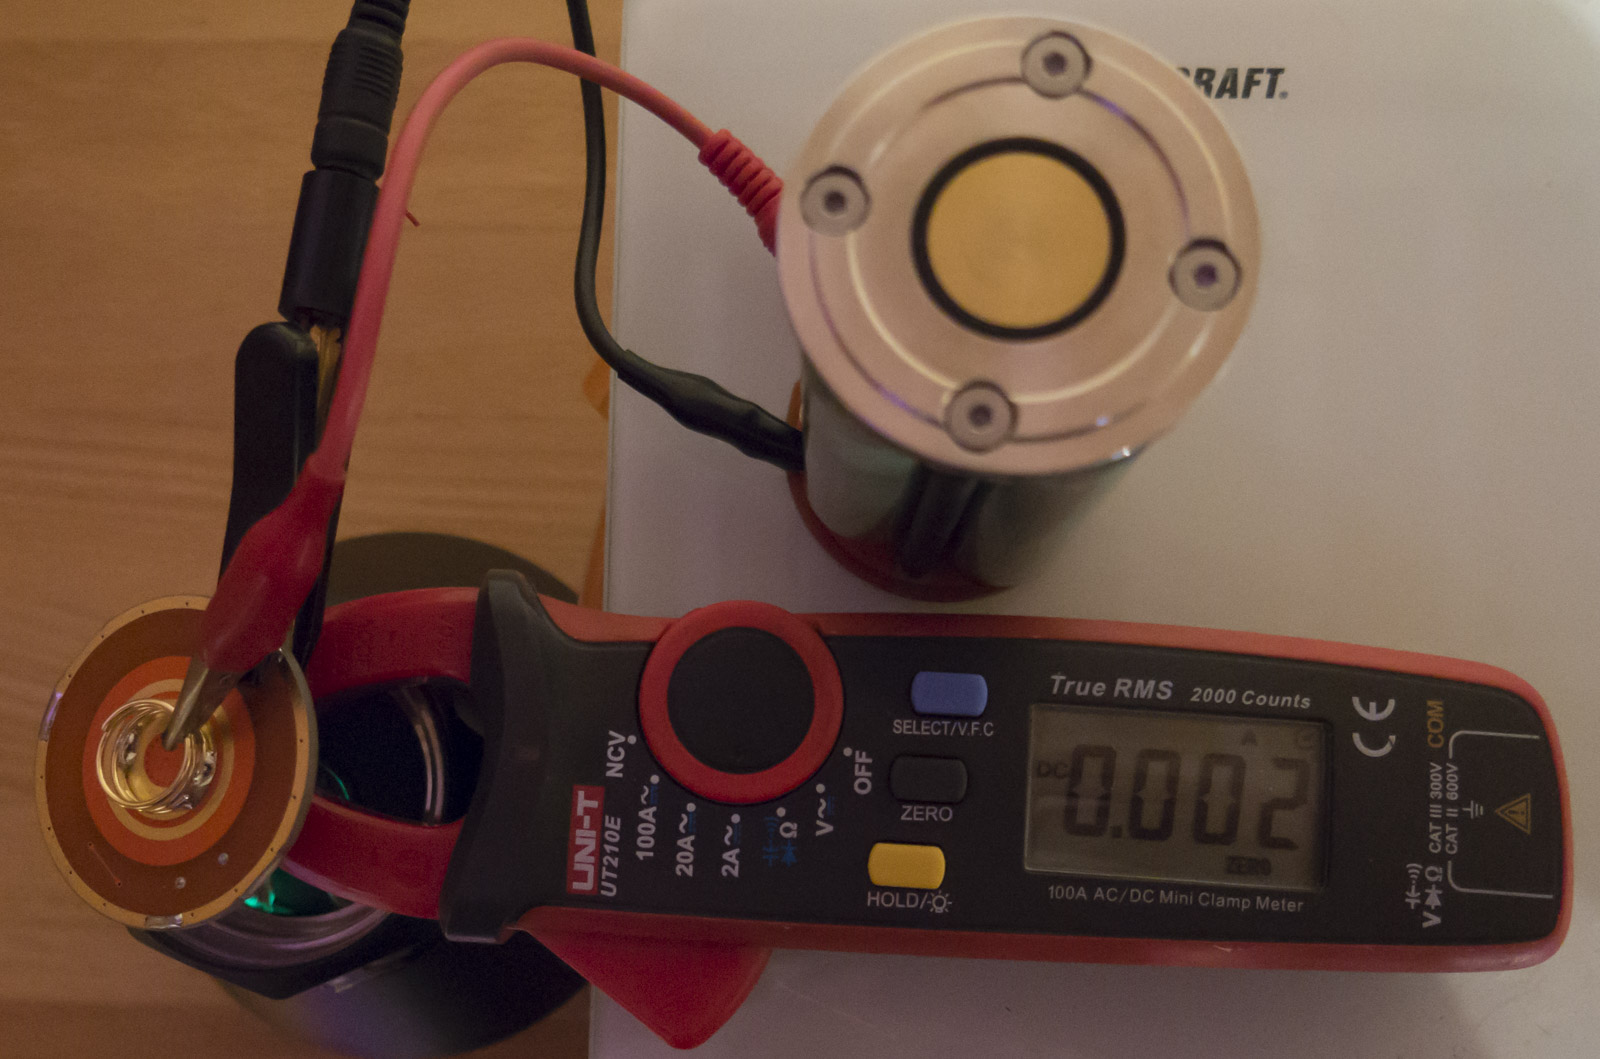
L1
about 17mA

M 206mA
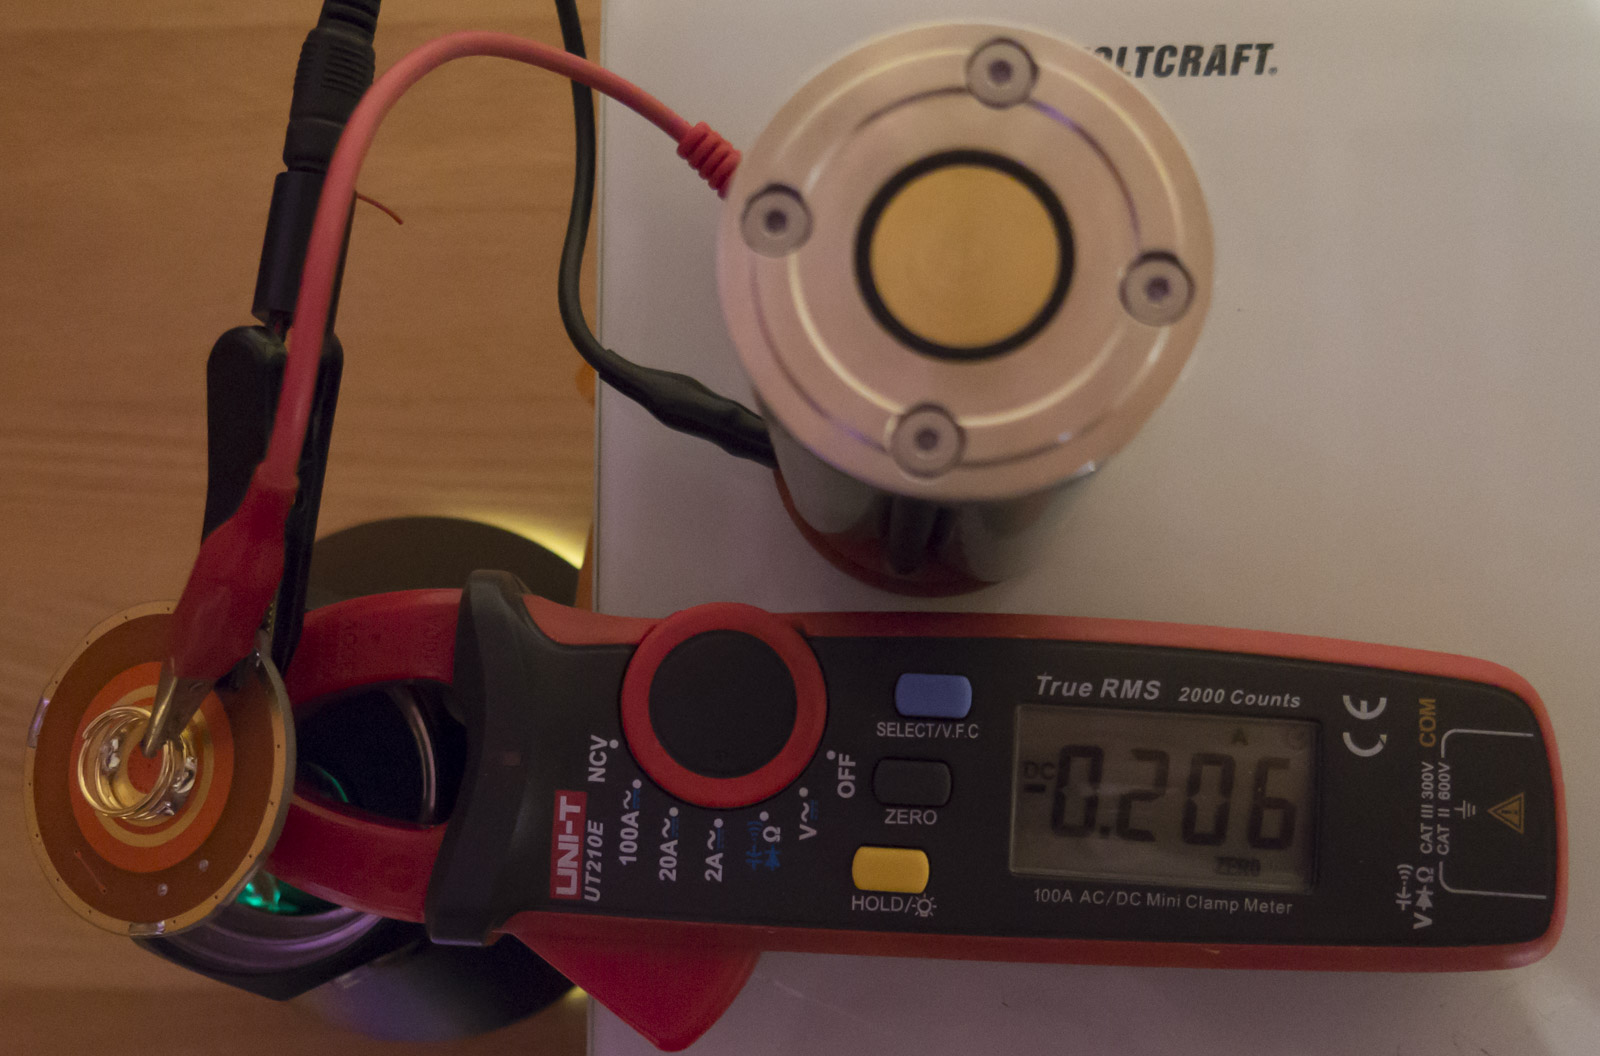
H1 0.94A
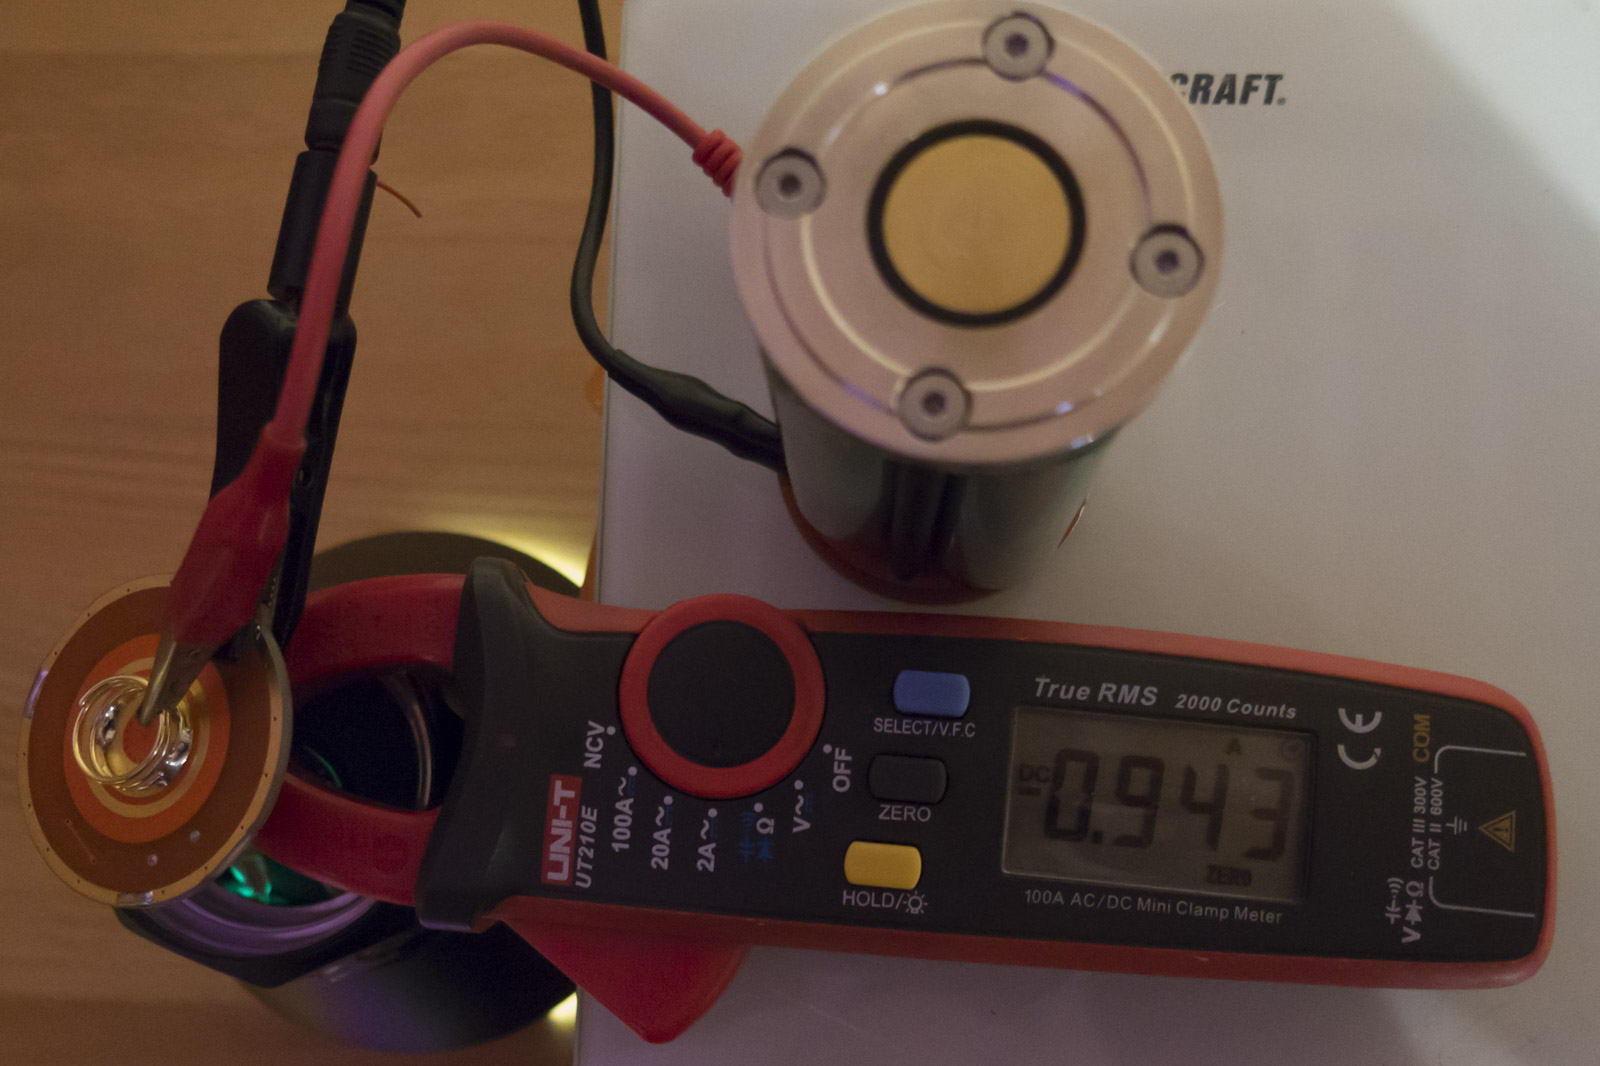
H2 1.7A
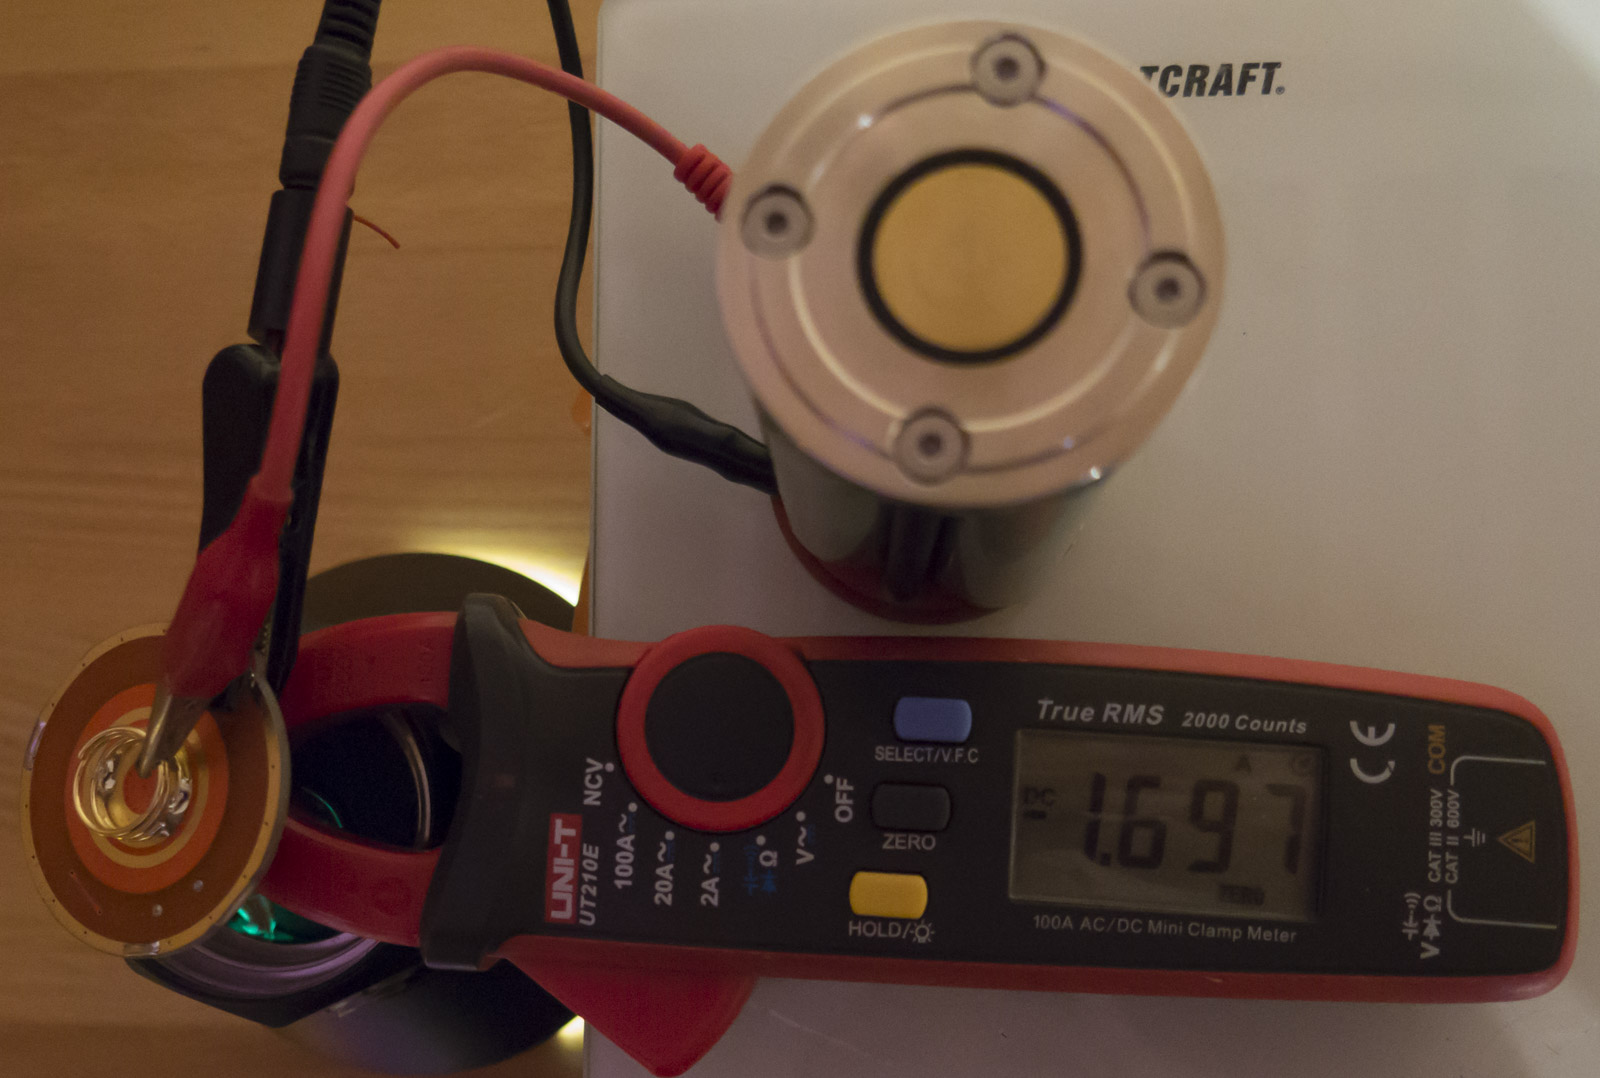
Turbo 2.42A

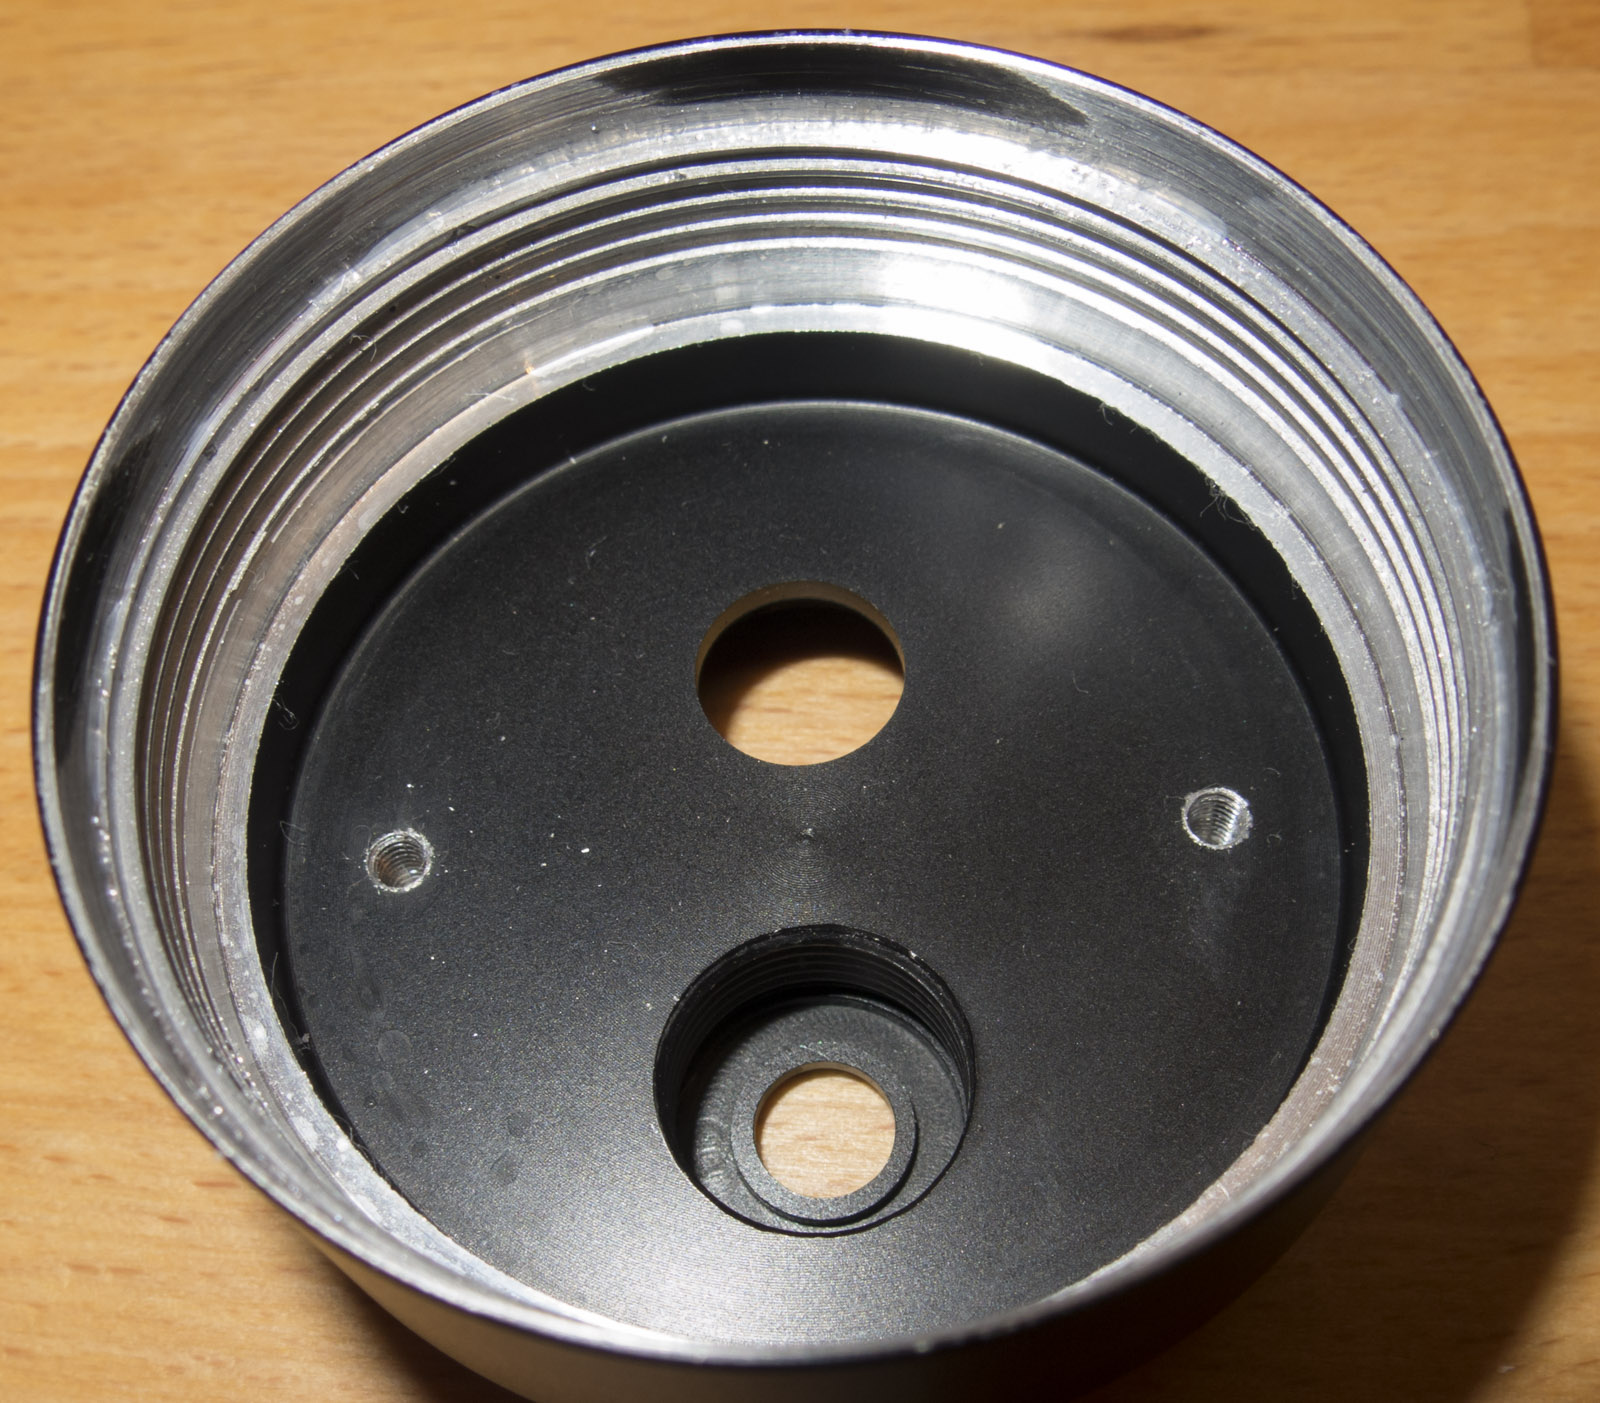
Driver space
back inner 25mm outer 38mm and 3.2mm high, silimar but smaller compared to TN42 size

Driver cavity
14mm deep and 2.5mm thick ground ring sitting on the cavity rim
.
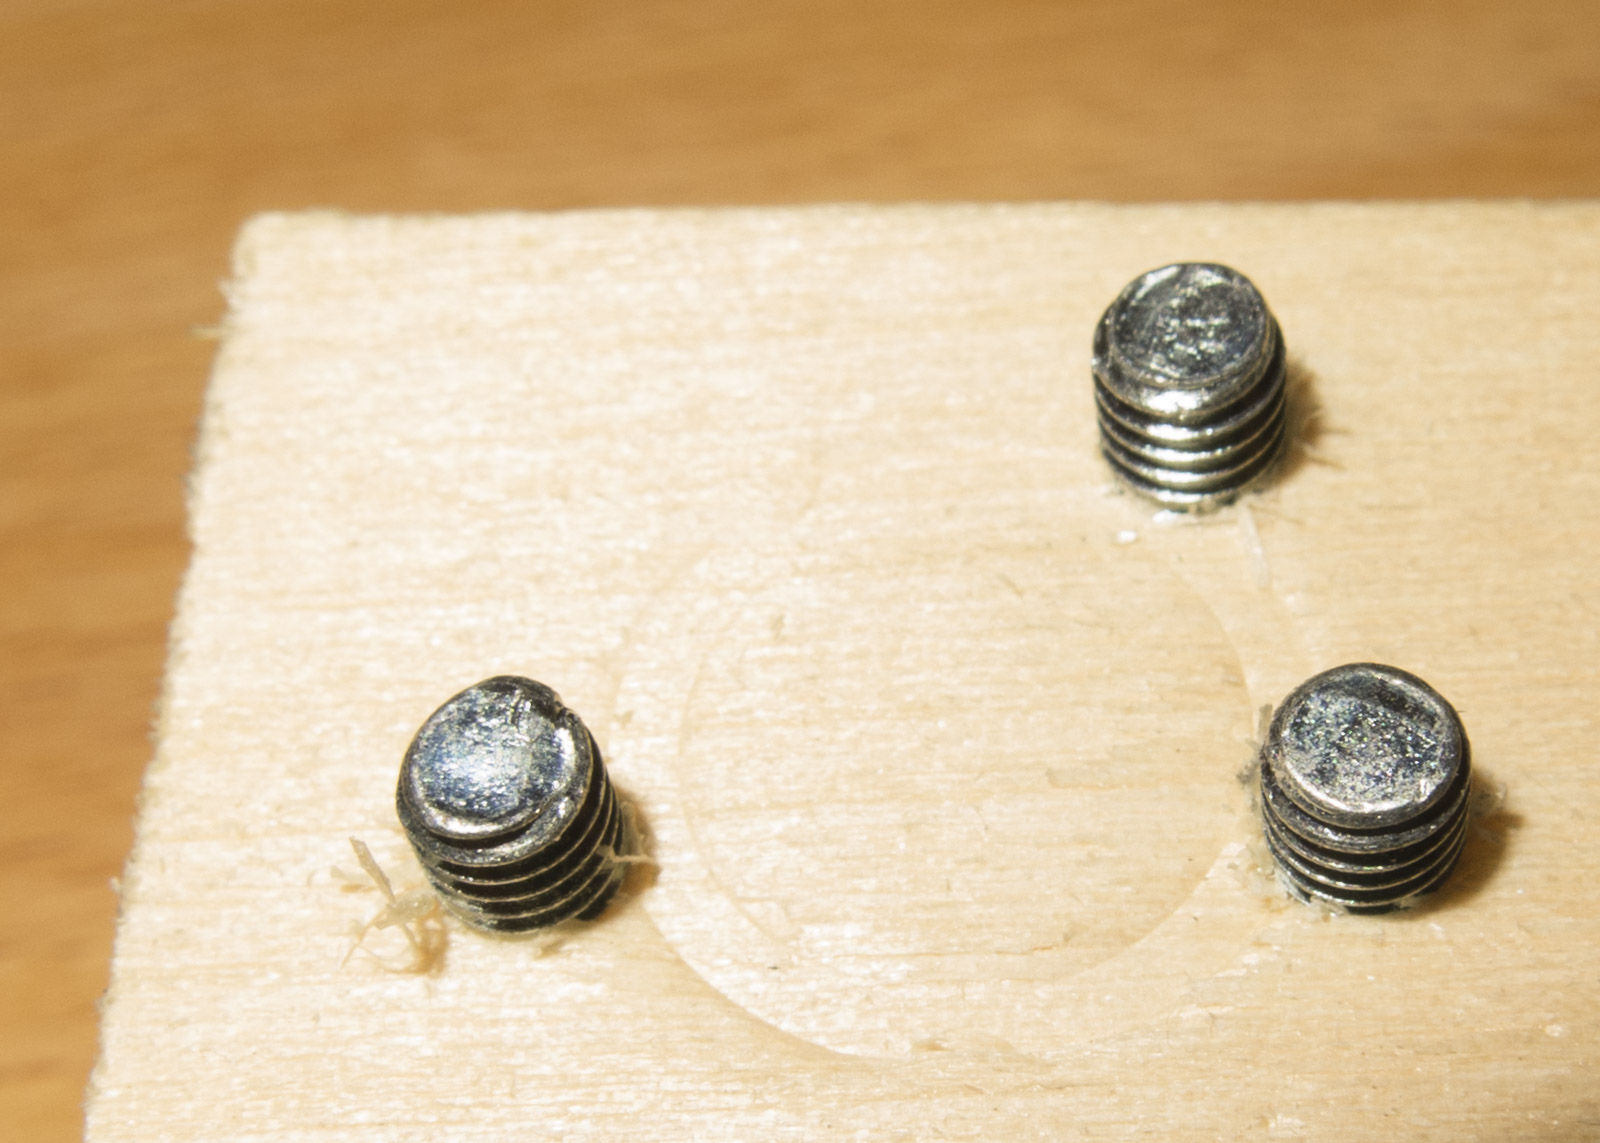
Modding:
I added 3 solder blobs to the drivers ground ring, as it has some play when the retaining ring is screwed down all the way
I will swap in a NW XHP35 E2-3C in this light, the bezel is not glued so it’s very easy to get to the LED
To open the switches I had to make a tool as the notches are not symmetrical
punched the tail one in wood

got 3 scres in it
Update:
I noticed today that the light sometimes flicker in Turbo after a few seconds then a few seconds later it stops again
I looked now again close on the driver and its used parts
The driver uses a pretty bad MOSFET compared to new Infineon and Vishay types
and the driver has no Output capacitor to smooth the PWM from the Buck regulator
So I did 3 improvements replacing 2 parts that could cause the flicker
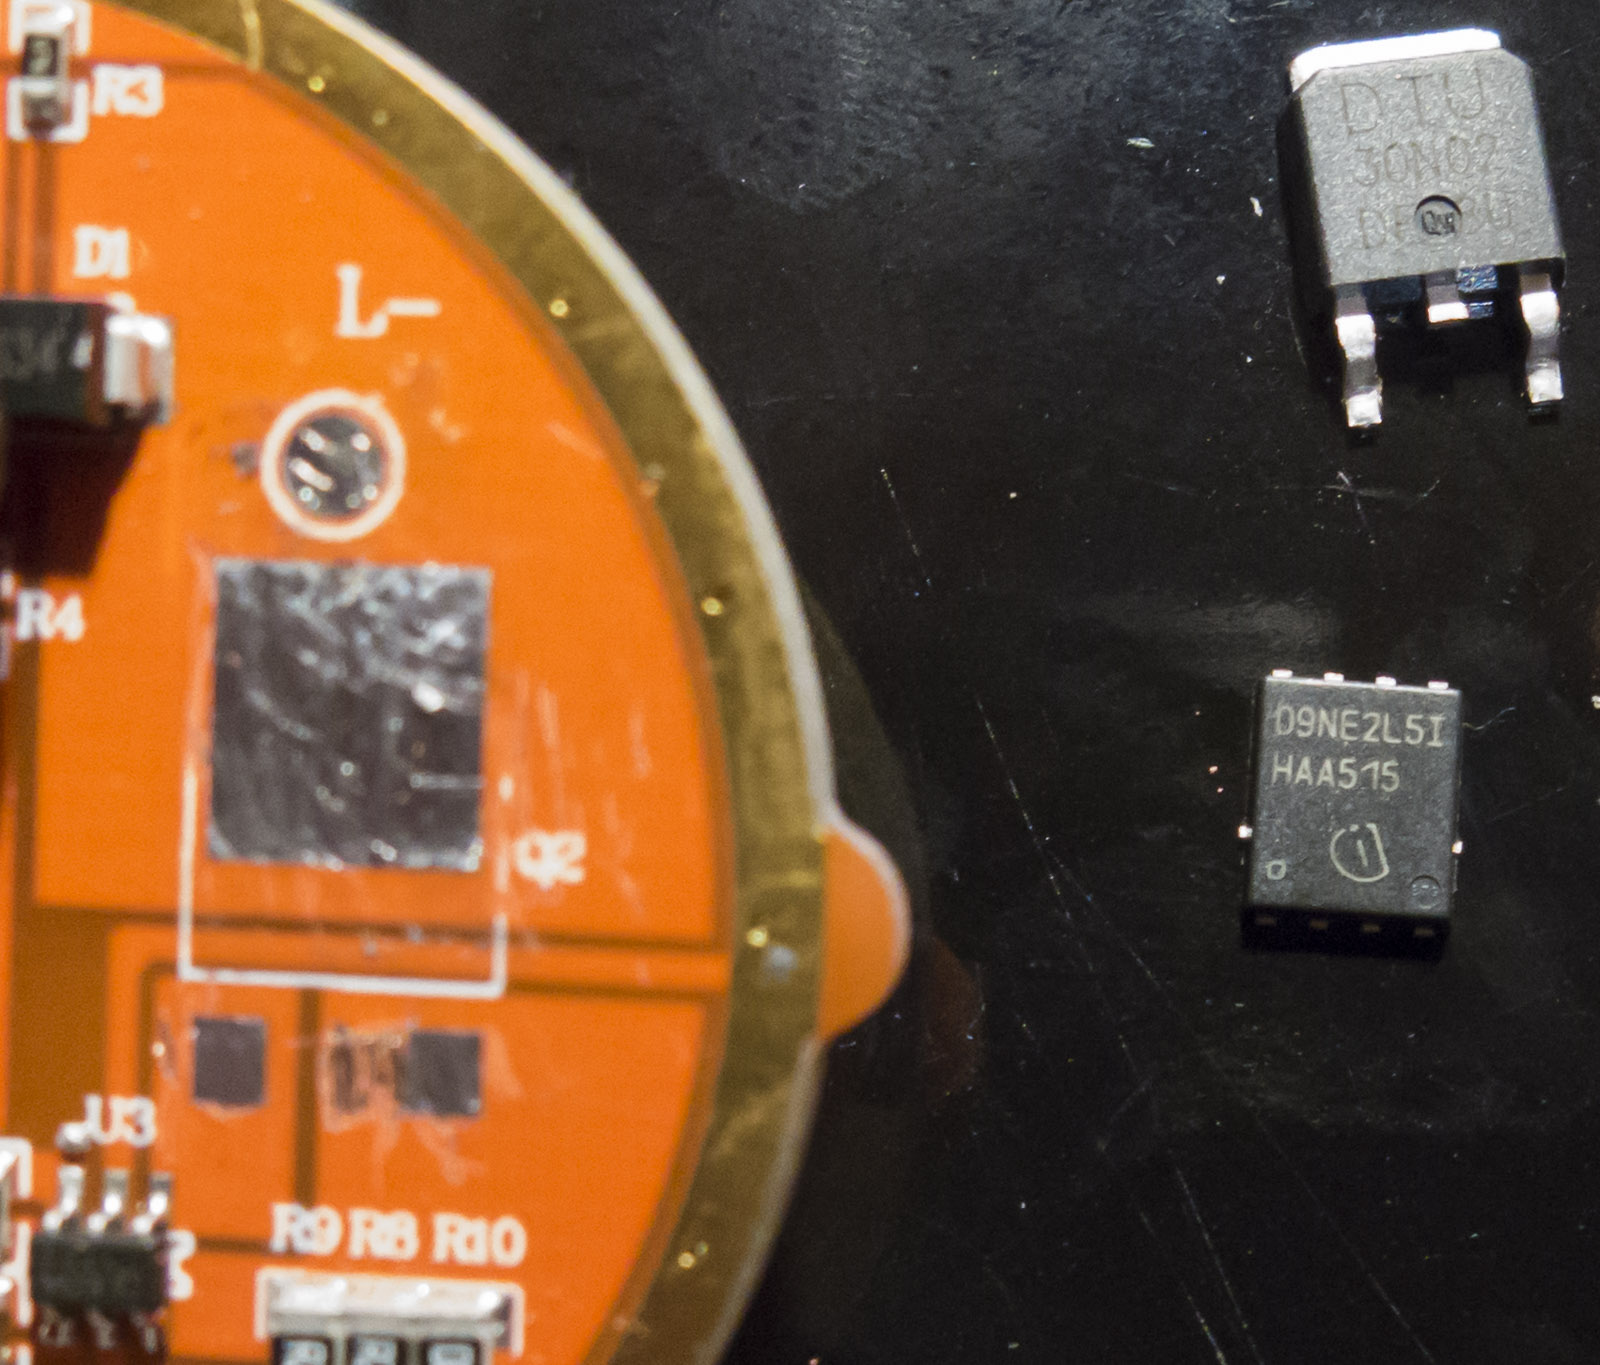
- first remove the old MOSFET and solder one of the best available ones there
- second remove the Diode and put in a 10A SMD type
- third add a 4.7uF 07R capacitor parallel to the main LED

Playing more with the light I notice at some points a whining sound from the driver, I am pretty sure the unshielded inductor is causing it
So I switched out the Inductor with a 10uF shielded one
just in case I added another 4.7uF cap on the input in case the used inductor was smaller value
.
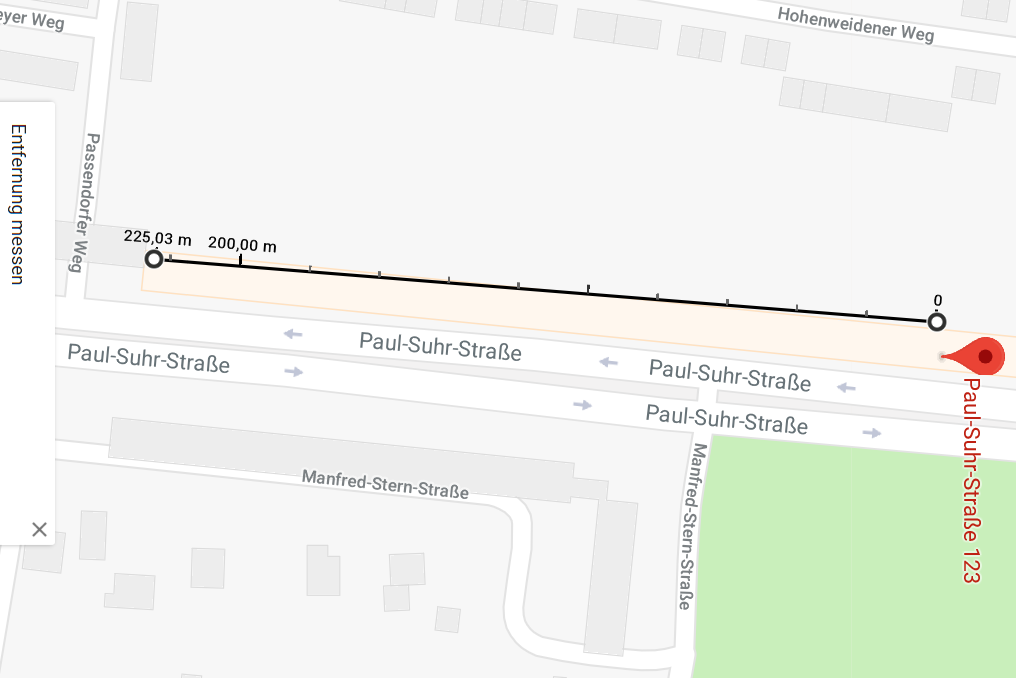
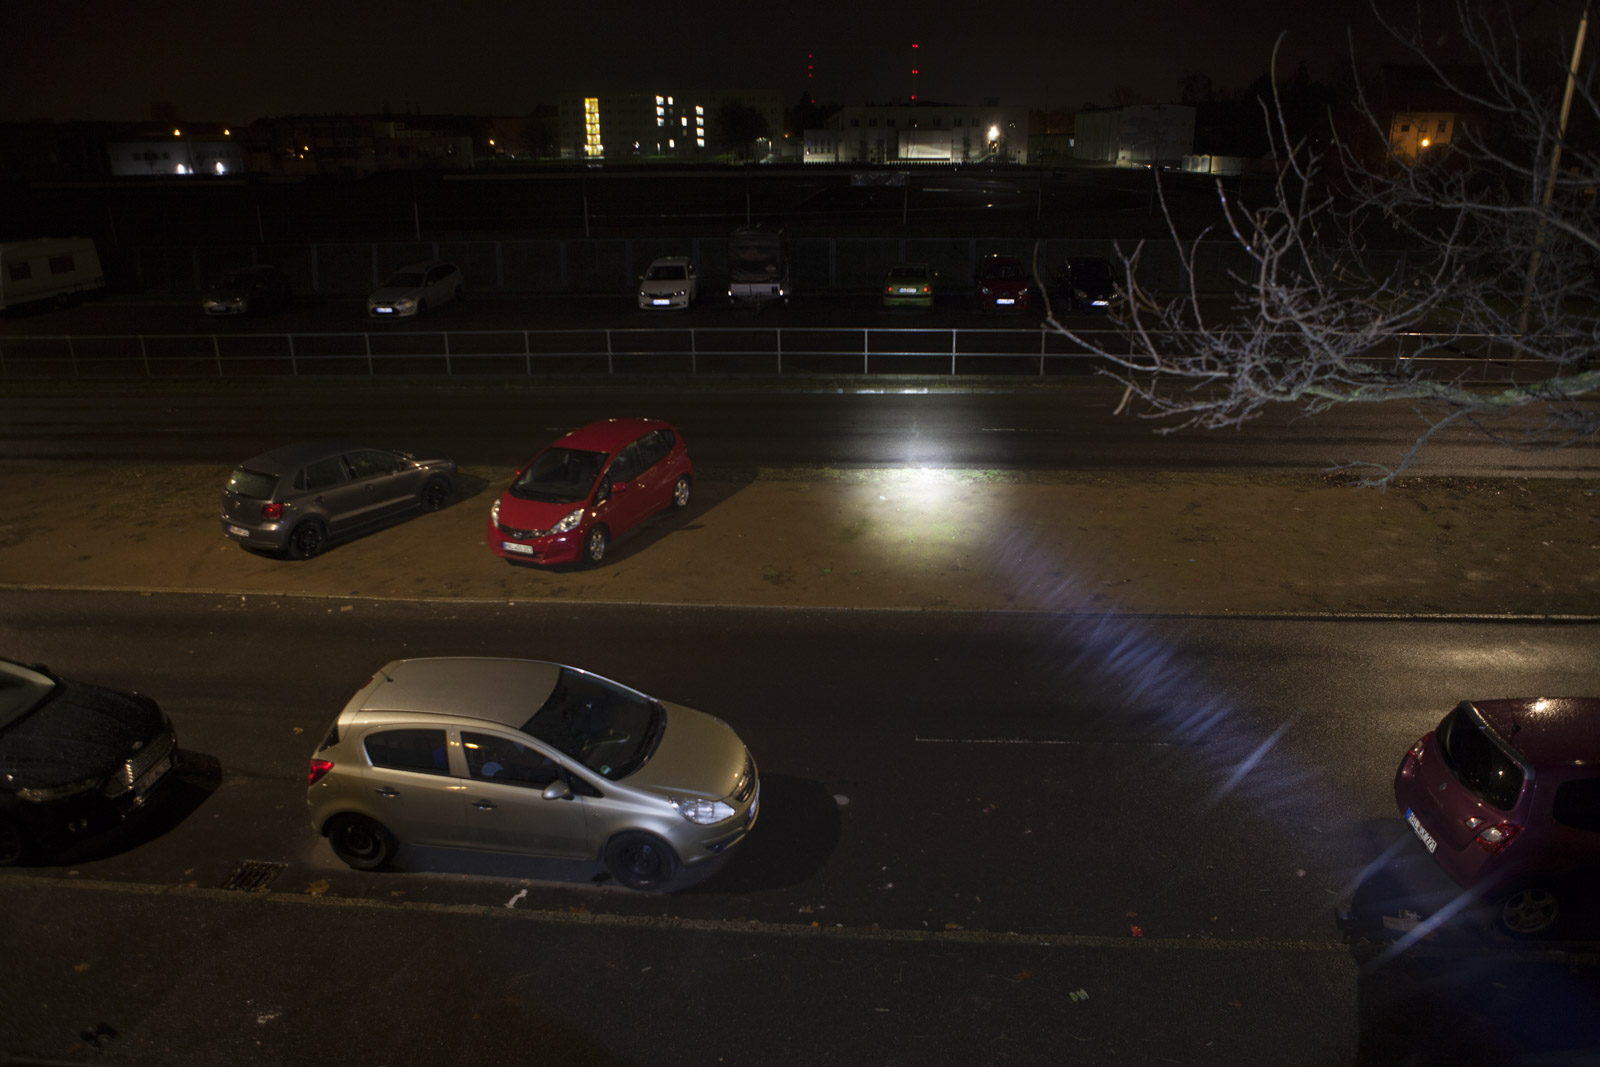
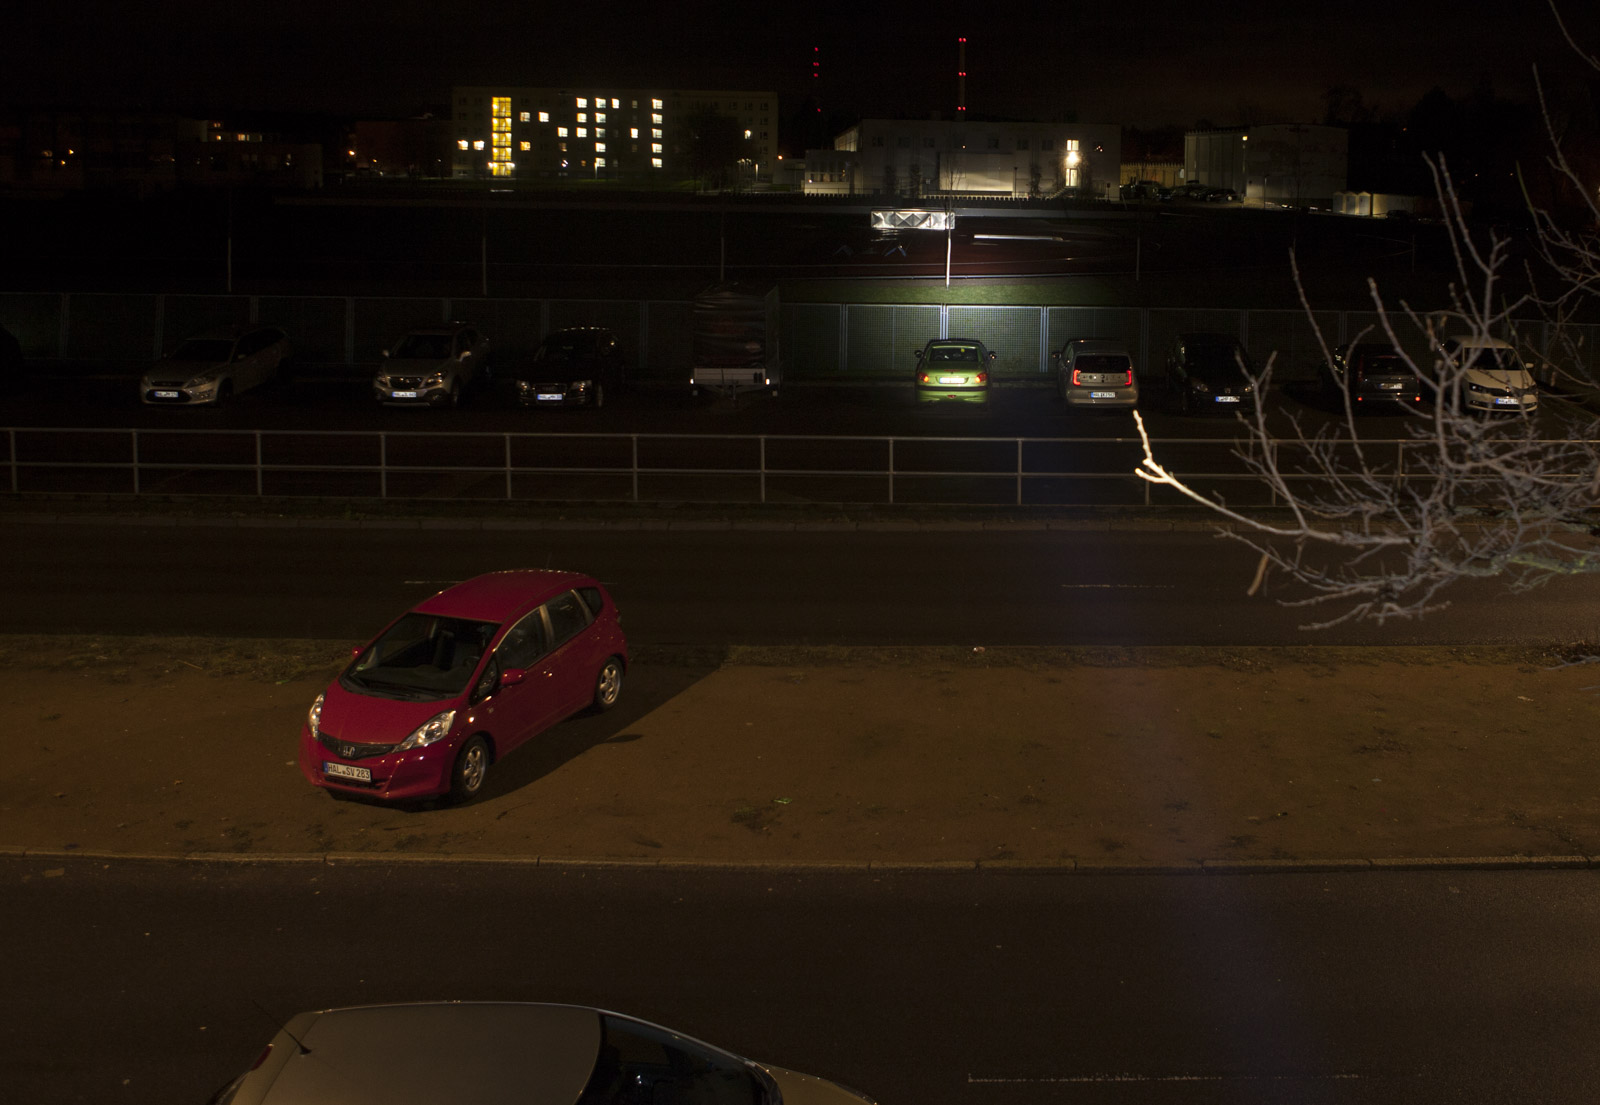
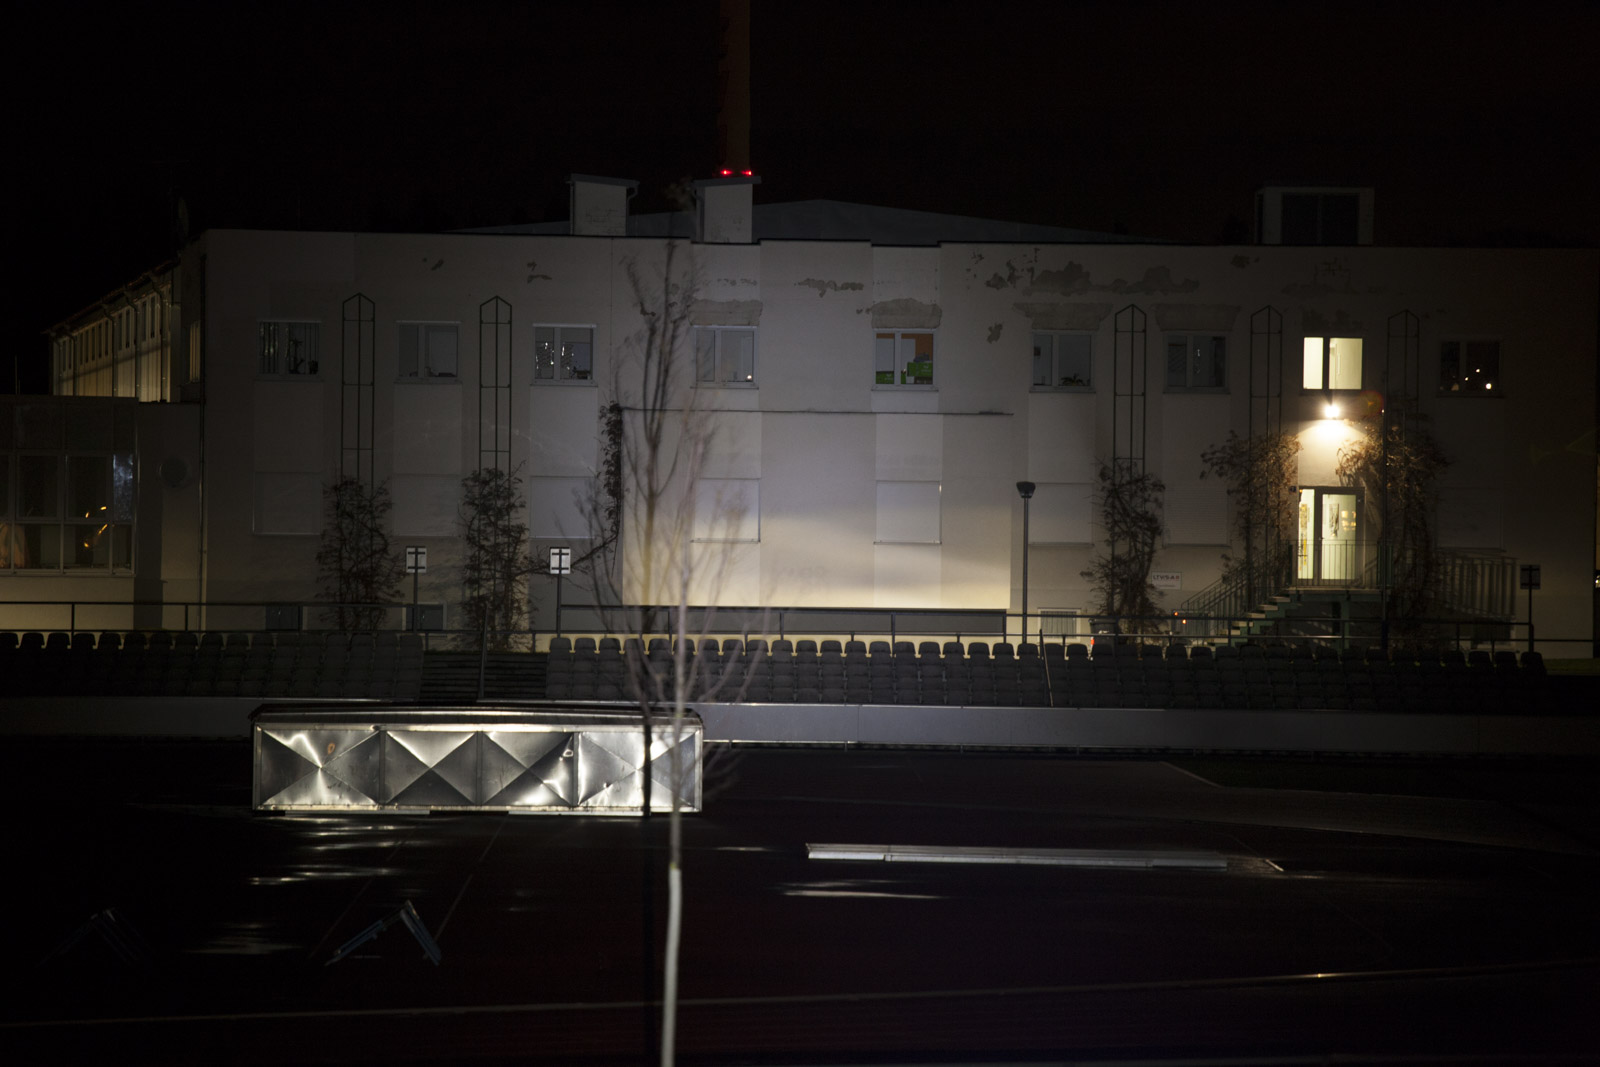
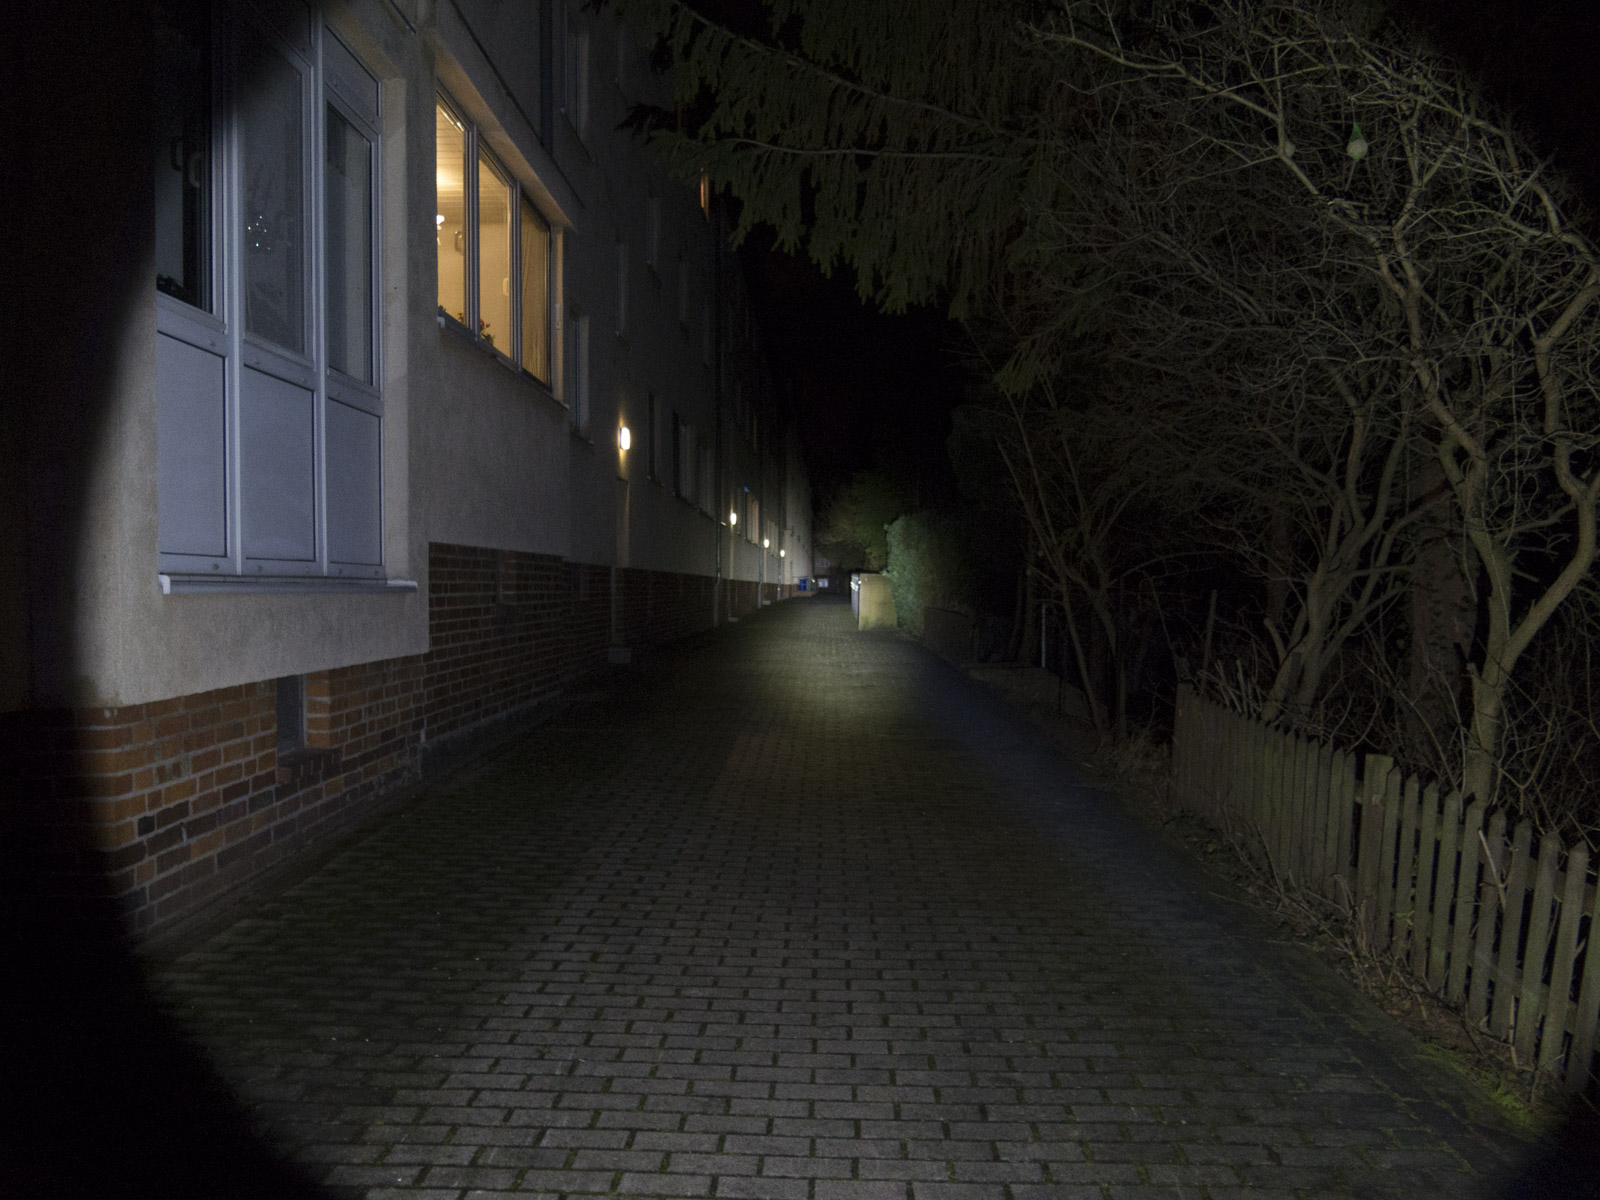
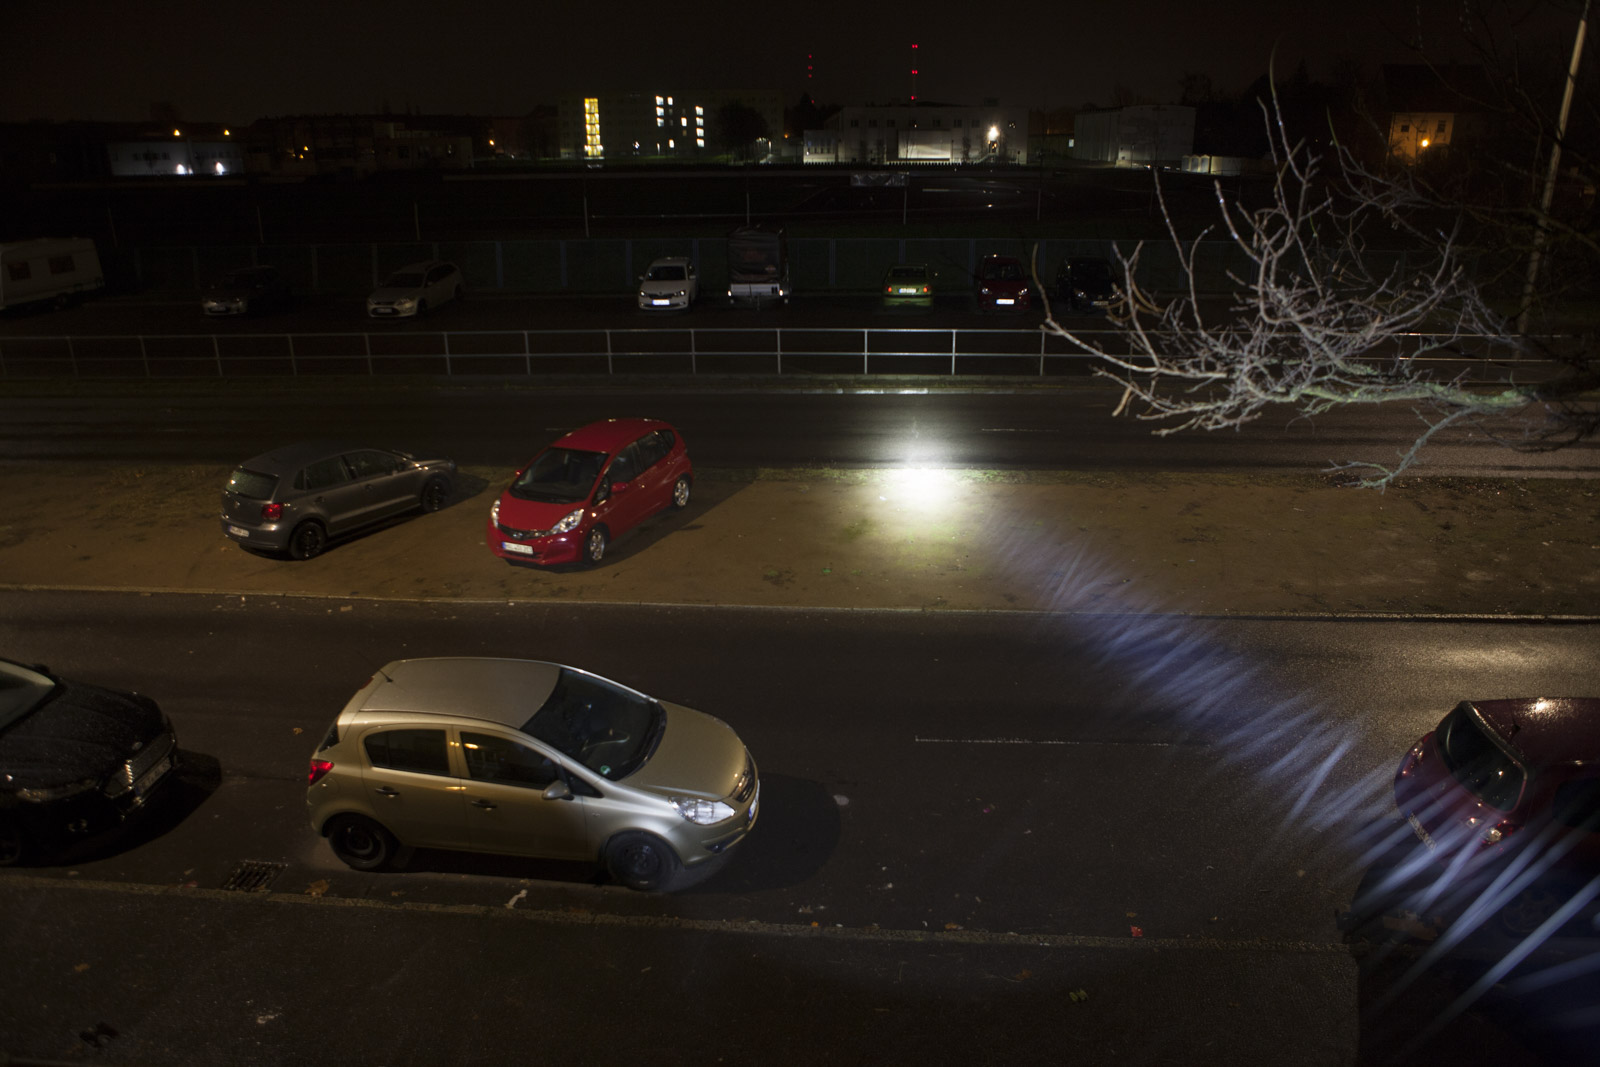
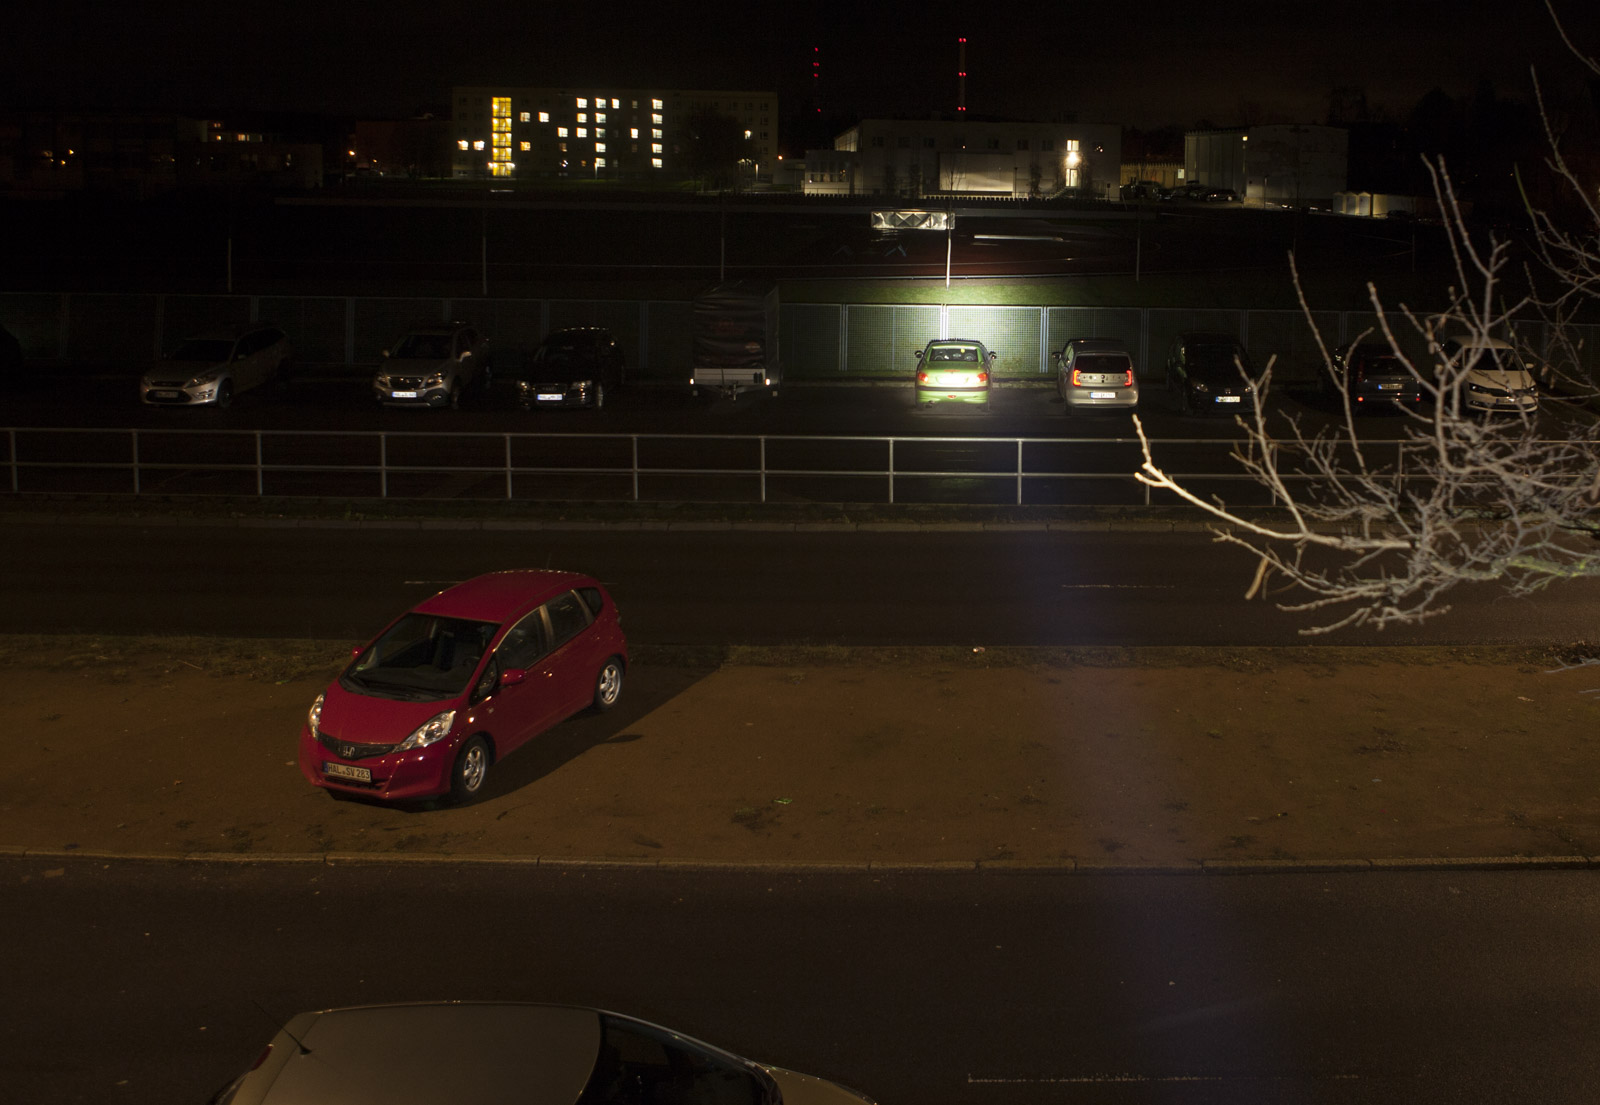
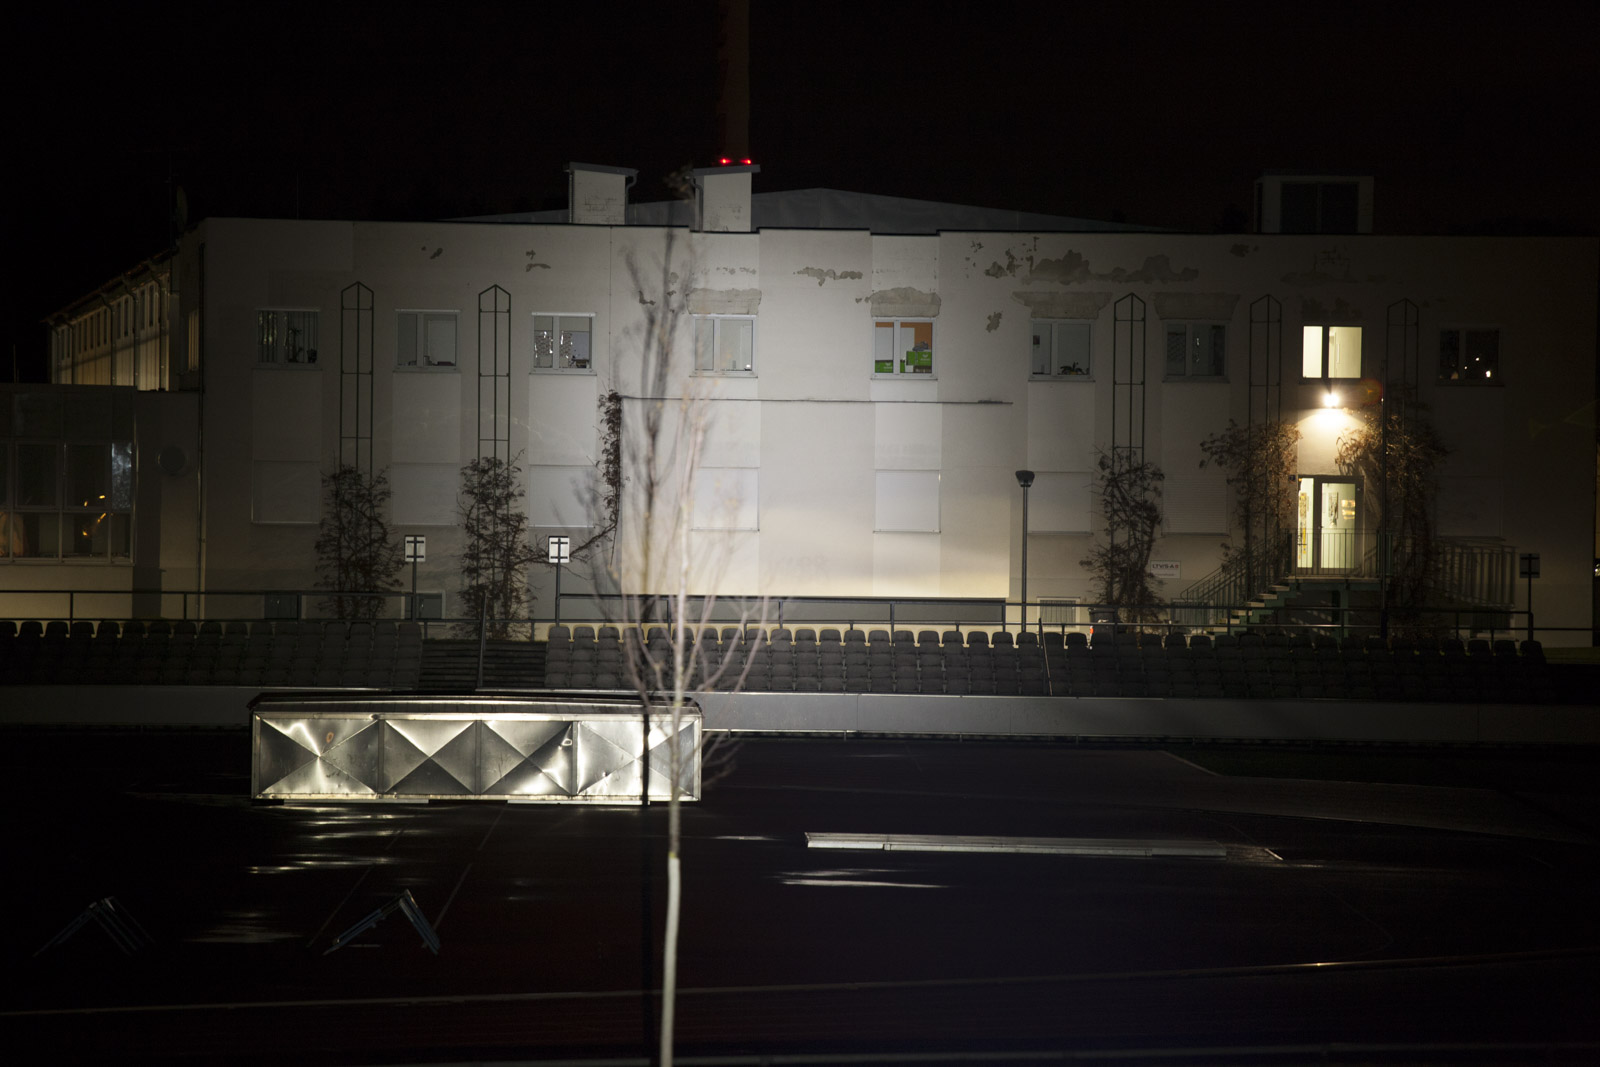
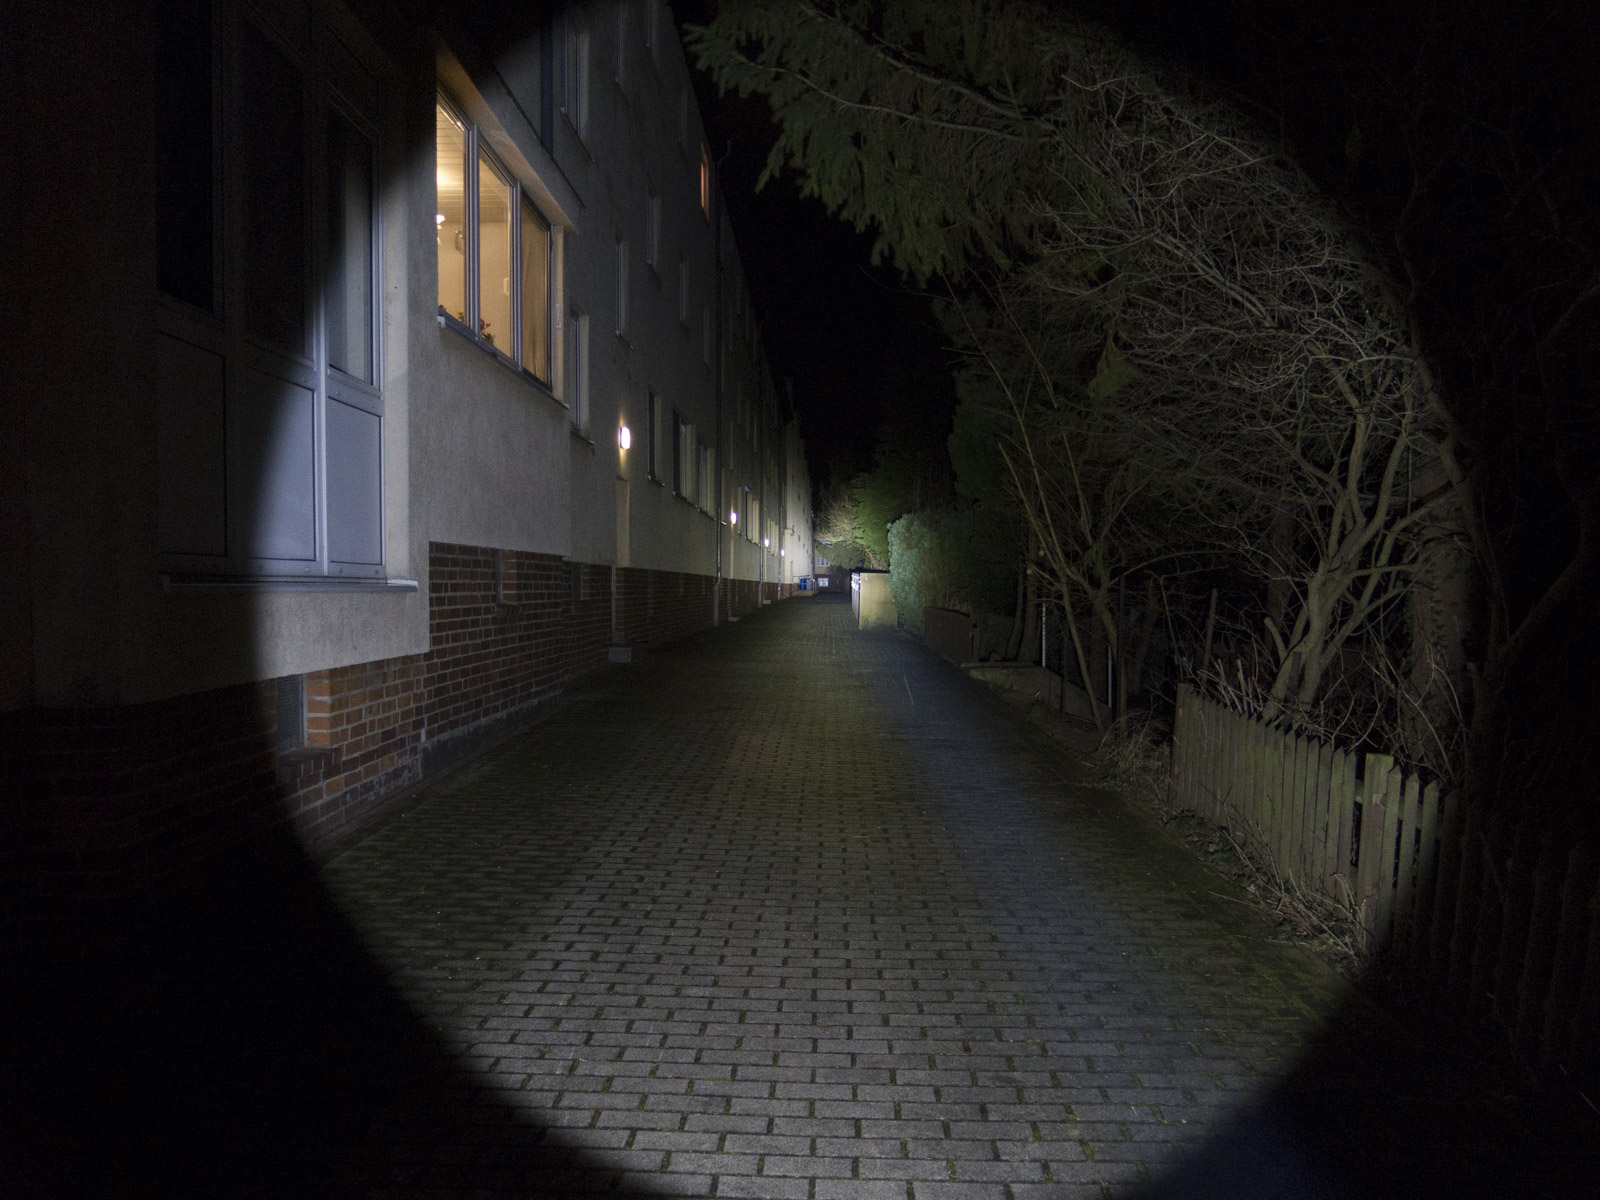
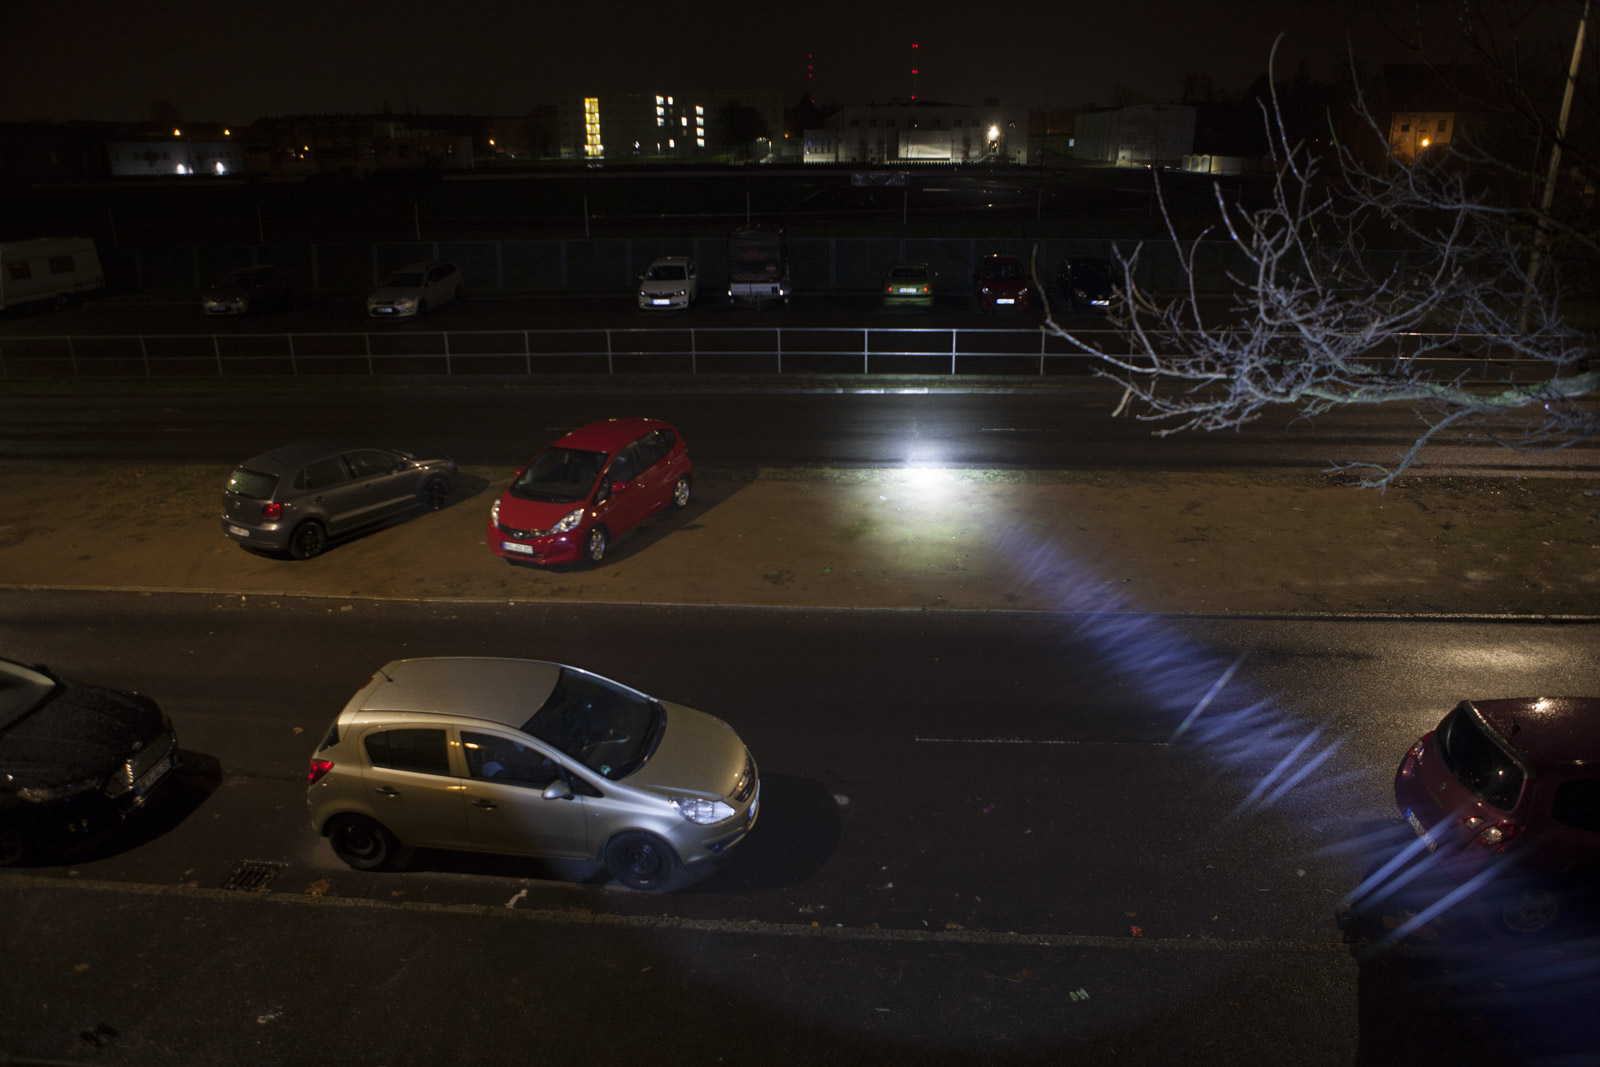
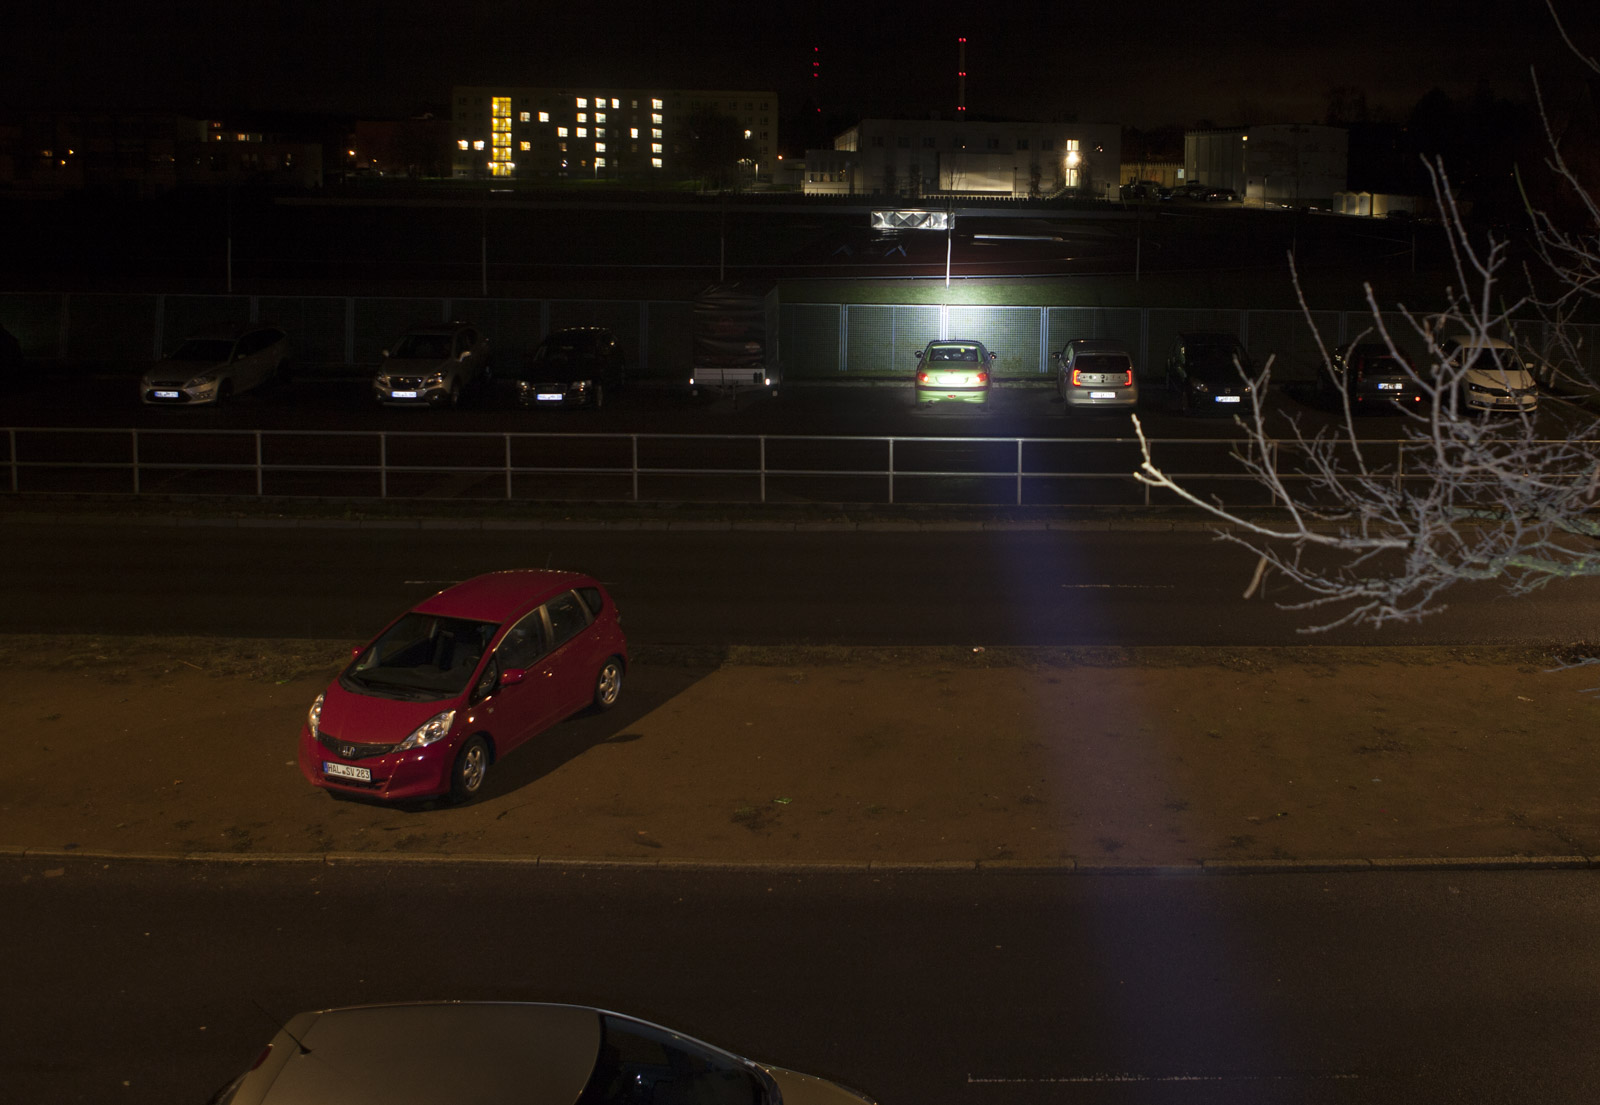
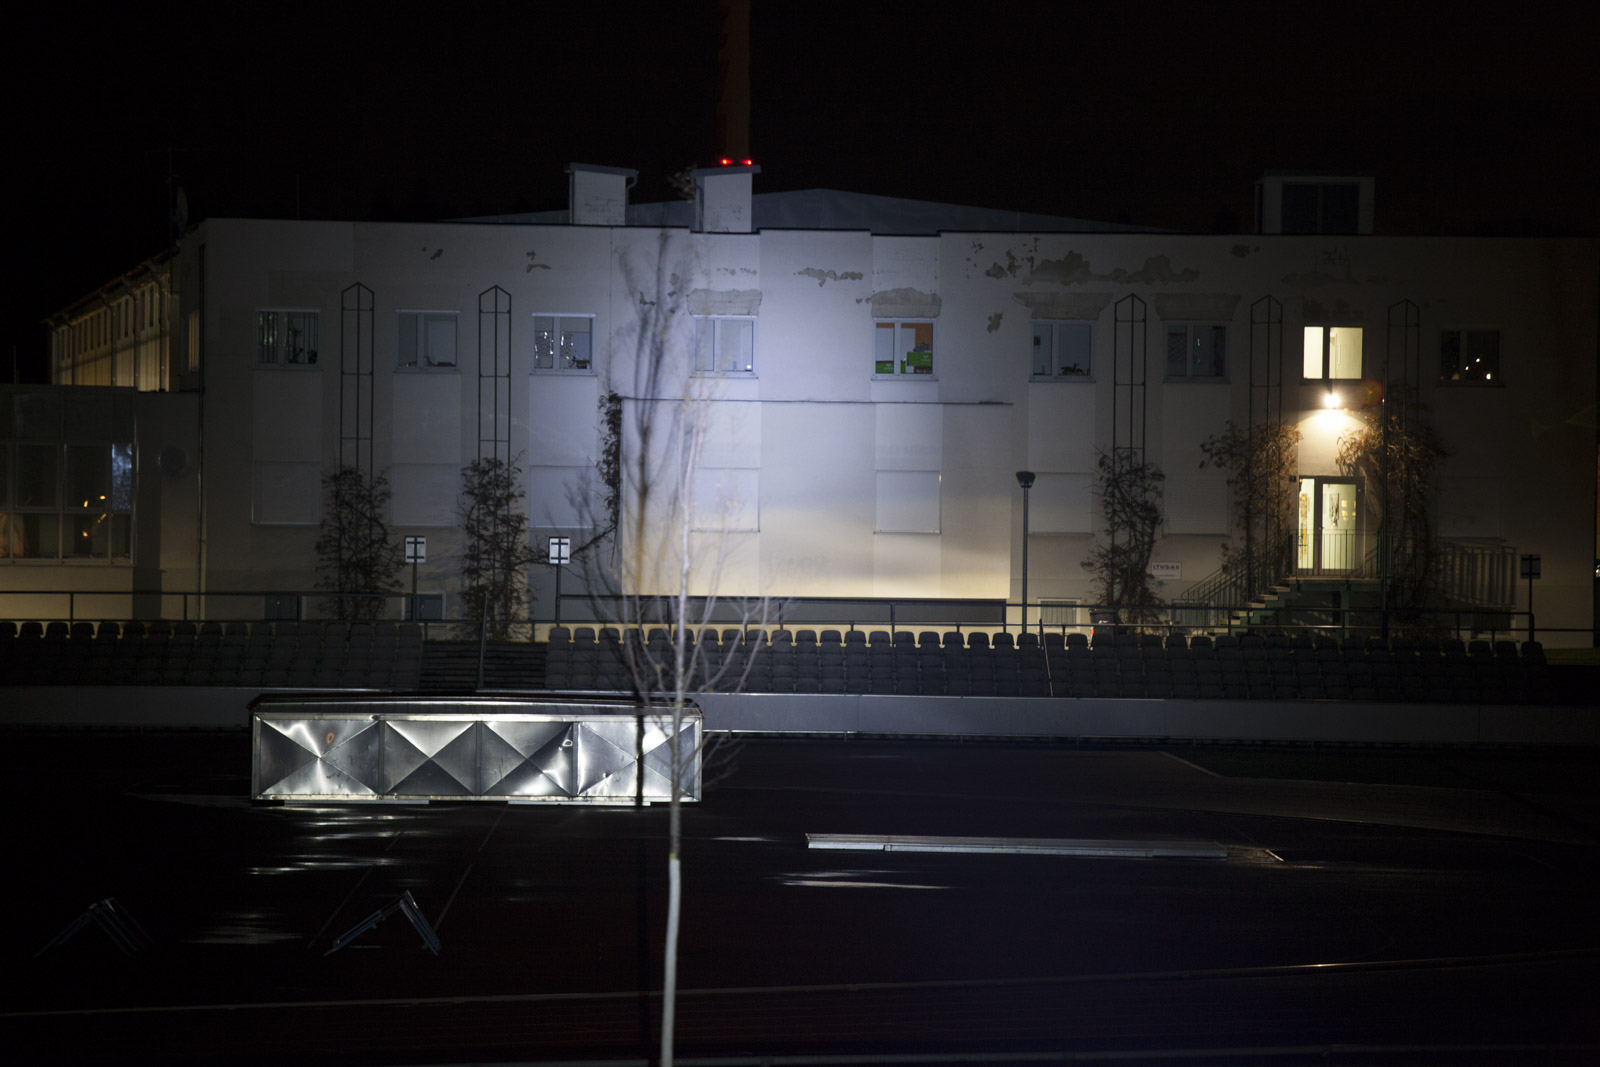
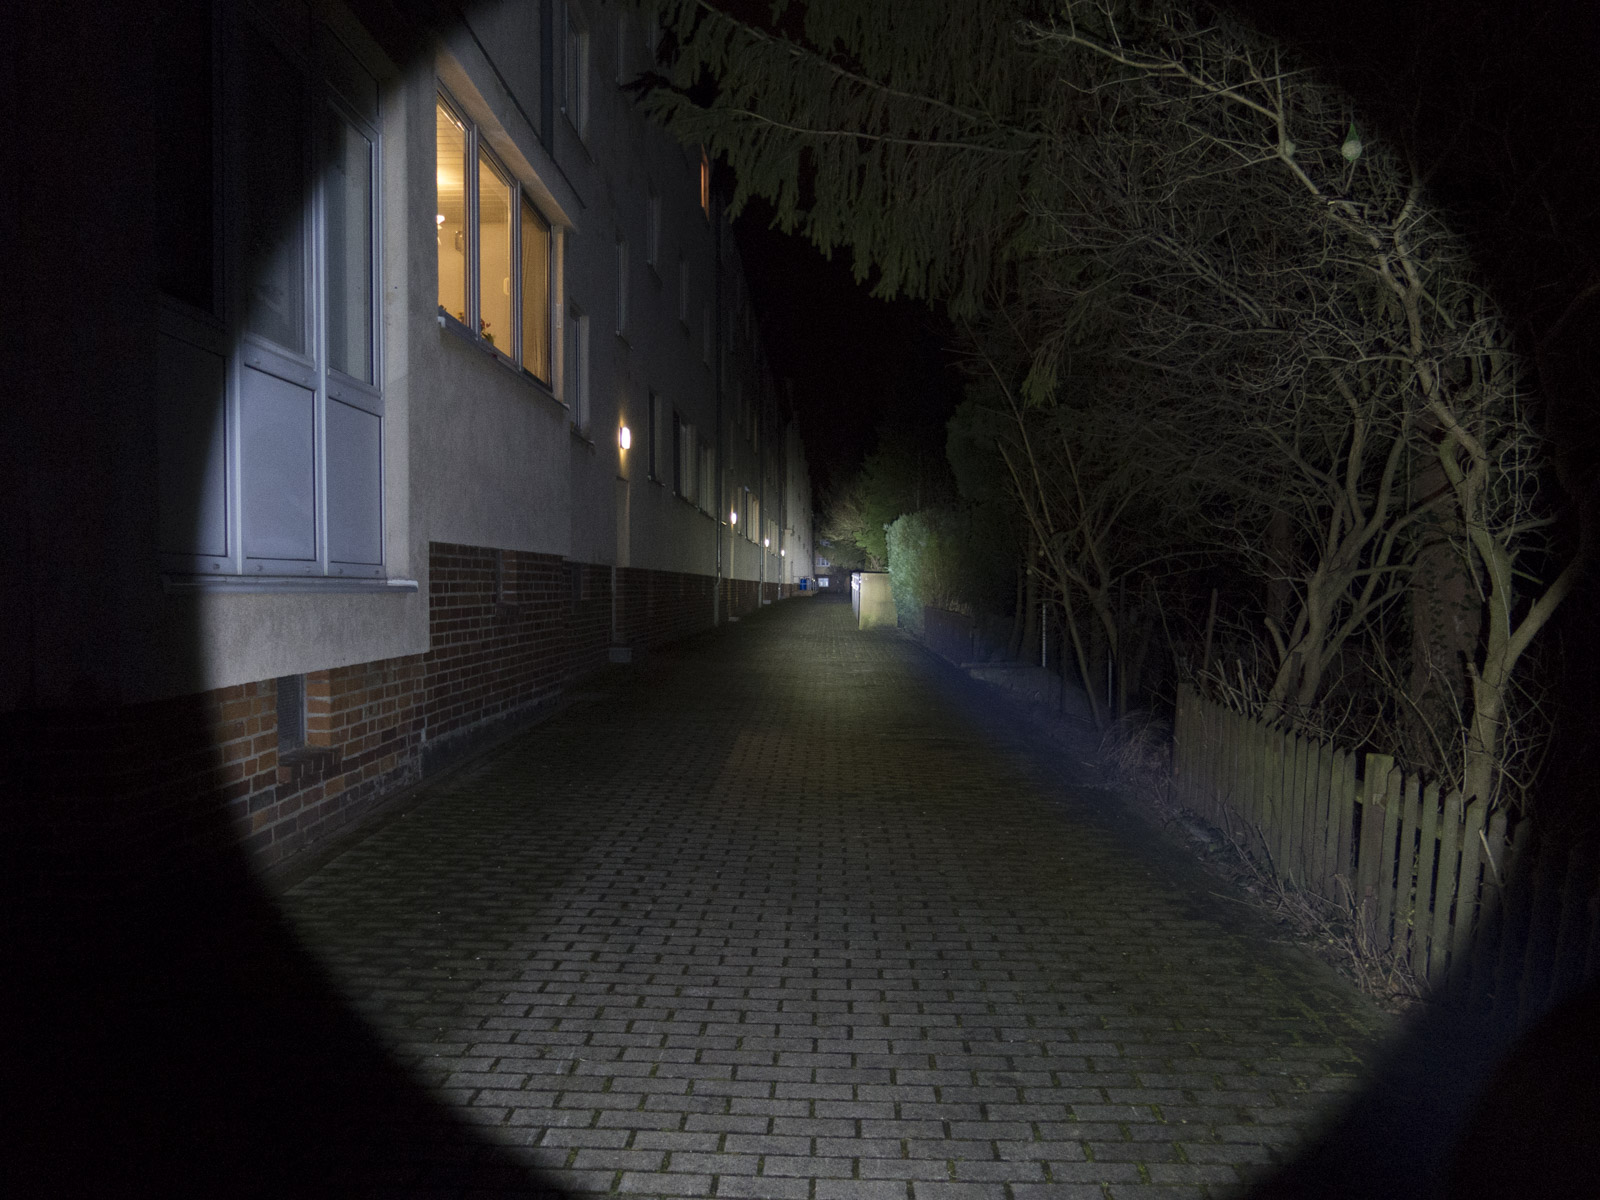
Beam shots
left 20m, 38m, 190, right 225m
Control shots
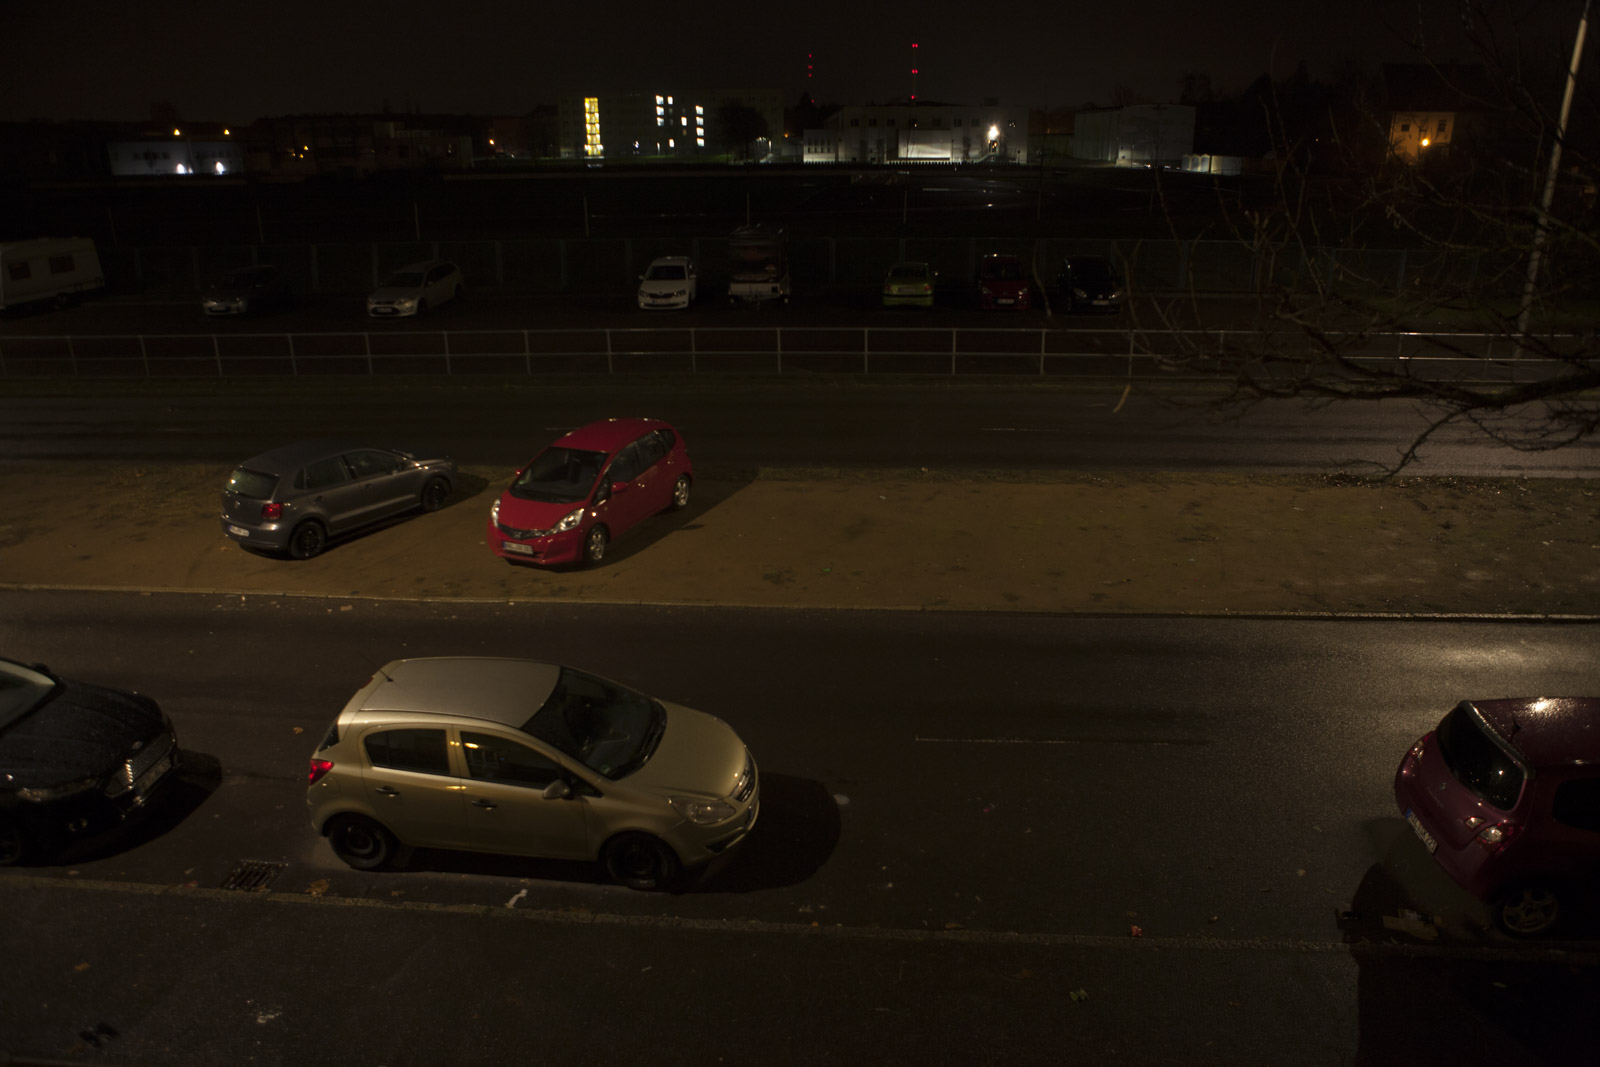
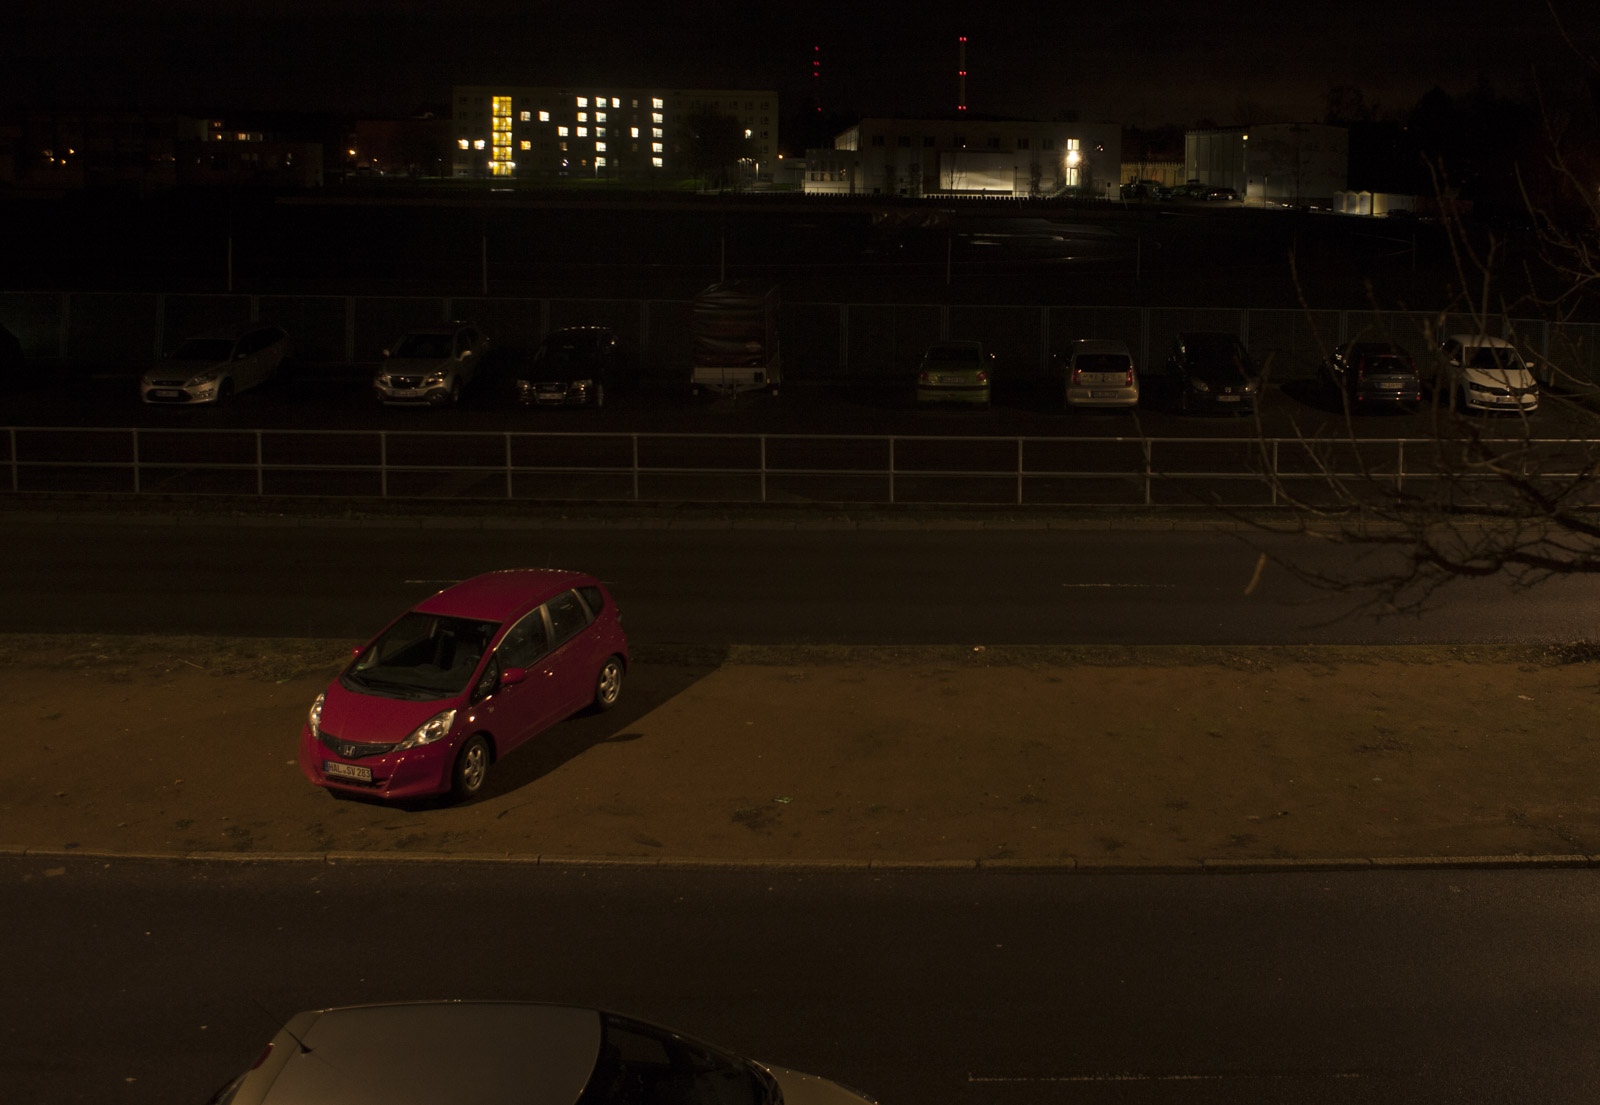
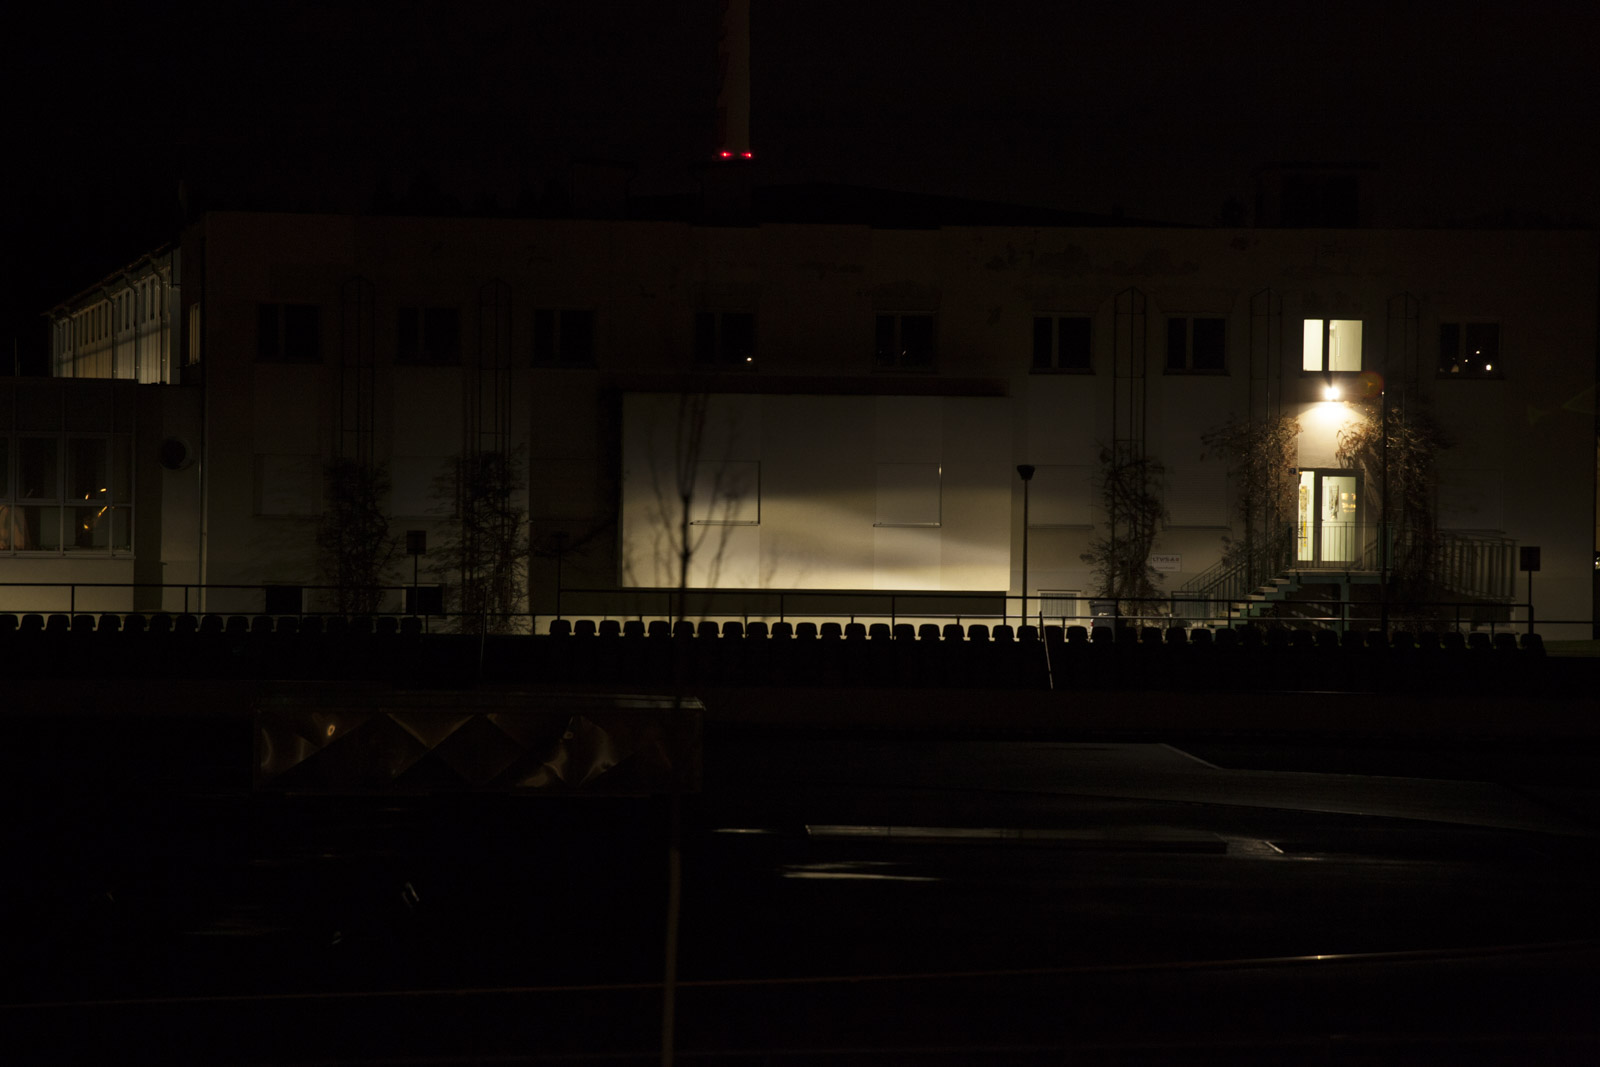

all lights always on Turbo
modded Klarus G35 XPL HI 285kcd
Astrolux MF02 modded with XHP35 E2-3C 540kcd
Niwalker BK-FA30S
.
User Interface
The light has 6 modes and UI is a bit strange I do not like how some things are done
The main switch UI seems to be copied from Olight
Main switch operation
short press turns it on with last memorized mode
double press from off goes to strobe
long press from Off gets to momentary Turbo, if clicked within 3 seconds after released it the light gets to constant turbo
unfortunately this is the only option to get to Turbo if you have not stored it to another button
and the bad thing is if you got turbo this way the next click or long click does not change modes it simply shuts the light down
long press and hold presses starts to cycle through modes release to lock mode
double click from on goes to blink modes, press and hold switches through other modes
SOS—>Beacon—>Warning flash
short press goes to last stored mode
Any mode including strobes can be stored to the 2 side buttons by a long press
I wish the aux buttons would have momentary like the main button
Also the UI listed on the website does not match with my sample, also if you do the double click too fast then the light does not recognize it, the range of timing here needs to be better. If you have not stored Turbo to a side button you have to turn the light off to get to it.
And the option to configure the side buttons to a momentary mode change then automatically turn back to last memorized mode
I have also found some inconsistencies in the UI
for example if I switch the light on with an auxiliary button then click the main switch the light turns off
while I turn the light on with main button switch to aux buttons then main switch gets me back to memorized modes
Another odd thing is this
I have a medium mode memorized for main switch
I turn on the light with Turbo on auxiliary button and turn it off with the same auxiliary or the main button,
then the light comes on in moon the next time I switch it on with main switch
after this I turn the light on with a blinky mode on the other auxiliary
now I switch it off with that button or main button
and now switching on the main switch recognizes again the stored medium mode
Next thing
I switch the light on with blink mode on aux1 or switch it on with main button then switch to aux1
then switch to turbo on the 2. aux button
if I click now the main switch I do not get the memorized light level instead I get again the blinky mode of aux1 button
If the light is switched on with momentary Turbo then hold for Turbo it is not possible to change modes with main button
instead the light shuts down whith a long press
.
Conclusion
The light is an impressive thrower, but has some minor things in the UI that can be optimized and improved.
At least the 2 auxiliary buttons compensate the UI as you can go to 2 saved modes directly by clicking those switches
Positive:
- mechanical well made
- solid but lightweight head, DTP MCPCB on thick shelf
- very well machined reflector
- 3 buttons make a good and intuitive control of this light possible and it can be customized as you wish what the 2 outer buttons have for modes
- AR coated glass lens
- good hotspot and massive throw
- even with drained batteries the light has full output
- proper LVP and low battery warnings
- low resistance copper alloy springs for carrier
Neutral:
- the UI could be better
- the tail cap has a red/green warning light for people behind you, this could be improved to have an electronic switch that also controls the light using a FET to connect and disconnect the head
- the driver has little play in the head, it makes contact by the spring force, but the retaining ring tightening all the way down would be nicer
Negative:
- UI has some bugs and my light did flicker sometimes in Turbo mode