Why don’t you install a separate relay for the DRLs and run it off straight from the battery? With an extra switch hidden somewhere? Here in india DRLs unless its on the bike by original design by the manufacturer is kind of illegal. So I would like to switch it off when not needed. My motorcycle doesn’t have any the canbus issues though. My tail light is already modded to an array of LEDs without any canbus errors. Using http://matchlessclueless.com/store/modern-leds/triumph-bonneville-led/. Which is quite awesome if you have a vintage looking bike.
I used those exact lights for the same purpose with the same setup. Check this thread for details on what I used. I wouldn’t try to find a driver that will fit inside the light. I made a sealed copper tube and located my drivers in there. The tube is mounted in the headlight housing.
Excellent Lights. I will try to do something similar, I need to find some automotive grade drivers for it. I read somewhere here that most of the flashlight grade drivers don’t stand a chance when mounted on an automobile.
As for todays mod,
I built a shelf for a cheapie Skywolfeye zoom. The driver side is quite a tight fit.

To do it, I cut off two copper plate using a disc cutter and filled the space between with chopped up old copper wire and solder. To finally make the bond to aluminium, I used arctic silver epoxy.

The LEDboard is taking a bath in petrol. Once its done I will put it all back together.
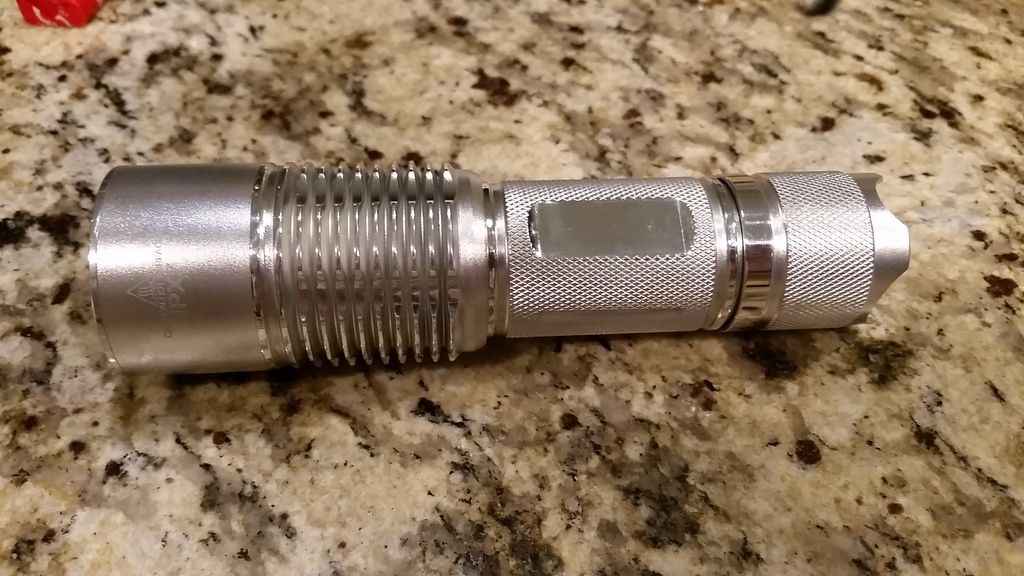
Here is the host ready to be put back again.

Cheers!
I made dis : a 3D-printed holder with Neodymiums for my beloved HC30 (not on the pics because I forget it at my mom’s home…) but you get the idea


Way cool idea! You should market those! I’m in for 3…. can there be belt loop options? ![]()
I seriously would like one though, to be honest, for a head band and the new Rofis adjustable angle tube light, the TR20. I’m doing a review on one and it’s a pretty nice light, when in the 90º angle configuration it’d be perfect for this holder as a headlamp.
Design possibilities are infinite :-p
I’ve thought about a belt holder, this one is already molle compatible (a bit hard to install though).
Once you can make 3D part (I use SolidEdge at work) and you have access to a 3D printer you can make a ton of stuff !
The slot on this one is 7mm wide, 47mm long and 3mm deep.
Very nice indeed
Finally finished the NarsilTriple firmware, least finished enough, to install it in my OTR M3 that's been all done, waiting for the firmware. The TA15mm driver has no R1/R2 resistors because of space, so had to get the LVP working off the 1.1V internal reference rather than external resistors. In addition, it frees up an I/O pin, pin #7, so I could use it for the built in LED in the switch of the M3. I also threw in temperature monitoring and regulation while I was at it. The low level code to support battery and temperature monitoring was courtesy of DEL, from his published Attiny25 driver, so I simply ported it into NarsilTriple, added the hooks and config settings so it all plays nice together.
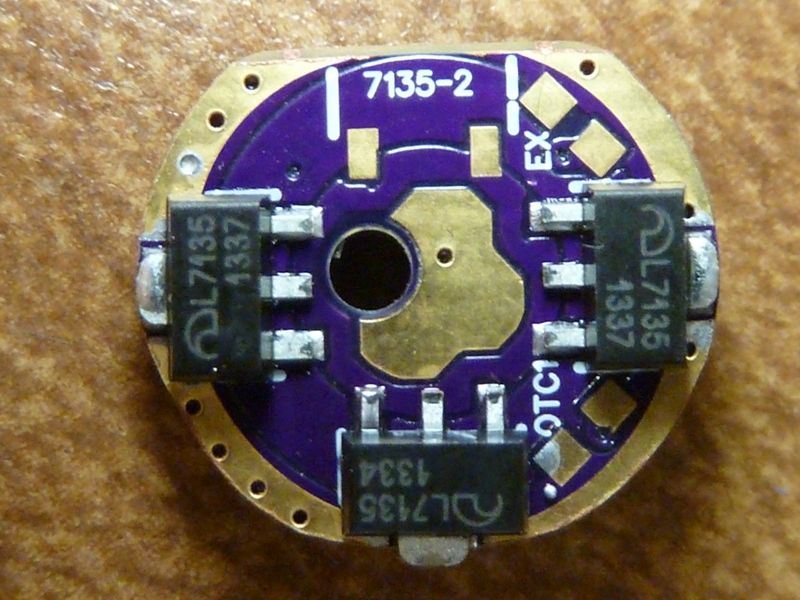
For those not familiar, a triple channel board has 3 channels of output to the main LED(s): single 7135, bank of 7135's, and a high power FET. Triple channel driver originated from PD68, then Texas_Ace and Harley Quin spun off their own versions w/different feature, sizes, goals. TA has been cranking them out, so I asked him bout making a 15mm size for those PITA little lights that I try jamming a piggyback driver in to. So he did!
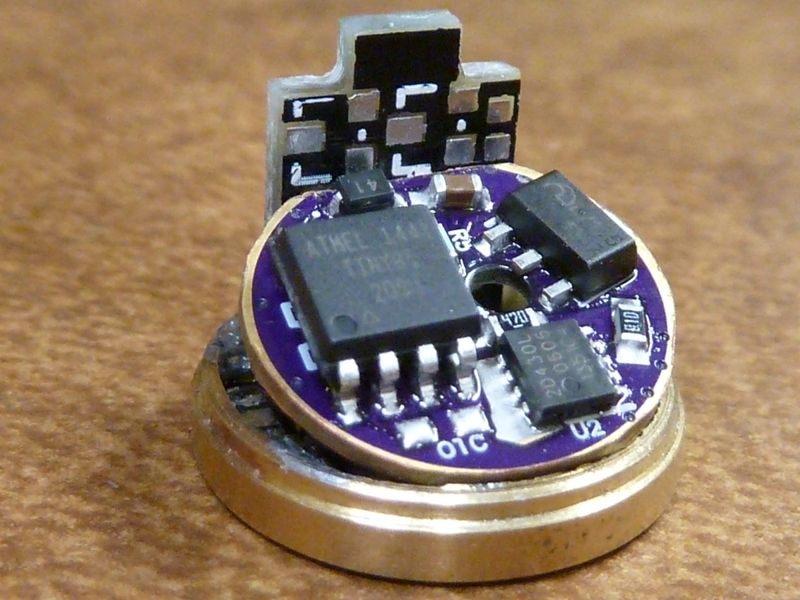
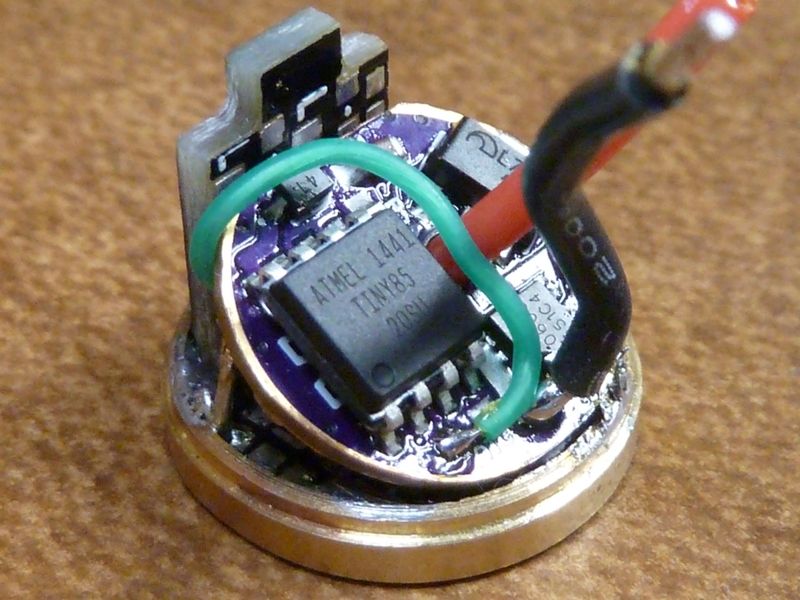
His 15mm board supports up to 4 7135's, but I could only fit 3, so 3 is what' I'm using. here's his board with my Attiny85 squeezed in, and shaved down to get it in the M3:

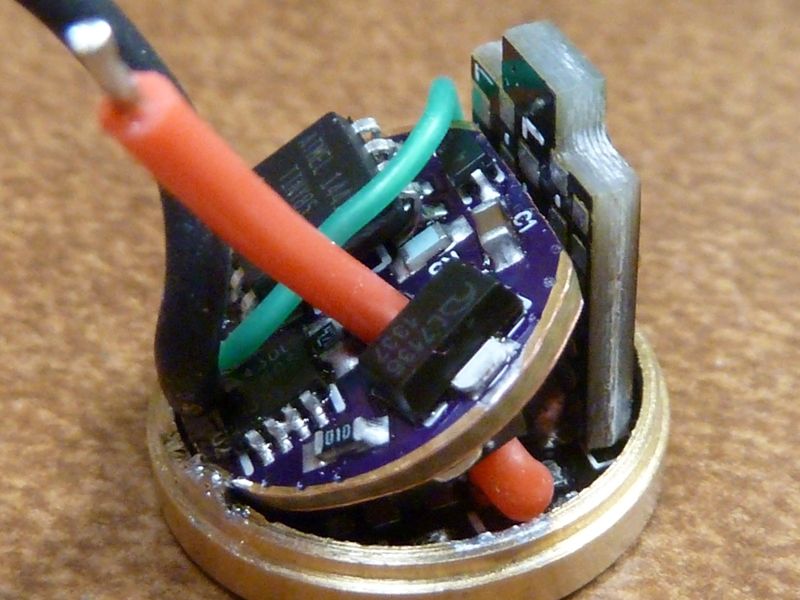
Here it is sizing/fitting it into position. Didn't have enough clearance to get it flat:
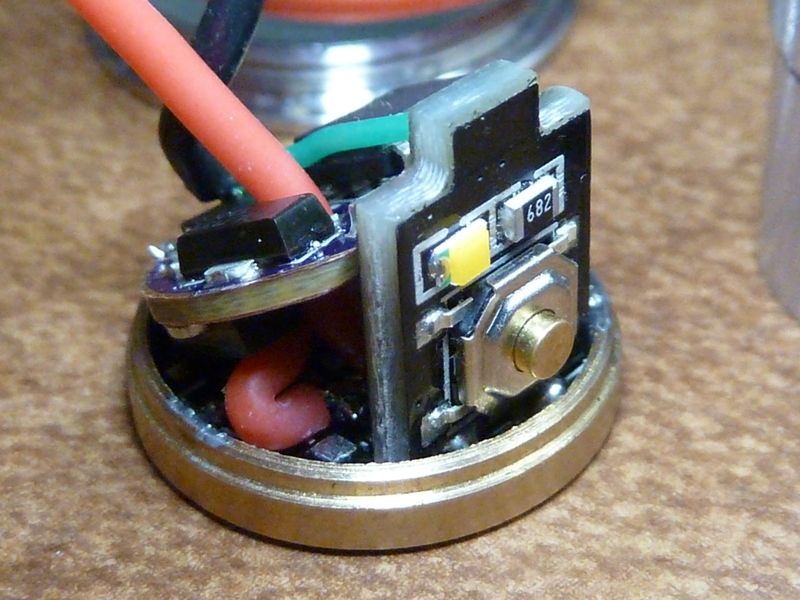
I replaced the stock switch LED with a warm white one I had, and bumped up the LED resistor to 6.8K.
Before:
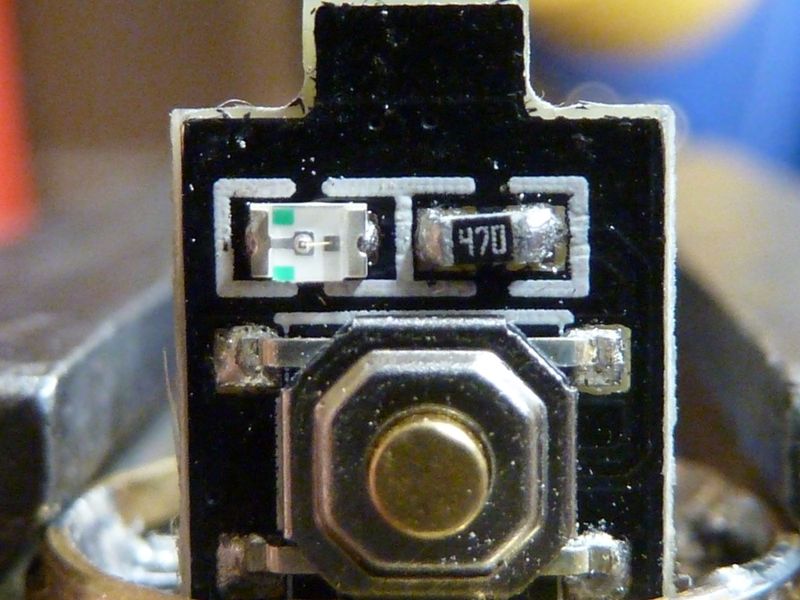
After:

Here's a shot of the wires in place, ready for assembly:
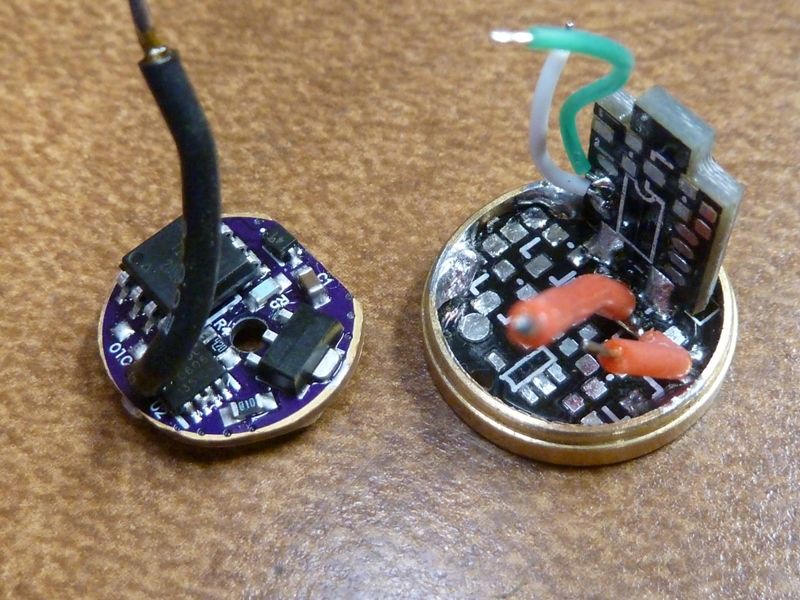
Now fully assembled:
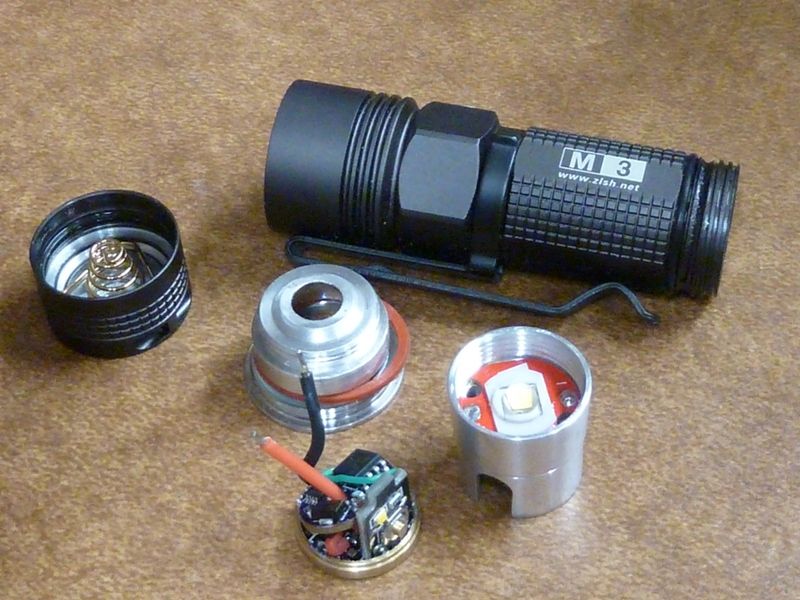
All the pieces at this stage:

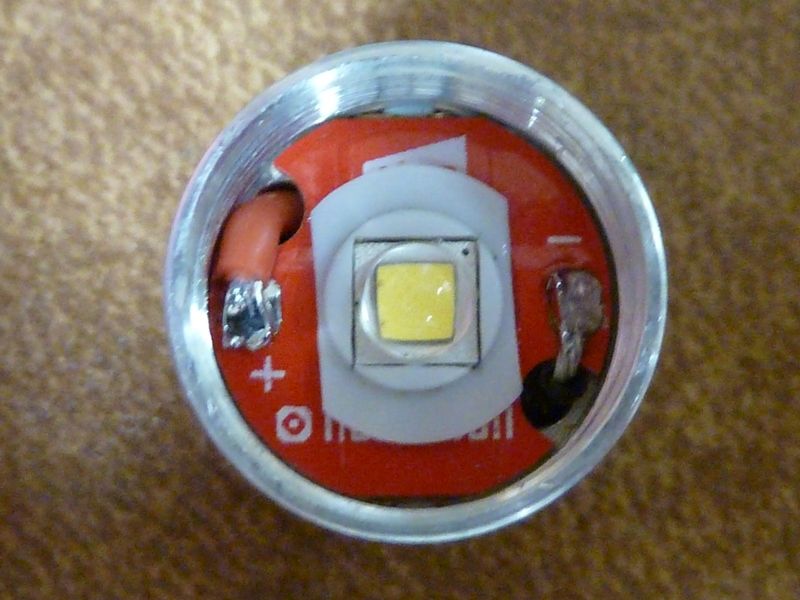
Pill assembled. Notice partial covering of the LED, not too good:

XM-L2 U3 3D LED wired up. Didn't take a shot of it, but had to get the solder joints down lower, than added kapton tape over the wires to prevent ground outs:
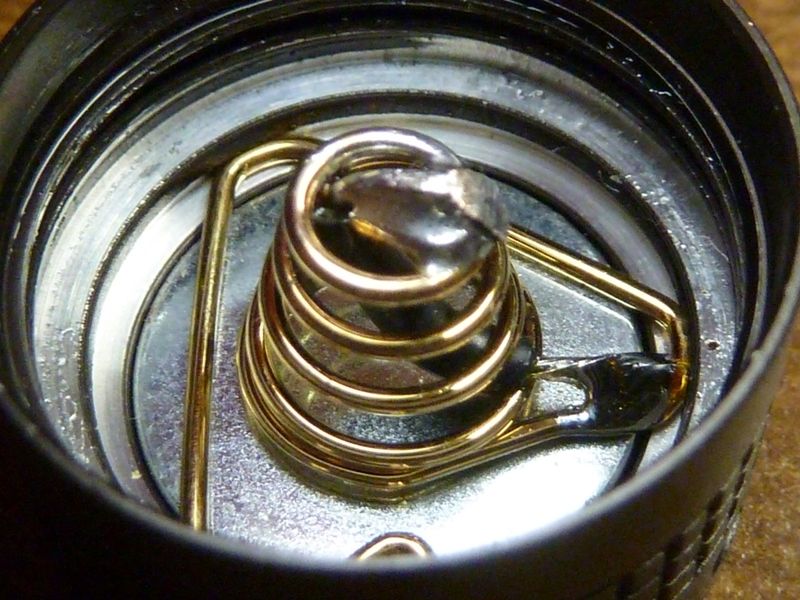
22 AWG wire for tail spring bypass:
Results:
- On a IMREN 16340 with a solder blob added to the batt+ end, @4.22V, lumens at start were pretty good at 1,156 but dropped to 1,034 at 30 secs. Throw measured at 5m was 7.4 kcd (172m)
- Parasitic drain with the switch LED off is 0.022 mA, and with it on: 0.223 mA
So with the new NarsilTriple firmware, lots of bells and whistles:
- full LVP and blinks out the voltage reading (high resolution 10 bit A-D conversion, by equation not calibrated values)
- temperature monitoring and regulation, and blinks out the degrees in Celsius (also high res 10 bit A-D, trip point is configured to 54C, backs off to 2/3 level, 30 secs min in-between)
- full 150 step smooth ramping, transitioning between all 3 channels to make full use of the more efficient 7135's. Takes 2.4 secs to fully ramp in each direction
- 8 mode sets, tailored to take advantage of the single 7135 and bank of 7135's for best efficiency
Plus all the features of regular Narsil for FET+1 drivers, including:
- configurable moon mode level (I like this feature). Set your own preference of PWM value for moon mode (1..7)
- in ramping from OFF, direct access to moon (press&hold), last level used (click), max level (double-click)
- when ON, press&hold will toggle between increasing and decreasing
- mode set operation features the "Werner UI" mode navigation, but with a twist: keeping in a mode for 1-2 secs locks you in, so the next click turns the light OFF
- configurable strobes - choose between a whole bunch, just one, or none
- more, but get'n too tired to think...

Lot of power in a little light - it's my new EDC that will be with me all the time.
Of course I was hoping for more power, but there were limitations trying to pack it all in - probably a little too much resistance between routing the wires, small FET, plus limits of even the best 16340 cell.
Ohh - as I suspected, between the switch LED partially covered over, and the not so translucent rubber switch cover, the LED is not all so bright, but still looks pretty darn good in partial or full darkness.
Speechless Tom. What a collaboration and outcome. You are a champion.
Does LVP blink out on the main LED or on the switch LED?
Both by default, but there's a config setting to blink it out only on the Indicator LED if that's what you prefer. Same for temperature. Some lights have a nice bright indicator LED, some don't, so might depend... For the little M3, best on the main LED.
Nice, you’ve thought of everything. I really like having Voltage blink out on the red side LED on my X6R. It starting to look more and more like my SP03 will get Narsil Triple in a few months. I have very few e-switch lights.
Nice work Tom, and great teamwork making it happen. ![]()
Might have to send you my MecArmy PT16 and let you fix it. ![]()
Thanx! Really is a true collaboration, from JohnnyC, TK, DEL, plus a few other contributions to the UI, like Werner, Halo was a big help on the tech side with the 25/45/85 stuff, then of course DEL, not only for the circuit design improvements, but the nice A-D conversion implementation for processing voltage and temperature. TK contributed a lot in here, including the ramping data methods which include her Python script I use to generate the ramping tables with, and the PWM driven 3 channel support. There's a bunch of others suggested ideas/features I directly incorporated.
Did y’all notice how he sidestepped the PT-16 thang? ![]()
Yes, I did. Just dunno enuf bout them. Ok - Triple 16340 w/side switch and USB charging.... Hhmmmmmm. Haven't read/researched one up - has anyone dis-assembled one?
Dunno, maybe a triple can fit in a OTR M3? Boy, they got brass and titanium, wow.
Tom, not long after I got my first PT-16 I modded it. I pulled the charging portion, bored the tube for an 18350 and piggybacked a 10mm FET driver (no room, way tight in there!) I had it doing some 2200 lumens with a ramping firmware. Sold that one to Slow2Go. Really neat compact light with serious power when modded, I like the pineapple style knurling and sheer small size.
Yea, looked it up in the mean time and found your thread on it. For some reason, I was never interested it in and all the flavors, so never followed any threads on it. Actually not sure why I wasn't - might have been the cost at the time or unsure of the mod-ability, but you seem to get it fully apart - didn't find much though - not sure if there were any pics of breakdowns. Sometimes if I have doubts, I just stop following, then miss out if it turns out to be good. This probably was after I got burned on buying some lights that I got stuck with, not being able to mod them. I'm getting a little more adventurous again as of late, so I'm not so hesitant, but it's hard to keep up with everything for sure - this thread alone is a full time hobby to keep up with  .
.
I just need a better way to crack open glued bezels/threads with no damage - it's my #1 problem. The soft wood w/drilled holes, and slots for compression seems to be the best I've seen or heard of, so wanna get that set up, posted here by Keepitsharp: https://budgetlightforum.com/t/-/42267/42, post #42 here: https://budgetlightforum.com/t/-/42267
Still waiting on parts, so did some polishing.
I’ll move my question here, presumably there are people with related experience in particular matter: