.
Really size doe not matter ![]() Your creativity in the last 2 OL contests are unmatched
Your creativity in the last 2 OL contests are unmatched ![]()
It’s really about friends sharing their love of lights of all kinds and sizes as you are continuously contributing. :student:
Your number of posts says a lot :sunglasses: I’m honored to be your friend here at BLF. ![]()
Modding the Wavien:
Regards Xandre
32 MLUX…. wow :cowboy_hat_face:
Swapped the cool white LED in an Olight Mini Warrior 2 for a 4000k LH351D. Much nicer tint, but definitely lost a few lumens. Then again, I almost always use my lights on medium or lower, so not an issue for me.
no need to be redundant buddy
Thanks for your kind words CNCman ![]() Indeed, in the end of the day, what brings us together here and that leads us to share our passions, mods and experiences, is what matters the most
Indeed, in the end of the day, what brings us together here and that leads us to share our passions, mods and experiences, is what matters the most ![]() And if it is flashlights, so be it
And if it is flashlights, so be it ![]()
I would say that what I did in these lights and in the contests are things of a simple mind searching for some fun within the hobby! Though,thanks for appreciation and I am also honored for sharing this place with you and your works as well ![]()
Kind regards ![]()
.
Now that is to complicated for me to understand. I will look more into this weekend. But that is some serious modding going on over there at TLF. Thanks for sharing that over here at BLF. ![]()
I will check out your forum as well. ![]()
.
I’ve posted this before, but it appears you just need a small wood-carving knife to remove the retaining ring: What did you mod today?
Perhaps it works for some ZebraLights and not on others.
Maybe Bob_McBob would be willing to share his technique: Zebralight SC64c LE w/High CRI Nichia 219B R9080 $150
Emitter swap day…
C8+ SFT40 and PFlexpro micro textured lens, huge upgrade from XPL HI

BLF D80 also modded with SFT40, hotspot has a more defined edge than the C8+ but about 10% less throw. Didn’t change the focus height, looked nice enough with the stock centering ring.

L6 with GT FC40 mod kit, much better beam and tint than stock XHP70, but i wish I ordered a warmer tint instead. The 12V driver Draws 6.7A on high

Yet another attempt at modding a Zebralight. This time my SC52w.
I was able to get the bezel off. I used a hobbyist x-acto knife with a curved tip. With the tip underneath I was able to go around the edges slightly widening the opening. Once the opening was big enough I replaced the knife with my smallest screwdriver, then my next smallest, and then the screwdriver tip from a Victorinox mini. With that I was able to lever out the ring with no damage to the glass.
But now I’m stumped again…. the driver does not move no matter what I do.
- I desoldered the two solder blobs to the switch.
- I removed the 2 screws
- I cut around the grey potting compound where the driver meets the head.
But no matter what I try the driver is stuff fast. Even inserting a rod into the back of the battery compartment and then hammering on the bottom of the driver with a pliers did not cause it to move even one mm.
I also tried using my hot air gun to attempt to reflow the LED while inside the light. As expected no luck. The heatsinking is quite good and easily wicked off the heat.
Anyone have any suggestions? I’m stumped. ![]()
I hope my efforts haven’t killed the light.
I have read that someone soaked his light in acetone, but I don’t know the side effects on all the components.
Did you desolder the positive wire ?
That’s not going to do anything, there is a wall between the positive contact PCB and the driver, with a small hole for the wire.
Heating the head makes the silicone adhere less.
To properly pull on the driver I put slightly larger screws in the mounting hole (like ~2.3mm screws for plastic)
Whoops! No I didn’t realize that. None of the posts I looked at on how to disassemble the light mentioned that. :confounded: Or if they did I missed it.
Unfortunately, my misguided attempts to modify the light appears to have destroyed it. :weary:
I reassembled it, but now the light doesn’t work properly. It doesn’t turn off. Pressing the switch causes the light to turn off only while the button is held down. And while holding it down I can see it cycle through the modes, but the moment I release the button, the light goes back to max power.
I don’t think I’m going to attempt to modify a Zebralight ever again.
I can’t even take a close look at the driver to see if maybe something got shorted or dislodged, since I can’t remove the PCB.
EDIT:
I opened it up again to attempt to remove the positive wire. But how do I do that?
The tip of the wire passes through a hole below the left screw. The hole is completely filled with solder, which I can’t remove. My solder sucker isn’t long enough and doesn’t have enough suction. Also, even when I keep that solder liquid by keeping the tip of my iron in it, the driver still does not move at all when I insert a pick into the screw holes and try to pry it up.
I need more detailed instructions on how to remove an SC52 driver. The existing pictures on the internet are not sufficient.
I never opened a SC62, usually there is no solder in the plated through hole and the wire is soldered to a pad next to it, but in the case of the hole filled with solder ( e.g. in the SC700 there is no pad, instead of a wire it’s a solid pin soldered to the through hole) then you need to do as you did, pull on the driver while melting the solder, add a lower temp solder (ZL use lead free solder) so that it melts more easily.
And as I mentionned it’s easier to pull with screws to grab on :

You are welcome
Thanks for the kind words
You have also my attention ![]()
Allways interesting builds :+1:
Regards Xandre
I agree that SFT40 and D80 are good match. The reflector and green coated glass make the beam look better than from other hosts.

First time dealing with 4xE21A. They’re too tricky for me. Using Convoy S15 (4500K) and Non-branded S2+ (4000K) as hosts.
- Reamed Convoy’s 4040 gasket
- 4x26awg (same length) each
- Non-AR glass & “Sandblast 215” sticker
- OP Reflector
- Convoy 4 modes driver (tested 5.2A max)
Dunno what lumen loss I get. Lol


congrats on your mod, and thanks for the great photos
you might have better luck blending the dark center with a pebble tir, than with that dc fix…
Last night I “modded” the dome light in my subaru. I removed a 13w incandescent, and installed a 5W LED… Lumens tripled, and power use went down 60%
But the spectrum quality of the LED light is disgusting, so I went back to incandescent.
stock:
 .
.
Warm White LED:
 .
.
I choose quality over quantity.
I’m very much considering modding a Streamlight pistol light:
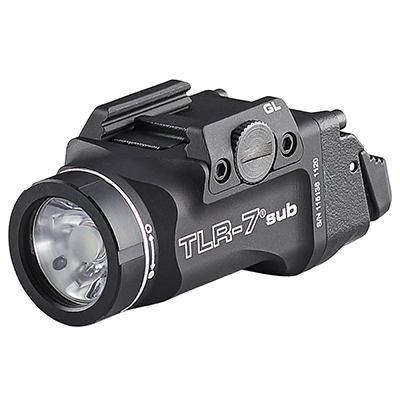
Anyone modded one of these? I’ll measure the spectrum and lumens soon and decide what to do but I may just leave it to retain warranty.
Thanks jon_slider , I’m sorry if the photos is too much ![]() . Yeah, but I still don’t know what Pebble TIR that would fitted well. Also, what degrees would be match between throw and flood? I don’t have any experience with Pebble TIR before, any idea?
. Yeah, but I still don’t know what Pebble TIR that would fitted well. Also, what degrees would be match between throw and flood? I don’t have any experience with Pebble TIR before, any idea? ![]()