Well, you all know I'm not in the Scratch Build contest, but I can't resist doing a week-end scratch build. I know y'all got three months to do your builds and some of you need it. (Those that have a life). But for some old farts, we don't have anything better to do, so I'm going to whip out this little Copper 3x14500, XM-L2 light this week-end... I hope...
So, I am using a 1-1/4" Copper coupling for the head and three pieces of 1/2" Copper pipe for the battery holder. I've got a 37mm reflector and a 37mm lens. I would have preferred 36mm, but I ain't got, so 37mm and it's called "make it fit". I have a Qlite driver with some extra chips, an XM-L2 neutral white on a Copper star, a C8 Copper heat sink, a momentary switch, a rubber boot, an old driver that will be used as a contact plate and some other Copper pieces lying around, for this and that.
The tools are fairly simple, but of course I don't have them all out. What I do have are files, pliers, cutters, some measuring and marking tools, Calipers, soldering equipment, an Exacto knife, sanding blocks and steel wool. I don't have here, but I will use, a small butane torch, a hacksaw, possibly a hammer, some small vise grips and maybe some other small hand tools. I will not be using any power tools, at least I don't think so.
The reflector and lens are too big to go into the head. They are the same diameter as the Copper coupling, so in order to use them, I have to come up with something to hold them in.
I am making a sleeve that they will fit into. It's a piece of Copper coupling, but when I add it over top of the main coupling, it has a gap to be filled.
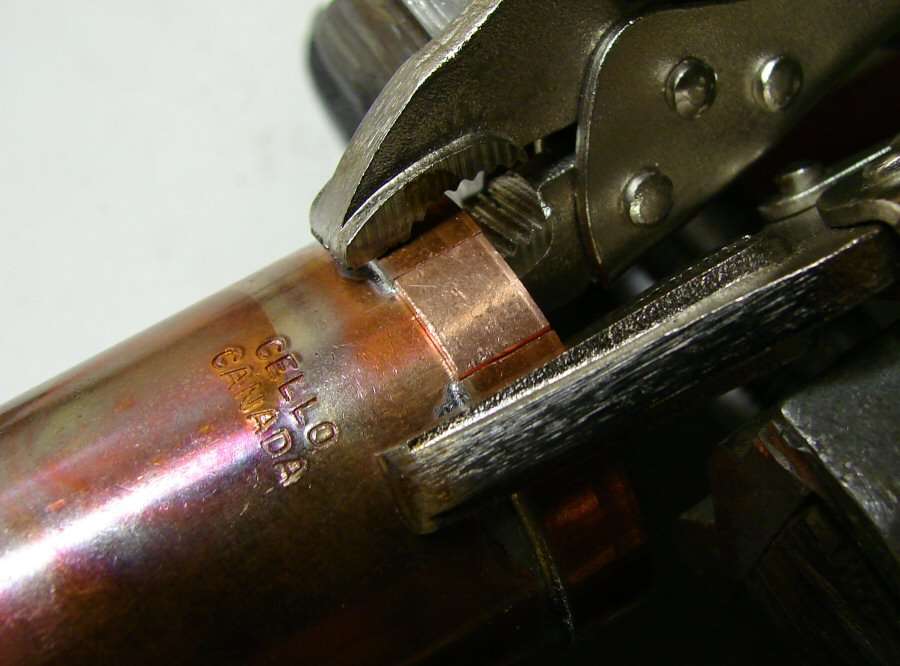
I use another small piece of that same coupling material, to make the rest of that collar. It's a matter of cutting close and then doing some fine filing, till it fits in. I have to clamp the ends of the first part, so they don't move when I solder this section in.
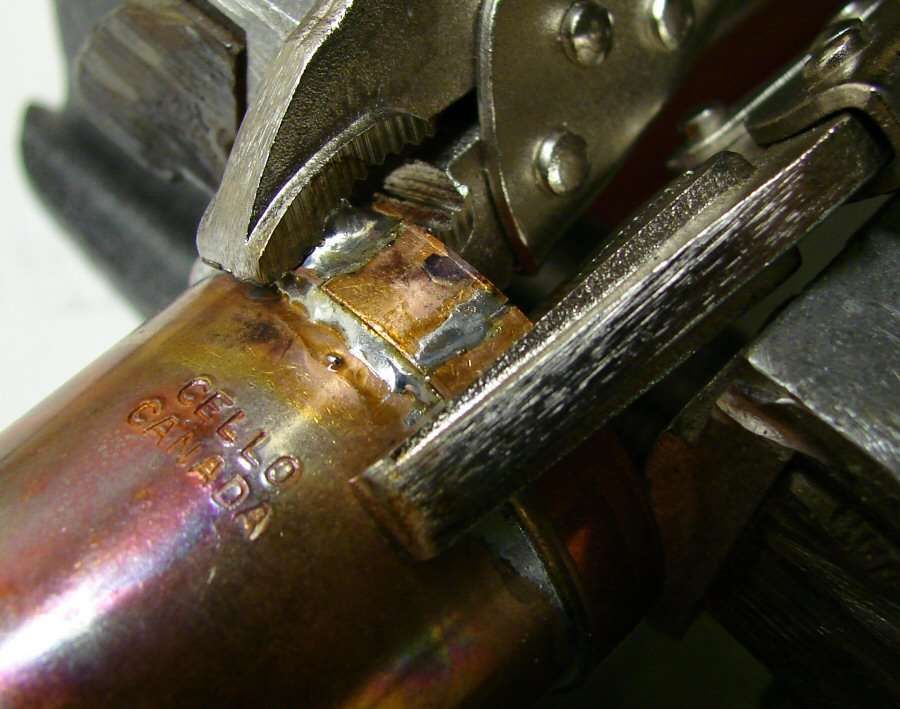
I always use too much solder and I always have to clean off the excess. It will take some filing and sanding to get it all cleaned up.
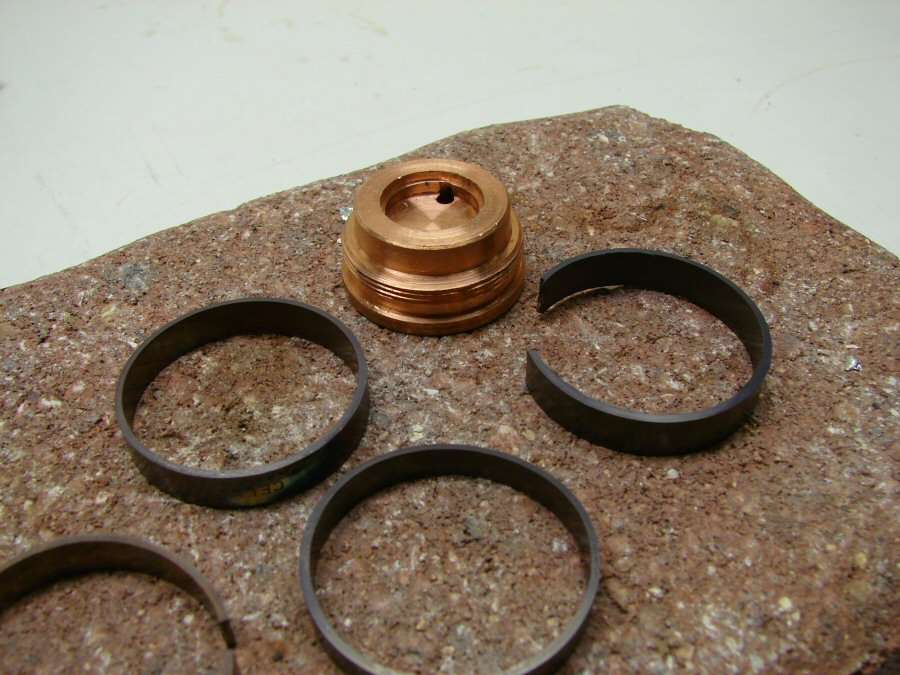
I started this project at about 9:45 this morning and stopped for lunch at about 12:30 p.m. I will be working on the necessary adaptor rings, to get the pill to fit into the Copper head, this afternoon. I imagine I will get most of the build done tonight, if I don't run into unforeseen problems.
---------------------------------------------------------------------------------------------------
Time for some more photos...
I've got most of the excess solder off the top ring on the head, but I still need some more work. It's starting to shape up.
I've been working on the body too. The three tubes are soldered to the back plate, (tail cap).
The springs are also soldered inside.
It will load from the top. The 14500's just fit in the tubes. They stand high, so they can touch the contact plate, sort of like an SRK does.
I'm also working on the top plate. It will be more of a guide, when putting the body on the head and I have drilled out holes that I will need to open up. I will be using the Dremel after all, since it's more precise for opening the holes.
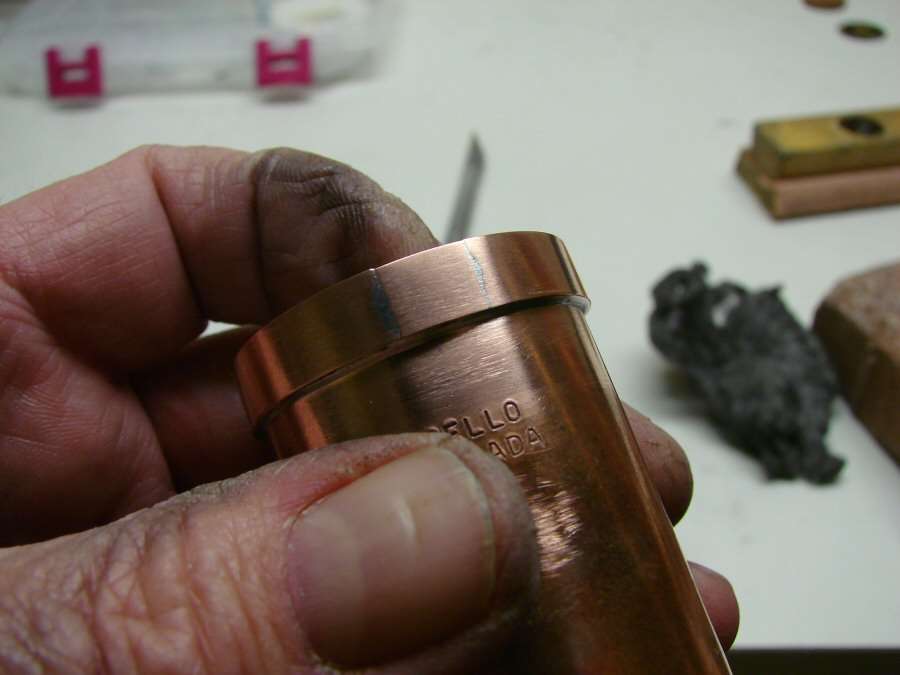
The pill has a couple layers of copper around it, so it will fit tight in the head and I need to do a bunch of clean up on this too, but it's break time...
-----------------------------------------------------------------------------------------------------------------
End of the day, I'm tired.
The reflector and lens are in. I used clear epoxy to hold the lens in and seal it.
The momentary switch on a 10mm star.
It will go about here, when everything is together.
I'm using Arctic Alumina adhesive to hold the switch in place. I have a piece of copper under the star, to hold it against the rubber boot.
The pill is ready to go.
4 extra chips. Since the driver is behind a contact plate, I don't have to worry about height, so I added the chips on the back side.
Speaking of contact plates. I am using an old driver for the contact plate. I added a copper center, for the positive and I added solder to the outer ring. The outer ring is not the negative. The driver is grounded to the pill, but I have to keep the contact plate off the copper body, so things don't short out.
The body is done. I milled out the center, to make double sure the copper contact plate cannot short to the body.
With the spacing, I know for sure that there won't be any shorting. Bad things happen to Li-ions when they short.
------------------------------------------------------------------------------------------------------------------------
That's it for day one. I'm beat. Hopefully, I will get it finished tomorrow.
It's history. Several failures that amount to a light that will not ever be repairable. It's resting in the circular file now. after using a big hammer on it a few times. Boy, that felt good! Didn't realize how much rage I had. Now I want to go smash about a hundred more, LOL.
The real problem with lights like these is that they are not made in sections with threads. Once something is soldered and glued together, there's no going back and with all the errors made, there's no way to fix those errors except to start over and I'm not about to waste the money and time doing it again.
You have to know how much I beat myself up over this light. I do not like to fail and I don't take it well...
So, I revived it and finished it. Well, I am still waiting on the lens, (Camera UV filter), but it's basically done and in working condition.
Here is the last of the build.
All the guts are in and here's the contact plate.
I still need the lens, but I am going to hold it in with a copper ring instead of gluing it in. That way it can come out again.
I filed the grooves, so that the body tabs fit in and a small twist locks them in.
Yep, I painted the body with textured paint. It's Rustoleum.
That's it! Once I get the lens, I will do beam shots, but this will by my 5000 post giveaway light.
