Being slightly old and with a horrible memory, I looked up the meaning of YOLO on the Urban Dictionary to be sure I was understanding the meaning correctly.
Yolo
Abbreviation for: you only live once
The dumbass’s excuse for something stupid that they did
Also one of the most annoying abbreviations ever….
Guy 1: “Hey i heard u got that girl pregnant”
Dumbass 1: ” Ya man but hey YOLO”
Guy 1: “Hey i heard that you broke ur leg falling off the balcony at that party”
Dumbass 1: “Ya but hey YOLO”
And so now I know the mentality of an era that is losing young people at an alarming rate.
I’ll be waiting for the gray version so maybe perhaps another 10 or more days (China National Day) before my unit is sent directly to your address in the USA. Stay tuned.
Waiting for mine to be shipped, hopefully soon.
Being a bit of a newbie here, and up for doing some light modding (at first) - what would you guys say are the ‘must do’s’ to get this baby upgraded to a better, safer spec without changing too many bits. ie, does the whole thing just need a rewire?
I’m not talking modding the actual led or driver yet or anything too drastic, I just want to do what they should have done in the first place, so to speak.
I did have a look at the teardown thread etc, but would appreciate some advice for a beginner. One of the main points they seemed to skimped on is the cable quality?
Thanks
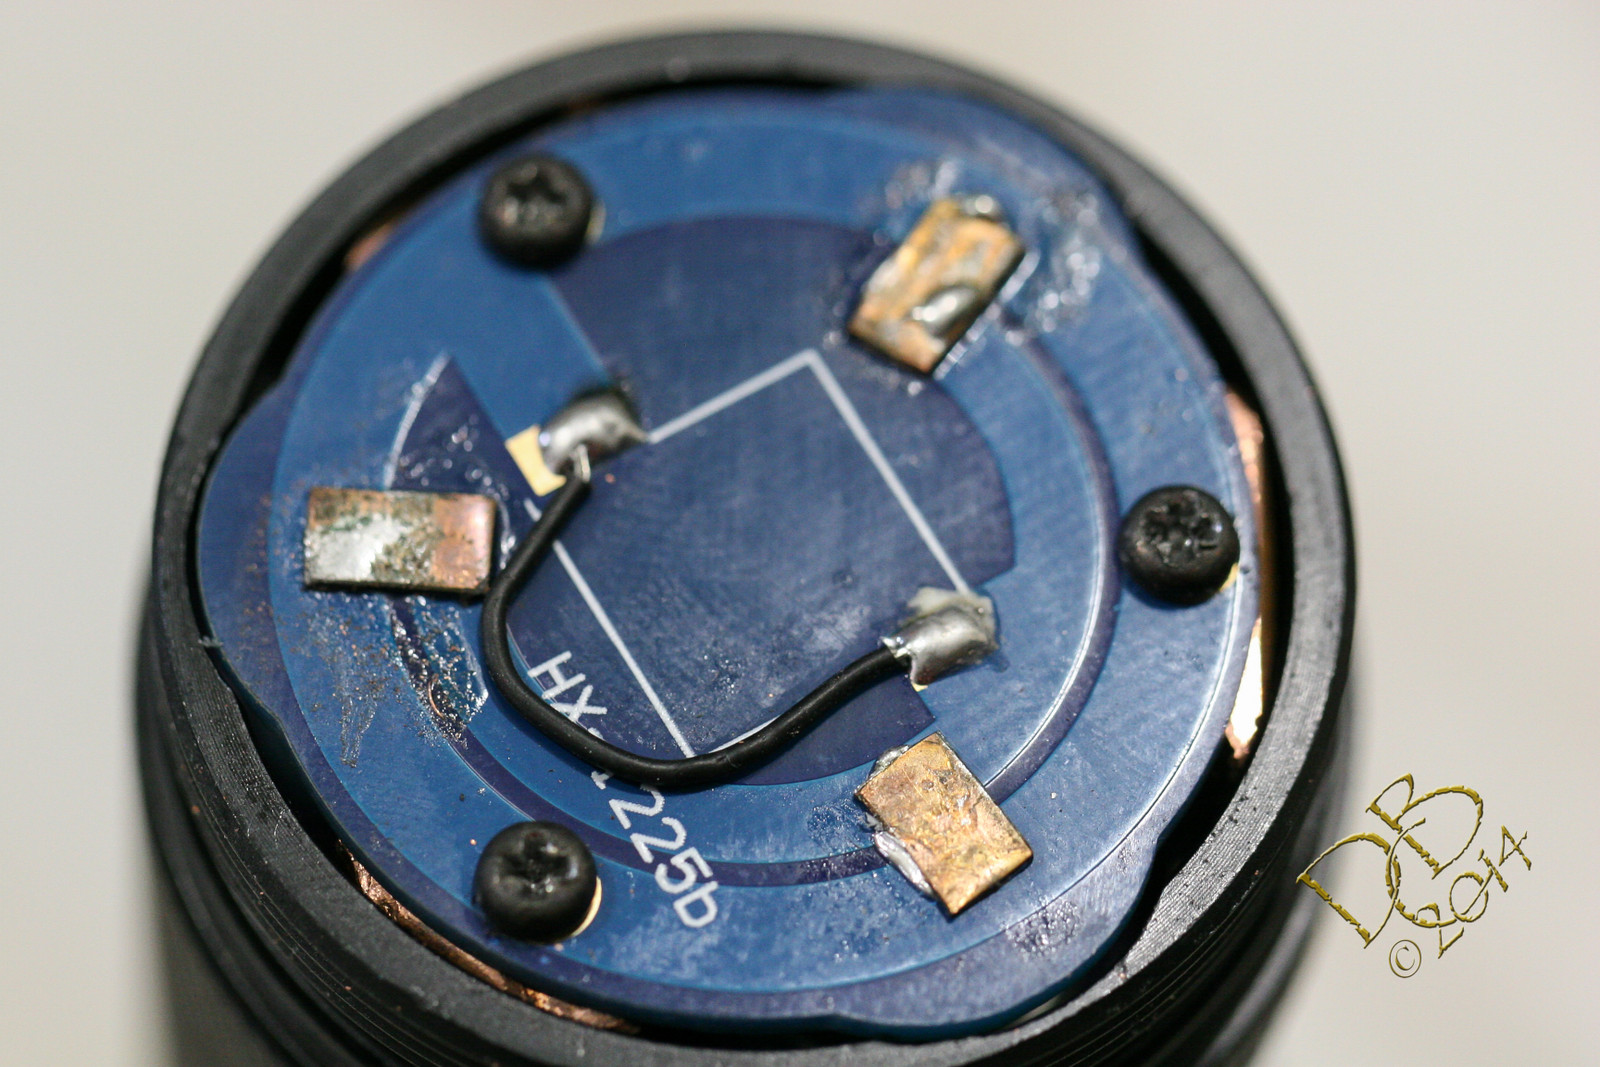
G0Ose, if I was gonna do one thing I’d address the ground issue in the tailcap. Make sure the inner trace where the springs are mounted have a more direct path to the outer trace where the screws ground it. That alone will give you better throughput.
The wire thickness is marginal, but at the stock current, it’s probably not holding too much back.
If you want to upgrade to a ‘better spec’, the mods all go hand-in-hand; Resistor mod to stock driver(very easy), which then necessitates thicker wiring, & then a copper MCPCB.
Even though there’s a few mod threads going for this light, I’m planning on posting another thread when mine is finished.
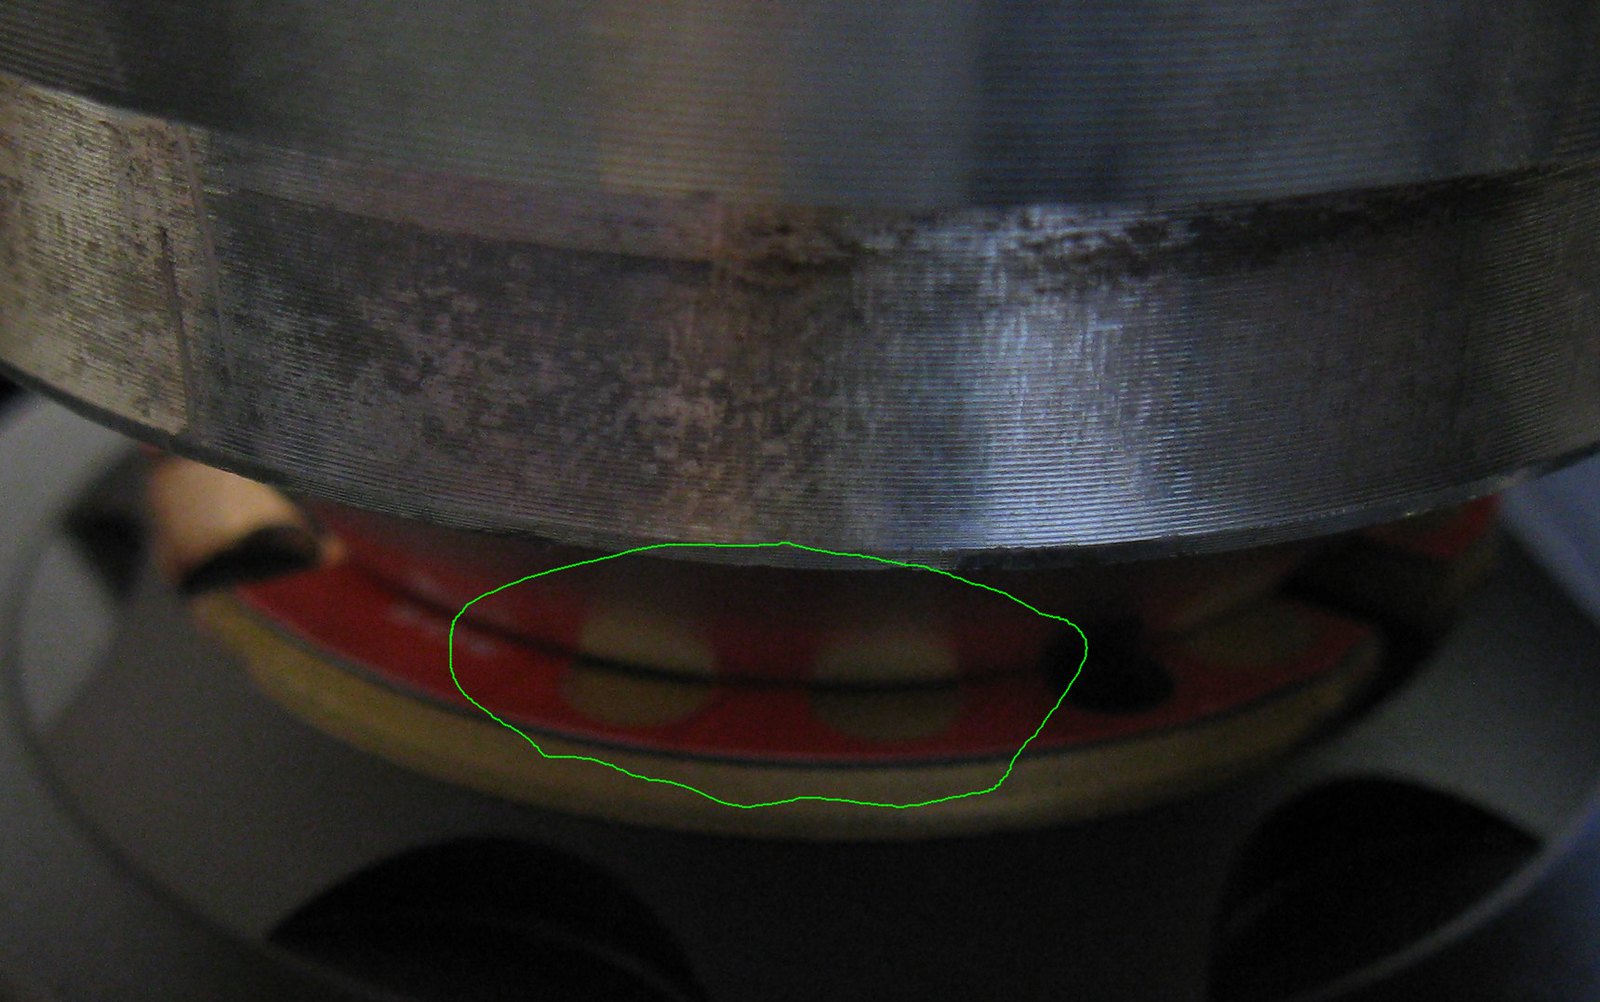
Not braided wire in the springs, but addressing the top of the pcb the springs are mounted on…inside the tail cap. Courui used a very thin wire to join the 2 traces, almost like a fuse. I scraped mask off in 3 places adjacent to the springs and soldered copper sheet between the traces, giving it a much more solid ground for the current to flow through. This made a big difference, as my hot rodding attempts were only getting 4A through. After doing this, it’s over 6A. Don’t remember exactly the amperage and am not at my desk to check, but the tail pcb set-up was holding it back.
See where the spring pads are on the inner trace? I just cut bits of copper sheet and used solder paste to join the outer trace to that pad directly, in each spot. A thick wire at each point would work similarly. Or one really thick wire. Or a copper “washer” cut to go all the way around the board with the screws going through it. Anything to make ground more capable of carrying current.
All dependent on how much current you plan to run.
I put an MT-G2 in one of my Courui’s and it wanted to run at 13A and over 4000 lumens, limited it in the UI to allow 3030 lumens for better thermal control. If/when I get a copper pill for it from Buck, I’ll pull the limitations. (re-flash the MCU)
You guys talking about modding this light, (or any light for that matter) and with accompanying pics will eventually lead me to start my modding hobby. So far I have been in the ‘pleasure of owning one’ yet. And thanks, btw, for the discussions.