Awesome lights! Box looks well made too.
Did you notice a protective coating or finish on the copper?
Awesome lights! Box looks well made too.
Did you notice a protective coating or finish on the copper?
I should have paid for faster shipping.
The unboxed versions still come in a box… it’s just cardboard instead of wood, as shown in the product listings. I expect it’ll have banggood’s standard padding around it. So, virtually no chance of the light getting damaged, and a low to medium chance of the cardboard box getting dented. I’ve received a bunch of similar boxes from banggood and they’ve all been fine.
The copper is coated on both lights, seemingly with a plastic type overcoat. I don’t know what it is, but it’s there.
The copper light threads together nicely, I didn’t really notice anything good or bad about how it fits, but the SS light feels simply elegant. Even the feel of the light externally has a finished, smooth, something about it. Like it, a lot.
Just took em both apart at both ends of the tube and the fit on the little Cu X5 is a bit tighter, very nicely done. There’s a little bit of side to side play on the tail cap of the SS light but the threads are mated well enough that it feels good going on, very positive feeling to me and smooth. The SS light seems to have been polished to a larger degree than my sample, more refined.
I don’t see any kind of centering ring at all, and no flat base inside the reflector. The HI emitter sits high in the reflector cup giving a good tight hot spot with a smooth spill on the wall. It’s about dark out so I’ll check beamshots after supper. ![]()
Beamshots from the new X6 and X5 lights. These are with the same batteries, so the X5 is at a disadvantage as the small cell falls faster. Canon G1X at ISO1600, f/5.6, 1/2 second shutter in Manual Exposure with 2 second timer on a tripod. 97 yds to the red 55 gallon drum in the middle of the shot.
Cu X5 with AW Red IMR14500 button top
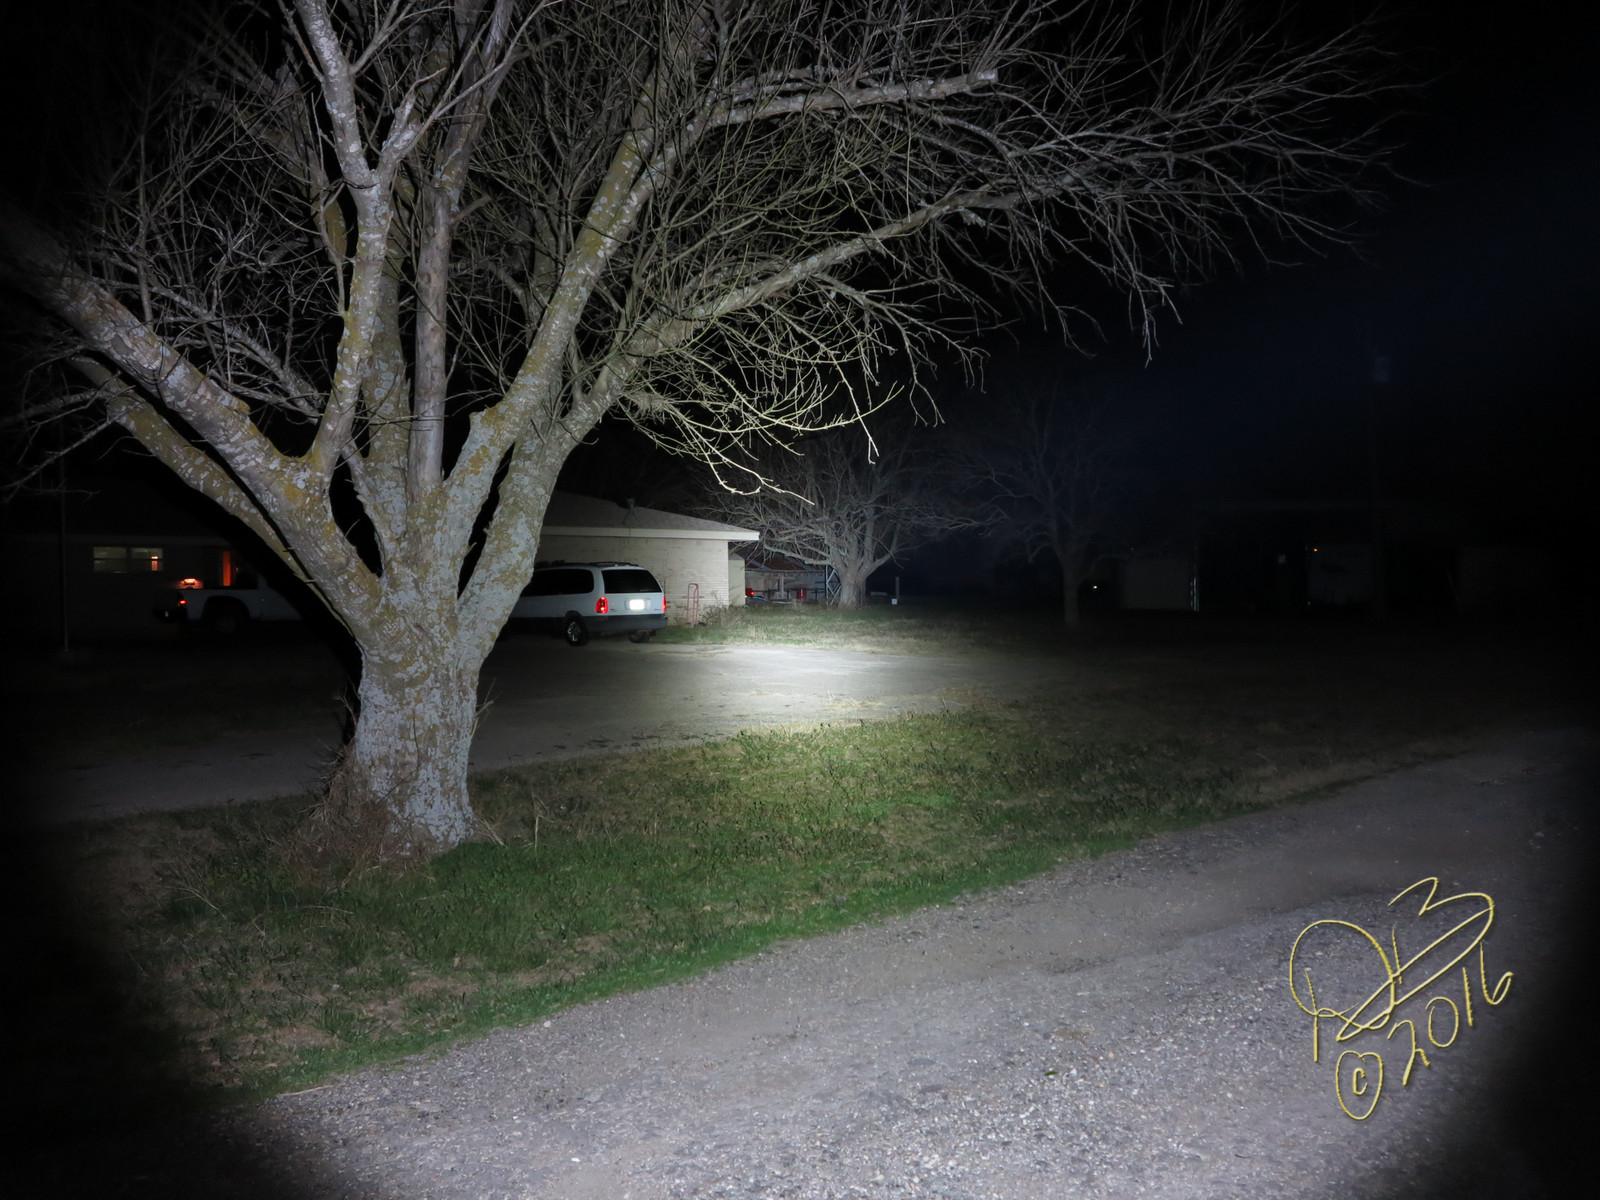
SS/Cu X6 with Efest Purple 3000mAh 18650 flat top
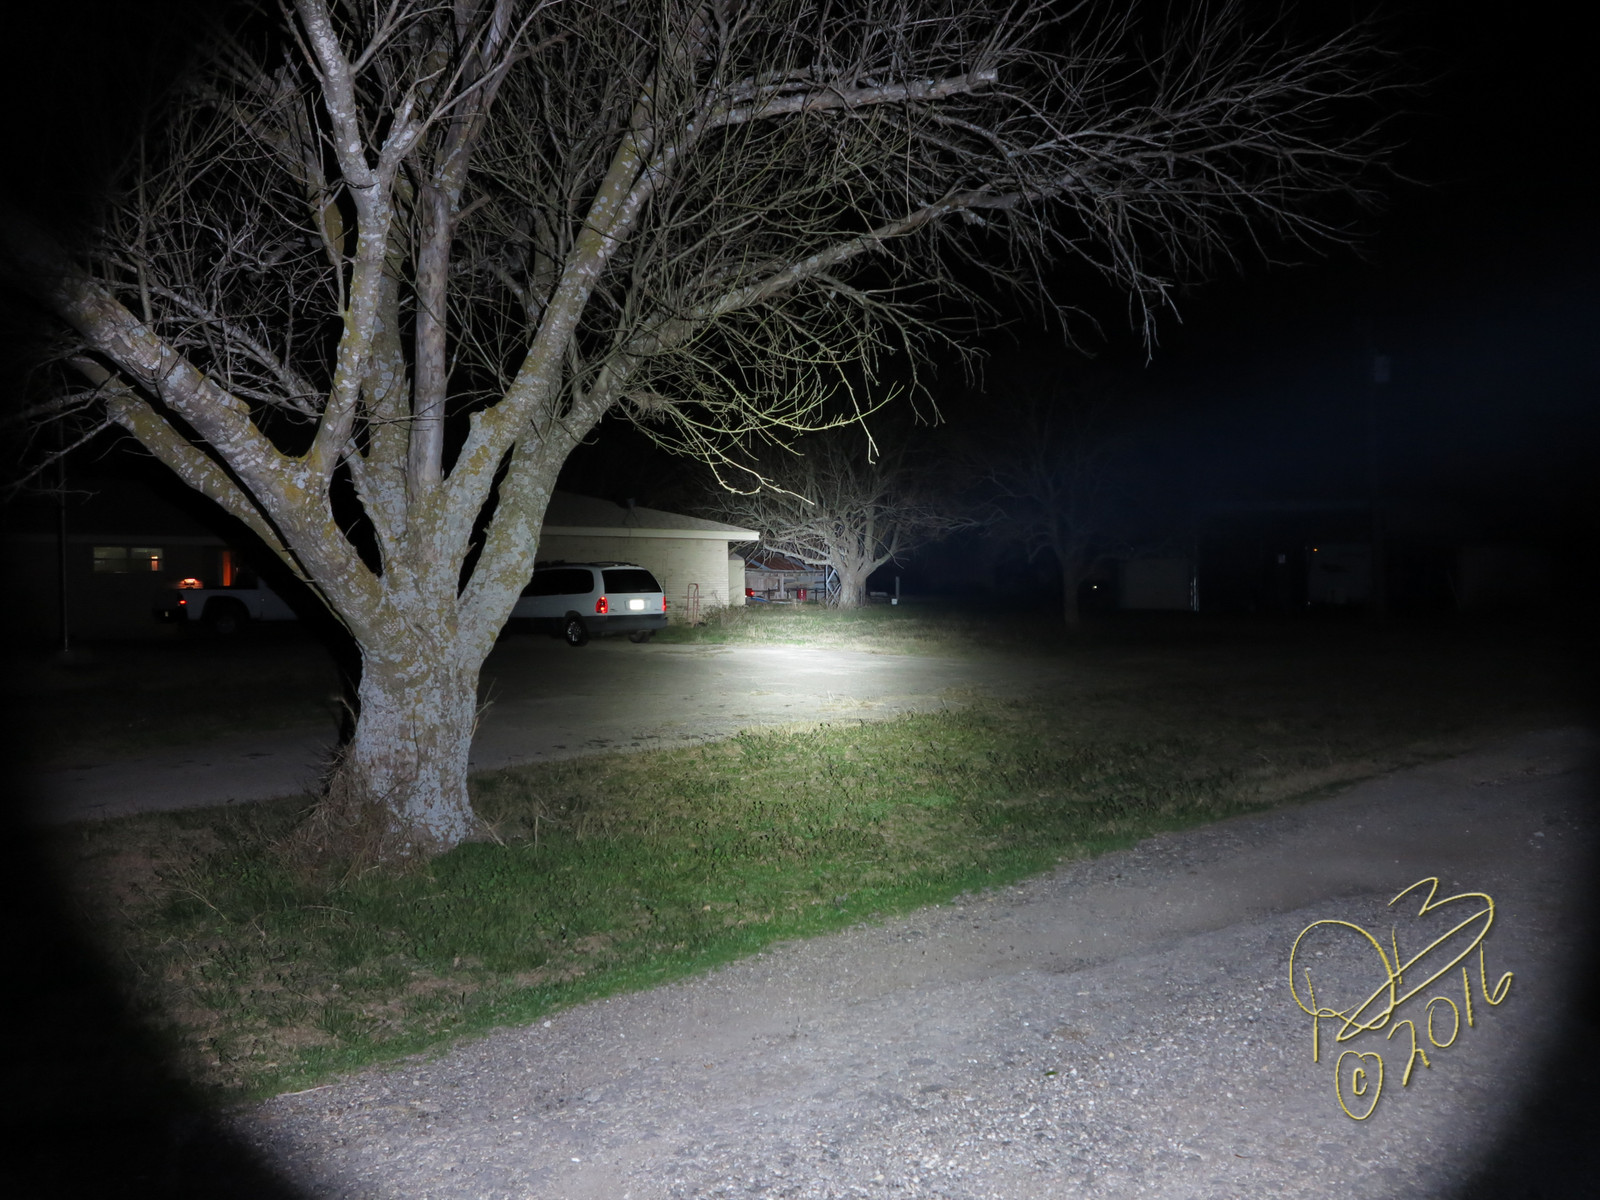
If you left click on each picture they will open in a new window, click that pic for full size 1200x1600 image. Then flip back and forth to compare. The little X5 does a remarkable job but the X6 beats it in the intensity of the hot spot, as you would expect it to with a larger reflector and hotter cell. Still, very nice output from the pair, straight out of the box.
Great job Dale.
You’re going to have everyone (including me) chomping at the bit waiting for their lights to arrive.
My Efest 14500 is on the way and I chose to give the LG ICR18650HE4 a try so ordered a couple of those too.
I have a box full of other 18650’s harvested from laptop batteries but wanted to make sure I had the right battery for the job!
What s/n did you get db custom?
Dale that set must be something that you about ready to throw in the trash, just send it over to me and I will put it in my trash can so it wont take up room in yours :bigsmile:
Just joking, anxiously awaiting mine now, amazing how bright that little x5 is though huh?
Here is the breakdown on what is left in stock. Wow…people really helped with the lack of 3B tints:
48 Boxed SS/Cu sets left:
4 x 1A and 44 x 3B
11 No Box SS/Cu sets left:
11 x 1A and 61 x 3B
PLENTY of Aluminum sets still available. No need for a reservation since 400 sets were produced. Aluminum set GB code: 3aeb2e
Thsnks,
krono
(Updated in OP)
good idea!!!
DHL arrived.
I haven’t had time to test everything, but I can at least share a few observations / measurements:
Things I’ll probably change on my personal units:
I tried to take pictures of the lighted tailcaps, but low-end digital cameras simply can’t capture pure electric shades of blue like this. The images don’t look even close to how it appears in real life.
Now I can finally fix up the earlier samples, which need new springs (the early sample springs sucked) and drivers (I broke most of the drivers during testing) and emitters (all samples were 1A tint, and I damaged two during thermal regulation tests).
Overall I can’t complain much. The hosts turned out awesome and most things are reasonably close to where we were aiming. Not bad considering that it is, in many ways, the first of its kind.
are available? T
Typos in your posted numbers?
Thanks.
BTW Awesome lights ……and boxes.
Can someone post pics of the tailcap pcb and the SN engraving?
TK that is an awesome post. Thank you! I’m impressed with the accesories! Can’t wait! ![]()
Cropping didn't turn out great, but looks like 003/400, nice!
"### of 400" looks lightly engraved under KRONOS on the tube. Nice.

From Dale's gif posted above.
I hate waiting! I need more flashlights, tonight! Banggood should look into drone deliveries for that ultra fast shipping method.
Add me to the wait list for another SS/Cu 3B. I backed off of one 3B to allow others to get 3B but I’d like one more if possible.
EDIT: Sorry, dropped the please without realizing it. So here it is: please!
Now we are talking constructive!
Hello. Could you please confirm if the following is the firmware on the light?
This is designed for an ATTiny25V-based driver with off-time capacitor
and FET+7135 power channel configuration.
The interface is as follows:
(see bistro-ui.png for a quick start)
While off:
- Fully click and release to turn the light on. It will go to the
first mode or the last-used mode, depending on whether you enabled
mode memory.
While on:
- Short tap: Do a short (less than 0.5s) half-press to go forward to
the next mode.
- Med tap: Do a medium (0.5s to 1.5s) half-press to go backward to
the previous mode, if medium-press is enabled.
- Long tap: Do a long (longer than 1.5s) half-press to reset to the
first mode (if mode memory is turned off).
- Or fully click and release to turn the light off.
- Short tap a bunch of times (15+ taps, or until the light stops
turning on) to enter config mode.
Hidden modes:
- Go backward from moon to access the hidden modes. They are, in
order:
- Turbo (just like the regular turbo)
- Tactical / police strobe (7 Hz / 14 Hz alternating)
- Battery check / beacon mode
It should blink out the voltage in whole numbers then a ‘.’ then
tenths. So, for 3.6V it would blink out “—- . ———”.
Voltage range is from about 2.5V to 4.4V
- Biking flasher (2-level stutter beacon, 1 Hz)
Configuration options:
The config mode has several options. It will blink out a number to
show which option is active, then “buzz” or “stutter” for a bit.
Click during the “buzz” to select that option. Some options may
enter a secondary config mode after the light turns back on.
Options include:
1. Muggle mode / simple mode. Good while lending the light to
others. It overrides other config settings temporarily:
2. Mode memory. Off or on.
3. Moon. Select to turn moon mode on or off. This is in addition
to the other regular modes, so you get 2 to 9 levels when moon
is enabled.
4. Mode order. Low to high, or high to low.
5. Mode group. Choice of 1 to 6 regular modes from low to turbo,
or one of 3 special groups. After clicking, the light should
come on in a special group-select mode. In this mode, it
slowly blinks 9 times, pauses, then repeats. Turn the light
off after N blinks to select mode group N.
The mode groups are: (output is approximate)
1. 1300 lm only
2. 8, 1300 lm
3. 8, 235, 1300
4. 8, 104, 506, 1300
5. 8, 75, 254, 642, 1300
6. 8, 50, 167, 366, 757, 1300
7. 140, 1300, strobe
(police modes)
8. bike flasher, battcheck, 8, 140, 1300
(biking modes)
9. 4, 36, 140, 500, 1300
(like group 5 but lower)
Example: To select group 3 (low-med-high), let it blink three
times then click the button.
Note: 140 lm means 100% on the 7135 channel, while 1300 means
100% on the FET channel. Both are no-PWM modes.
6. Medium-press. Off or on. If on, a medium-press will allow
going backward through the mode sequence, and hidden blinky
modes will be accessible.
7. Thermal calibration. Set the temperature at which the light
will begin stepping down to cool itself off. After clicking to
select this, the light should turn on in a special thermal
calibration mode. It will start at a medium-low brightness,
wait a second or two, then step up to turbo.
- To turn off thermal regulation, click within the first second
(while the output is relatively low).
- To set a new maximum temperature, leave the light on until
you think it is too hot, then turn it off. From this point
on, the light will use that new temperature as its maximum
allowed heat.
Note that there may be a delay between when you feel the heat
and when the MCU feels the heat, so the value saved may be a
little bit lower than expected.
8. Factory reset. Change all settings back to default.
thank you….
Excellent, I thank you for putting my concerns to rest!