Convoy L6... XHP70 Beast!

Which you can mod with the linked emitter+mcpcb combo.

L6 was my first real flashlight. Now I have so many but still use the L6 a lot. It has to have the best flood/throw out there for the money.

I have a clear anodized L6 modded by TA with XHP70.2 4000k 80CRI and lighted side button and lighted tail button. It is THE MOST BEAUTIFUL flashlight I have ever seen! It makes 6,200 REAL OTF lumens and it has better heat shedding compared to other lights I have. The form factor reminds me of Maglites; very easy to hold and feels solid and reliable in the hand. It can be a duty light or art on a display shelf. It throws well yet having good spill. The MT09RTAs that I have are great too, has near identical beam, can be much brighter, but are not as easy to hold and feels less practical for every day use. I like both of them the same but find the L6 more convenient to use and better looking (at least the clear anodized version).

Anyone know if Lexel made those lighted tail switches and if they just drop in or need some soldering?

I bought mine from Lexel. Multi-color tail switch and pink (looks like purple) side switch. I sent them to TA to help me mod.

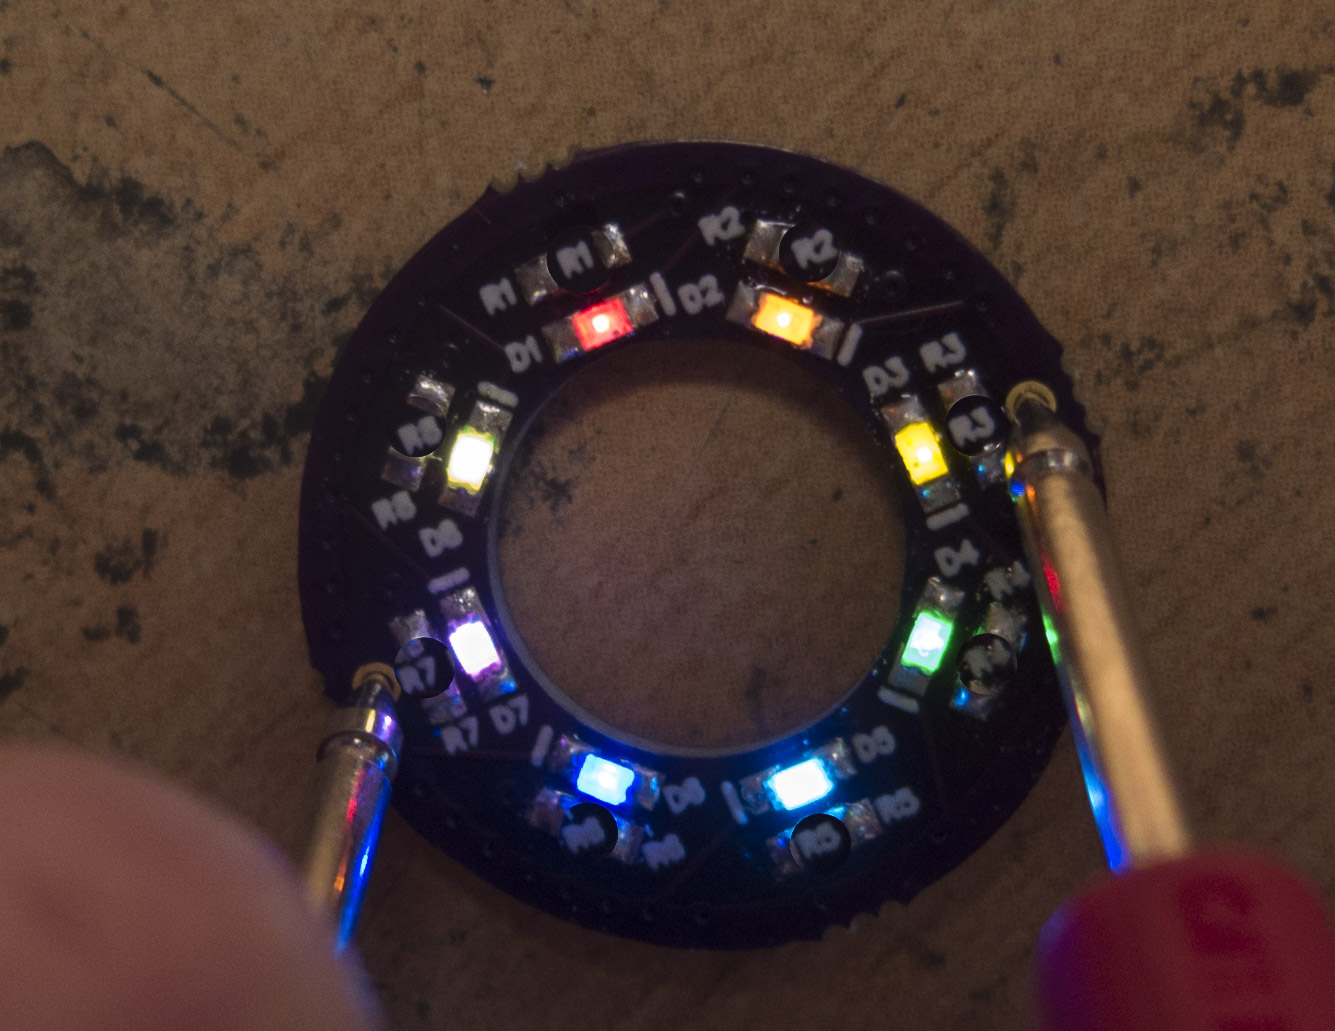
They definitely need soldering. They take the place of the metal washers you usually find in switch assemblies. Pics and video in links below.

Link to board design.

Link to order thread.

Too bad they don't just drop in like the C8 ones. I know I asked you this before, but where is the info how to solder them again? Forgot the link but if I remember well, I need a massive magnifying glass to solder them or something like that! What does "trimmer" mean?

I have no idea how these tail switch pcb’s wire up. Maybe a short length of wire from the pcb posts to both sides of the switch?

Looking at the design and applying some logic, I think it has to be wired like this. It basically replaces the metal or plastic washer that holds the switch in place.

Original pic courtesy of brted circa 2010.

Jason, you DO realize that the switch is only an interruption in the negative side of the circuit, right? There’s not a plus and minus, in other words, both sides of the switch are minus.

I don’t think that’s right. A switch would not work if both sides were negative. Basically, the battery tube is positive and the switch spring is negative. This is the nature of a “circuit”. Electricity flows in a circle.

The positive and negative side of the load is all relative. The “negative” side of the main led is the “positive” side of the driver. The “negative” side of the driver is the “positive” side of the tail switch.

Let’s say the battery positive anode goes to the main led with a red wire. The black wire from the led tells us “negative”. This black wire goes to the driver circuitry which then gets transfered to the flashlight body. Then the tail switch has a positive side (the flashlight body) and a negative side (the spring touching the battery negative). Lexels tail pcb needs to have it’s positive terminal attached to the flashlight body side of the tail switch (since it’s polarity sensitive). Then his pcb negative terminal needs to go to the spring side of the switch, bypassing the tail switch.

Make sense?

Sorry, I completely forgot to answer this question. A trimmer is another word for pot or potentiometer. It’s a variable resistor. You turn the little screw to change the resistance which, in this case, increases or decreases the brightness of the LEDs.

Generic picture:

You can see the blank spaces on the backside of Lexels board for the pots.

Lexel got back to me about how his tail board is wired. It’s like I pictured. You just run little wires to the sides of the switch. You may also need a bleeder resistor on the driver.

I get it now thanks Jason. So it's really not hard to solder it, but I wonder if I have the skills to add a bleeder resistor to the driver! It sounds like something that is real tiny and if so, good luck me not messing it up when soldering lol. Lexel also mentions that not all drivers like bleeder resistors and I am wondering what type or effect it may have on the light itself and if it is is worth doing or not. Thanks for the trimmer info. If it was called a "dimmer" I would have understood but "trimmer" threw me off there!

I know people have installed them on the L6, but I’m not sure what driver they used.

Maybe we need a database of which drivers need bleeder resistors and which don’t.

A database would help everyone who wants to do this I would think. It shouldn't be a guessing game.

Hmmm, sometimes his short answers need dechipering.

I think if your driver uses a Atmel ATtiny processor (5.5V max) in a 2S light (8.4v max) then it needs a Low DropOut (LDO) regulator to drop the voltage down to power that processor. My understanding of this is sketchy, but I think this is correct.

So basically I think Lexel is saying that any of the Texas Avenger 2S drivers as well as Richards 30mm FET+7135 Driver - 2S Momentary - Convoy L6 driver doesn’t need a bleeder resistor.

The stock FX-30 may or may not have an LDO. I’m not sure.

I sort of gave up on lexel with his cryptic answers. If I message him about one thing, he answers in a way that leaves too much guessing as to what is really going on. I think he's just too busy and it can be quite a bother for him getting a lot of pm's, which is easy to understand. If you are correct and I don't need to add the bleeder resistor, then I should go for the rainbow gen2 one from lexel and hope that all I need to do is solder two wires and I'm done. Thanks for helping me try and understand the whole thing!

Jason, look at the back end of the flashlight… the battery tube is ground to connect the negative end of the battery to the driver. At the switch PCB the battery tube meets the outer ring of the PCB and the battery meets the inner ring, the switch is merely breaking into the line between the end of the battery and the battery tube, giving you a cut-off to the completion of the circuit. Negative all the way. In the same way that you can bridge the battery tube to the battery with a wire, the switch breaks into this wire so you can kill it at will. :wink:

Positive from the top of the battery (cell) goes through the driver and straight to the emitter (s), the negative path is run through the driver so we can have modes. If you happen to short out the negative pad on the MCPCB with the reflector you will bypass the driver and go into direct drive only. So the driver bleeds off a wee bit of the positive to power the MCU but otherwise the + goes directly to the LED, - runs through the driver for control. The switch breaks the - path so we can kill the circuit.

In an e-switch light, the emitters literally have power all the time BUT the MCU is essentially asleep when the e-switch directs it into the OFF position. This is why if the e-switch driver is not done well the parasitic drain will destroy the cell. Also why you normally have to back off the tail cap to lock it out, by backing it off you break the contact between the negative end of the cell and the battery tube effectively “switching” the light off.

Edit: Look at this picture of my Noctigon Meteor M43 set-up, I have a Master driver and 3 slaves… I only need to run positive up to the 4 triple MCPCBs and the negatives from the drivers themselves… each slave doesn’t get it’s own power as it doesn’t need it, only the signal wire to the 7135 and FET and then the Negative from the FET to the triple MCPCB. In this way, each of the 4 triple boards has it’s own driver but only one driver has the MCU with the firmware, so it’s all controlled from the same place. Positive straight up through the middle from the 4 cells positive ends, negative directly from the 7135/FET on the individual drivers. The small orange wires are the signal leads for the 7135 chip, the small green wires are the signal leads to turn on the FET.

In a way, the driver acts as a second switch, delivering the negative current through the LED in a predetermined pattern… either direct drive or PWM’d to provide lower modes. Current flows from Negative towards Positive, this is what allows this system to work the way it does.

Edit II: Sorry, I used red wires in the Negative lead position because I was out of black wire in this gauge. The Positive leads are Teflon so it was easy to see up top which was which. :wink:

klrman, the bleeder resistor actually puts some positive current into the negative circuit, such that when the light is off there is a small positive charge flowing backwards, this is what allows the lighted tail cap to work.

So that's how it works thanks! Would you know for sure if my stock L6 would need one still? I'm still not 100% sure as of this point.