Done. All posts edited. I purposely made them big so people could help judge my work but I do see your point and they are still full res if desired.
People can still do a right click - open in new tab - and enlarge the image.
People can still do a right click - open in new tab - and enlarge the image.
It has been a while since there was last a topic on how to do a spring bypass, it is nice to see that some evolution has taken place, the techniques are more diverse and refined now ![]()
If I’m feeling lazy I’ll use the bangbang notation and just paste the url between, but more often I’ll just type
<img width="100%" src="image-url-here"/>
for a bit finer control. Also lets you display a smaller image and link to the big honkin’ one, eg,
<a href="url-to-big-honkin-image"><img src="url-to-thumbnail-pic"/></a>
if you want to go really crazy.
Yes a lot came up that I didn’t even think/know to ask so i’m very thankful how it has evolved. The “how to” threads and videos I was finding were literally ~5 years old and not consistent with what I was reading from new threads.
I’ll post my latest and final attempt for now with a bonus first time heat treating pic. Thanks again for all the helpful replies.
Helper in the background:

Using a handheld Bernzomatic torch, spent too much time on the thin bezel but otherwise I like it (inspired by Zoltán Andrássy on facebook):

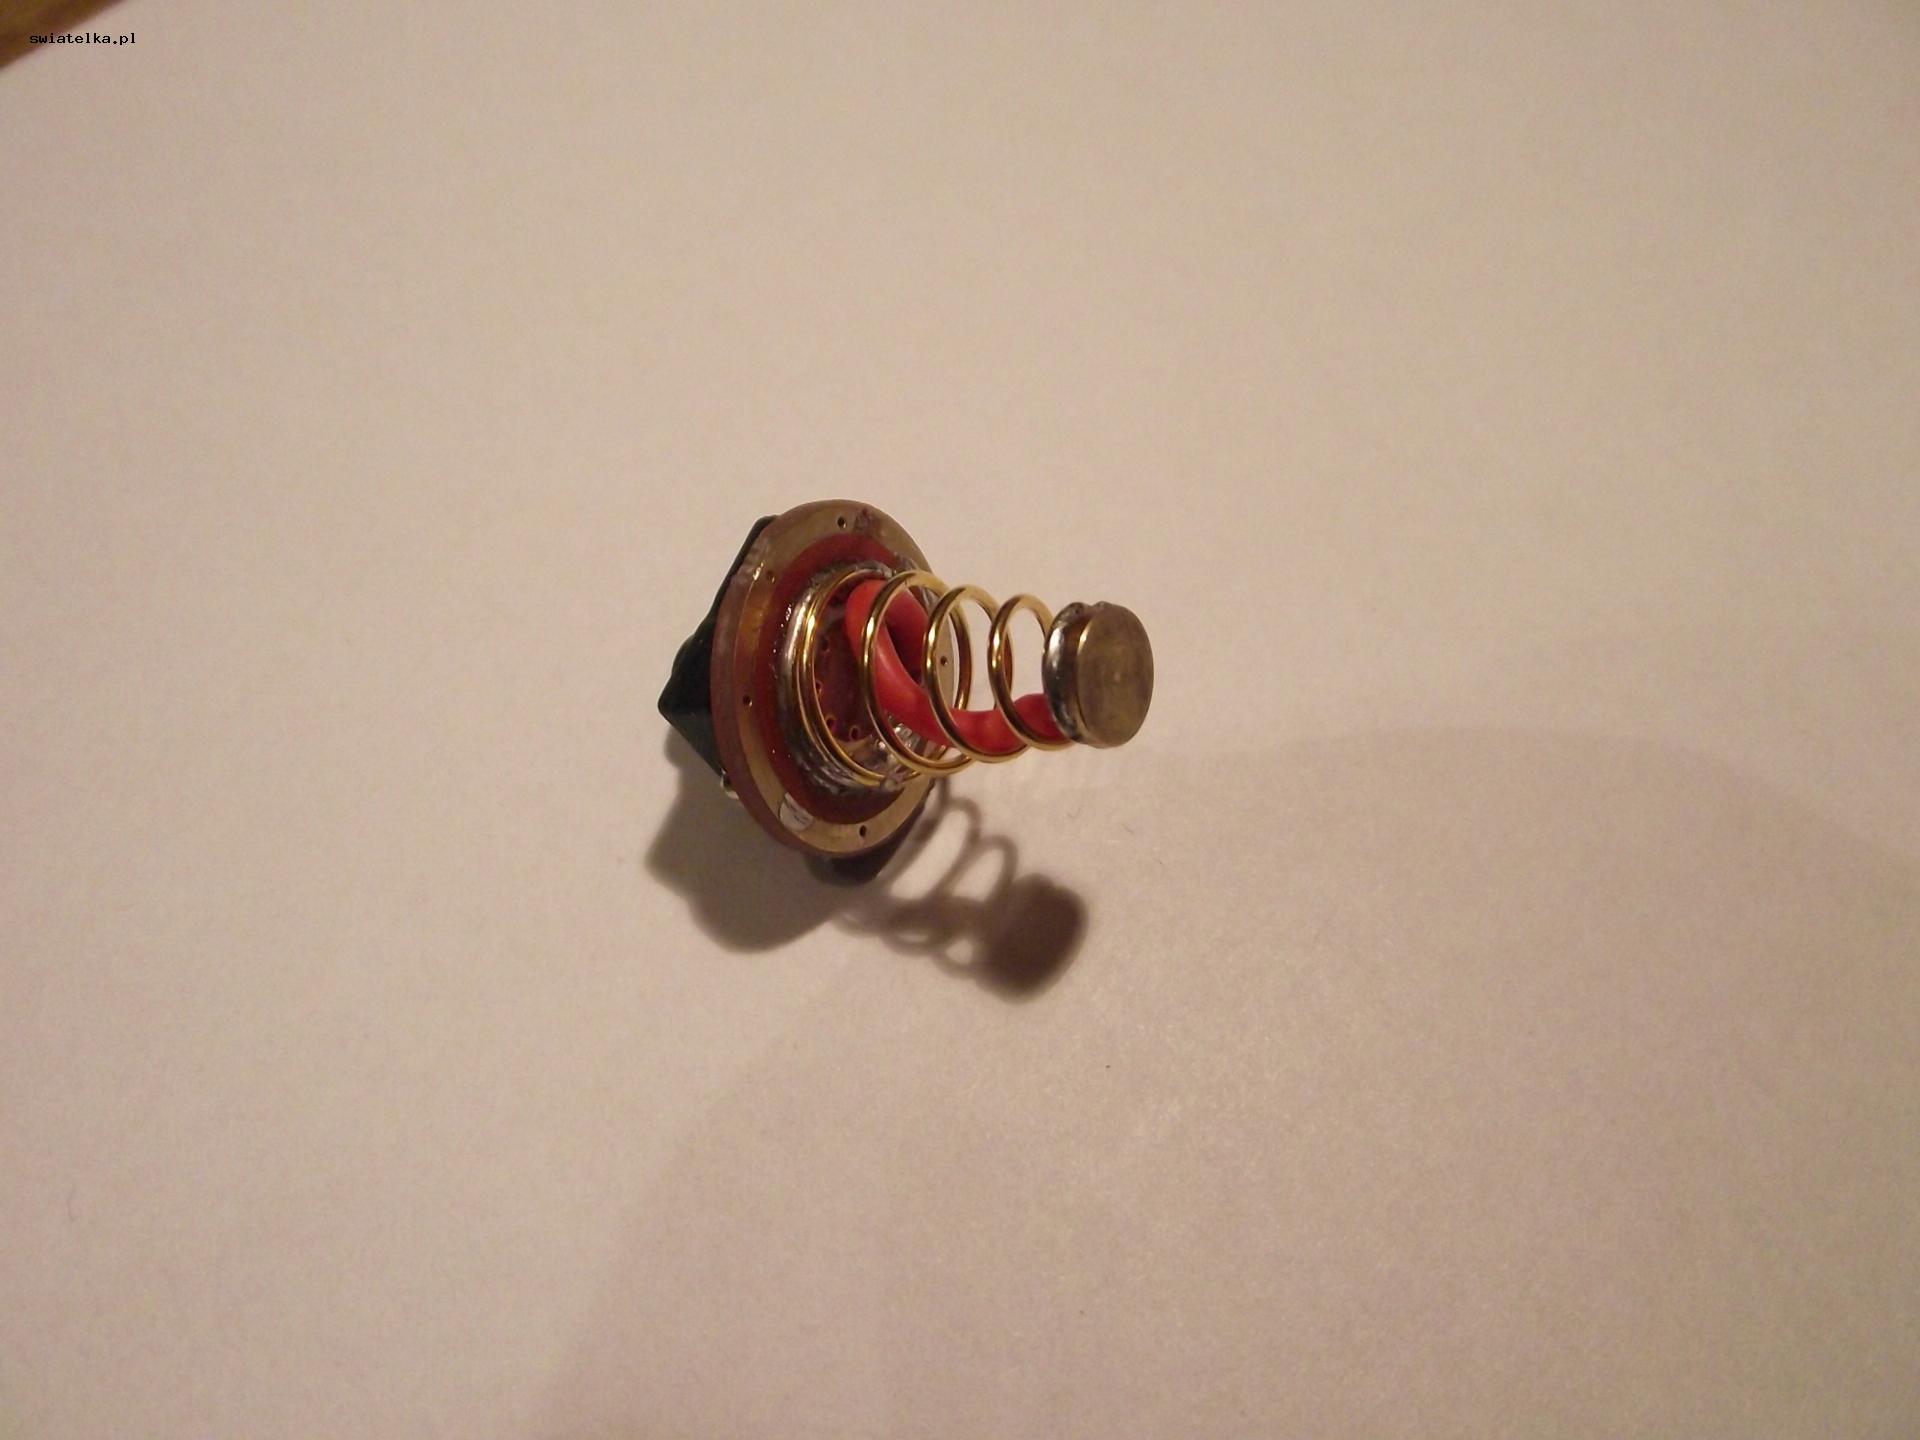
My spring bypass using 22AWG silicone wire and brass pill:

And this is my typical bypass


when you doing bypass to lower resistance, it does not really help when only a tiny dot of solder touches the cell. due to bad soldering job. you want as much surfice of the solder to touch the battery. make the tip of the spring flat, use a file if needed.
I like the idea of that little brass pill on the top.
I would think the wire and pill on both sides would make longer batteries really tight but I guess it’s really dependent on the light.
Worth repeating
I usually try to do it with a brass button, but now I do not have enough. Below is a convoy L2 switch with a brass button and a picture of my buttons and compared to those you can buy (on the left) for example on fasttech


This sounds right, but it doesn’t really make a difference.
As long as you have a decent mechanical connection between spring / bypass wire and battery, the surface area of this connection doesn’t need to be all that large.
One could even argue that a small connection surface area could be better because there’s more force per mm².
Resistance is a product of diameter and lenght.
But there’s virtually no length involved.
How would you guys go about bypassing a double spring? My a6 has a double spring at the tailcap and a single up front. Should I just bypass the single spring and leave the tailcap spring alone? Or is it like if I dont do them both it’s not worth doing them at all…
- Bypass the driver spring.
- Remove the small spring, and solder a bypass to the big spring.
1 Thank
Is there a way to know it was done correctly? (I’m a newbie). If I don’t see a noticeable hike in output does that mean it was done wrong? Or do I just make sure it looks good and check that the light functions properly and call it a day.
You won’t really see much a difference, but there will be a nice difference in output. Just be careful when you do it, and get plenty of rest before doing it.
Doing a spring bypass when being tired is not smart.
Ok. Thanks for the tips!
How do you guys solder the brass pill to the spring? Do you first bypass the spring, then rest the brass pill on top and solder on the sides?