Put this driver in an old SRK that has been sitting on the shelf since new.
What an improvement, I will actually use this light now, and the driver swap was very easy for a noob like me. Very pleased
The old SRK has 6 genuine xml emitters and a good shelf, one I bought from fastek a couple of years ago. <:-)
Mine is sitting in the mailbox for when I get home  .
.
Got a few Q’s on this driver, and not sure where or if anything is published on it.
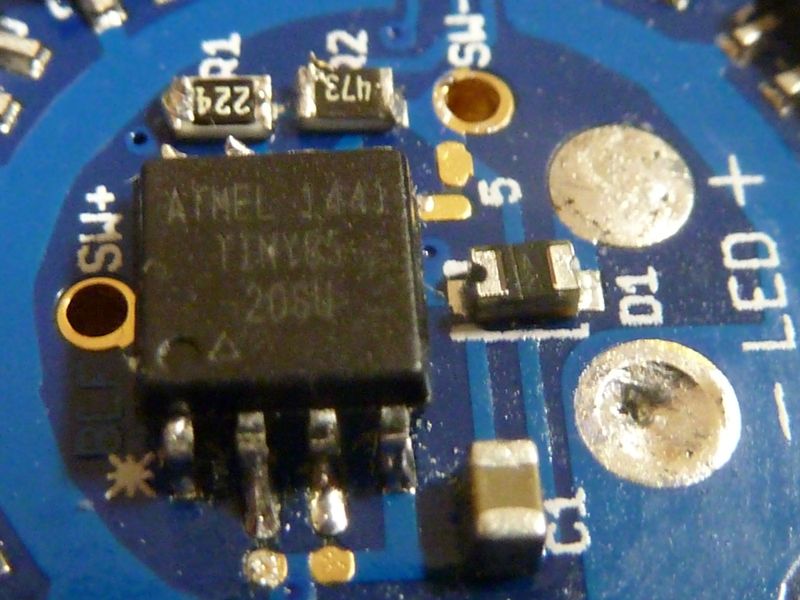
- my plan is to upgrade the MCU to a ATiny85, so, it would help to know what the #’s are the stock firmware uses for LVP
- Relating to LVP, the voltage divider resistors are before the diode, but the lower value resistor is used, as we typically use after the diode. Any reason why this one done this way?
- The C1 cap is after the diode while we typically use it before the diode, at least on custom FET drivers. Not sure if this is normal for custom 7135 drivers, or why it was done this way?
I can always figure out LVP values, but the C1 cap, I’m not sure how that will work out with a 85.
I think this driver should work out well with an 85 and the Narsil firmware. Also, I’m thinking of adding a locator LED that also indicates low voltage. Planning on using it on MCU pin #3 and adding a hole through the body and use a light pipe in the hole.
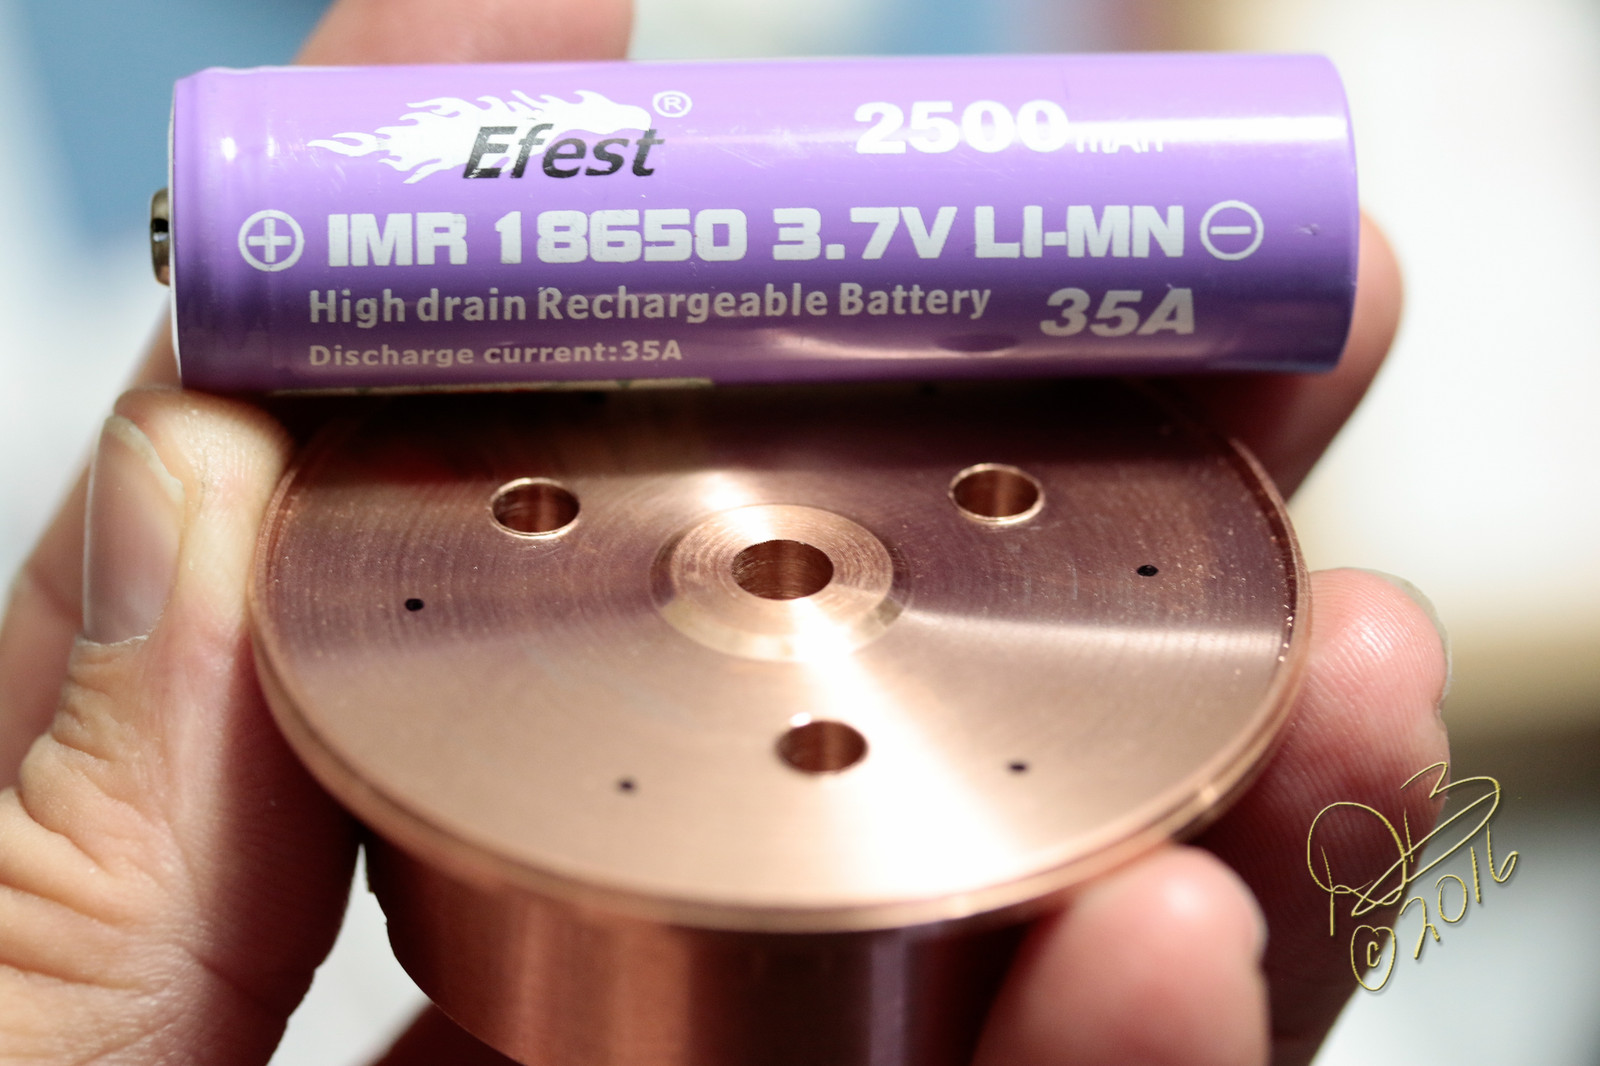
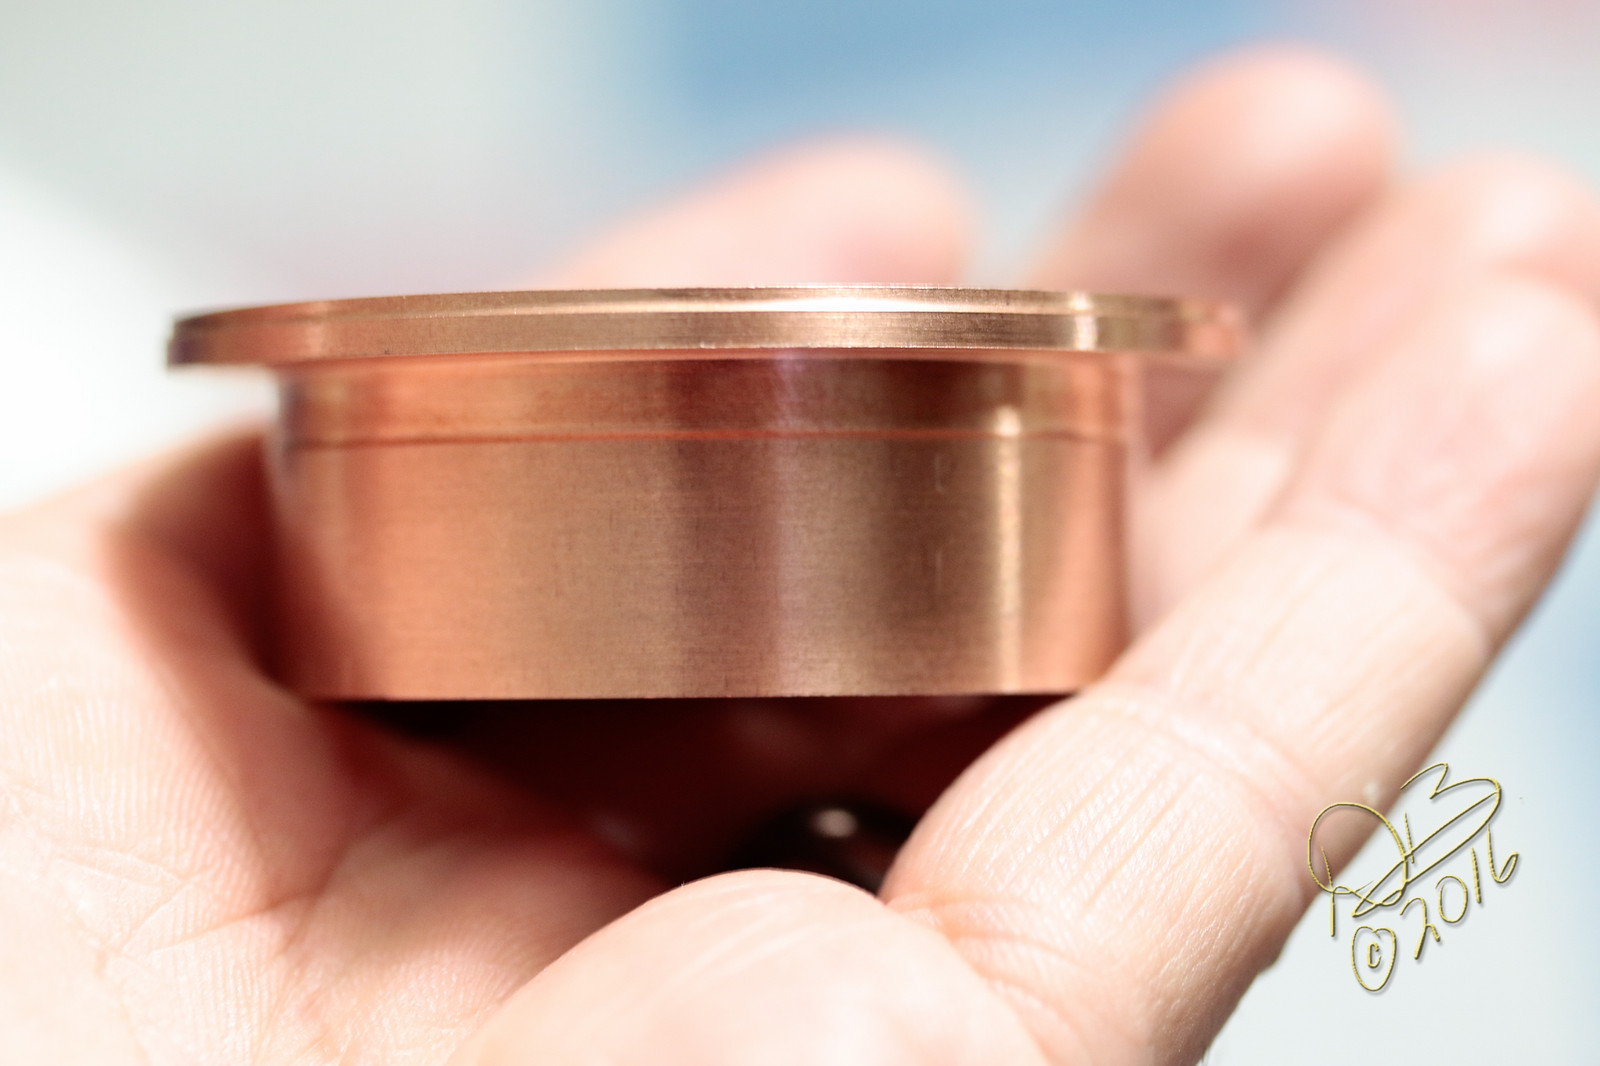
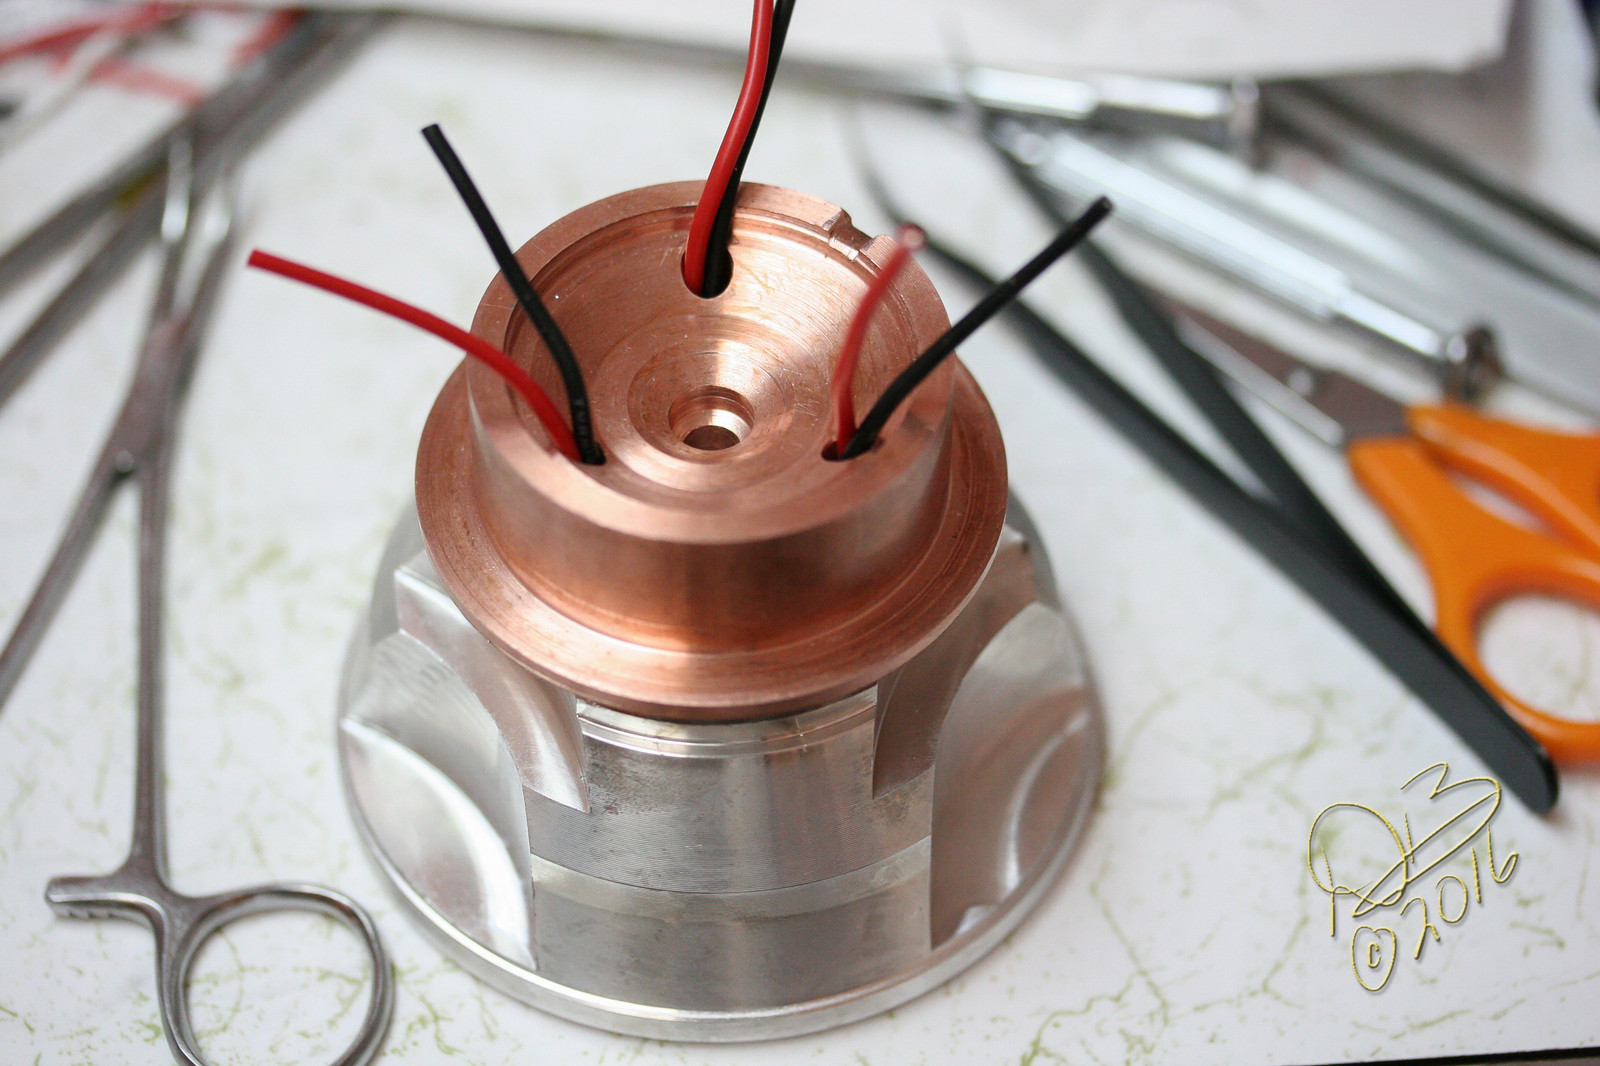
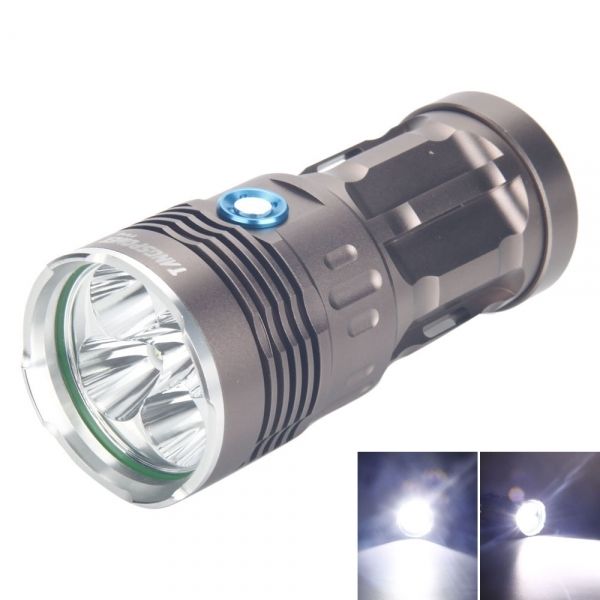
Got my SP-03 in that I ordered for the SRK special MTN driver. So, I got right to it (I did actually turn the stock light on once or twice first) Pulled the light apart and headed out to the shop. Built a copper pill to replace the thin aluminum disc that they glued onto the shelf in the big SP-03.
So now I have this massive Tellurium Copper heat sink that makes the light weigh 2.25 lbs with cells. ![]()
I pulled the stock XM-L2’s off their thin 16mm aluminum mcpcb’s and put them on 20mm SinkPAD’s. Then, after affixing them to the copper pill, I de-domed em. I opted for the 7 level reversing firmware and love it!
On the box, Solarstorm claims the SP-03 to make
3020 Lumens
93Kcd
780M throw
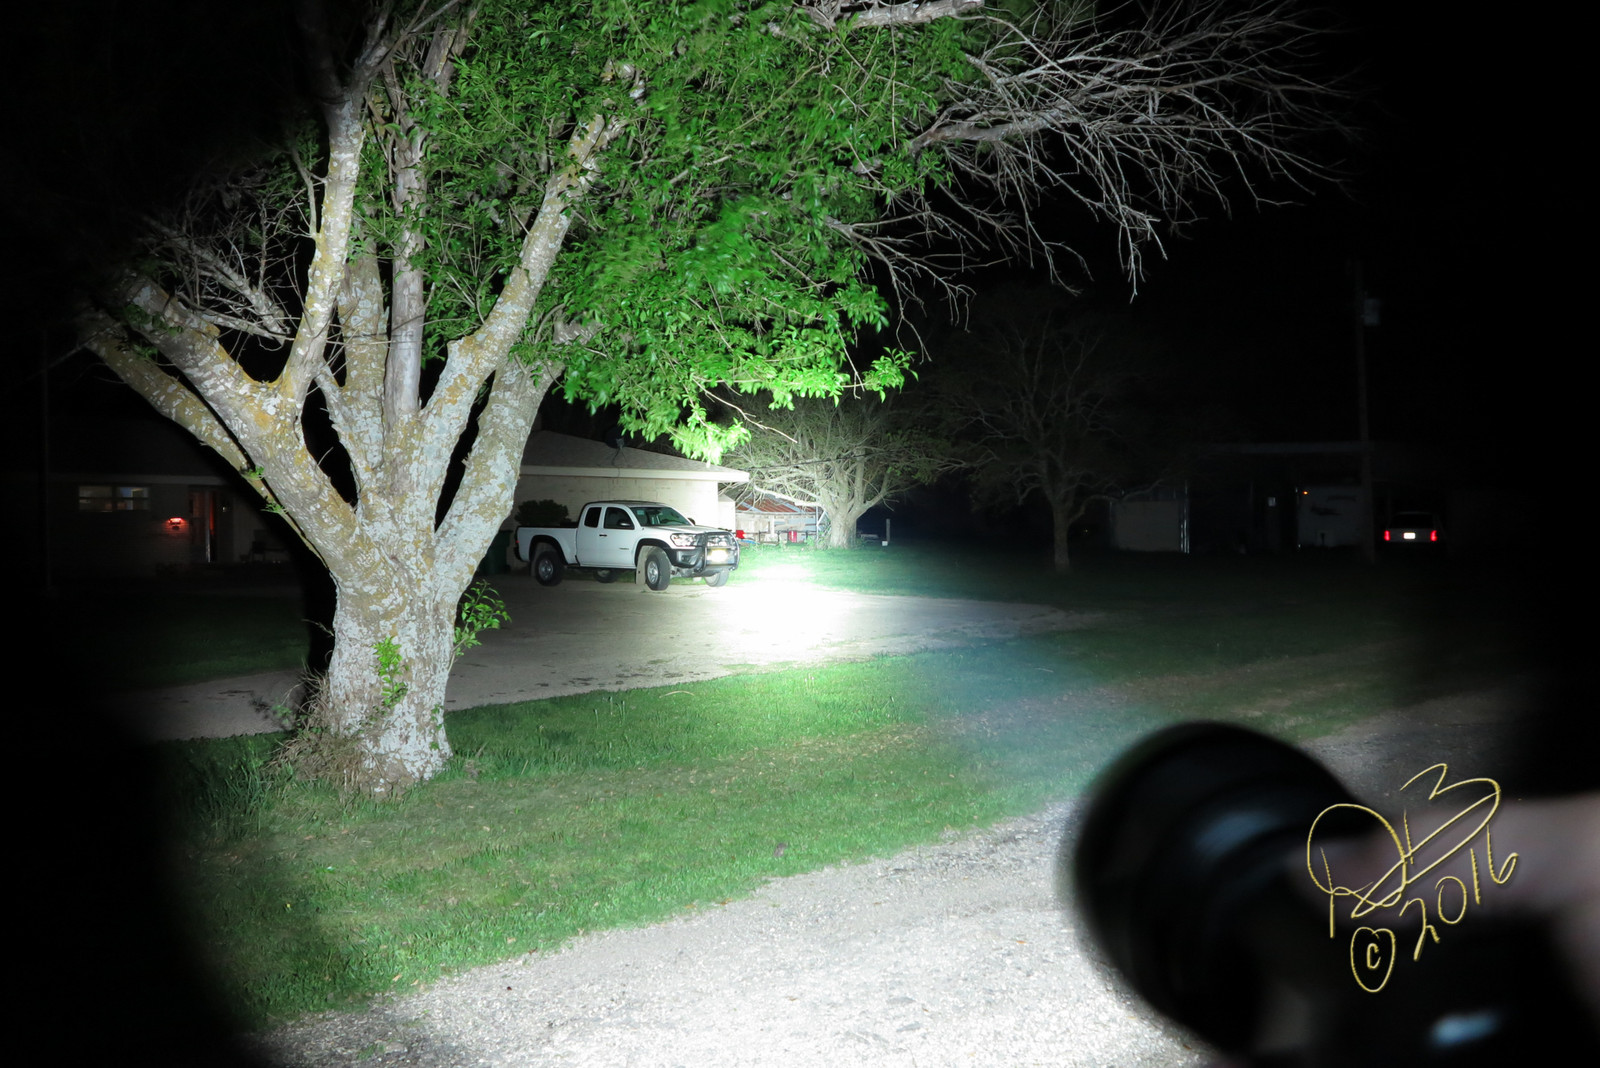
Now, after a spring bypass in the tail section all the way around, I see these numbers…
3532.8 Lumens
235.25Kcd
970.05M throw
And the gains come with so much more thermal mass for continuous run time it’s not even comparable!
Thanks Richard, appreciate the driver very very much! ![]()
Edit: More pics…


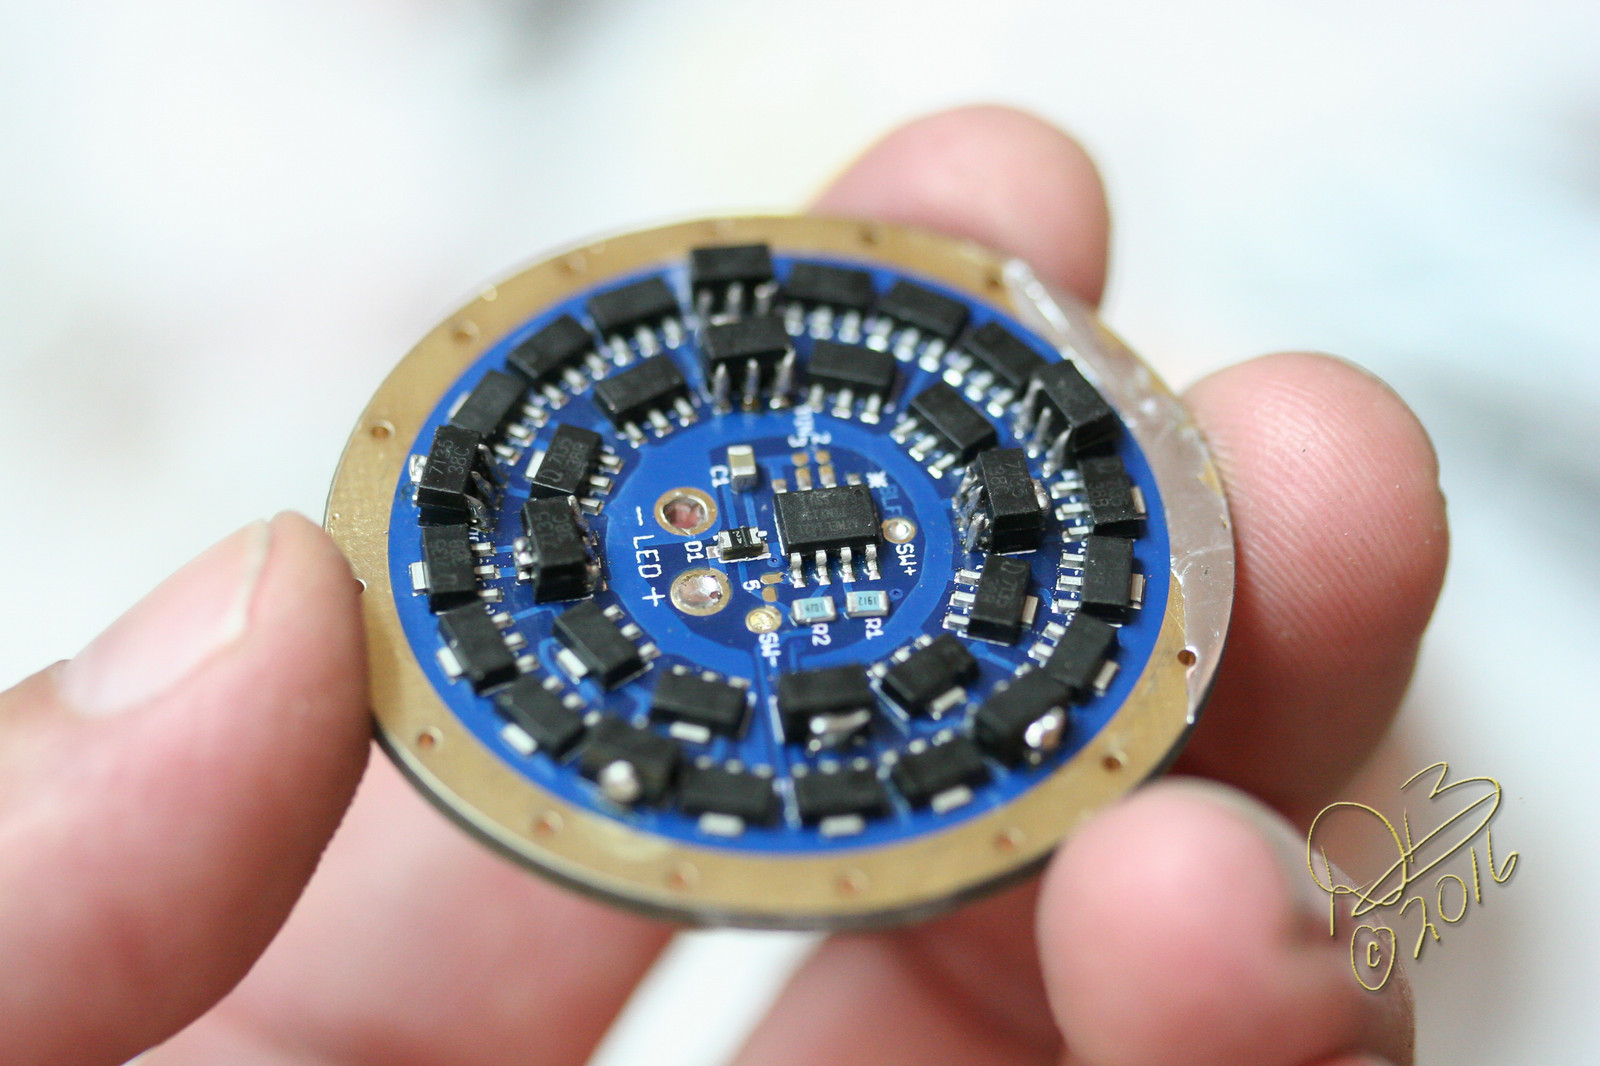
I, uh, kinda dropped about 9 7135 chips on the driver and they stuck to it. :shy:
Nice
Sorry I didn’t respond sooner. The lack of any sort of e-mail notifications is killing me!
LVP: 128 and 120. If you don’t run them before the diode, you can’t have LVP on a 2S+ driver since it will always read MCU voltage. Also, if you remove the diode from the equation you eliminate that variable, which is a moving target depending on the diode used.
C1: As long as we don’t have any boosting problems, I’d always like to see the capacitor as close to the MCU as possible. Since the 7135s don’t pose the same capacitive issues that the big FETs do, I left it this way. It should work better with the 85. If needed, you can always use some of the other pads for the LDO as well, but without the LDO.
RE LVP: I think that Tom E was thrown off by the actual resistor values. Probably moving from. 2x.x back to 19.1k.
Because that is exactly how that works. ![]()
I’m kind of tempted to put magnets on the other side of my board and make a video of dropping chips at it.
LOL
I hadn’t stacked chips in quite a while now! The FET drivers have thoroughly spoiled me…
Thanks RMM and wight for the info!
Dale - that copper heat sink pill is sic!! Was that made out of bar stock? Do you have a way of recycling the materials, or rather, being able to get some money back on the shavings? Sure hope so… I know shops do that of course, but not sure how it works - salvage place, etc.
I’m planning on adding more 7135’s as well. Got a ton of them going unused.
Thanks Tom. Yep, but not just any bar stock… Tellurium Copper. It cuts so much easier, almost as easy as brass. And yeah, tell me about it! I see piles of shavings going in the box and realize I should probably salvage it and smelt it into bullets or something, but I’m focused on the job at hand and it all goes in the scrap box with the aluminum, brass, Delrin, white nylon, polycarbonate, whatever….
FWIW… just got this bar in the other day, it’s 12” long and 1.375” in diameter. A cool $97.
Oops! Sorry, I did just get that bar in the other day, and it did cost that, but it’s the one I used to make a pill for a Raysoon F13 yesterday… for the SP-03 I had bought a piece of Tellurium Cu at 2 1/4” diameter and used the remainder of that 3” piece here.
I got an UCLp lens in for the SP-03 today, Chris custom cut it to fit, very nice of him! ![]() Perfect drop-in replacement and the result is spectacular, as usual!
Perfect drop-in replacement and the result is spectacular, as usual!
Some 200 lumens gained, for a total now of 3939.9 out the front.
I’m very glad I went with the Solarstorm SP-03 instead of a soup can light, this thing is very impressive! Thanks Richard! ![]()
i am in for one if still possible
is it possible to get also the firmware for soem small mods /?
Thanks
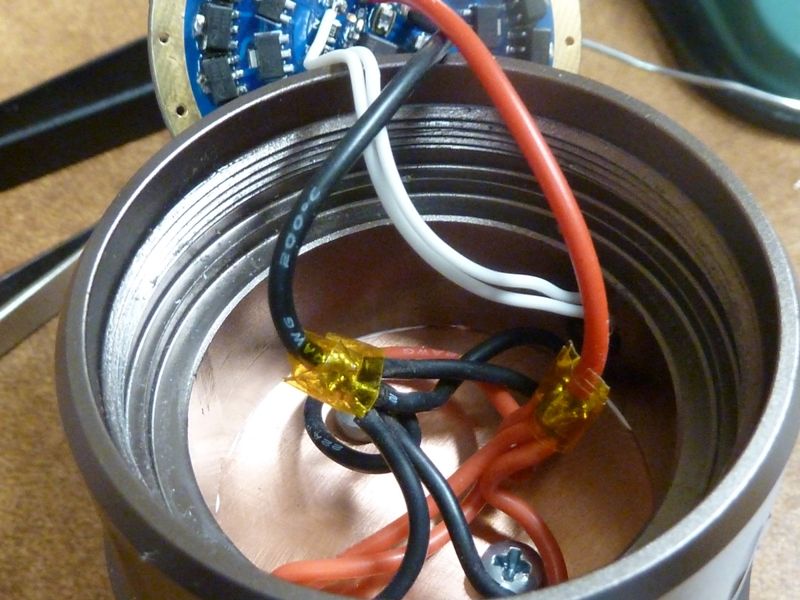
Finally finished my mod last night using this driver in a TangsPower Fing 5X, bought from TMART way back in 2014 here: https://budgetlightforum.com/t/-/26483. I'm so-so with the results of power/output, achieving "only" 14.66A measured at the tail, but with 50 7135's, should be 17.5A. Probably the bird's nest of wiring contributed to loss's. I had to use 22 AWG wires to the LED's because of reflector clearance space, then used 20 AWG off of the driver, all wires could probably use shortening as well. Here's some pics:
The 5X light:
Showing the extra 18 stacked:
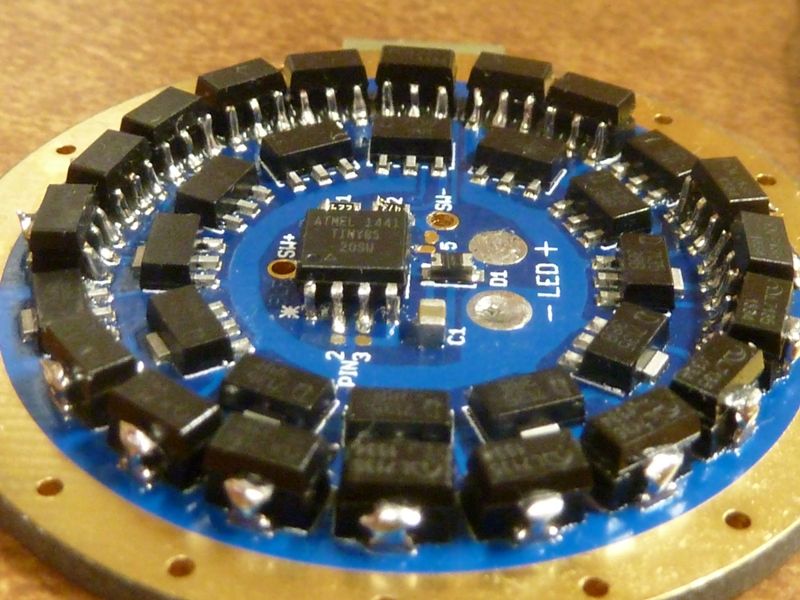
Here you can see the parts I swapped: Tiny85 for the 13A, and low drain voltage divider resistors of 220K and 47K:
Here is the tabs sanded down, and the two notch's put in on the outer edge to help prying out the driver:

The birds' nest:
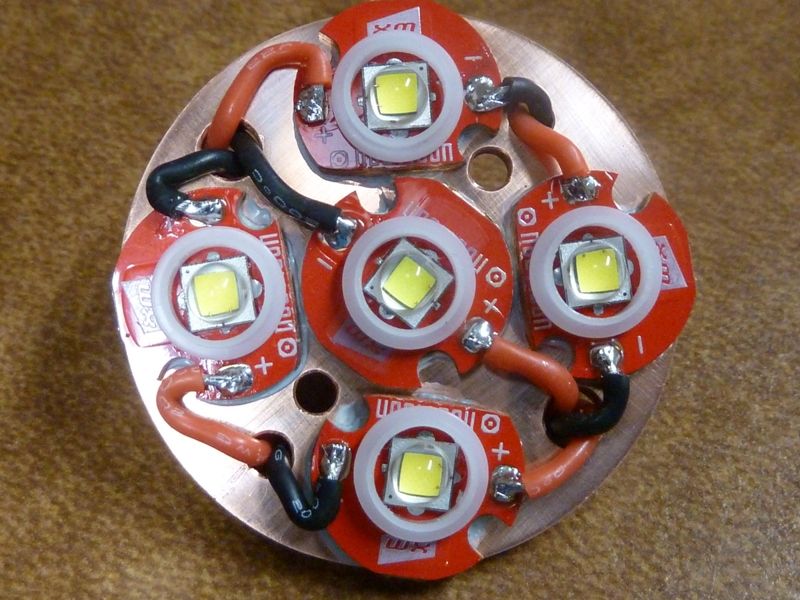
LED's mounted on the copper plate, made from 1.75" 18 gauge and 16 gauge copper copper rounds reflowed together, LED centering pieces filed down from stock size, a little:
So the good news is I didn't have to do anything to accommodate the Tiny85, like adding a cap or increasing the C1 cap. Of course w/Narsil and the voltage divider mods, the parasitic drain is extremely low, has a great lockout feature, and fully configurable modes. I found I had to raise the PWM value for moon mode to 5. 4 makes the LED's glow actually, but way too low for any use at all.
I should be getting in a UCLp in a couple days. Might just add a indicator LED using a light pipe, and see if I can reduce resistance, maybe by shortening up the wires, not sure yet.
For now, on SAM 30Q BT's @4.21v, 14.66A measured a the tail using a clamp meter (18 AWG loop built into the end cap), got:
lumens: 5134 @start, 4910 @30 secs, 41.4 kcd measured at 5m
This uses 4 U3 3D's, 1 U4 1C in the center. The UCLp should bump it about 5% or so.
Cool mod
Love the soldering Tom. You do amazing work in more ways than one.
Awesome work there, Tom!
Thanks! I’m very curious though on the loss’s of amps though, so may do some more testing/mods.
14.66A is 2.93A per LED, 3.665A per cell, and getting bout 1,000 lumens per LED, seems little low for U3/U4’s. At 2.9A per LED, Vf should be fairly low for fresh cells.
The stock driver is 31 x 0.380, so 11.78A, plus 18 * 0.350 is actually 18.18A. Could be the wiring, but maybe also something in the ground path.