The top edge only - all the tracing is on the top of an MCPCB. Not sure how you can scrape one layer without damaging the other - this stuff is really, really thin. If you could that would do the trick though.
Carefully, go about it gently, and all will be well. Too easy to get carried away with a drill bit in a drill, use the drill bit by hand and simply twist it to bevel the masking layer, this moves the live edges of trace copper away from the edge. ![]()
Does that really solve anything? Don’t you still have the exposed end of a trace right next to the copper base underneath? Or is the issue just the fraying left by the drill?
It’s not gonna jump the gap. As long as it’s not touching……have you ever looked at the components on the driver? Some are a hair away from others!
In the center of the board where the wires come through on a Quad copper star, it’s not a critical area. You could use bare wires to hook it all up, as long as they don’t touch each other. The polycarbonate optic isn’t going to short it.
It’s easiest to cut a bevel, that’s why DBCstm suggested it. An X-ACTO knife or oversided drill bit or whatever tool you want. Anything which puts a cutting surface at an angle and then presses that against the ‘problem area’. Draw the stackup on a sheet of paper (copper based, dielectric, copper traces, solder mask, silkscreen) and then draw a diagonal line through it. You’ll easily see how a bevel predictably increases the separation between exposed conductive surfaces at an edge (vs a perpendicular cut).
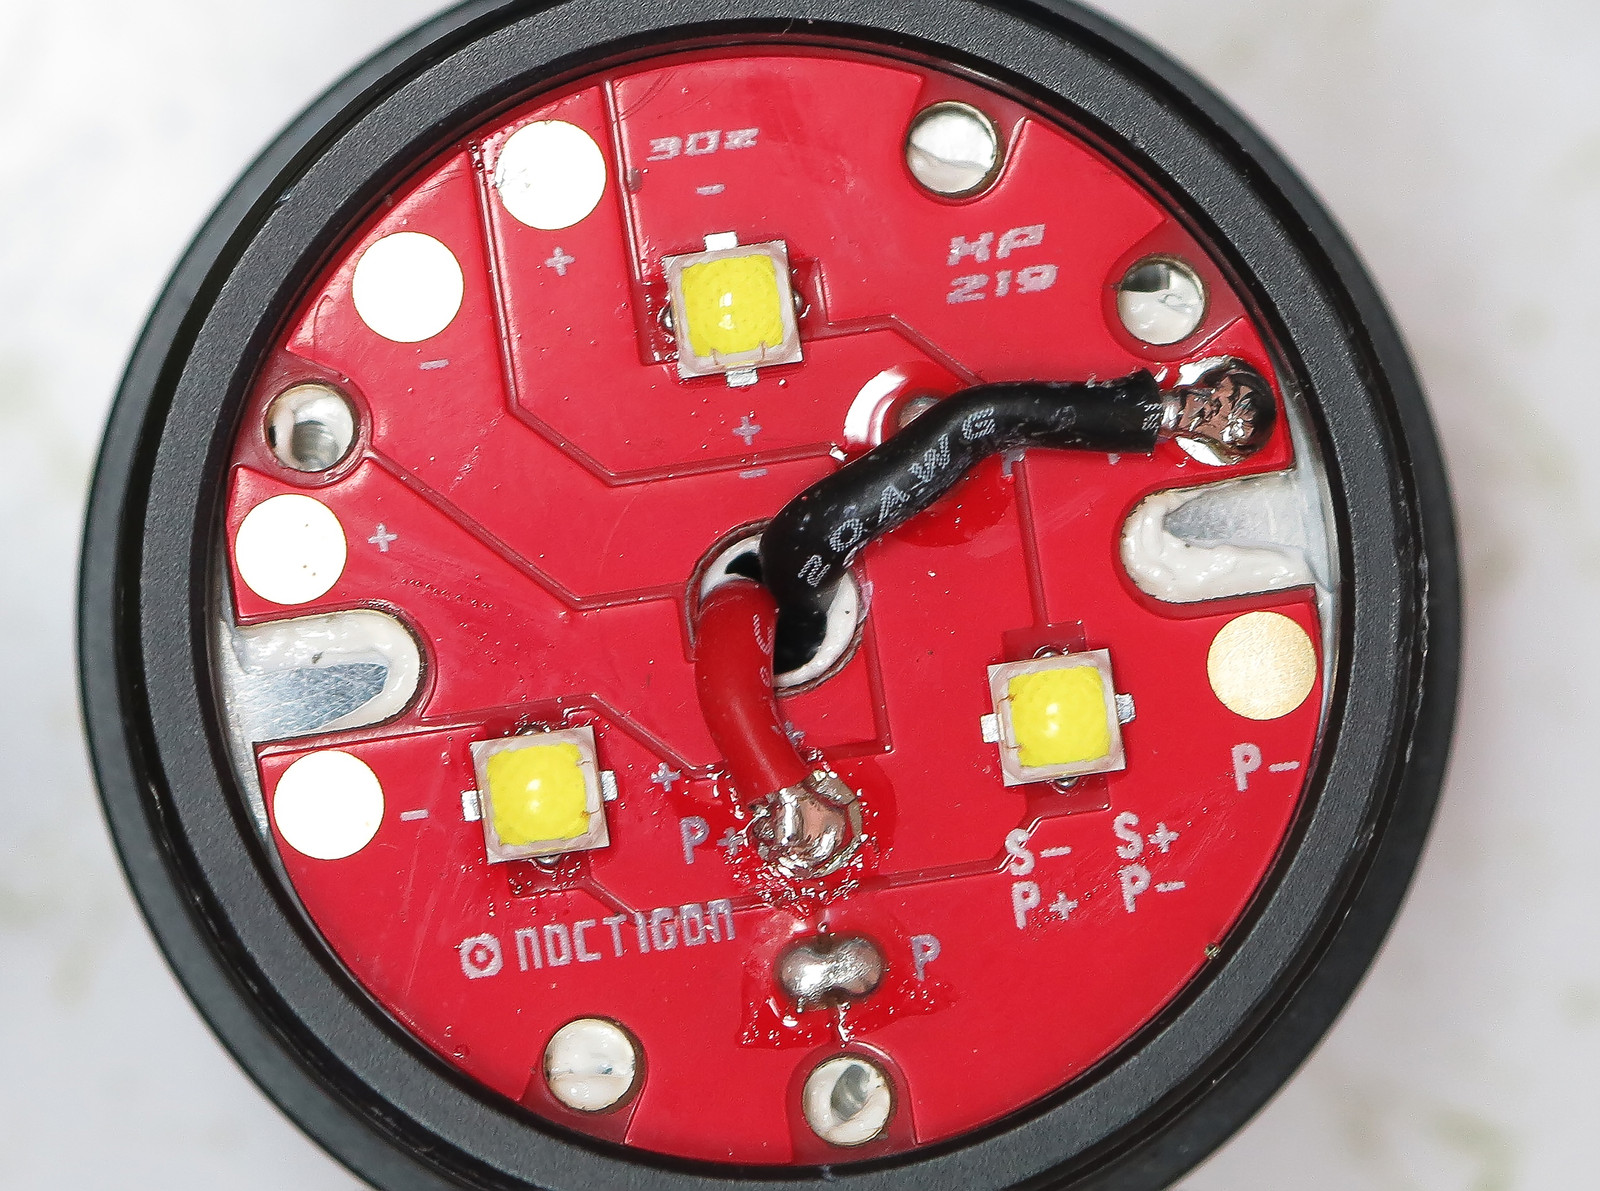
On this one, the trace that I’ve drilled is not one that will be used. I stayed clear of the live traces by the slightest margin…
This quad was done and re-done and done again, got a bit sloppy after a few times around…

Thanks dale, pictures help me a lot. That 32mm board looks really clean. What size bits did you use?
The quad started out that way, but got moved around a couple of times. lol
Edit: Didn’t answer the question…I use the smallest bit that cuts and step up. I found a Ryobi drill bit set at Home Depot for $10. ![]()
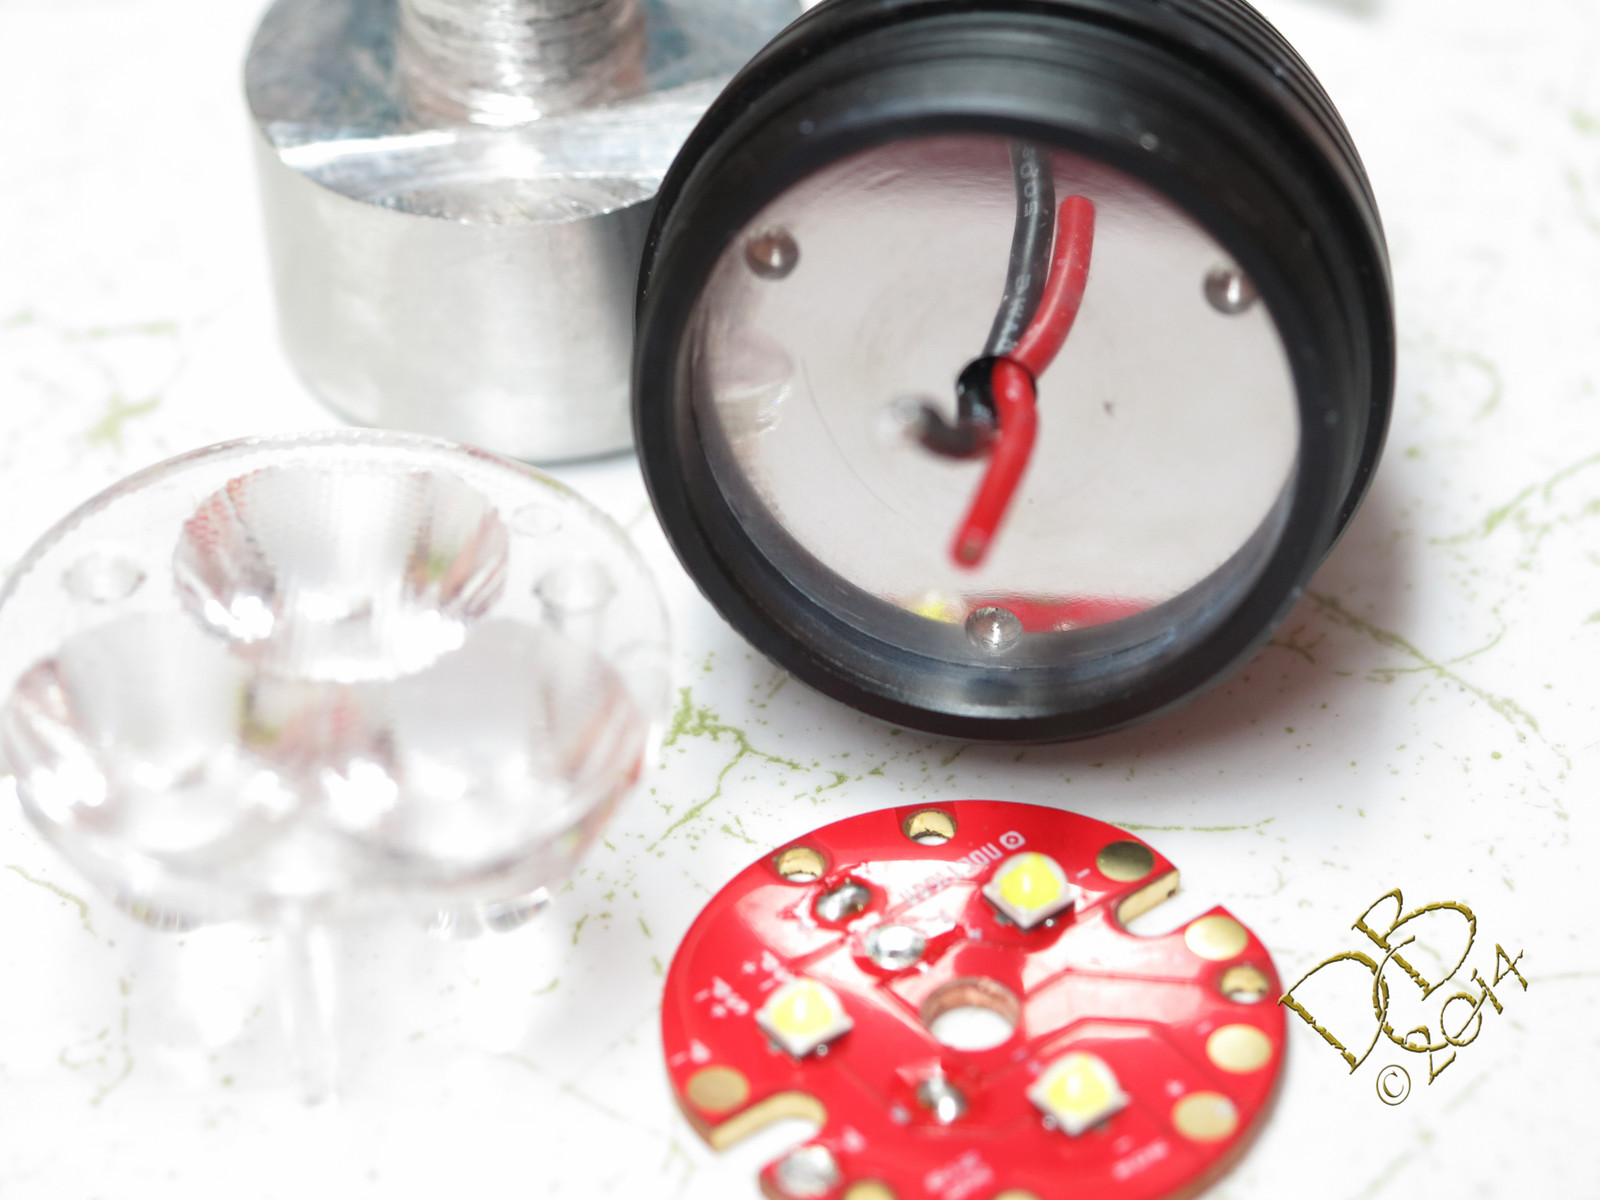
What you can’t really tell on that 32mm is that I also drilled through the optic mount holes into the aluminum spacer/sink. The CUTE-3 optic has the legs a little long, they come through the Noctigon. By allowing them to sit into the spacer underneath, it won’t spin and damage the emitters when tightening the bezel. ![]() On this one, I kept the spacer a very slight amount large and drove it in with a hammer and a block of wood. It’s snug, not going to turn, the wires are safe.
On this one, I kept the spacer a very slight amount large and drove it in with a hammer and a block of wood. It’s snug, not going to turn, the wires are safe. ![]()
Good to know.
I’m going to reference that picture when I reflow my emitters as well. It clearly shows the bond wire orientation. thanks.
Question: since you drilled out the leg holes for the optics, is there any pressure pushing the mcpcb to the heatsink?
The legs are thicker above the mcpcb, stepped down to go through the star. So the pressure is the same.
Edit: To clarify, I didn’t drill the mcpcb any larger, simply used it to mark the sink, then removed it and drilled the sink for that leg to clear. The relationship between the optic and mcpcb is the same.


I see. I didn’t realize the optic legs were stepped. thanks for clearing that up
As far as I know, they all are. These are designed to be glued to the mcpcb. There are others that have a housing or mount, those have no legs at all.
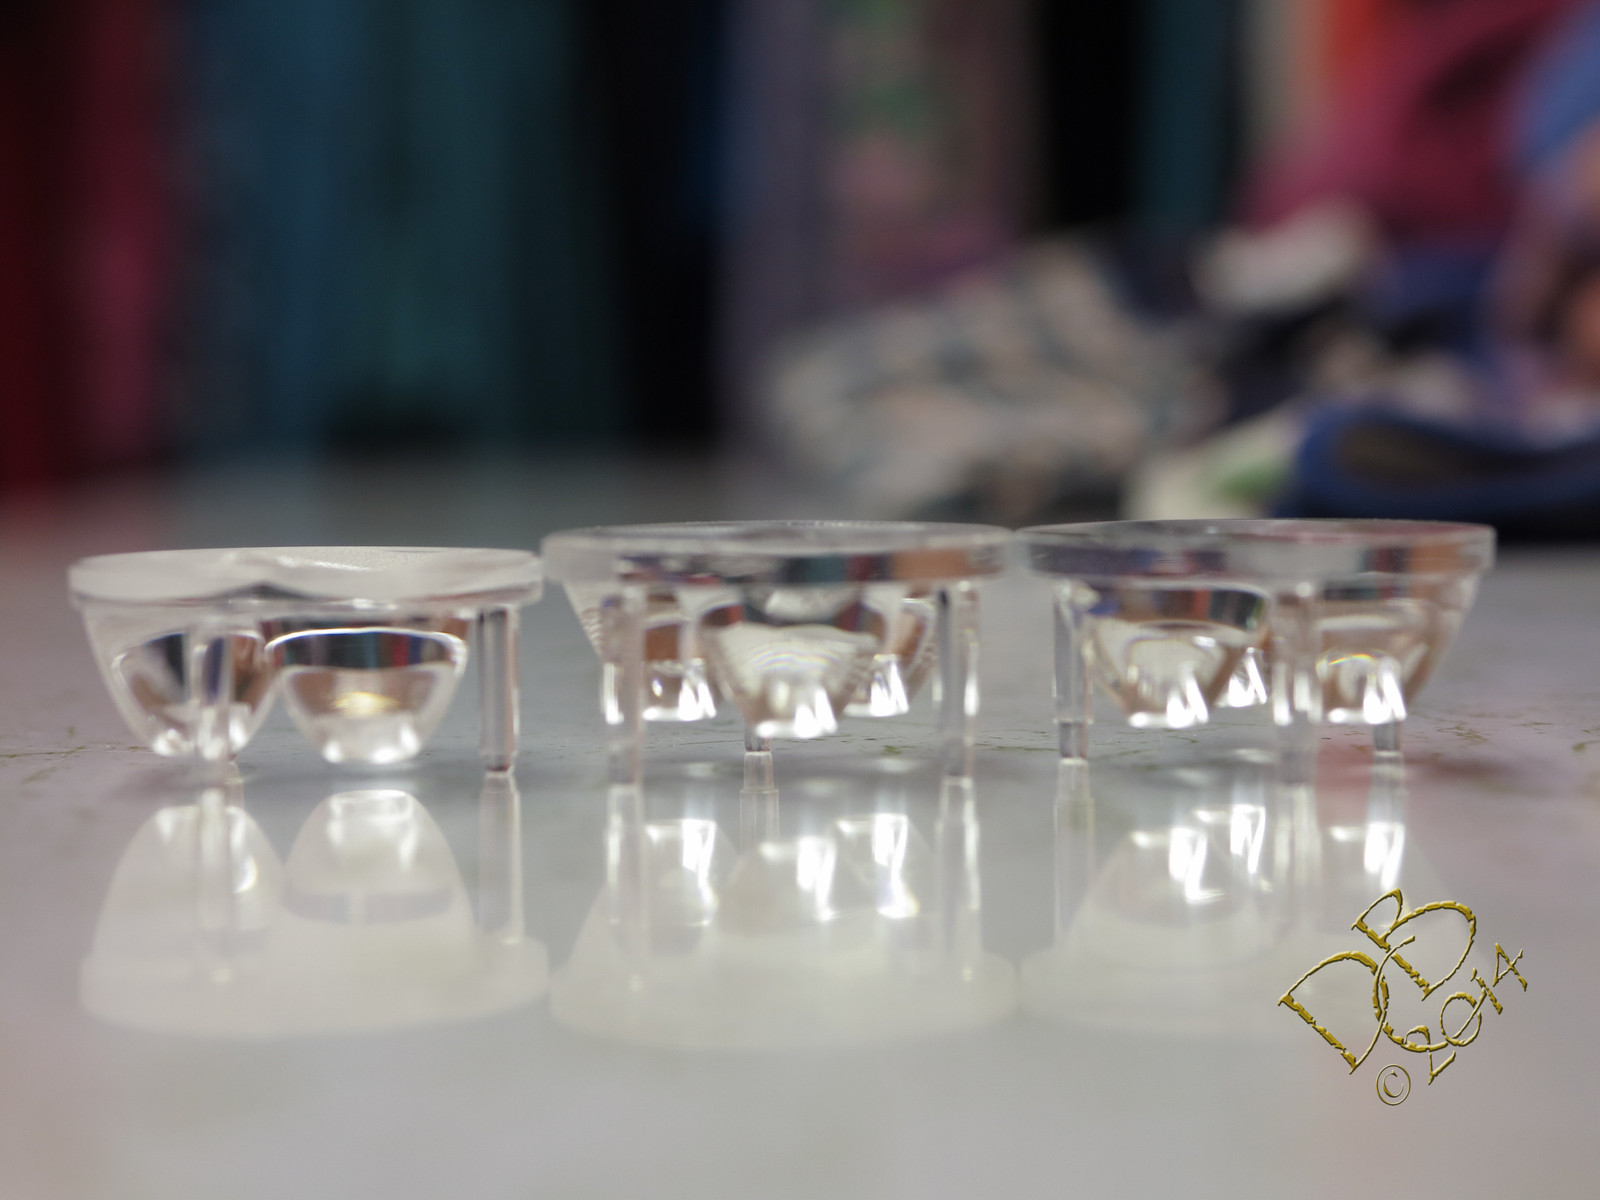
Notice the Wide angle variant on the left, the leg below the step is shorter. The two 10754 on the right have the longer part that goes all the way through the mcpcb and then some. At first I sanded those off, then I realized they could be used to protect the wires and emitters. ![]()
Hank your leds are done and reflowed and tested, going to go clean up some of the solder and clean around the board :) the other is working perfect as well


Nice! Are the copper spacers ready soon?
he said at the end of this week, the Quads will be last to be made since i did not order large enough copper to have them made :(
are there any identifying marks between the narrow and wide versions? I ordered the narrow spot, but I just noticed the legs on the on I received are short like your wide optic. Maybe its just variation between batches?
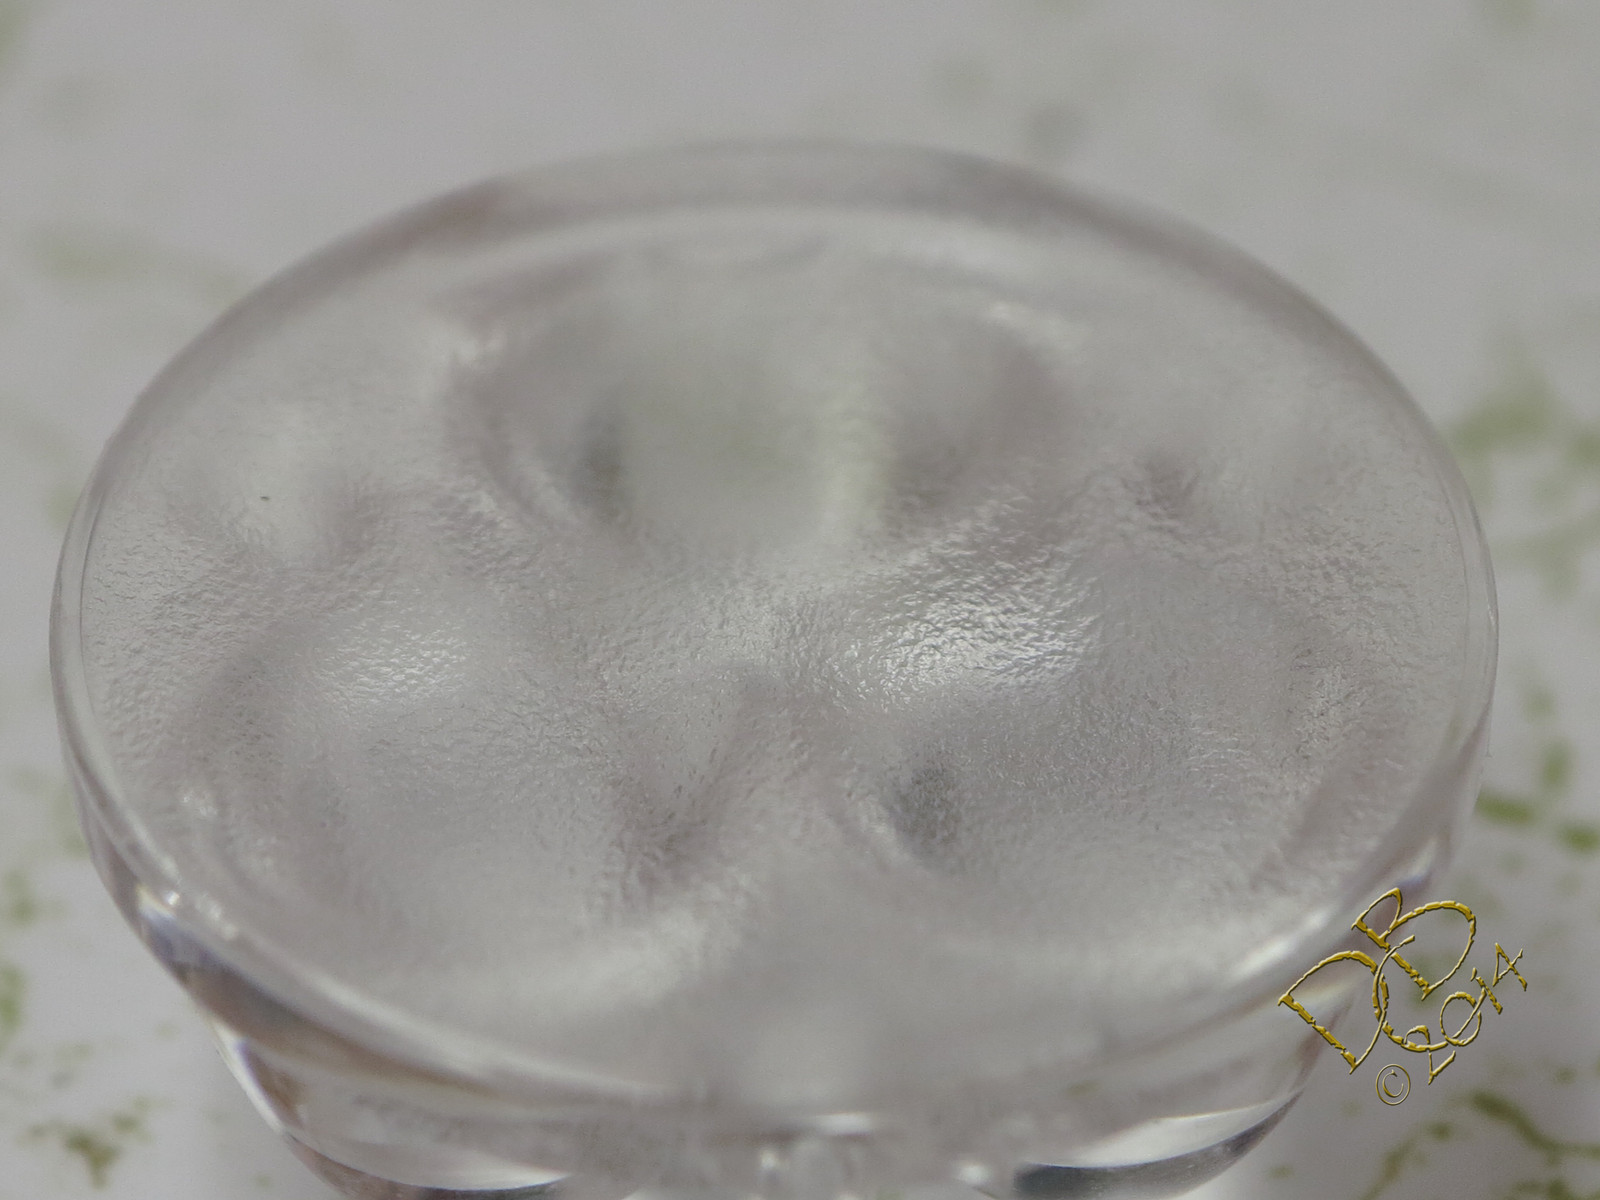
The stippling on the optic face is much heavier on the wide optic and that face is much thinner than on either the medium or spot optics.
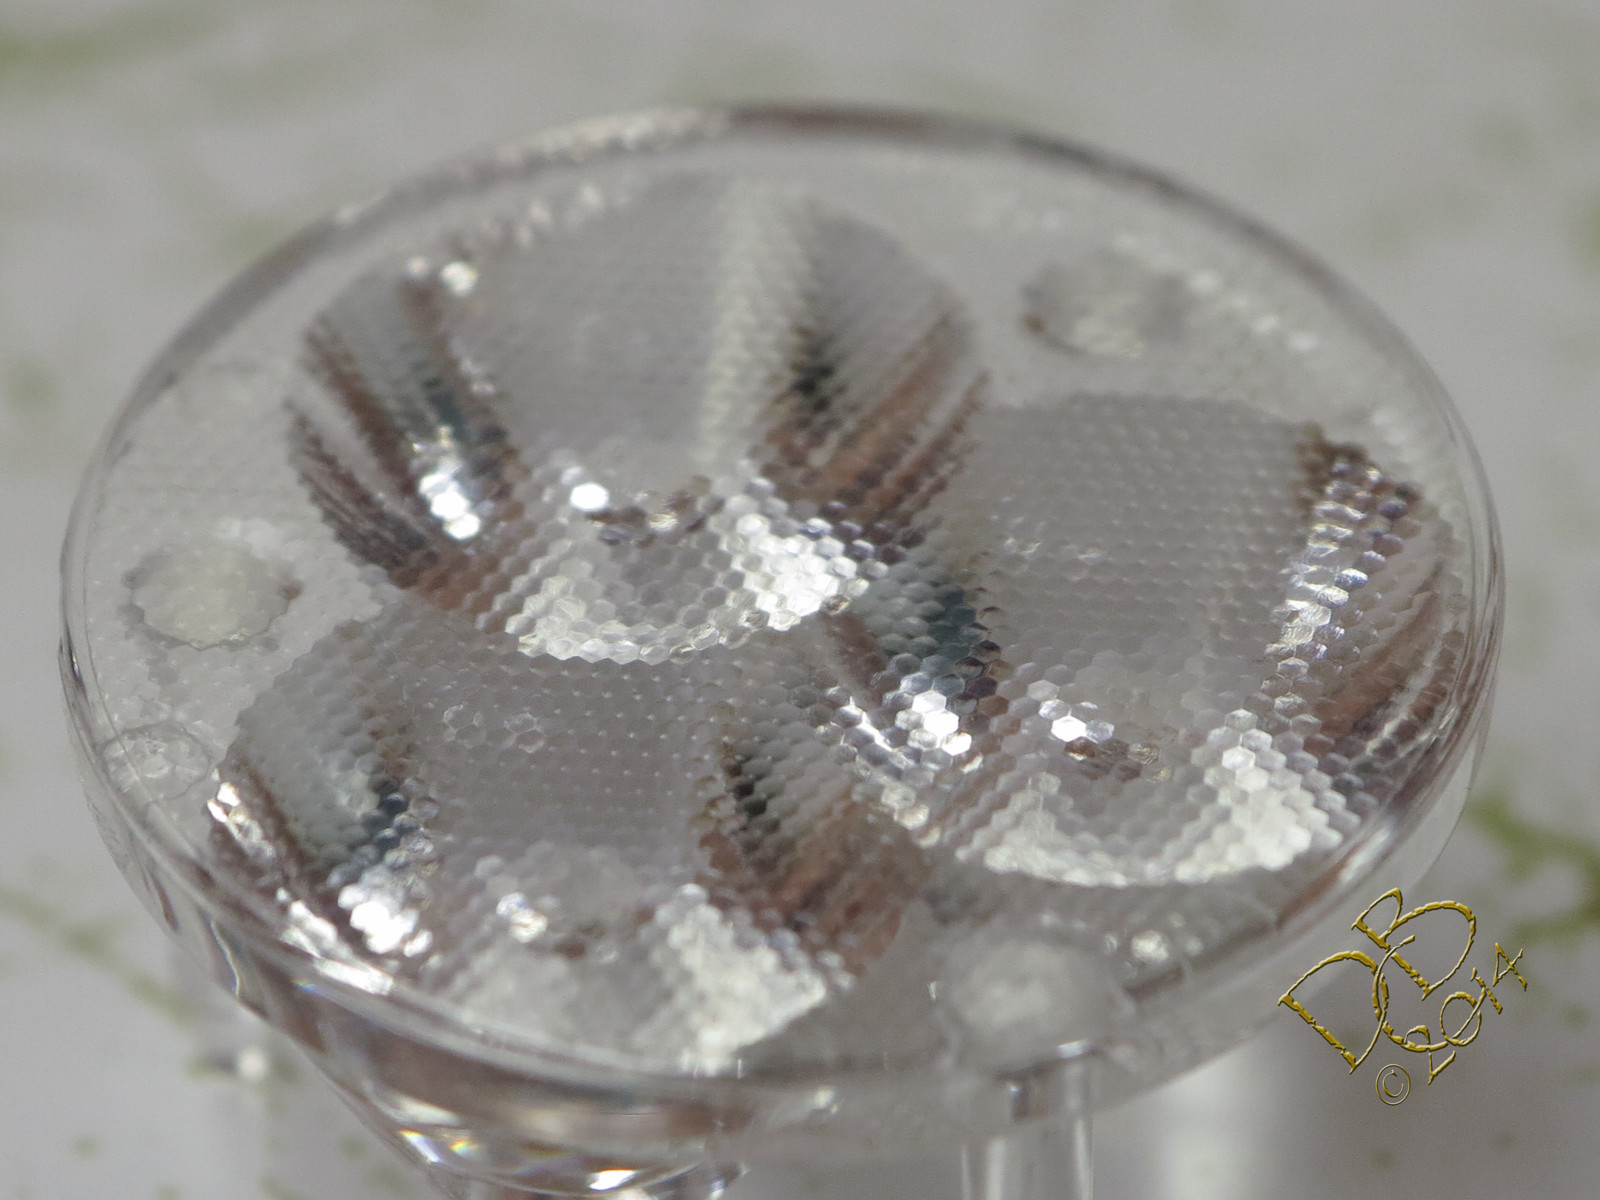
The spot optics are flat across the top, with a honeycomb pattern that serves as the diffusion. The Wide has a shark skin look to it, with dimples in the middle of each TIR (a low spot in the middle) I’m not sure why there are differences as they’re the same family or model number series.
Soft spot…
Wide…
Ok thanks. Mine is definitely the spot, but also definitely short-legged