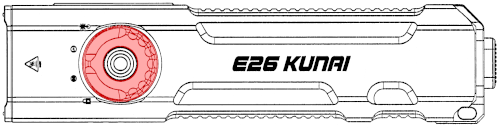
You don’t hear much about JETBeam. That’s a shame, because the long-established company has some interesting flashlights in its portfolio. The new JETBeam E26 (“Kunai”) has just been released.
The E26 was announced a few months ago via a Kickstarter campaign and was successfully funded after just one day. I had the opportunity to test the flashlight before it was officially shipped.
You can find the German version of this review on my website: SammysHP Blog › JETBeam E26
![]()
I got this flashlight from flashlightgo for free in return for a review. Thank you very much!
Overview of hardware
For about two years now, flashlight manufacturers experiment with larger flashlights with a flat instead of a round body. Examples include the Olight Arkfeld (Pro), Nitecore EDC27 and the Wurkkos HD01. Now the JETBeam E26 has joined them.
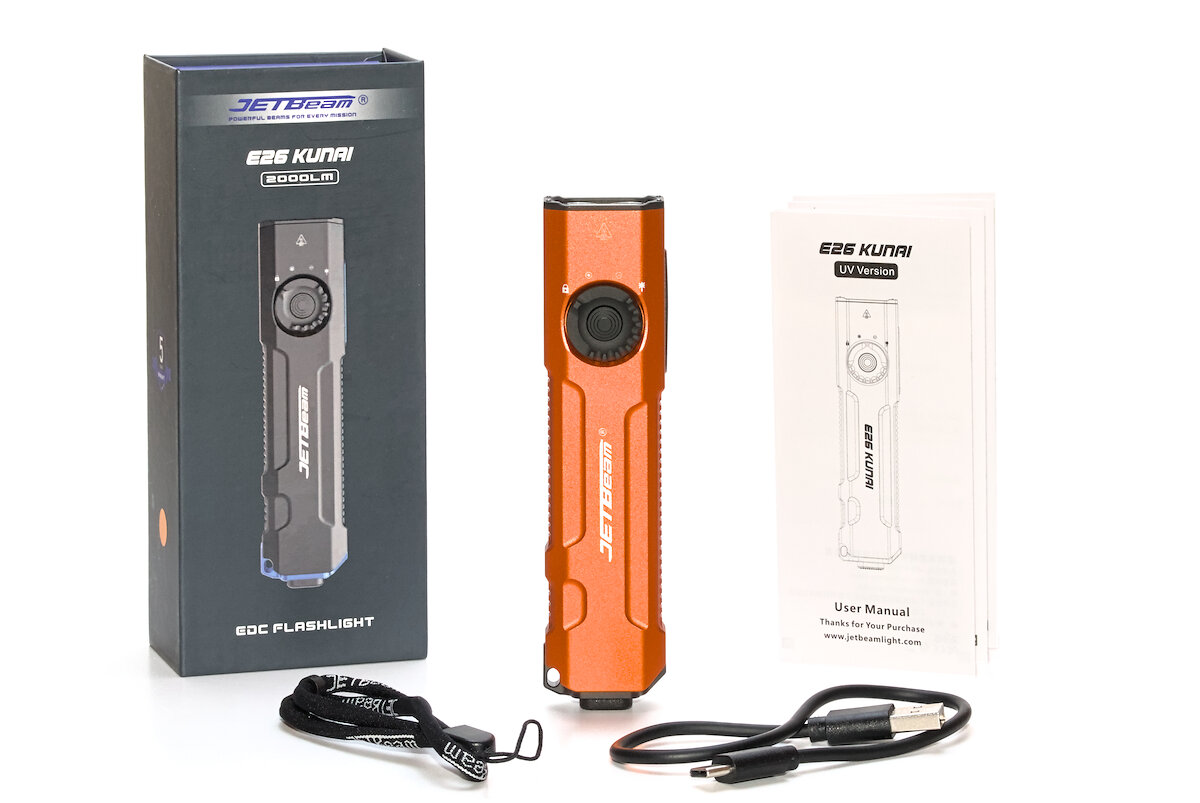
Due to the monolithic design, there are only a few accessories – apart from the flashlight itself – in the sturdy packaging with magnetic door:
- Lanyard
- USB-C charging cable
- Manual (EN, CN)
The battery is integrated, the clip already attached and there is no need for replacement seals as everything is screwed together. The instructions are comprehensive and easy to understand.
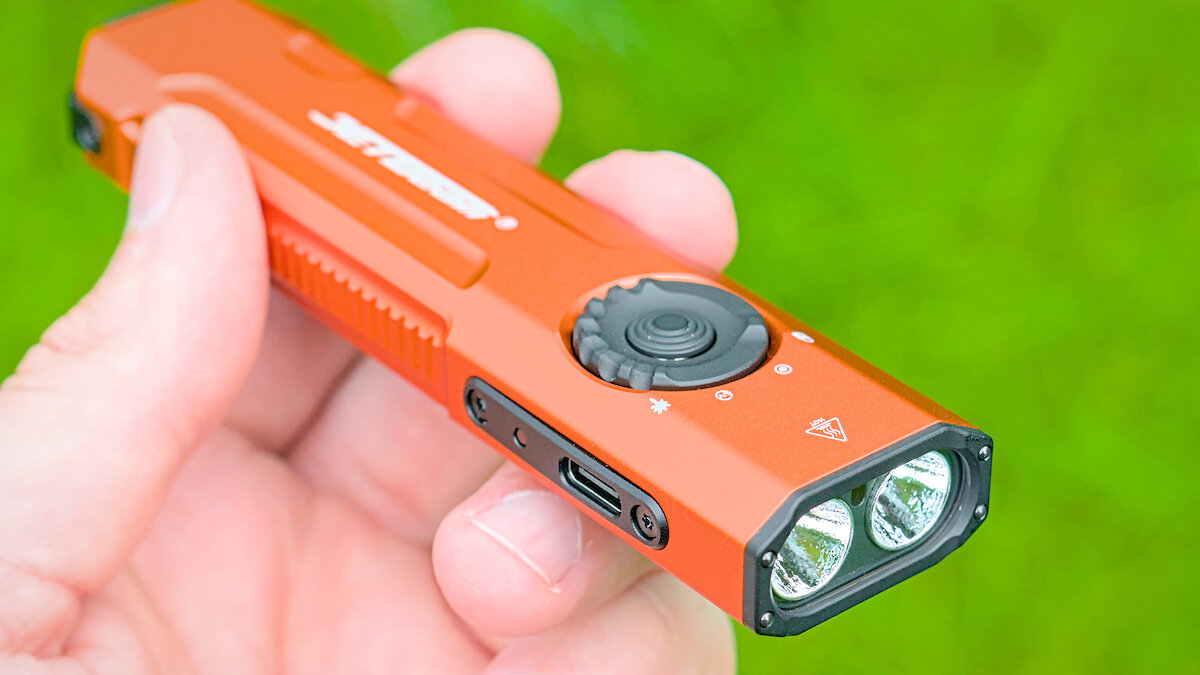
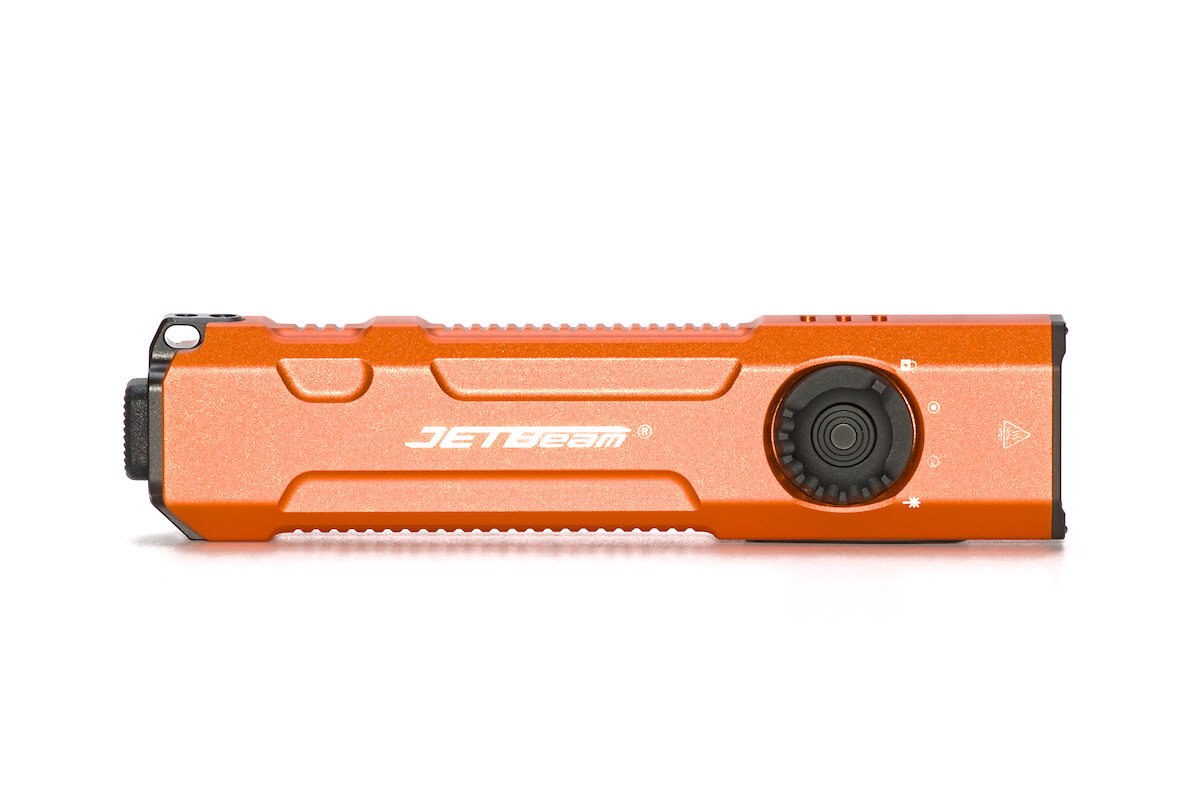
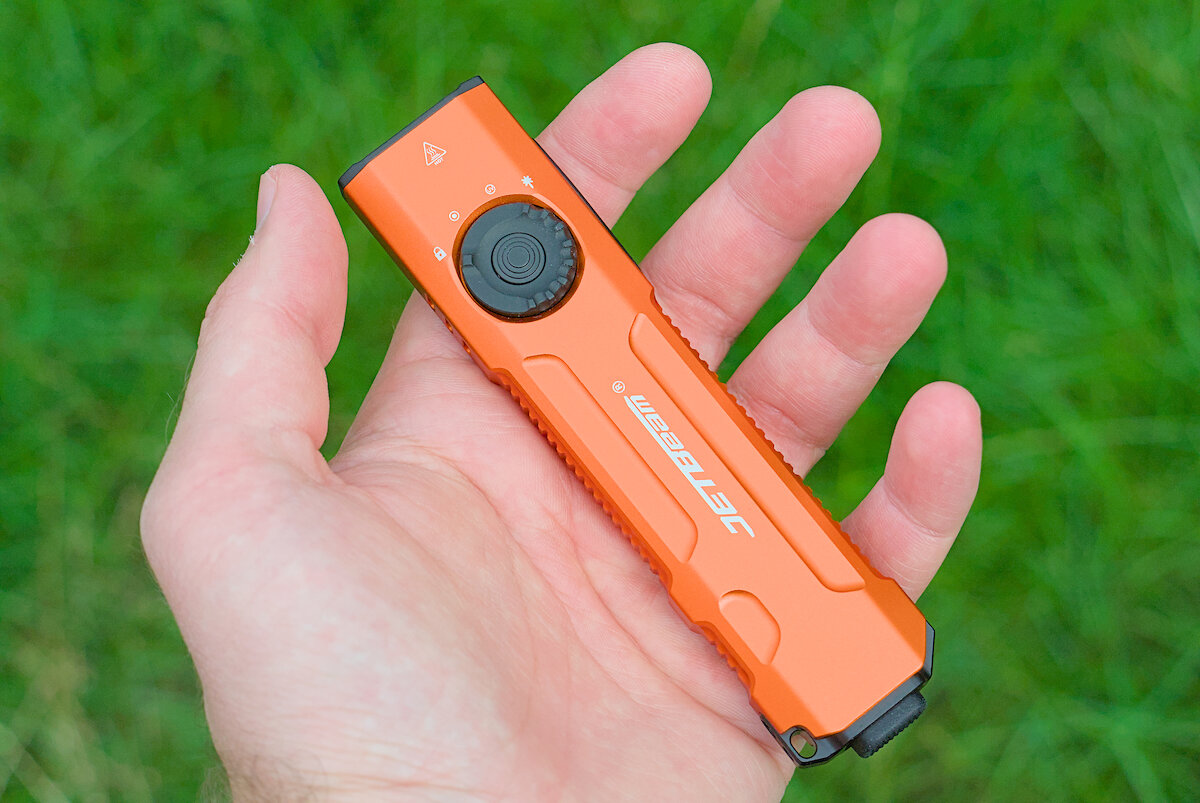
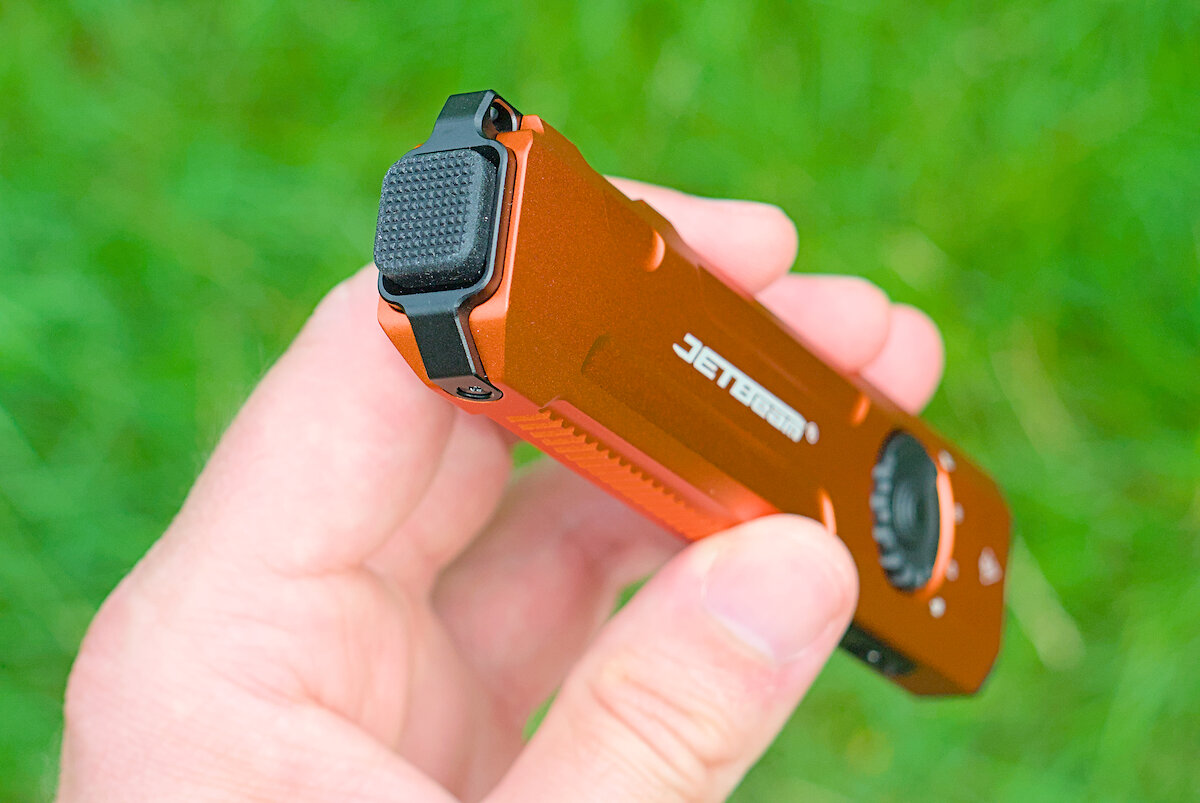
The main feature of the E26 is the flat, rectangular shape with a size of around 16 × 31 × 131 mm. Flashlights with a classic round body tend to be bulky in a pocket. If such a flashlight is “flattened”, it becomes slightly wider, but also flatter and therefore fits more comfortably in your pocket. It weighs 115 g with clip and (non-removable) battery.
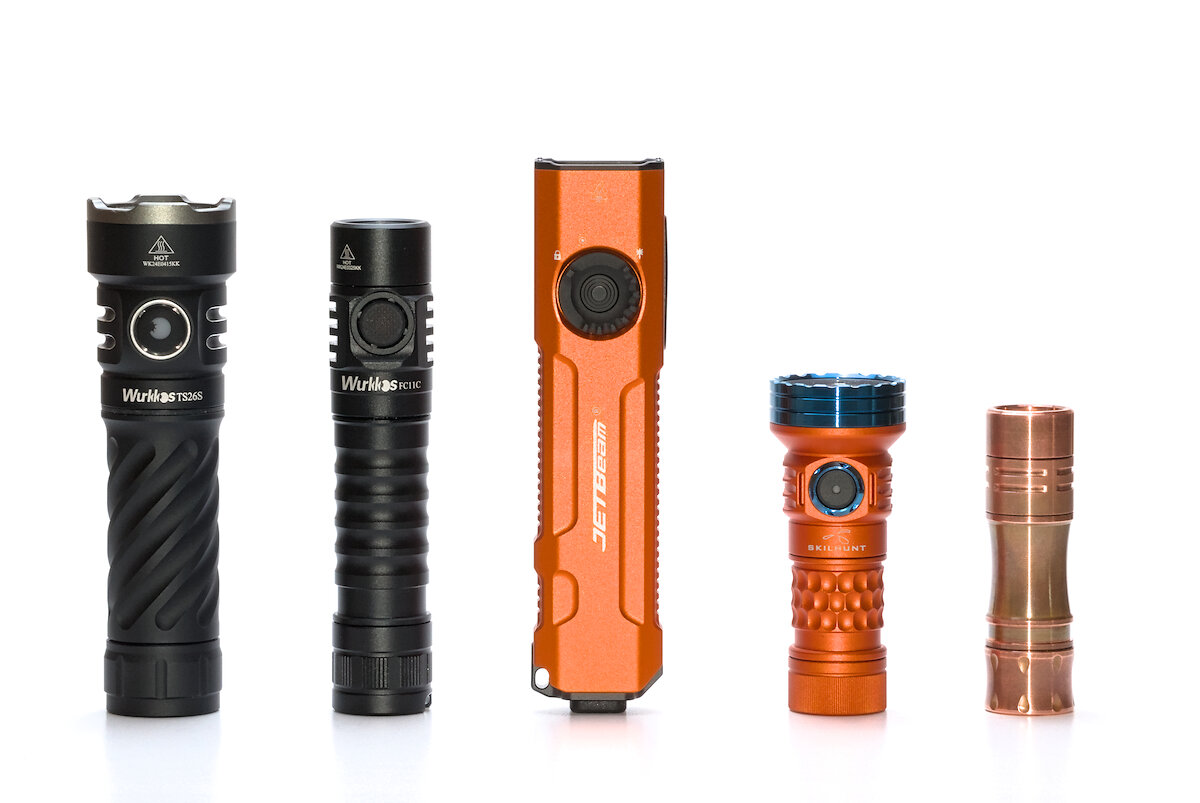
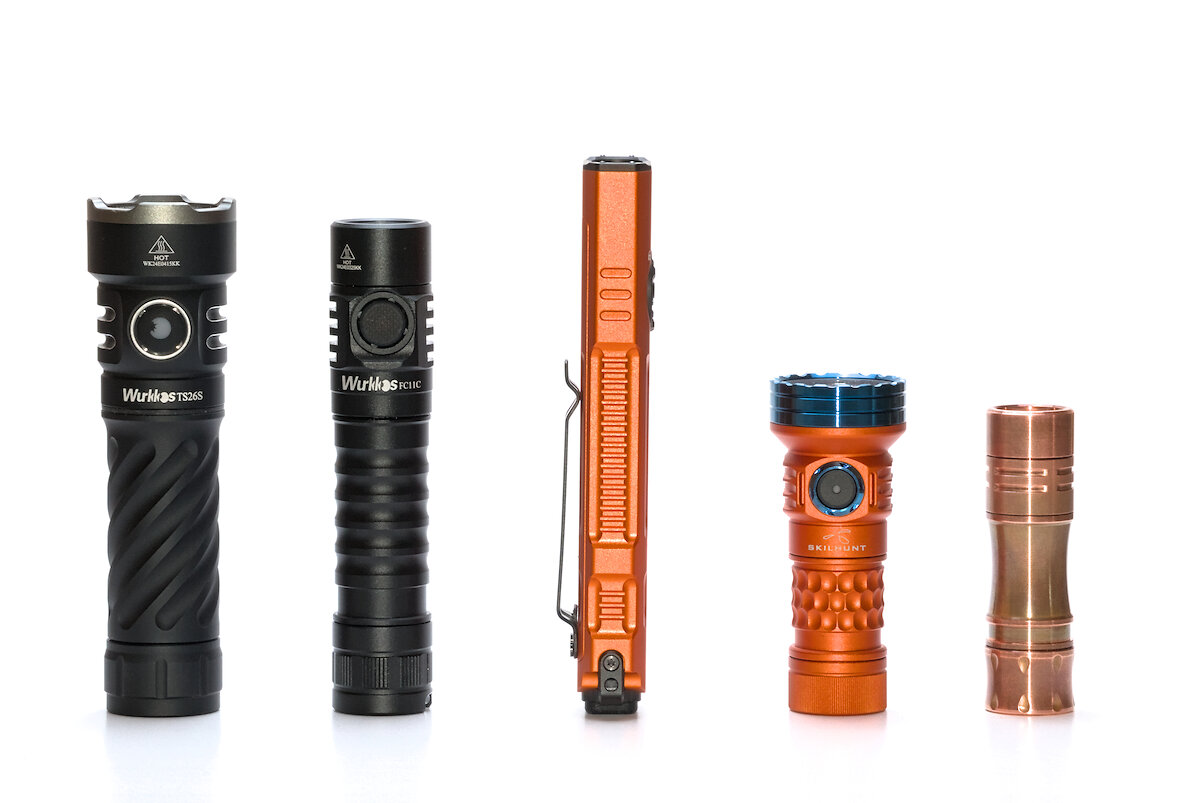
Wurkkos TS26S | Wurkkos FC11C | JETBeam E26 | Skilhunt MiX-7 | Wurkkos TS10
As an EDC flashlight, I’d prefer if the E26 was a little shorter. The battery is specified with 1700 mAh – just a third of a 21700 battery with 5000 mAh like in the TS26S. The advantage is clearly the flat design and the resulting improved carrying comfort.
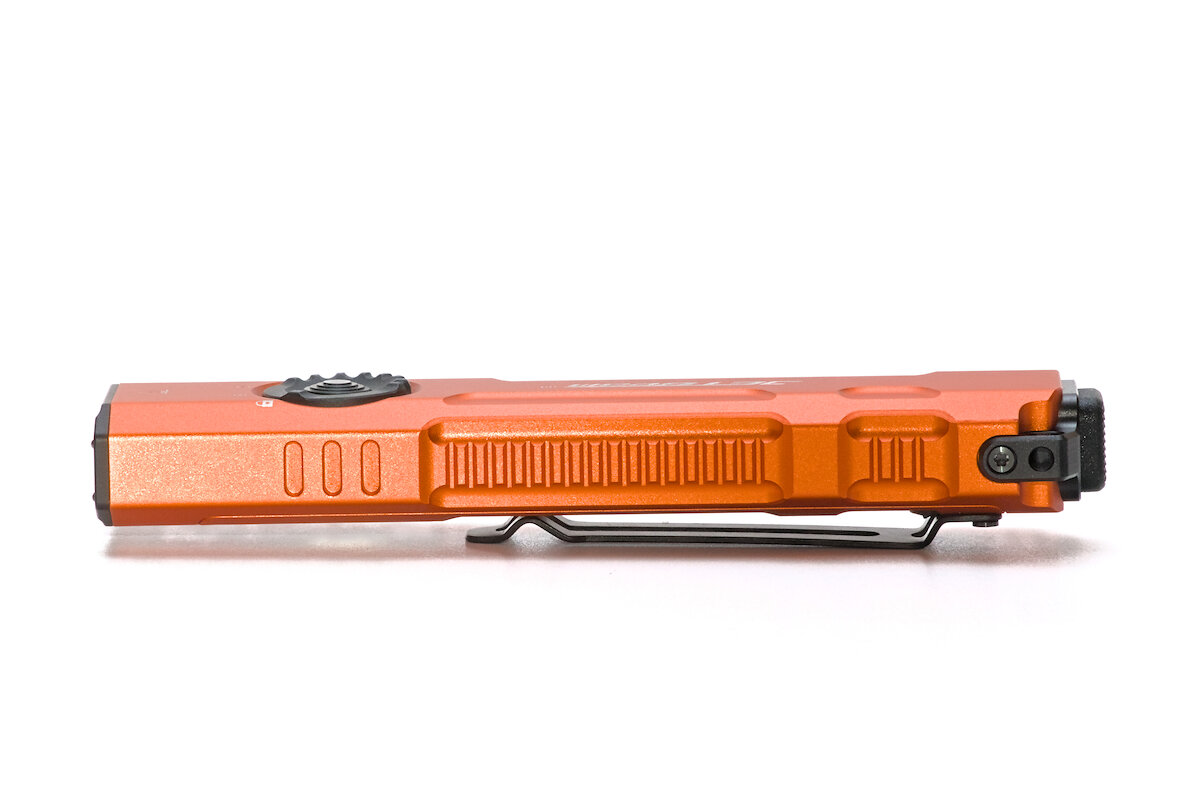
The EDC sector seemingly likes angular, partly asymmetrical designs with plenty of cut-outs for some time now.
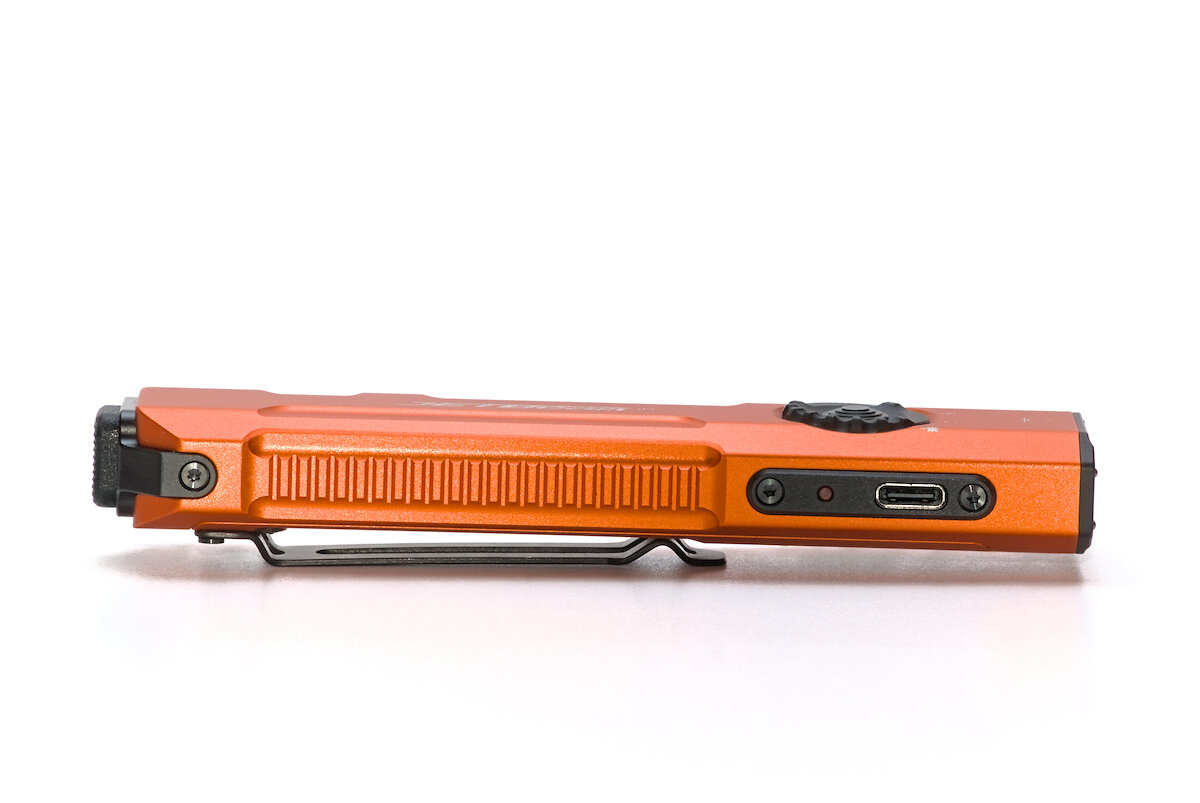
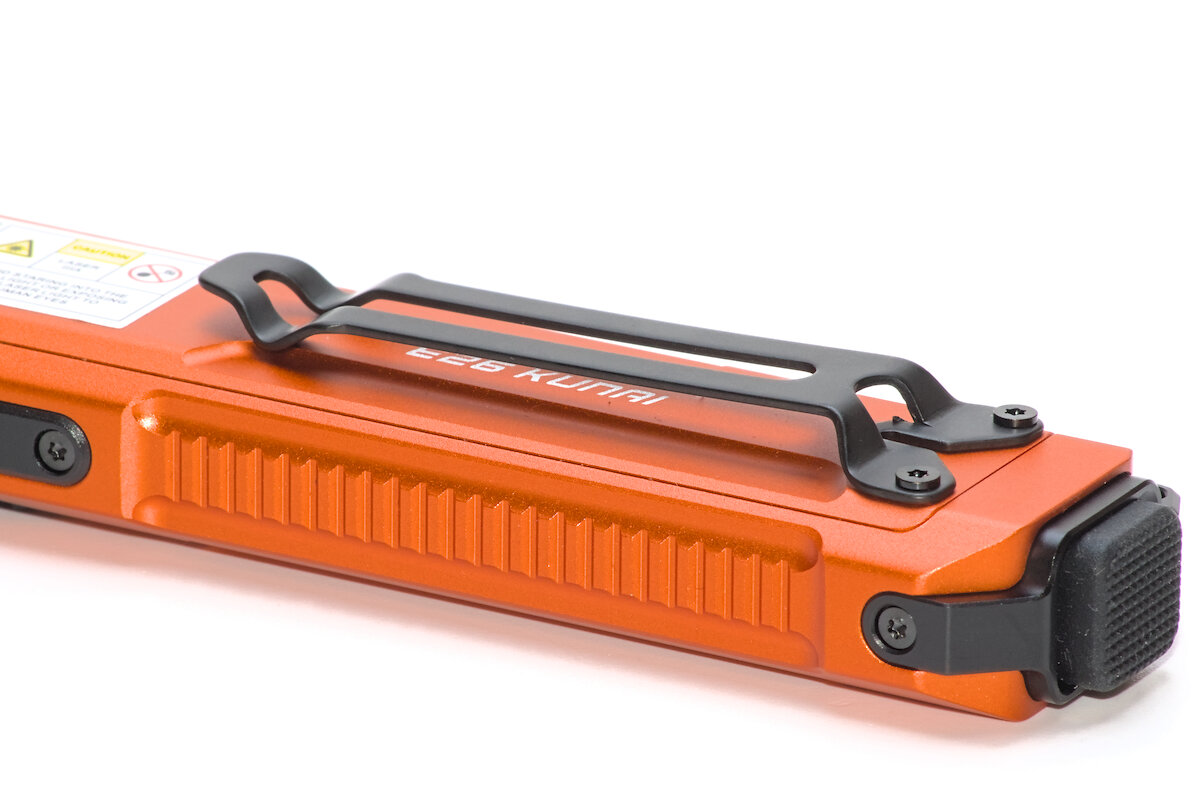
The ribs on the sides improve the grip of the otherwise rather smooth case. Overall, the flashlight is very comfortable to hold.
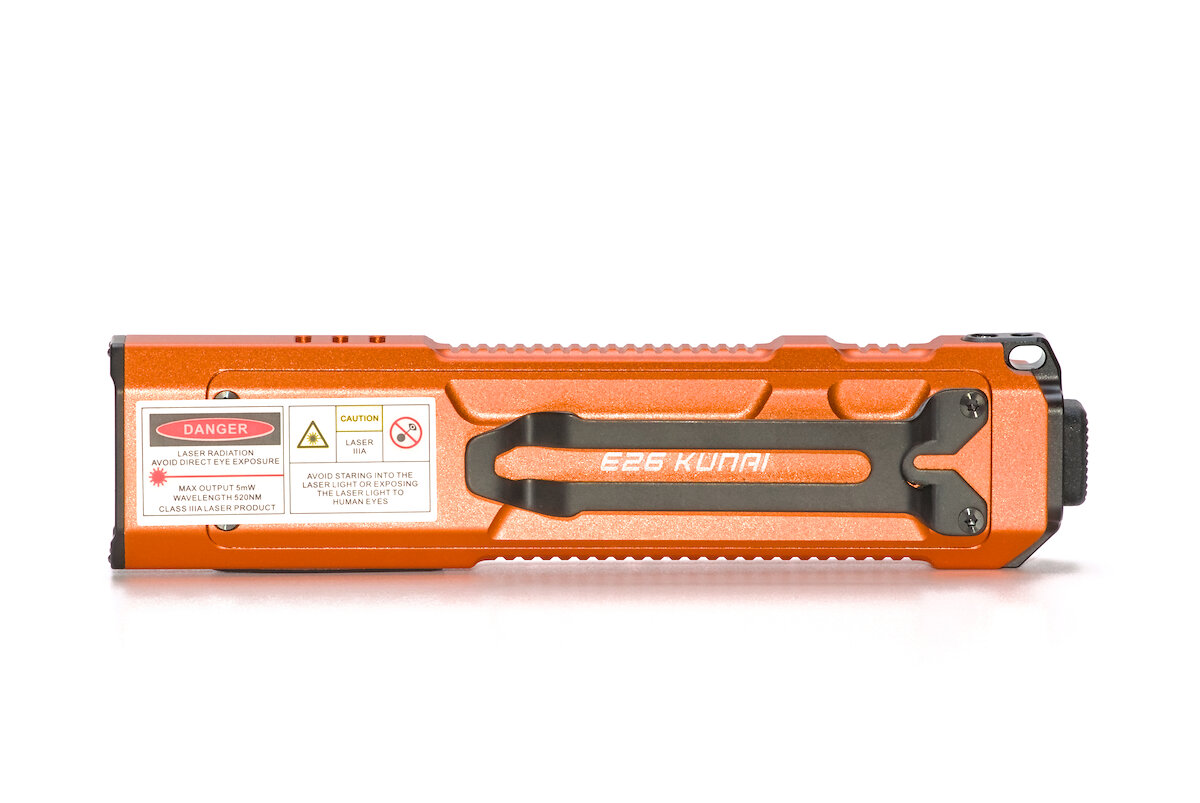
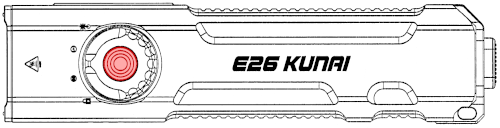
There is a label on the back indicating the laser class. This sticker covers the serial number and CE marking and can be removed without leaving any residue.
Currently three colors are available: black, green and orange. The green and orange versions come with black accentuated parts around the USB port and the rear switch, while the black version uses blue. A white version was originally announced, but does not yet appear to be available.
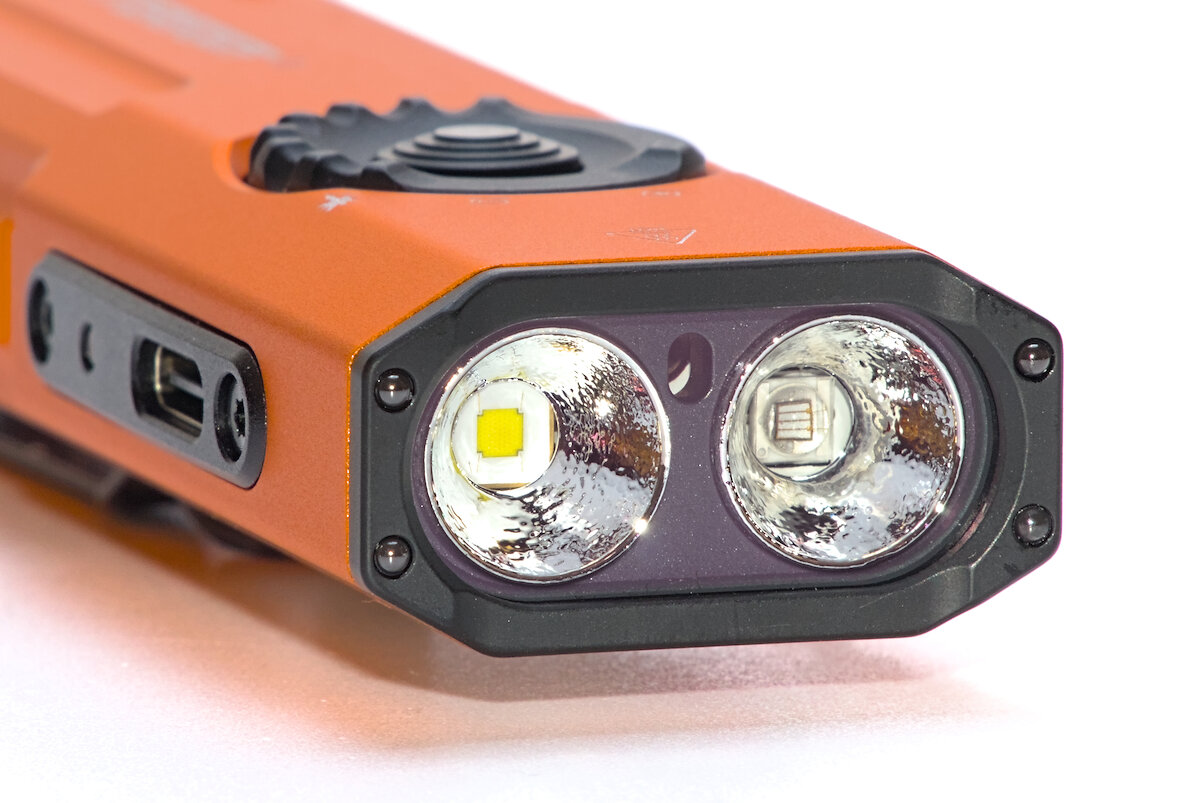
Four “zirconium” spheres are integrated into the bezel to act as a glass breaker. The bezel is one of the few parts that are not fastened with screws. This could make it more difficult to replace the emitter.
As shown in some of the pictures above, tailstand is also possible with some care. The flashlight stands on the flat switch cover, but tips over easily. The rectangular shape naturally prevents it from rolling away.
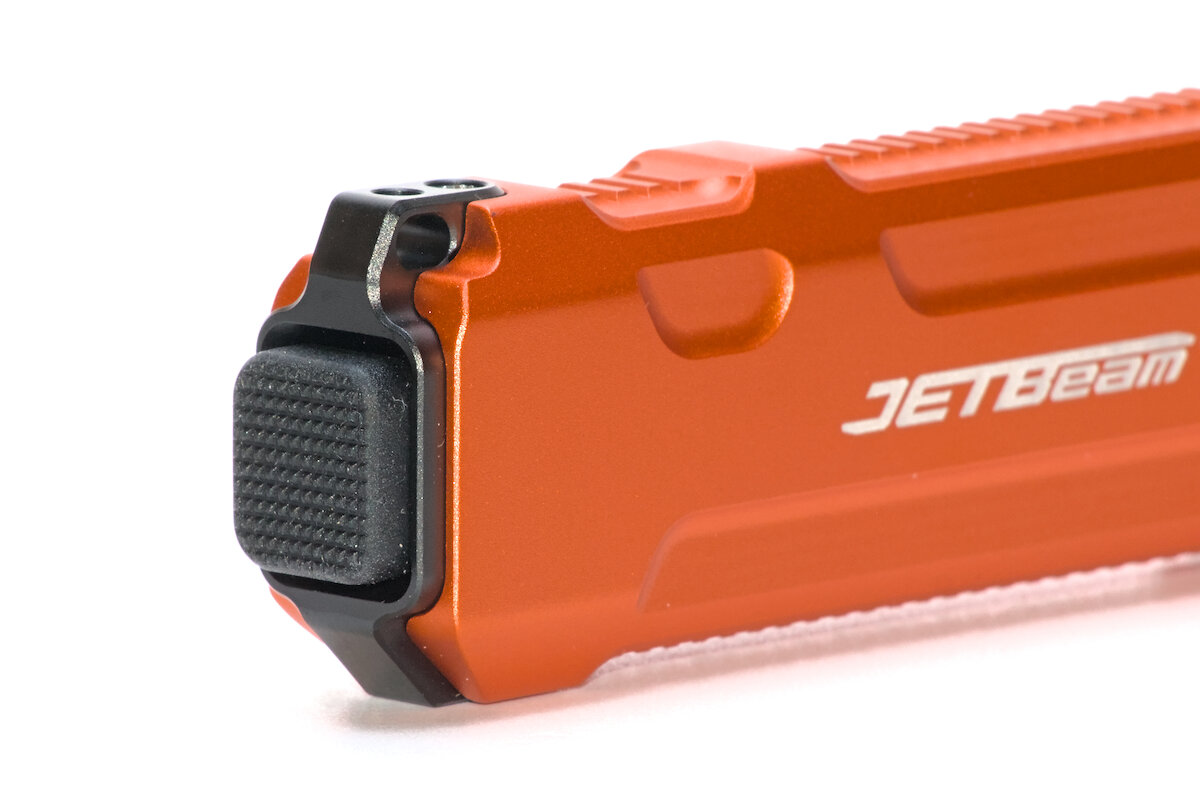
A mode selector switch and a button are located at the front. Another switch is located at the rear. Right next to it is an attachment loop for a wrist strap.
The clip on the back works as you would expect. The flashlight does not disappear completely into the pocket, but the protruding part does not get in the way.
If desired, the clip can be easily removed by unscrewing the two M2 screws with T6 drive. The clip can then either be turned around and attached to the front part of the flashlight or the flashlight can be used without the clip. In this case, however, the original M2x8 screws are about two millimeters too long. It would be nice if JETBeam supplied suitable screws.
On my example, there was a small spike on the clip left over from cutting. However, it could simply be filed off.
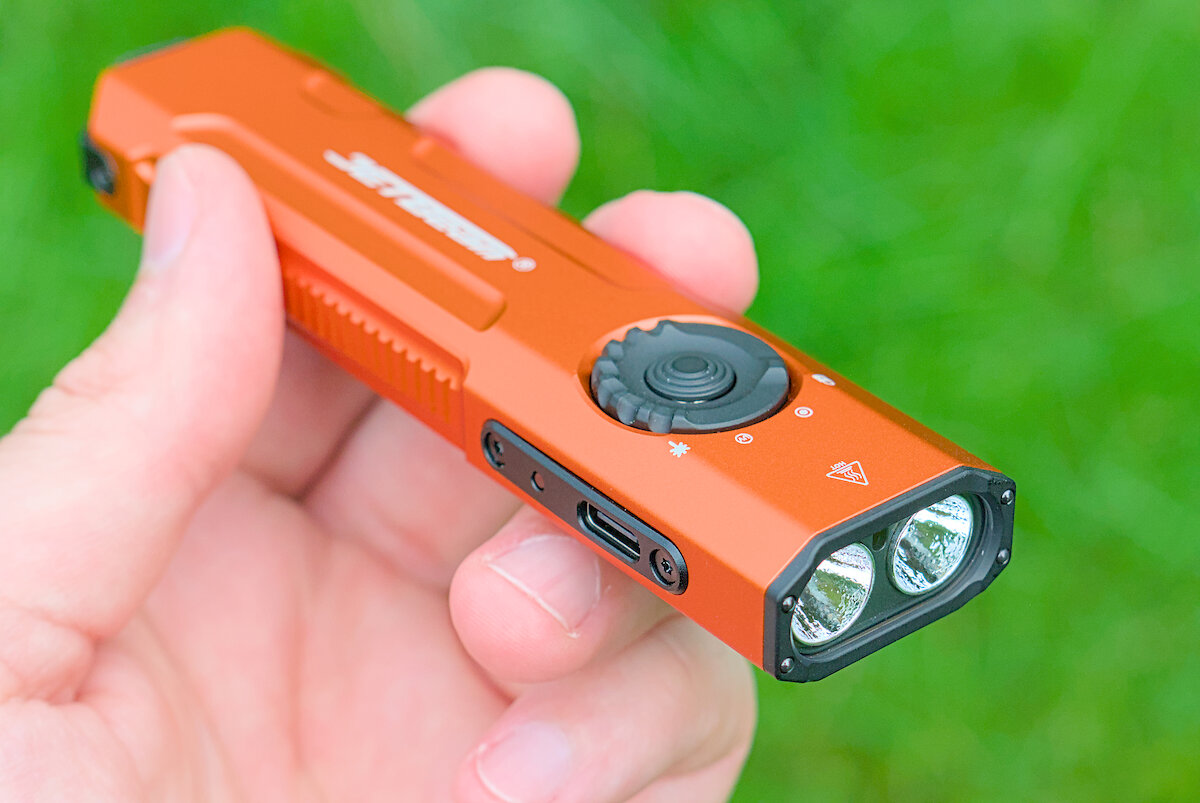
The USB-C port for charging the flashlight is located at the front on the side. There is no cover to protect it against water and dirt. However, the E26 claims to be water-protected according to IPX8 (water depth of 2 m). The port should therefore be sealed internally and only needs to be sufficiently dried before use.
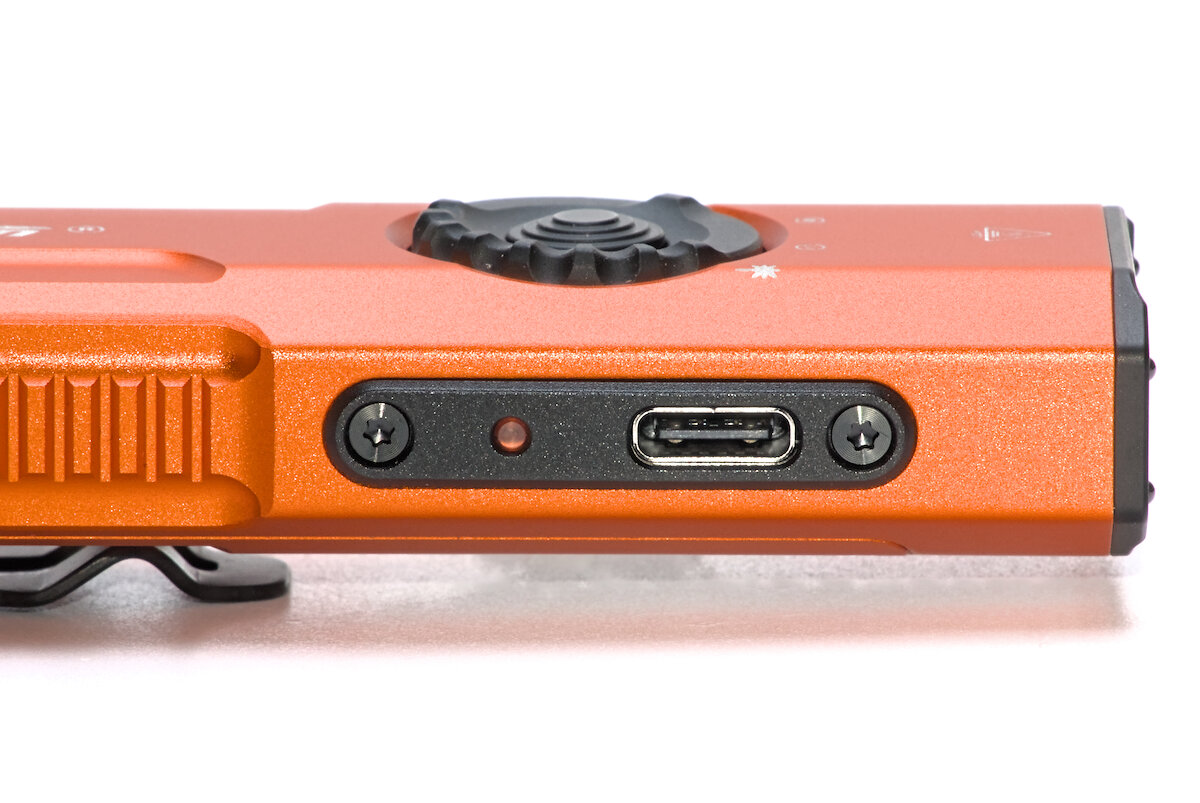
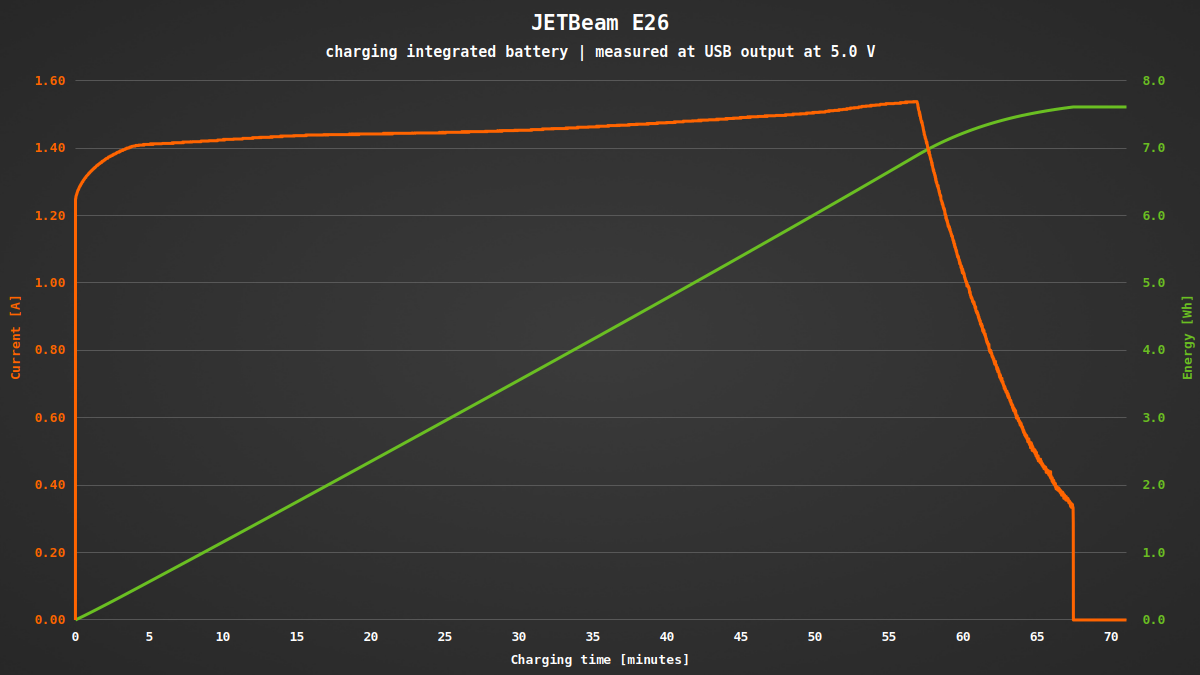
Although the connection is labeled as a “Type C quick charging port”, it charges at 5 V with up to 1.5 A. No QC or PD, but fast enough for the battery size. The battery is fully charged after just over an hour. This is important, as you can’t simply swap the battery quickly. While the flashlight is charging, it can still be used as normal.
A status LED next to the USB port flashes red during charging and lights up green when finished. After turning on the flashlight, the indicator LED shows the approximate state of charge of the battery for five seconds. On very low voltage, the indicator will light up in red as long as the light is turned on. An additional level between 35% and 100% would have been useful.
| Color | State of charge |
|---|---|
| Green | 35% – 100% |
| Orange | 15% – 35% |
| Red | < 15% |
There is almost nothing wrong with the build quality. All edges and corners are rounded and the screws are secured with blue “Loctite” (as a generic term). The only flaw is that the bezel around the USB port is slightly warped. The reason for this is the rubber seal of the USB port. As a workaround I have reduced the pressure a little with two 0.2 mm thick plastic washers (the seal should still be tight enough).
User interface
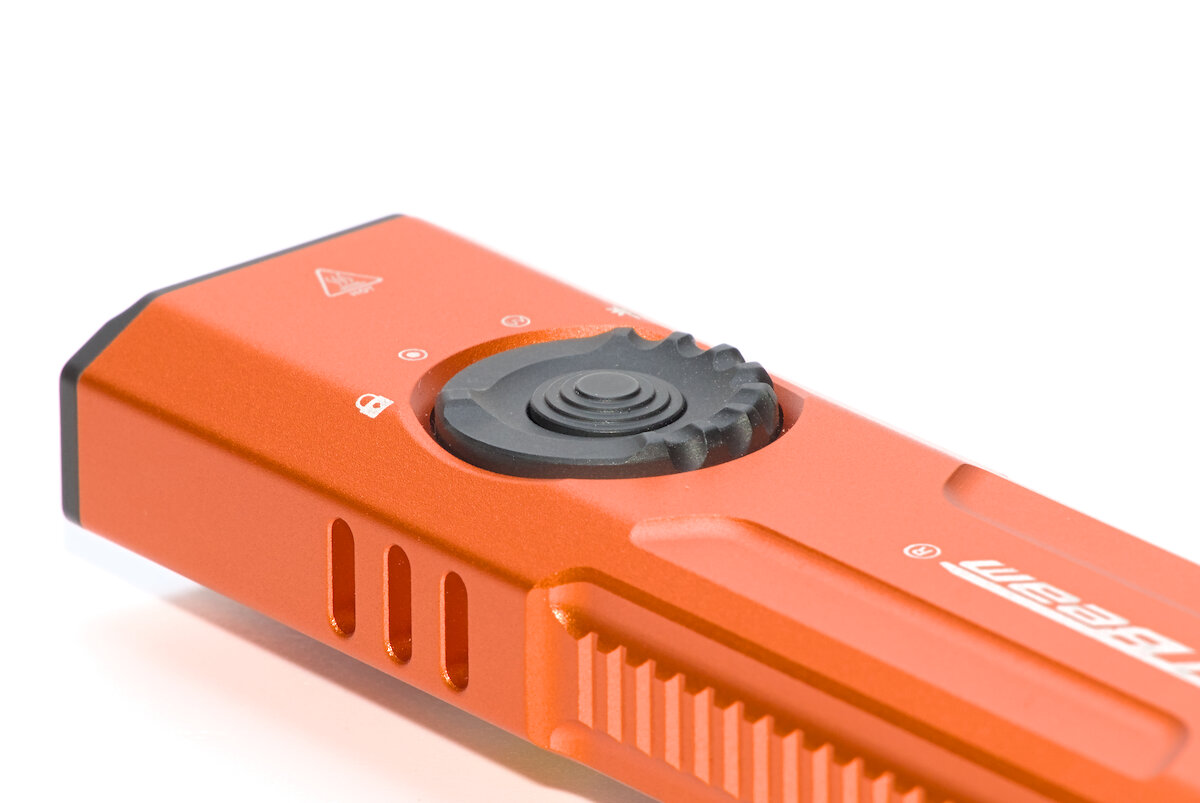
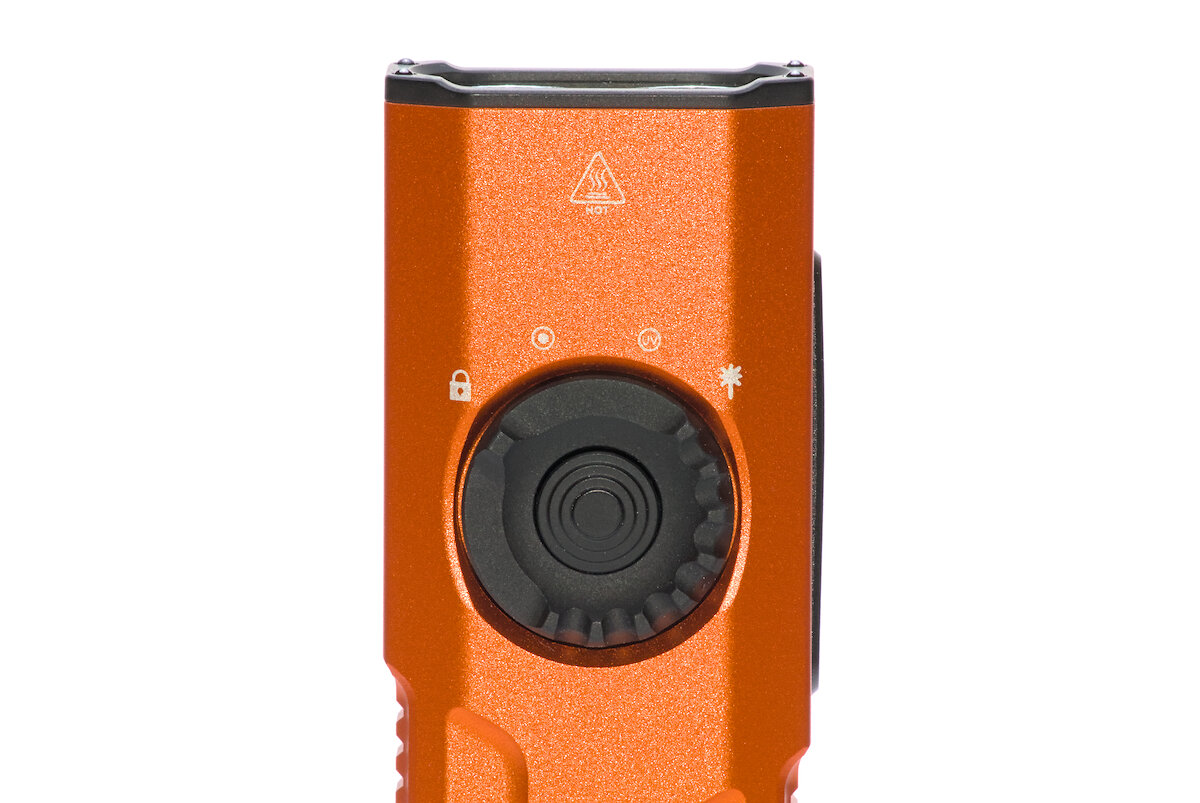
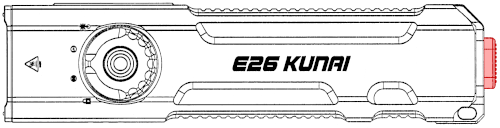
Three controls are available for operating the E26: On the front part of the flashlight there is a flat rotating ring with a button in its center. Both parts appear to be made of aluminum.
The ring can be easily turned with one finger and engages in any position with a fine click. When pressed on one side, it has a little play and scratches slightly on the body. It works via a magnetic field sensor, which means that a strong magnet can disrupt the function. However, my tests have only shown an effect in very few circumstances. The flashlight cannot be switched on accidentally with a magnet (with one exception).
The button also has a nice pressure point with an audible and perceptible click. Due to its exposed position, the flashlight should be locked for safety when it is put into the pocket.
Another switch is located at the rear end behind a rectangular silicone cover with fine pattern. To trigger the first stage, you have to press it with around 10 N, and with around 20 N until the second stage clicks in, which makes it relatively safe against accidental activation.

Despite (or because of?) the many control elements, operation is very intuitive. As soon as you play around with the flashlight a little, its operation should be self-explanatory.
The ring is used to select the mode. Each function is laser-engraved in the form of small symbols above the ring. The following modes are available in sequence from left to right:
- Lock
- White light
- UV light*
- Laser
The lock turns the flashlight off completely and also locks the rear switch. In the variant without UV light, the third switch position activates the white light and the laser simultaneously.
The flashlight is switched on and off by briefly pressing the button in the center of the ring. When the flashlight is switched on, the brightness of the white light can be adjusted in four levels by holding the button (the version without UV has five levels). UV and laser only have one level.
The flashlight can be turned on only at the last used brightness level. Unfortunately there is no direct access to the lowest level. In the worst-case scenario, you turn the flashlight on in Medium and have to switch through High and Turbo by holding the button until you finally reach Low. Then, of course, you are already blinded.
The rear switch allows direct access to turbo. It is a mechanical forward clicky so that it can be pressed halfway for momentary light. If you press it all the way down, the turbo remains permanently switched on. This switch always activates the white light, regardless of which mode you have selected via the ring (except when locked, in which case the tail switch does not work either). After switching it off via the tail switch, the light is switched off completely, even if it was previously switched on in another mode.
Tapping and then holding/pressing the tail switch activates a strobe whose frequency changes every three seconds between 8 and 16 Hz.

Apart from the lack of direct access to the lowest level, I like the UI. All buttons can be found quickly by feel. A short anti-clockwise turn reliably locks the flashlight to prevent it from being accidentally switched on in your pocket.
If you combine the tail switch with the lockout, the light can also be switched on immediately in Turbo using the ring: Leave the tail switch on and use the ring to switch between lockout (left stop) and any other mode. The lockout switches the flashlight off, while any other position switches it on in turbo. (In this configuration, a strong magnet could switch the flashlight on).
With its flat design, the E26 sits comfortably in the hand. In the normal position, the front controls are directly under the thumb and are therefore easy to reach. In the “tactical position”, the flashlight can be controlled via the rear switch.
Illumination
At the beginning, the E26 was announced on Kickstarter in two versions with a Luminus SST-40 LED. An upgrade to the Luminus SFT-40 was promised as a stretch goal – and this goal was reached after just two weeks. There are now four variants to choose from, each in three (or four?) colors:
First, you can choose whether you would rather get the SST-40 or the SFT-40. According to the manufacturer, the SST-40 achieves up to 2000 lm, the SFT-40 “only” 1800 lm. In practice, the difference should not be noticeable. On the other hand, the SFT-40 has over 25% more throw and a much nicer beam (the SST-40 tends to have a slight green tint and a color shift from the center to the edge).
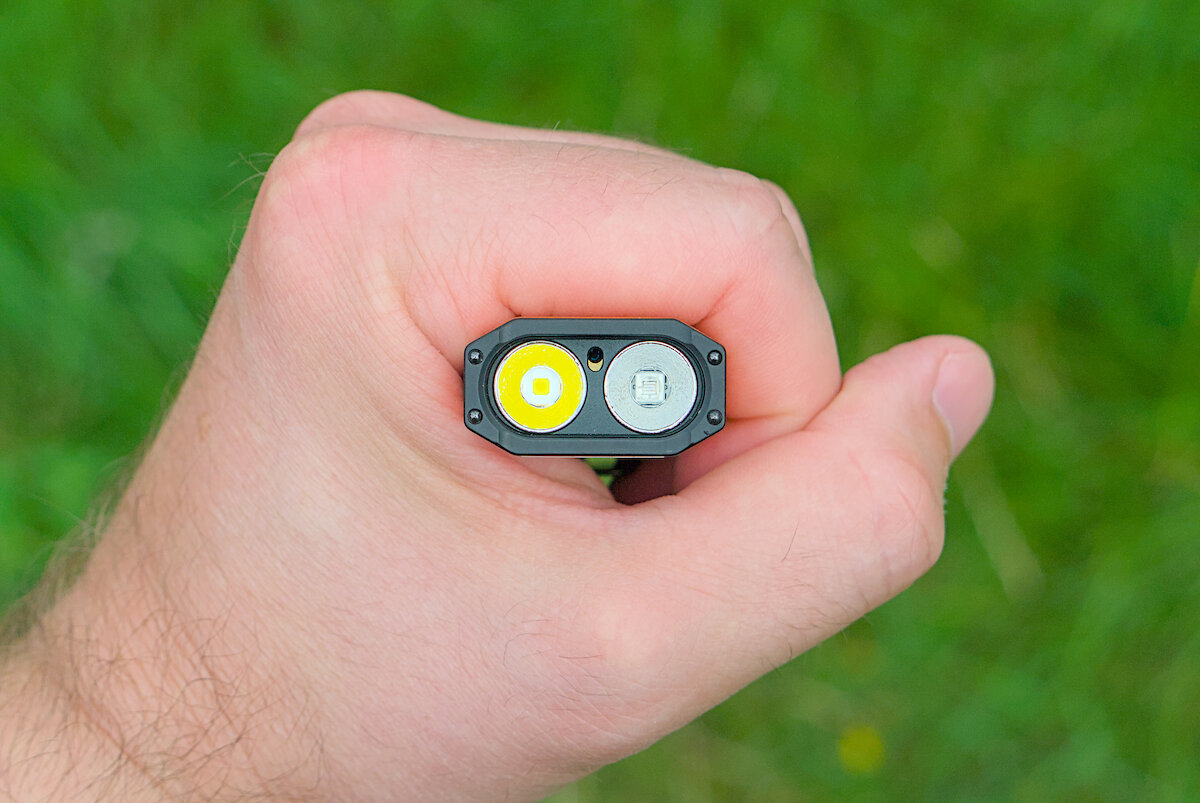
Second, you have the choice between a version with white and UV light or alternatively a version with two white LEDs and almost twice the brightness. The green laser is included in both versions.
Currently three colors are available: black, green and orange. The green and orange versions come with black accentuated parts around the USB port and the rear switch, while the black version uses blue. A white version was originally announced, but does not yet appear to be available.
I’ve chosen the version with a Luminus SFT-40 and UV LED in orange. A single white LED is enough for me, as the maximum brightness can only be maintained for a short time in turbo anyway due to the generated heat. Also, UV light is very practical in many situations (more on this later).
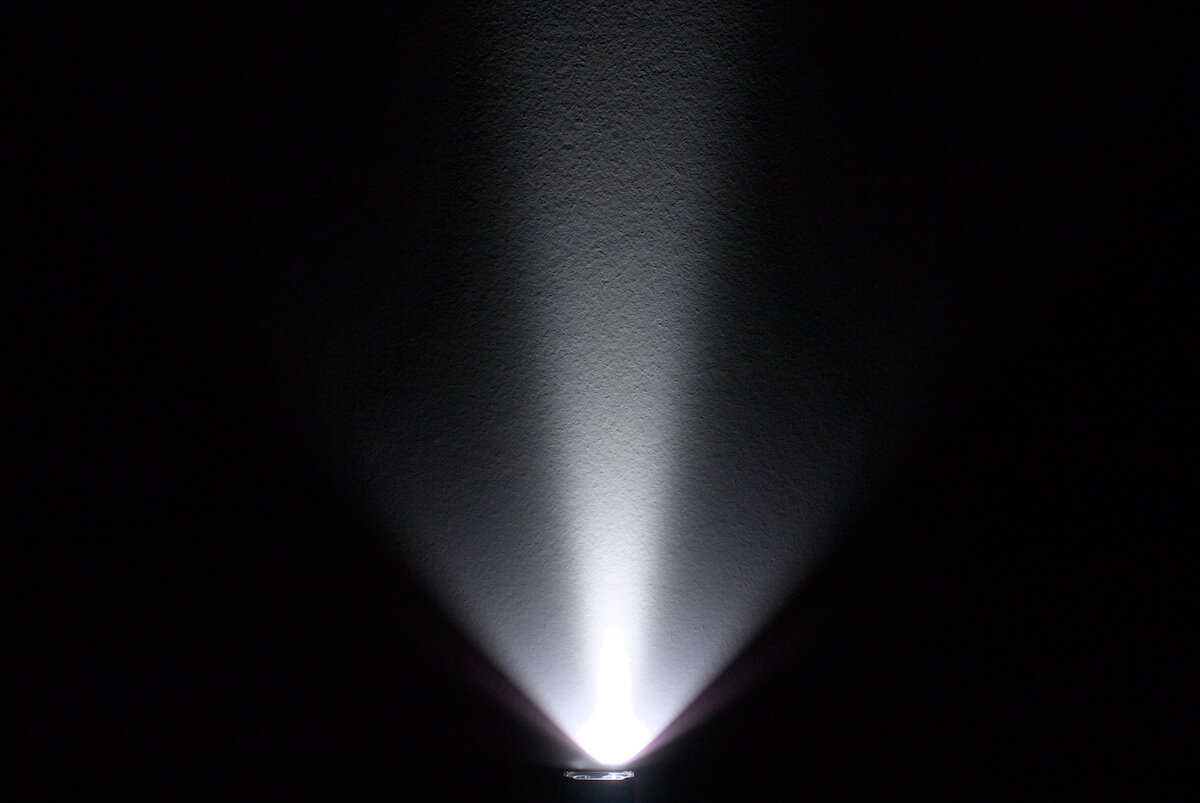
In my experience, the SFT-40 has a much better beam: uniform white without green tint or color shift, plus a narrower beam with more throw.
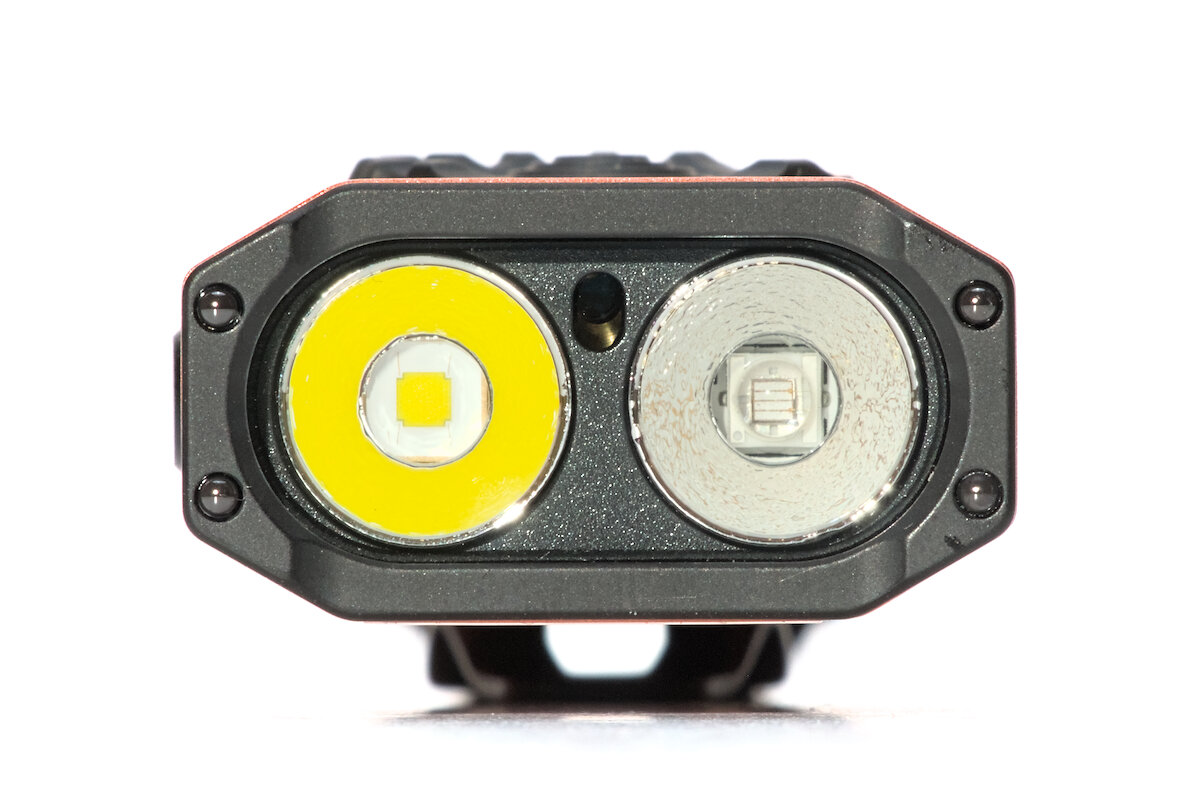
The two LEDs fit side by side in the flat body. Each LED has its own small reflector with orange-peel texture. This reflector produces a fairly narrow spot with a soft edge and a bright spill. A magenta-colored ring can be seen on the outer edge of the spill, which is created by the anti-reflective coating of the glass.

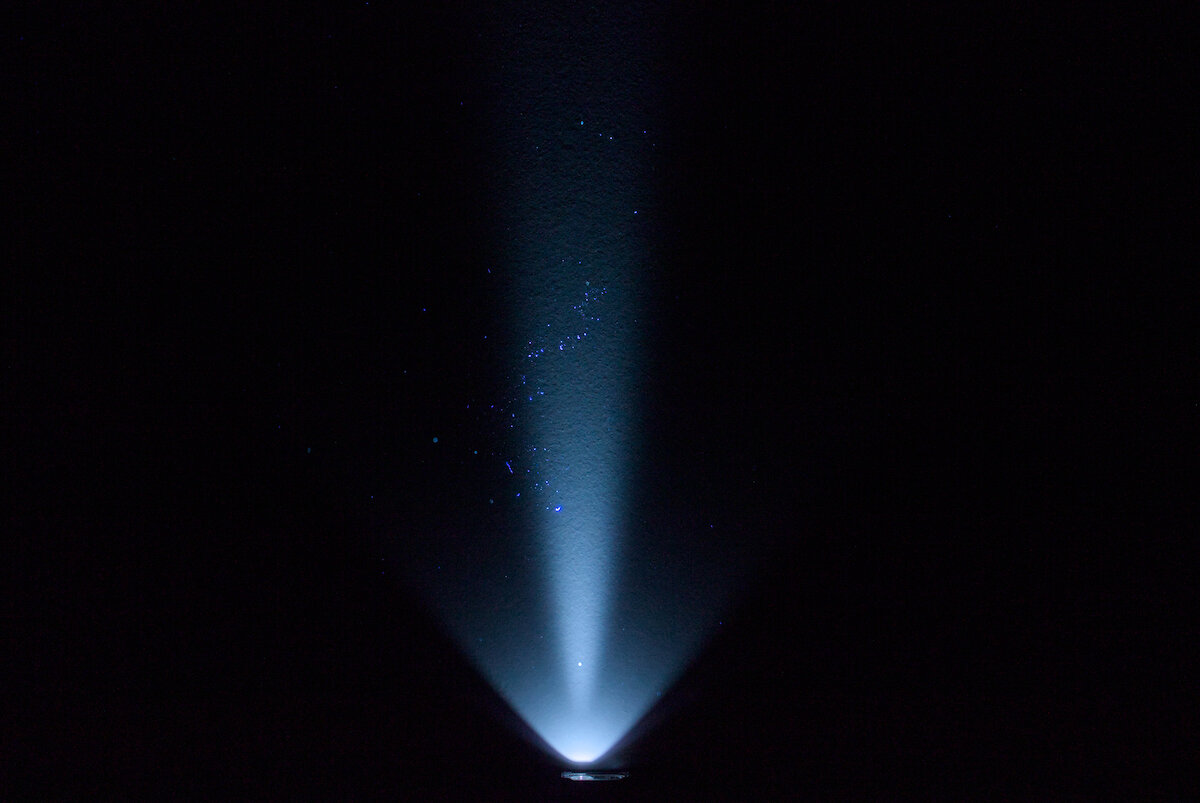
The UV LED has a similar beam, but in practical use this can be seen only in a few situations, such as on a white wall with optical brightener.
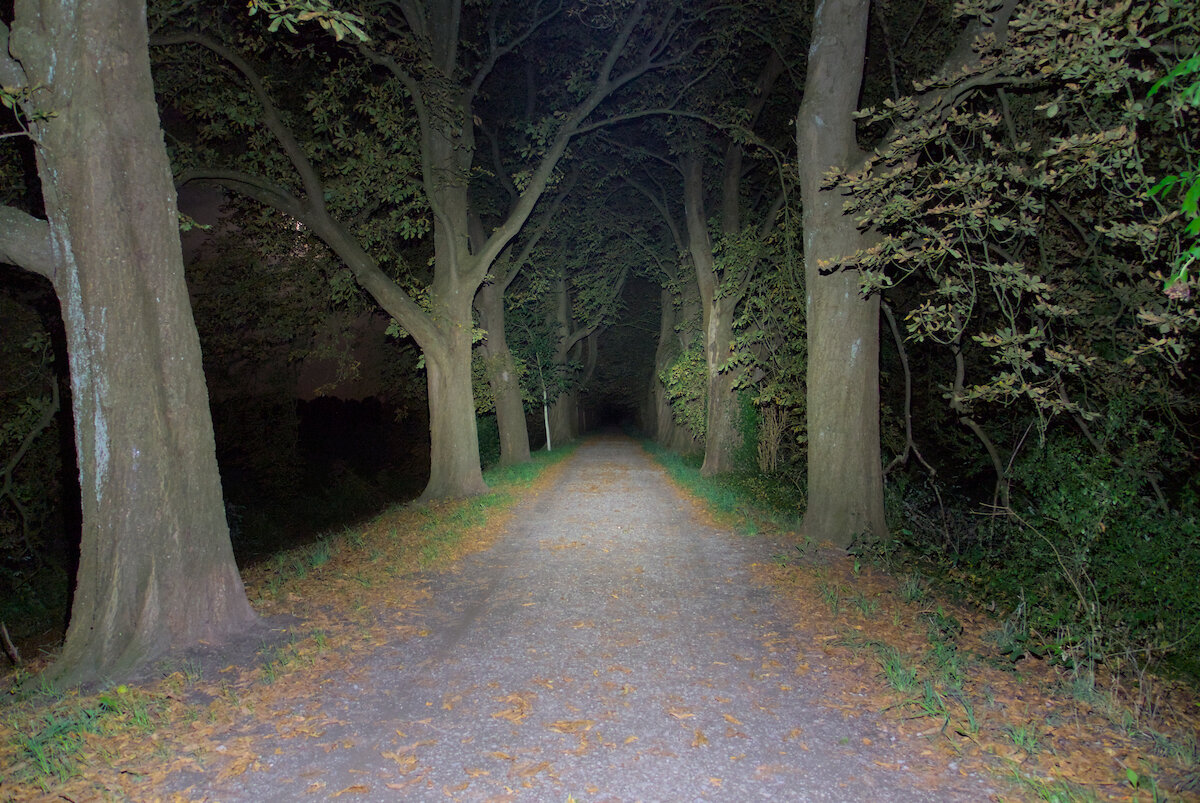
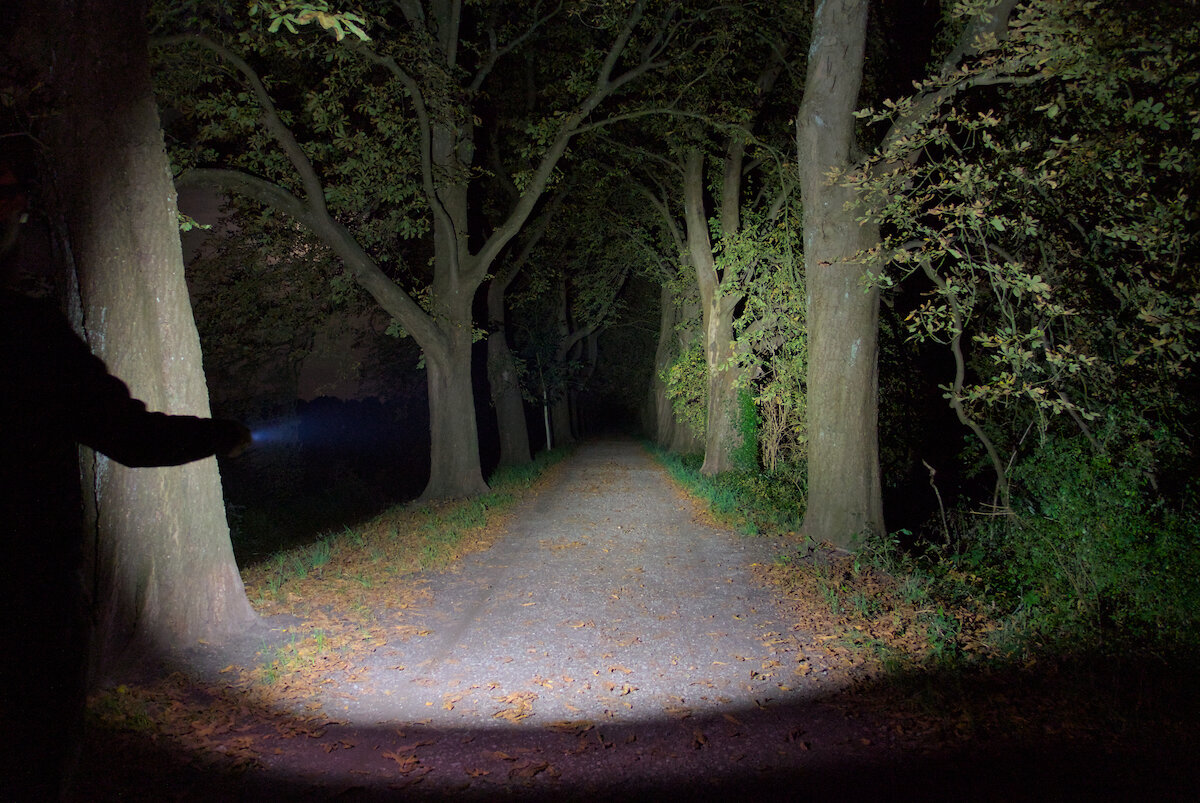
Outdoors the E26 performs very well at both short and medium distances. It works similarly well indoors. At short distances of less than one meter, however, the spot might be a bit tight.
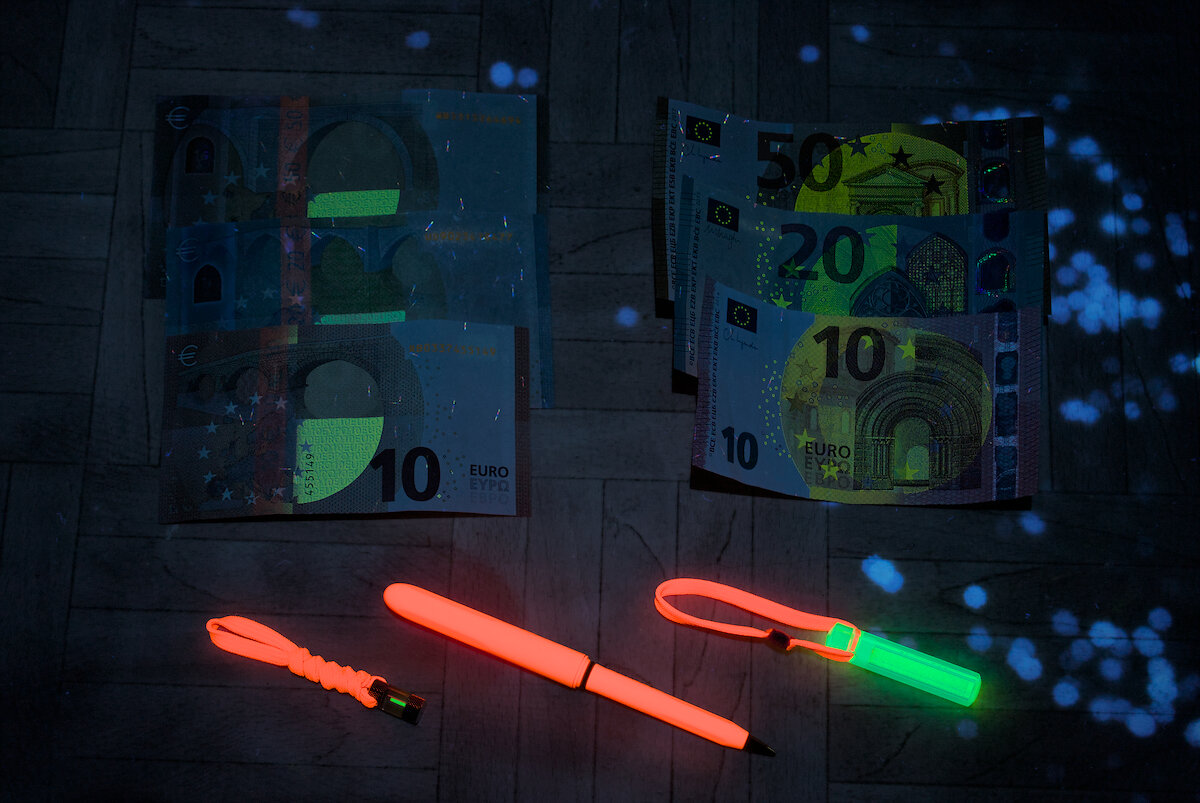
UV light is an exciting topic, as we cannot see it directly by eye, but only through the fluorescence of illuminated objects. It is divided into three categories, of which only UV-A is relevant for flashlights. Inexpensive UV flashlights in particular use LEDs with a fairly long wavelength (around 400 nm) and a high amount of visible light. As a result, the effect of fluorescence is partially hidden by the visible light.
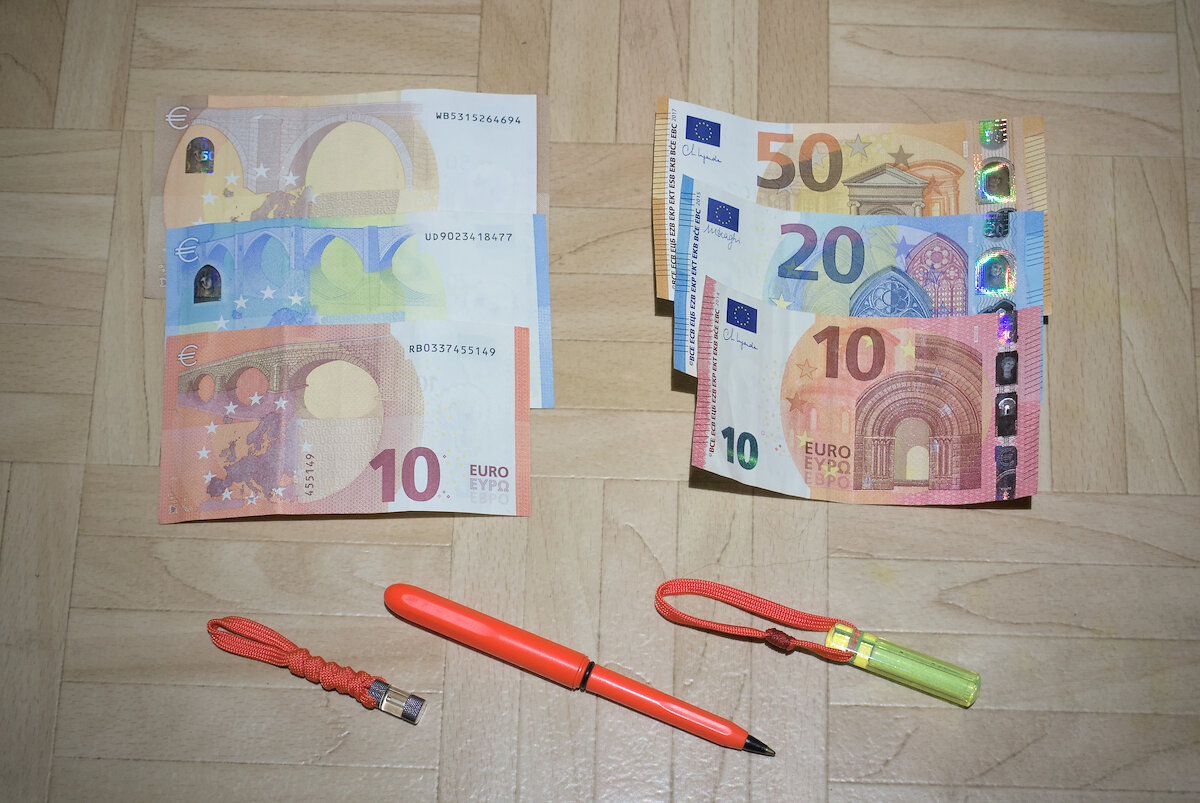
Better UV flashlights use LEDs with a wavelength of 365 nm, such as the E26. Many minerals, security features on money and ID cards or “organic residues” in the bathroom or on the carpet fluoresce in this range. These LEDs also have a small amount of visible light, which can be eliminated with a ZWB2 filter (which is not installed in the E26).
In practice, I use the UV light to check the even application of certain lubricants with a UV indicator or to detect dirt (including dust). And finally, it often opens up a completely different perspective on the surroundings.

Now let’s talk about the laser – a sensitive topic for good reason. Due to the extremely high intensity even a weak laser can be dangerous to the eye and possibly permanently impair vision. In order to evaluate the risk, laser sources are divided into classes based on their power and design. Class 1 lasers are relatively harmless, but they quickly become dangerous above this level.
The green 520 nm laser in the E26 is specified as class 3A with an output of less than 5 mW. According to this old classification, the laser is officially harmless to the eye for short exposures (up to 0.25 s), but according to the new standard it is more dangerous. I would probably not want to use it as a laser pointer in a presentation, but it is quite suitable for pointing out stars in the sky (make sure there are no planes nearby!).
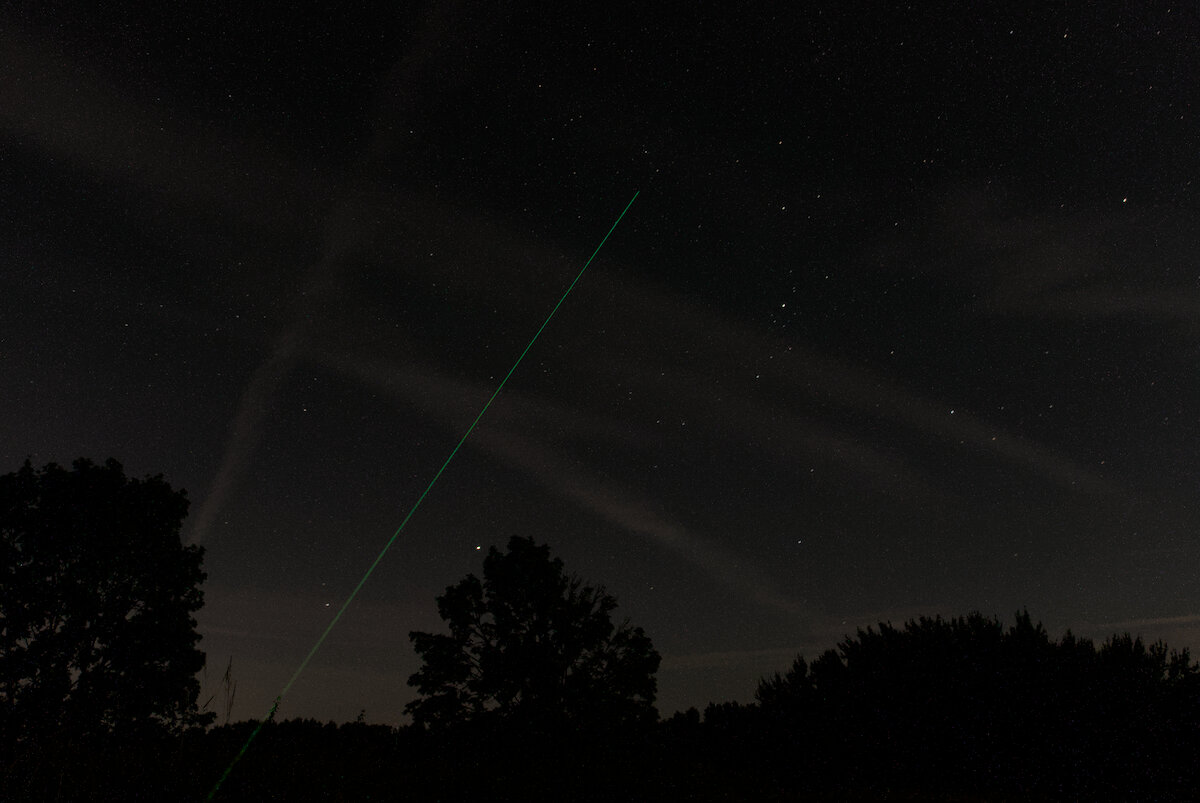
In summary, the E26 has a really nice combination of different light sources. A version with red light instead of UV would also be interesting (but then with several brightness levels, please). This would make the E26 a nice flashlight for stargazing.
Driver and runtime
The information on brightness, runtime and intensity varies depending on the model. The following table is from the version of my review with an SFT-40 and UV light:
| Mode | Brightness¹ | Runtime¹ | Intensity¹ (Throw²) |
|---|---|---|---|
| Turbo | 1800 lm | 1:36 h | 11 000 cd (210 m) |
| High | 650 lm | 1:42 h | |
| Medium | 300 lm | 3:30 h | |
| Low | 15 lm | 65 h | |
| UV | 1300 mW | 3 h | |
| Laser | 5 mW | 15 h |
¹ According to manufacturer ² ANSI FL1
The distribution of the levels is not optimal. In particular, the distance between low and medium seems a little too large. In my opinion, the E26 lacks a significantly lower level than 15 lm (i.e. a real “Moon” level with 1 lm) to make it a real EDC flashlight.
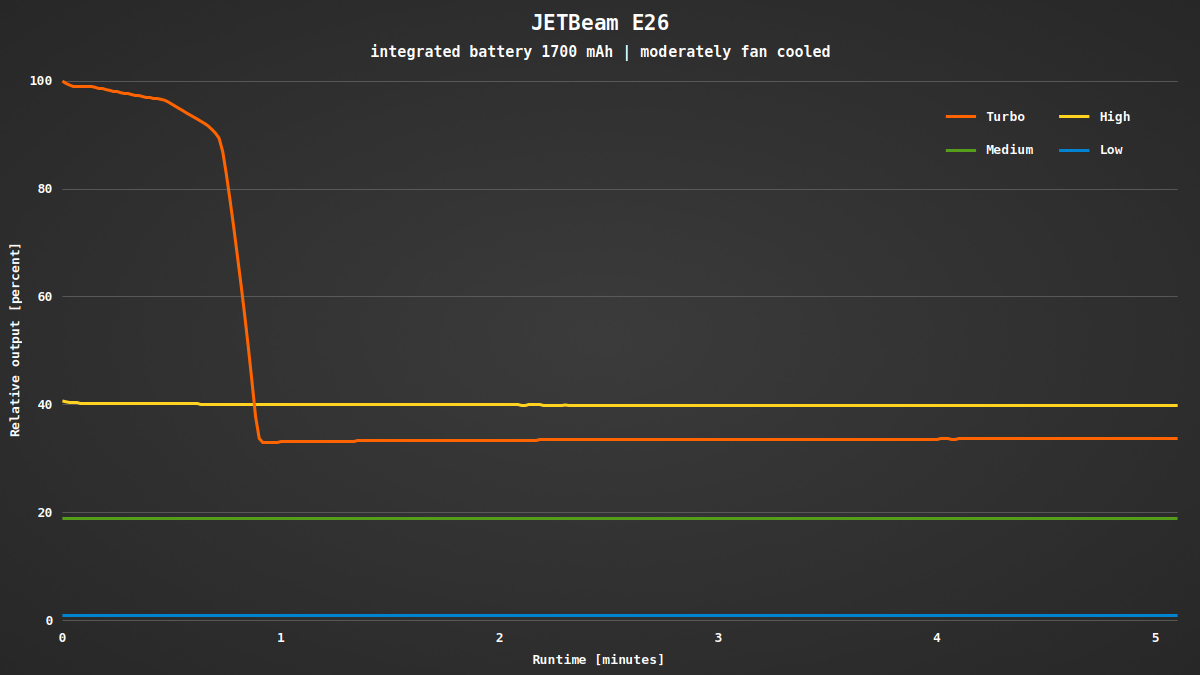
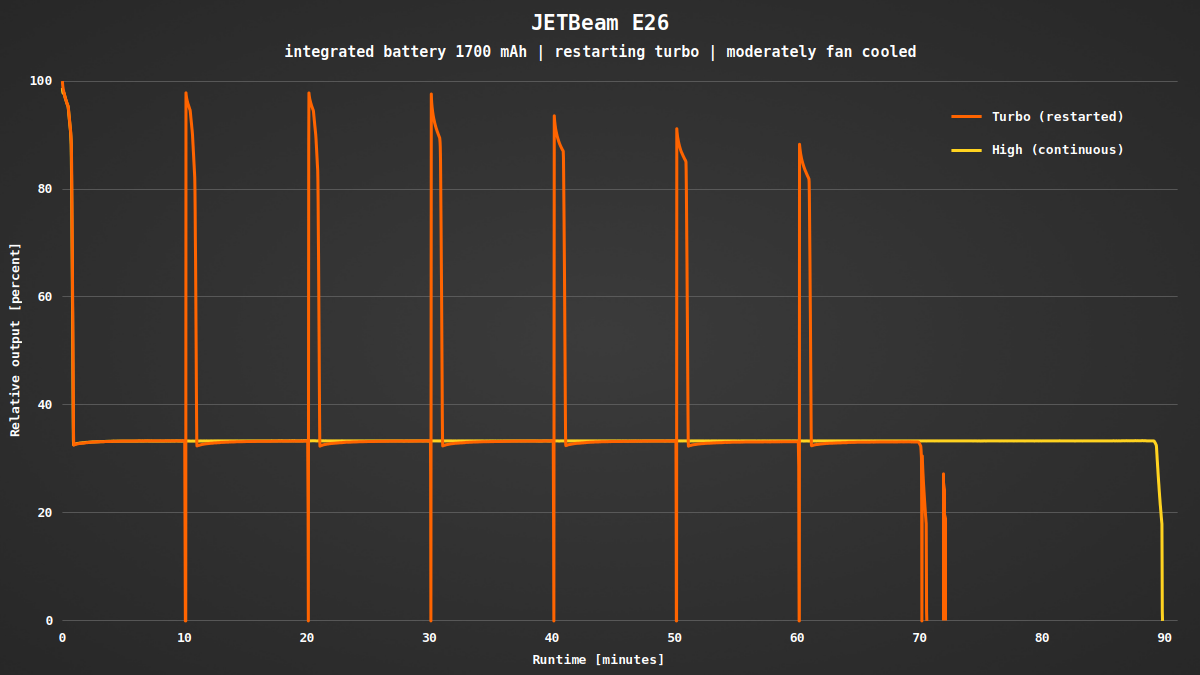
The turbo runs for almost a minute before the brightness is reduced to around 35%. At this point, the temperature is just 38 °C, so a little more would be possible. According to the manual, the E26 has temperature regulation to protect it from overheating.
All other levels are kept absolutely constant until shortly before the end. With an EDC flashlight, you want a constant quality of light at all times, which is made possible by this. It is noticeable that the brightness in Turbo is lower after the stepdown than in the High level.
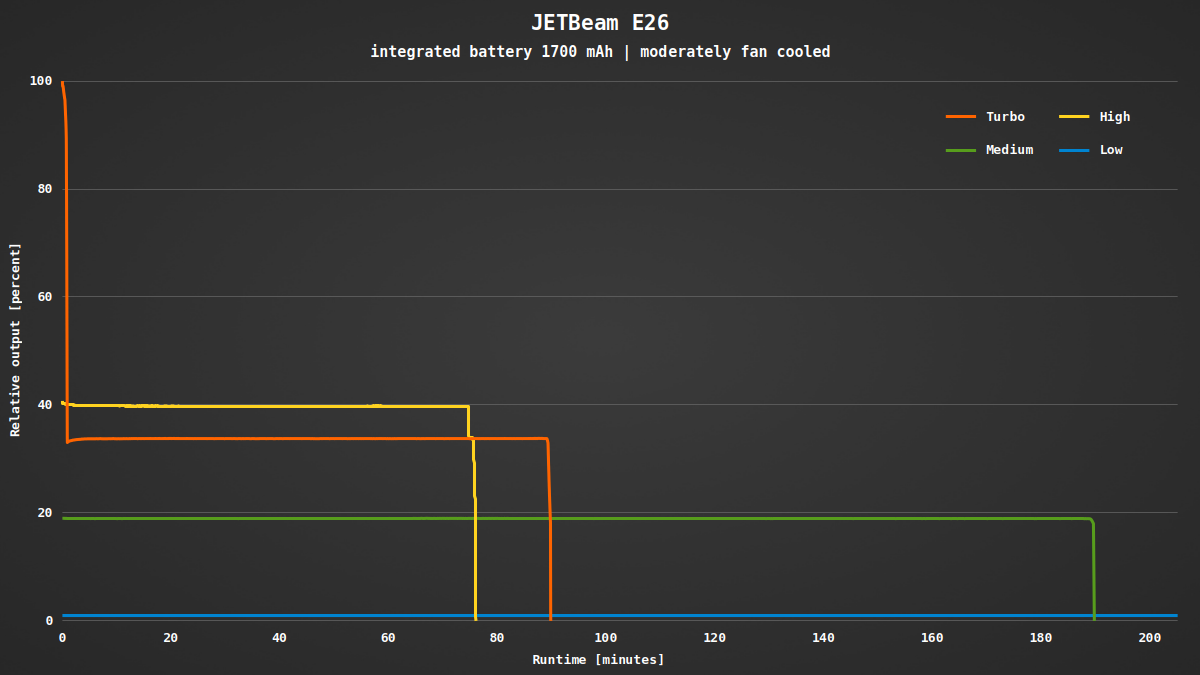
For many flashlights, Turbo will often reach its maximum brightness only when the battery is fully charged. This is not the case with the E26, where you still get almost the initial brightness even when the battery is half discharged. In this example with repeated activation of turbo, the temperature rises up to 43 °C.
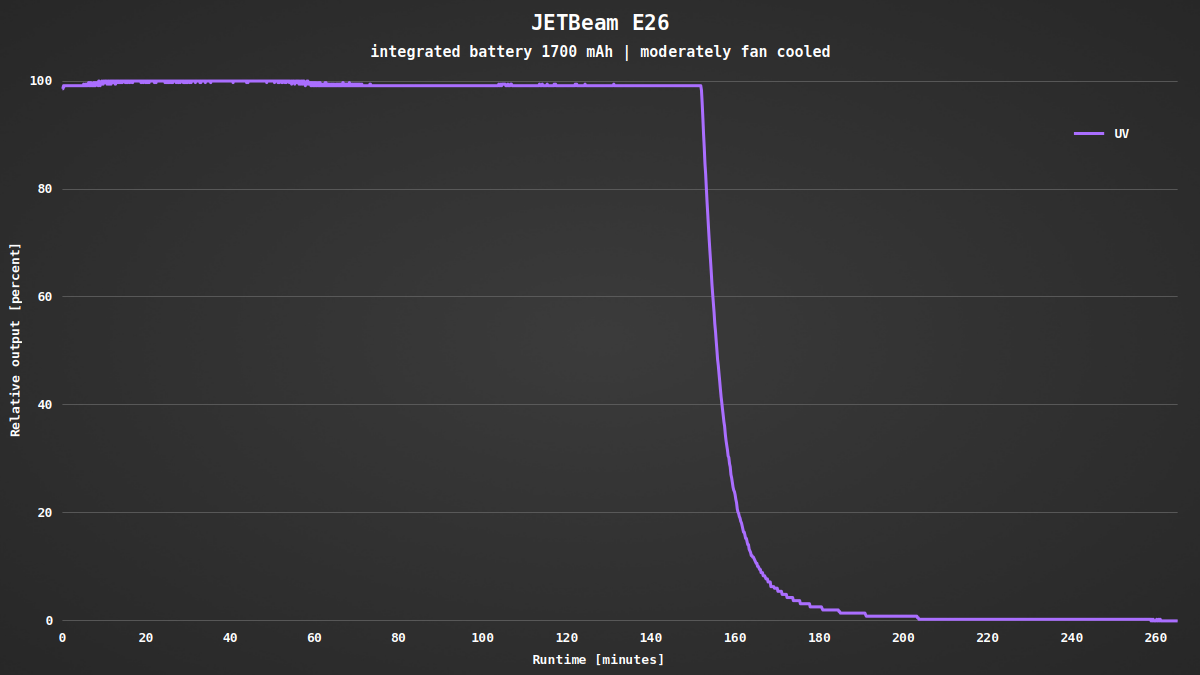
The brightness is also constant for the UV channel most of the time. It only drops abruptly at the end. The LED then continues to glow for a long time. This is probably due to the higher forward voltage of the UV LED compared to the white LED. The controller does not take this case into account and would only switch the flashlight off at a significantly lower voltage.
The constant current driver regulates the brightness completely without PWM. I was unable to measure the current and the low voltage protection as the battery is built-in.
Conclusion
JETBeam made a successful start with the E26 “Kunai” into the world of flat flashlights: white light, UV light and a green laser, combined with intuitive UI using a rotating ring and two buttons, fast charging via USB-C and an ergonomic, practical design.
For the perfect experience I miss direct access to the lowest level, which could also be a little lower. That, and if the flashlight was a little shorter, it would be the perfect EDC flashlight for me. But even as it is, it makes a very good impression.
Got curious? The JETBeam E26 is available on flashlightgo.