Hey, i like chatting with you all. So i figured i ought to make a thread where i can post whatever im working on
1 Thank
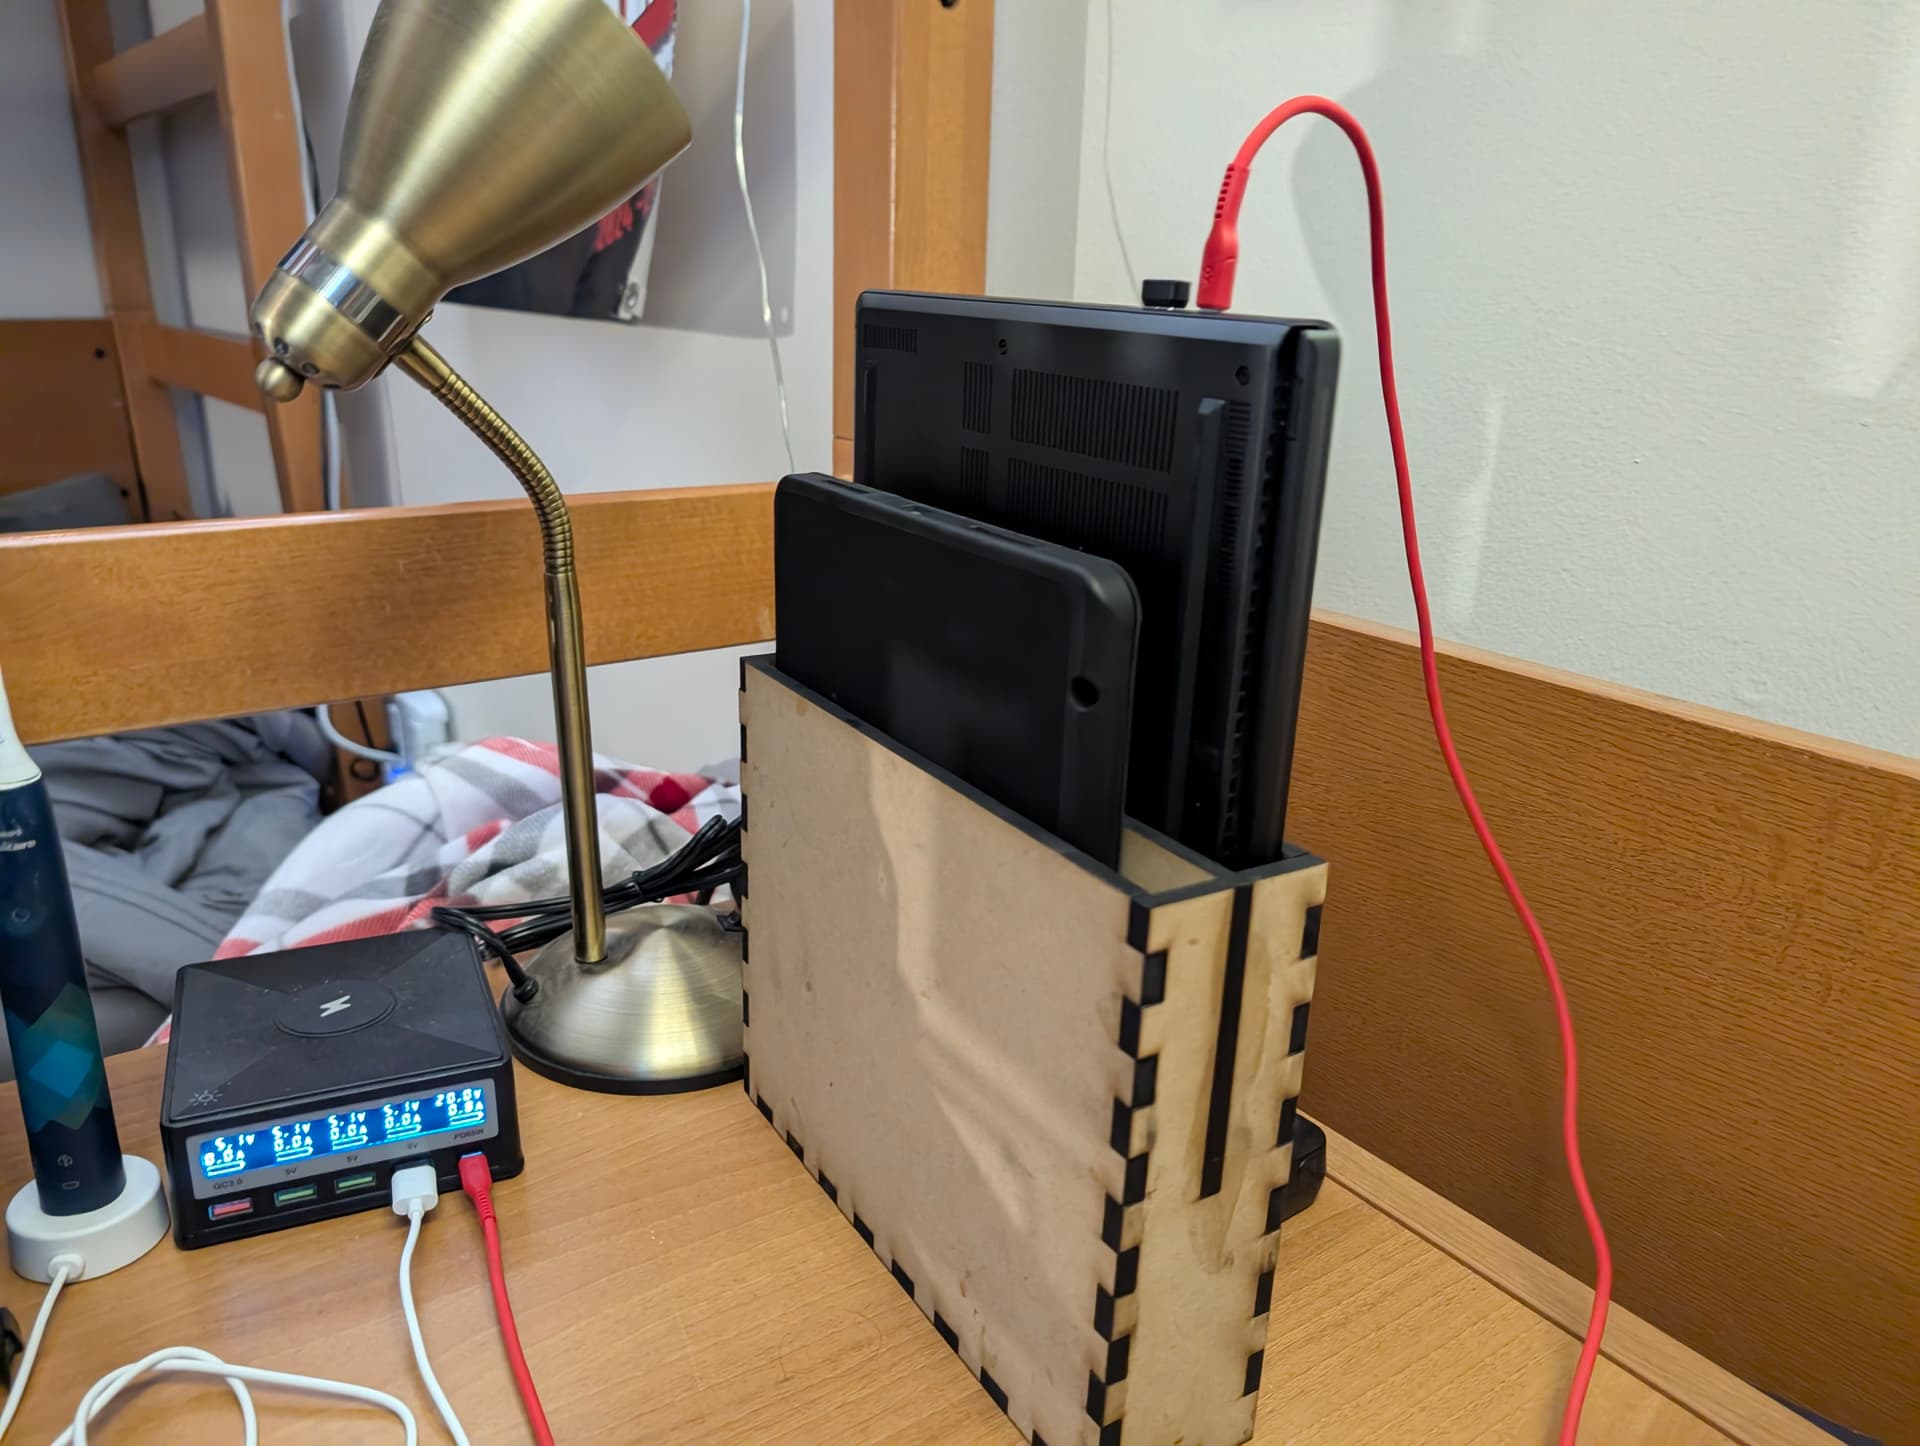
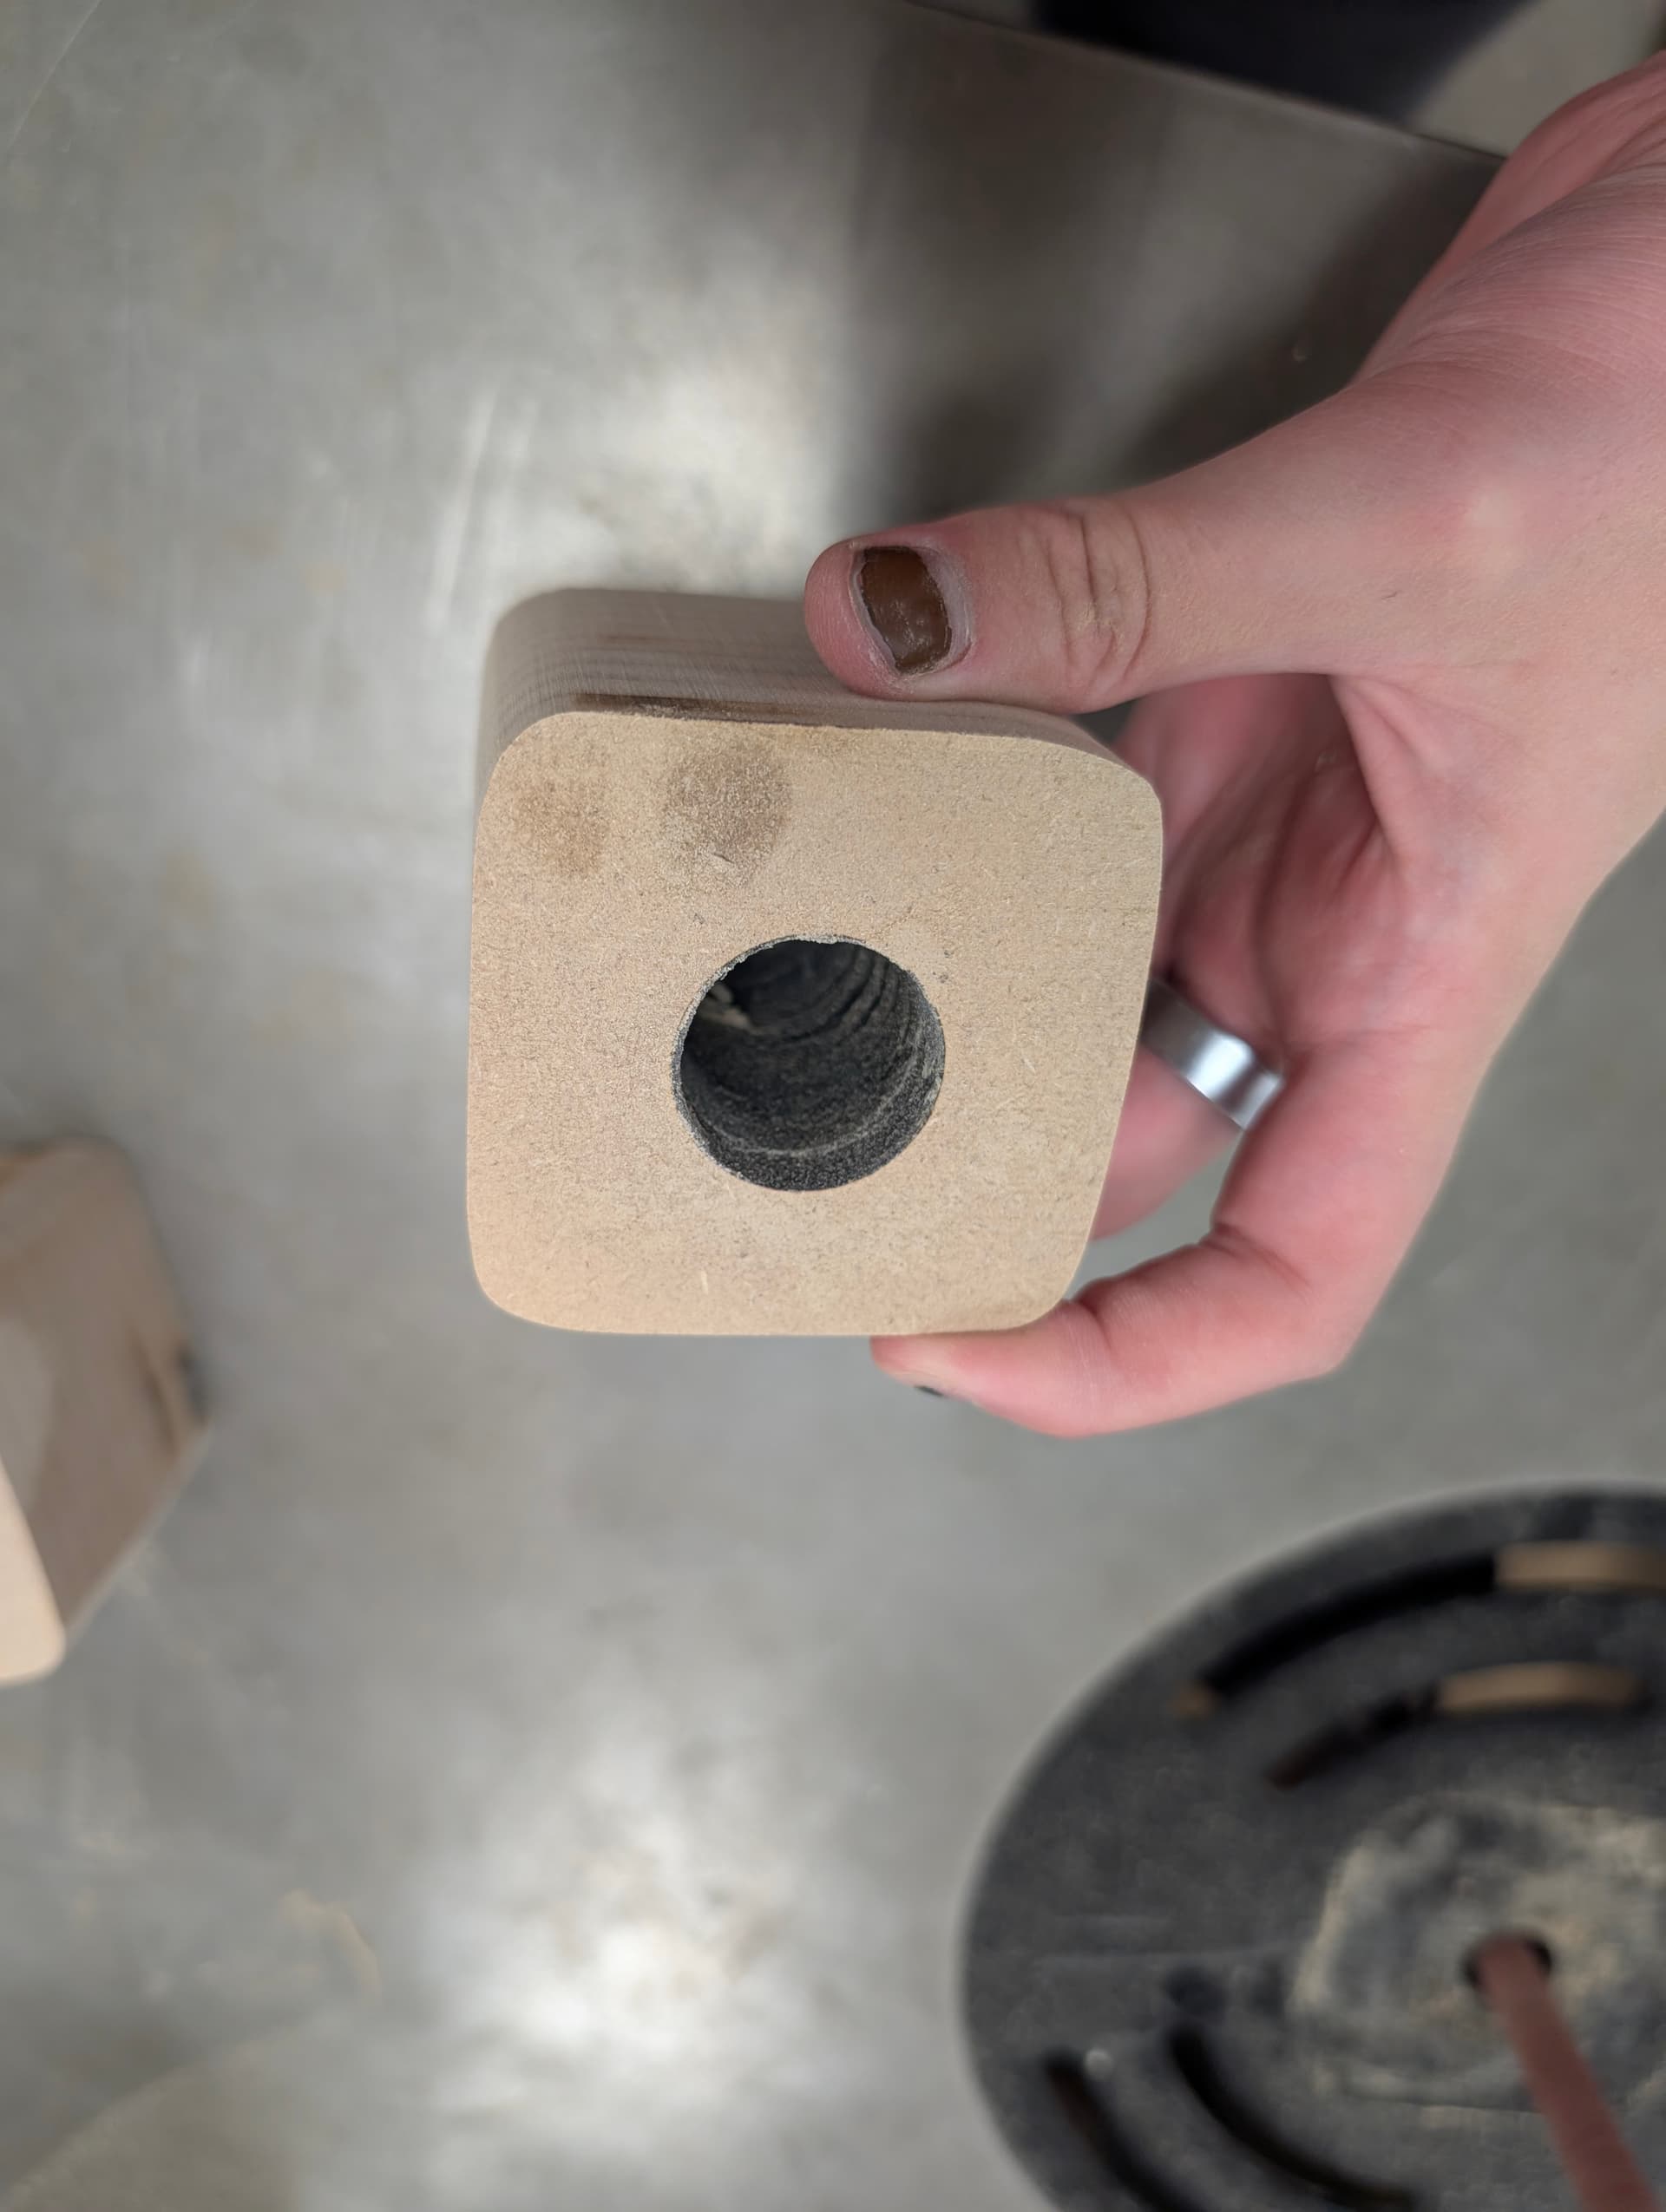
Yesterday was organiser day, I made a charging stand for my electronics with foam tape at the bottom.
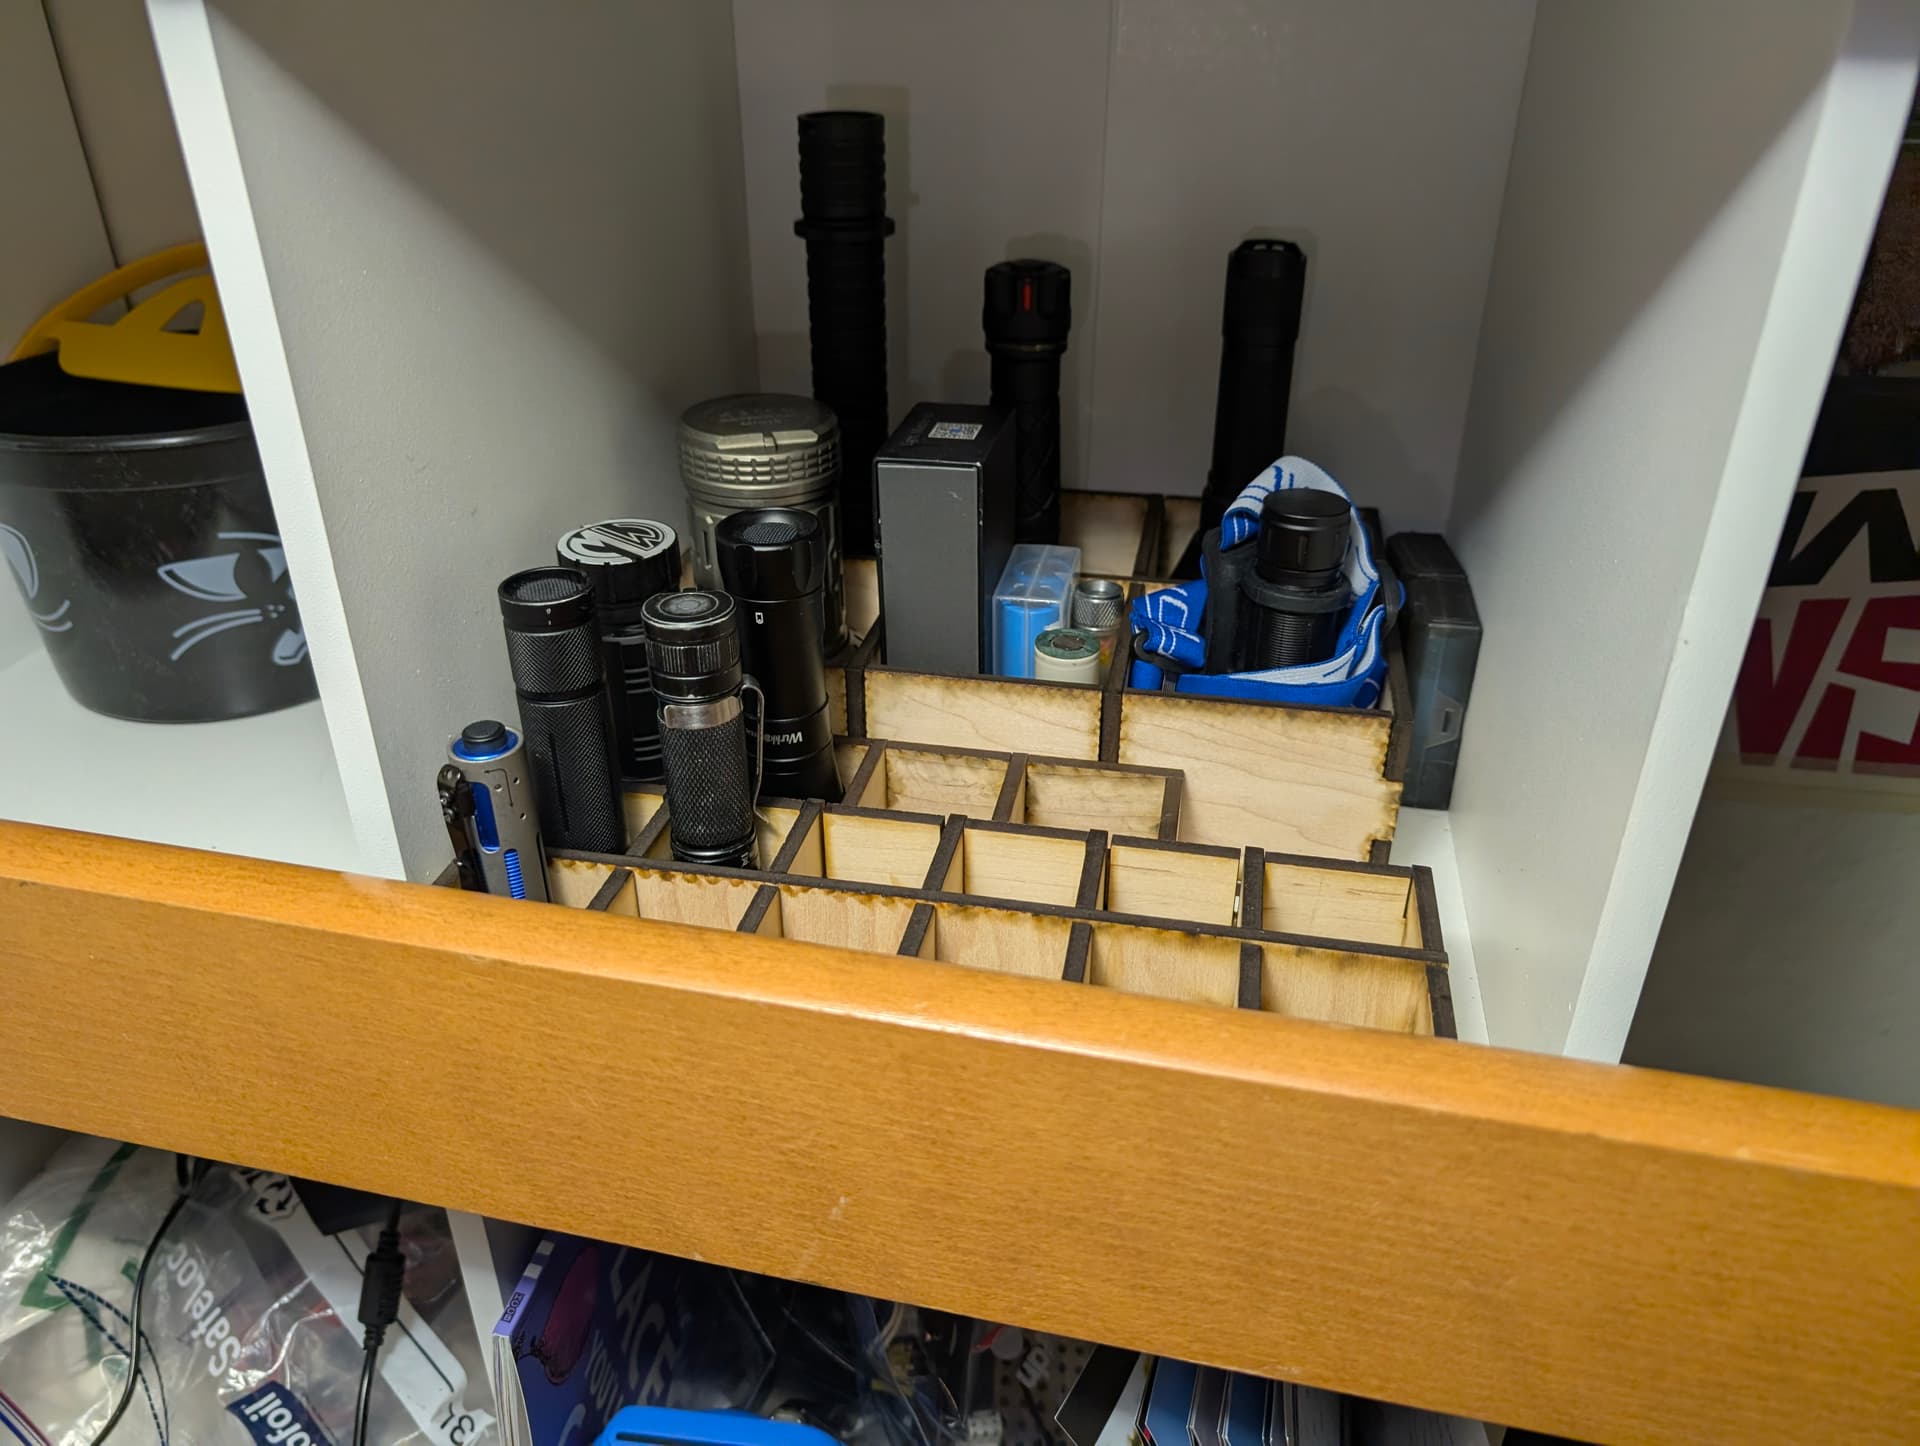
The flashlight organisers are a bit of a mess, the sizing is a little off for all of them because my lights have such a range of sizes, I might come back to them and fix it.
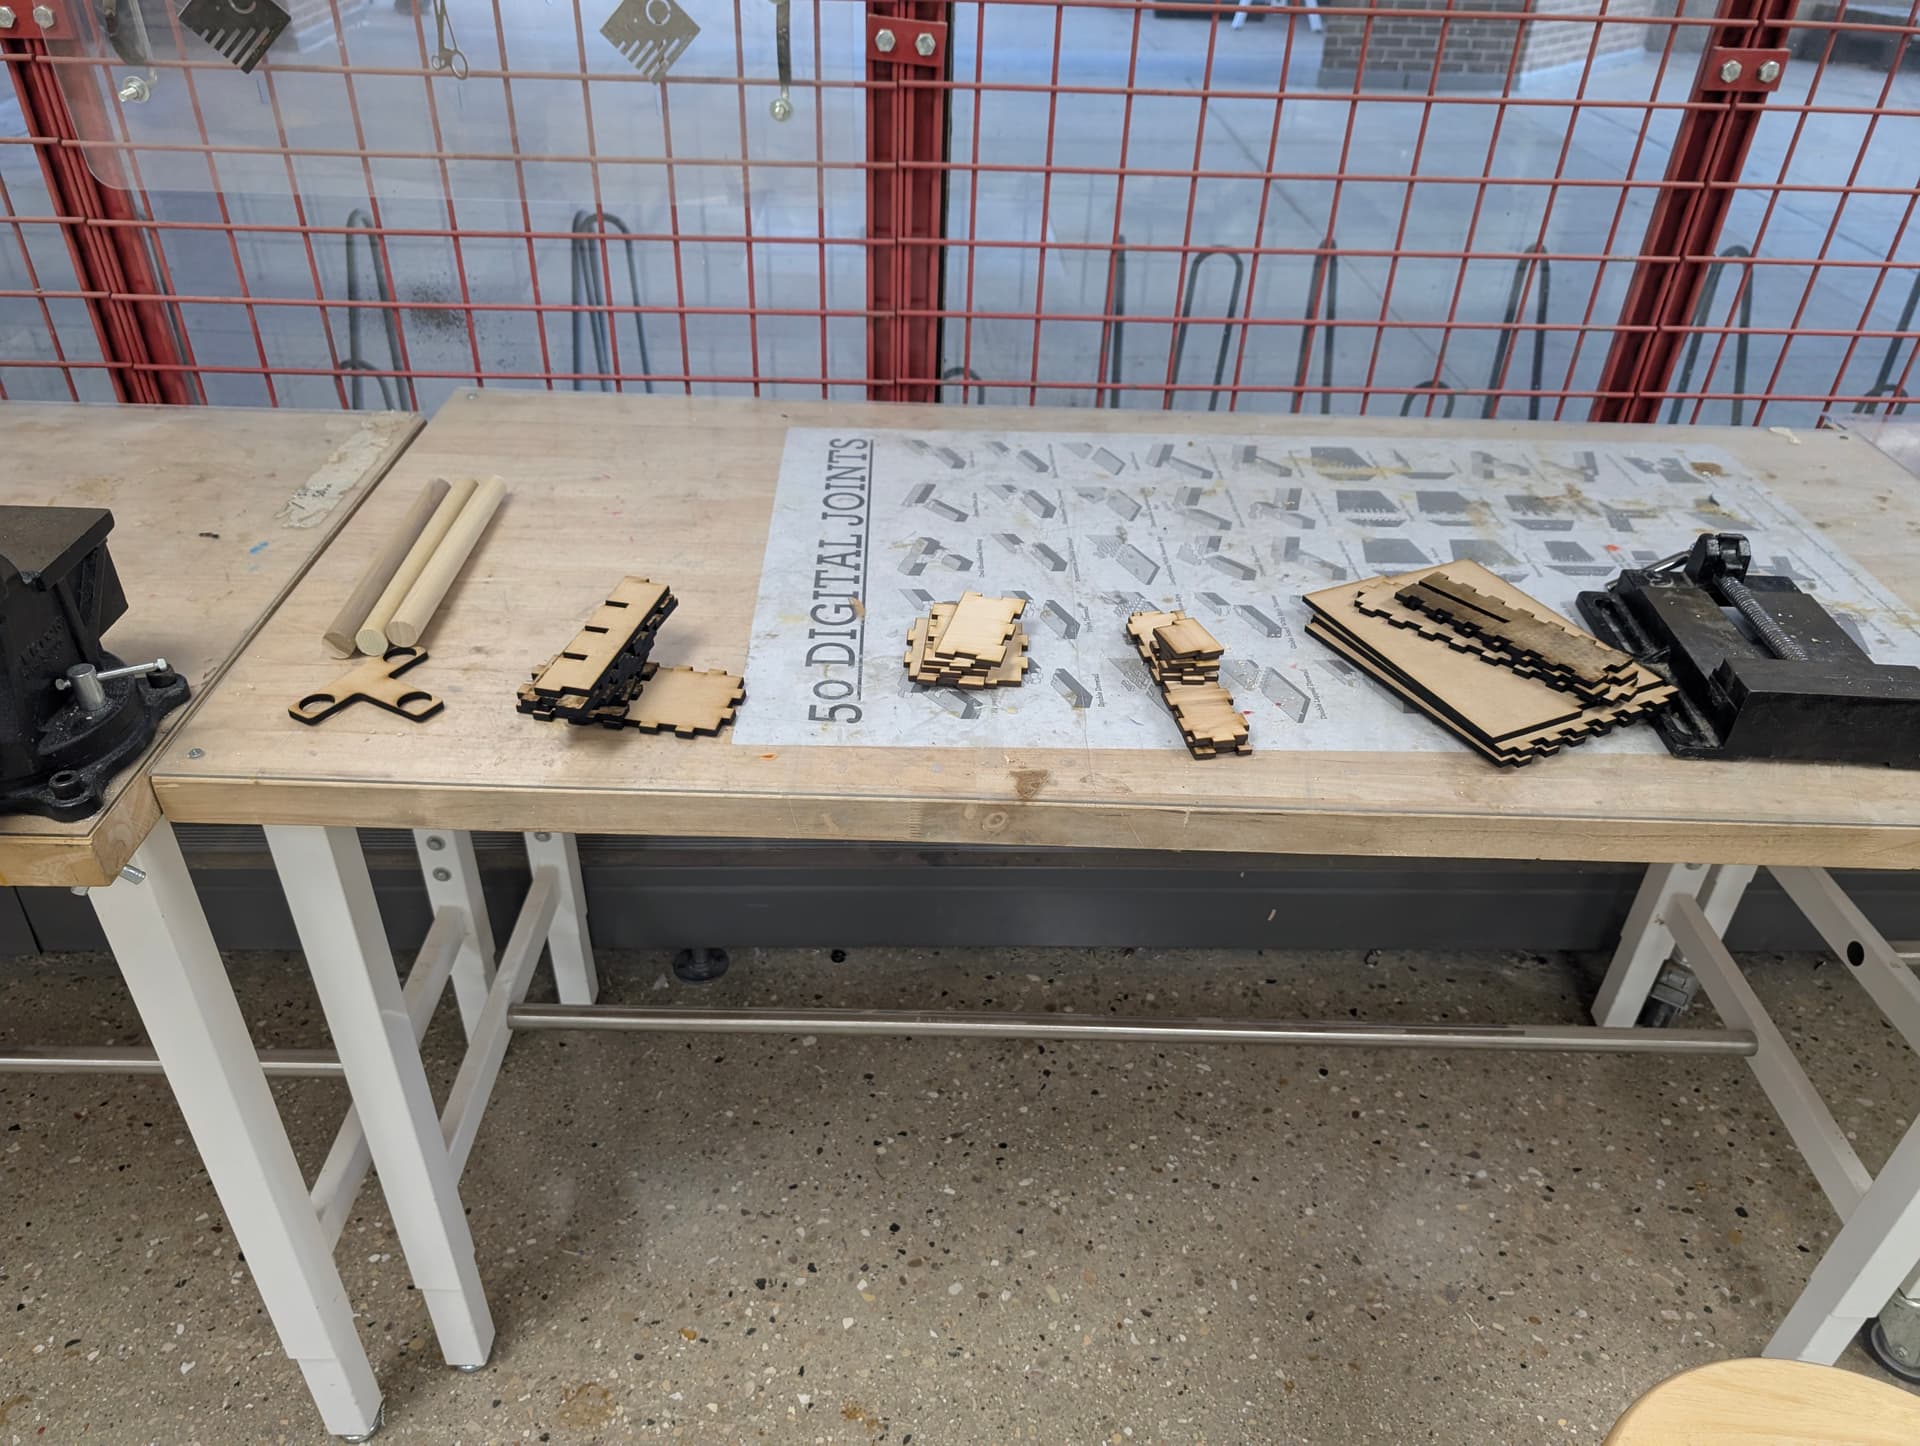
I also started working on a princess bed style canopy for my dorm bed to make it cozier.
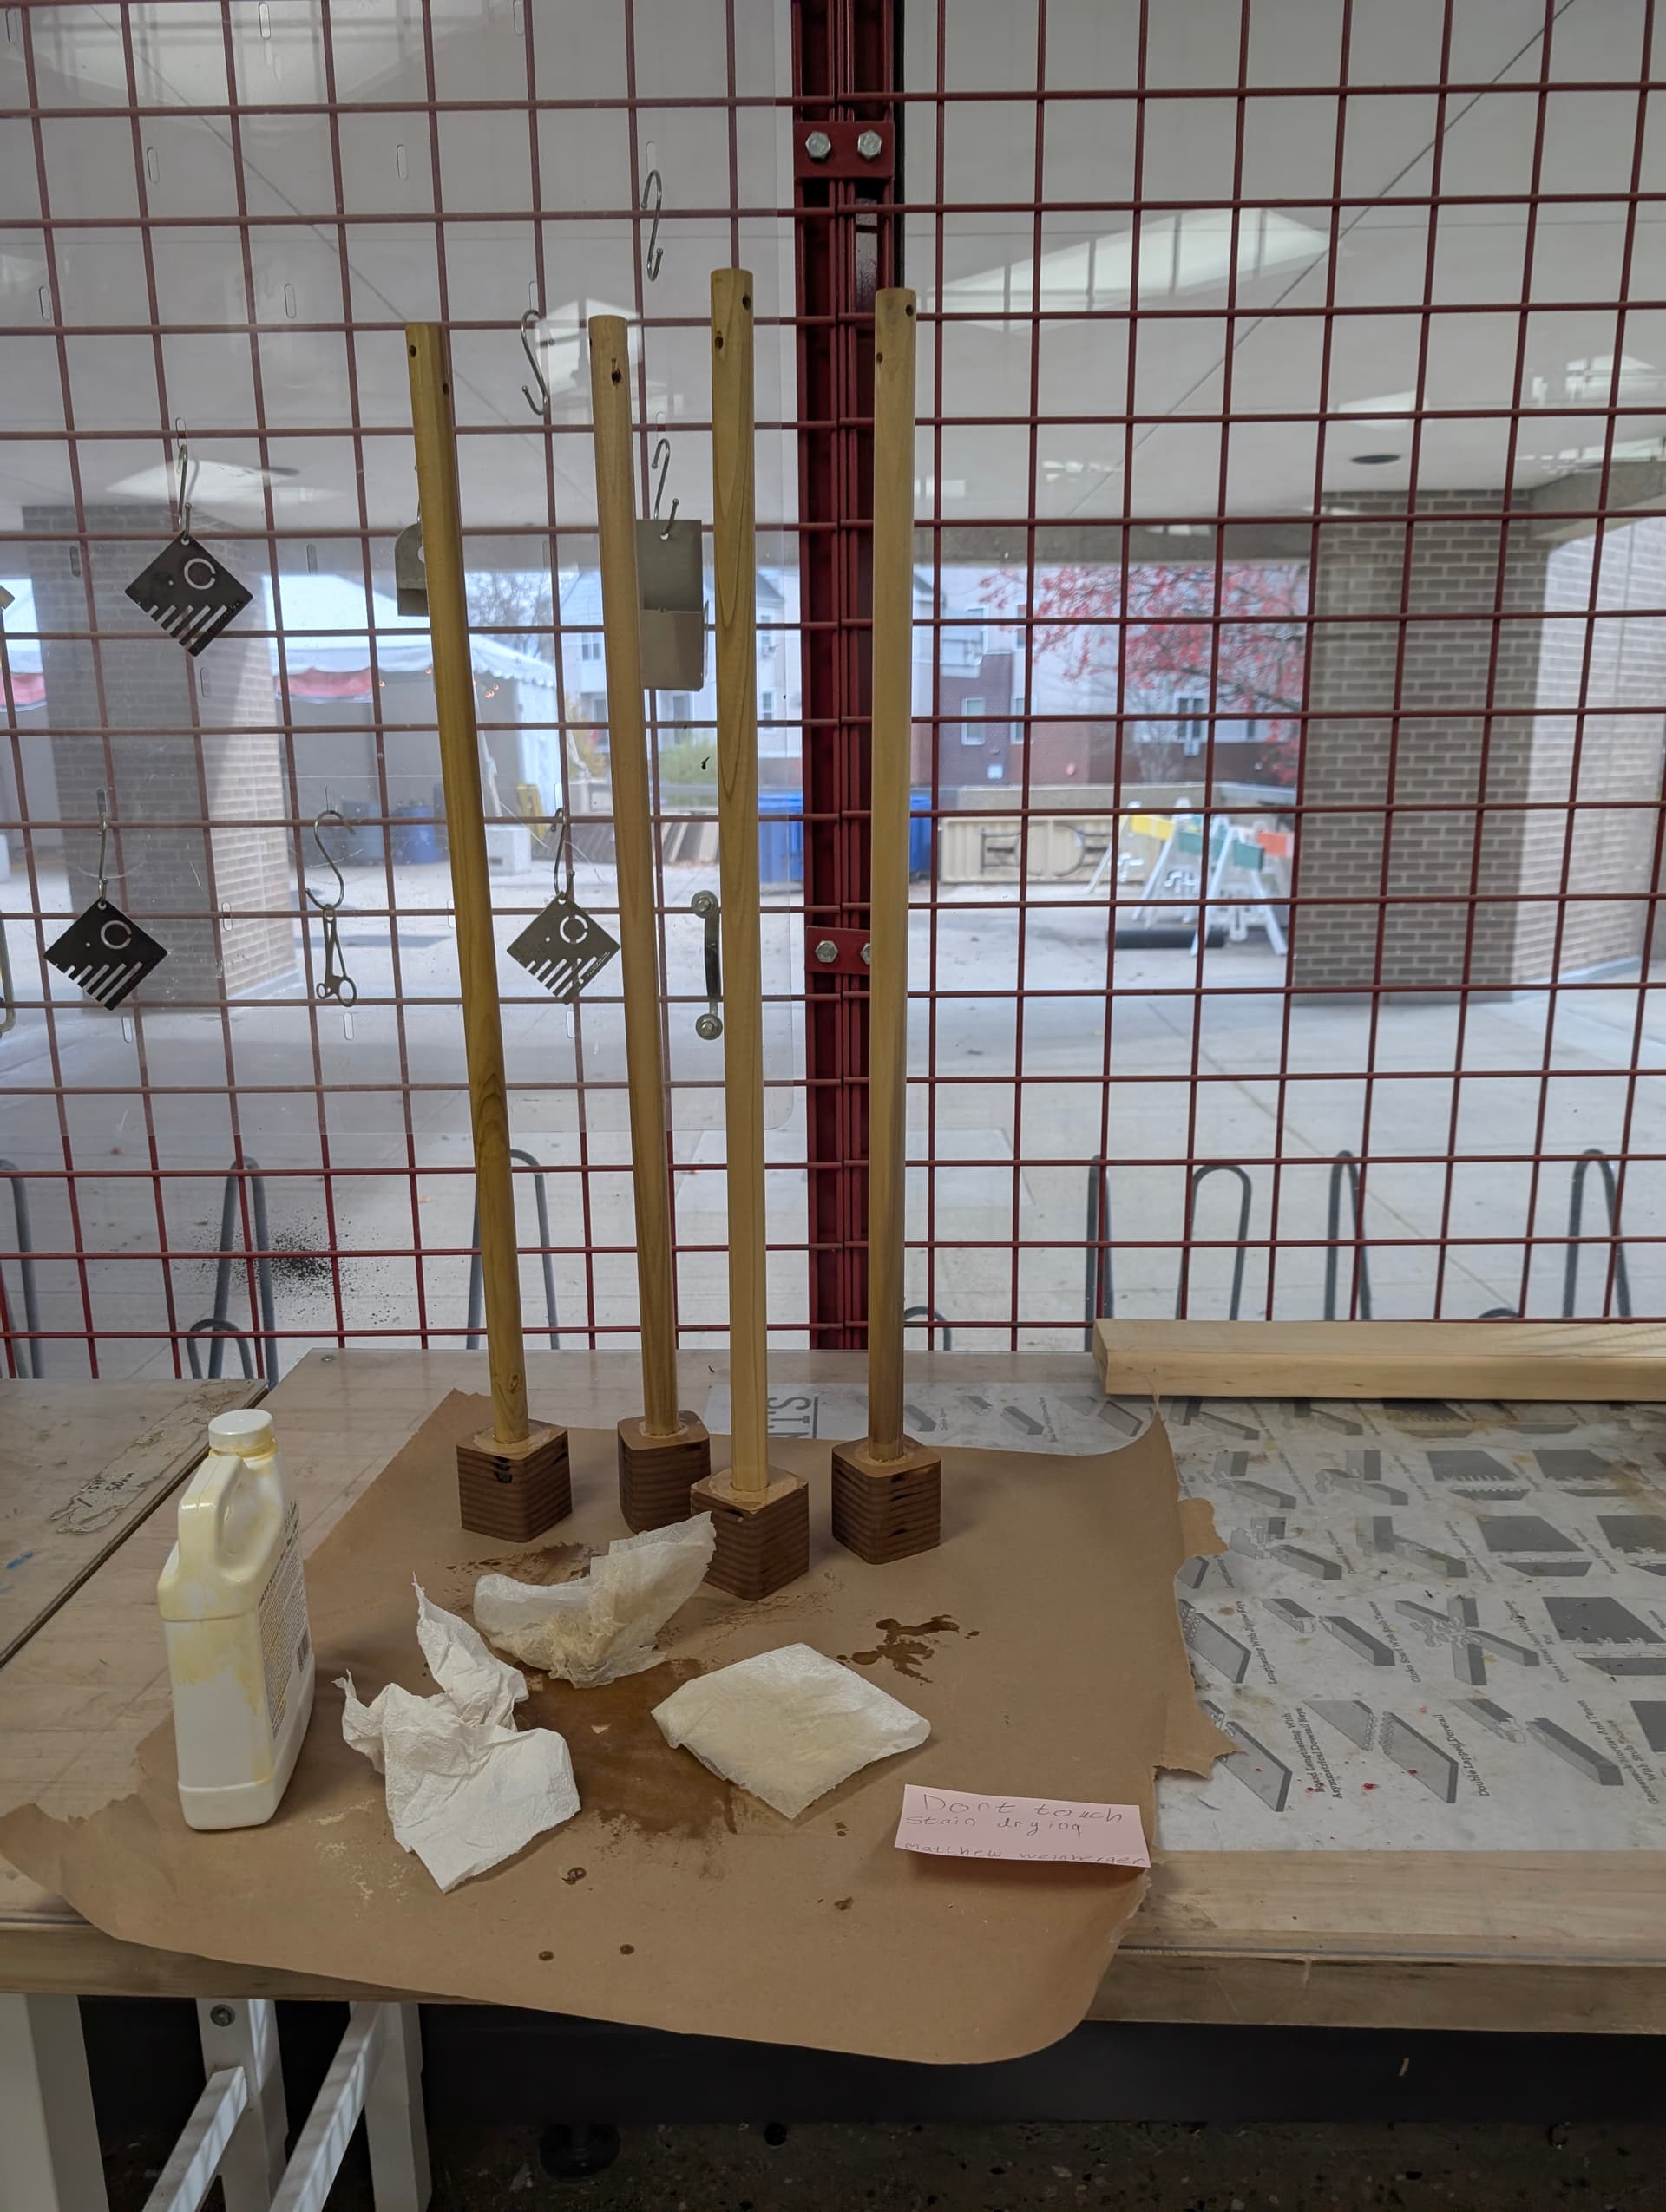

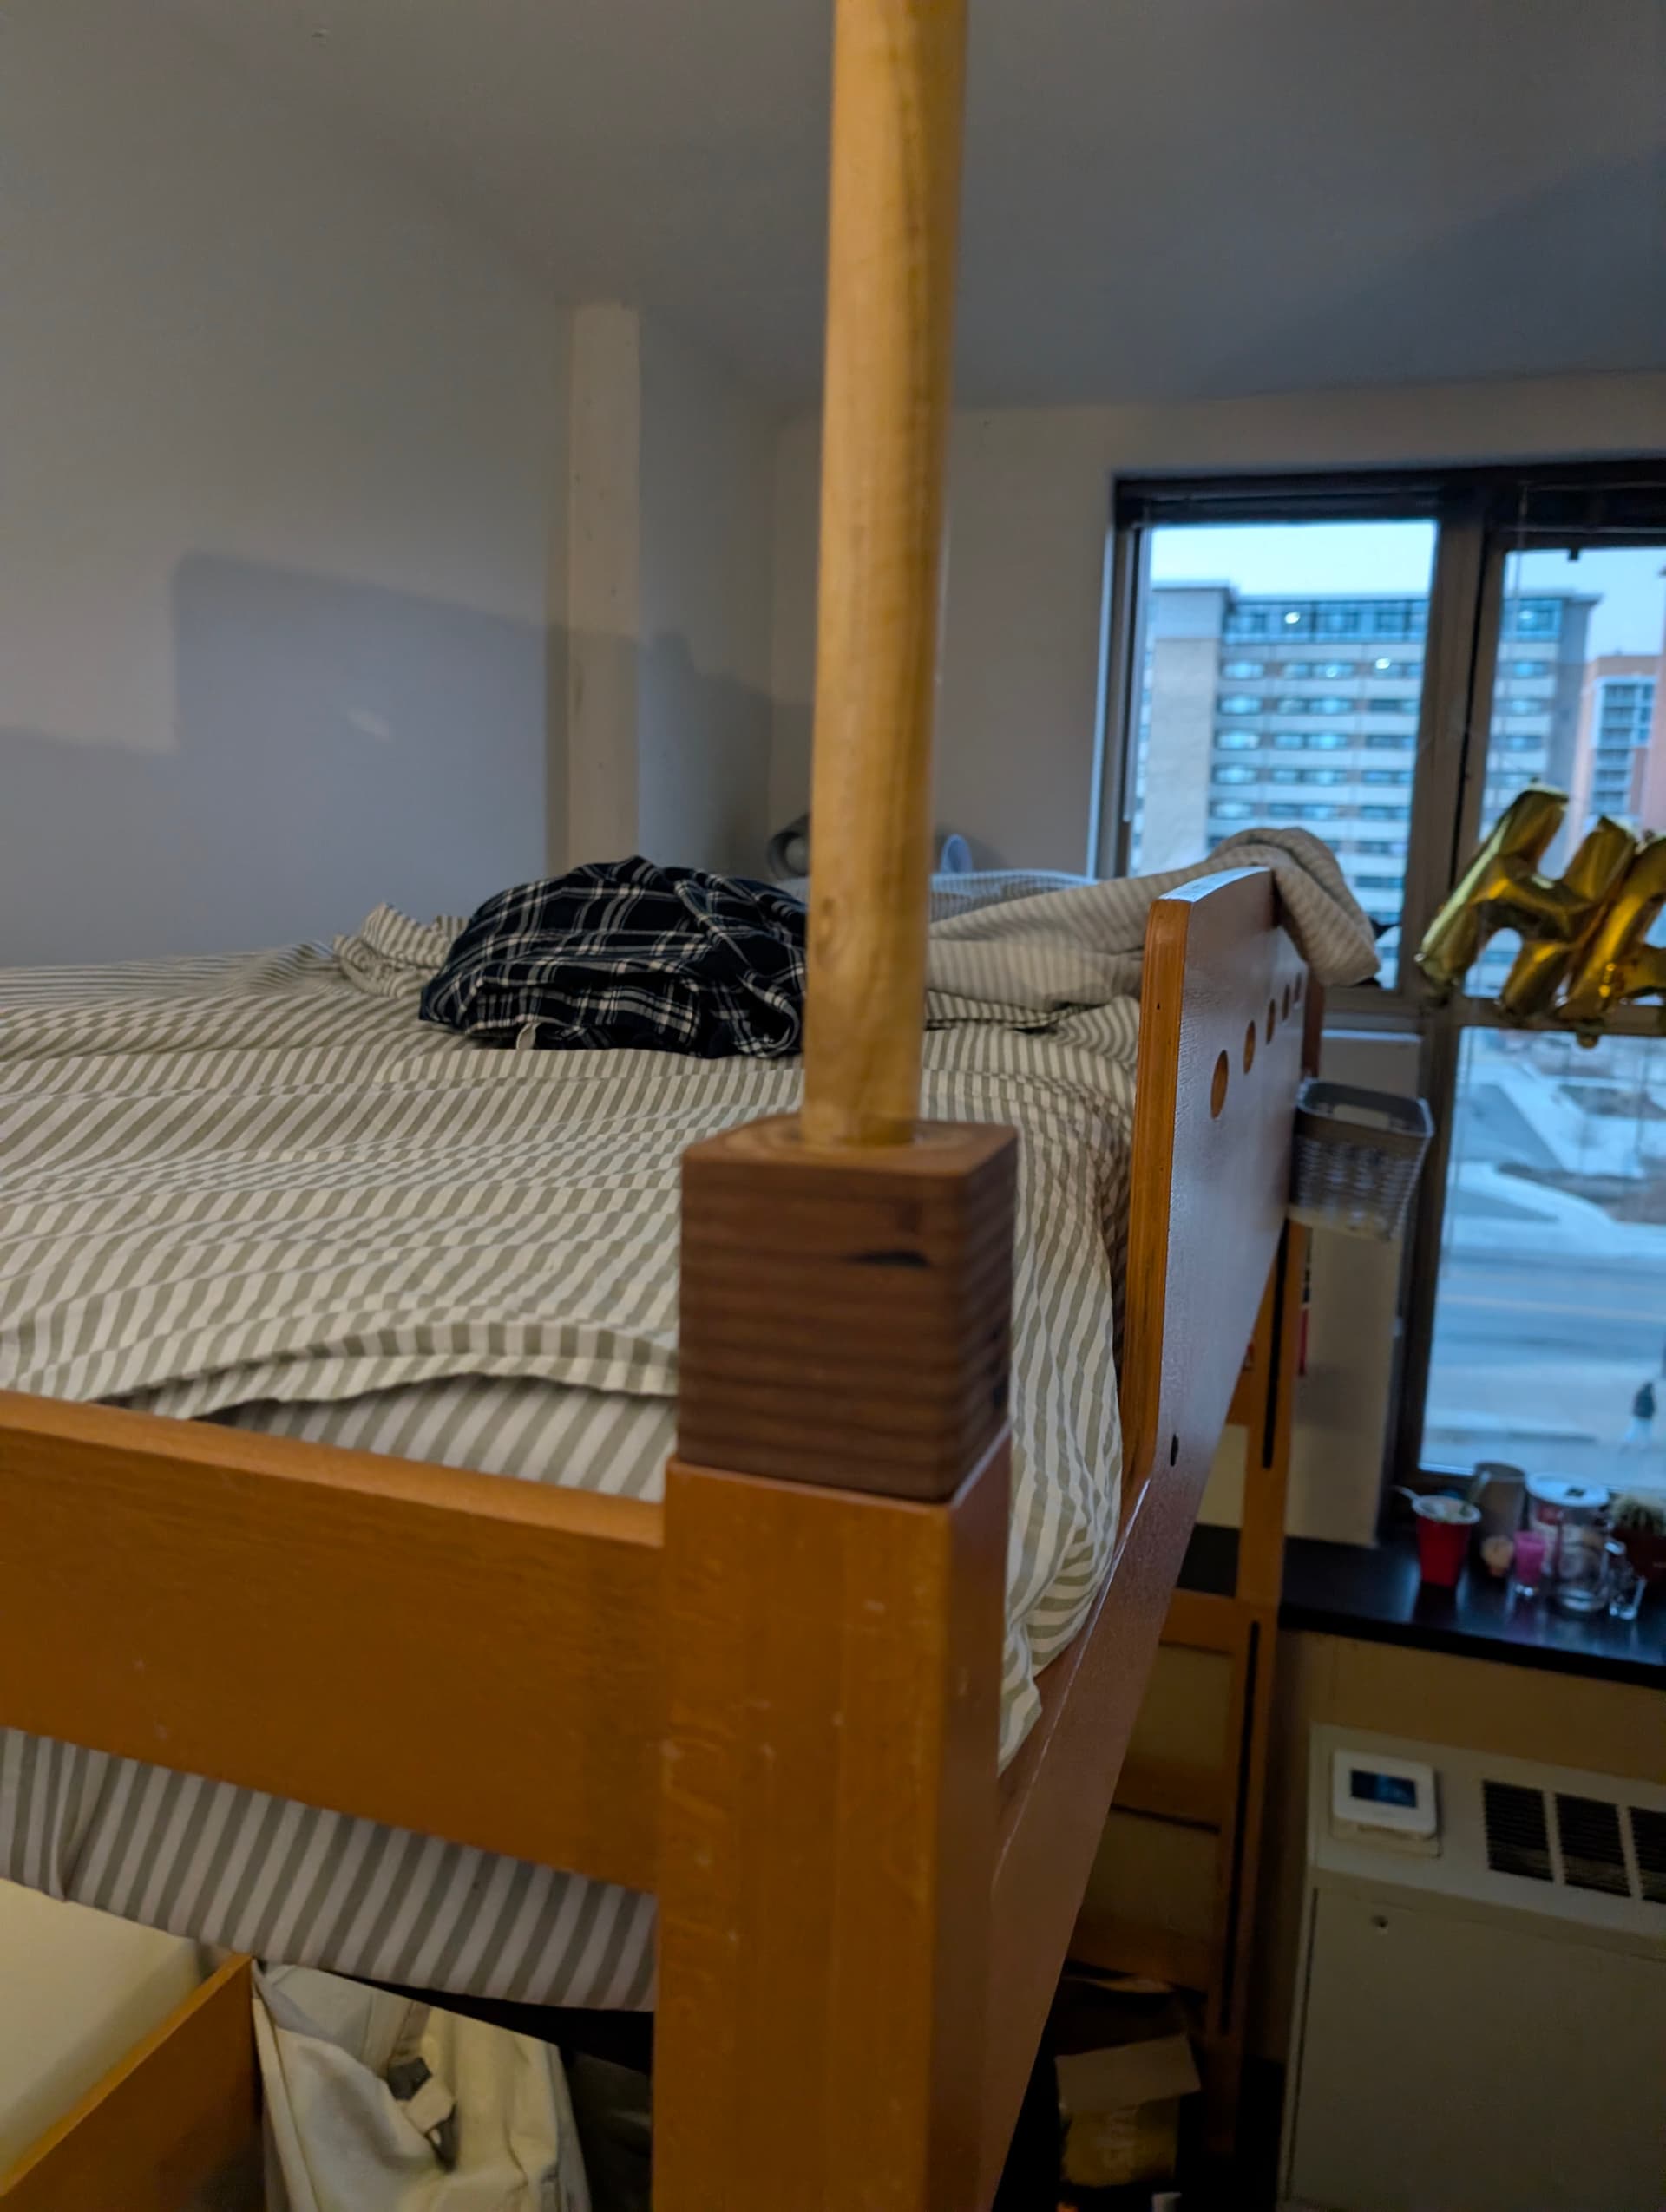
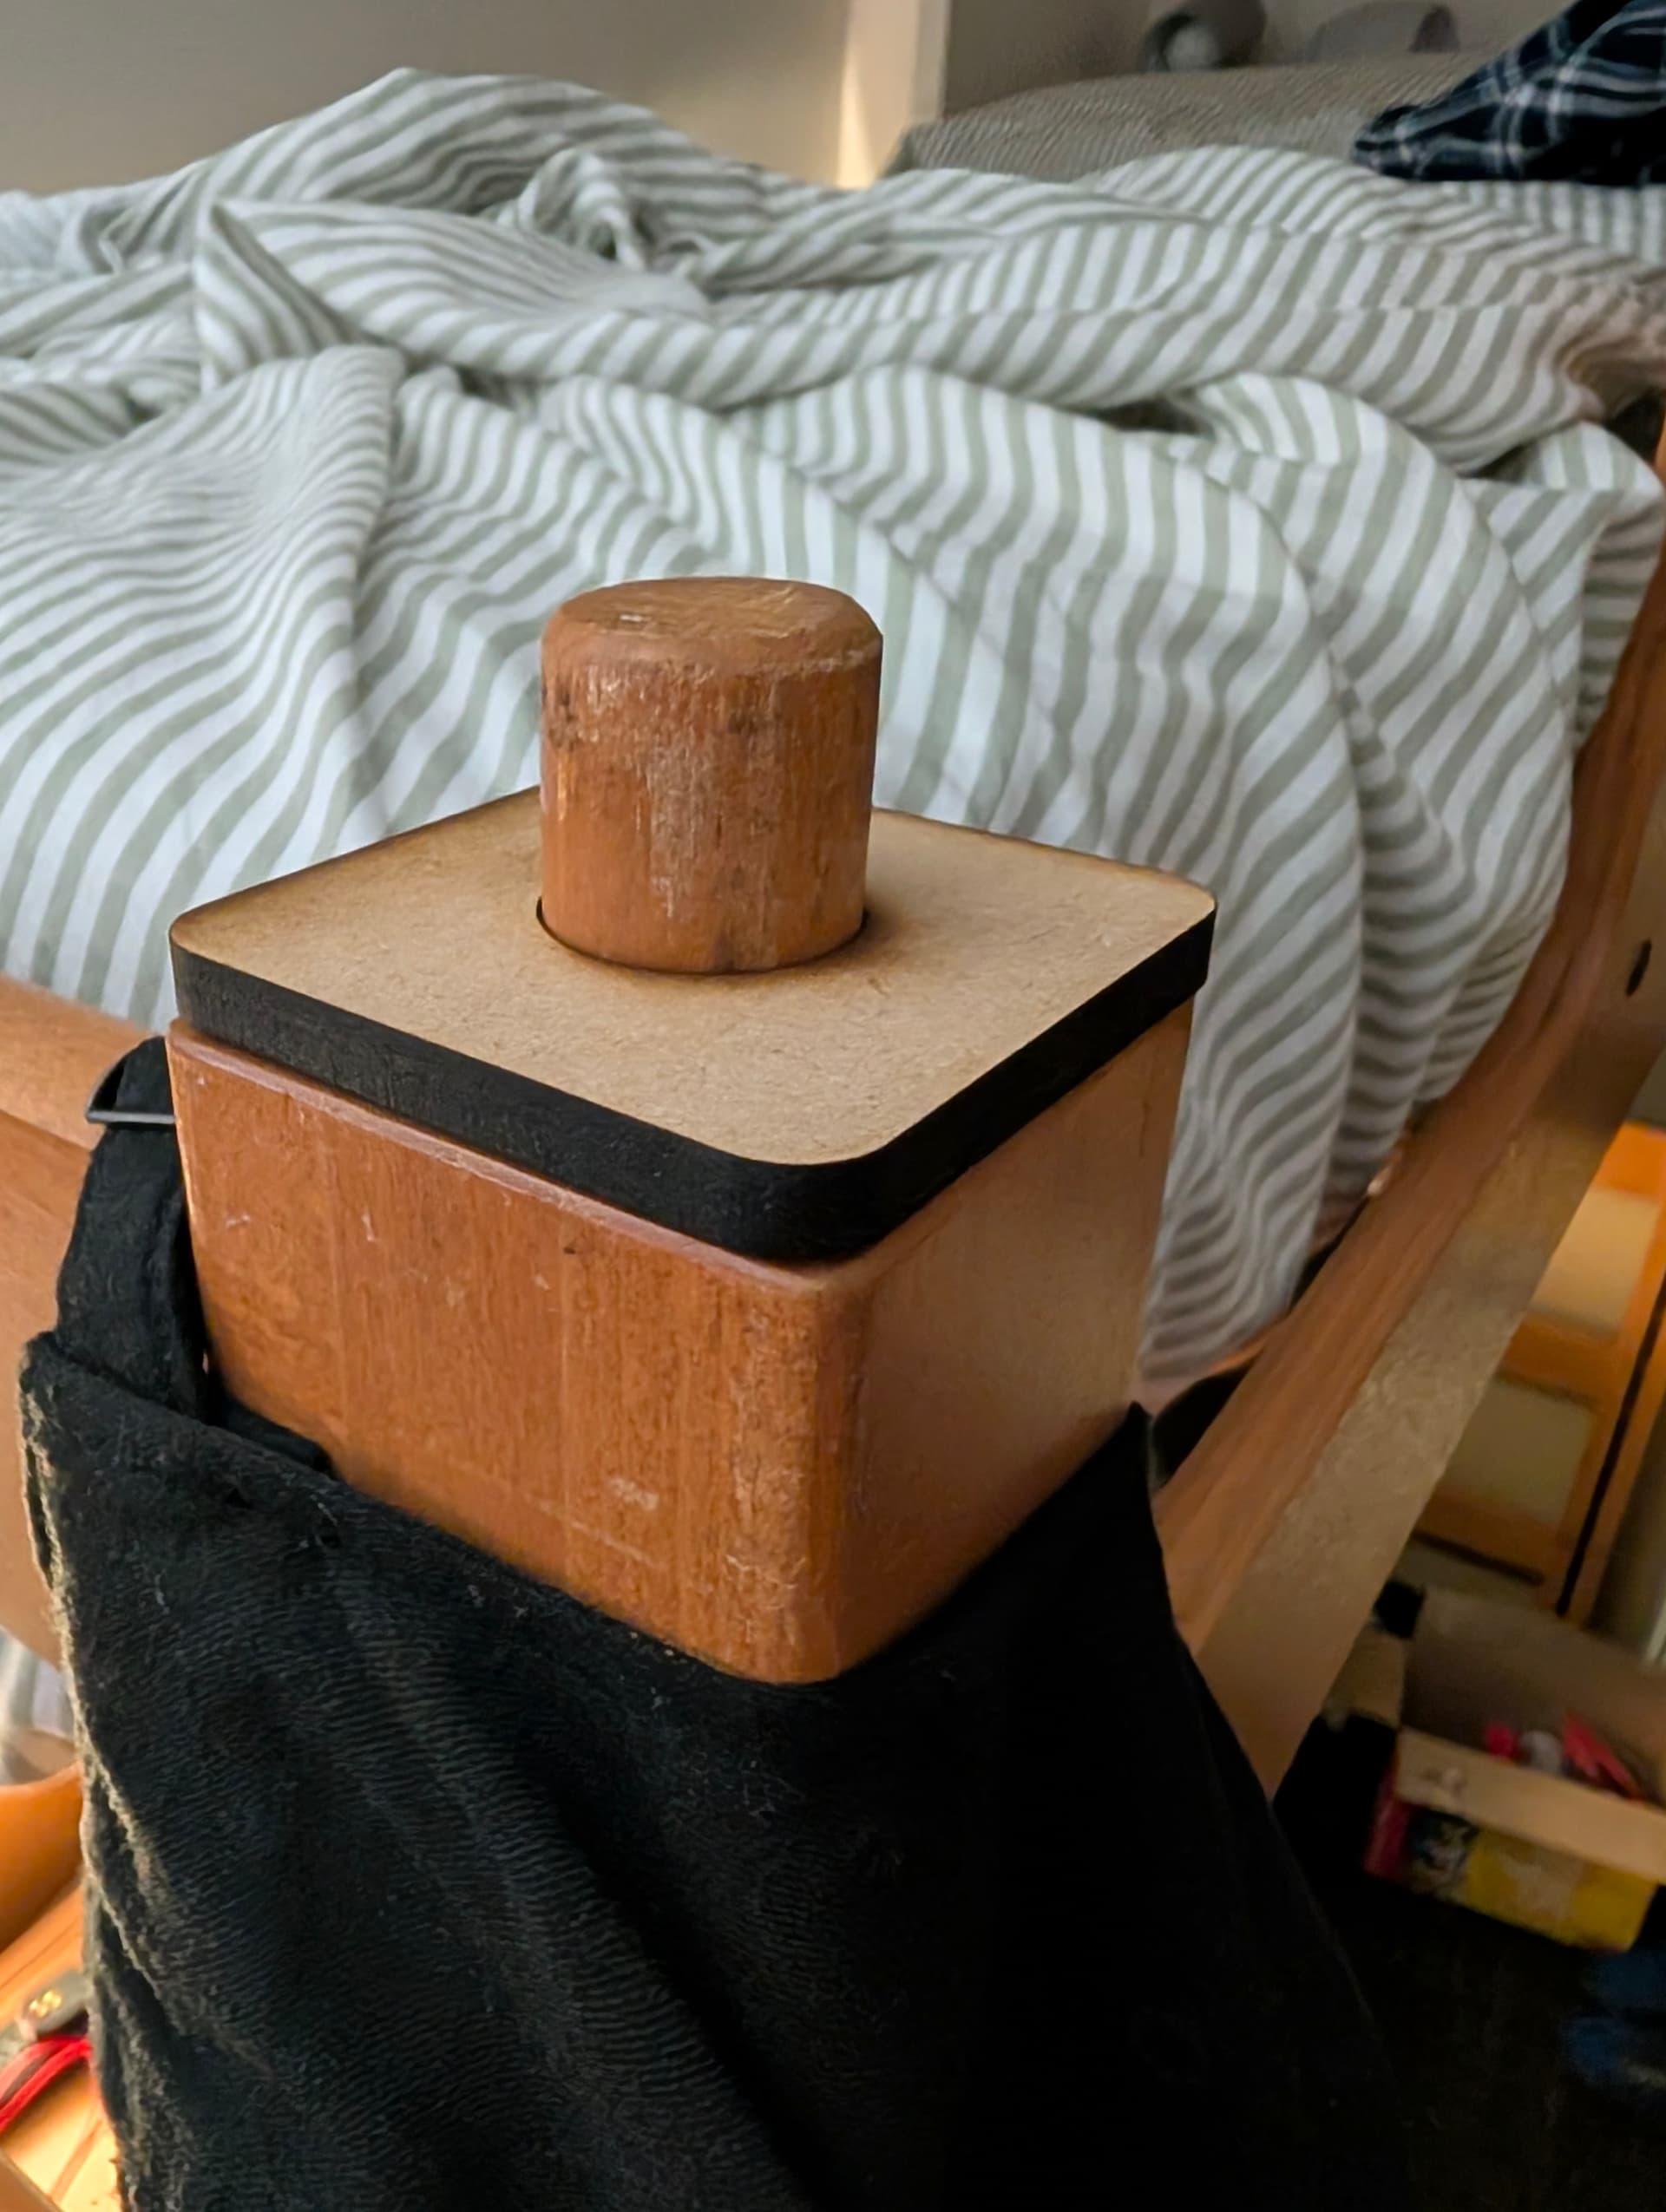
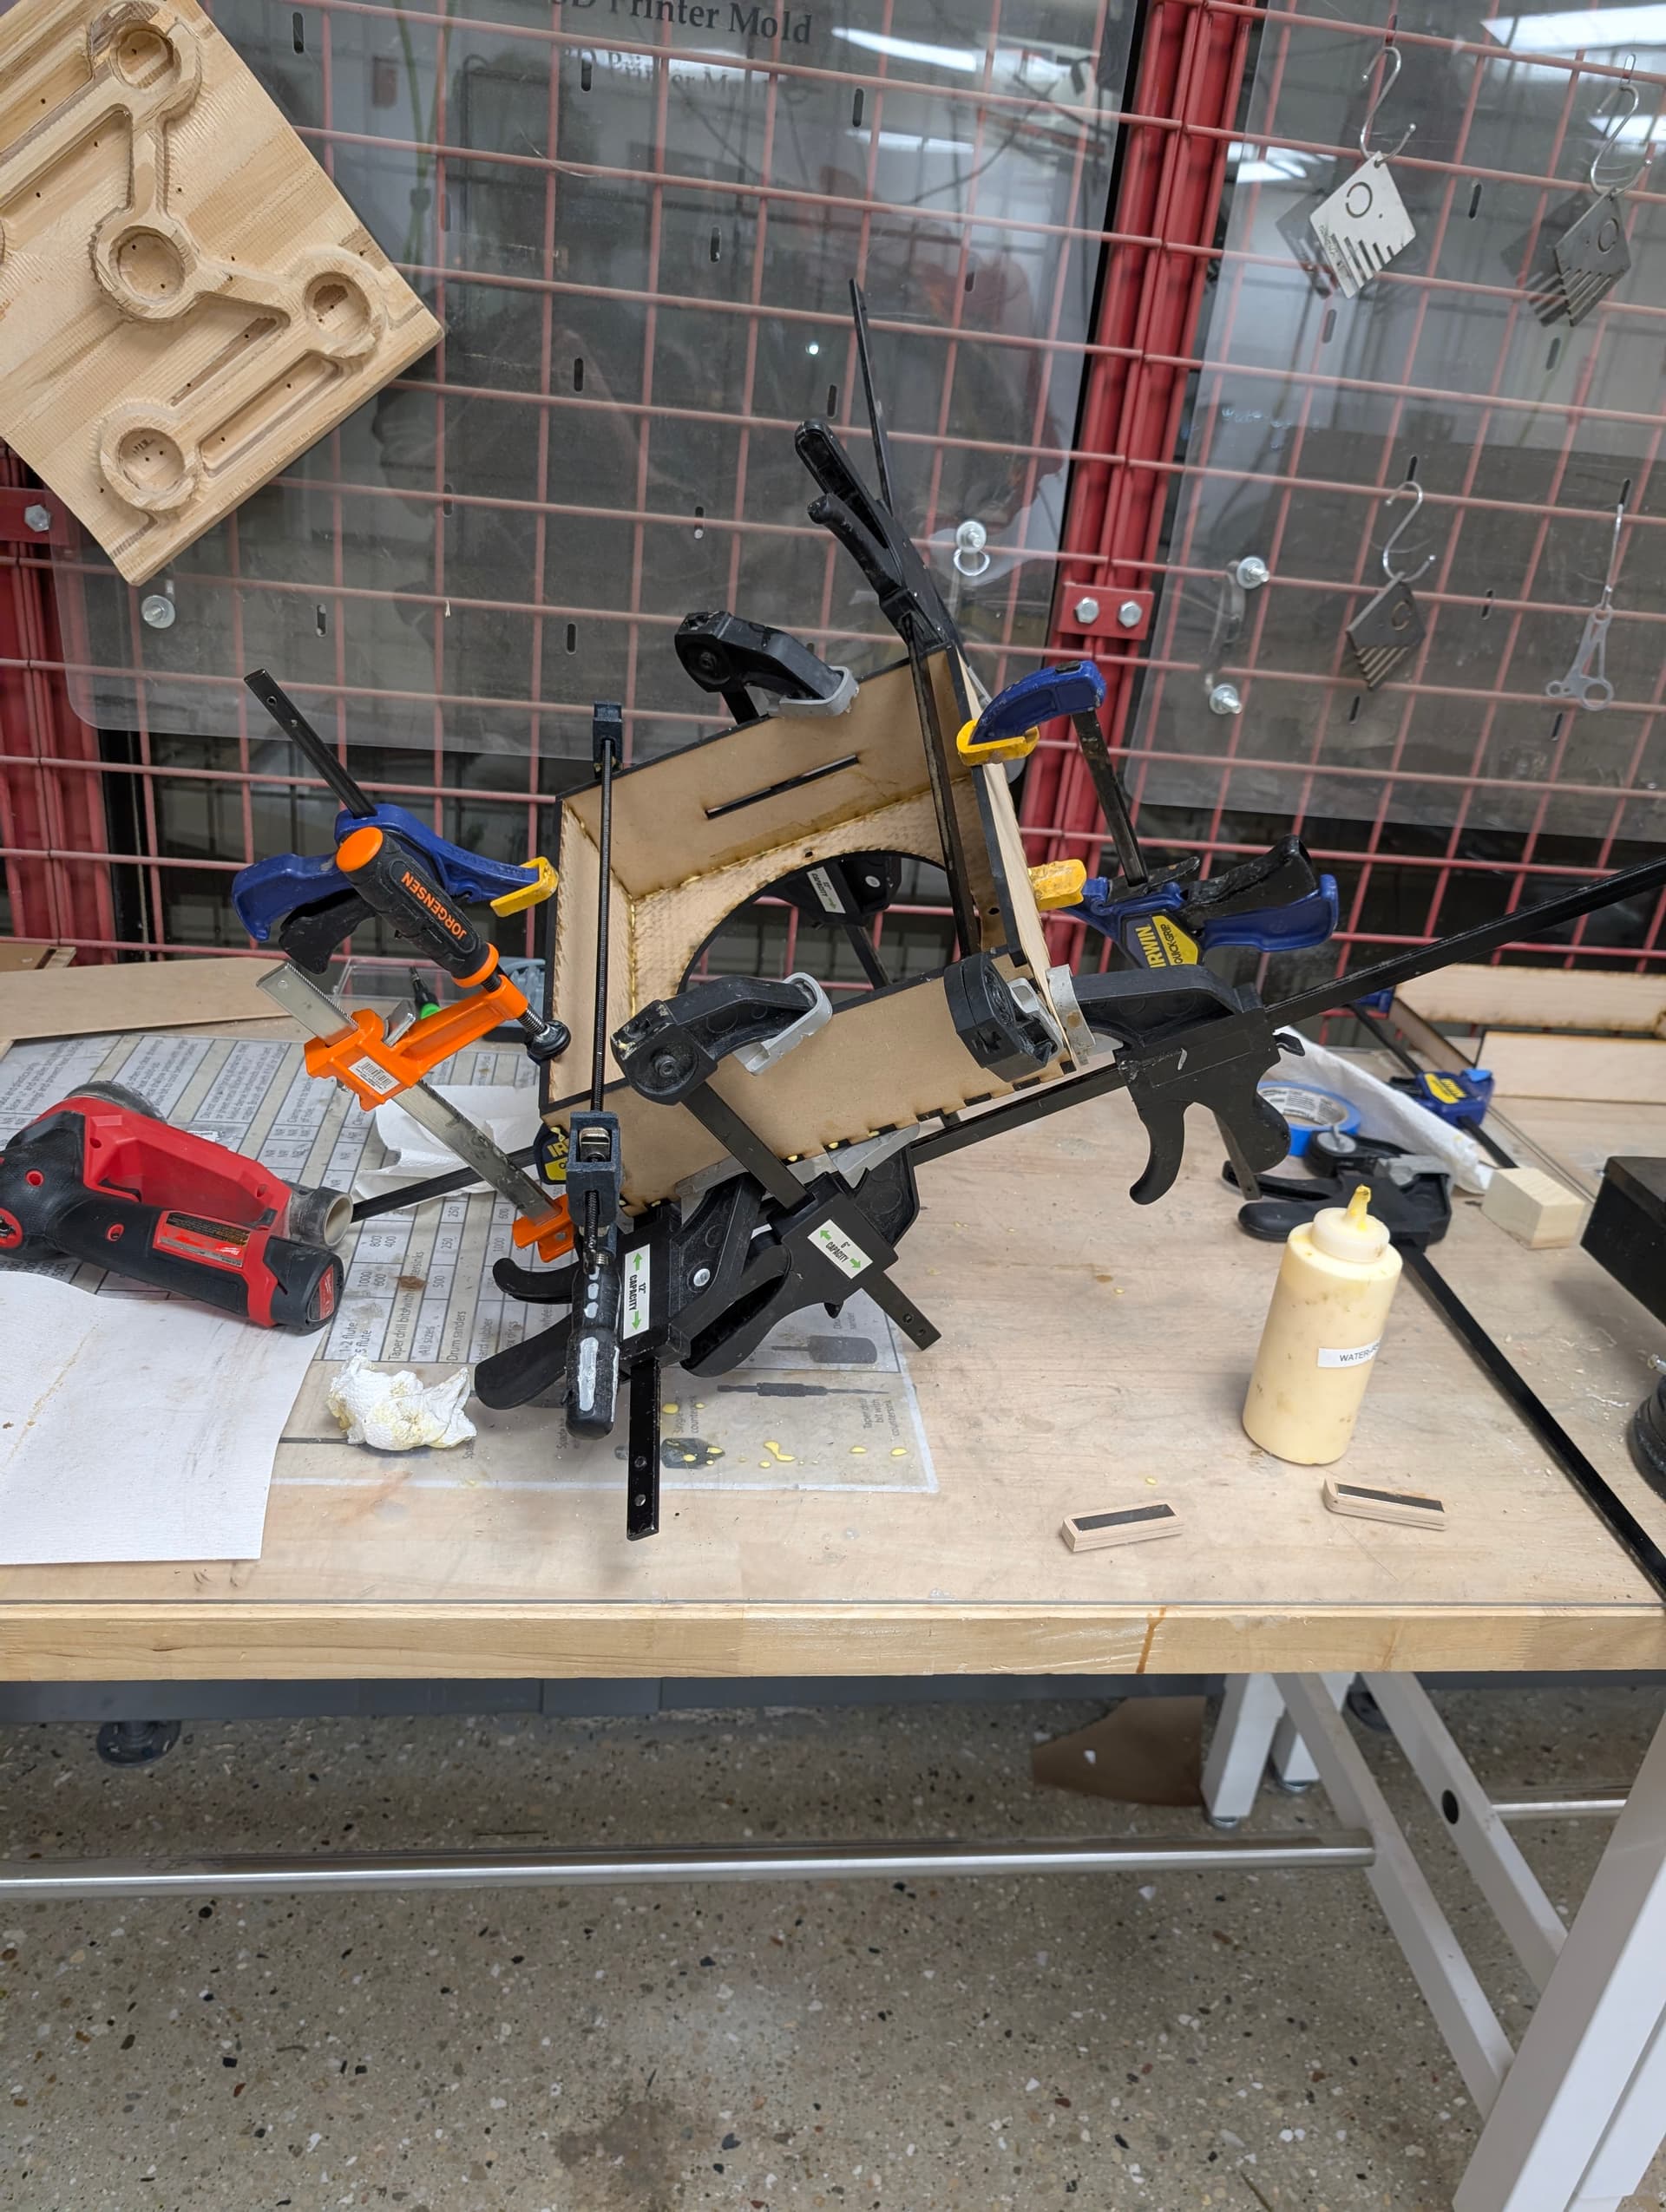
It’s glued together stacks of laser cut MDF that friction fit to the frame, they’re still drying as I applied a coat of tung oil to hopefully help them survive longer. The vertical poles have holes drilled at 90 degrees to eachother so I can make a rope frame to hang the fabric
The fabric canopy will be made from a king size blanket that I’m going to install eyelets into. Then I’ll either string up some fairy lights inside or above it. I was thinking if I do it above then the light shining through holes in the fabric would look kinda like stars.
I’m considering placing some speakers at the foot of the bed inside that I can play music or rain sounds from before bed, and possibly a fan for ventilation.
Small woodwork projects are so fun because I don’t need to do any rigorous planning or designing or research, I can just have a idea and execute it immediately
1 Thank
I also enjoyed this type of woodworking when I was young. Your current project is really cool and very functional.
Perhaps consider some small directional lighting for reading that’s either built into the posts at the head-end of the bed, or attached to the posts using something like bike handlebar mounts.
Thank you for sharing & please keep posting as you advance!
1 Thank
How about a vertical organiser, rather than horizontal? Like shelves but with dividers so each light gets its own space. Perhaps if you wanted to over-engineer, design so the shelves slope downwards towards the back.
Don’t tell my parents, but there’s not much reading happening ![]()
1 Thank

It’s finals week next week, so this has just been a quick weekend project to submit for OL in case I can’t finish anything else, I don’t think I’ll bother with the handmade category this year. I’m really enjoying CAD and using the laser cutter (it’s a 150W c02 with 24x36 inch work area)
2 Thanks
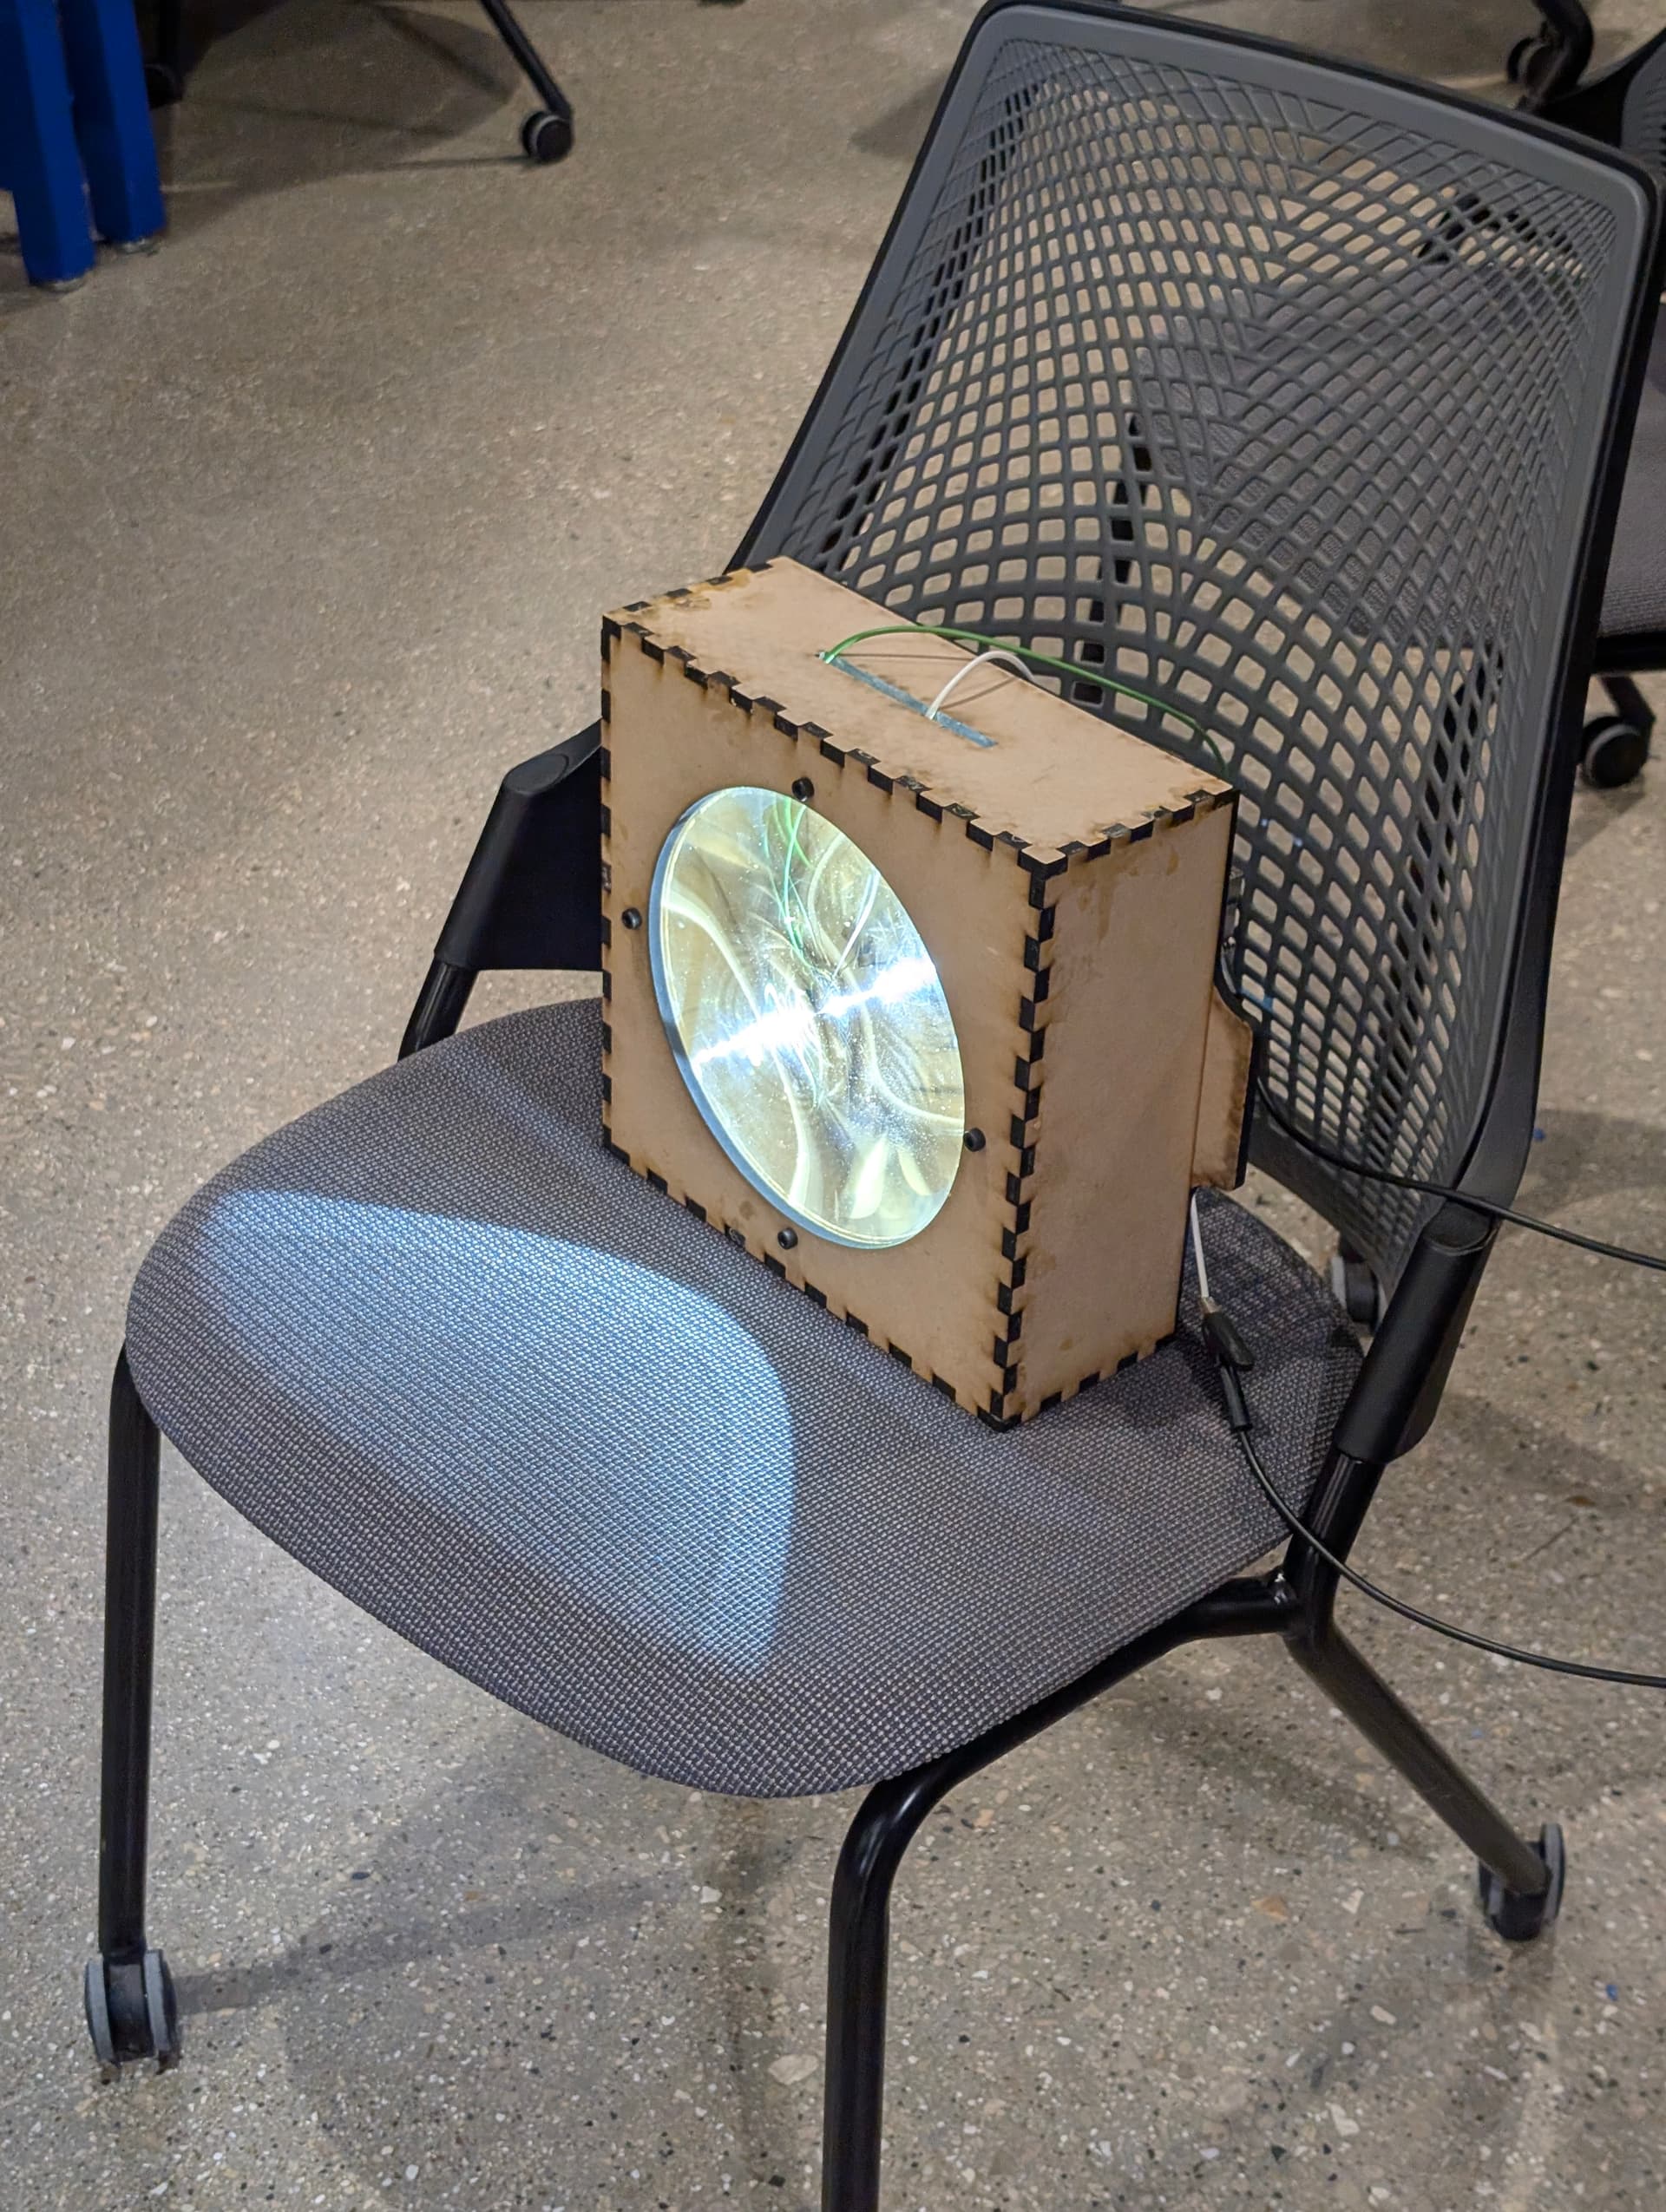
This is really cool! Where did you source the Fresnel lens, and what’s the diameter and focal length?
I’ve been having trouble finding nice lenses, short focal length gives a crap ton of chromatic aberration, while long takes a ton of space. Some of it is fixable by introducing a small convex collector lens between the emitter and the Fresnel lens, but not everything.
The chromatic aberration is insane, even my non technical friends pointed out that it’s a straight rainbow
It’s a 200mm diameter, 70mm focal length, that maximizes lens area at the focal length, any longer and I’d be wasting some light, any shorter and some of the lens would be unused. It’s from AliExpress
1 Thank
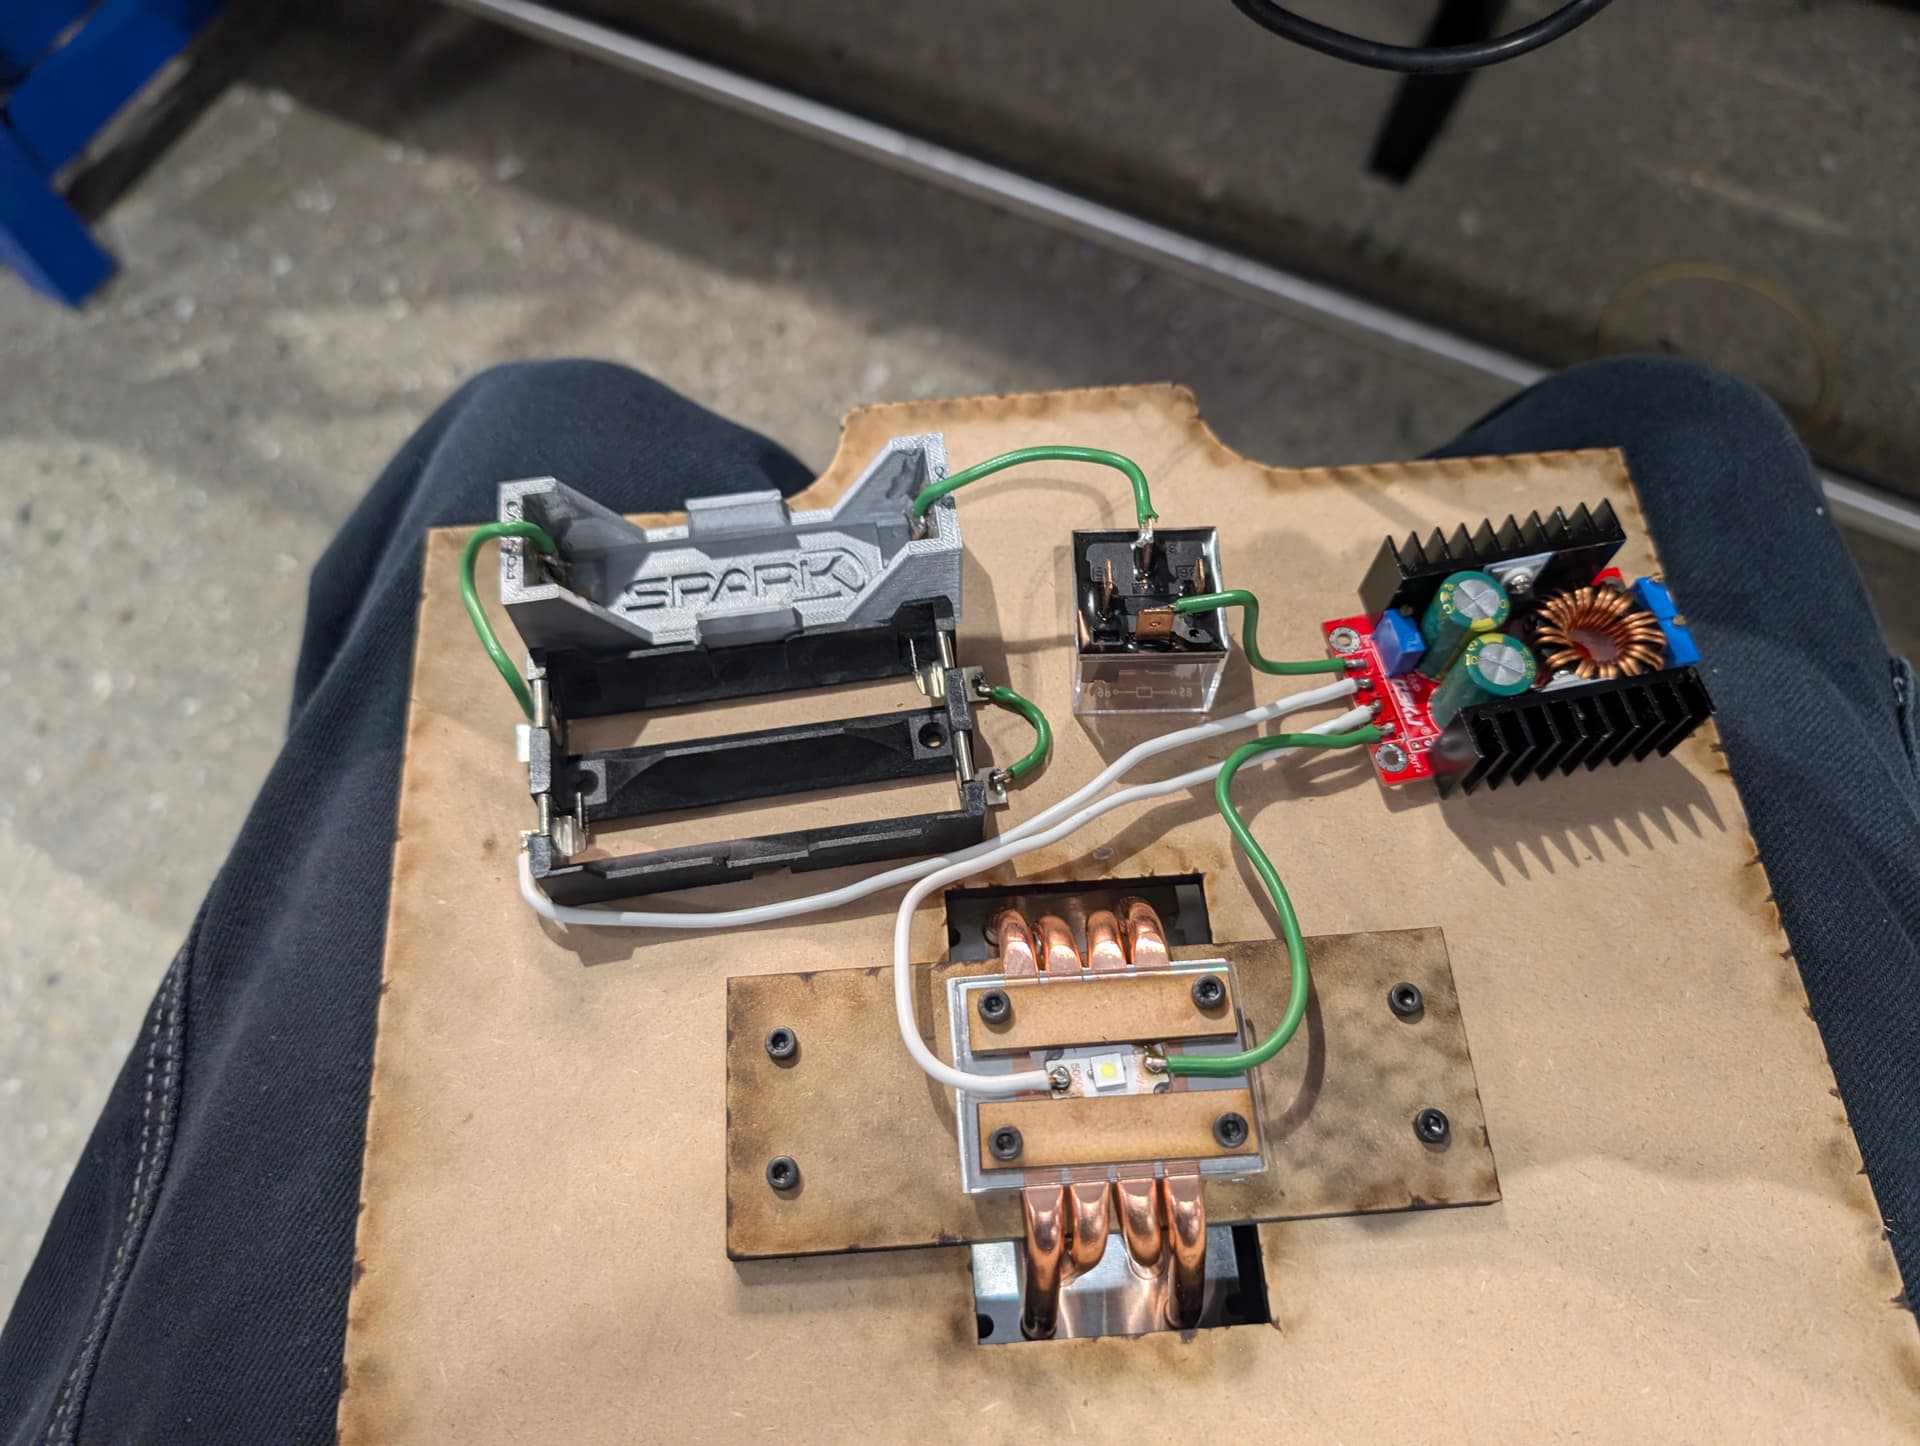
All the high current electronics are done, I need to do the BMS stuff next and the UI, an Arduino is handling that.
I need to take a break to finish school work though, might be next weekend this is finished
4 Thanks
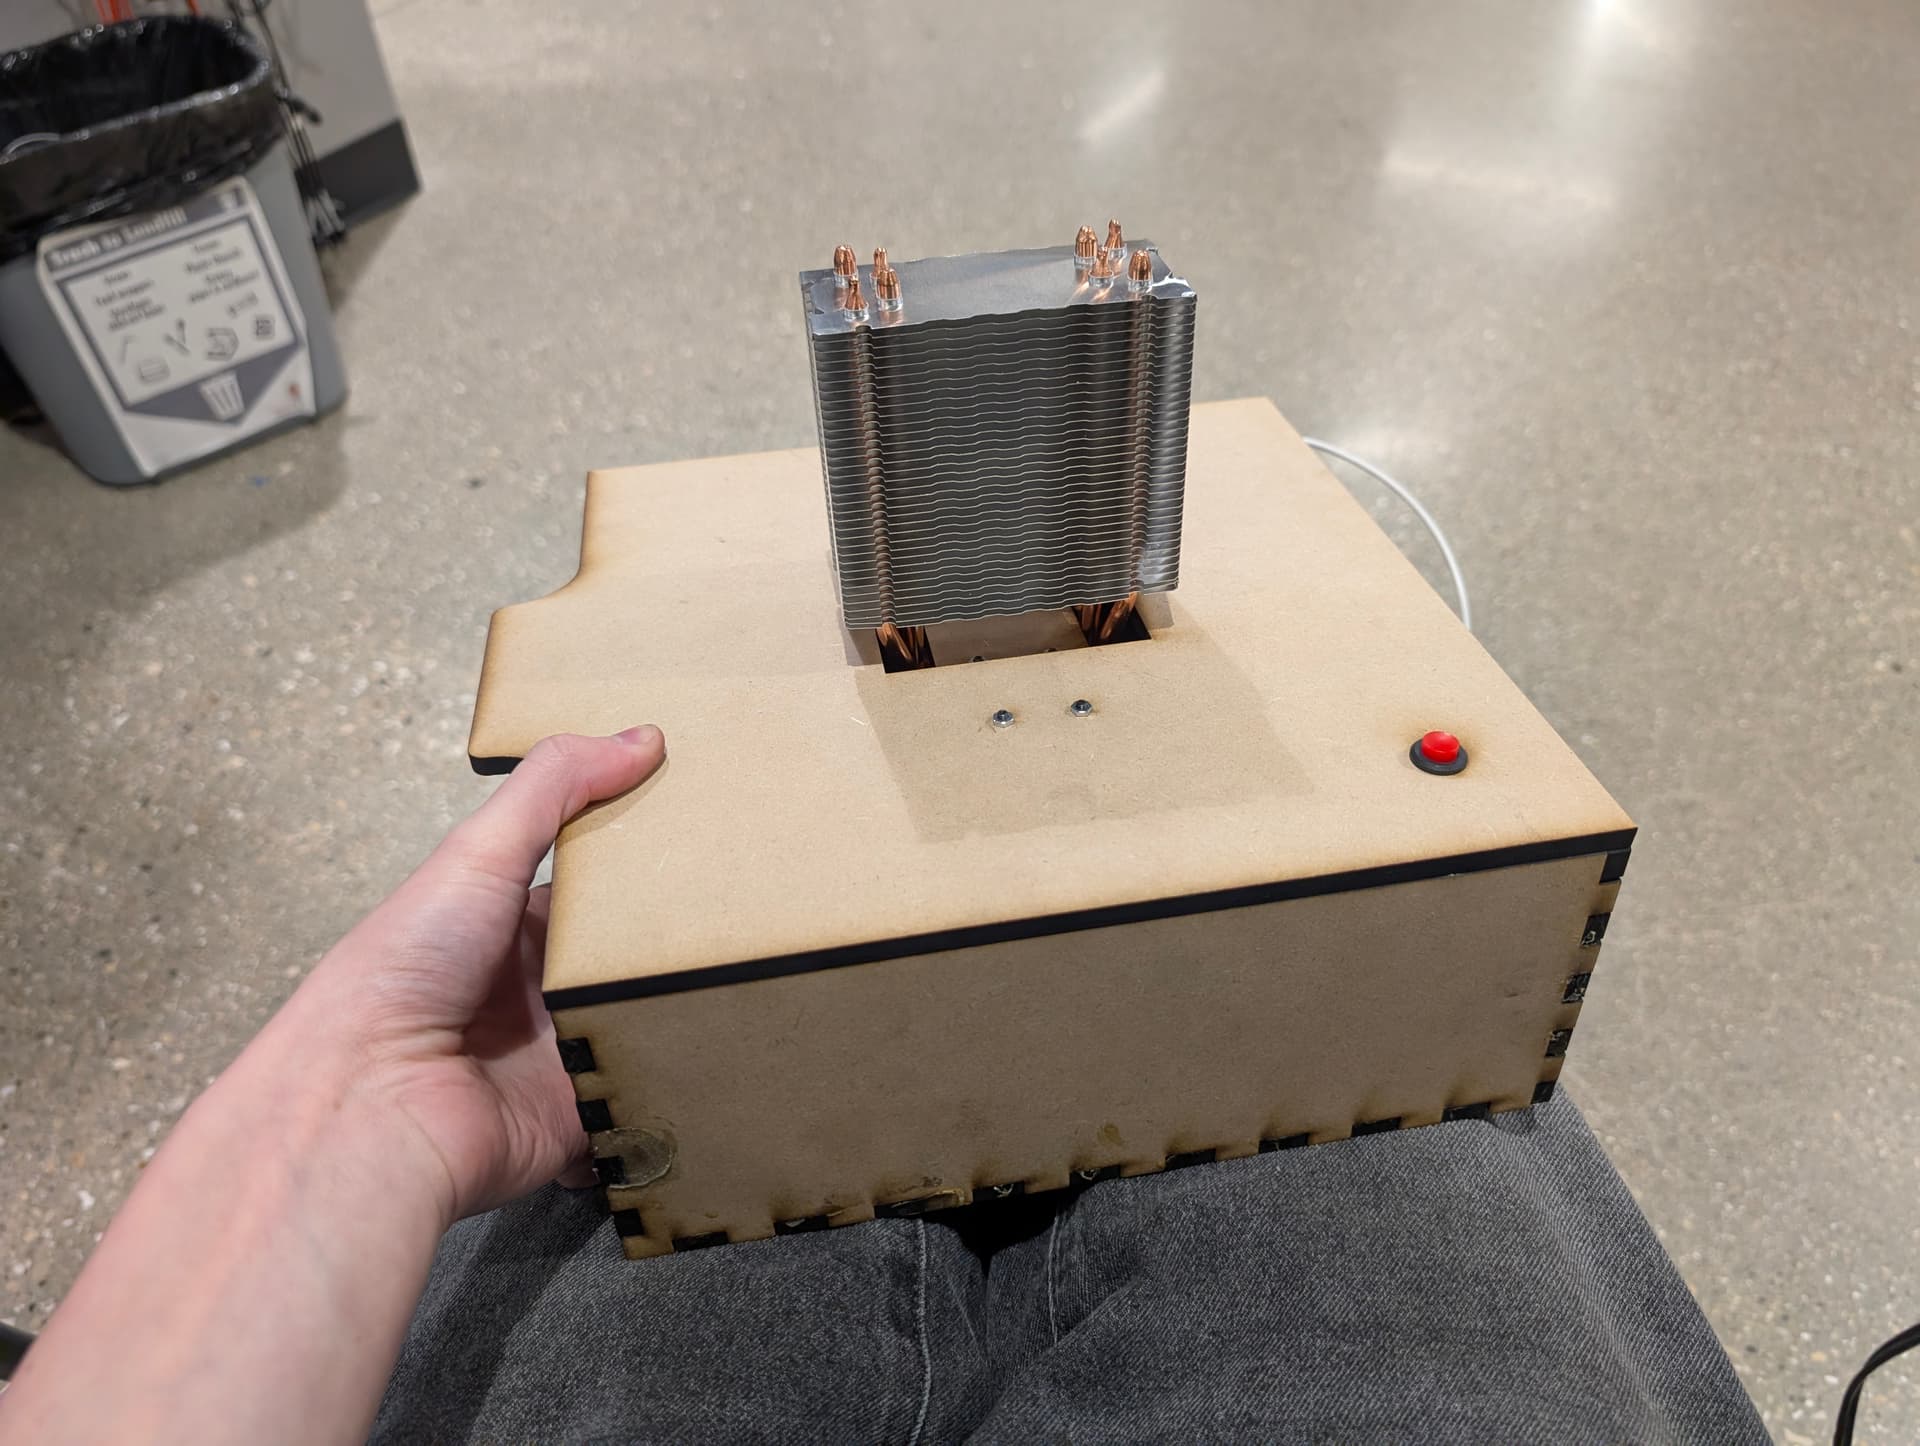
Cool, that’s quite a big driver board with serious heat-sinking. What is it?
its a constant current buck module, itll be doing 40W continuous so it needs a good amount of heatsinking
Please share more about this when you’re ready. I’d like to try something similar eventually.
i will post part numbers and schematics and photos ![]()
2 Thanks
I am so very interested in this project, have been playing with similar ideas in my head for a while!
Cheers!
1 Thank
I’m happy to help advise anything you need, design choices, electronics, CAD methods, anything
Thank you so much!
I’ve also been playing around with esp32s running wled, and my “holy grail” is essentially running your setup through that - just don’t have all of the background/know how to do it all quite yet (***I’m getting closer!)
1 Thank
I’ve goofed
I didn’t read the buck modules datasheet properly, it says max output current of 8.5A, I’m going to try going higher either by just turning the knob further or maybe some kine of shunt mod maybe
If anyone has a good recommendation for a buck that can do 3v 13A let me know
Is the input 12.6V? Why not put the batteries in parallel? Convoy has several flashlight buck drivers that do 13A or more at 4.2V input. Or are you using that buck driver specifically because you want to control it with an Arduino?
Here is a picture of me playing with some ideas - def not an attempt to hijack your thread. The potentiometer in that circuit does not do what I thought that it would (I misunderstood, and thought that it would dim my emitter - doesn’t seem to do that).
I’m interested in running things off of line voltage, hence the LED PSU and buck converter.
I can see myself wanting to control a flashlight driver off of line voltage, just not certain how I’d go about that.
https://www.aliexpress.us/item/3256806282476168.html - buck module
Trying to use this as a roadmap for doing things, as well: Compatible LED strips - WLED Project but it doesn’t directly translate to what I’m after, and again - I don’t have the deepest background in these things:
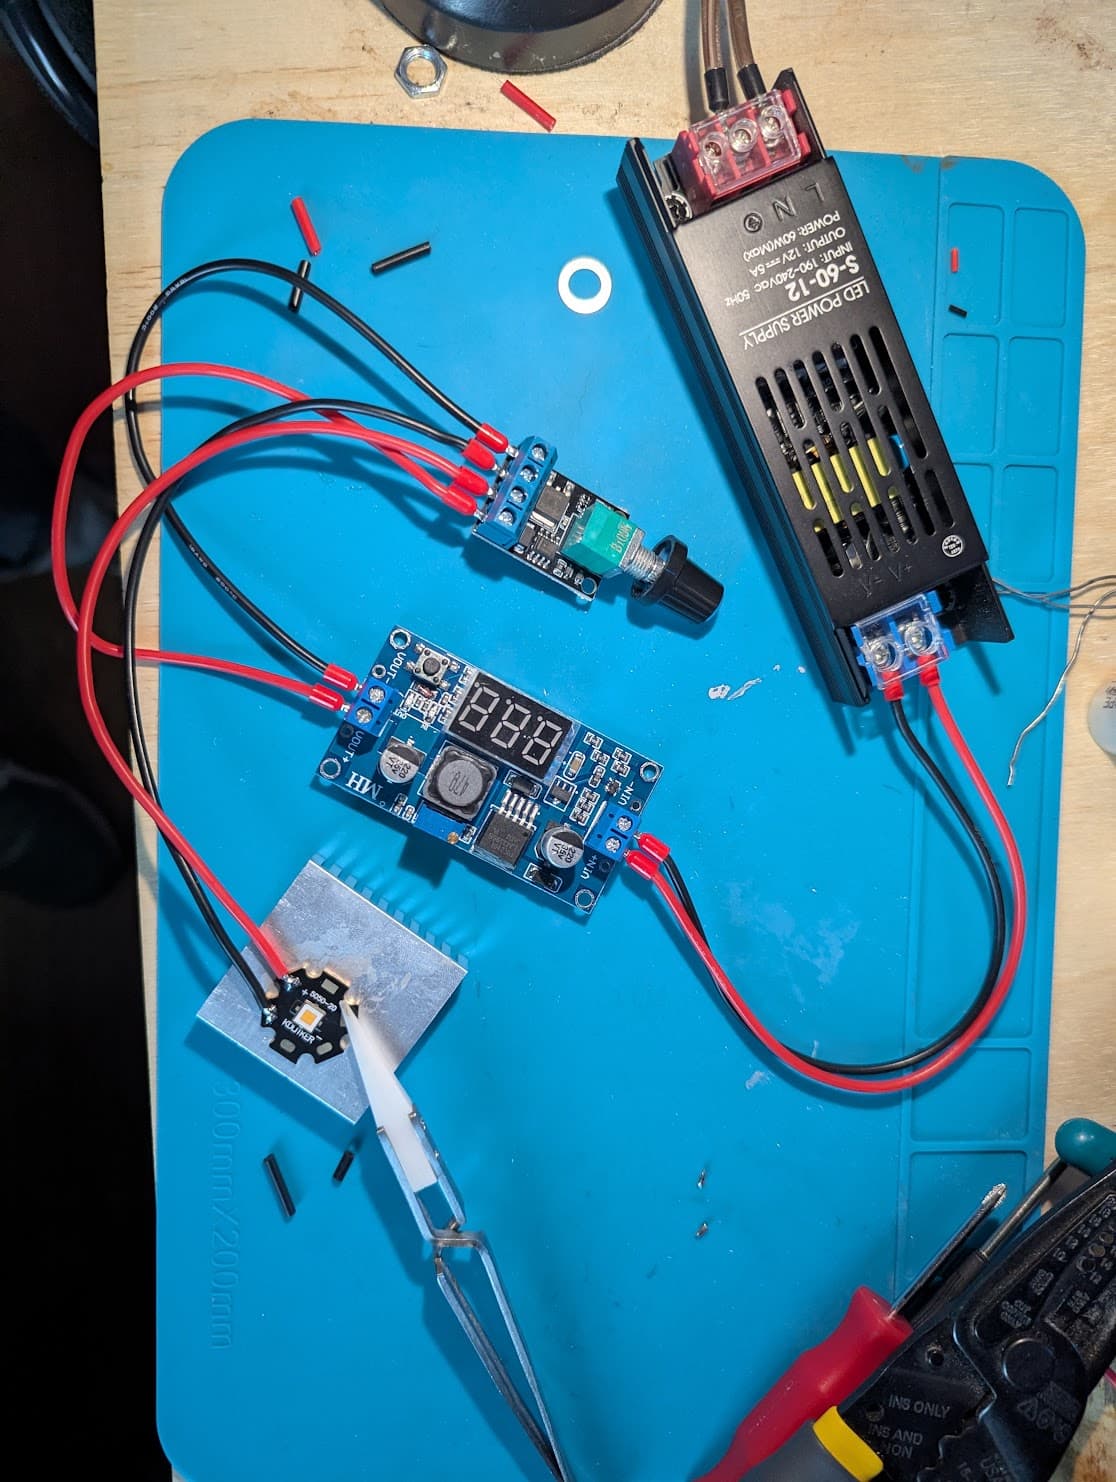
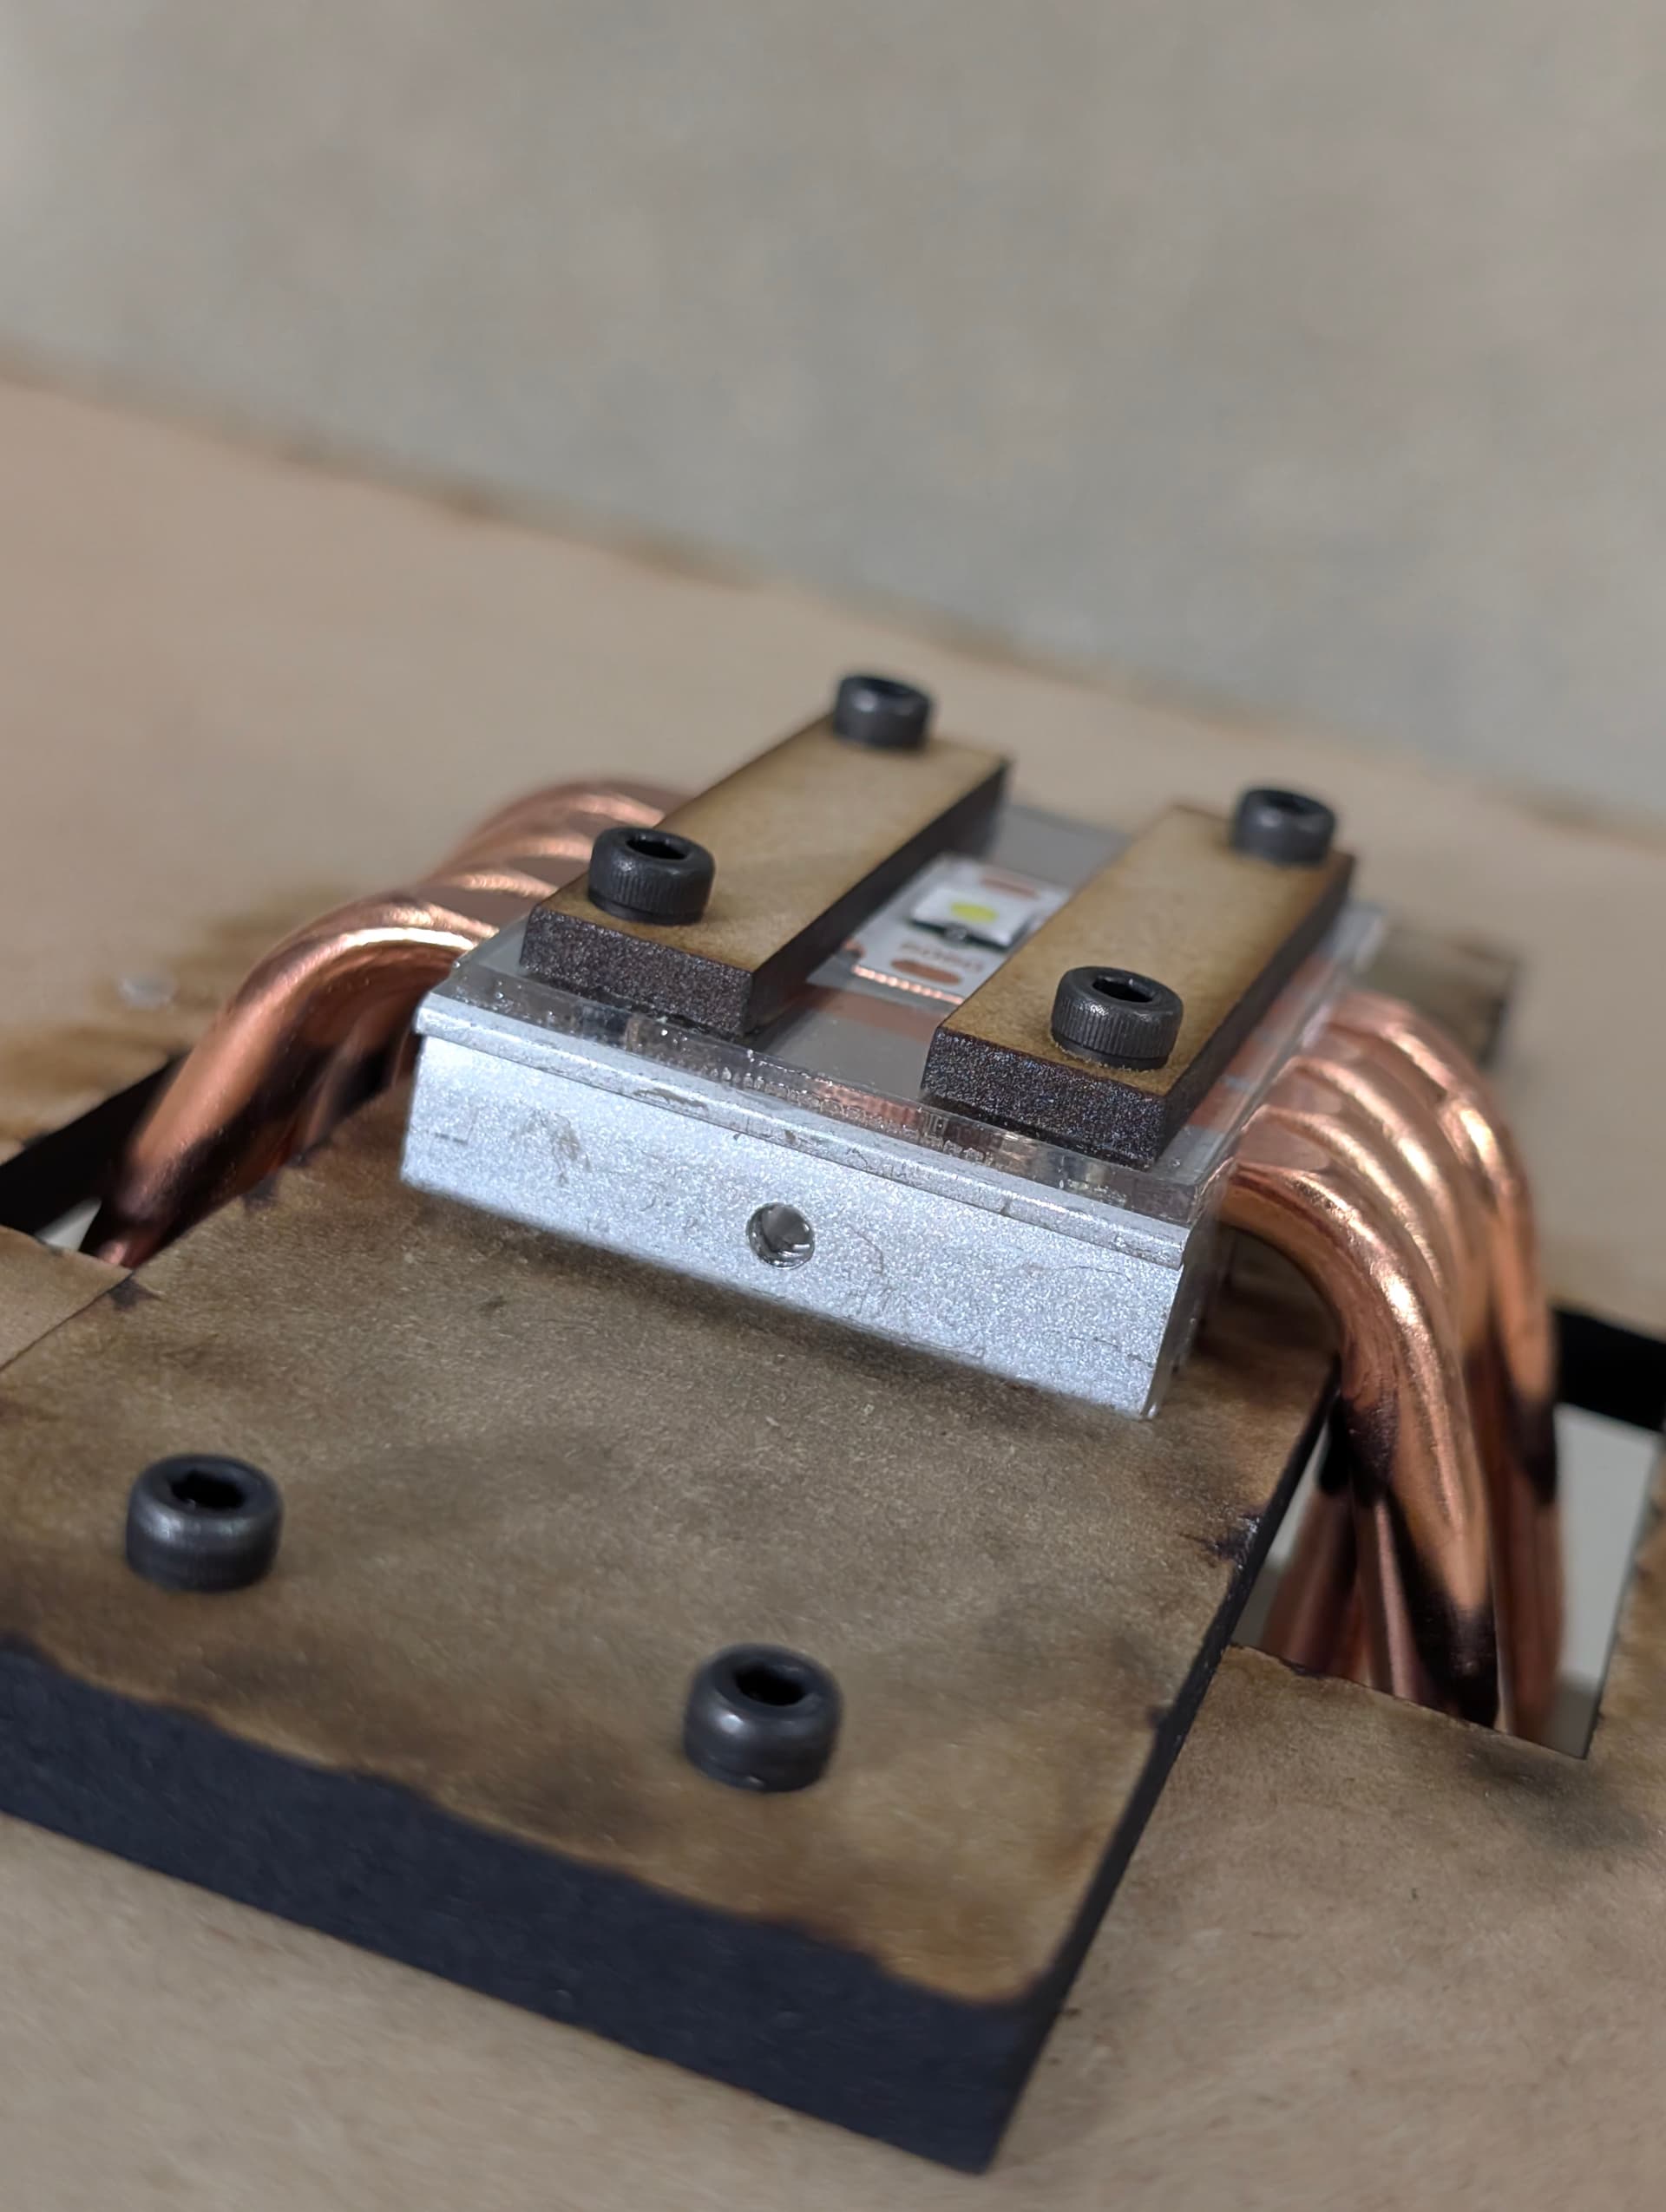
I also learned that I need to firmly fasten the LED MCPCB to a heatsink - it flopped off briefly and I saw some magical smoke - not sure if it was thermal paste cooking or the LED… was measuring current from the wall when that happened, and I was pulling ~25w to my 12v PSU, which I’d been stepping down to 6V. Would that imply that I was pushing around 4amps to the LED?
Cheers, thanks again - I’m try’n to learn over here!