Tofty's 10A Tailcap Switch (17 available)

I think trying to completely redesign the latching mechanism is certainly the hard way to do it.

Another way might be to have a small toggle switch just inside the rubber boot which could be pushed from side to side to switch on and off. The major problem being trying to work out the orientation of the torch relative to the direction of movement for the toggle.

The zebralights have a very clever switch layout as the switch doesn't have to be part of the battery circuit and therefore doesn't have to cope with high currents and adds no length at all to the length of the light. Difficult to achieve though as it would require a custom host and custom driver to make something that operated similarly.

Here are some of the spring heights for various switches. The yellow represents the maximum spring compression.

And some general dimensional data on two popular switch types.

I got a nice present in the mail yesterday. Yes my switch has arrived and what a beauty it is to. I’ve spent half the night thinking off all the different lights I could put it in. Thanks Tofty.

Mine shouldn't be too far off either then :)

mine arrived a while ago. but with everything that has happened this month I’ve had little chance of doing anything other than admiring it sorry.

I do have a few hosts to try it in and hope to get something done over the Christmas period.

one things for sure. anyone who gets one won’t be disappointed.

Question…the internals being copper and having a brass rod in place of the spring, this should allow more amperage through the body, right? I have a couple of lights that I’ve put a brass post in place of the driver spring, can’t double that up so I’m gonna have to watch which one I use.

Don’t know if it’ll go in the MaxToch SN6X-2X, I just got that light doing 4.32A at the tail on 2 18650’s with 1631 OTF lumens @ 30 seconds from an XM-L2 U2 domed emitter. Should be some 6A running through the emitter. Will be great if this switch fits that light. :wink:

Thank you for the switch diagrams! I will look at your links also.

When I said dirty I meant it literally. I do apologise for the state the switch looks but everything in my shed ends up greasy when I touch it because of the lathe. I cleaned it as best I could without melting the plastic. It is white after all.

This switch arrived yesterday and as the wife is at work for another 3 hours today I could do this brief review. I decided on this light to review this switch as there is probably more hot rod HD2010's out there than many other lights and its begging for a decent switch to go with all these mods.

Does it fit? Yes and its almost a straight drop in. Only very minor mods were needed which l'll explain with the pictures. As it fits this light I see no reason it wont fit most other lights out there that have a 21mm board with minor adjustments.

With my multimeter I could not measure any resistance in the switch other than what was in my leads.

With the switch retaining ring unscrewed from the switch housing this is all the components inside the stock switch.

These components are not used in the new setup.

These are all the new parts in Toftys HD2010 switch. The mods carried out are, the retaining ring is drilled out to 12mm to fit over the small diameter on the contact end of the switch. Original hole size is 11.73mm. Its not a lot really being .011''. The spacer I used is a flat washer measuring 20.7mm OD and the hole in it drilled to 11mm to fit between the rubber boot and switch. This measured 1.75mm in width which worked fine but 2.5mm would've made it just about perfect.

I use this setup with the washer between the switch and boot rubber in all the tailcaps with switches in them I make from scratch without any problems at all.

The new parts assembled together.

And finally the switch assembled together. The centre brass screw was shortened to allow the use of either King Kongs or Trustfire 26650 batteries.

To sum up this switch literally fell into this tailcap. It was that easy.

Cons. The white colour in my garage is the main one. Secondly which is not a con but you must be wary that the brass screw does not hold in with many threads in the plastic. I can see a few of these getting stripped with carelessness.

Pro's. If Tofty does not retire from the income from this switch I'll go hey. It is a very high quality custom built switch that in the greater cost of mods does not cost a lot of money. The switch itself is very precise in its operation. The click is very positive locking in and out with a firm but not hard push. There is no roughness in its movement like so many switches I have used lately. I love it and can see it being used in places not yet thought of.

I wish you all the best Tofty for your future endeavours and thanks for putting your trust in me for being one of the first independent testers of this switch. Your work in all things you do is truly inspiring.

As a disclaimer this switch was paid for by my hard working wife.

If anyone has any questions I would be only to happy to answer them. Happy Xmas all.

As usual, you didn’t finish….can you tell us if you see a noticeable difference in the switch feel? Brightness of the light? Would it be possible to get a measurement of the emitter amperage before and after the switch mod? Did your hard working wife buy me one too? Will there be eggnog at the party? If I bring my daughter, will your daughter do her nails? If my son gained 3 lbs and I lost 7, how much would my wife weigh?

Can the black spacer that was used originally with the HD2010 have the wings cut off and be used in place of your metal washer? Would a 20mm SinkPAD, drilled out in the middle, work just as well? (I already know the answer to that one)

Do Santa’s juevos get cold in the sled?

Are we there yet?

Ok, I’m done. But I reserve the right to speak up for round 2.

:santa: Merry Christmas! :santa:

Dale read the Pros’s again. The only reading taken was of resistance. I could not measure any unlike l am getting now the wifes home. :wink: I would not use the plastic adaptor with the wings cut of as its very fragile and not very thick, yes unlike me.

If you want to know the resistance, I have equipment that will measure down to below micro-ohms…

Thanks texaspyro. I’d hate to think what you had stashed away. Next time your in town drop in and we’ll measure it. :bigsmile:

Would probably use one of my three HP3458A 8.5 digit multimeters (the most accurate multimeter ever built… or will ever be built… it operates at the theoretical edge of what silicon is capable of doing. The design is well over 20 years old and is still being built). The meters are never powered down.

I do have some equipment that can measure in the nano-ohm area, but it is a bitch to use.

If you or Tofty is curious, send me a switch and I’ll measure it.

Your not dropping by with one of your rockets? :_(

Nope, they tend to upset the airport baggage screeners…

All properly addressed and labeled and all the way from the UK! Anyone care to guess what was inside? :wink:

I looked at 2 different lights here, but both from Solarforce. My L2X extended is on a K3 modified head, pulling 4.76A and making 2411 OTF at 30 sec. Not really stressing a McClicky, but too much for the stock tail switch. And stock is what’s currently in it! So, With the other light being an M8 and having a significantly different tail switch set-up, I moved the McClicky out of the M8 and into the L2X. The McClicky should handle 4.76A easily enough. Even if the new arrangement doesn’t let the L2X tail cap thread completely down as it did before. The battery tube rests on the retaining ring, right after clearing the 2nd o-ring. Should be good enough, will have to watch when I change cells to ensure the retaining ring stays tight.

Now for the problems. The tail cap on the M8 has a 2 stage threaded interior, with the inner narrower stage being for the retaining ring to hold the switch secure and make ground. The outer or larger threaded area is for the battery tube. On this light, that inner area is 19.0mm, while the Tofty switch is measuring 20.8mm.

Will it be all right to turn the Tofty switch down a bit to fit inside the M8 tail cap? That’s what I’m going to have to do. By removing 1.8mm from the overall diameter, it will slip snugly into the tail cap and then I can cut the brass threaded rod down to proper extension length.

I dont think I need to take pics of the switch itself, as that’s been done extensively already. I’ll see if I can get some pics as I make adjustments, and will be taking measurements along the way.

Thanks Tofty, looks great, nice solid all copper connections looks very appealing. This light is pulling 5.98A at the tail, but making less lumens OTF than the K3. Same emitter, more amperage, less total output after the 30 sec period. I’m hopeful this switch will allow more of that current to flow and see the real potential of this light. I plan to charge the cells up to cut-off point. Take a lumens and lux test. Then when I get everything fitted, I’ll do it all over again and see where it stands.

And now it’s off to to the fun and games! :slight_smile:

Merry Christmas to all, and to all a good light! :wink:

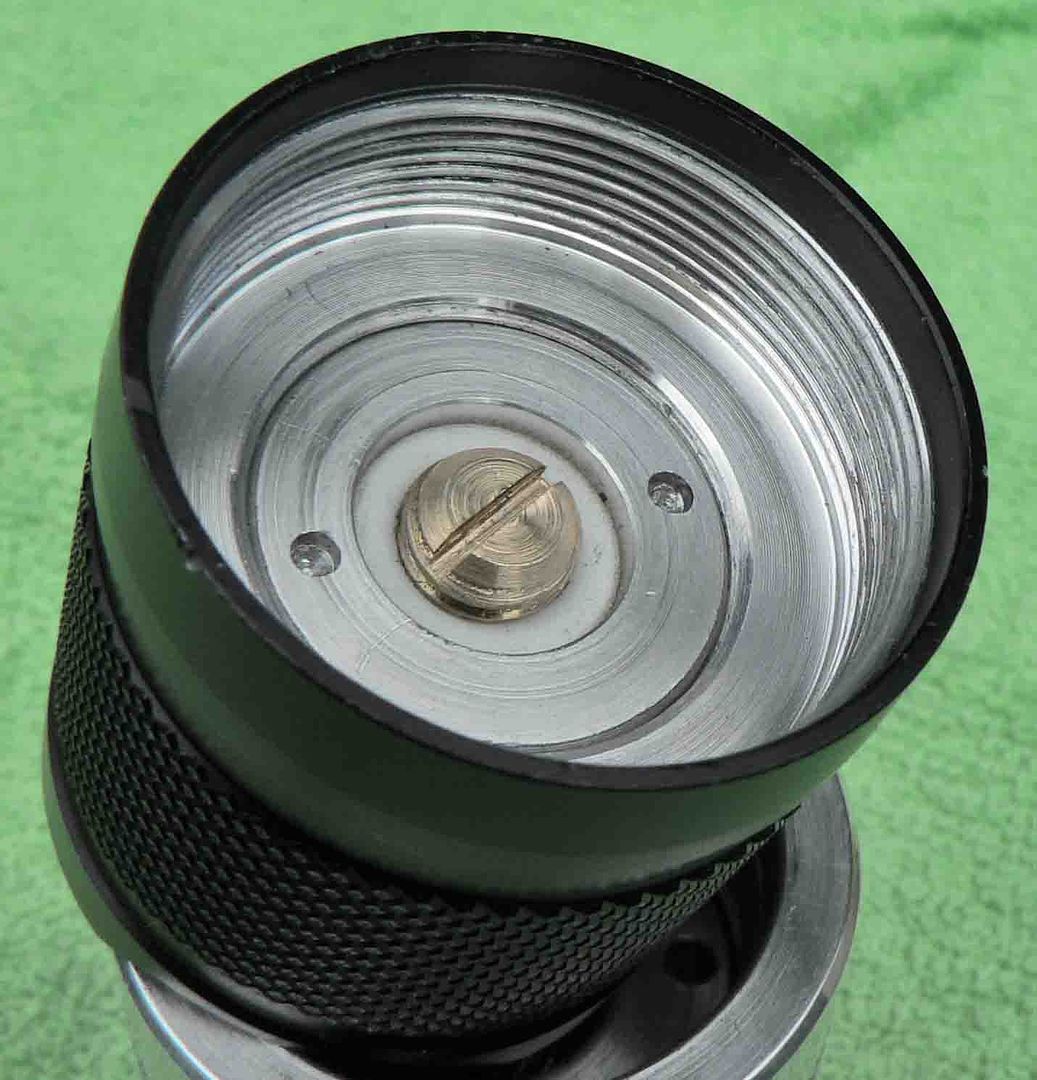
Tofty switch installed in M8, and it wasn’t exactly easy. The M8 has a strange tail-cap, strange distances, even an oddball boot. But all obstacles have been overcome and the Tofty switch is inside the M8 and functioning flawlessly! :slight_smile: I like that it’s a reverse clicky, have always been in favor of forward clickies but probably only because that’s what I was getting when I first got started. With a high power light, it’s nice to be able to shift down without going off.

Initial check pitting otf lumens from a direct circuit across the end of the battery tube shows I’m getting the same or even more otf lumens at start-up through the switch. I used my old German steel caliper to make the circuit, so it stands to reason that the copper in the switch would be more efficient. I’m charging cells and I’ll get a more complete set of readings using copper 12ga romex to make the circuit.

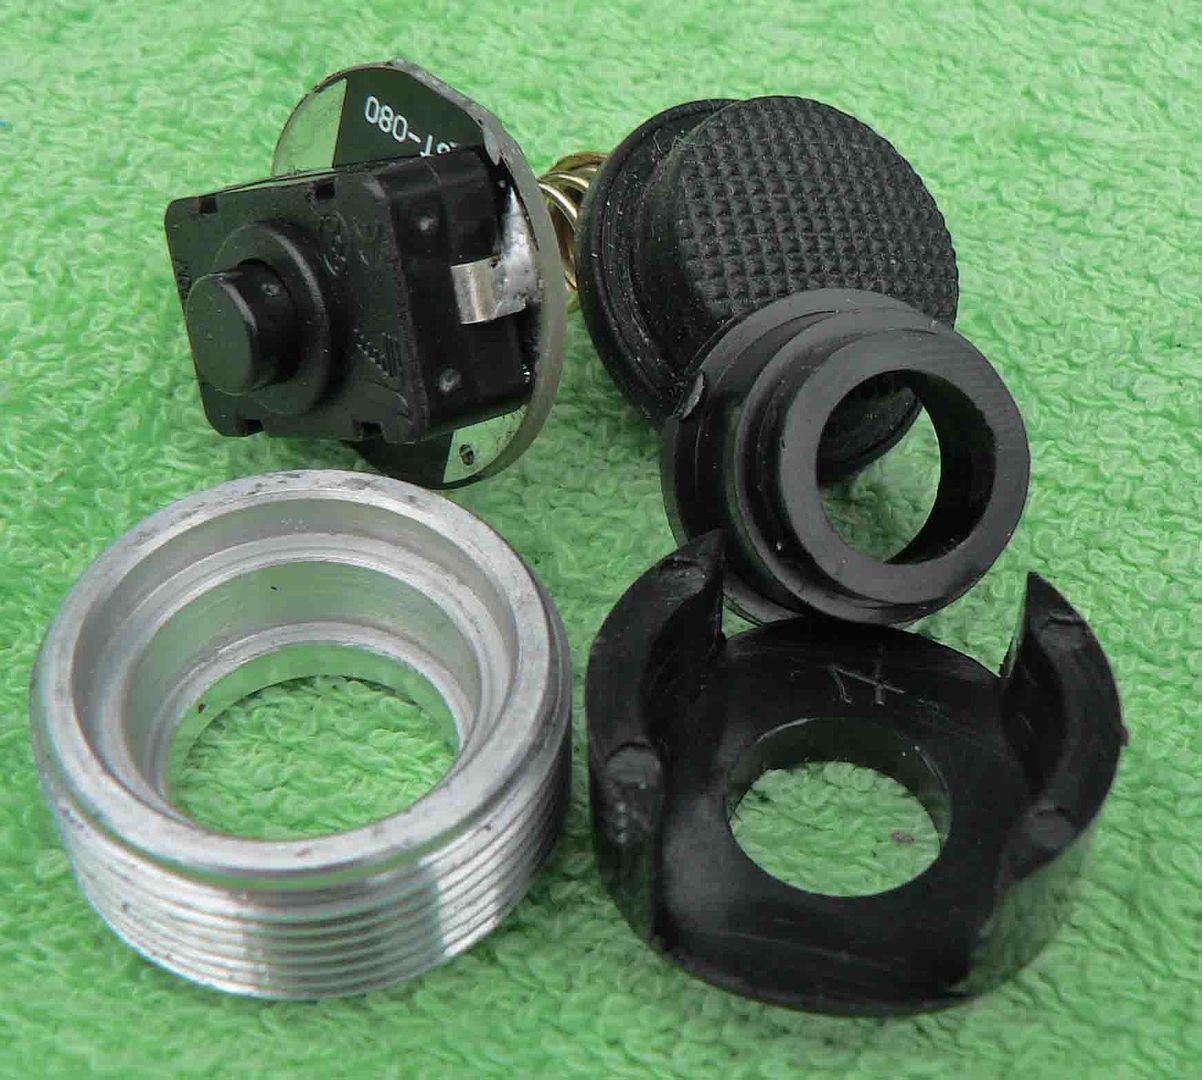
The plastic making up the body might be printed, but it’s very tough! Filing it, cutting it with an 1/8” carbide bit in my rotary tool, sanding it, the stuff is very resilient. Soft enough that screwing a 1/4 x 20 stainless steel bolt into the clicky end to mount it in my drill easily cut threads in the plastic, but this caused no ill effects and everything is working fine. Doing a resistance test on the switch my DMM goes to 000. Works for me! :slight_smile:

Thanks for the good work Tofty, more complete OTF numbers to follow…

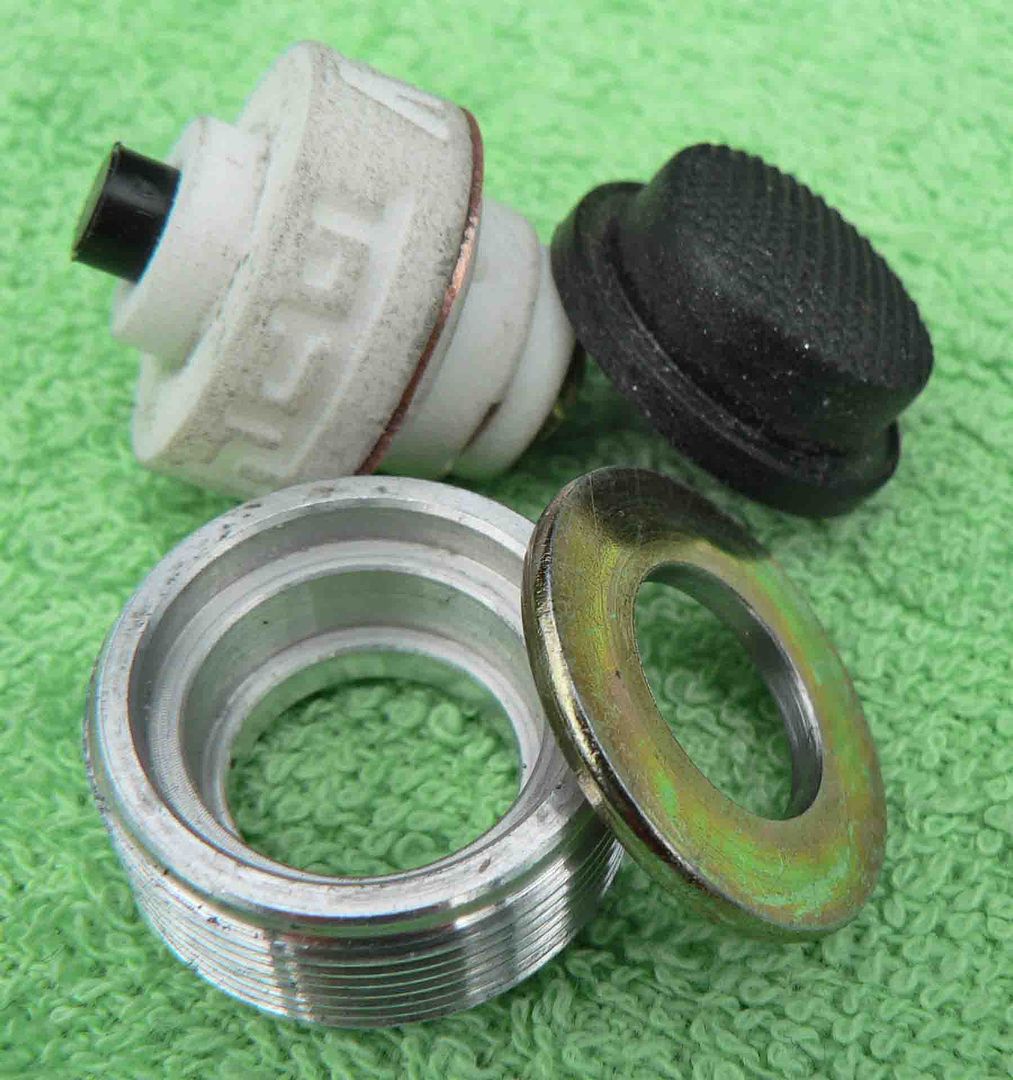
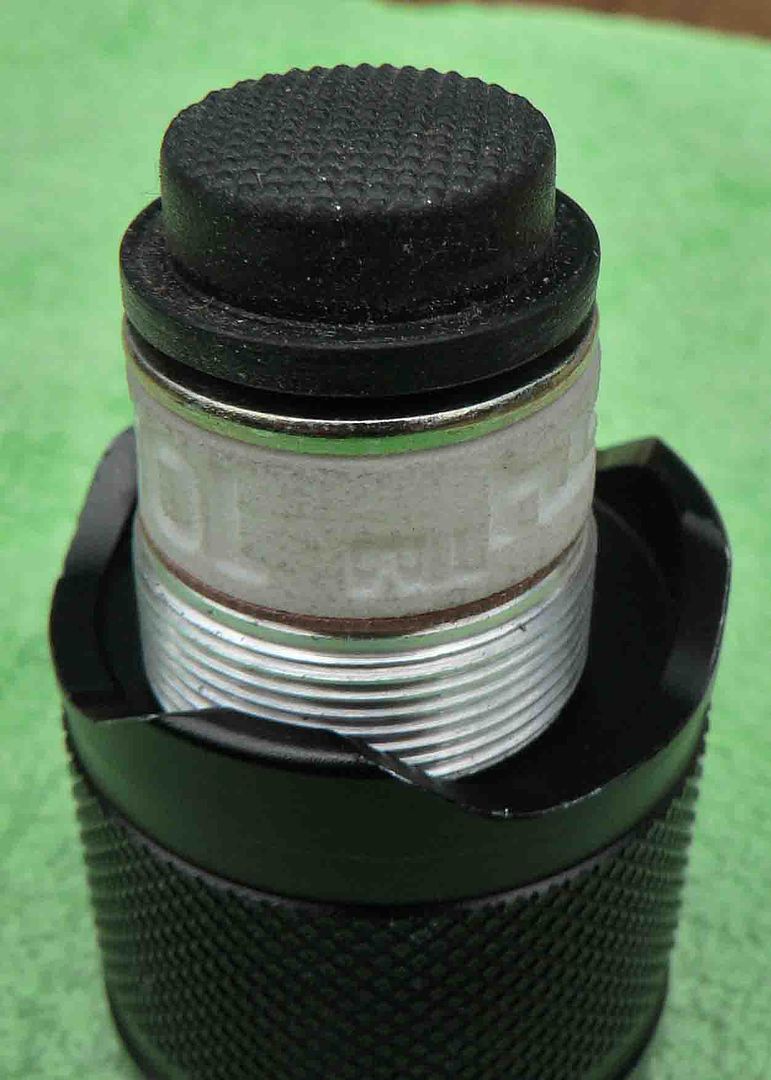
Here’s the Tofty 10A+ in the Solarforce M8…

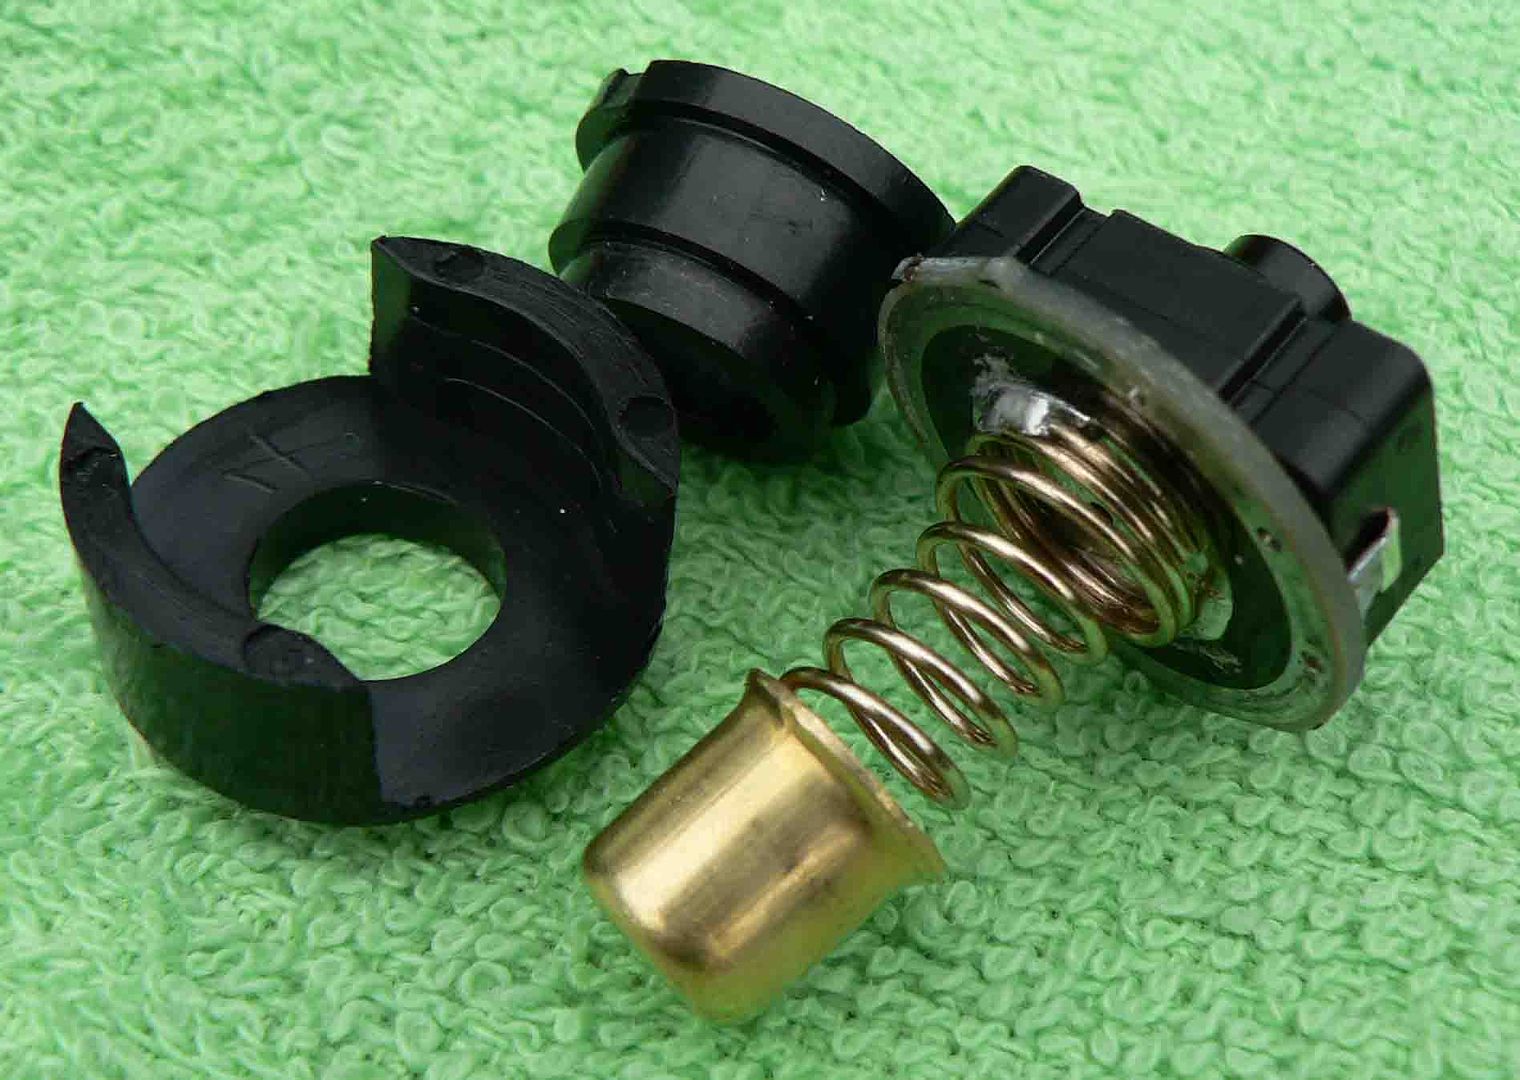
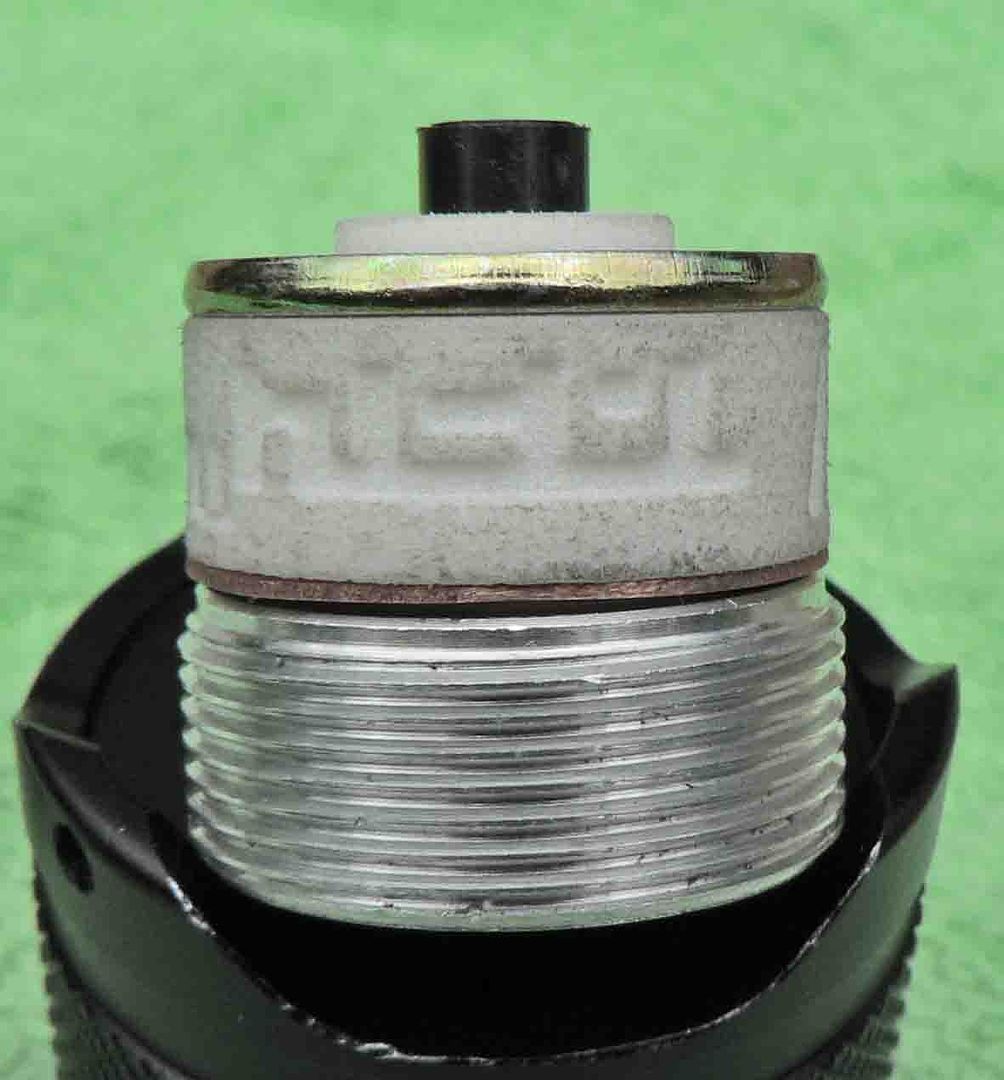
Notice the copper ring around the outer switch assembly. My retaining ring wouldn’t allow opening it up far enough to clear the step on the switch and make ground contact. I intended to make a copper “washer” to fill this, but discovered a piece of copper pipe I had in my dremel case fit perfectly, so I cut a 3mm wide ring off that and it’s a press fit into the tail cap, good ground even before the retaining ring is screwed in.

A closer look at the resized switch with the copper ring.

At first I was not pleased with the writing embedded in the sides of the switch. As nice as it looked, it was giving me fits trying to resize the outer diameter. Then I discovered that the writing was actually my guide, once it was removed completely the switch was just about the right size. :slight_smile: From 20.8mm to 19.2mm, now it fits nicely even if a bit difficult to get in the tail cap. I took it down just barely enough to get it in.

As far as taking OTF lumens readings, I’m not sure what it all adds up to. I used Panasonic NCR18650PF cells, fresh from Richard. Right out of the charger for each test, with time in between taking care of various things here at home. The last reading was with the Tofty switch. And that reading was odd, as by the 30 sec point the numbers in the light box were falling quite rapidly, unlike the other two tests. I haven’t a clue what would be different, or why my initial readings varied so much. But here’s what I got…

With a 12ga jumper wire and no tailcap…first reading at initial start up, second reading at 30 seconds.

2553 OTF, then 2346 OTF

With the McClicky switch

2670 OTF, then 2322 OTF

With the Tofty

2653 OTF, then 2256 OTF and plummeting.

I tried again with almost the same result, started a bit higher, dropped even faster. Cells went from 4.21V to 4.12V in 60 seconds. I will try some Sanyo Lap Pulls I have that have tested well in the past.

Similar results with the Sanyo cells, only they were faring a little better at 60 sec.

So I ran an amp at the tail test for 60 seconds on freshly charged Panny PF’s. Interesting…

Started at 5.97A, then climbed to 6.01A through 20 seconds, then starting falling, and falling fast, first drop went from 6A to 5.85A at 22 seconds and then started ticking off numbers to arrive at 5.49A at 30 sec, then continued to burn down to 4.79A by 60 seconds. The cells just can’t deliver that much for that long.

The switch is positive, very solid clicks, love how it fits in there, how it looks in there, and how it feels.

Well done Tofty, works like a champ. :slight_smile:

My MAXToch Sn6X-2X needs one for sure! Took it out for a walk tonight and immediately missed to solid clicky action as well as the reverse clicky. It’s doing 4.51A at the tail and some 1600 lumens OTF with an XM-L2 U2 on a Noctigon. Did a resistor mod and don’t know how well the switch is going to handle that.

Is this switch for sale or still in progress? Or have they all been spoken for?

Nice work Dale.

I managed to at least do something today too……I found it’ll need little persuasion to fit in an hd2010 tailcap, say a little copper tube and a suitable washer.

I was tied up “fixing the garage electrics” mrs gords shorted out and cuddling our little boy luke who simply WILL NOT be seperated from his dad, even with a crow bar, so testing was limited, but I would say this can be persuaded to work in most lights that would justify one with a little inginuity.

As is, I’ll persuade a judco into the hd2010, unless tofty wishes to sell me another swith or five, this is destined for another light for now.