When I hold the e-switch for 3 seconds, I got moon mode. I thought I discovered a hidden mode. Hmm, … it is supposed to turn off? I turn it off using the tail switch.
![]()
And the plot thickens… ![]()
New record for shipping . I ordered on the 12th and recieved it on the 24th. Oddly I ordered a differnt light on the 2nd and it still is in china.
Light seems pretty nice, my tail switch was loose but otherwise seems very solid.
Mine arrived yesterday, only 14 days. I think they used priority shipping due to CNY.
It’s underpowered, has a ton of spill and doesn’t fit 18700 cells, but the build quality is excellent.
Edit: No LED in the side switch.
aaaaarrrrgggghhhhhhhhhhhh!!!
SO they are the new batch??? grrrrrrrrrr my God!!!
Other guys have saw that improvement??
sigh…sigh…sigh…
I don’t know which is new vs old ,I only have one. The one I have does have a blue light in the switch and a centering ring.
Only thing I don’t like is the o rings seem just a tad big, lube helped but not perfect.
Mine arrived yesterday from BG.
The version from GB seems to have a different tailcap, without a spring. Mine has a spring & the LED of the switch is blue, ONLY blue! ![]() This LED goes more and more less bright. At circa 3,1V the blue LED starts to flash. But you have to look directly at the switch to see it! :~
This LED goes more and more less bright. At circa 3,1V the blue LED starts to flash. But you have to look directly at the switch to see it! :~
Turning off is possible with the side switch in pressing & holding for 2 seconds. Then only the blue led lights up. In every mode you can get the turbo with double click. Turbo hold’s on for 1 minute!
The two tailcap o-rings are orange, the fist o-ring get’s fastly damaged (open and close several times).
Which resistor did you used for modding?
greetings
I left the flashlight turned on from the tailswitch just to see how much of a drain that little blue light under the side switch would be. It drained a protected Keepower 2600mah in about a week so not top of the line efficiency there.
I read someone put a wire to bypass the resistors, will it fry the led from over current? Anyone tried it?
So far I like it, to get the driver out how do you remove the side switch? Is it Press fit or is it screwed in?
Thanks
I went ahead and modded the light, it was pretty straight forward and took me about 45 mins, this is how I modded mine
1 I removed the side switch metal button by using my fingernail, no need to remove the metal ring.
2 Unscrewed the bezel, remove the black plastic ring then the white centering ring and desolder the wires to the led.
3 Unscrew the metal ring that holds the driver and slowly pry out the driver, do not try to pull it from the spring
4 Bridged the R270 resistors with a wire
5 Replaced the 24 gauge wire to the led with 20 gauge silicon wire
6 Added desoldering braid to the driver spring and beefed up the connection around the base
7 Deoxit and Progold the driver
8 Polished the brass driver retaining ring and then used deoxit and progold to improve electrical contact
9 Reinstall the side metal button on the flashlight
10 Reinstall the driver, make sure the side button aligns with the metal side button
11 Screw in the brass metal retaining ring
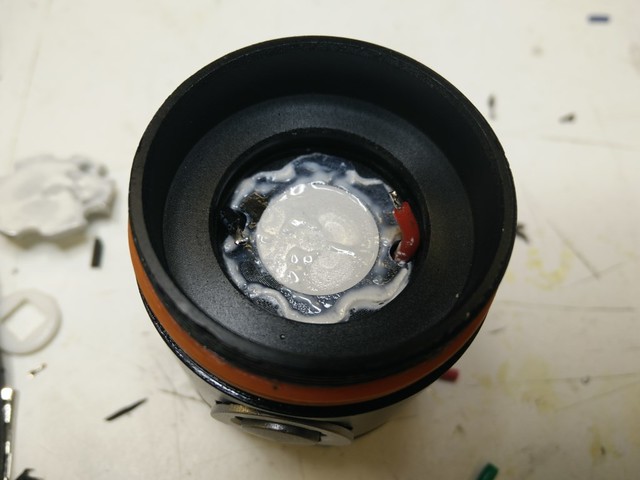
12 Replace the thermal grease for Artic Silver 5
13 Solder the 20 gauge wires to the led
14 I used kapton tape to make sure the wires do not touch the reflector (Not really needed but just in case)
15 Reinstall the centering ring then the black plastic ring (This makes pressure that holds the glass in place)
16 Reassemble the light and enjoy!
Now the light is just a hair brighter than the Sunwayman D40A on turbo that according to the specs is about 1000 lumen
I might give the switch assembly a thorough cleaning with deoxit and progold and also install solder braid to reduce resistance next…
Thanks for the info Alex!
Do the low and med modes still have their respective brightness?
I would say that all modes got brighter, the new low is about the same brightness as the SWM D40A low
Thanks! I followed your steps and modded mine too and took some photos during the process.
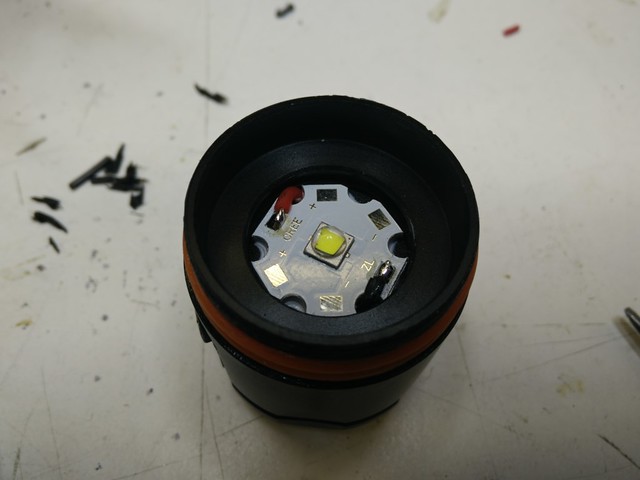
The star seemed to have enough thermal paste. It was a little bit watery though.
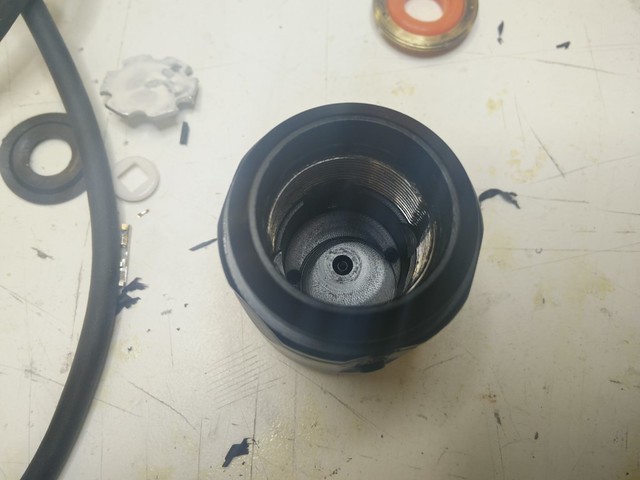
There is a small gap between the center of the body and the edges (around 0.5mm), and this might be a source of a thermal bottleneck.
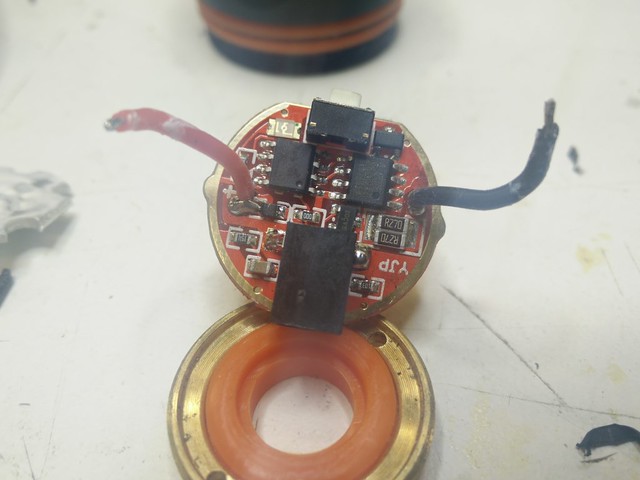
The driver itself. The two R270 resistors are the sense resistors. To increase power output, replace the two resistors with a solder bridge.
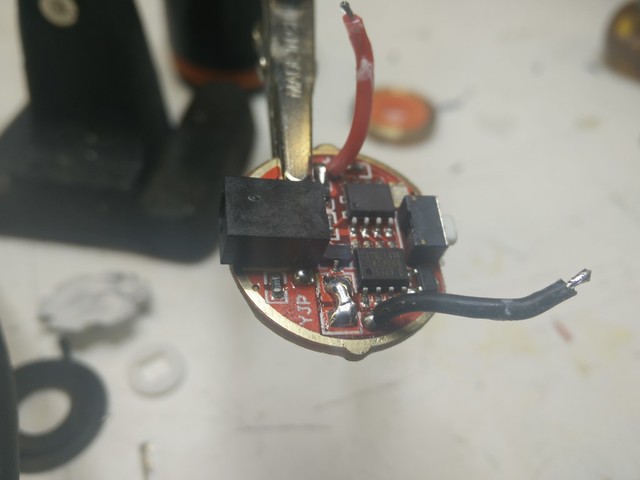
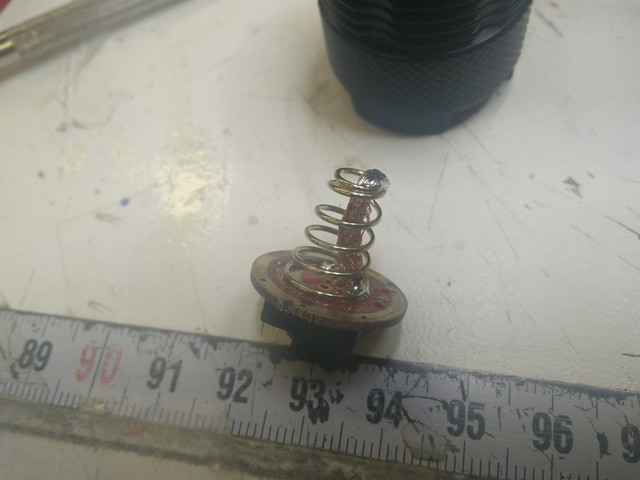
Put some solder braid on the tailcap and driver springs to minimize resistance.
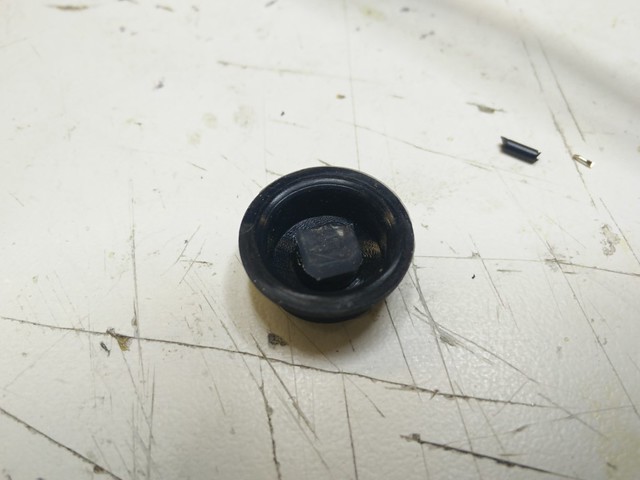
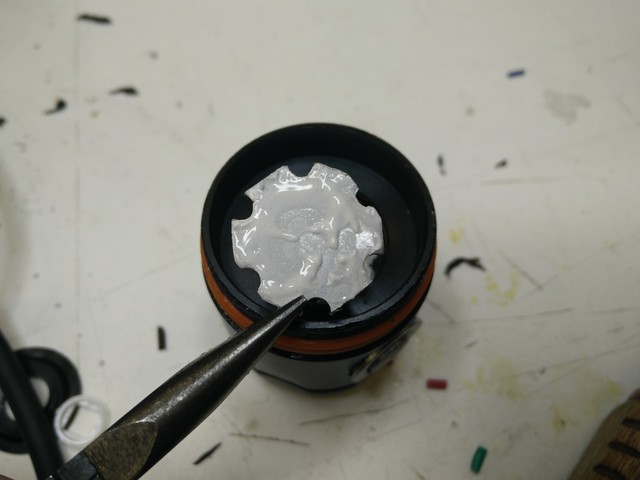
I put a small slice (2-3mm) of hot melt glue to fill up the air gap between the tailcap and the switch.
I also filed away the sharp edges of the light’s end but forgot to take a photo of it. I’ll put one up once I get back.
So how is it? I’ll mod mine later today too.
So how is it? I’ll mod mine later today too.
[/quote]
It’s great, the light is bright, throws well, and feels like a light worth twice its price.
The modding is pretty simple and went without a hitch. I’m not a big fan of its electronic switch and UI though.
Got an email from Banggood on March 6th that my order shipped. No sign of it yet. I even paid the $1.30 shipping upgrade. ![]()

:~
Exact same situation here, except no mail upgrade. Ordered Feb 13th (Friday), out of stock, CNY, equals triple whammy ![]() .
.
I think they only printed the shipping label or something on the 6th.
The RangeRover gets multiple votes, but does the customer get a vote? haha