OK, thanks. I’ll just use it as is, since I’m curious if it will cause any problems.
The gap just surprised me and I kept wondering about it.
OK, thanks. I’ll just use it as is, since I’m curious if it will cause any problems.
The gap just surprised me and I kept wondering about it.
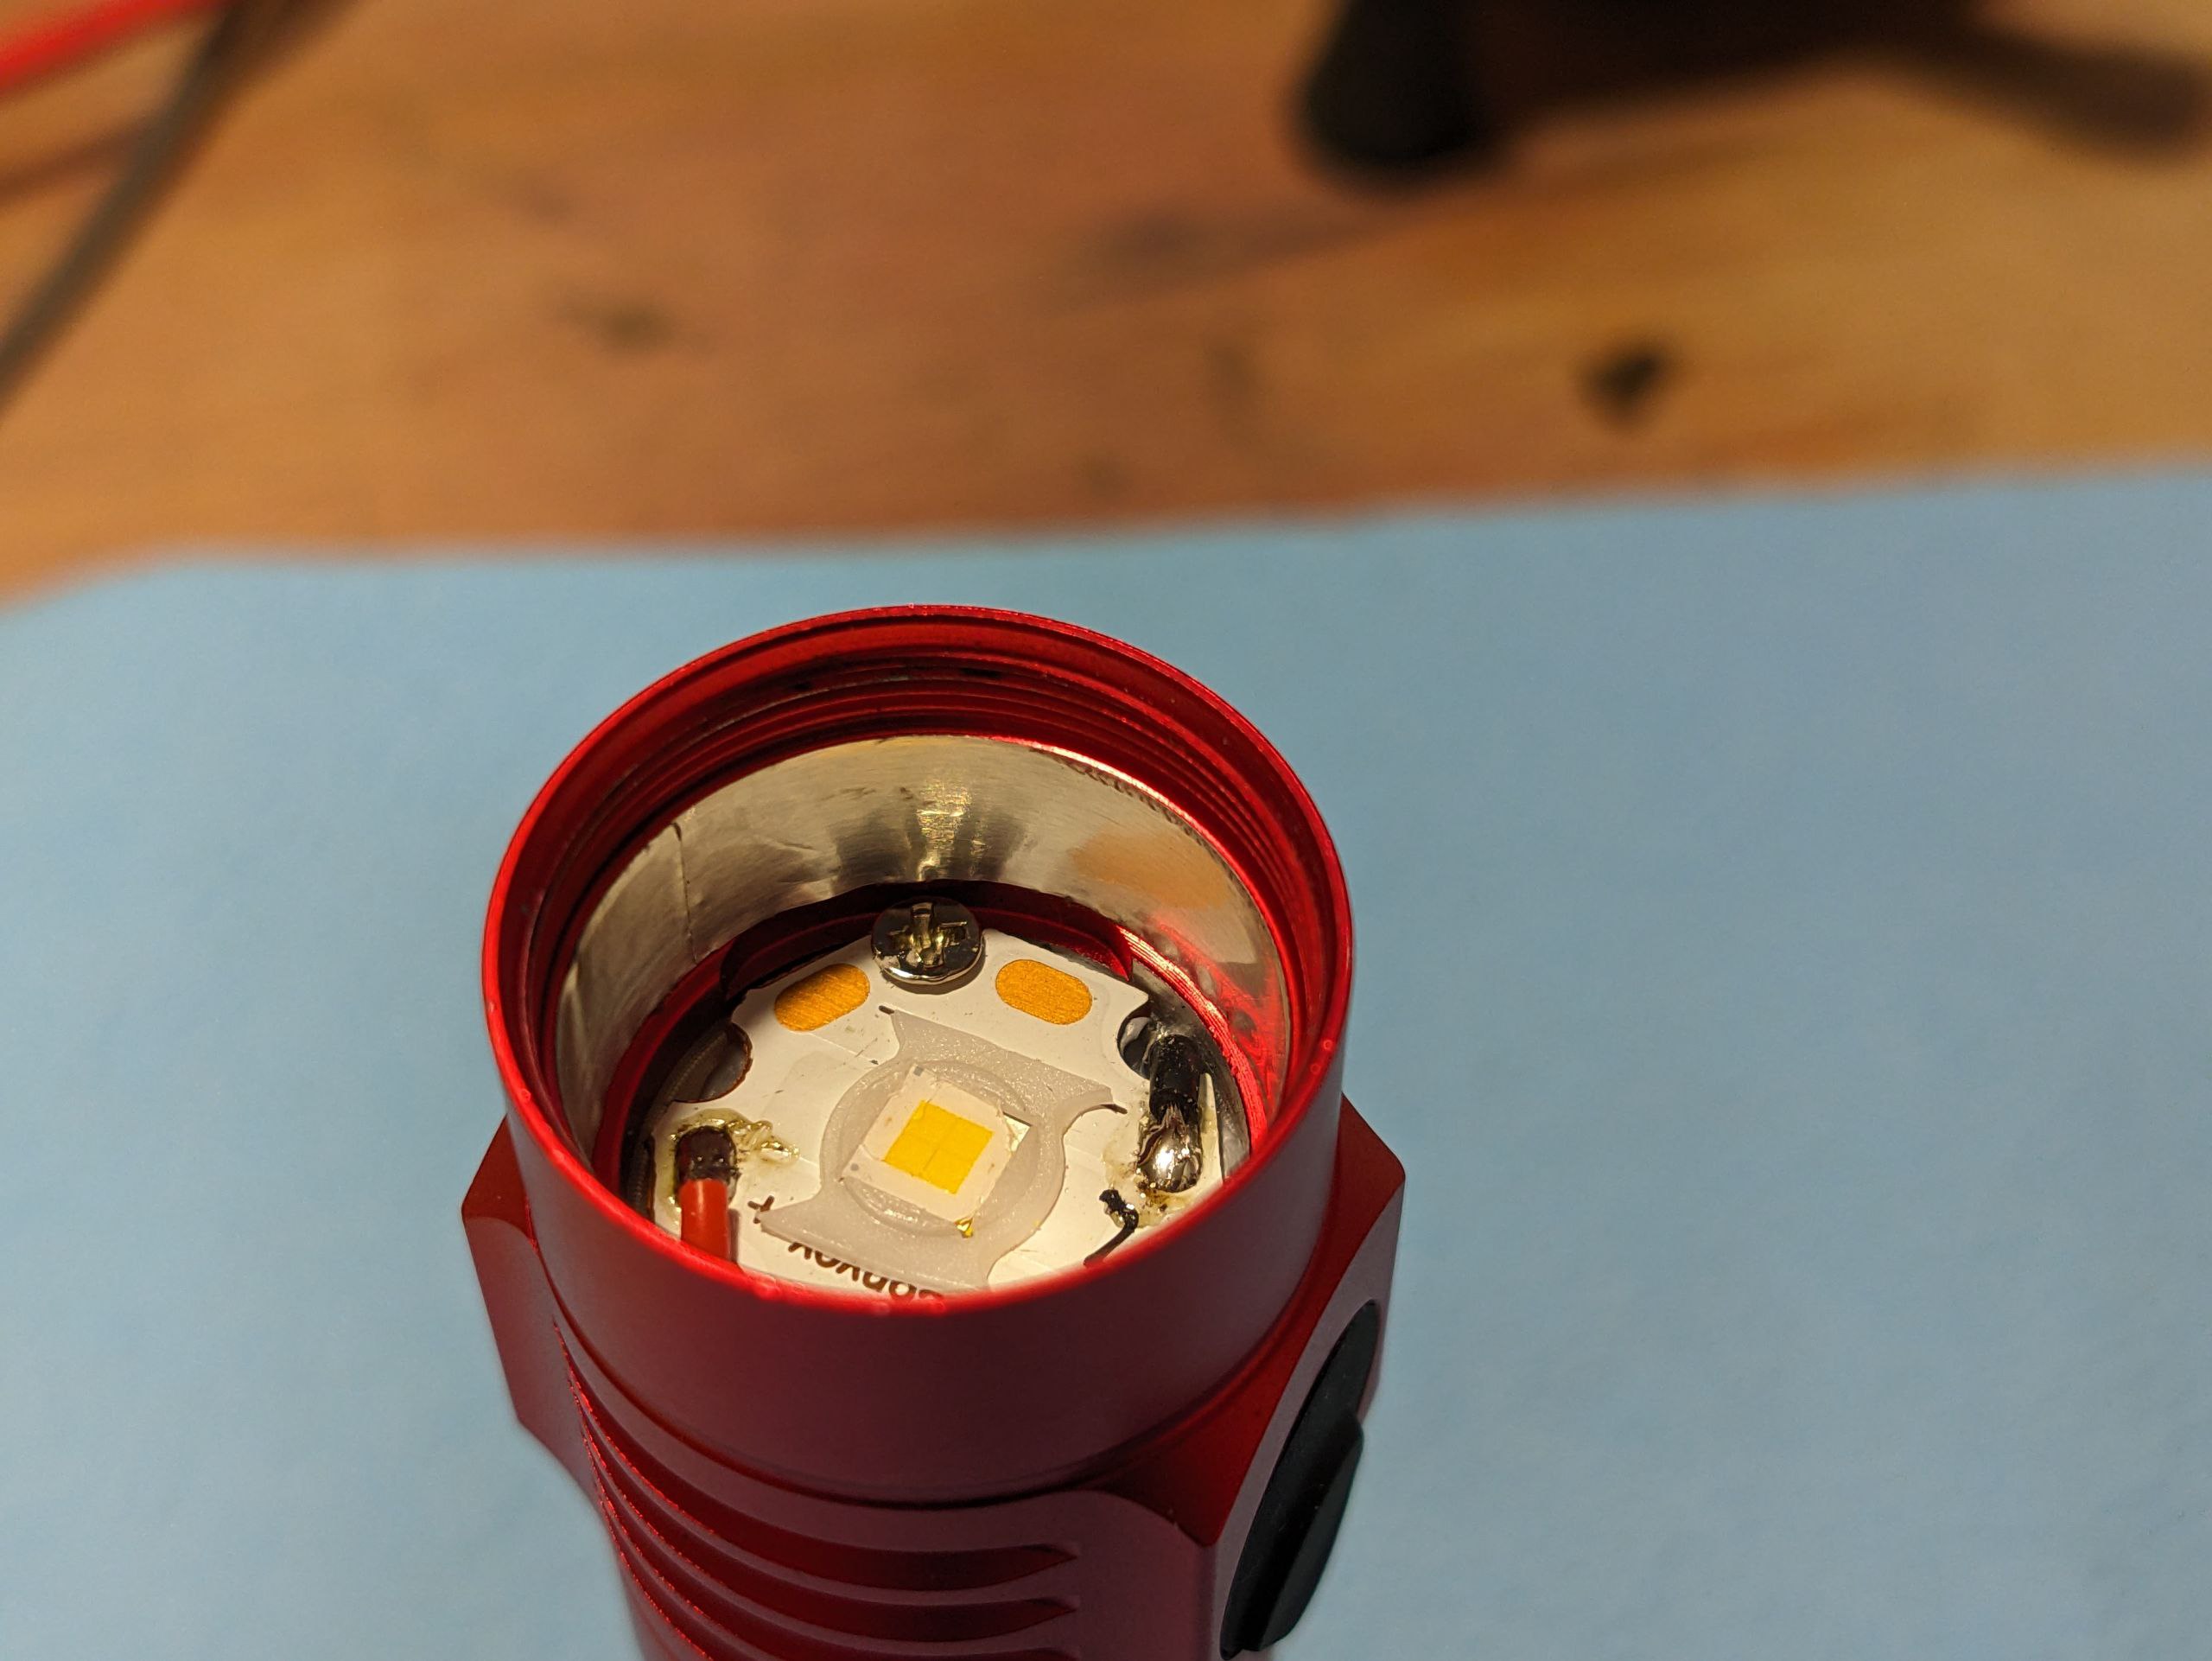
I was not entirely happy with the 15° lens, so I decided to put the 10° lens in now. It has a more coarse bead pattern (which I prefer from a visual point of view). Since I use a 5050 LED, I had to sand it down again. I went for 13.5 mm remaining “thickness” which turned out a little bit too much, the bezel still has a very slight gap to the body when screwed tight. 13.3 mm would probably be perfect.
Since I had a slight red shadow around the very far end of the beam, I decided to put a bit of alu tape in - this will capture stray light, and redirect it into the TIR without making it red. I think if I used the TIR as intended, with a 3535 LED, this would not be necessary and the beam pattern would overall be better, but hey. You can also see the damaged LED from my previous experiments with a partially sanded down lens and no gasket.
One of my soldering irons has a similar gap and I’ve never had an issue with it.
Thanks for another data point.
I will tighten the tips with gaps carefully until they are just snug to avoid any chance of cracking the ceramic heating element.
In use, the ceramic heating element should be hotter than the steel screw collar tube, but it will probably not expand as much (compared to the steel screw collar tube) since steel has a higher thermal expansion coefficient than ceramic, so hopefully heating will not increase the stress on the ceramic heating element.
Hello, I have just gotten my Oclip today and also noticed this ugly greenish tint from the emitter. I would love to swap it like you did but can’t figure out how to open it up. Could you give me some advice on how to do it?
Kind regards,
Christoph
Have a pleasant time at this friendly forum, Wtk!

Update on my flood-throw D1K inspired by the Nitecore EDC33:
Managed to stuff the S11 OP reflector in the head with the help of a dremel, still need to figure out whether the SFT-40-W30H can survive FET. Final build will likely involve the XHP70 D1K OP reflector from Hank.
Eye of Sauron is pretty much gone with both channels enabled but the SFT40 is still very intense compared to the flood so it really just looks like a thrower with bonus flood.
That’s a nice arrangement… wonder if hank would consider stocking something similar as a limited run or for general availability…
I don’t think he will, I had those MCPCBs made from JLC and there’s a few problems with the design resulting in only around 1000lm in the flood channel. Also the flood LEDs are nearly £1 each even in bulk.
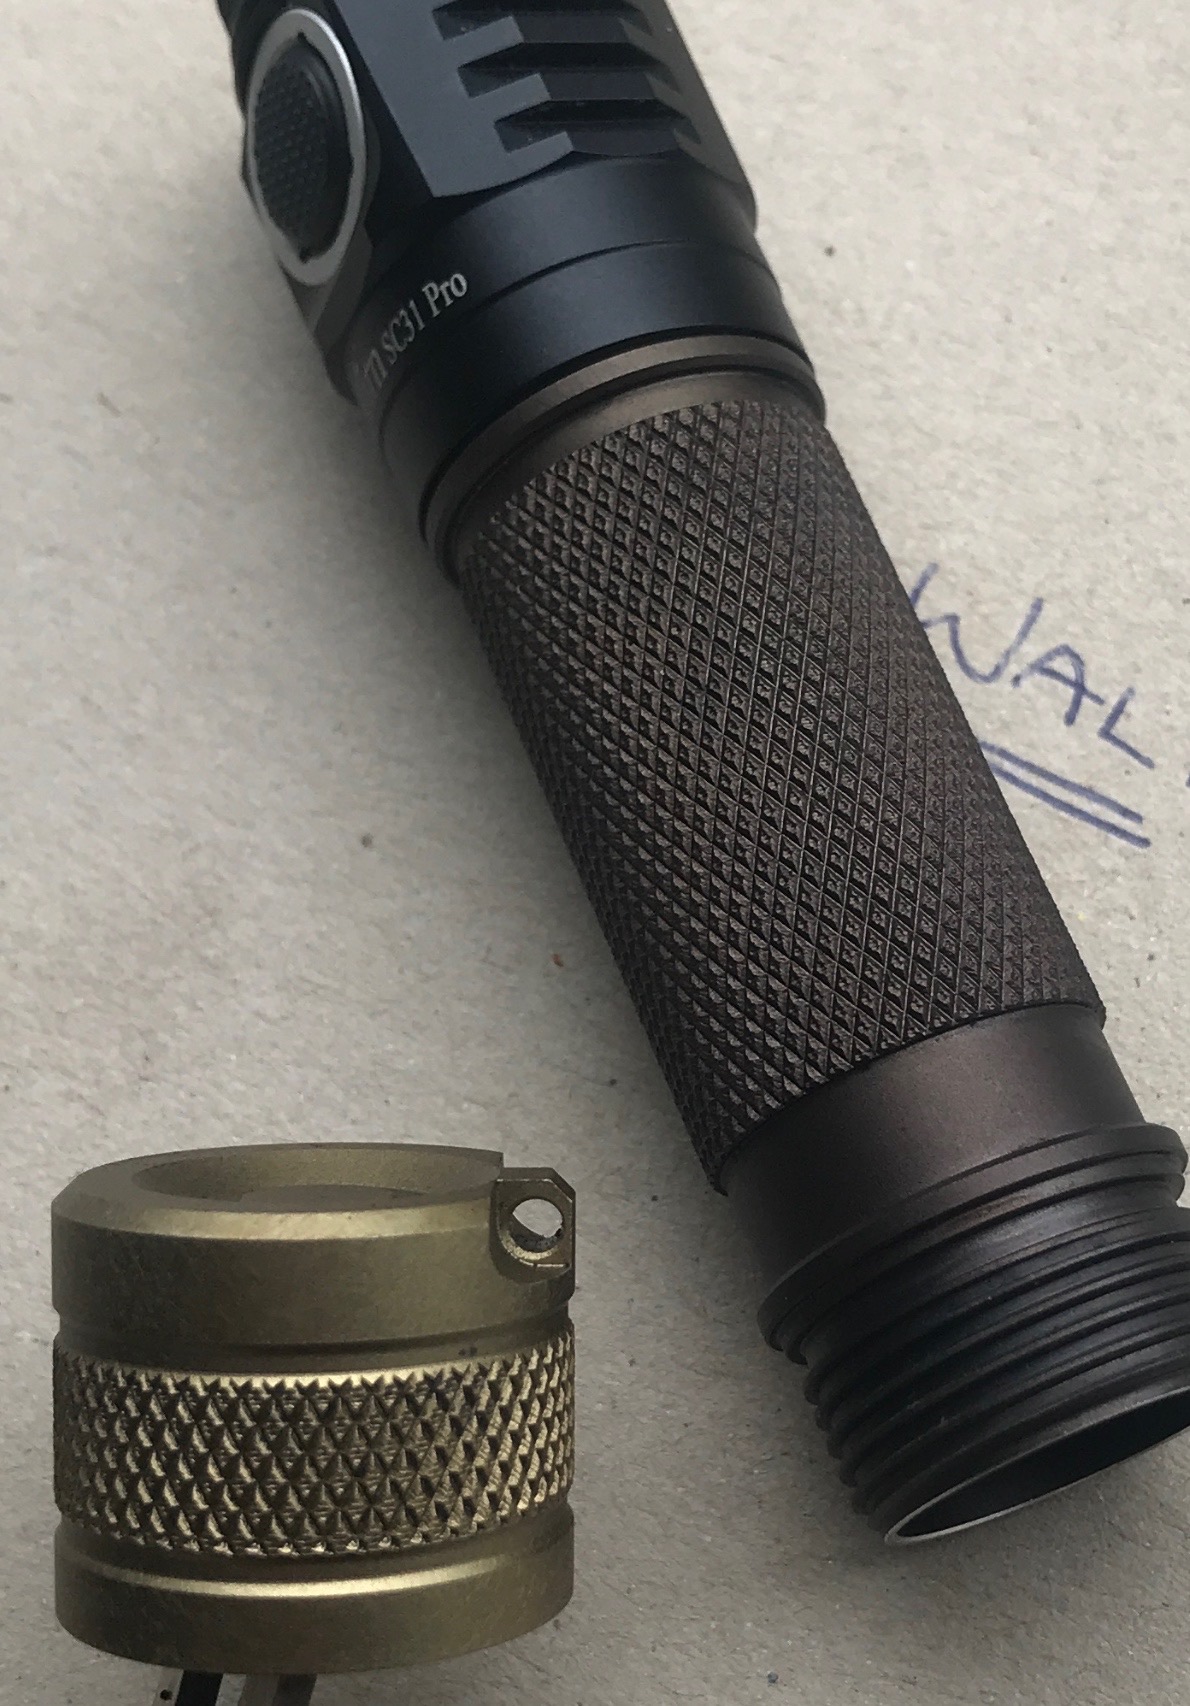
Tried baking the tail cap, bezel and tube. An hour later no change so held the buggers over a hob flame and they changed from black to dark brown to gold then silver. Should have stopped earlier when they were either chocolate or gold coloured but oh well you live n learn. Think I’ll nab a black tube and just keep the silver bezel and tail cap
Did the same on a SP33, cooked it a bit too much and decided to send it. Turned out alright at the end, with a light champagne look. Doesn’t look bad, but brown would be better.
Yeah I did exactly that. The brown was so nice but I went a bit overboard with the tail cap which then went gold then I did the bezel and it went from gold to a very light silvery gold fast so thought right they’re all going the same but I over flamed the tail cap and the tube wouldn’t go any lighter so looks completely mismatched but no biggie. The bezel and tail are close enough so I’ll get another tube. Kept me out of mischief for a bit if nothing else.
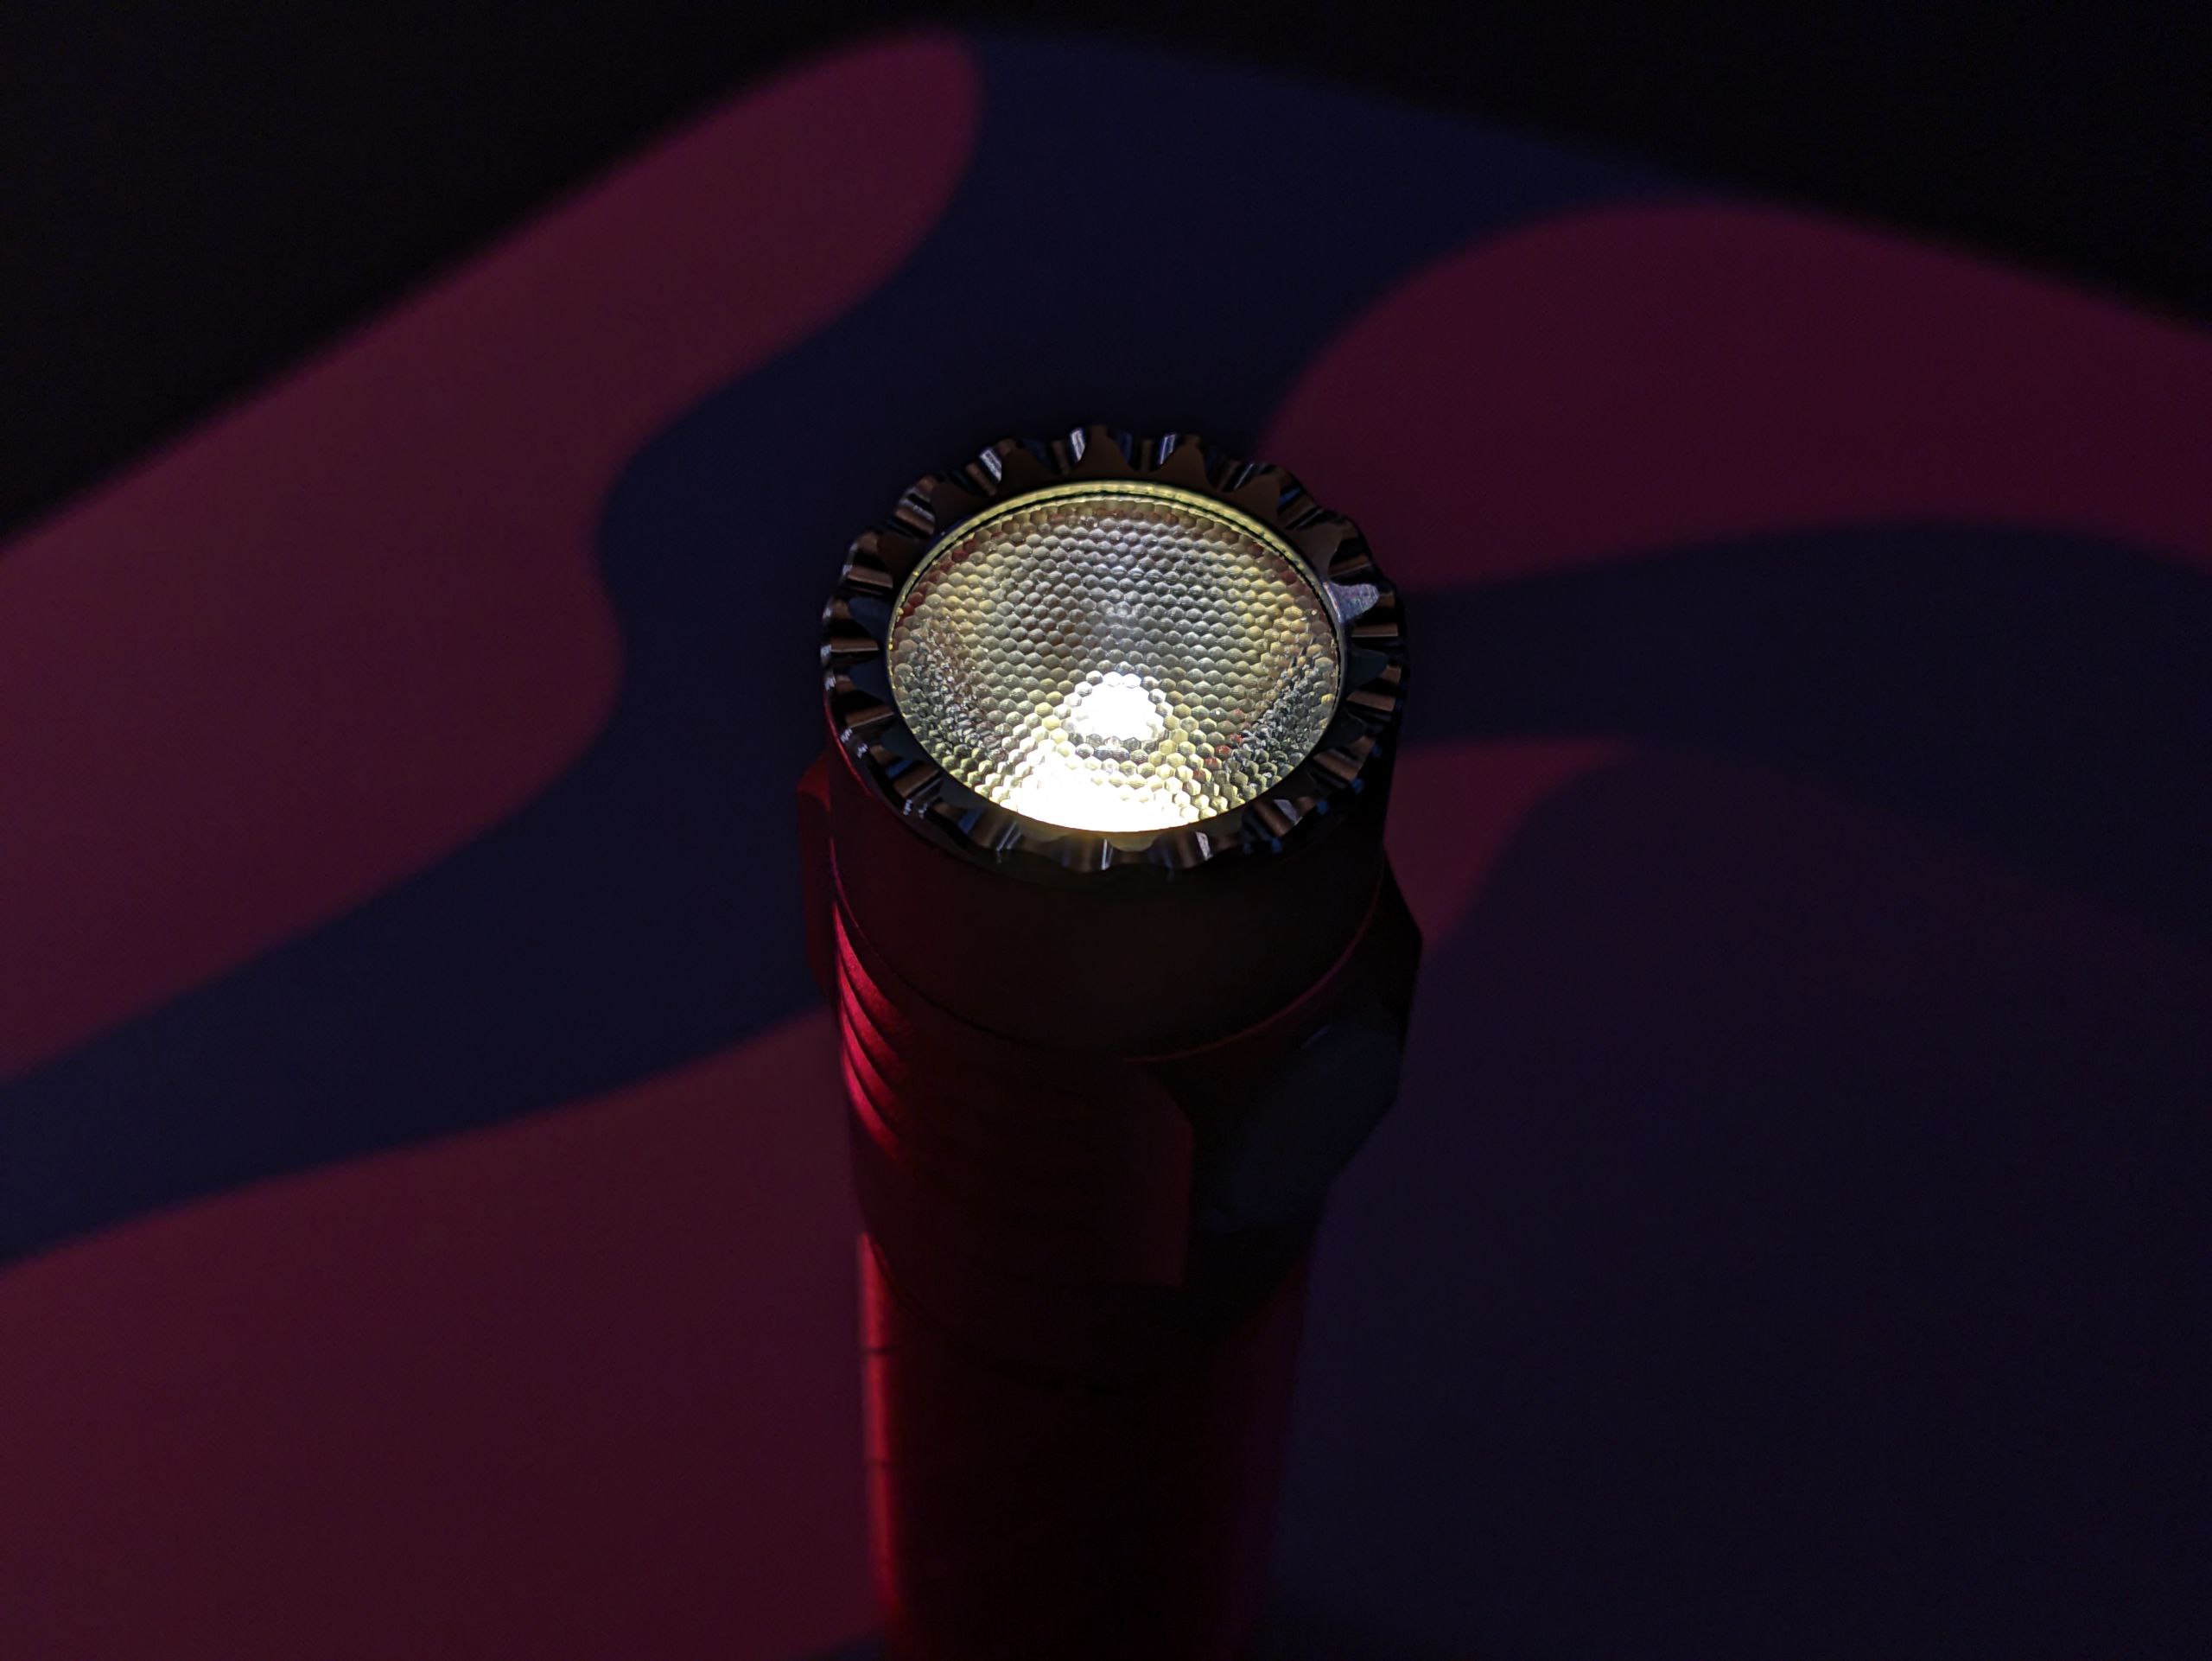
This is great. What’s the beam profile like?
It’s certainly a finicky process! What temperature did you try baking at?
The last one I did was a black Kaidomain S2 plus (Baked / Heat Colored Convoy Pictures). It took several iterations to get the parts to match. Strange how they change at different rates.
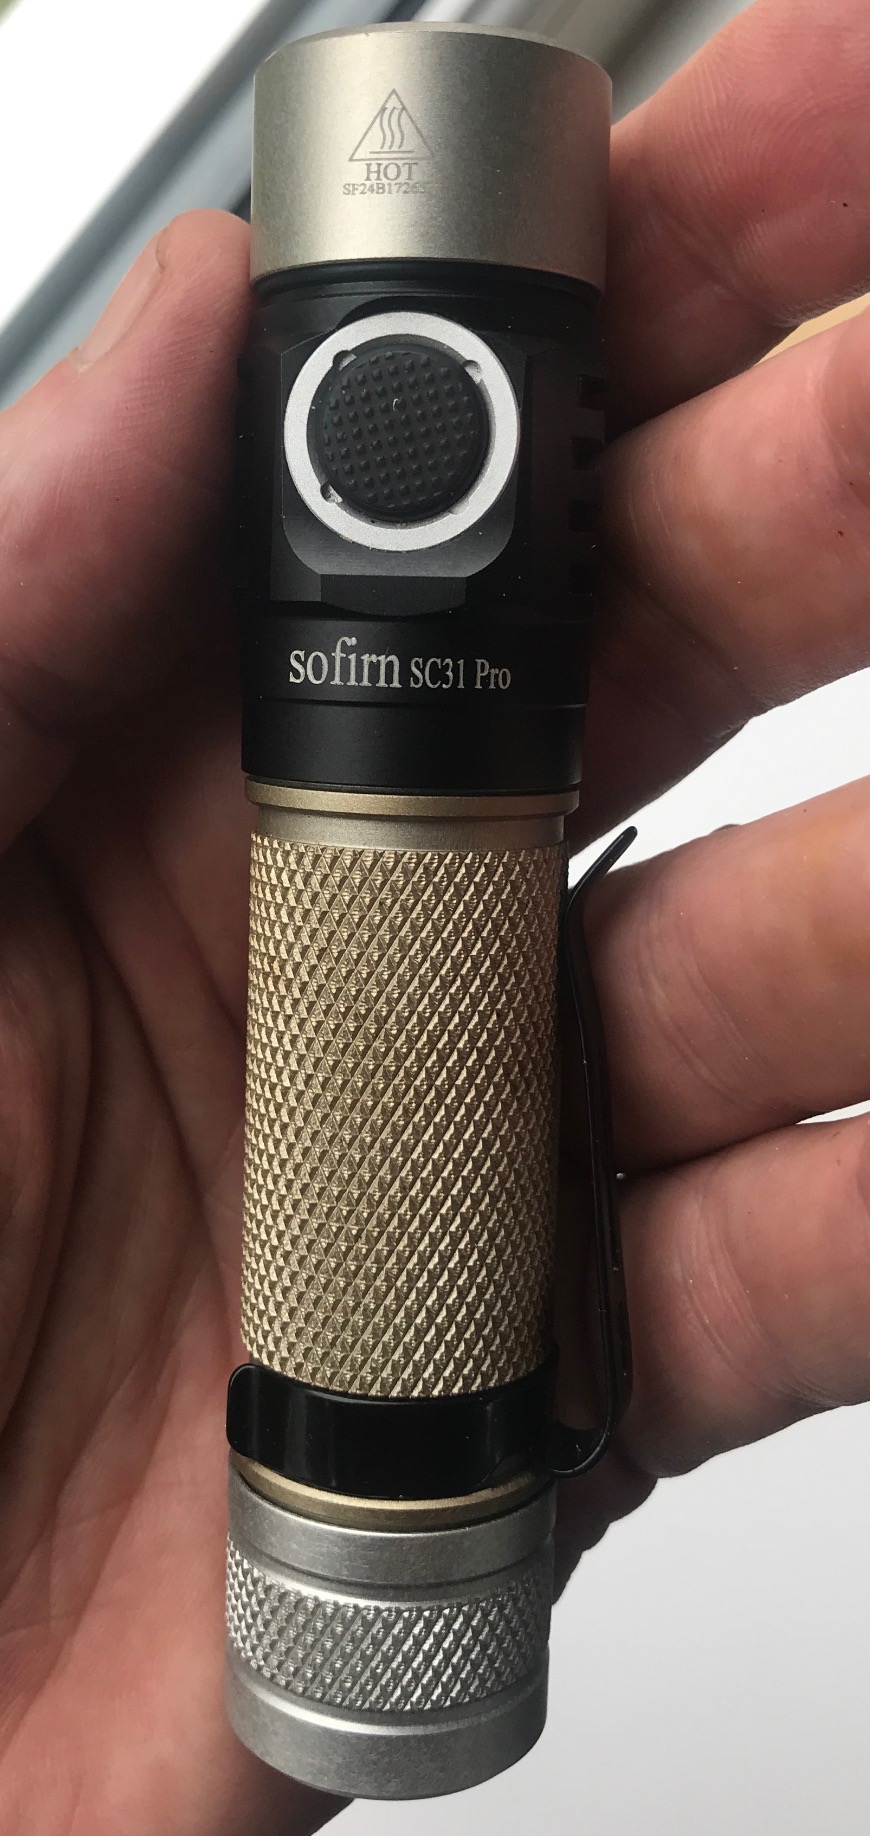
Oooh that turned out lovely. That’s a cracking shade you managed to get. The Sc31 barely changed even after an hour of it in the oven at its highest setting (gas mark 9 and the tray at the top) but the hob flame did the trick and yeah the colour change was surprisingly rapid once it started. Went a lovely chocolate shade at first which is where I should have stopped then did the tail cap which went chocolate then quickly gold then silver. Shame the tube on mine won’t change any more as it’s stuck like a light gold so I’ll get another tube. If I had more I’d probably have ended up having them all different colours then regretting it.
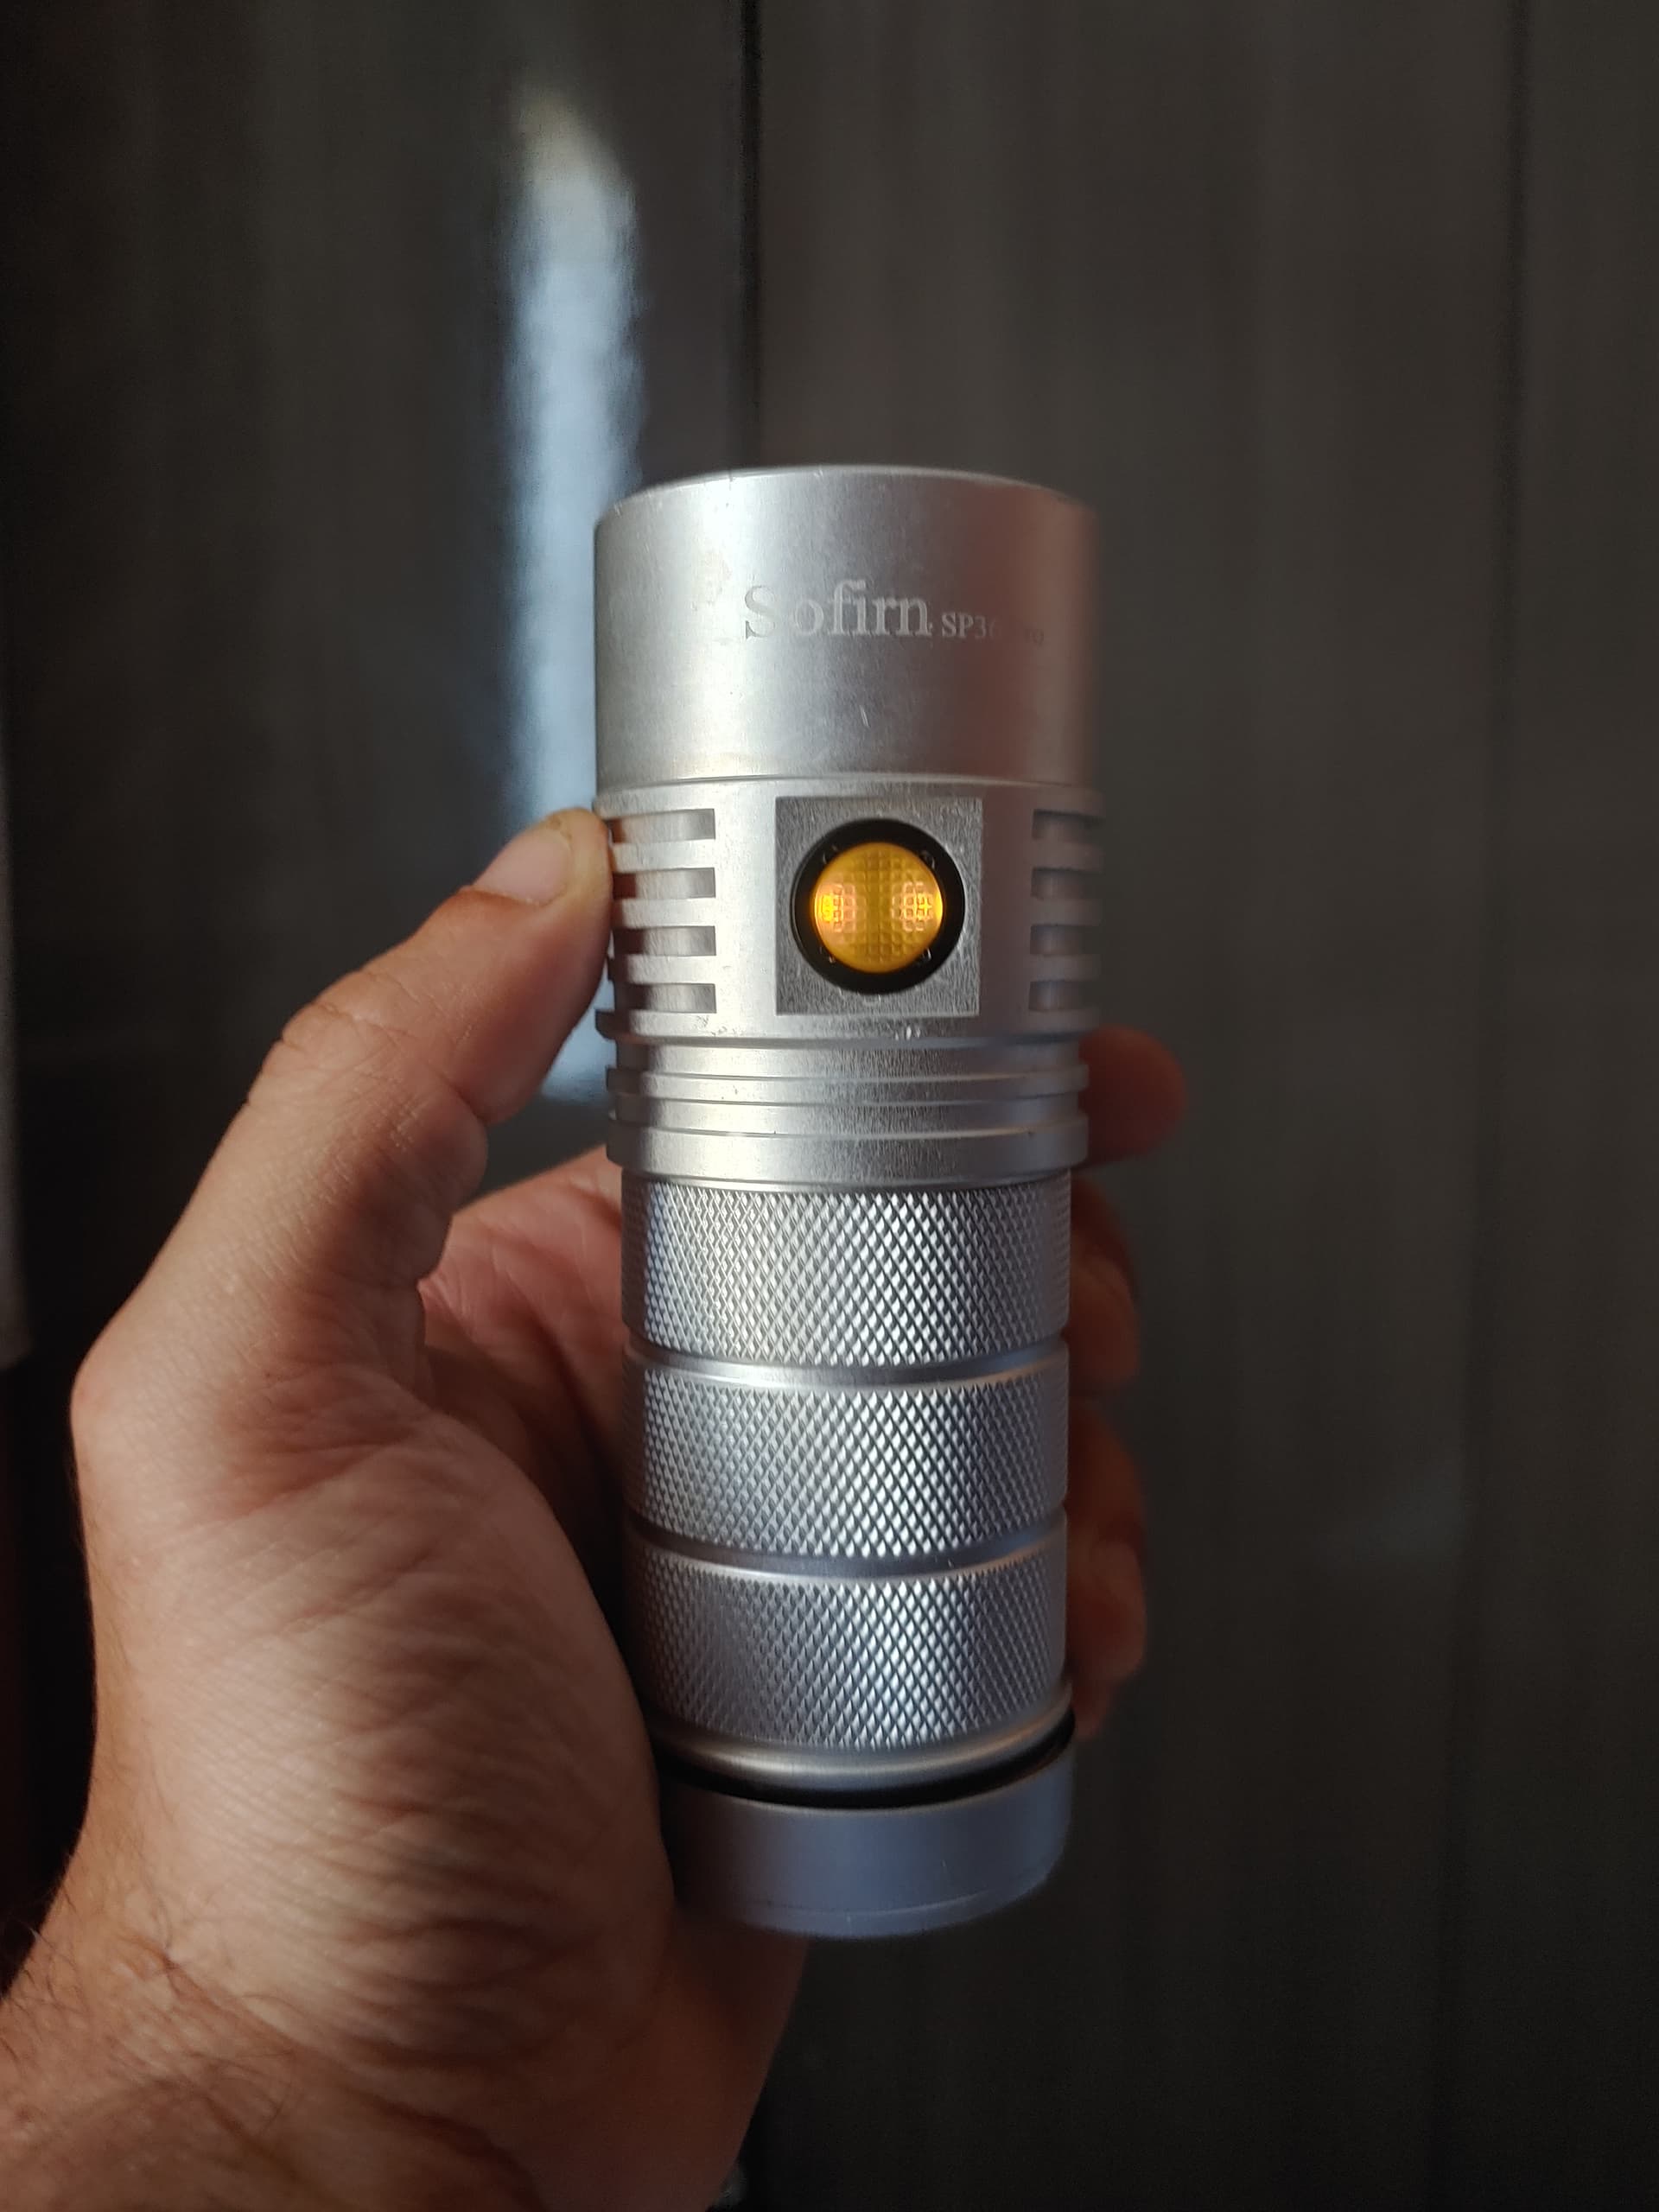
Another thing you can do is strip the anodization completely (WARNING: DANGEROUS PROCESS!!), i did this on my beaten up SP36 Pro and it’s looking clean now, and I’m planning on doing the same with my SC31 Pro and with my Galaxy watch active today. I used dilluted caustic soda to strip the anodization, and the surface texture didn’t change at all, it kept the bead blasted look on the outside, laser engraving marks were untouched, and the machining marks on the shelf were also preserved (shiny surface was preserved). Only thing that happened to me is that, for some reason, some parts (tailcap and head) were a little yellow at the end but a quick bath on the caustic soda managed to bring them back to the raw aluminium tone. The light must be fully disassembled, the electronics, optics, retaining ring, switch cover, charging port cover and o-rings must be fully removed, and all the parts must be very clean before starting this process. PPE use is mandatory for this process.
Now that’s a thing of beauty. The tail cap and the bezel on mine looks similar as it’s turned silver (the bezel is maybe a shade of very very slight gold) but yours looks so clean and uniform. Stripping the innards out is beyond me unfortunately as I’d end up knackering it,
I believe that is because the different parts were likely anodized in batches of tubes, or caps, bezels and so on. The finish color may appear the same black but there are differences in something we can’t see. Just a guess, but I too have had issues with getting to the same baked shades.
When I was stripping the anodization on my SP36 the color started to fade as the dye was leaving the oxide layer, but the color changed depending on the piece. Tailcap and bezel turned dark green while the head and battery tube turned dark blue, so, two different dyes, and these dyes behave differently when they are heated to the point where they start to degrade and change colors. I suppose these parts were anodized in different batches, and if I were to bake this light the tailcap/head color would have changed differently than the color of the head/tube.
Another factor that might make the color change differently is the rate at which the heat rises on the piece, the dye might degrade in unpredictable ways if heated for a long time instead of being rapidly heated (I’m not a chemistry master but I know how to boil an egg, and that’s how a boiled egg behaves)
With the dyes used for printing color photographs, the color black is mostly just very dark shades of greens, blues, etc. Sort of much like what you were seeing with color being removed from the black appearing anodizing.