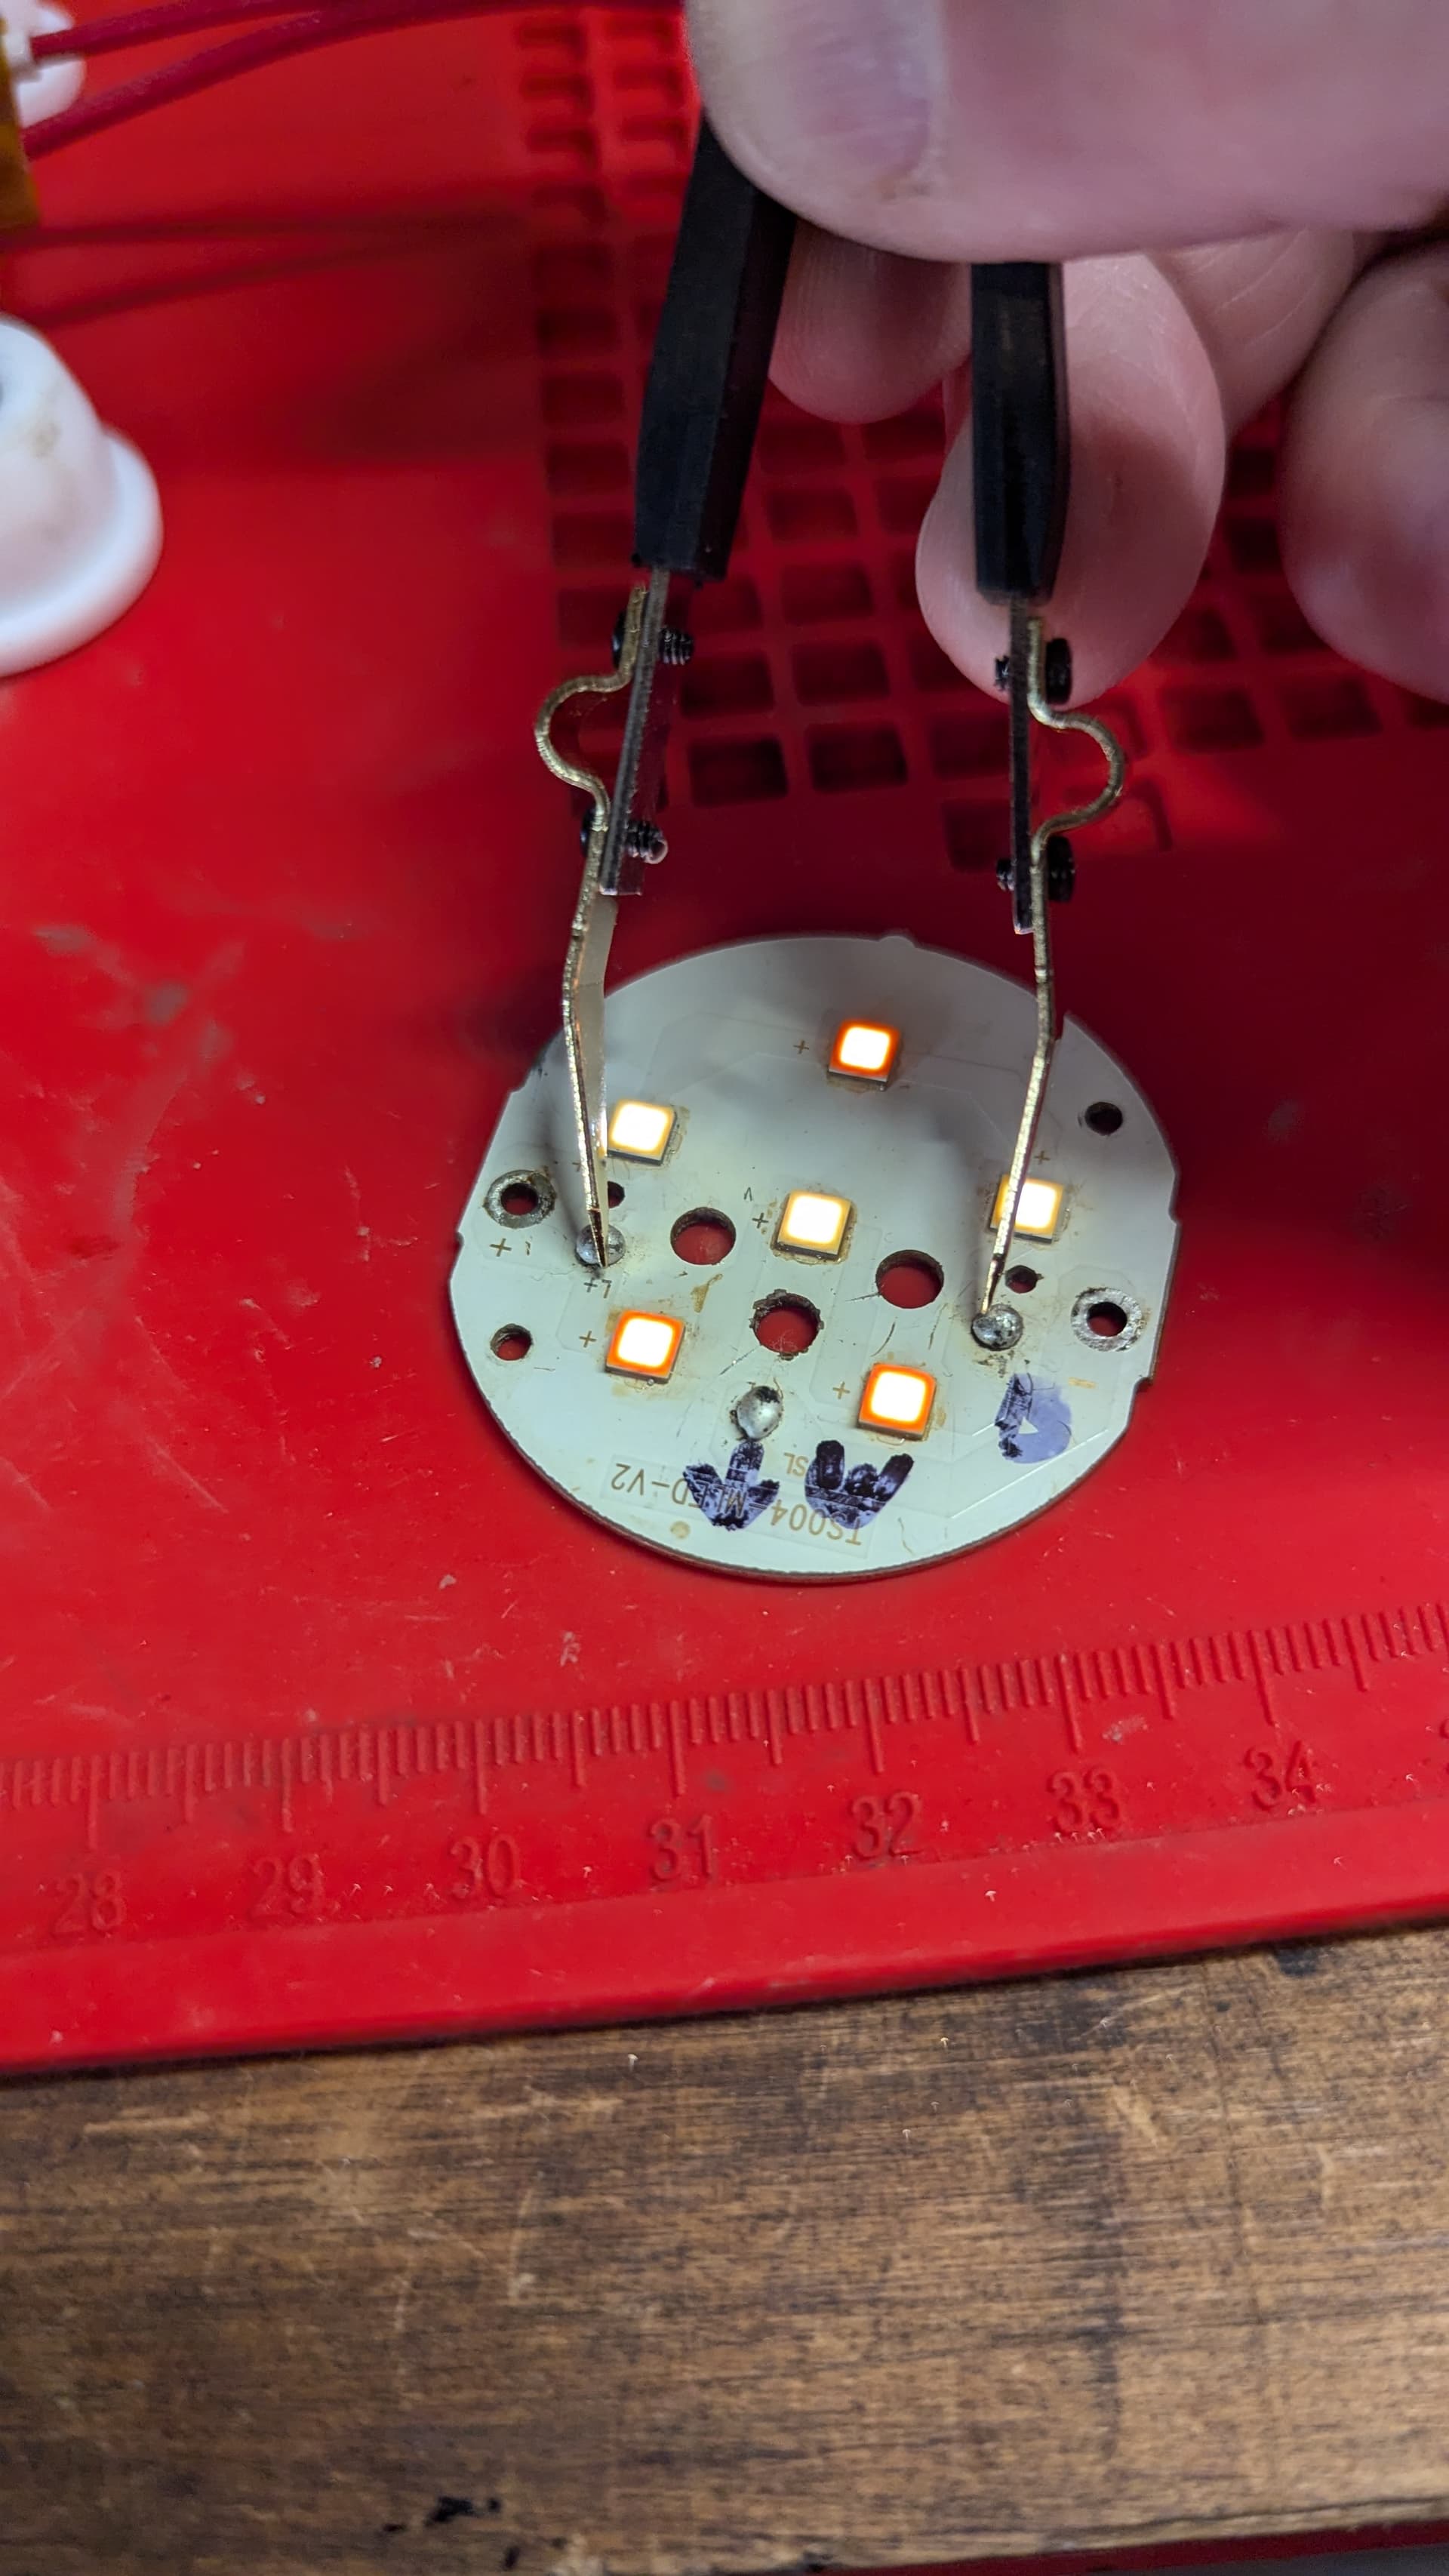
Nevermind! I’m an idiot. Even though I triple checked everything, I still had an emitter turned 180. All is good now!
9 Thanks
Well, how does it look now that you figured it out?
2 Thanks
I also had a pogo pin get stuck that I can’t get unstuck. I’ll post some pics tomorrow when the replacement comes in and I can get it all back together.
2 Thanks
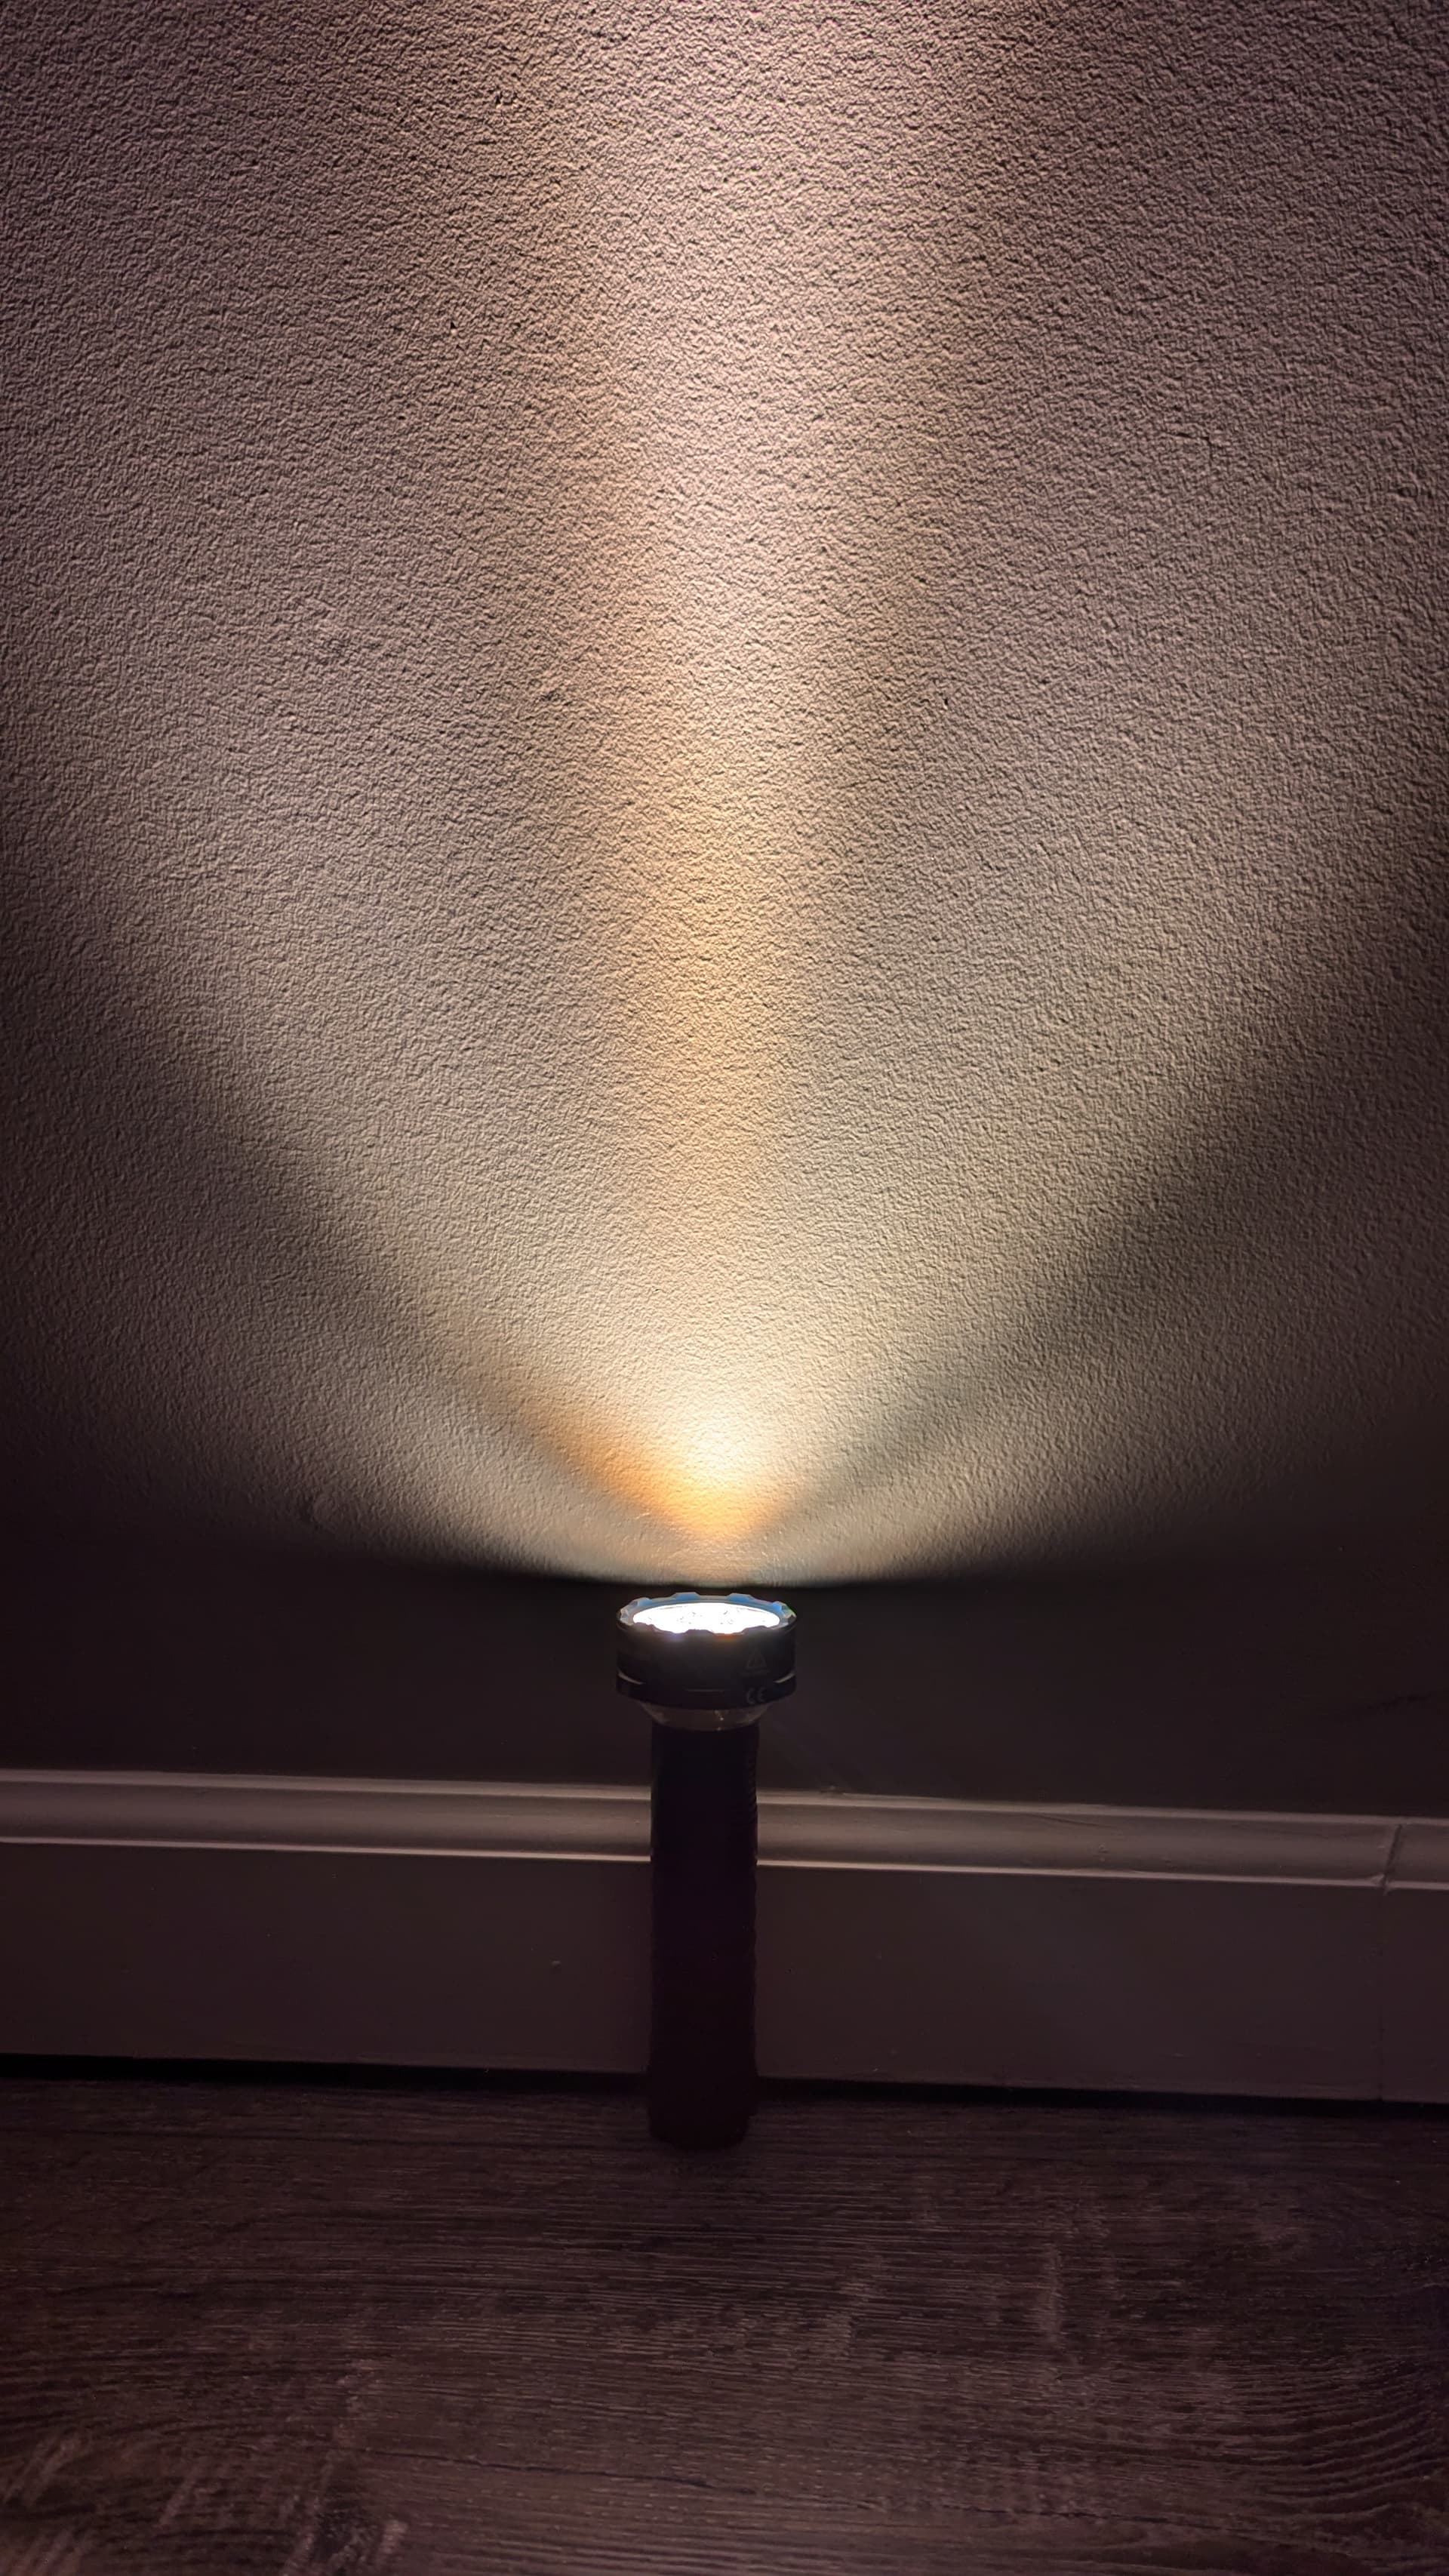
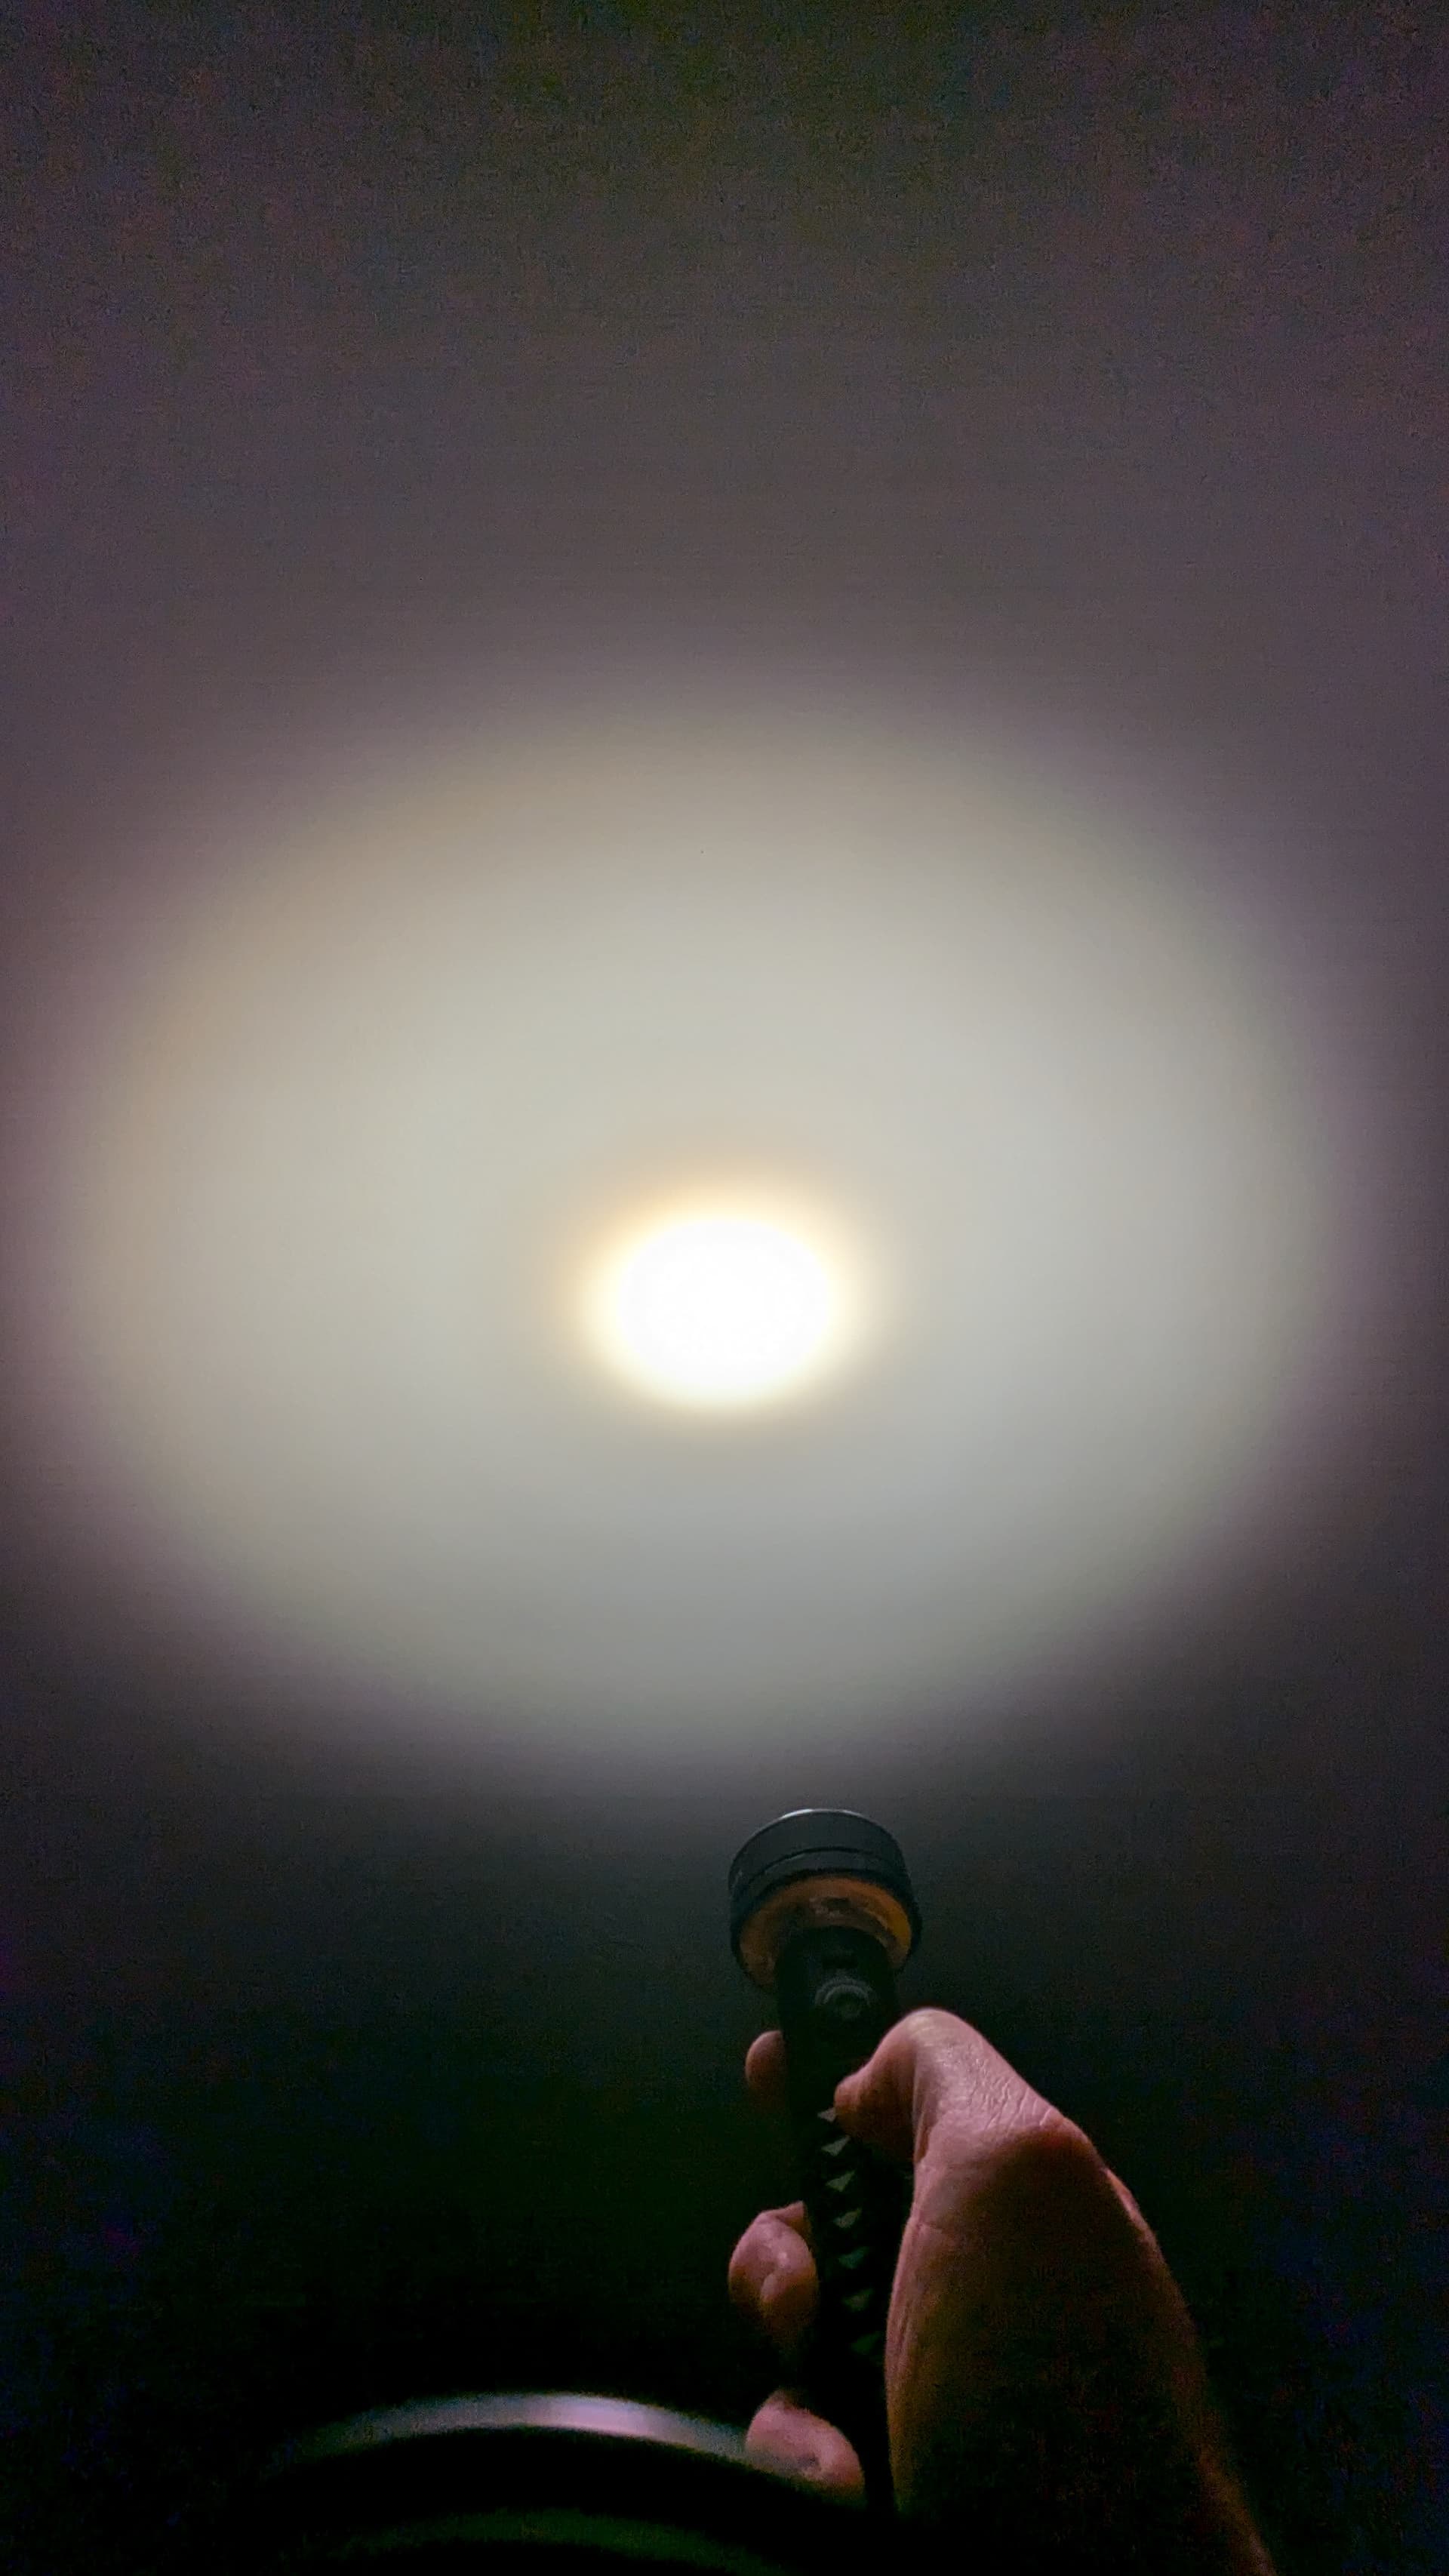
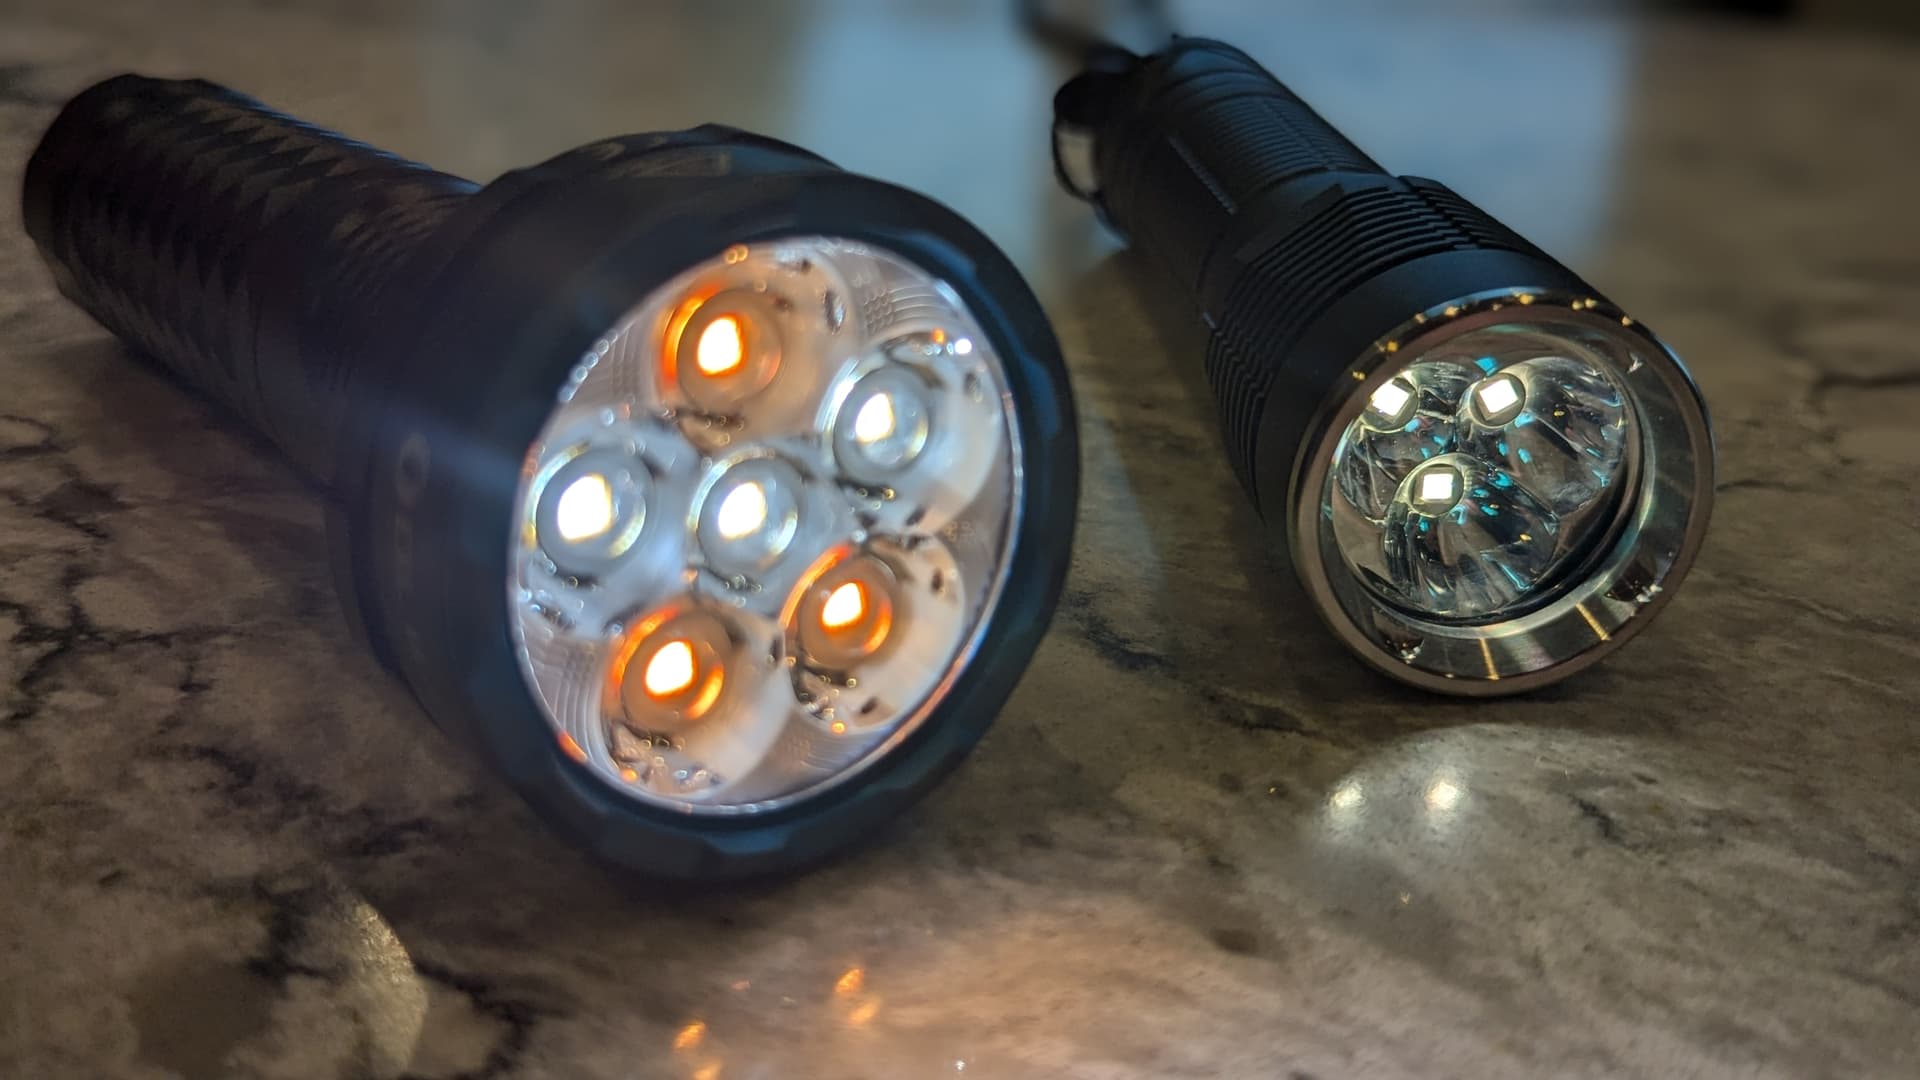
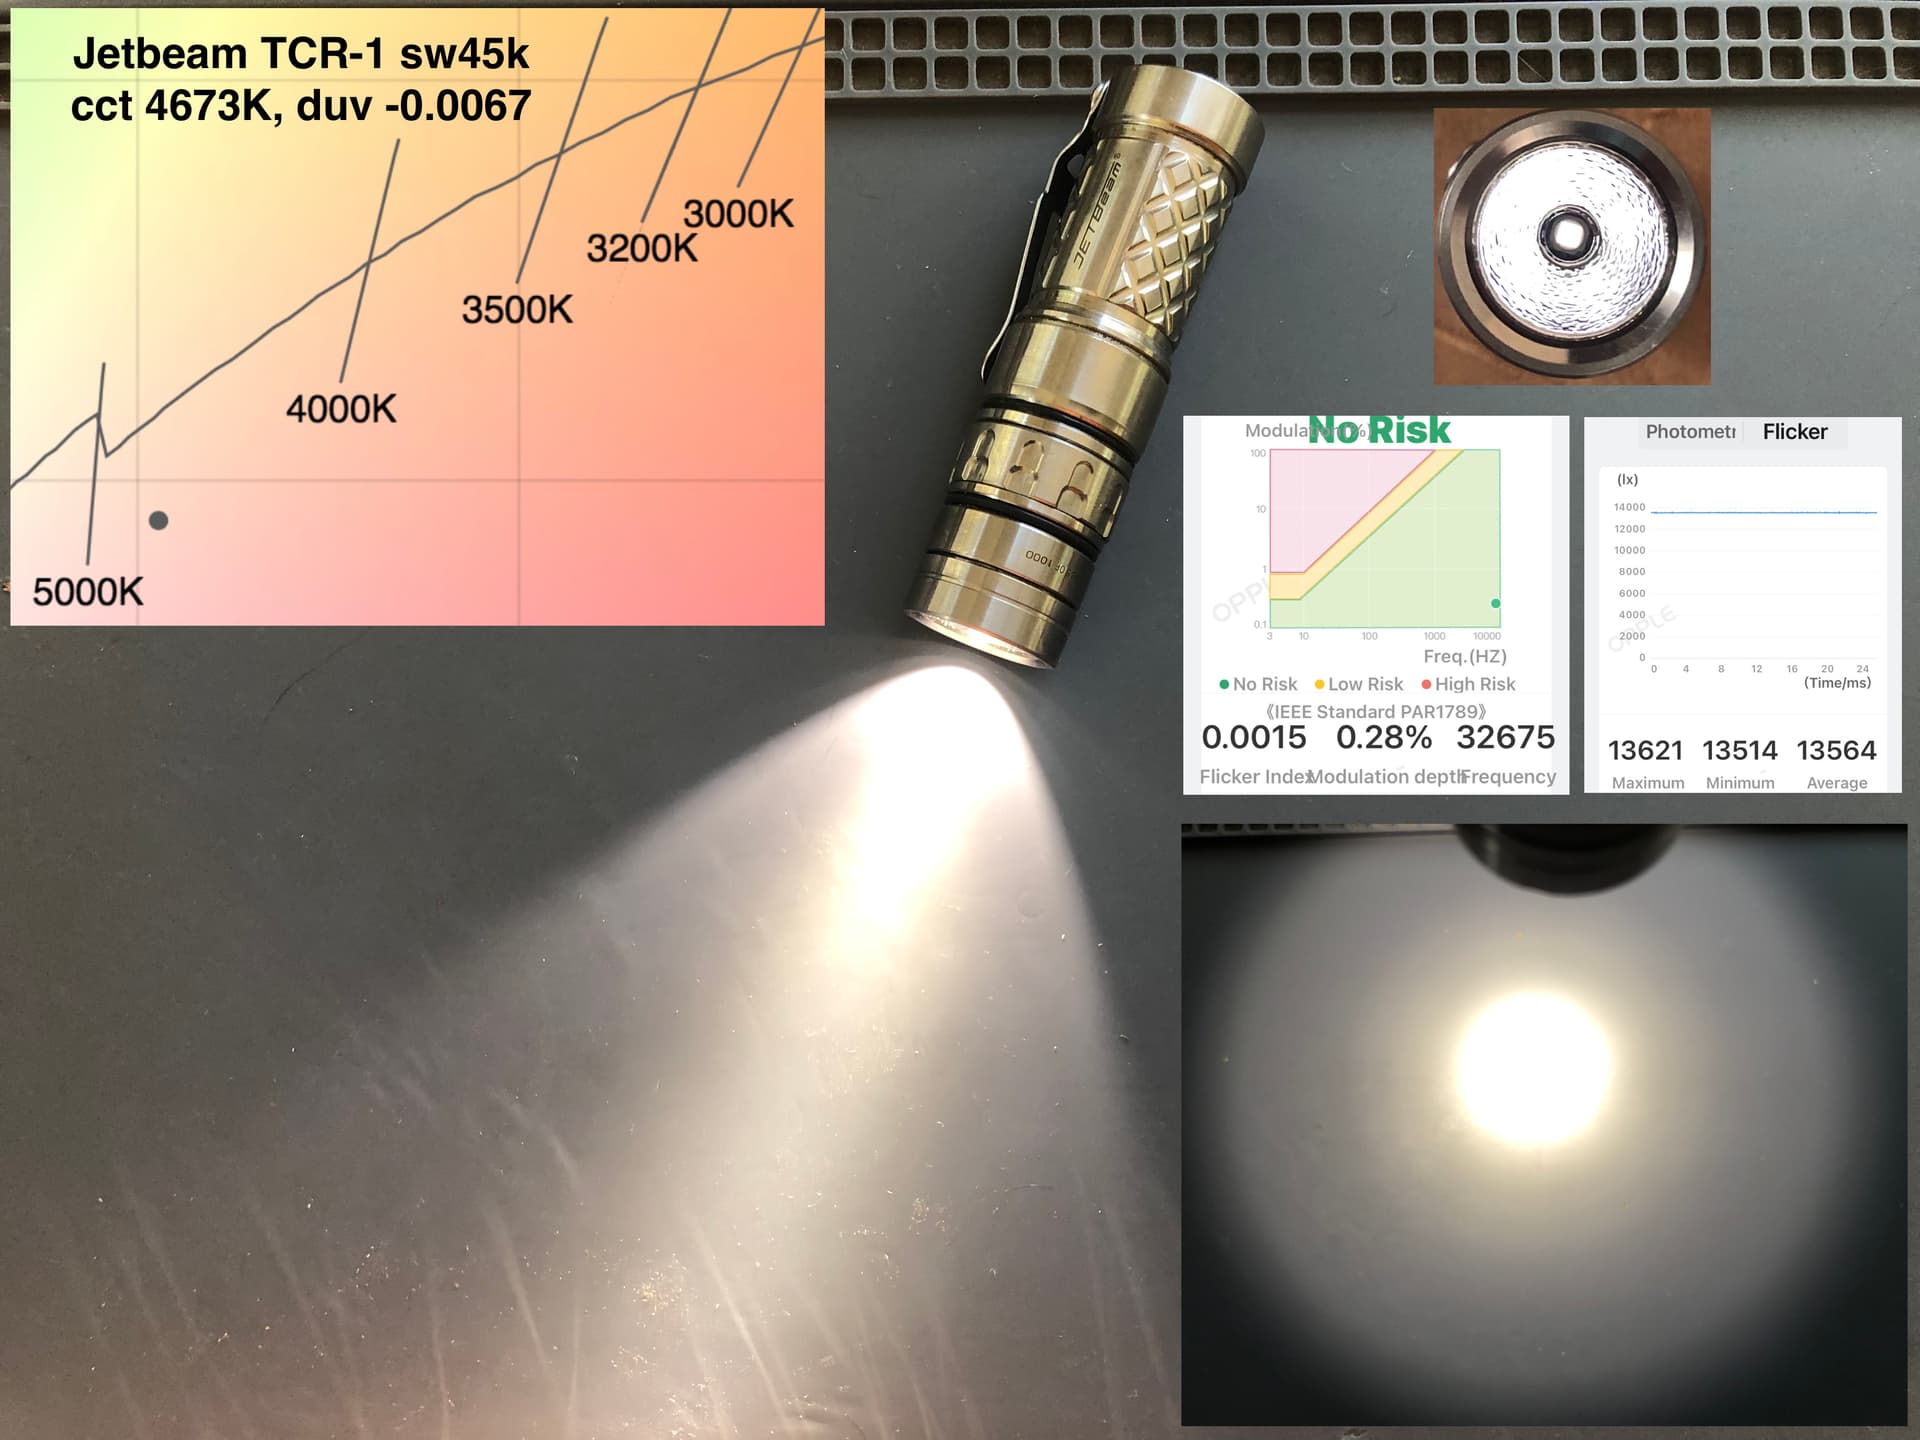
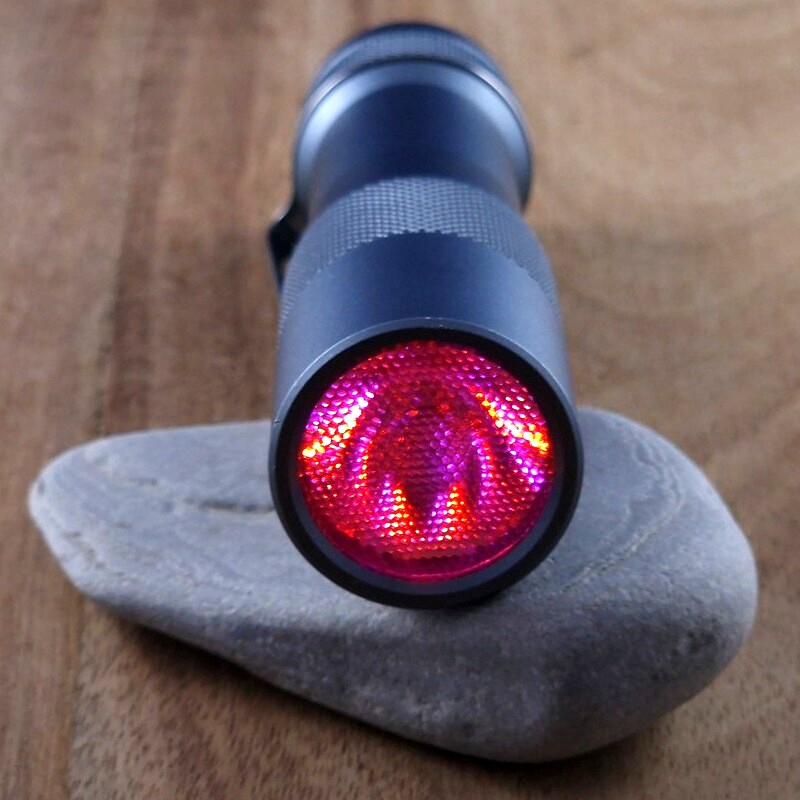
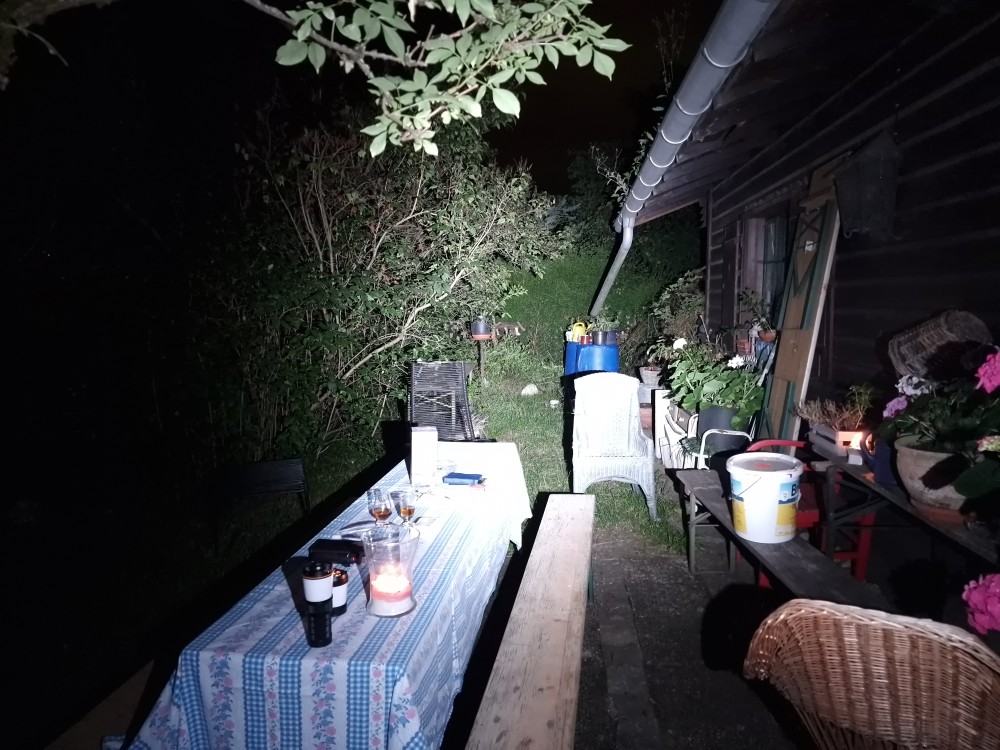
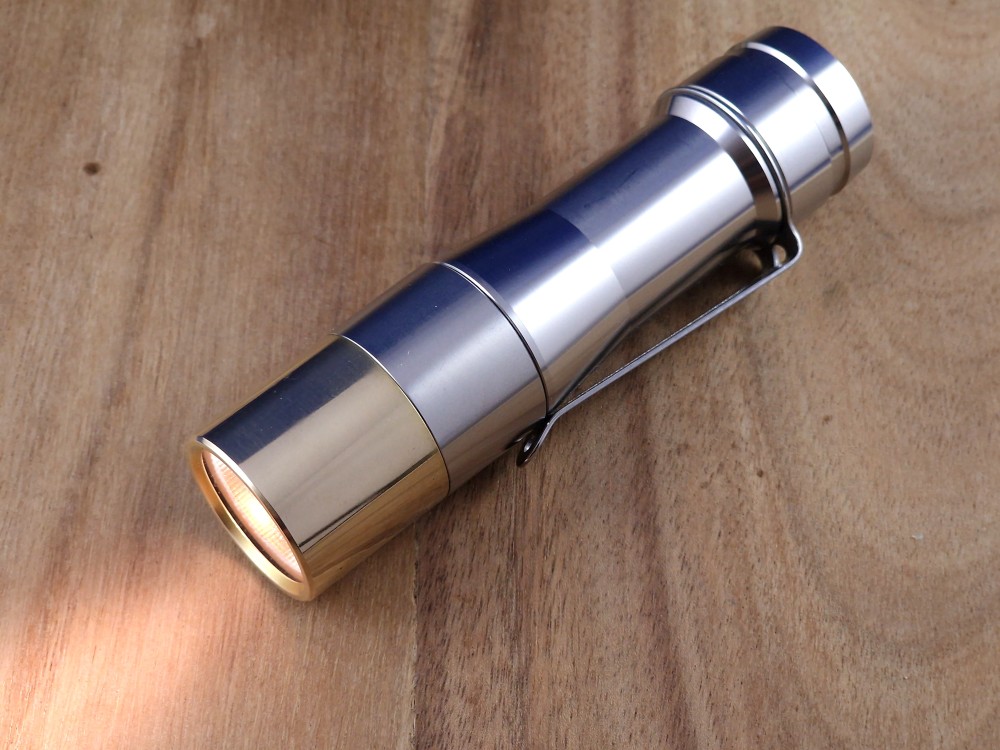
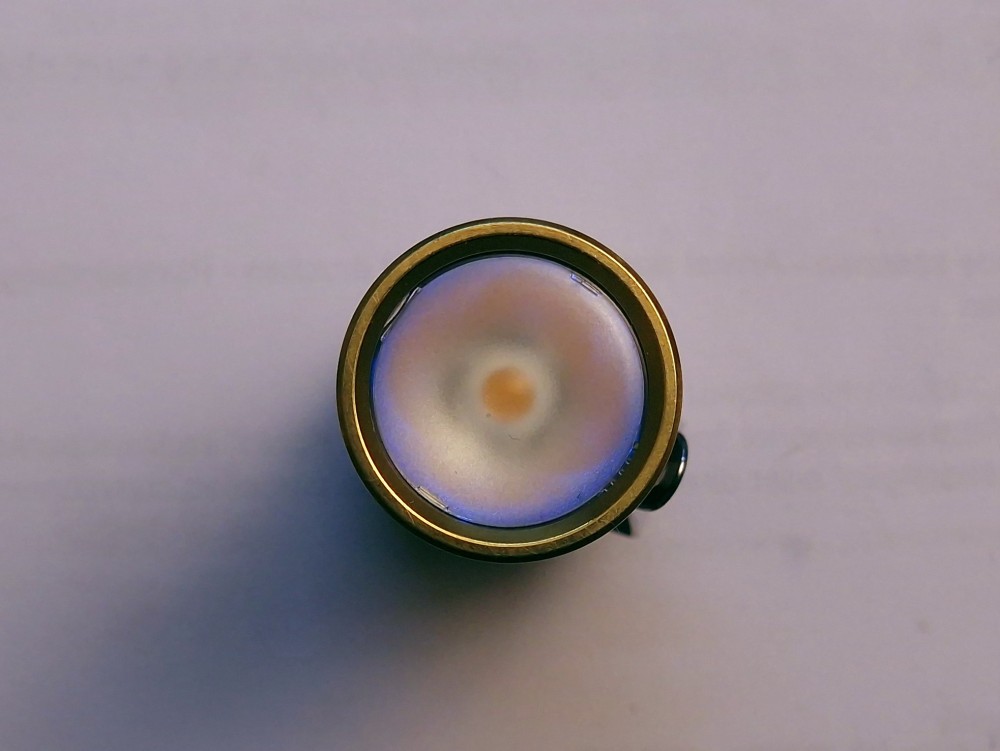
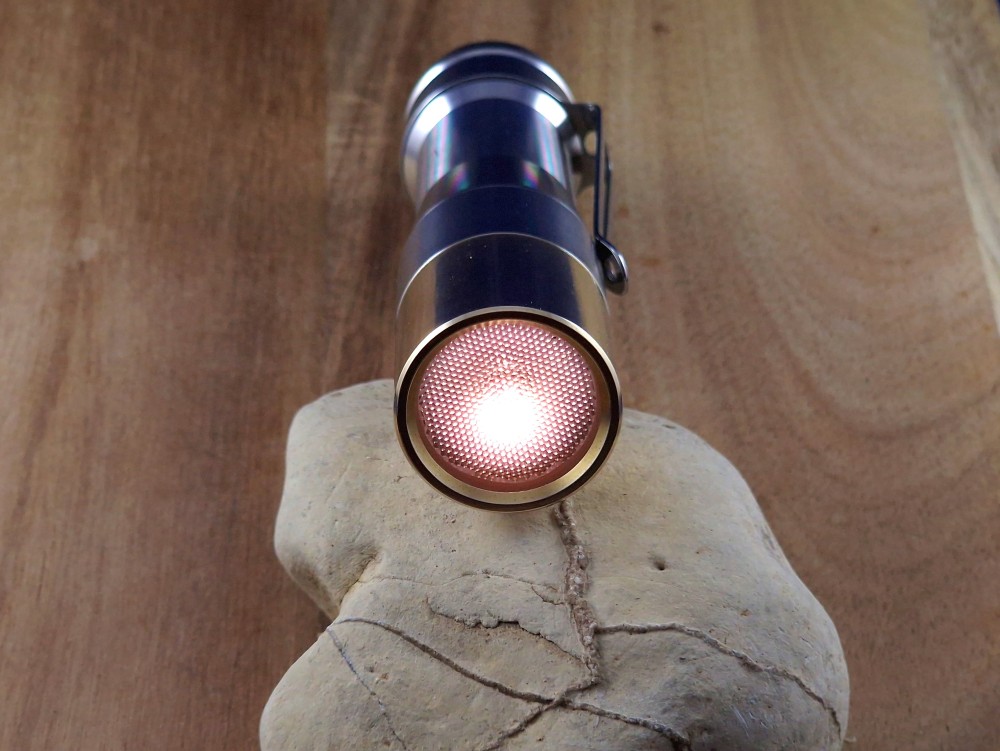
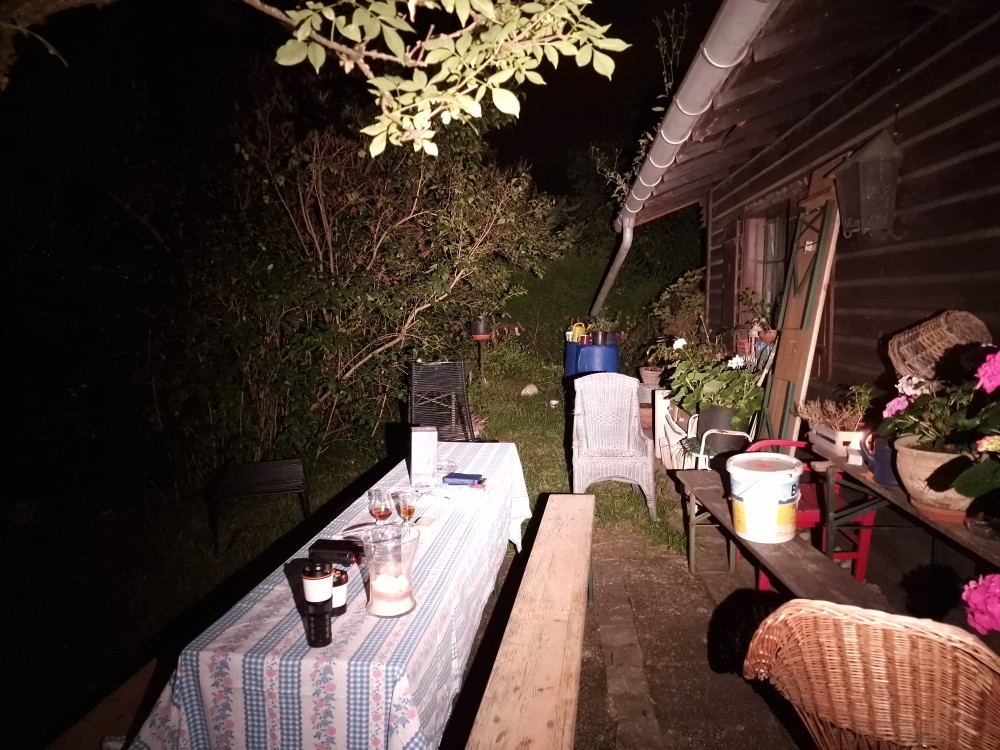
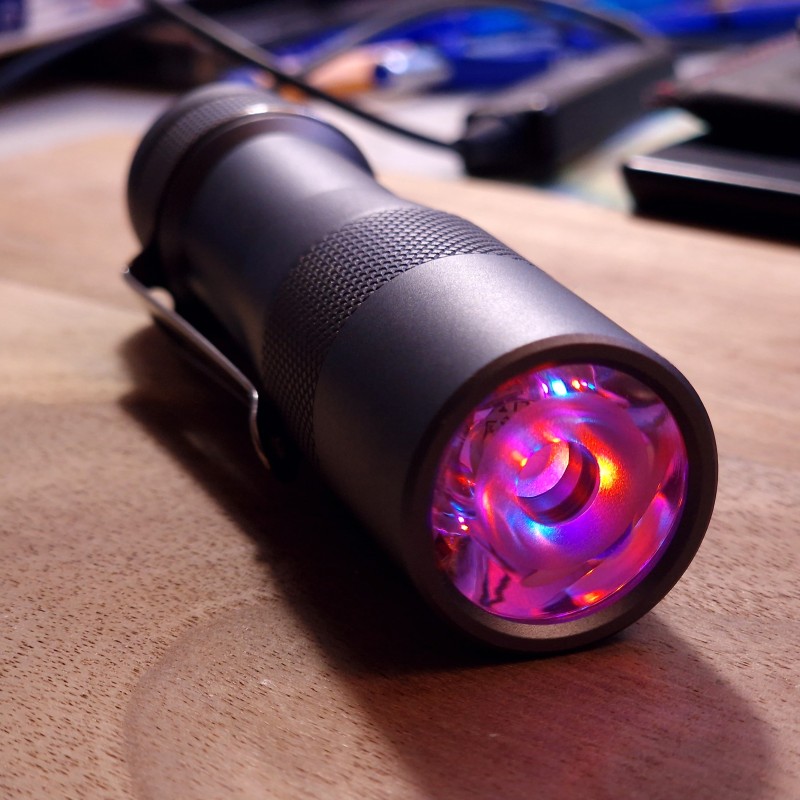
OK Campers! It’s been a busy day. Finished up 2 different lights. First up is the one you all asked for… the Prowess. It turned out WAY better than I anticipated!!! 3450k - duv: -0.0097 - CRI: 97! And its one beautiful, slightly rosy beam. Exactly what I was hoping for.
FYI, the wall shots are on a wall that’s not white (I don’t have one in my house that’s white). It’s a slight grayish/tan color.
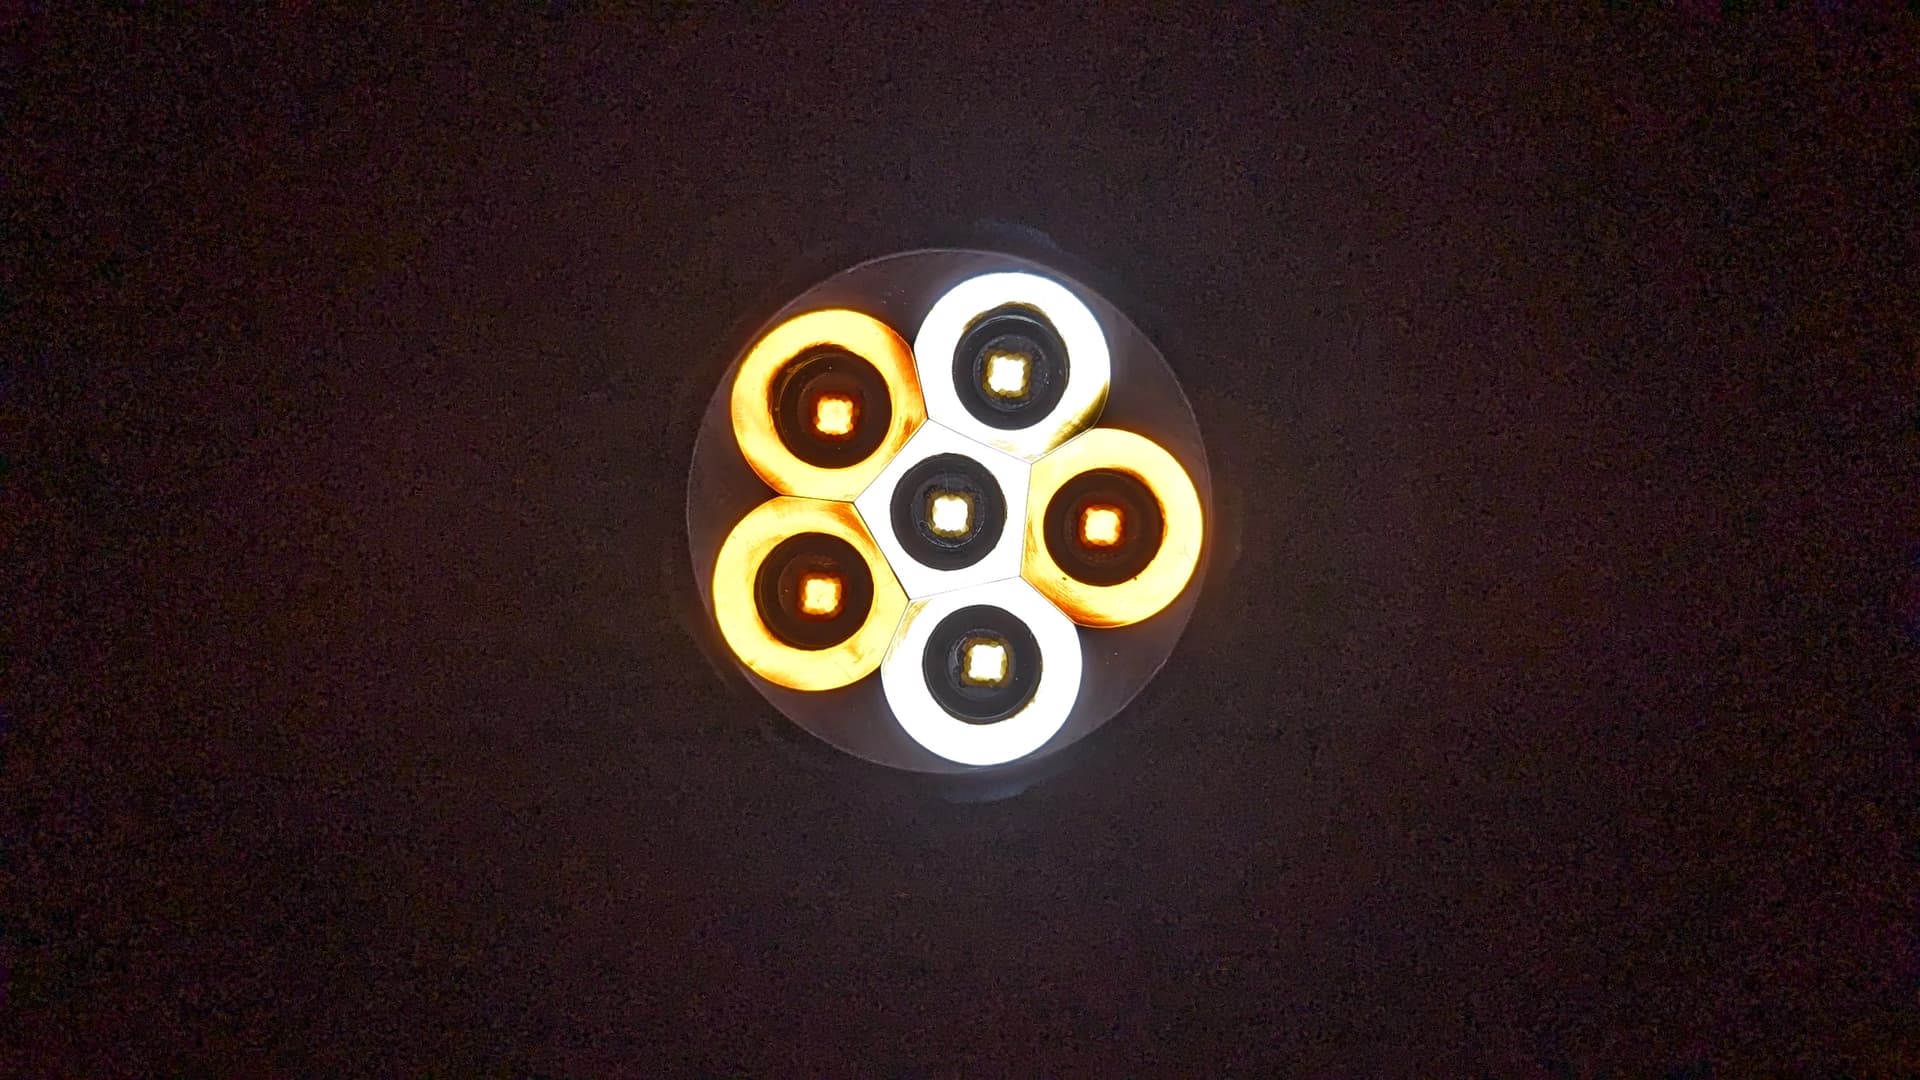
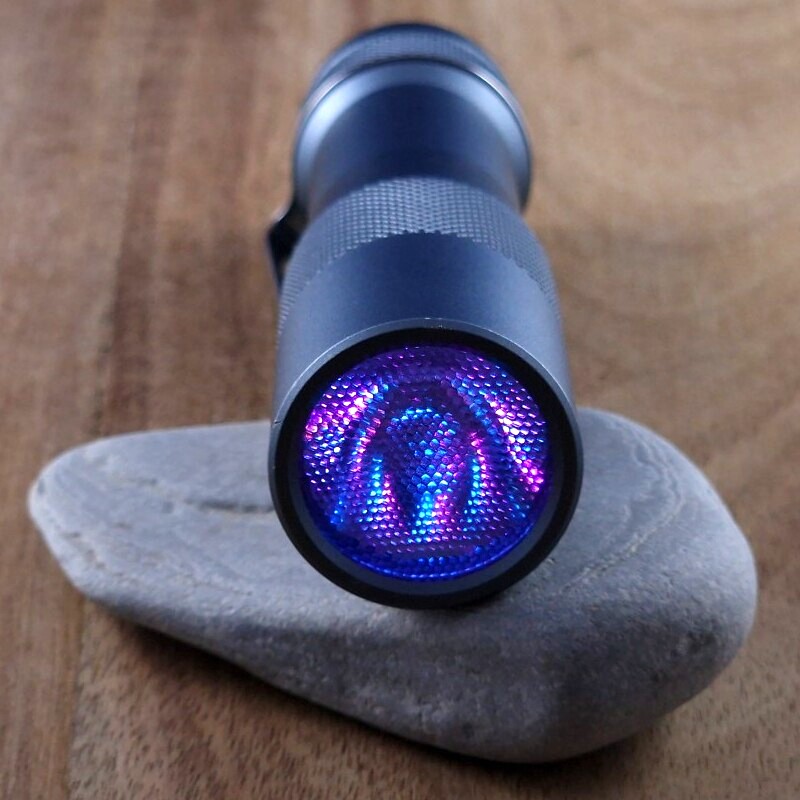
Then we have another full build that I completed. A Convoy S12 host with 3x519a DD5000k and Convoy’s 3v 8a driver. 3772K - duv: -0.0026 - CRI: 97.8

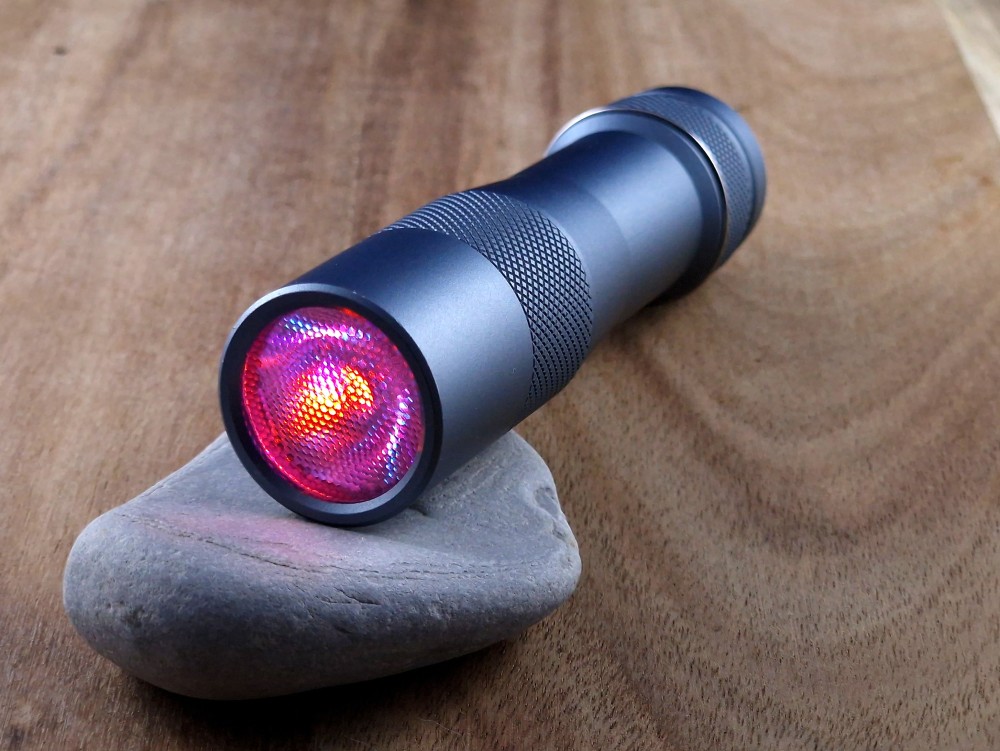
And a couple of side by side pics!

10 Thanks
99 cent store 2000k 95 CRI lantern mod

7 years ago I bought a few cheap bottom of the barrel plastic lanterns at 99 cent store. My attempt to swap the cool white leds to warm white (yellow, low cri, above bbl) leds at the time failed in a spectacular fashion. which ended in a burnt unusable pcb, lifted soldering pads and disintegrating iron tip. I put it away and forget about it.
After digging around my junk door I decided to come back to it. I could have used the great rngwn / sophia led high cri 5mm leds that need a home but instead I took the potentially dumber route and used these 2835 2000k 95 cri emitters. They seem to have a pretty good tint. they are rosier than rgwn 2300k leds.

Left to right: dedomed nichia 3000k, 2835 95 CRI, rgnwn 2300k, FFL1800K
2835 emitters can fit on 3535 pads relatively easy but getting them precisely centered is trickier. they are fitted on 3535 12mm alumnum mcpcb.

My original goal was to use convoys AA driver with a single battery because 2835 can handle higher current but I really like the rotary dial brightness because it gets really low. I may add dc-fix milky to clean up the beam. anyways 7 year mod finally completed.

13 Thanks

Finally finished getting a Convoy 16mm mcpcb sft40 3000k into one of my first flashlights…an sc31 pro.
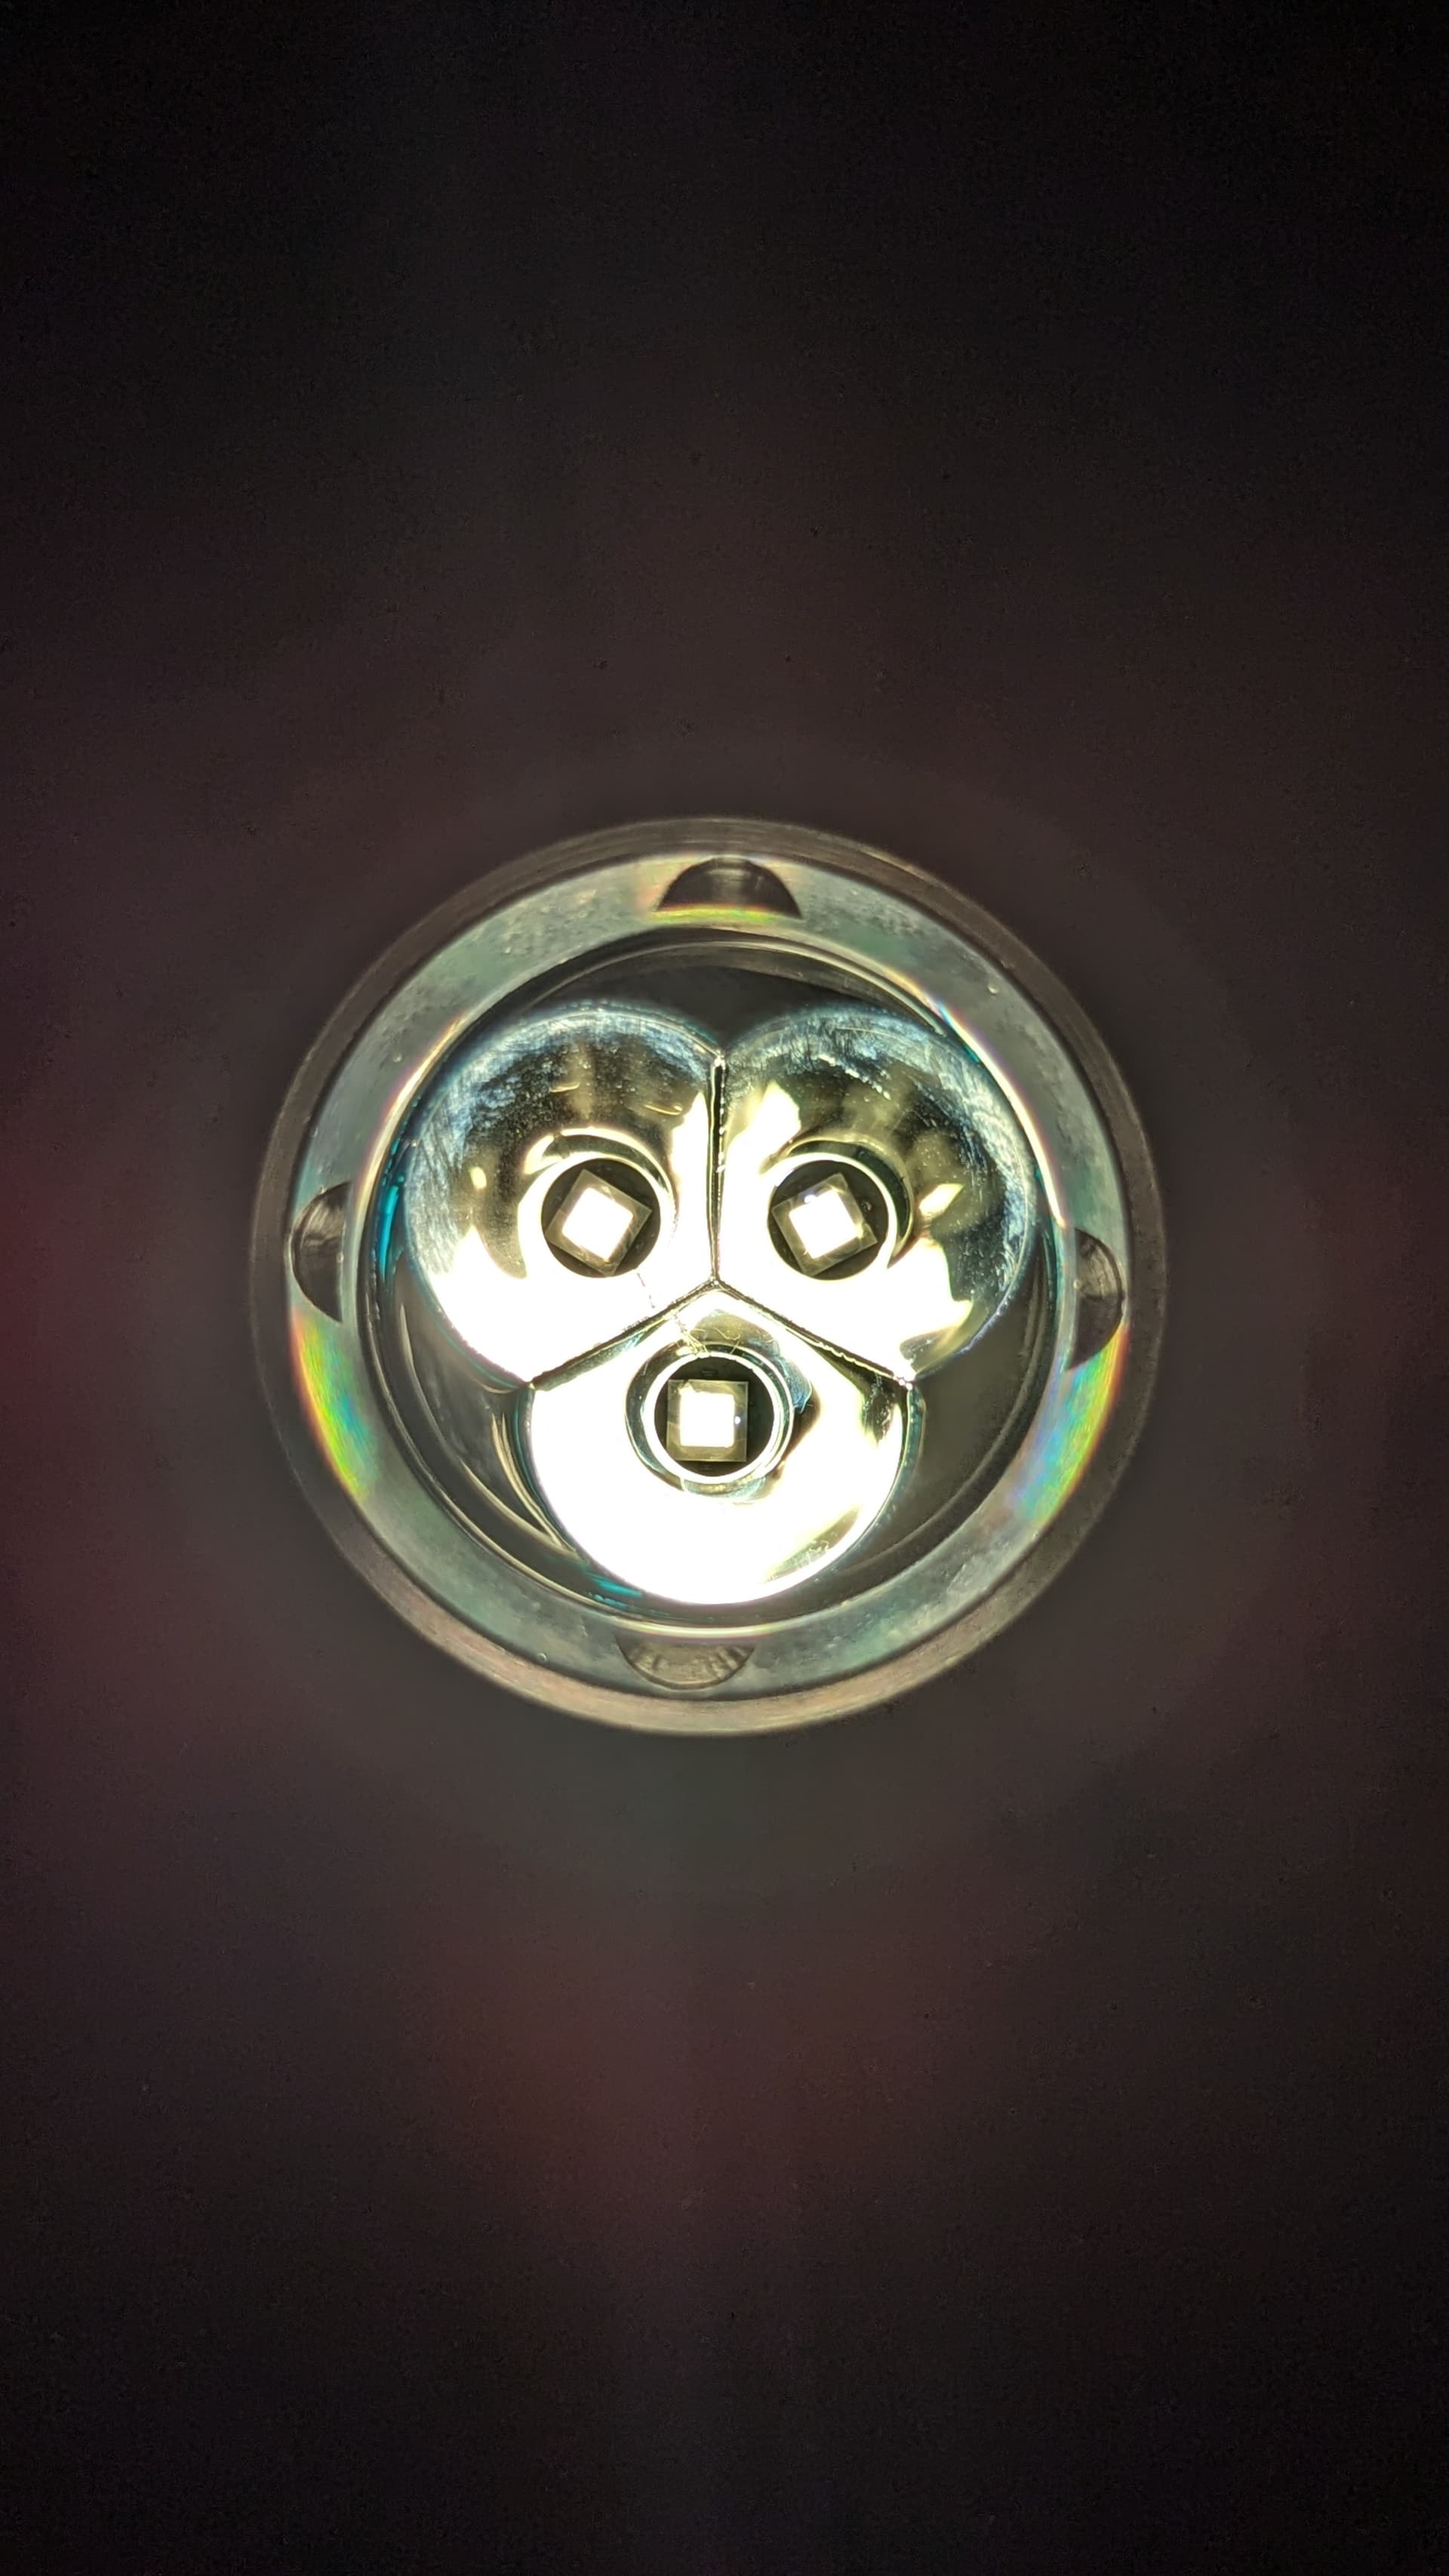
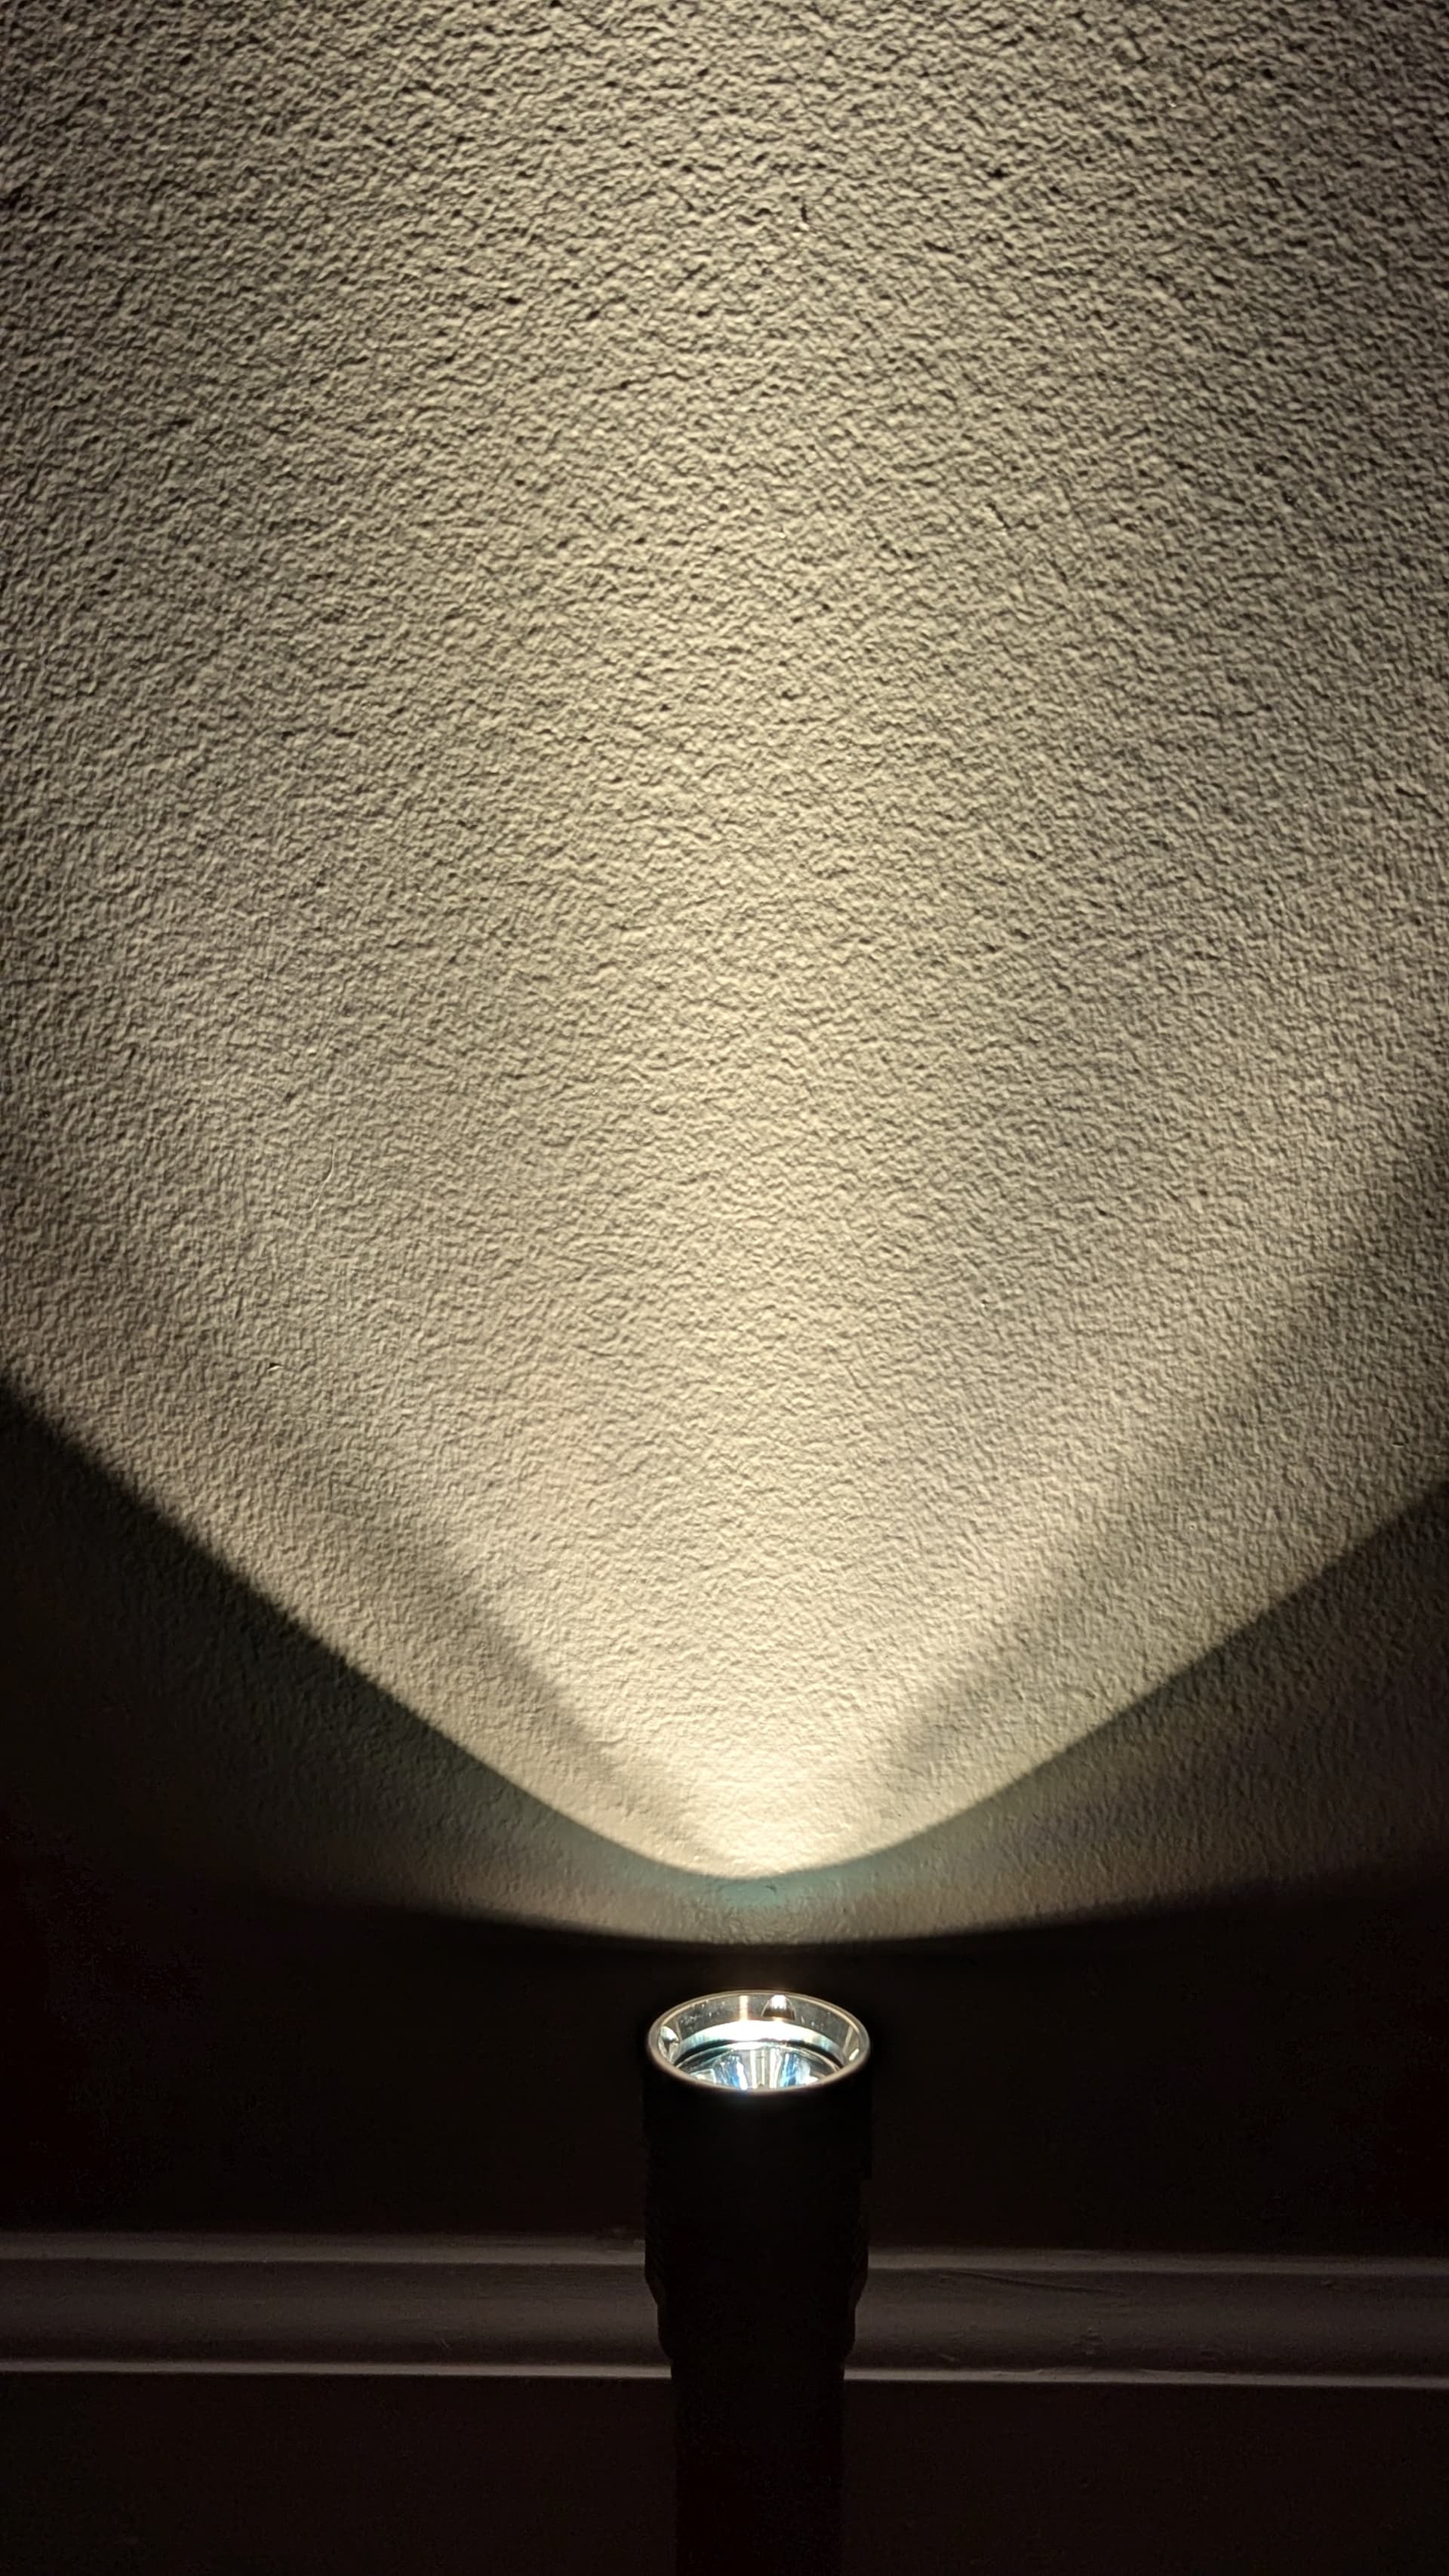
I’m a beginner and made a lot of mistakes, and I am now doubting whether it was even worth the time and effort spent ![]() as the hotspot has shapes in it and theres rings around it. Im a fan of smoother output. Have i chosen the wrong led for the unit maybe? I havent checked out the throw yet as its daytime.
as the hotspot has shapes in it and theres rings around it. Im a fan of smoother output. Have i chosen the wrong led for the unit maybe? I havent checked out the throw yet as its daytime.
I also had so many fights with the wiring and soldering it got less funny as it went on haha. And depending on how i tighten up the bezel and body to head it sometimes goes straight to high and the switch doesnt do anything…so i think the reflector may be causing a short when its pressed (screwed) down too hard? I’m a bit over messing around with it for now. I hope its not dangerous, it seems fine if i dont tighten everything up too much. Finger tight kinda thing is fine. Ive cleaned it all up with iso alc. And thermal paste is underneath the board. Soldering is not the best but i tried to push it down so it wasnt sticking up and connecting with the reflector…i think i may not trust my trusty old Sc31 pro again now Ive given it heart surgery ha!
I guess I’ve learnt a lot though, thats the main thing.
Check for continuity between LED- and the base of the MCPCB, it should be an open circuit. Also, check if the plastic gasket is installed or not. The gasket is responsible for properly spacing the reflector, so the focus point of the reflector sits right at the surface of the LED, and it provides insulation for the MCPCB. Running the light without the gasket will make for an improperly focused LED, which can create artifacts, and in some cases the reflector can short the MCPCB, which can result in erratic behavior of the device, damage of the driver circuit or even in catastrophic failure of the device.
2 Thanks
Thanks so much! I had indeed forgotten the plastic gasket around the LED! Its much more stable now…no flickering when tightening it up or stuck on high. Also gave the emitter another wipe with a qtip and some iso.
Im still not sold on the beam though. Artefacts seem the same as before and a pronounced outer ring.
Any tips for that please? Or is it just something to deal with going to an sft40 in this unit perhaps?
Thanks again for your reply!! Much appreciated.
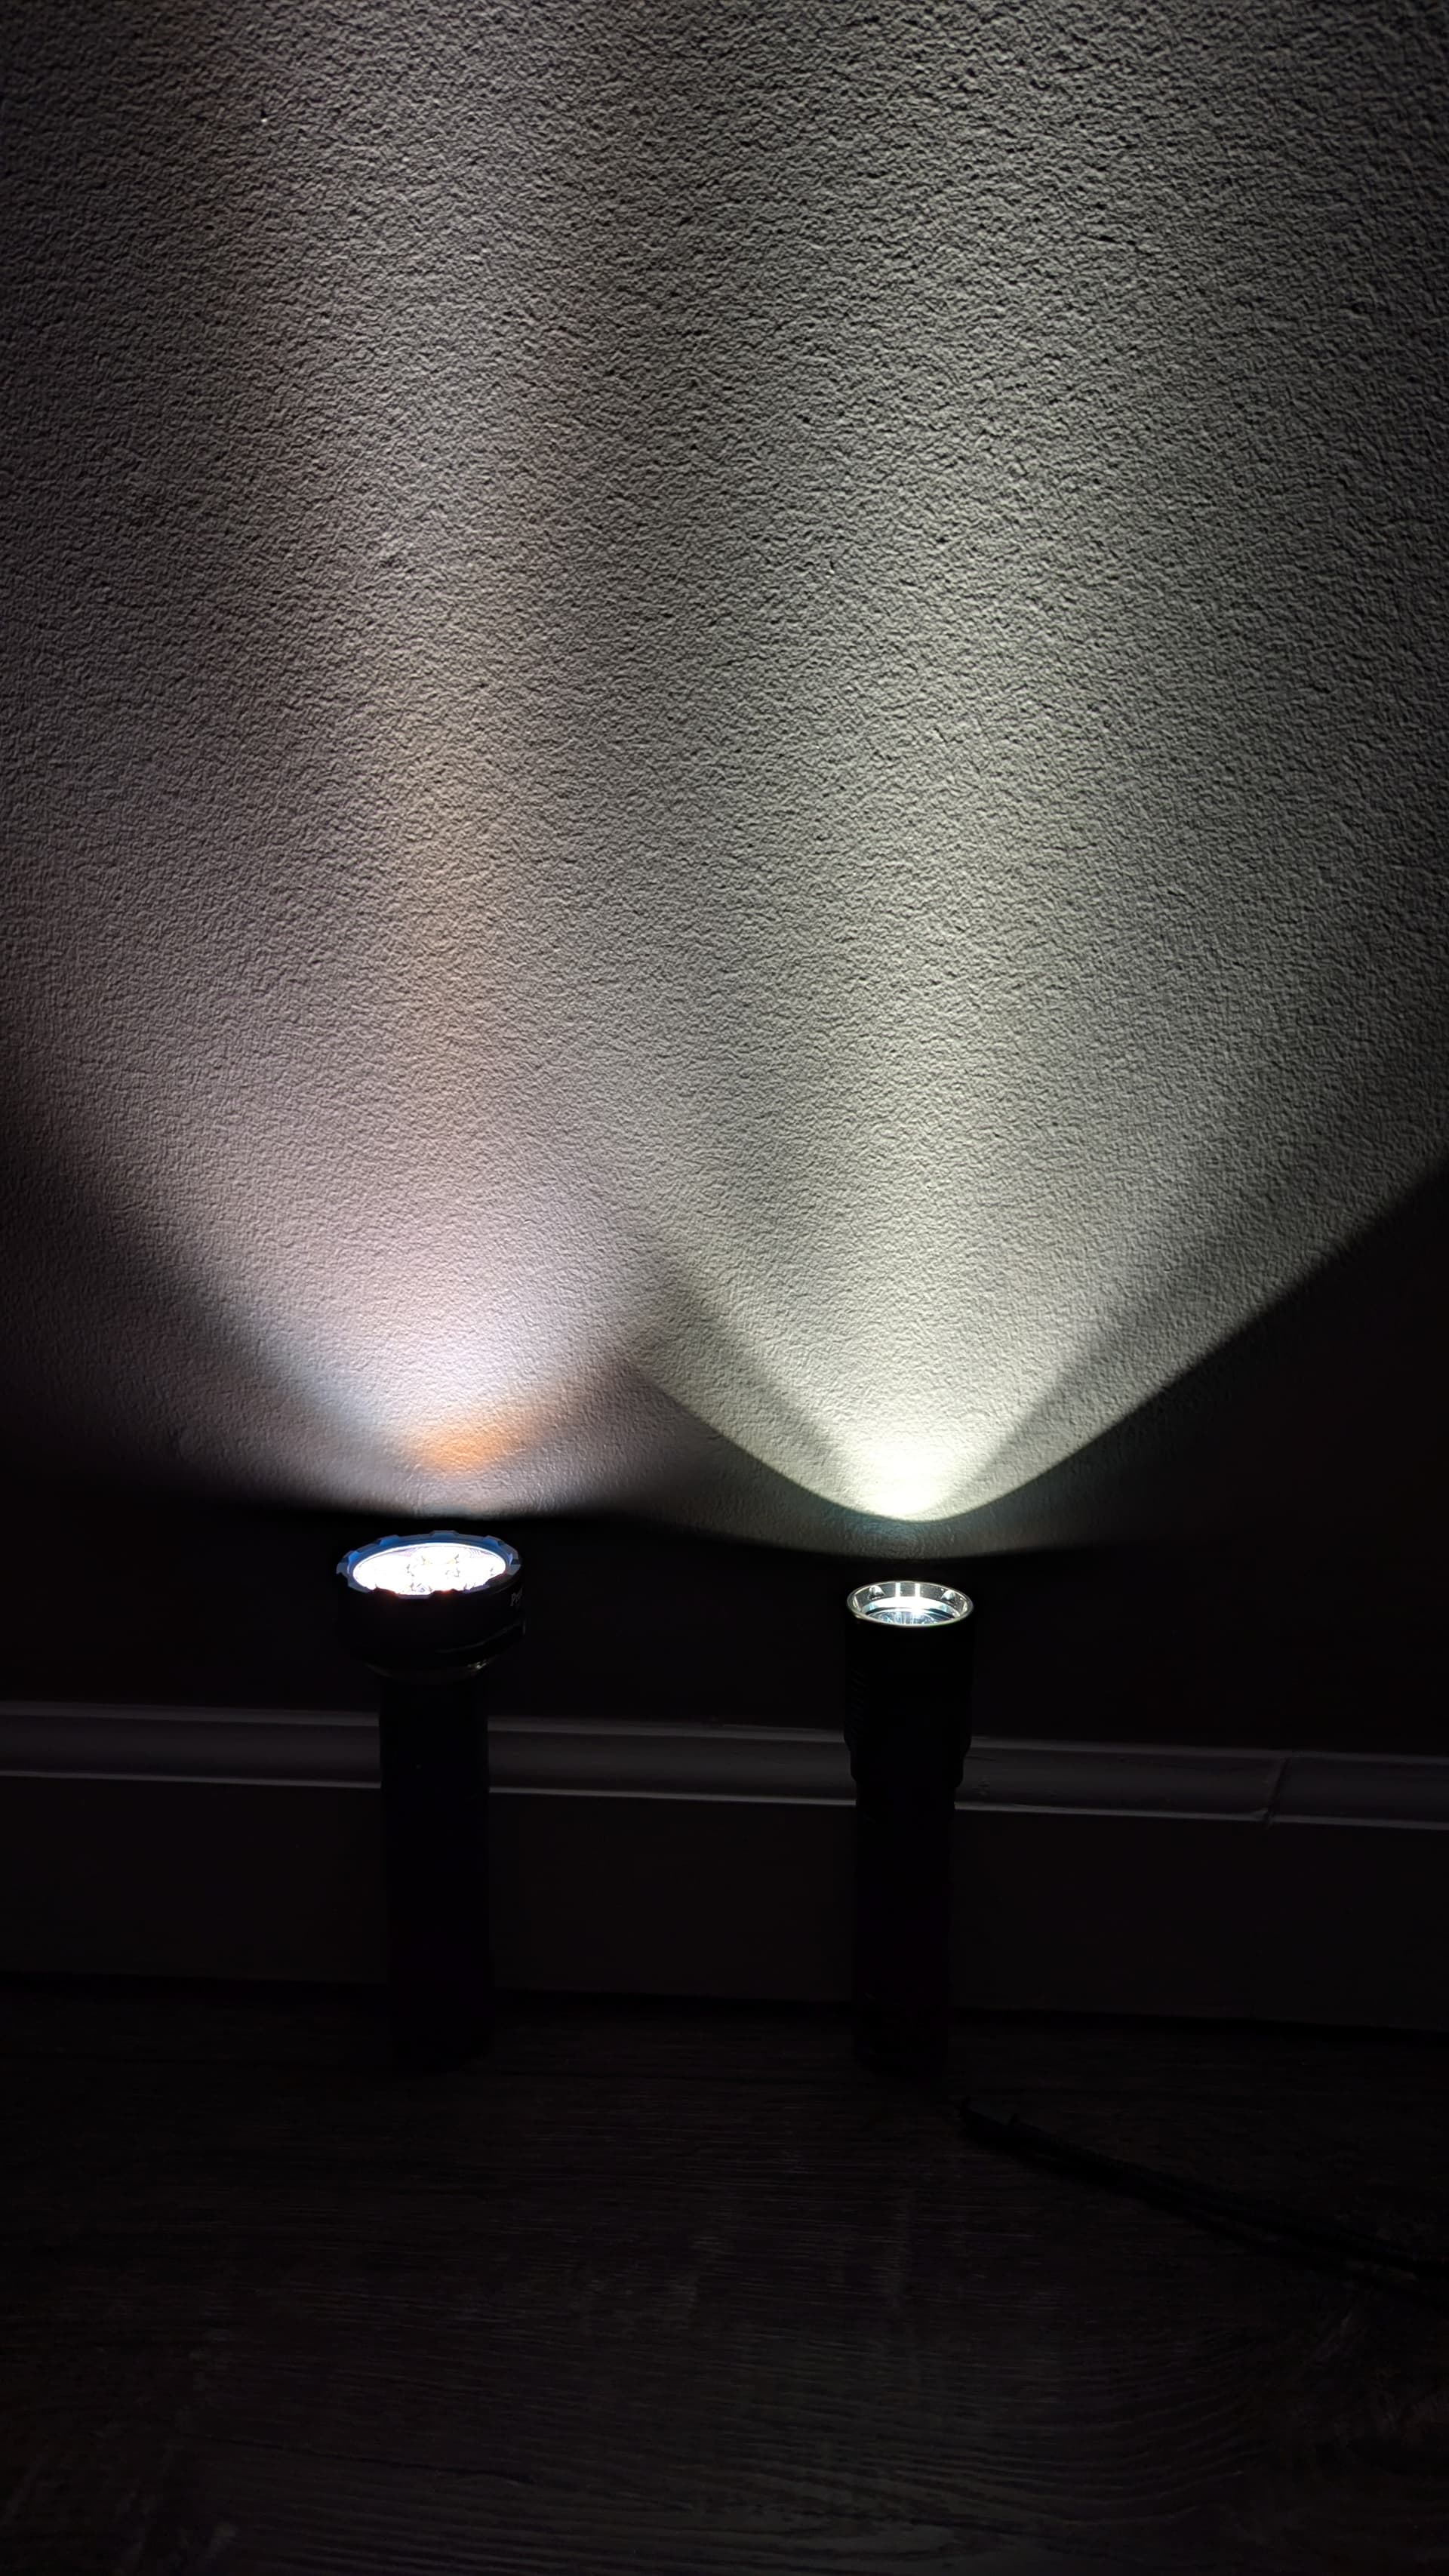
Lately I’ve been using the SC31 pro to test out LEDs and it always has a very ringy beam. I think it’s a design flaw with the reflector.
You could use something like DC fix to diffuse the beam. Or 20mm TIRs, like those sold by Convoy, will fit. I don’t know of any stock reflectors that directly fit, but a Convoy S2+ reflector can be modded to fit (the orange peel version will make the nicest beam).
2 Thanks
Thanks again James! You helped me out the other day with my LT1 too.
Im still struggling with this emitter swap in the S31 Pro…its not the reflector as i took it off/out of the equation and its when I put the body into the head it immediately comes on high mode and the switch doesnt do anything.
Is the driver supposed to be secured down with the screw i took out when i dismantled the Sc31 do u know? As the convoy sft40 i am trying to install doesnt have a hole for it. So its kinda loose in the head but held down by the reflector (when i install it, with the gasket in).
Also the USB C port i cannot get it to sit in its slot…ahain i assume as the driver is not secured.
How have you managed this in your Sc31 mods?
I can make a new thread btw…dont want to hijack this main one.
After some weeks with life getting in the way, I had some time to spare today for a mod I’ve been planning for many weeks. I got hold of this host nearly 2 months ago and had to wait for various bits and pieces to arrive.
This one is an FW1A - not one of the very early ones, but one with an FW1A Pro reflector. If I ever get my hands on an FW1A with the original reflector then I would keep the reflector and only consider swapping the emitter, but for this one I decided (as for my previous FW1A Pro mods here and here) to upgrade the driver, swap the emitter, add Aux and drop in a TIR.
The host has no branding or markings, except for a very small serial or model number on the tail. It has a plain button, which I much prefer over the ones with the Lumintop logo engraved onto them.
The original emitter was a 6500K XP-L HI. Against my usual preferences, I wanted to keep a cool CCT for this light, but with higher CRI. So this time I swapped in a 5700K 519A, keeping the dome on.

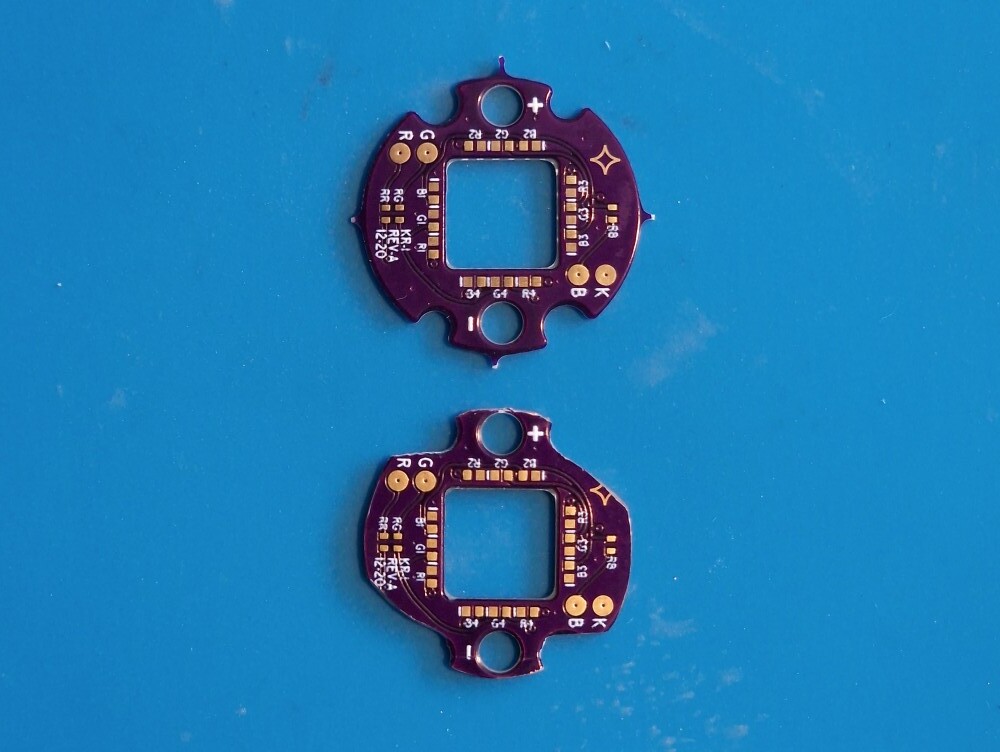
To maximise the efficiency of the light, I gave it a lume1 upgrade. I’m keeping the standard (fw3x-lume1-rgbswap) Anduril 2 version with activated FET. To maximise output but avoiding damaging the emitter, I’ll use a Samsung 35E battery with low CDR.
The Aux are added with a Lume x1 Tri-LED board that is filed down to fit. I chose orange, pink and ice-blue Aux LEDs. As usual with a tri-LED board, it took a few tries to get a good balance between the different colours’ brightness.
The optic is the one I used in my previous FW1A Pro mods. I bought a couple more from a reddit user to make the most of the shipping costs from the US when I bought another light. I’m not sure yet whether this is the best choice, I also have some Ledil Leila optics and I haven’t decided which gives the best beam.
4 Thanks
Now having a cool, throwy FW1A, I wanted to change the optic in my other FW1A to make it more floody.
The other one is a custom stainless steel FW1A mod built for me by reddit user u/F_S0CI3TIE.
The light is a stainless steel FW3A host with a brass FW1A bezel. The emitter is a 4500K dedomed 519A. A Lume1 driver is installed with a Tri-LED AUX board with orange, purple and ice blue LEDs.
I had used the optic originally received with the light in my first own FW1A Pro mod and replaced it with a Ledil Leila LXM-D 20° frosted TIR optic.
To make it more floody, I swapped in the LXM-M 30° beaded TIR optic instead.
This gives the light significantly more flood.
6 Thanks
That stainless one looks to have a more comfortable beam profile. Nice lights ![]()
I didn’t take a photo to compare, but that optic gives it a flood approaching that of an FW3A with stock optic. For around the house and garden, it’s great. For wandering about outdoors, I prefer a throwier beam like the other one.
great options, thanks for the photos and congrats on your mods
I like the 30 degree pebbled Tir, for my own indoor distance uses… agree tighter is better for increased range outdoors
Enjoy!
Sounds like a short bypassing the driver. Check your soldering and inspect the driver wires - make sure there are is no damaged insulation letting the wire touch anything but the solder pads.
Based on online pics of the driver, I’d say the screw only holds the MCPCB. Mine hasn’t used the screw in a long time and it’s fine.
Keep in mind the screw also serves to prevent the MCPCB from rotating when you tighten the bezel. If it rotates, it is possible for it to cut into the driver wires causing a short.
And be careful about shorting to the reflector. That has a tendency to kill the driver. Some tape on the underside of the reflector can be good insurance.
1 Thank
Check for continuity between LED- and the base of the MCPCB, you should measure an open circuit. If everything is measuring right with the LED, this means that the driver is already damaged (7135 or FET shorted)
1 Thank
After spending some time comparing the different optic options, I’ve settled for a different option - the Jarmay MUAW-2205. It’s a tighter beam and the Aux LEDs are mesmerising:
5 Thanks