Tutorial: Rewrapping a battery
Rewrapping a battery

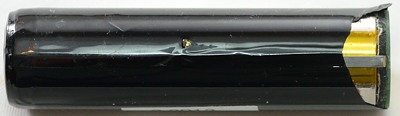
The above battery cannot be used anymore, it will short and might explode.
The wrapping will sometimes break, luckily it is a fairly simple operation to fix it.
Tools and parts needed

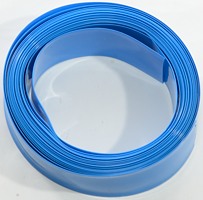
I am using shrink wrap to repair the battery, due to the heat gun I uses, I have selected a low temperature type.
When flat it is 29.5 mm wide, the inner diameter is 18.5 mm, it will shrink at 80 Deg. C.
I bought a roll with 25 feet (7.6 meter) on ebay for $11 (Sellers name is atop_authentic_auction). This roll will last for more than 80 batteries. Fasttech has heat shrink in 1 meter pieces for less than $1.
This heatshrink is also fairly thin, this is an advantage for some lights.
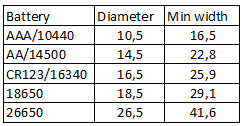
Often heat shrink is specified in width of the flat tube, the table below shows the minimum sizes for different battery sizes.


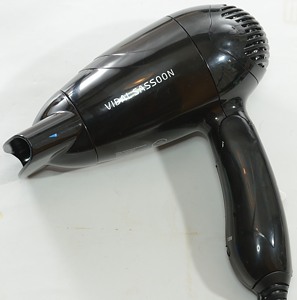
As a heat gun I uses a hair dryer, it is not the perfect tool for the job, but it can be used.

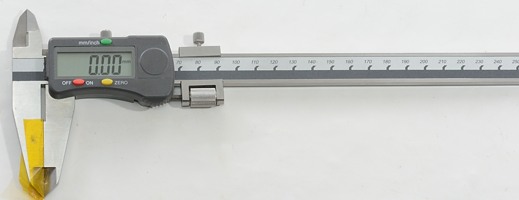
I do also need something to measure with, my digital caliper is fine for that (A ordinary ruler could also be used).
With a caliper, remember to cover the jaws or it will short the battery.

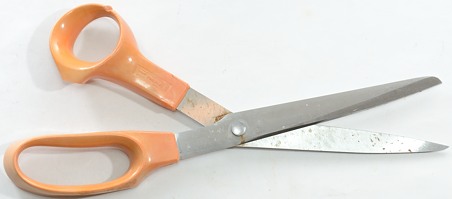
To cut the heat shrink I uses scissors.
Rewrapping

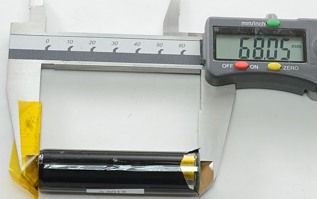
I want the heat shrink tube to be about 3 mm longer than the battery at both ends, with a 68 mm battery this means 74 mm tube.

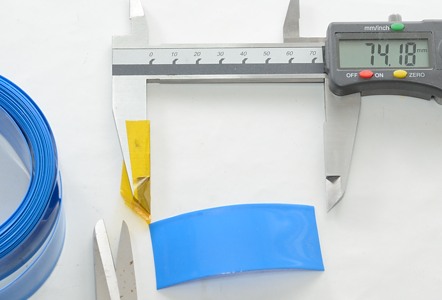
The new tube for the battery has been cut of the roll.

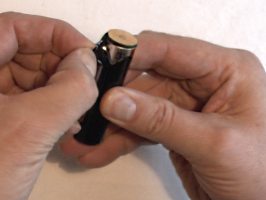
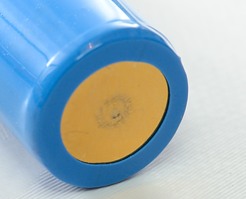
I uses the fingers to removing the old heat shrink, using a knife or scissors is unsafe.
If there is two layers of heat shrink, only remove the outer layer.

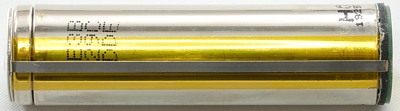
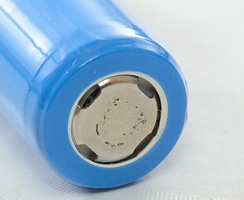
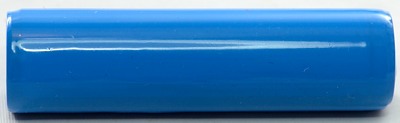
The "naked" battery, do not try to bend the protection pcb out to get a look.

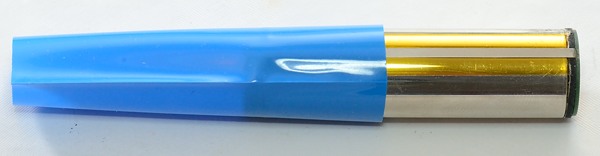
Putting the new heat shrink onto the battery.

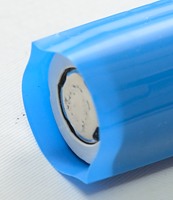
There will be about 3 mm extra at each end.

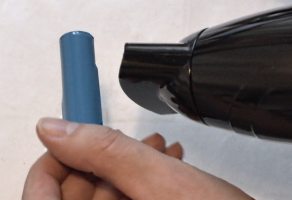
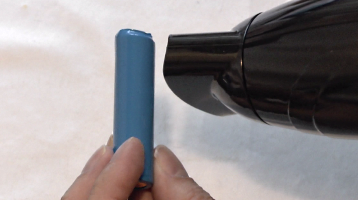
Applying heat, rotate the battery and swipe the heat gun back and forth. If using a real heat gun, be careful with the fingers holding the battery!
It is possible to increase the temperature by covering part of the air intake on the heat gun (This might also melt the gun if overdone).
The battery must not be heated much (As long as it is possible to hold it, the temperature is fine). This is usual not a problem, the heat shrink will shrink long time before the battery is heated.
Final result


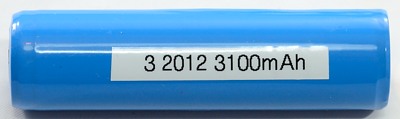
With a new covering, the capacity information is gone, to fix that I have added a label with capacity. I also included the date I got the battery.
Thanks for posting this HJK. One of my Trustfire 26650 5000mAh cells is starting to loose part of the wrapping. I’ll order this shrink wrap and make the fix.
Also glad to see I’m not the only one that uses labels to print the purchase date on the cell
Also glad to see I’m not the only one that uses labels to print the purchase date on the cell ;)
I’m not quite sure if the shrink wrap will be able to wrap a 26650 cell, might be too wide…
I’m not quite sure if the shrink wrap will be able to wrap a 26650 cell, might be too wide… 0:)
Thanks for the heads up. I’ll take some measurements of my cell and find the correct diameter for a 26650.
No problem, I’m sure you’d figure it out sooner or later. 
Thanks for the great write-up!
It is not exactly the same, the one I uses is without glue.
You have to get something that is slightly above 26 mm in diameter
My experience with pens is that the markings does not last, with these labels it will last.
It is not exactly the same, the one I uses is without glue.
Thanks for pointing that out.
Do you know how different it will be with the adhesive?
My experience with pens is that the markings does not last, with these labels it will last.
I use an industrial Sharpie for all my cell writing, haven’t had issues with it yet…
It is not exactly the same, the one I uses is without glue.
I have not tried with adhesive, but I will not expect any different when rewrapping, the final result will probably be a bit stronger.
I would just like to add that a similar wrap used by HKJ (this one with adhesive) is avaliable at FastTech at 1m units:
http://www.fasttech.com/products/1140200
I have ordered this shrink and it is without adhesive glue whatever…just blue plastic which is a tight fight on a 18650.
pictures in another thread:
http://budgetlightforum.com/node/17907#comment-314389
I also rewraped a 16340 with the fasttech shrink, this worked but the wrap doesn’t get perfect plain…
I would just like to add that a similar wrap used by HKJ (this one with adhesive) is avaliable at FastTech at 1m units:
http://www.fasttech.com/products/1140200
I have ordered this shrink and it is without adhesive glue whatever…just blue plastic which is a tight fight on a 18650.
Thanks for the confirmation!
Nothing but red x’s…can’t see the pics.
Looks like the server is down, it will probably not take very long before it is up again (I uses a hosting service).
Cannot see pics at the moment.
They are back again.
Nice, thanks!
I have re-wrapped some batteries, did not bother to measure the wrapper before cutting. Just estimated it by eye.
I think after re-wrapping it feels at least as much if not more durable than before.
HKJ gives good advice.
I use a Laundry Marking pen from the Office Supply to mark cells. This is better than the so called “permanent marker”. The Laundry Markers are the ones that never wash out of clothes, even in hot water. Don’t get it too oily before you mark it.
If you mark it….better check your spelling first, you ain’t gonna change it.
Thanks for the tutorial
I have several metres of green shrinkwrap suitable for 18650’s – anyone in the EU who wants some – PM me – the cost will be the postage plus a few pennies. The cells I needed to rewrap have been rewrapped. Happy to supply it in 75mm chunks. And don’t pay till it arrives. Experience there.
Thanks for the tutorial!
Question, isn’t the heat shrink too tight? I know that you need your heat shrink to be 3-5mm wider than what you intend to wrap. If the typical diameter of a 18540 is 18.5mm, how does your 18.5mm shrink wrap fit with a bit of room to spare? I was wondering if I should go a bit bigger by 3-5mm to be safe.
The internal dimeter (unshrunk is 18.78mm). “Circumference” of the flat stuff is 59mm. So 59/pi gives the “diameter”.
it is tight but it works, like i mentioned this shrinks not so much thats why my 16340(16mm diameter) is not so tight shrinked than my 18650.
No, as long as it can be pulled over the battery it is fine.
I have added a table with diameter and minimum width of the heat shrink tube for the common battery sizes. If you buy from somewhere where they do not specify that it fits a specific battery, I would recommend to get at least 1 mm extra.
The larger the heatshrink, the thicker it will get. So for most flashlights its best to use a heatshrink that doesnt have to shrink very much.
Thanks for clearing that up guys. I didn’t want to end up picking up the wrong ones.
Thanks for the write up HKJ. Just broke the wrapping on one of my keeppower 18650 and was looking for the wrap to fix it.
![]()
That is actually easier than I thought.
nice crisp tutorial thanks!

awesome tutorial
I agree.
Super job!
Thanks. An excellent write up.
Fine tutorial
Nice tutorial and thanks for all the extra info on supply and sizing. Really helpfull.
Thanks for posting this tutorial. Very Nice!
Great info, need to do this on 2 batteries and stop using tape on em. Didn’t think a hair dryer could manage. Now I know. Thanks
That was the reason I made this tutorial. It is easy and cheap to make a good repair, instead of doing a unsafe repair.
I did play a bit around with the hair dryer, coving part of the air intake with a hand, did increase the temperature and made it faster to shrink the heat shrink, but be careful with doing it, it can damage the hair dryer.
Does anyone have another source for different collars ? And I have some 18650 and I need button tops where can I buy them
excellent ! thanks Hkj
I’ve heatshrinked well over 1000 cells, I’m quite good at it now. 
I couple additional tips. Heatshrink the positive end of the cell first by rotating the cell 360 degrees in your hand. Then go to the bottom of the cell.
Secondly, heatshrink along the crease from end to end. Use a low enough temperature or point the heatgun at a distance so it shrinks slowly. This prevents a wavy effect.
After this is done, give the entire cell a quick pass over by the heatgun to shrink the rest.
I couple additional tips. Heatshrink the positive end of the cell first by rotating the cell 360 degrees in your hand. Then go to the bottom of the cell. Secondly, heatshrink along the crease from end to end. Use a low enough temperature or point the heatgun at a distance so it shrinks slowly. This prevents a wavy effect. After this is done, give the entire cell a quick pass over by the heatgun to shrink the rest.how on earth did you manage to heat shrink a 1000 cells ? Do you work in a cell manufacturing factory???
I couple additional tips. Heatshrink the positive end of the cell first by rotating the cell 360 degrees in your hand. Then go to the bottom of the cell. Secondly, heatshrink along the crease from end to end. Use a low enough temperature or point the heatgun at a distance so it shrinks slowly. This prevents a wavy effect. After this is done, give the entire cell a quick pass over by the heatgun to shrink the rest.how on earth did you manage to heat shrink a 1000 cells ? you work in a cell manufacturing factory???
I was wondering the very same thing, unless he owns and wraps every Redilast???

Or maybe has a severe addiction
:bigsmile:
When I first started Redilast, I would do a good part of the heatshrink work myself. Now days I just do it occasionally… Quality control. 
—————
On a side not if you plan to do heatshrinking make sure your heatgun has a low mode. And avoid harbor freight heatguns. I had 2 fail on me in a 2 month period. And not to mention when you first get them, they smell smoke and smell bad… My wagner brand one for $17 from home depot is holding up great and is used several times a week.
Cool beans. 
Do you use tape or something to hold them together? Cuz I don’t see how they stick together?
No, heat shrink tube will shrink when heated, this will keep it in place.
I chuckled at the middle part.
LMAO
i wrapped a few old eneloops . I used a cigarette lighter so results werent as preety but are ok
. i guess you need a good consistent heat like a neat blower with an udustable heat output to do it really well .

Excellent instructions! Worked like a charm after a few attempts to get the measurements/placement just right. Thanks!
Every time I see this thread pop up and see the photos, I think HJK should be wrapping all of our Christmas presents! Such a neat and exact job on wrapping those cells!


Awesome tutorial, thank you very much!
I would just like to add that a very similar or even the same wrap used by HKJ is avaliable at FastTech at 1m units:
http://www.fasttech.com/products/1140200