Flashlight parts are easy to hoard. They are light, small, & can be easily stashed out of the way in nice little containers, so normal folks don't notice your affliction.
After a while, I'm sure most of us here have accumulated various bits & pieces. Don't worry, If you haven't been here long, it will happen to you eventually.... :)
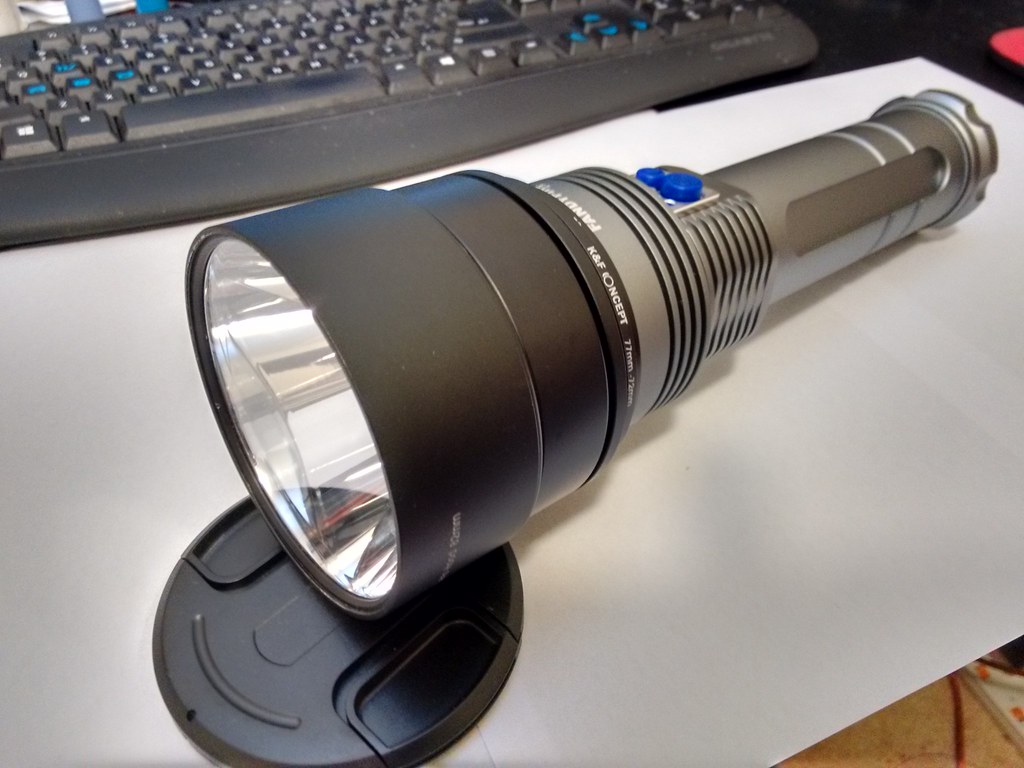
I'd been wanting to do something with the FandyFire L3 that I had sitting around, as it was a well built light, & offered some good power potential with it's 2S3P cell arrangement.
In stock form, it's a 7x XML under-powered flooder. I bought it with a gift certificate I won from the 1st DIY comp here a few years back, & promptly blew the driver in it searching for more power.
It got stripped down, & made it's way into one of the nice little containers I mentioned earlier.
Fast forward to now, I have several containers with all sorts of bits & pieces, & with a little time off work for the silly-season, I had come up with a plan to use some of the parts to resurrect the L3.
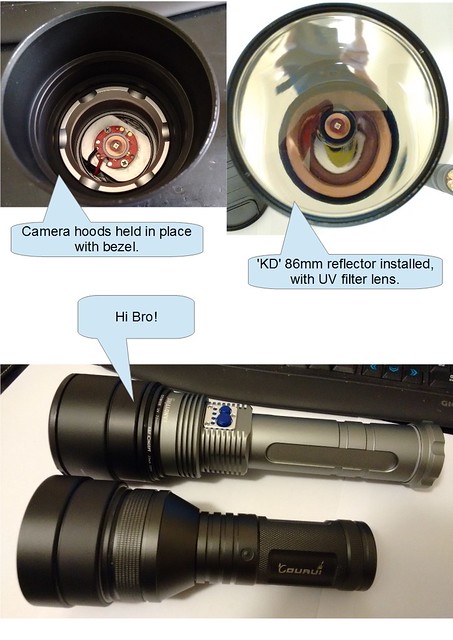
I wanted to do another thrower, but that meant a few mods to the head of the L3... mainly to fit one of these to it;
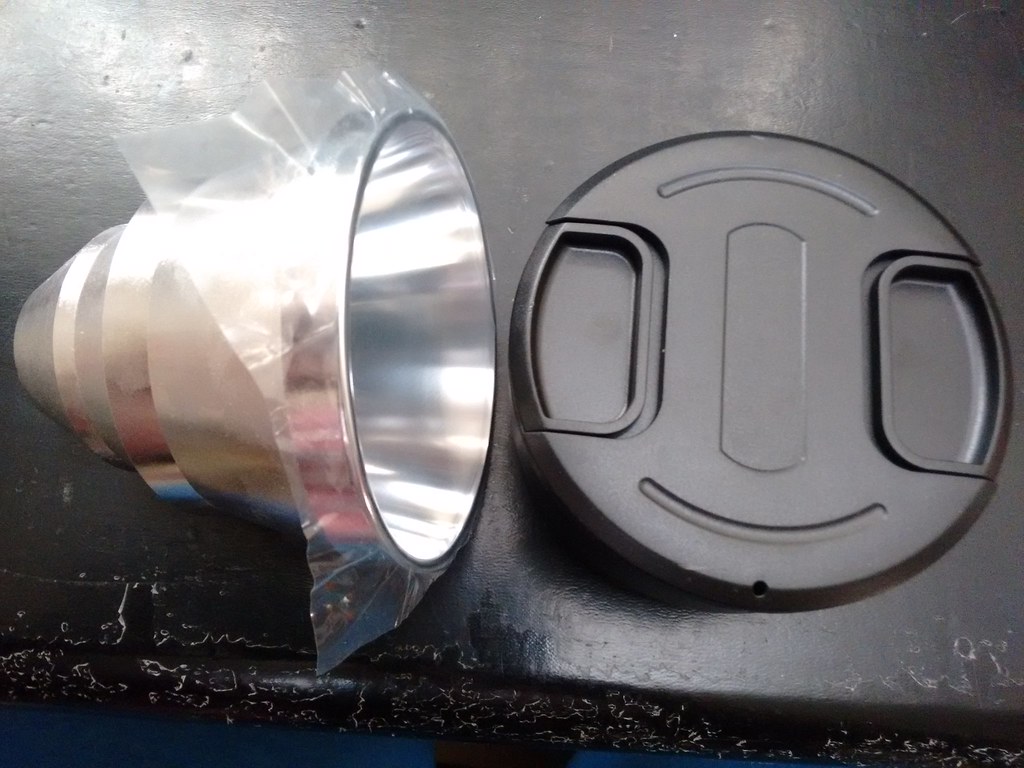
It's the "KD" 86mm reflector, & the guy on the right looks really happy about it.
I started by trial fitting the camera hoods & adapters I had lying around(in a neat container), until I had a working solution that would screw together directly onto the host.
The LED shelf needed beefing up & raising, so I cut a 6mm thick piece of aluminium to size, & fixed it to the head, with JB Weld to fill the old emitter cavities, & secured it with machine screws from the underside.
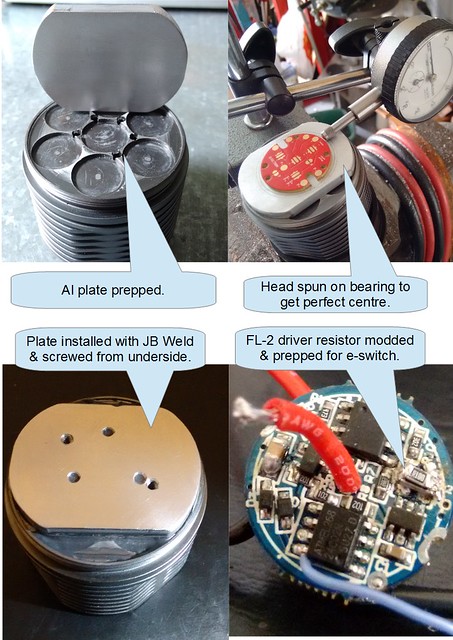
I centered the head assembly on a bearing, & spun it to mark the exact center for the LED, using a dial gauge. The plate was then drilled & tapped to accept a 32mm Noctigon.
I needed a buck driver, & I had a few old FL-2's kicking around. After a bit of probing around on the test bench, I found that if I briefly grounded a certain pin, it would change modes, so I was set for the e-switch-only L3.
The FL-2 needed juicing up a little, but it also needs to be well heat-sinked for long-term operation. After blowing several spare LED's from one of the nice containers, I settled on a resistor combination that gave good, sustainable power, without being too close to the edge.
The stock driver was stripped, & I added a copper ring, & made a copper cradle to sandwich the driver in, using silicone cubes cut to size on both top & bottom of the main driver components. The copper strips for the cradle were left over from the 2nd DIY comp, where I was attempting to neatly engrave the name plate for the stock....I must have about a dozen or so left....
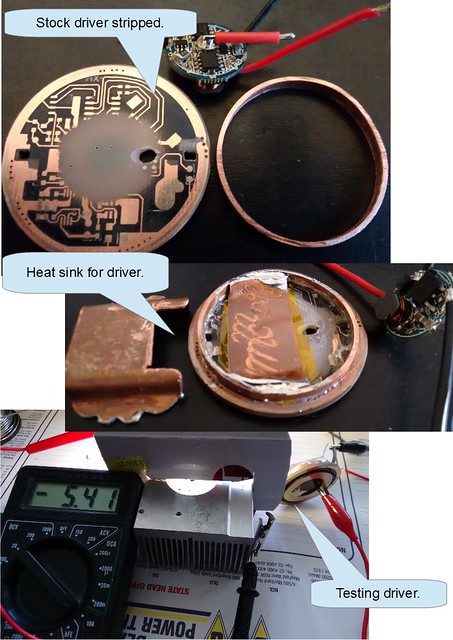
The above reading is taken at the emitter, at around the two minute mark. It starts off a little higher, but settled down to that. Bring on the clamp-meter, I want to know what it really is....!
Without a clicky switch, I realized I would have no way to turn the torch off, & there was absolutely no room in the tail (well, there was 1mm..) to install one. To provide a lockout, I modified the rear contact plate by cutting the ground traces, & attaching some more left-over copper scraps, which are connected by a washer which is epoxied to the underside of the tailcap, when it's twisted tight.
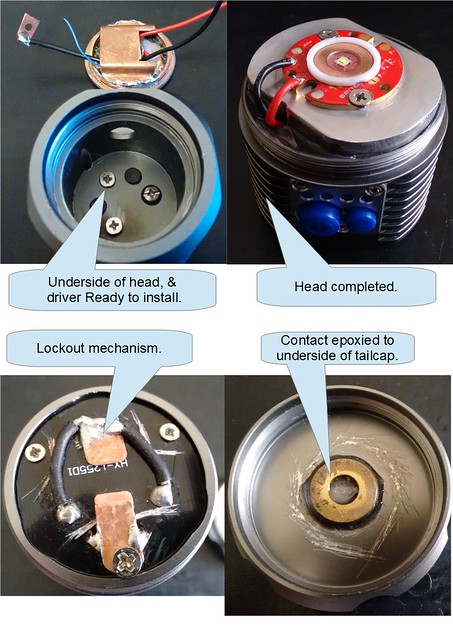
With that tested, it was time to screw it all together, to see if it could become more than the sum of it's parts. The emitter is a XP-G2 S4 2B, de-domed in petrol. I spent a lot of time making sure the LED was centered perfectly in the reflector, & focused the height using shims cut from thin plastic sheet.
Now, a little teaser before I attempt to get some decent beam-shots.... :beer:
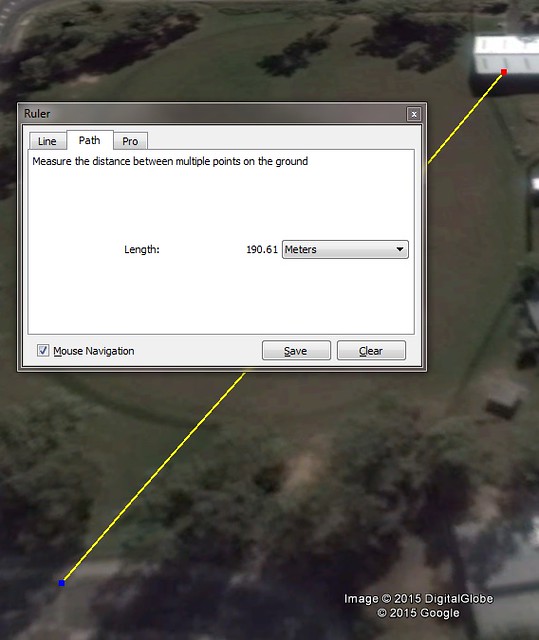
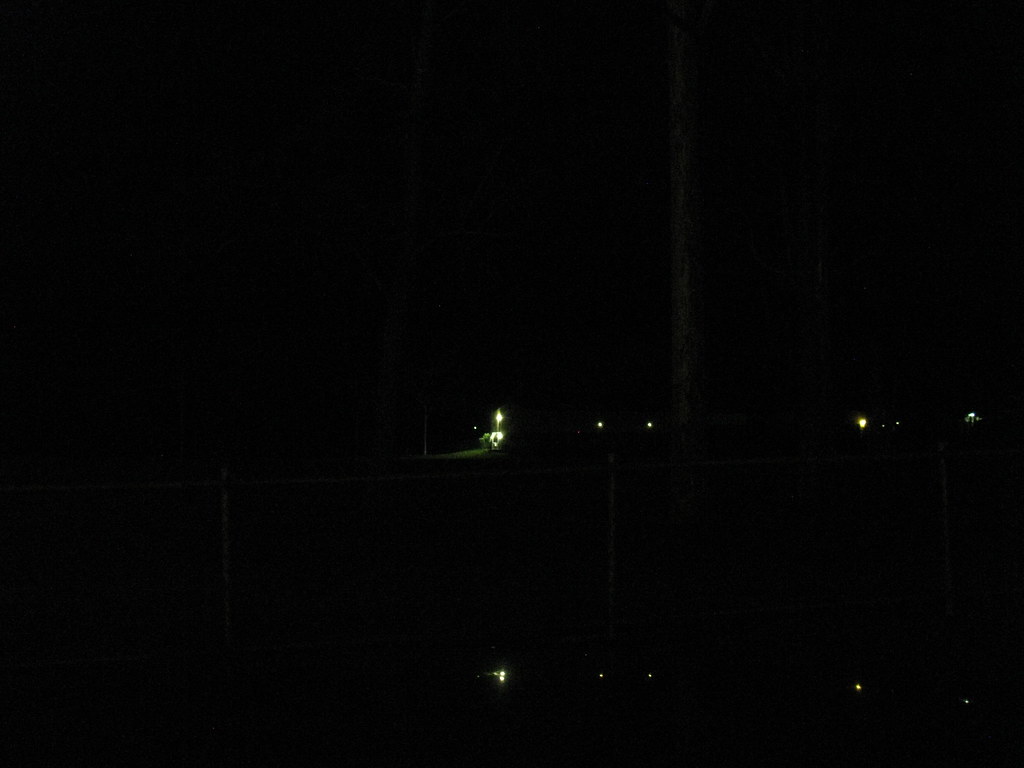
Well, the beam shots are rubbish, but here's one of a building that's on the opposite side of a sports oval, just under 200 meters away. Mouse-over on the control shot to get the beam shot.