I hope both excited sides of the discussion can keep in mind:
bugsy36 et al did not have a hand in any of the quality issues, its all on Manker for producing different quality level than was supplied in the samples.
and bugsy, people will be irritated about the many quality control issues Manker caused, but they aren’t your fault, so don’t take the complaints personally. Plus every time someone gets a light its a “new” problem and they will complain again, just realize its a complaint to Manker, and everyone will want to vent if its not as expected and start it all over again…its human nature.
Personally I’m very unhappy about what Manker did at this point on the quality, I still really love the light. I think we all like the light a lot and want it to be perfect is all, but even as is its awesome, thanks for your work guys! And its not just me, first hike with one, a hiking buddy bought one off me! I gifted a second. I’m waiting for a refund on another. Mixed bag but more positive than negative for certain. Plus I can’t stop trying to downshift my other lights now…such an awesome UI.
That looks like you shorted the 30Q. Is it that what you mean by beeing careless with the wires? If you took the measurements with the cell that has been shorted before, that would explain why the other cell (HE2) performed much better…
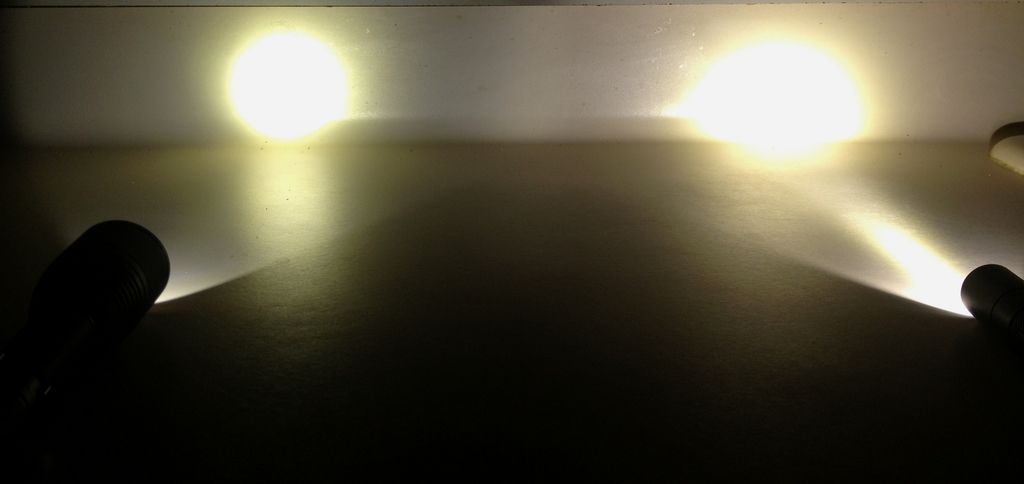
Tint comparison...not scientific but you get the idea. It wasn't until I fired up the EE X6-SE 4C tint alongside the Manker BLF A6 5A that I could see the rosiness exuded by the 5A. Funny how the brain plays tricks if viewing tints one at a time.
I also appreciate all the dedication and hard work you and the rest of the team have done to design this light and arrange for this great group buy. Although I still haven't yet received the 4 lights I ordered but I admire all the good things this project has created. Please continue the awesome work and don't be put off by the complaints. We expect even more beautiful lights to be created for future group buys. J)
well… i was trying to meassure at the driver and slipped from the retaining ring to the base of the spring… bzzzZZZZ
replaced it with a carbobronze from fastech (the driver of the 3D survived btw)
i have 5pcs 30Q - all gave quite the same numbers
does the 5A have a higher Vf and lower Ampd therefore?
Well, I am among the successes! I ordered three BLF Special Edition A6s from this group buy, one of each tint.They were received two days ago.
I disassembled each flashlight to ensure I could get at any part of each A6 and to clean out any metal dust that might remain from manufacturing. Out of the box, all rubber O-rings in each of my three flashlights were properly seated.
The 3D and 1A tints were readily disassembled by hand. For a quick tryout, I inserted a protected EVVA 18650 3400mah cell. Both the 3D and 1A tint units powered on flawlessly, into the default 7-mode Moon level for starters, and successfully cycled-through the remaining 6 modes. Memory mode was configured off by default.
To disassemble the 5A tint flashlight, I had to use small rubber strap wrenches to separate the driver section from the optics. The 5A tint flashlight powered-on into the default 4-mode low level. Actually, at very first power-up, it ran through a blinky mode of sorts, then went into 4-mode low level. The initial blinky mode was not reproducible on subsequent power on-off cycles. I was able to successfully cycle through the remaining three modes of the 5A tint unit’s default configuration. Memory mode was set to “ON” by default out of the 5A tint’s box. I followed the UI documented by Toykeeper to change the 5A tint flashlight’s configuration to 7-mode with Memory mode set to “OFF” (same as the default config above for the 3D and 1A tint flashlights).
Anodizing and thread quality appear to be quite good on all three of my flashlights.
The turbo mode puts out an incredibly bright beam (all tints). I refrain presently from running on high or turbo mode for more than a few seconds until I get around to doing spring bypasses on both the battery’s positive side and the clicky switch side. I also plan to bypass the clicky switch copper traces. I first need to find the post that illustrated how to bypass the positive battery spring - I do have the post that contains a video of bypassing the switch traces / negative battery spring. Then, I’ll insert the higher current drain batteries :bigsmile: .
All-in-all, I am VERY happy with this Group Buy! GREAT job by Bugsy36, Toykeeper and the rest of the Group Buy Gang! I don’t know how you find the time and stamina to lead these activities, but I for one certainly appreciate your time and energy. Even if I had problems with the A6 lights from this group buy, I would have worked them out as Bugsy notes above. And, I still would have appreciated as much what you all have done for this forum!
I also do have a little color mismatch on my 5A, but meh, didn’t notice it until I looked for it. Probably would have seen it sometime but it doesn’t bother me. I kinda like it better than the default black the rest of the light has.
Hope my 3D arrives this week. Will be a different batch so hope it will be at least the same quality as the one I have.
Despite the minor flaws it has, it really is one lovely little light. So bright and great UI. Had to look at the manual for the mode switching but it was very easy to understand and switch.
Thumbs up for everything involved in this!
And, remember, without error there is no improvement.
People learned a lot from the X6 groupbuy. A lot of that information is used in this groupbuy. People learn again from this groupbuy.
Don’t let the negative comments discourage this great team from organizing a new groupbuy in the future! Complaints are often more voiced than praise
Nice pics, makes the 4C look greenish, I haven’t compared mine to 4C yet. If you stare at the 5A on a white wall a bit on higher levels you can also see a yellower core and a rosy ring around it without having to compare with another light, enjoying the cree rainbow.
maybe trying this setup for group buys - samples - initial limited run - then full production - to soften the hit if things are not 100 % in production from the word go but then again no guarantee that unforseen things will not happen between production runs…
I’m not sure if this was resolved earlier or not. I think you figured out how to enter config mode (don’t click, just do a quick tap or half-press). After it enters config mode, it does this:
pause
blink
<— click here to toggle 4 or 7 modes
blink
pause
blink
<— click here to toggle mode memory
blink
pause
… and then it exits back to a regular mode.
Amps are very hard to measure without a clamp meter and a short thick wire. If you used a normal DMM, it is probably just showing you the wrong value. Lumens are a more useful measure than amps, if you have the ability to measure lumens.
Two things to note:
Part of the first batch used a different copper DTP MCPCB, before upgrading to the Noctigon. This was confirmed visually by Otanacious, who received one of each. Both have been confirmed as DTP though, and both perform well. The other boards may have extra flux left on them though.
Apparently Noctigon doesn’t want other companies using their brand, so Manker was required to cover up the Noctigon logo with something else.
In any case, the difference is only aesthetic, not functional.
Yup, I’ve got a long list right next to this window.
Ouch.
I’ve been watching .hack//SIGN lately, and there’s a very similar theme running through much of the show. A group formed inside an MMORPG to try to encourage people to play nicely and have fun instead of constantly raiding each other. Eventually, some of the group took on a police mentality and wanted more power to enforce rules, while others stuck to the original idea and insisted that they are all regular players so enforcement is way beyond what they could or should be doing. The idea was to bring about an enjoyable culture through courtesy and respect, not through heavy-handed rules. And I think that’s a worthwhile ideal which BLF embodies pretty well.
I had a similar experience during testing… except the glowing part was my finger, and the hissing part was me. Second-degree burn, and it took a couple months to fully heal.
It sounds like someone in the factory must have been playing with it, changing settings, and left it in a blinky mode. Perhaps that means QC is doing some actual testing.
I want to add my experience with the A6. My one light in 3D is an awesome light, even better considering the price. Anodizing of all pieces matches as well as any light I have, no chips or scratches, beam and tint are great, the UI seems to work exactly as specified but I haven’t tried to enable mode memory or switch to four-mode option yet. The only thing I don’t like is the clip but not a big deal for me. Pocket clips seem to be an area that is almost impossible to do in a way that pleases everyone. I didn’t order mine right away so maybe the QC has improved from the very first lights manufactured. I hope Manker is getting it figured out because when done right this is a very nice light. Because of the high number of issues, I’m slightly nervous to order the bare version but will probably go for it. Thanks to everyone who made this happen!
I noticed the threaded ends on tail cap end of the tube are over half a millimeter longer. I reversed the tube and screwed the head on the longer threaded end that the tail cap was screwed on to. That did not solve the problem.
I think some people think you made these yourself Bugsy. Possibly that Dale machined the bodies while setting up the new lathe. Maybe,just maybe that Toykeeper assembled the drivers while sleepwalking one night
No honestly, Manker has accepted responsibility and will rectify the main issues. It’s all a learning curve, and a learning curve with a new manufacturer for Blf so I don’t see why Bugsy is getting the blame.
We all entered this willingly and no one has to join in on any GB.
So long as Manker sort the issues out and get their act together for the next GB, I’m OK with that.
Keep it family friendly.
I do feel sorry for Banggood though being stuck in the middle of all this and I hope this hasn’t put him off working with us.
 Ouch.
Ouch.