Hi everyone,
as a long time lurker, this is my first post and first entry to Old Lumens Challenge.
The lights were build and sinished during the 11th Old Lumens Challenge, but I never came to wirting the post, so I’m entering it this year. I hope you’ll enjoy the idear.
The inspiration came from tritium lights, which seem to be a less talked about topic due to their (altough small) radioactivity.
Addtitional thanks goes to Mike from Canada for the Lamplighter keychane, which works on the same concept and to whoever build a 519a based flashlight smaller than a reaspberry (unfortunatily I cant find the post any more so please post a link in the thread if you have it).
I wanted to find a replacement for tirtium keyfobs (comparable runntime and size) and luckily LEDs made it possible.
Thanks to the rediouclous efficancy of blue led chips, it’s posible to have the light up even at 2µA (at ~ 2,6V), producing a guesstimated 0.001 lm with 0.000 005 W of input power.
In combination with coloured dies, there are plenty of colours available to make it interesting. Only downside is, that LEDs which directly emmit red, orange and yellow light are much less efficiant, and need ~ 20µA do be reasonable visable with the naked eye in the darkness.
(I got the led’s from kt-ecelctronica on ebay, since the offer the most phosporeconverted colours. Straight green and blue led also work, but the rest only work effectivly at these low powerrates as blue leds with phosphor colour conversion.)

Now to the power source:
Wikipedia provided a nice overview of button cell sizes and their capacity, so tha choice fell onto the AG0 and SR512 (same size, Alkaline vs Silver oxide) button cells. With ~1,5 V and a capacity of 10 / 15 mAh, they are big enough to run the LED at 2µA for ~ 210 / 312 days (in practive they run longer, I’ve got one that runs on two SR512 in series since 1,5 years and still is as bright as new).
A simple resistor matched to the forward voltage for the led (2,6V) (~ 250k ohm) in series with the led limets the current.
With the leds found and the power supply sorted out, it was time to build the housing.
The transparent cap was 3d printed on an elegoo mars 2 pro. It may be possible to make it by hand from i.e. an acrylic rod, but it was considerable easyer going this way. That is also the reason this entry falls into the machine made category. The rest was don by hand.
The body is made from a brass tube, drilled out to the righ diameter. Then threds were cut into it (M7x1) to be able to crew on the transparent cap while minimising the space taken by the threads.
To get sharp inside corners, I used a drill as a lathe and a dremel with a grinding disc to make a small endcap, which I soldered onto the threaded tube.
Here you can see the endcap, some failed parts and some already soldered bodies:

And here’s the soldering:
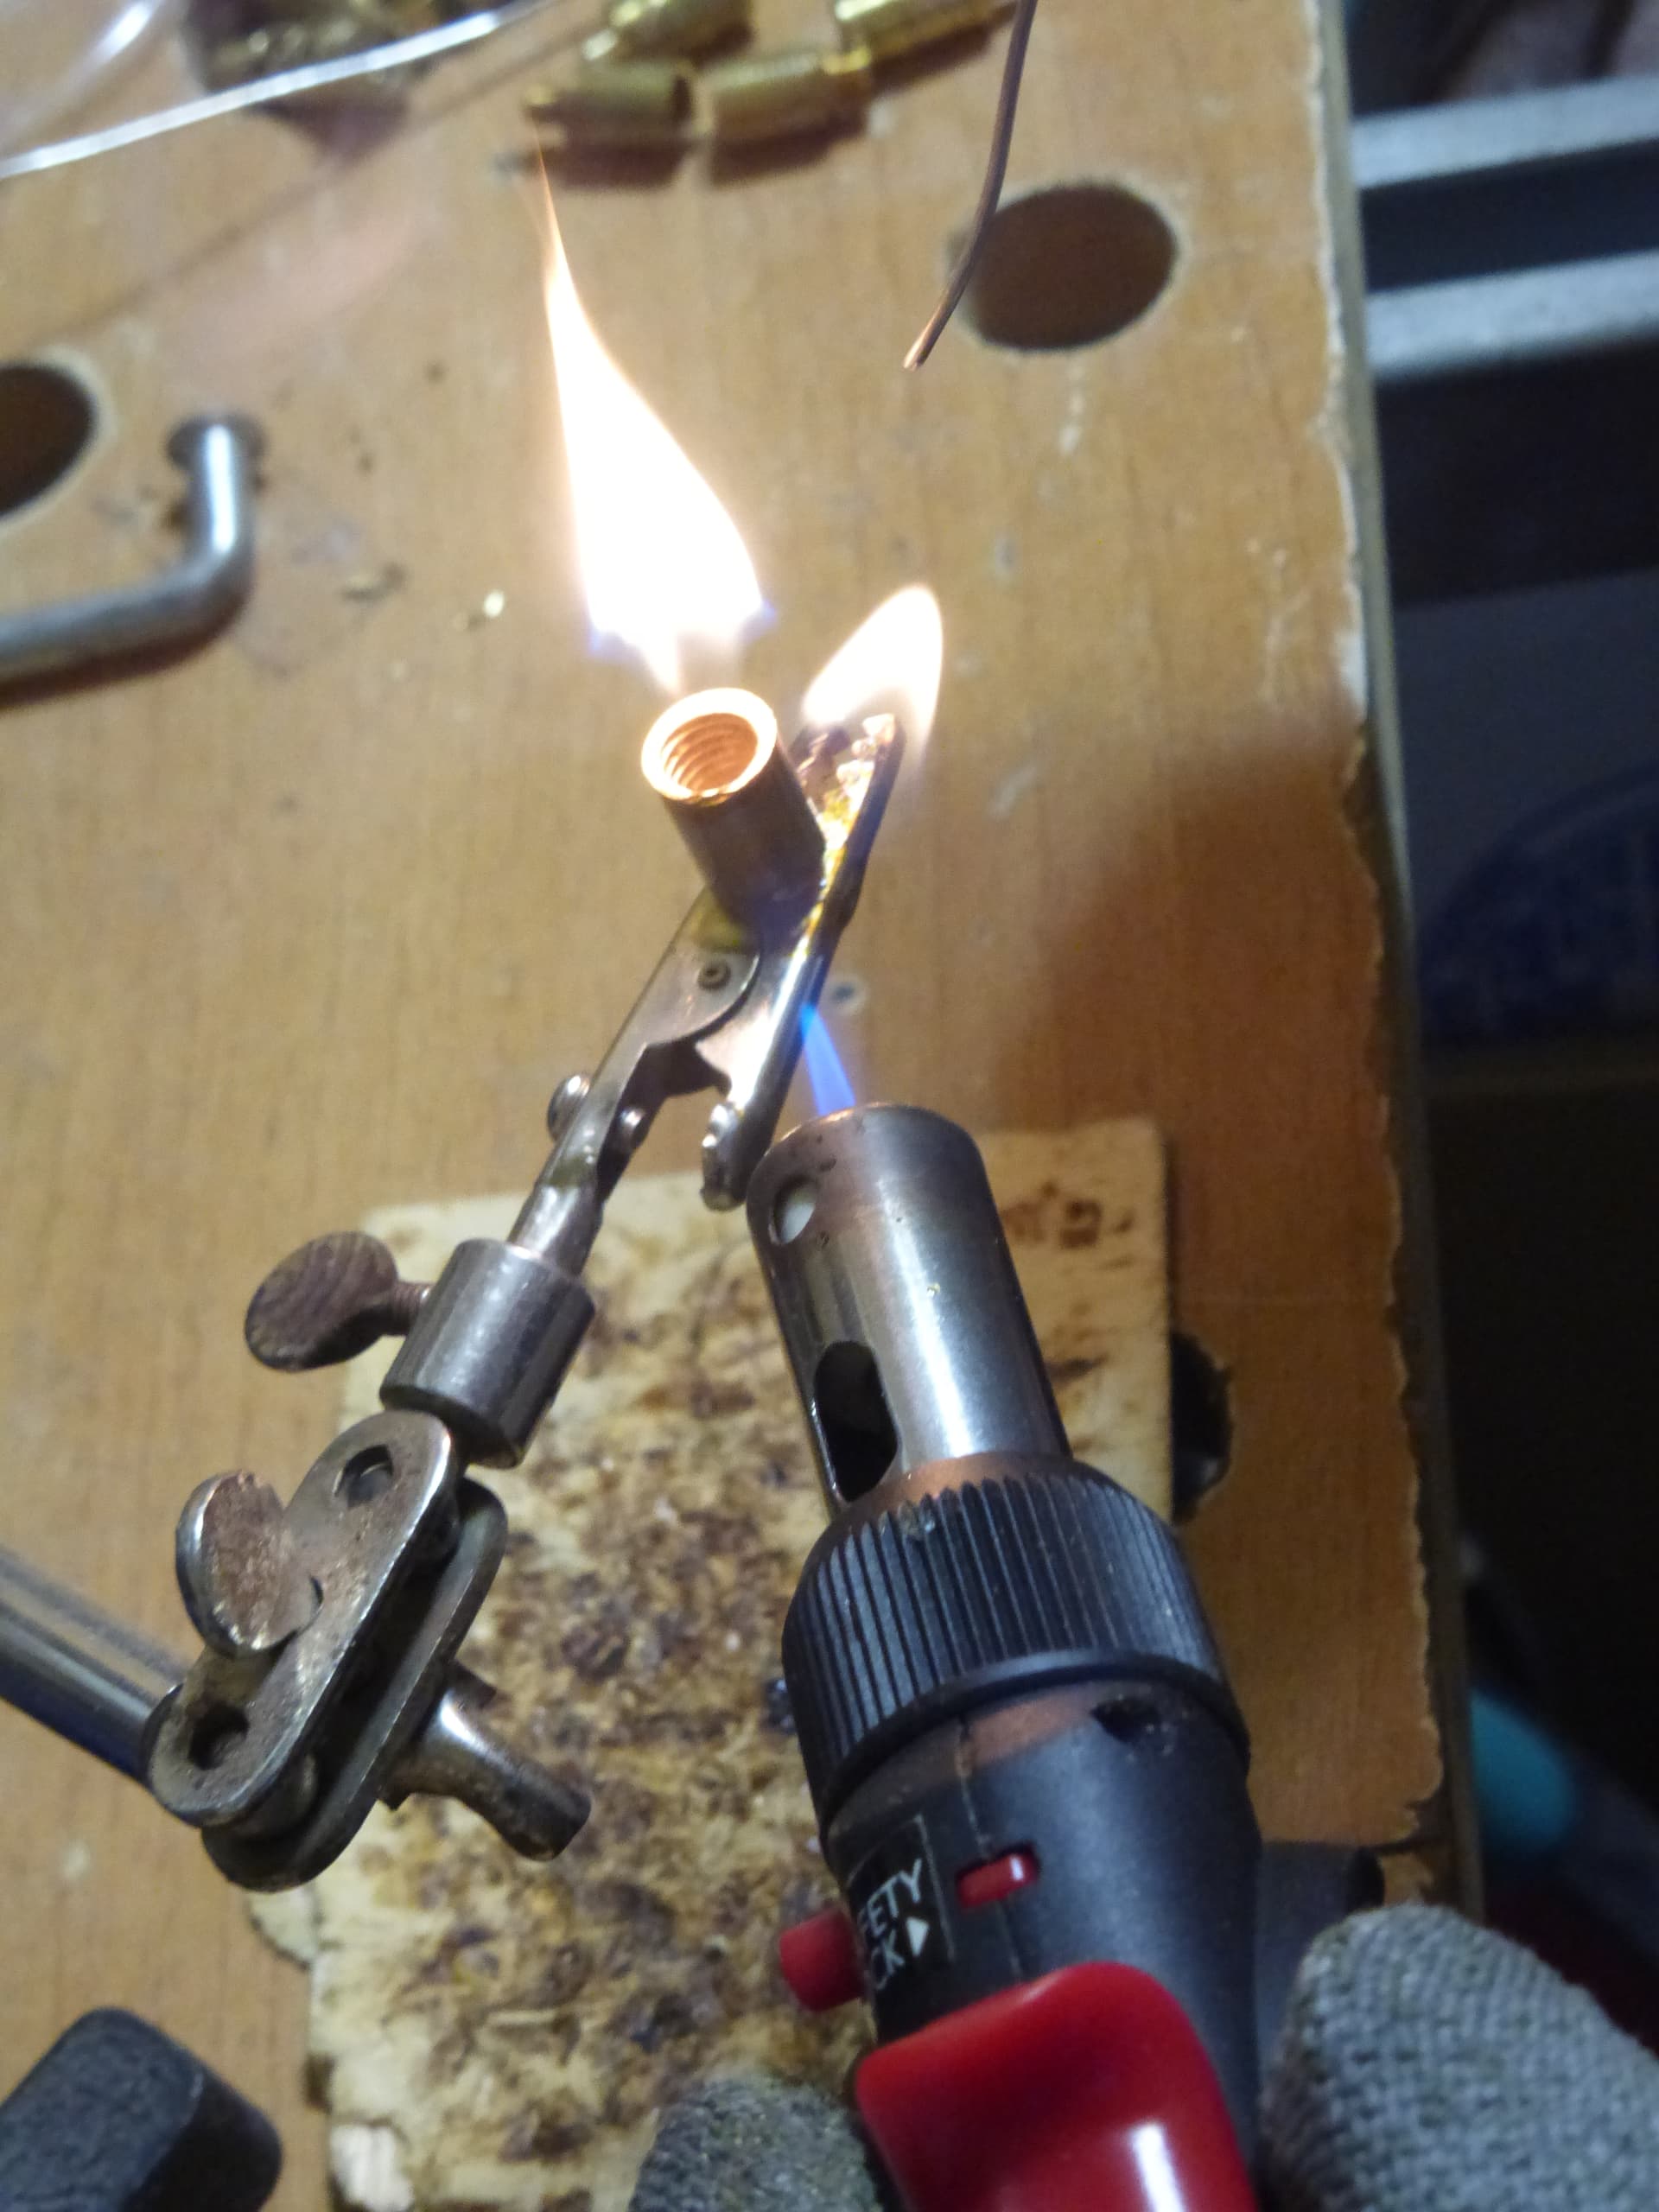
I’ve put a bit of soldering fluy into the body to help with solder spread out (standard lead free electronics solder was used).
Here, the cleanup and surface finishing is done after soldering:

The resistor and some wire as leads were soldered onto the led, which in turn was glued into the transparent cap.
Stainless steel pot scrubbers were used as spings.
With everything ready, it was time for the assembly:

Finally, it is time for the glammer shots:
As a Comparrison, you’ll find true tritium keyfobs in white and blue in some of the pictures.


The left led light (warm withe with 1800k) has a bit of glow powerder in the cap. It was the first one I made (and the one that is still going strong), and the idear was that it would chanre in sunlight and glow on its own, and the led was just an addition for when the glow powder loses its brightness after a frew hours, but in the end the powder wasn’t nessecarry.
Overall, these keyfobs are bright enough to read text in the darkness if you hold them right next to ist and the can still be seen in daylight, but only if you directly look at them.
I hope you like it and maby have some inspration to use leds as tritium replacement if you find a usecas for it.
Let me know what you think and happy building.
Clockwork
