Hello,
I just had to show a little teaser on another 1D Maglite I am doing. It's something totally different for me and it worked!, so I'm showing you how it's going.
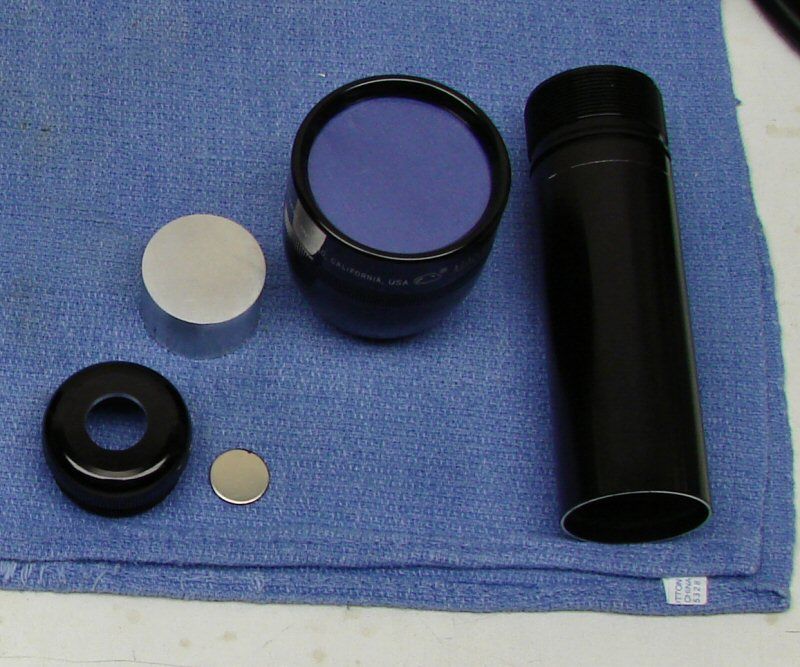
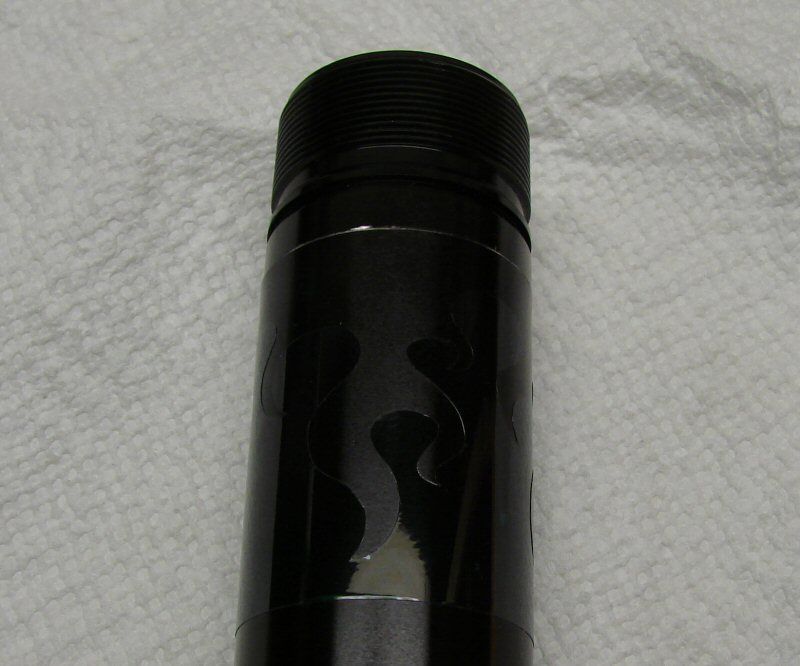
Here's the light already cut down and the tail cap has the (will be), polished tail switch button beside it. The reflector is already fit in and the body cut and put back together.
First, a little music to get you into the mood:
I have wanted to do flames on a light for a long time, but I just never got to it, or didn't want to risk ruining a light. I finally took the plunge and it's an interesting way to do a simple two color light.
Here's the key to doing it:
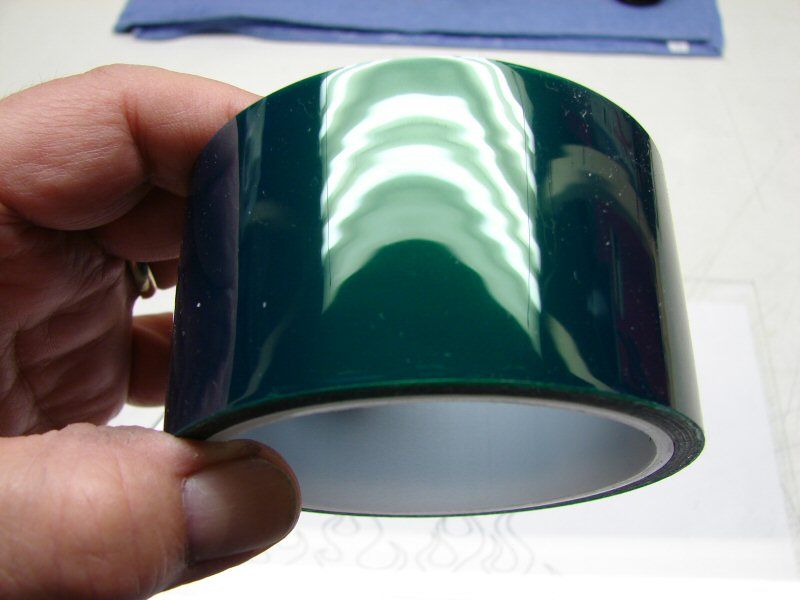
This tape is made for masking aluminum before anodizing. I figured if it worked for that, it would work for stripping the ano. It's Polyester tape with Silicone adhesive on it and it's high temp. I got it at Drillspot with free shipping. There's also a red version, which has a thicker layer of adhesive on it.
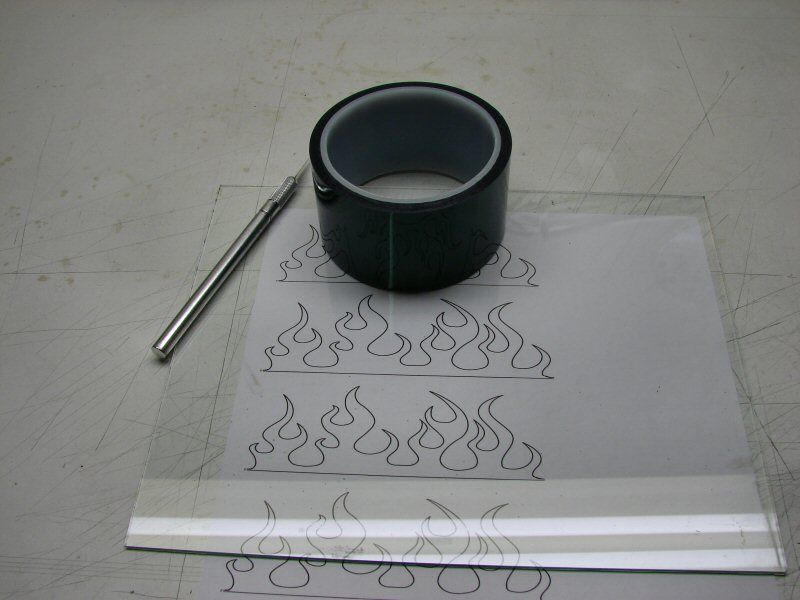
I used my PSP8 program to print out a flames outline in the width and height I needed, to wrap around the body. I laid the pattern under a piece of glass and then I put the tape on top of the glass.
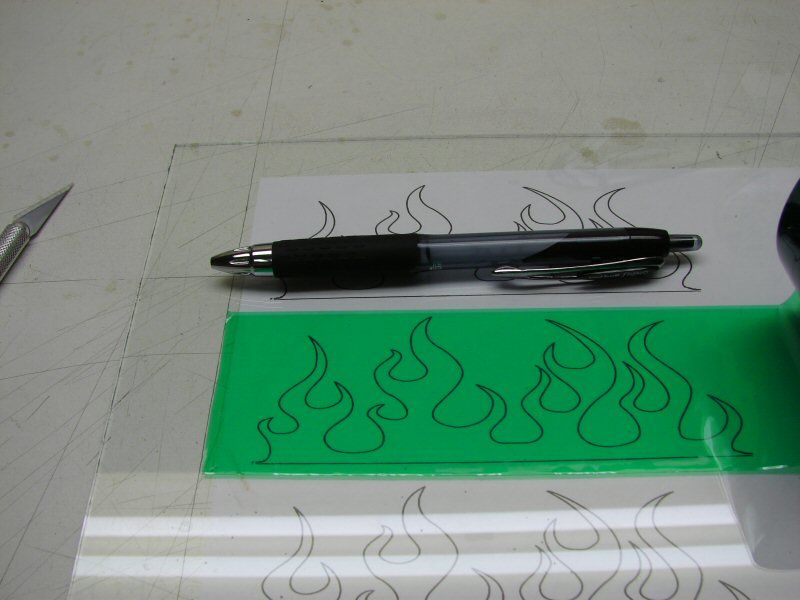
I used a roller ball pen to mark the pattern on the tape and then cut the outline out with an Exacto knife, with a new blade. This was not easy. I used an 8x10 picture frame glass, gut I really needed a smaller one. I had to rotate the glass, while holding the knife, so I could get all the curves cut. I failed on the first two times, but got it done on the third time. After I got it cut, I wiped all the ink off, before taking the tape off the glass, to keep ink from bleeding into the adhesive.
Then I put the tape on the body.
This was also hard. I had to hold the tape off the body and work it on very slowly, so it didn't warp. Then I spent a lot of time smoothing every edge with the flat of my finger nail. (I was at work and didn't have anything else). It took time to get every edge down so that there wasn't any way for the chemical to seep underneath (hopefully). I also sat the body under an incandescent light, to warm it slightly, so the tape would lay down better and hopefully stick better.
Well, it worked!!!
This is after washing it off with water and then with alcohol. The tape stayed on even after an hour in Greased Lightning and It really cam out better than I hoped. The seam where the two ends of the tape come together was a big concern. I just made them long, overlapped them and cut thru with the exacto (very carefully), to make a tight seam. I had one small spot where it seeped in, but it's tiny and for a first try, I'm happy with it. Oh, the seam on the body (cut down seam), will go under the head when it's screwed down, so it won't show.
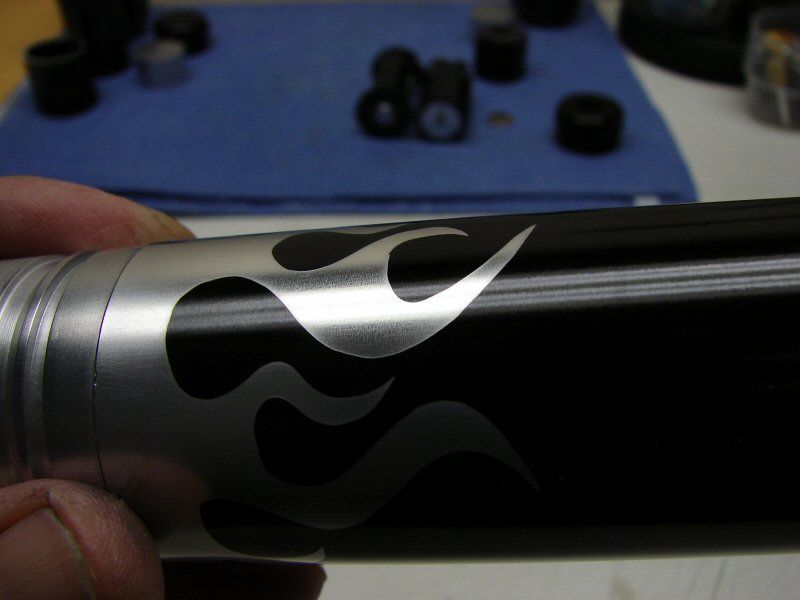
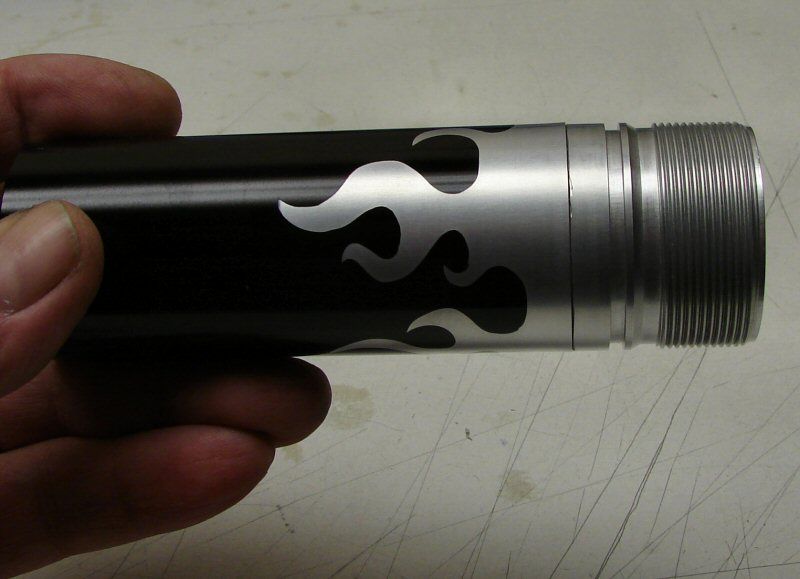
I rubbed one spot with a little #0000 steel wool and hit it with a little polish. I think it's going to be a nice look when it's done. The whole head will also be polished and when it head stands, the flames will rise up toward the tail cap, (which will have a polished switch button on it).
There's still more to do, to finish the build, but I thought this would be a good teaser.
-------------------------------------------------------------------------------------------------------------
The head isn't polished yet, but here's an idea of how it's shaping up.
---------------------------------------------------------------------------------------------
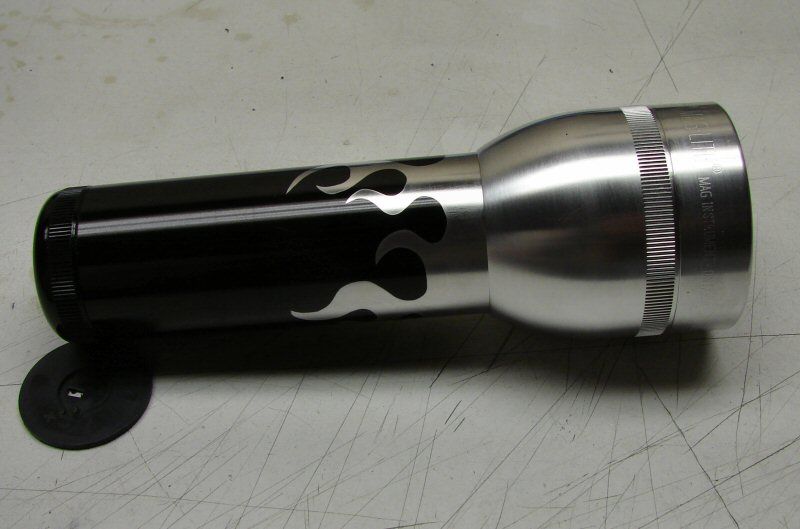
The light is finished. Here's a few parting shots.
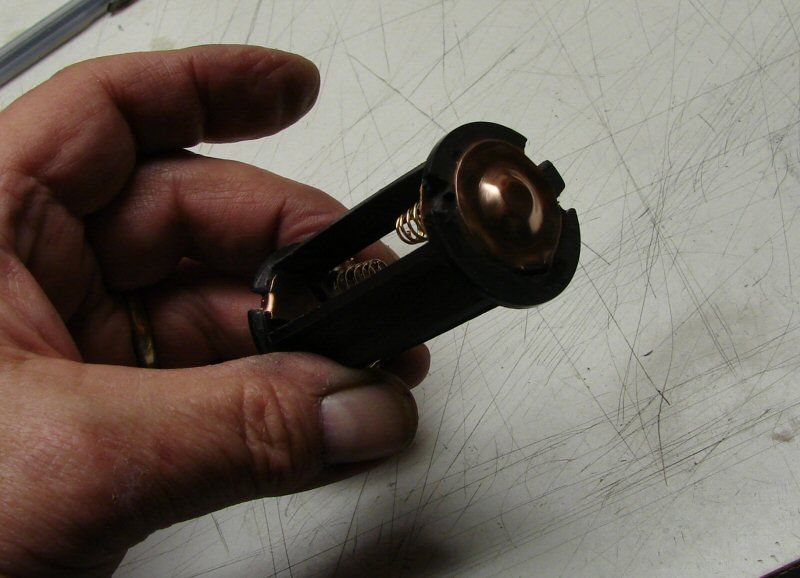
3AA battery holder, redone with copper
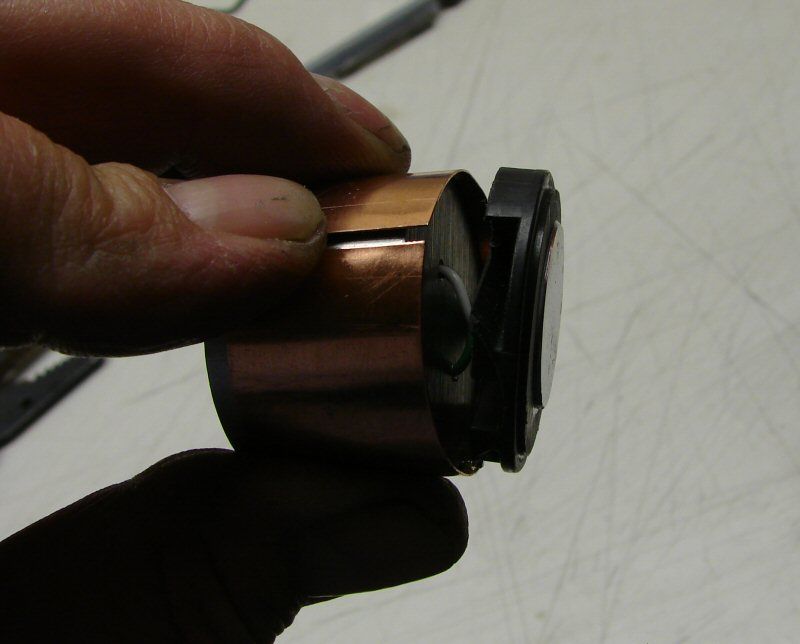
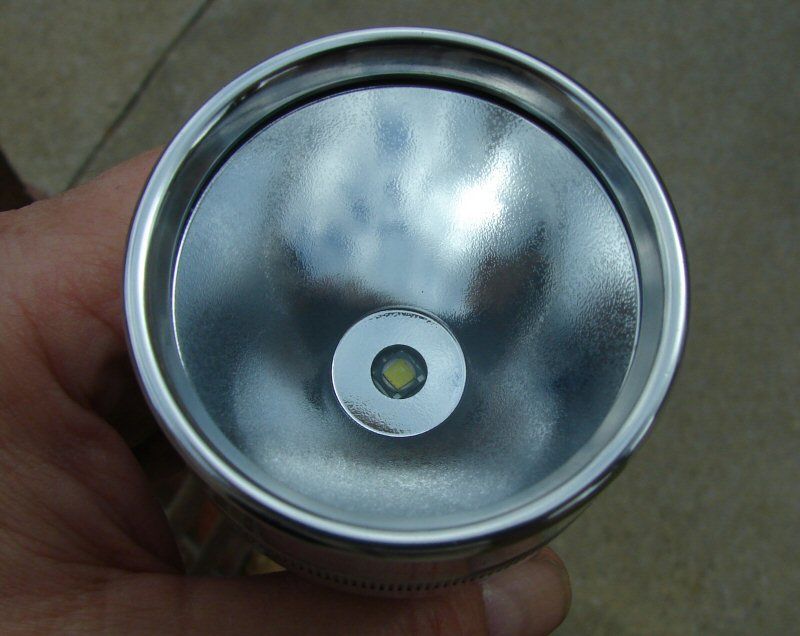
Heat sink and end cap for positive. No driver, Running DD
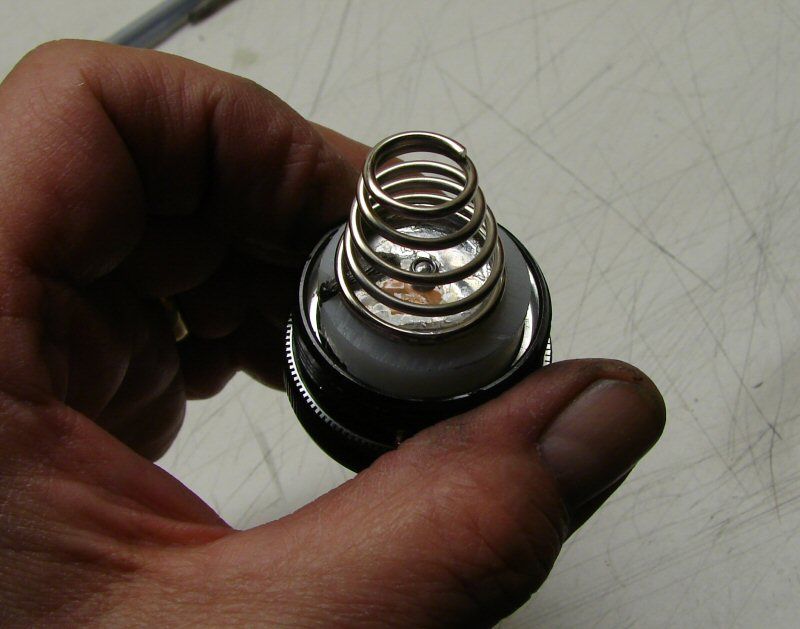
Tail cap switch assembly & spring.
It's all the normal stuff I do for these 1D mods.
Finished light.
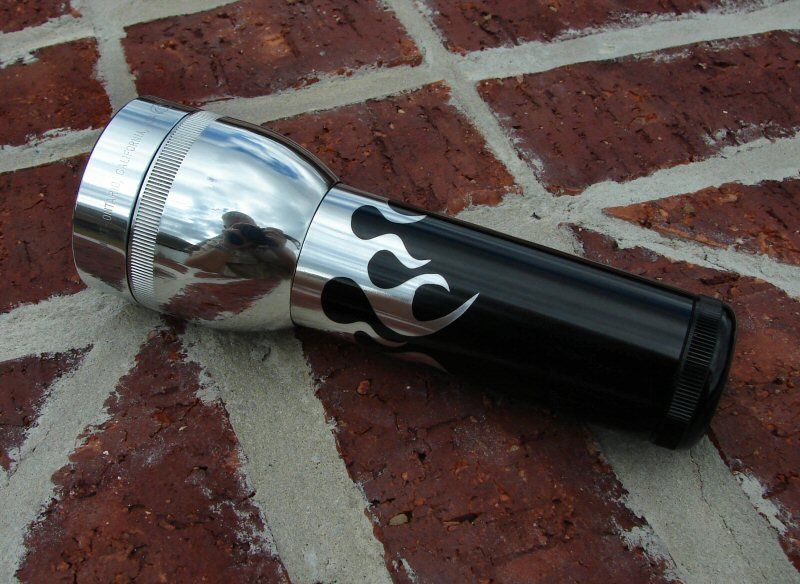
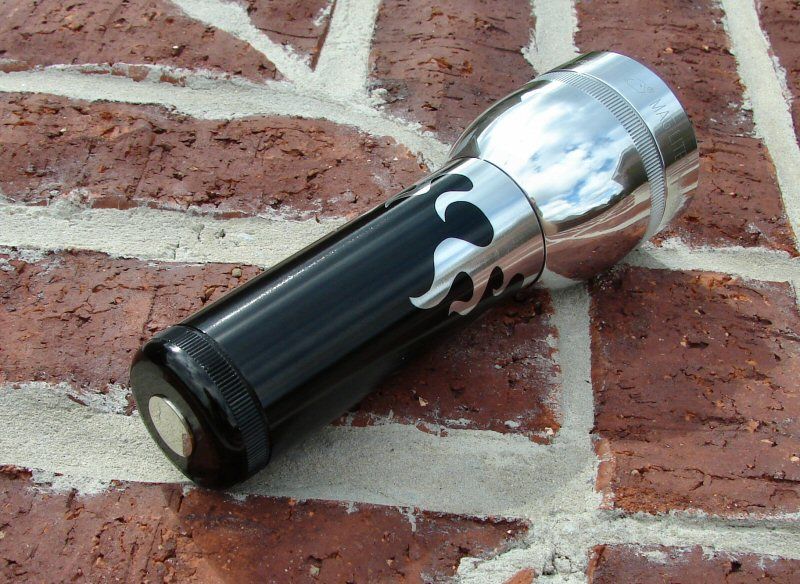
Old School light, flames and direct drive. Two modes, On'Off 
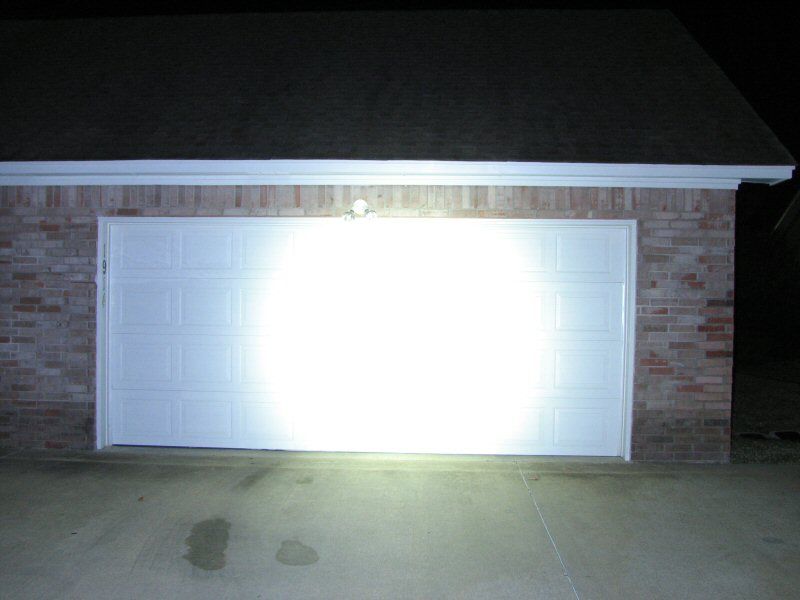
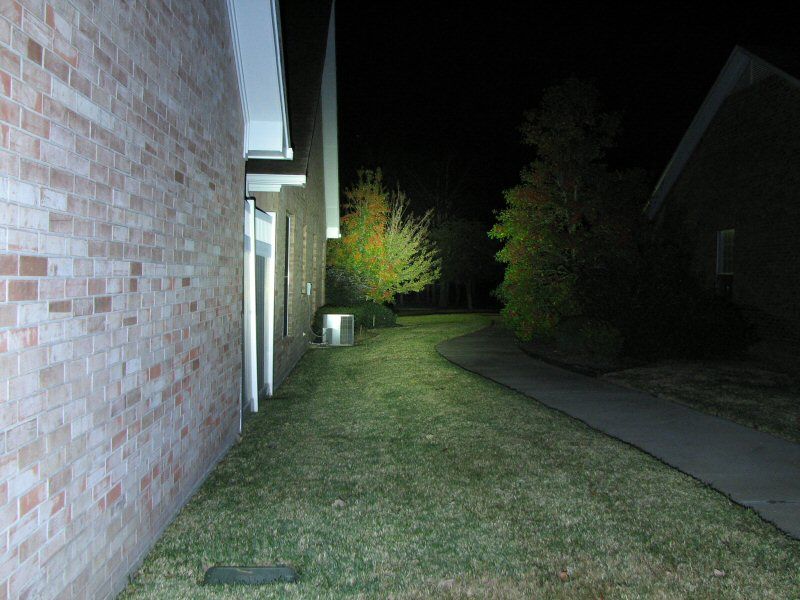
XM-L T6 1C Direct Drive on 3 Eneloops. Beam shots tonight.
 ? Do you have a link for the tape?