TK75 R86 edition
This mod is based on the Taskled H6Flex driver. More technical info. Oh, yeah it comes with a tiny user manual as well. 32 PAGES! It costs 40$ + shipping. (10$ if you are outside the states.) I want to thank MRsDNF for putting this driver in his scratch build light. Not sure if I would have thought of it otherwise.
Lets just cut to the chase right away with some numbers measured by me. Slightly higher compared to Fenix due to my current calibration. These numbers are comparable with each other, and I believe they are quite close to jmpauls320 measurements on vinh lights.
TK75 stock. 3150 lumen, 129kcd (2,9A to each emitter)
TK75 resistor mod: xxxx lumen, 154kcd (Up towards 3,65A to each emitter)
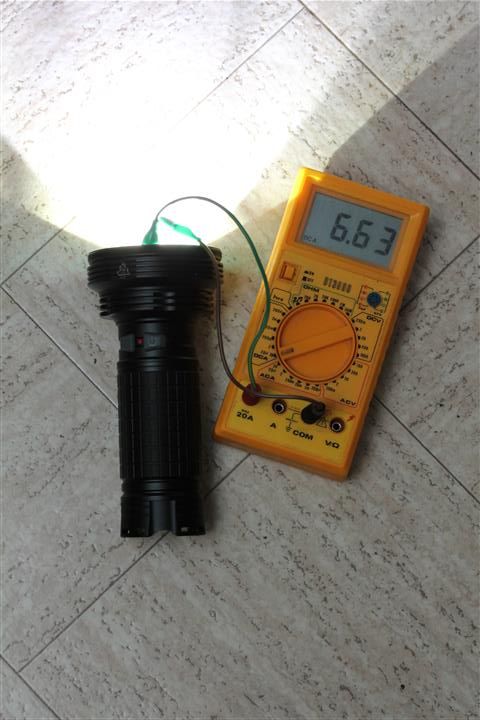
TK75 R86 edition: 5112 lumen, 207kcd (6,6A to each emitter of the stock emitters. Properly regulated. 5334 lumen on startup)
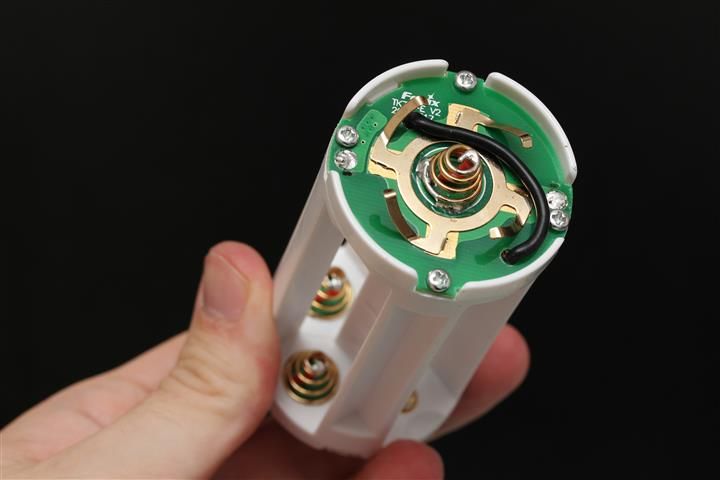
WOOT! Did you notice the red battery light in the middle of the buttons?
Some R86 edition specs:
-6,6A to each emitter, properly regulated! (Ok, with 3,4V resting voltage its a bit out of regulation but still close to 5000 lumen. At 3V, its still brighter than a stock TK75, and most will probably not run the batteries below 3,4V. With quite low voltage batteries, expect around twice the brightness vs a non regulated hot rod (Shocker, etc, etc)
-3 stage fully configurable battery monitoring system
- Medium voltage, red LED lights up
- Low voltage, red led blinks (can be configured to lower power to desired mode as well)
- Cut off, double blinks for a minute, then shuts off. Light can be turned on again in case of emergency (How this works can be configured too)
-User configurable temperature monitoring system
-Can be set to 50 degree celcious, 60,70,80,90 or off. Im using 90.
-User interface fairly similar to stock, but more modes and no blinky stuff.
- Right button for on/off. It is now a mechanical power switch (absolutely zero power drain, and much lower risk of accidental turn on)
- Left button for mode changes (Im using UIP UI, 7 modes and startup on lowest mode. Quick accesses to high from off. Can adjust brightness back and forth. Quite similar to a ramping UI, but with well spaced modes.
- A ton settings that the user can customize, various UI, etc etc etc...
How to do this mod:
Im not doing a step by step on how to do this mod as there as lots of steps.
But ill share several pictures of what I did. I dont have pictures of everything. I would not consider this a beginner mod. Mod is involving and its being done on a expensive light with an expensive driver. Know what you are doing and don't mess up are my best tips. And figure out things yourself, instead of sending me a PM. 0:) ... Or just ask in this thread.
These are the modifications I did to
Body:
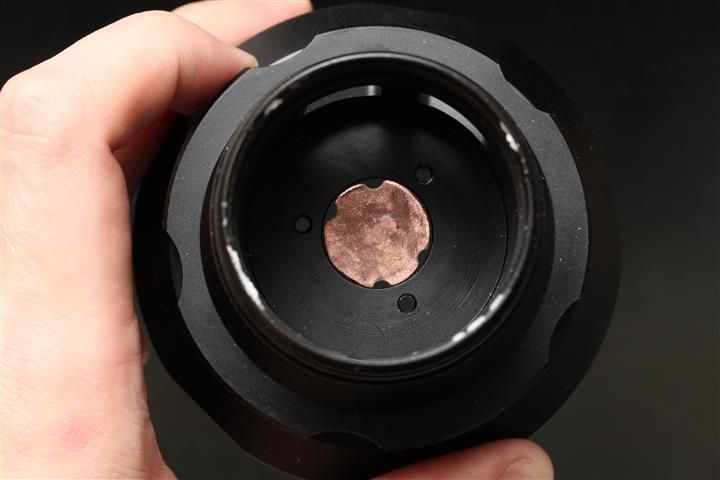
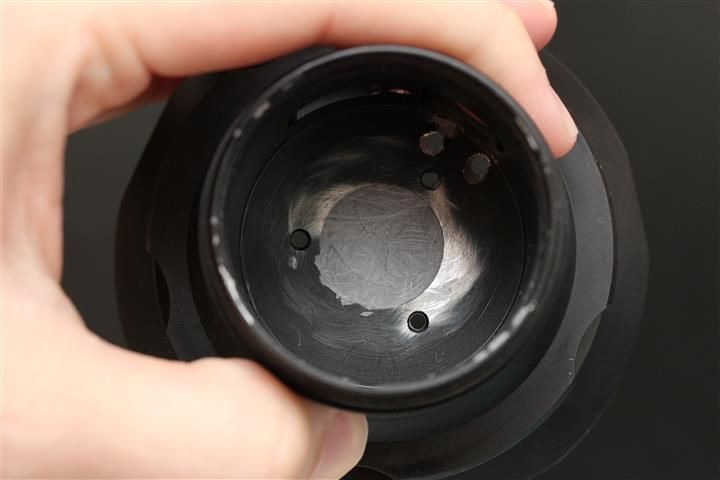
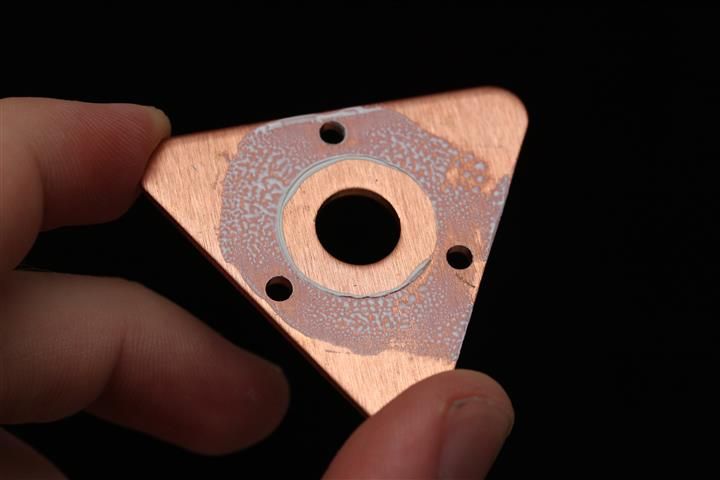
- Copper insert in pill
- JBwelded the hole in the middle of the light to become flat for good heat transfer to the driver
- Drilled new holes through pill for emitter wires
- Drilled hole for battery light
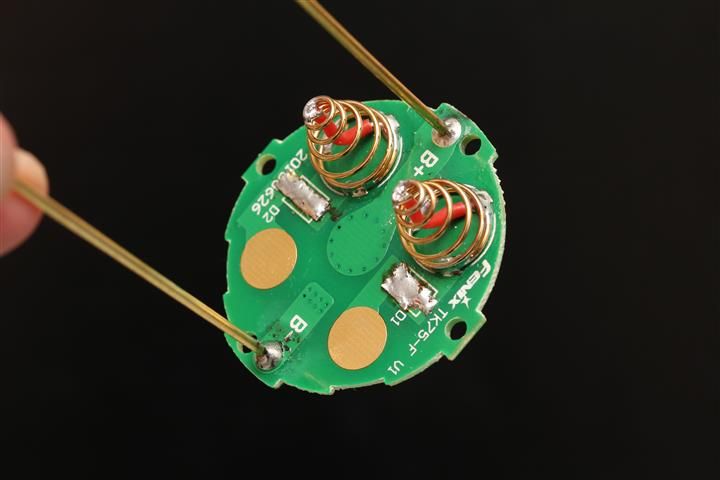
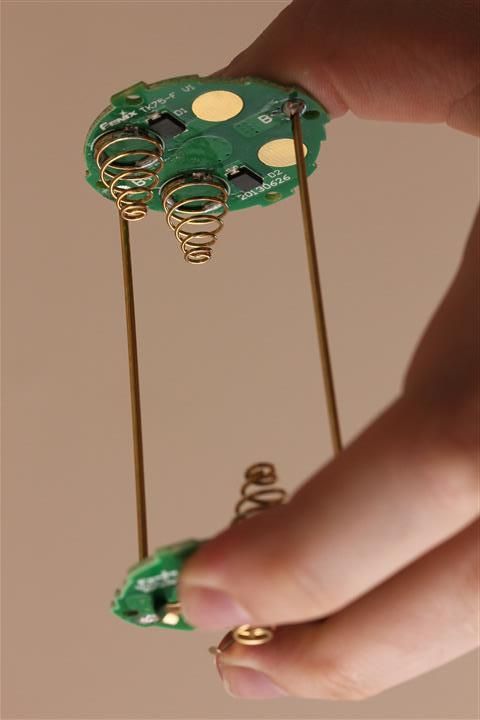
Carrier:
-Rebuilt from 2s2p to 4s (I removed the diodes since I did not know their specs)
-Added extra wires to the springs
Plastics:
- Trimmed backside of both the large plastic pieces a lot to fit driver at the bottom of the pill. Lots of trimming required.
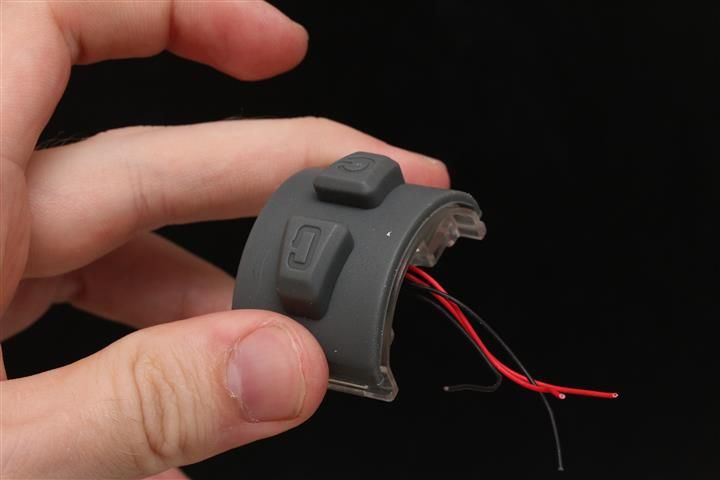
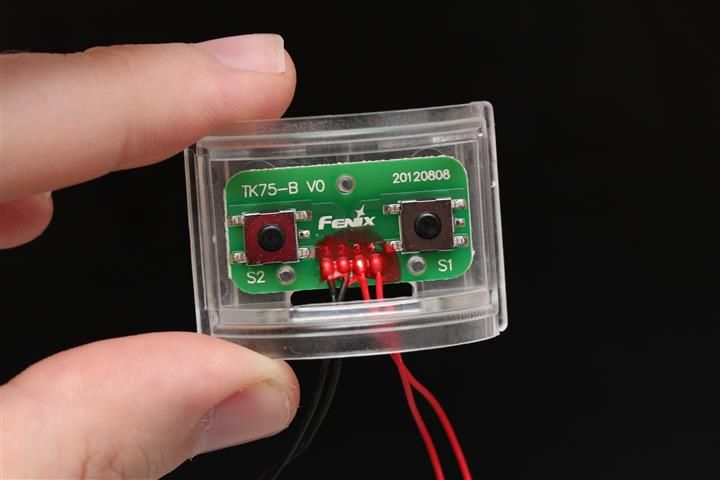
- Cut stock switch board in half. Replace one momentary power switch with a mechanical Omten switch. Lots of trimming on the plastics to get the Omten switch in place.
- Trimmed the little plastic piece above the Omten switch to the correct height
- Trimmed a hole for the battery warning LED
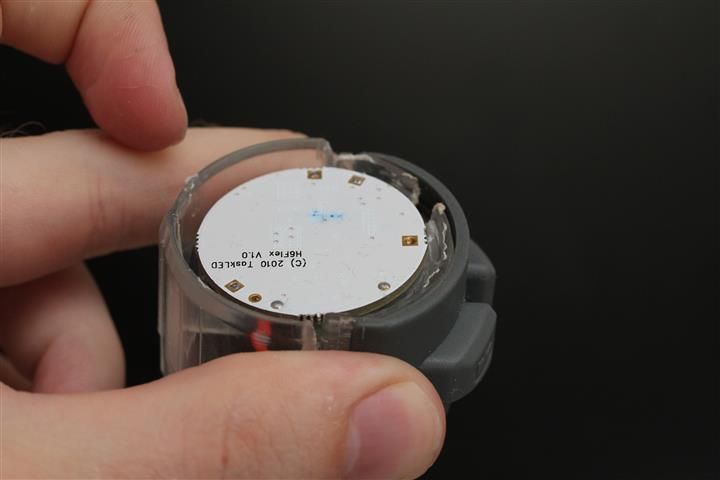
Driver:
- Programmed to suit the light and my preference (this is quite time consuming, remember that 32 page manual)
- Added suitable resistor for the battery LED and input voltage
- Attached driver to pill with fujick (Thermal pad that came with it was recommended, but needed to move it around a bit after putting it in there, and found it easier to use fujick since I have never used one of those pads)
Emitters/MCPCB
-Lapped mcpcb
-Currently using stock emitters (This light might end up in the hands of a local. If so, ill build a new light for me, with some NW emitters and maybe a subtle tint mix. I would try and stick to as close temperature as possible and perfect tint based on how emitters looked if I were doing any mixing.)
Misc:
- Lots of messing around to get everything nicely in place.
- Testing driver before putting it in the light, and also in the process to see that everything worked nicely.
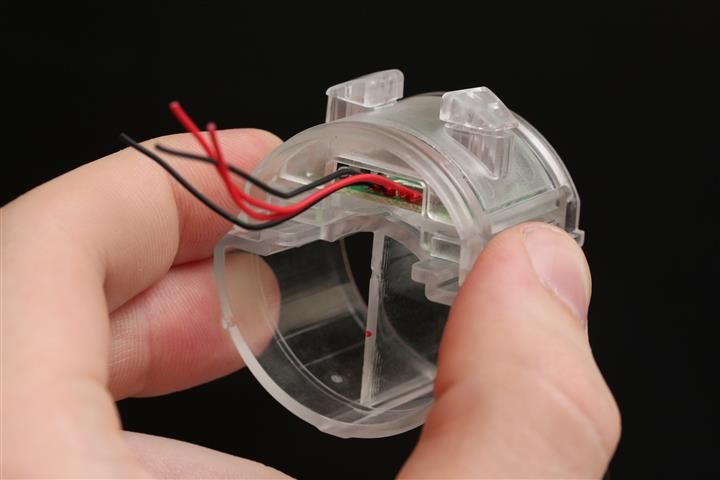
- Shrink wrap around wires (from driver board to switches and battery LED)
- New high quality thermal paste under mcpcb
- Made hole in switch cover for the red battery warning led
- "Burn in" heating it up in order to avoid condensation on lens (I have not done this yet)
- Clear silicone on battery warning LED in order to make it even more water proof (not done this yet)
- Glue battery monitoring light in the correct place
- Glue switches in place
- Glue /fujick mechanical switch connections so that vibrations cant damange it.
- Glue /fujick under the (stock driver) aluminium retaining ring so that it holds all the plastics nicely in place (not really necessary).
There might have been more details, but the above probably covers most.
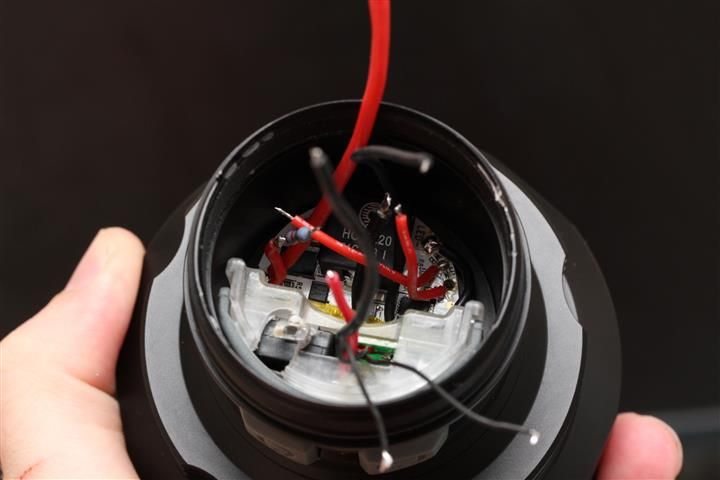
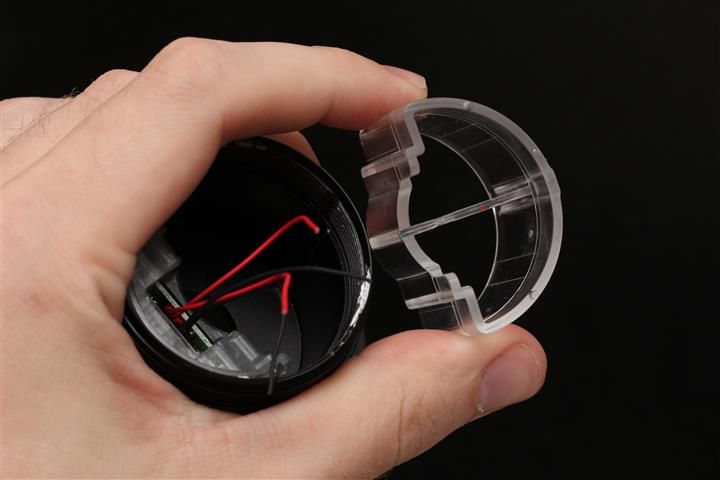
Some pictures:
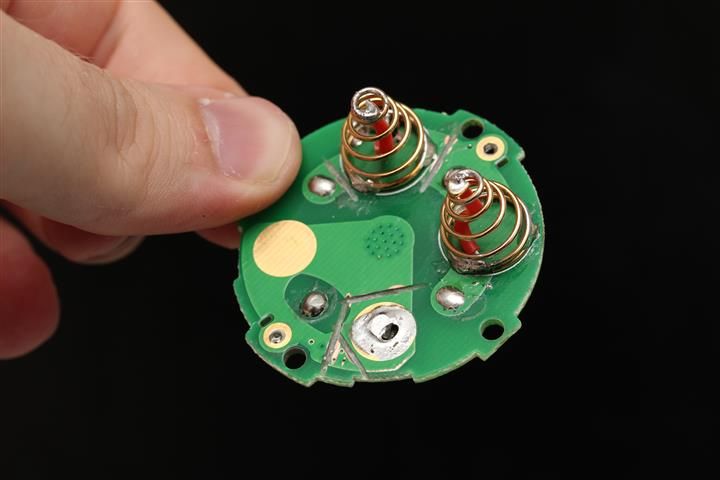
Not sure if I will put the plastic cover on top of the carrier back in place. That would need trimming since I put the wire on the top side. I could have made it more subtle, or 100% stock looking from the top, but I want it to be different compared to stock carrier. I already did the mistake of putting this in my TK61 (did not use the light or damage it). Having this 4S carrier similar looking to a stock 2s2p carrier is not recommended when having several lights that uses these.
I ended up with some excessive heat shrink wrap around the wires since I heated several when they were not in the right place. :X
I considered to make plate that would sit where the stock driver used to be, but the aluminium retaining ring presses on two of the small plastic bits, and I used some glue/fujick elsewhere to make sure everything is nicely in place.

Might put in some beamshots, comparison pictures with other lights, etc..
,,,,,,
Last words
Are there any cons? The mod, and setting up the light is a quite time consuming process if you want it to work perfectly with heat monitoring, battery LED, mechanical power switch and adjust it to your preferences. If those things are not a priority, it can be mounted in the light in a much easier and quicker way. For me, having those features is important and enhances the user experience a lot.
Im currently using UIP (read the manual) + startup at lowest mode. I would have liked to perfect the UI a bit. But to make it short, its a nice UI. The only thing I can think of being an issue to some is low PWM on the lower modes. UIP have 7 modes and the 3 lowest modes have visible PWM if its raining. I can also hear a faint PWM sound in those modes if its 100% silent and I listen for it. For normal outdoor use, I would say its silent. There is no moonlight, or super low mode. Mode spacing is good though.
Stock TK75 is a great powerful allrounder, now, this light is in a different league. Im not kidding when I say that my BTU, SP03, Lustefire 3xU2, all modified "hot-rods" are now pretty much obsolete. As in, this TK75 outperforms them in pretty much every possible way. This will probably make some of my incoming Supbeams X40 and K40M obsolete as well (hopefully Ill like the thinner carrier enough to keep them). This might make some other lights that I have been planning mod obsolete as well. This will also out throw X60. Naturally, It wont run as cool as a much larger light. But it will fit in my jacket pocket, and that makes it into a light that I will use much more compared to something that is larger.
Used in a mild/cold winter environment with some wind or maybe rain. It might be able to run at 6,6A without step down from full to low batteries. Now, late summer/early autumn with some wind I can use it for around 6-8 minutes before it steps down. Wait until it cools 5 degree (which is fairly quick) and I can crank it up again for a little while if needed. I can disable the feature, but I prefer to have it there for safety.
If you think 6,6A is over the top, or generates too much heat. Then its easy to adjust it down to 6A, or 5,6A or... 5A .... Well, easy once you are confident in how to operate the driver and how the menu system works.
I can go on and on, but the main thing is. The light is now frickin awesome!
...grumpy cat approves...


 )
)