Gentlemen,
(Foy inspired quick summary: I made my own I.S. using a $2 big rubber ball, paper mache, and a luxmeter )
)
When I was into building disturbingly fast street cars, one tool that I always wanted was my own personal dynometer so I could accurately test/tune the fruits of my labor. Seeing as how they cost over $15k and would take up the entire garage, I was stuck either finding a local shop with one or testing at the local drag track.
For reasons I can't fully explain (or completely understand), six months ago I found myself drawn into the flashlight world. I would have never guessed messing with lights would be so much fun! Yet, once again, I found myself in need of an accurate testing device...and for this hobby an Integrating Sphere (I.S.) replaces the dyno. It serves the same function, but instead of reporting horsepower/torque it gives me lovely lovely lumen ratings. Seeing as how there are no "hobbyist" IS's for sale, I was in a quandary as to what to do. Thanks to some of the wonderfully inventive folks on this forum, I saw how one could be built fairly easily. Being a traditionalist and an accuracy junky, I wanted to stick with the sphere instead of a box. I've read where others have used large styrofoam balls, but the price for one (after shipping) was close to $100. So, I decided to make my own from scratch - which is more fun anyways!
While perusing the aisles of my local Walmart, I saw the perfect "host" for this project. A $2 big rubber ball in which I was going to entomb in paper mache to create my sphere.
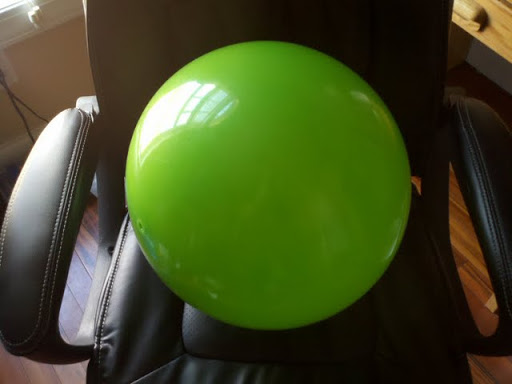
I actually ended up buying two of them, just so my young children could play with one while I destroyed the other.
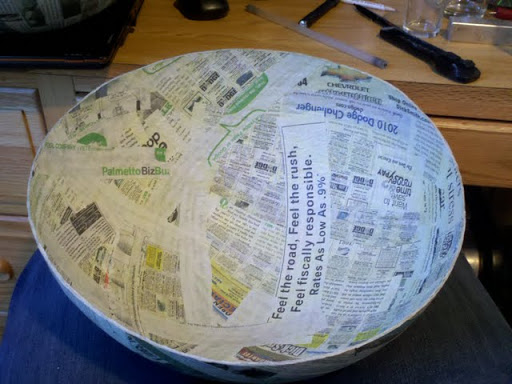
First step was to wrap the ball in plastic so the forthcoming paper mache doesn't stick to it. I used an old plastic picnic tablecloth cut into strips, but thinking back any type of food grade plastic wrap would work. Once the ball is covered, it's simply a matter of layering thin strips of newspaper over it. I tried a few differerent adhesives on this project. The first was a leftover can of wallpaper glue, which seemed to work fairly well, but then finally settled on a 50/50 mix of white glue and water.
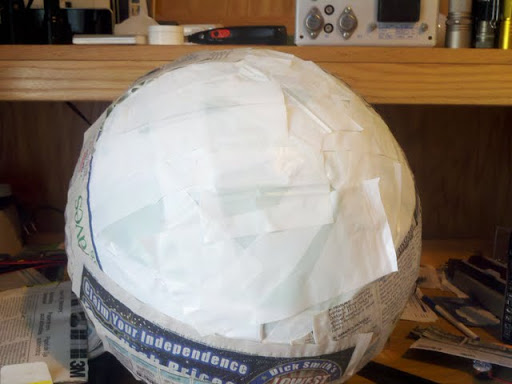
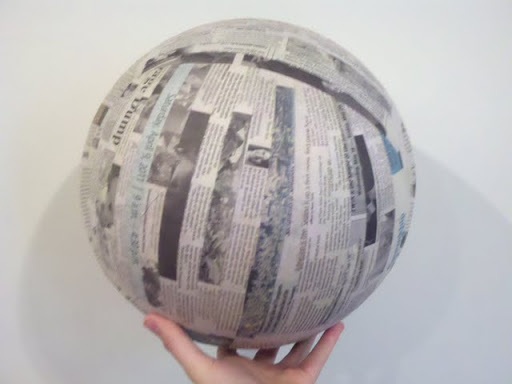
Here's the ball in the beginning stage after the plastic is on and the first layer of newspaper is going on. I honestly lost count on how many layers of paper mache I ended up using, but want to say it was around two dozen. The test I would do to determine if it needed more was once it was dry I would give it a squeeze. If I could still feel the rubber ball underneath, I put more layers on. Eventually it felt solid (just don't push too hard), and ended up looking like this:
The moment of truth comes when taking that first cut into it with a razor knife. Carefully cut across the equator to create two equal halves. Then, remove the remnants of the rubber ball and plastic wrap. If all goes well, it should end up like this:
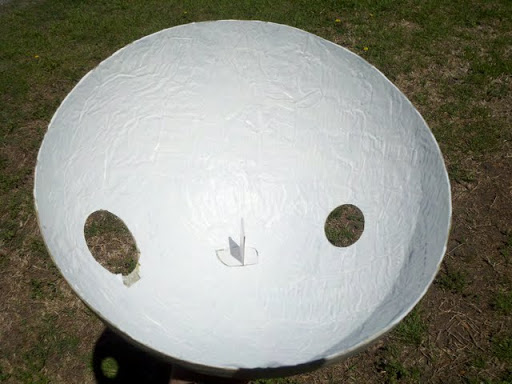
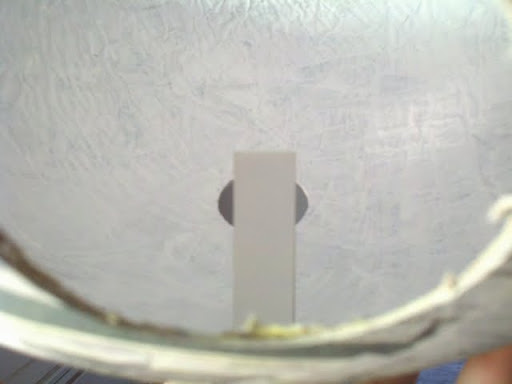
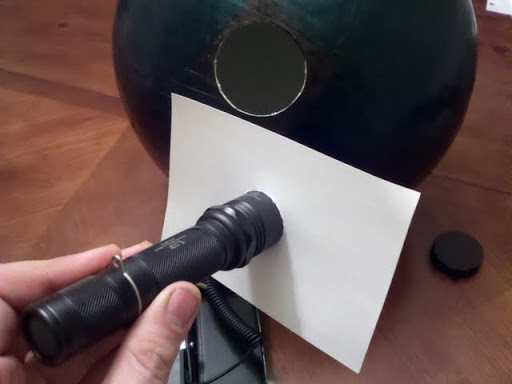
Next, paint the inside of both halves with a white matte paint. Mine took a couple of coats to cover up the type on the paper. Once the paint dries, the two ports need to be cut into one of the halves. One is for the luxmeter, and the other is the entrance for the flashlights. These should be at a 90 degree angle from each other. The only other addition required on the inside is a baffle. From researching, this should be as small as possible but still cast a shadow over the sensor port when a light is shown into the input port. This prevents any light from directly hitting the luxmeter. Here's how mine turned out:
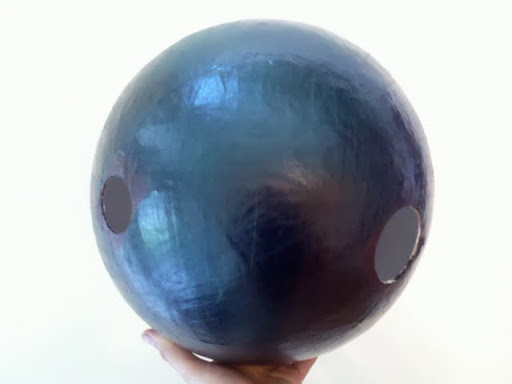
Once this step has been completed, the sphere needs to be reassembled. I used duct tape (or as I've been calling it, "Don's Tape") to hold the two halves in place while I re-applied paper mache to the outside. It only took a few more layers around the cut to firm everything back up. Once back together and dry I decided to shoot it with a quick coat of spraypaint to make it look more complete. And here it is:
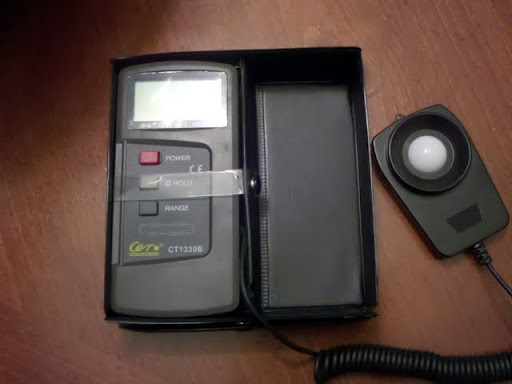
At this point, the only thing left to do is plug in a luxmeter in it's port and determine what the sphere's correction factor should be. There's a lot of different ways to do this, but the most accurate one I tried was to simply take a light of known value, test it to get the lux reading, and then divide that reading by it's alleged lumen rating. For example, I have two lights that have been tested a lot by others. The zebralight SC60 (300L otf) and the H51 (200L otf). I came up with a value of 12.65, which, when tested shows the H51 at 200L and the SC60 at 300.4L. I also tested various other lights and the values returned seemed quite plausable. One thing I found helps is using cardstock with a perfectly sized hole cut into it for the head of the torch. I've got a bunch of these now of various sizes. Here's me testing my L2P:
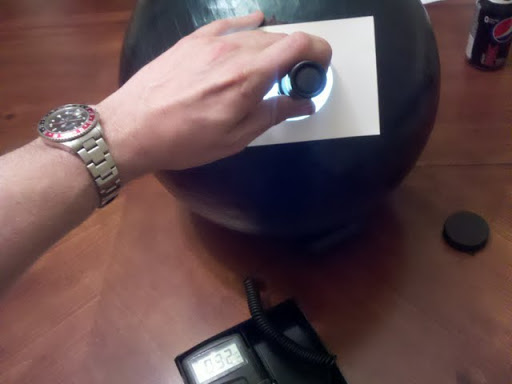
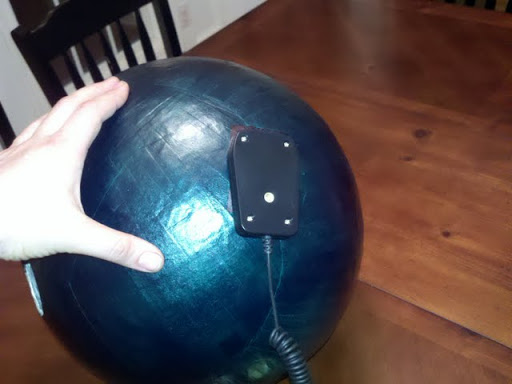
And a couple shots of the luxmeter and how it looks attached to the I.S. It is a tight press fit, so no other retention is needed to hold it in place.
Summary:
I'm very happy with the results of this and now having my very own 14.5" I.S. Unlike the other flashlight projects I've done, I was able to get the kids involved with this one. Gave them a tray of glue/water mix, some newspaper, and let them have at it! Thankfully my 7yr old is as anal as I am, so it all turned out well. The project was pretty simple and went fast. The longest part was waiting between paper mache layers for the glue to dry. Total cost for creation was @ $5 in change, for the ball and a couple bottles of white glue (assuming one already has a luxmeter, if not add ~$20). The best part is the repeatability. I can take any torch I've previously measured and using a battery of the same charge level get results within a tenth of a percent.
Here's a few reasons why it's a handy device to have:
- Accurately test recently purchased lights and ensure proper performance
- Test outputs of a torch on various battery combinations
- Compare before and after results after modification
- Determine how various reflector/lens combos affect total light output (It's hard to subjectively compare the light output of a flooder vs a thrower by using the naked eye)
- Troubleshoot a bad driver or emitter
- Give lumen ratings on new flashlight creations!
Some test results can be found here. Thank you all for reading and humoring my flashaholic DIY sickness.


