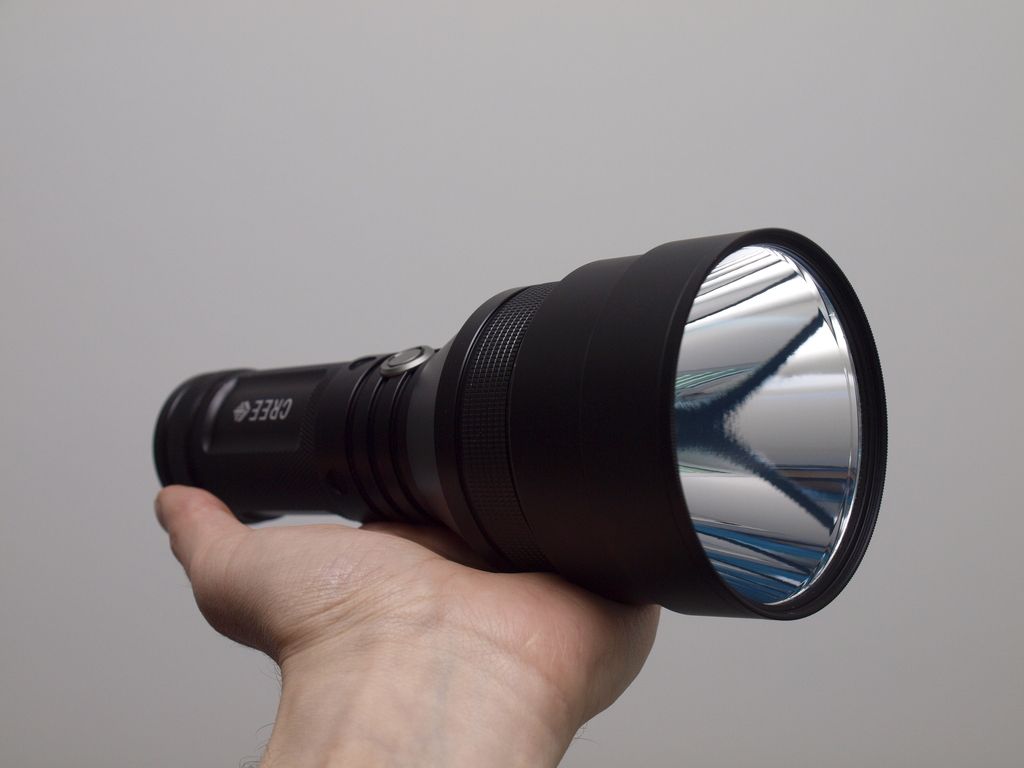
I was posting some of this over in the general Courui D01 thread but thought I’d put up a new thread here with more of the details.
The idea was to pair up the Courui D01 with the very large and deep 86mm reflector from kaidomain.
Obviously there aren’t many cheap hosts out there that will house a reflector this large so something needed to be built/modded.
Option A: Own a lathe or have a talented machinist make something custom.
Option B: Try to extend an existing host using (preferably 100%) off the shelf parts and lego together the whole thing. Minimal manual work would be a bonus.
So this is my attempt at Option B. For a very successful build involving Option A have a look at Pinkpanda3310s TK61 mod thread .
Current Parts List: (may change as I work on the light)
- Kaidomain 86mm x 84mm Reflector SMO Buy Here
- Custom Copper pill courtesy of NikolaS (not essential, stock pill shelf will work but not ideal for high wattage emitters, sbt-70, mt-g2 etc)
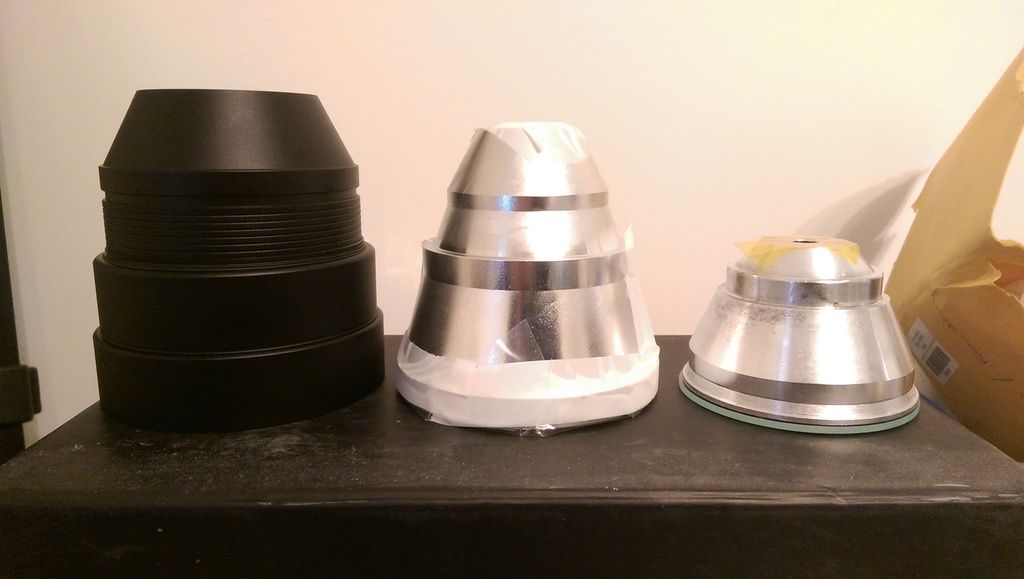
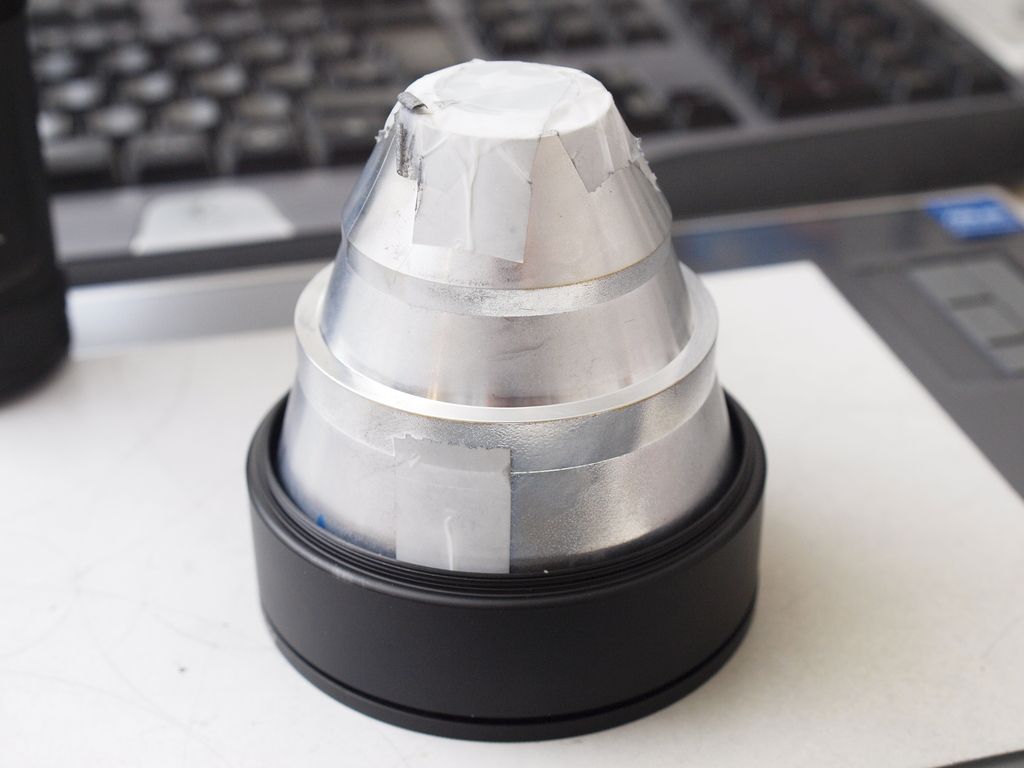
- 77mm Fotga wide angle lens hood (77mm male to 82mm female filter threads, 25mm height) Ebay various / Dealextreme
- 82mm Fotga wide angle lens hood (82mm male to 86mm female filter threads, 25mm height) Ebay various
- 86mm Fotga UV filter (any 86mm lens filter will do) Ebay
- Custom Led centering ring made by Hoop Here
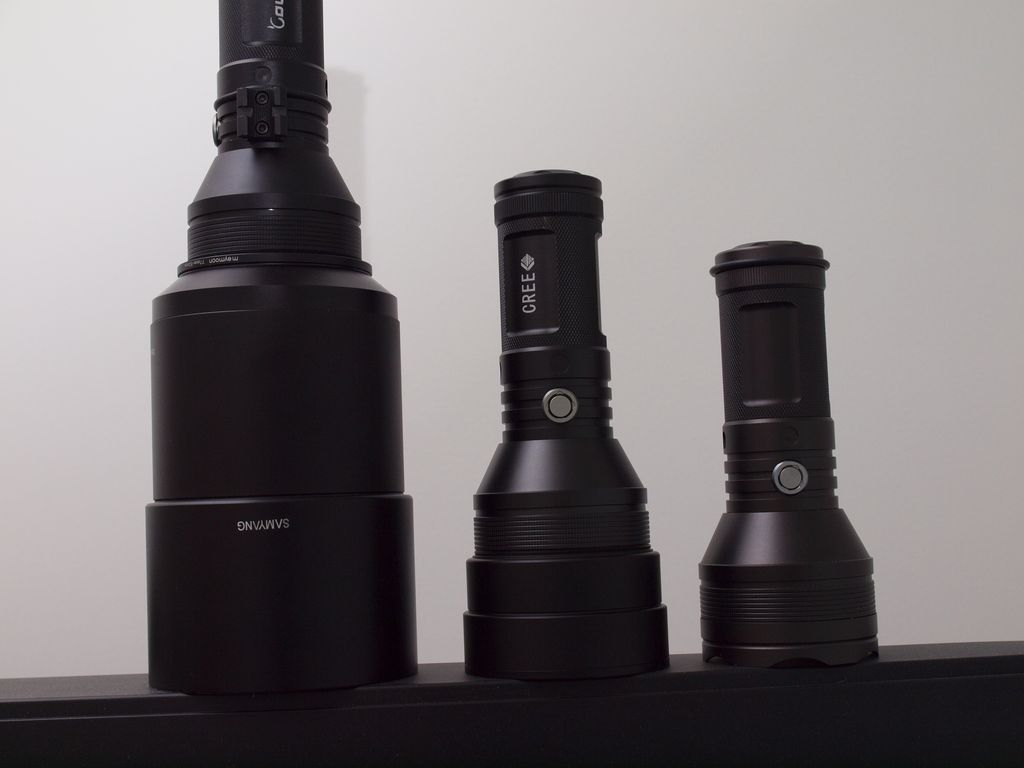
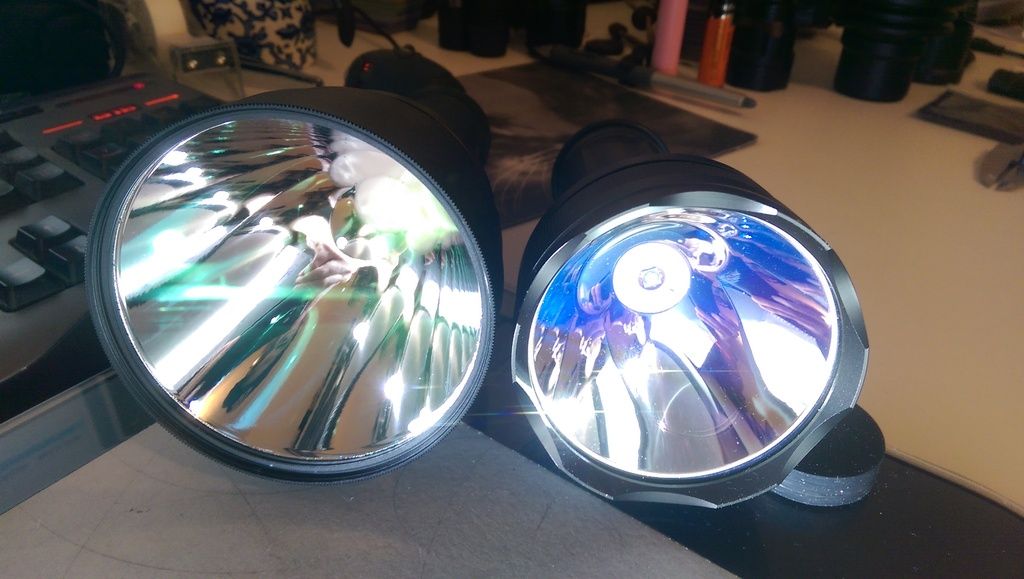
Reflector size comparisons. Kd 86mm vs Stock Courui D01
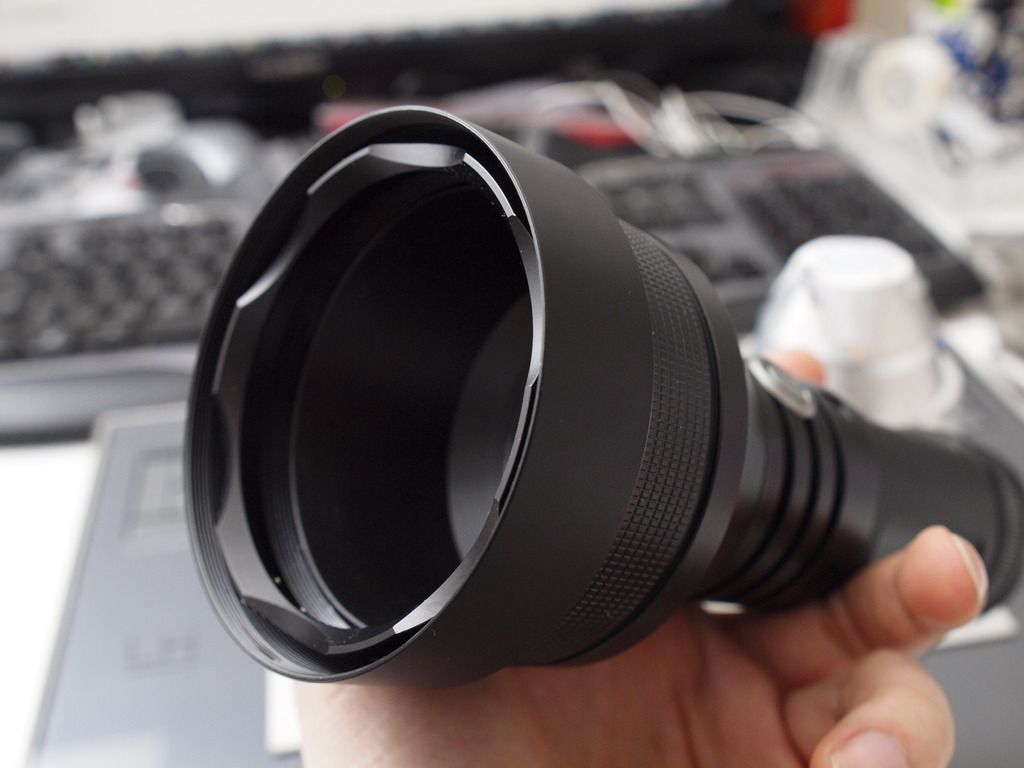
All the lens parts screw together with the 77mm hood snuggly sliding onto (but not threading into) the threaded lip on the head of the courui.
The stock bezel can be cut down and repurposed as a retaining ring to firmly mount this first hood from the inside or it can simply be epoxied into place.
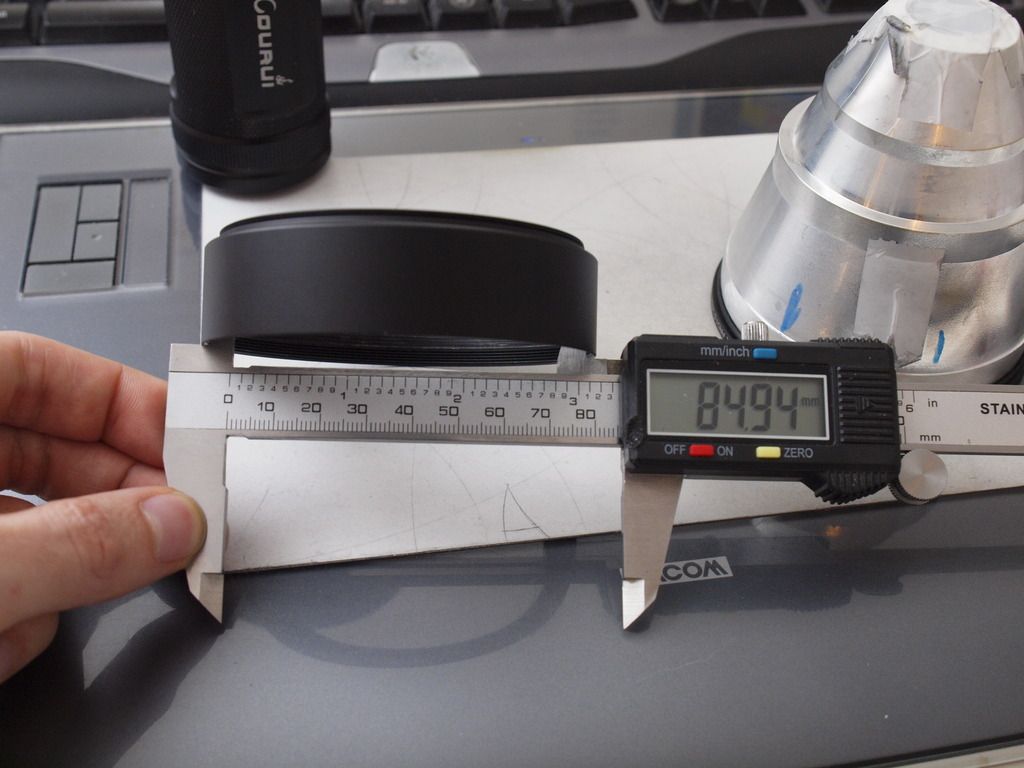
Unfortunately the lip on the reflector is a little bit too wide (about 0.5-1mm all around) to fit into the 82-86mm lens hood. Basically you need to reduce the max OD of the reflector down to below 85mm.
This is the main part of the mod that will require some machining/filing/sanding.
I used a portable belt sander to bring this down to size but an hour or so with a hand file should also do the trick, I wish this wasn’t needed but for this particular plan it’s unavoidable. Just make sure to protect the reflector from dust by covering the openings during this step and it shouldn’t be too bad. I stuck a piece of plastic/acrylic over the opening of the reflector with double sided sticky tape to keep out the dust during sanding.
I’ll update this post with more details as I work on the light. Below is some random progress stuff from the Courui thread.
Update: 27/4/15
Did some work on the light today removing some material from the reflector to make it fit into the compact configuration (2x hoods + uv filter lens)
Here’s after the first assembly.
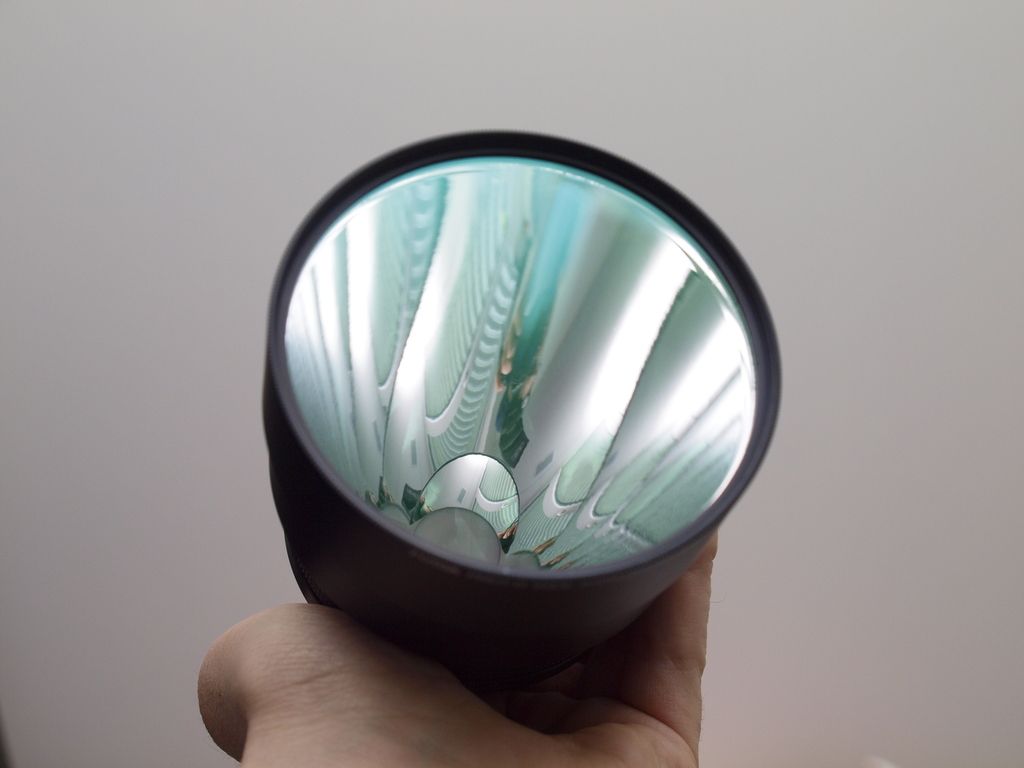
The reflector is a beast, though it doesn’t have the most perfectly smooth mirror finish. A very slight OP surface can be seen here.
I have yet to see how it performs in this config but this feature/flaw may make it a good option for an mt-g2 or similar just to help smooth over the honeycomb artefacts slightly. Just a thought, I’m sure it will also produce a very respectable beam with a normal die.
The UV filter and lens on the front: This is a really cheap UV filter but has what it claims is a multiband AR coating. Multiband? Hmm, probably not. But it definitely knocks down the reflections and the unusual green bias has the added benefit of counteracting the green tint shift seen from a dedomed cree led. So this may not be a bad option at all.
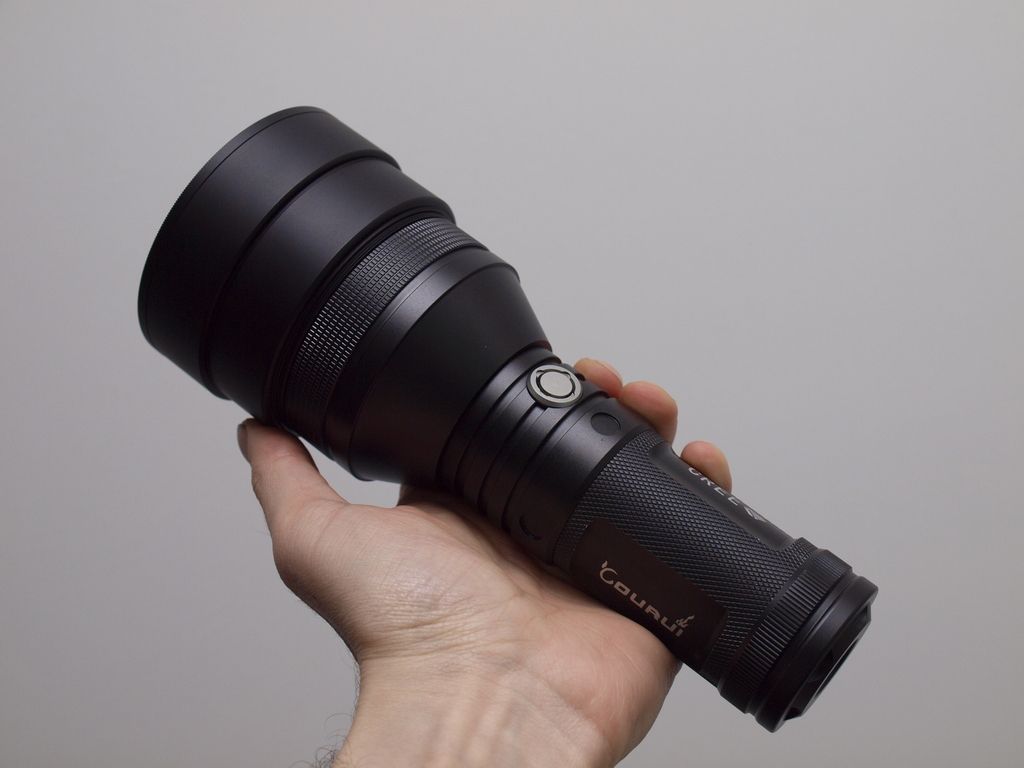
Still waiting on some parts to do a working assembly of the full light (led will be an sbt-70), but so far everything is lining up nicely. I like! ![]()
Next to my original BigHead with UCLp lens.
Update: 01/5/15
A few more photos of the parts and assembly.
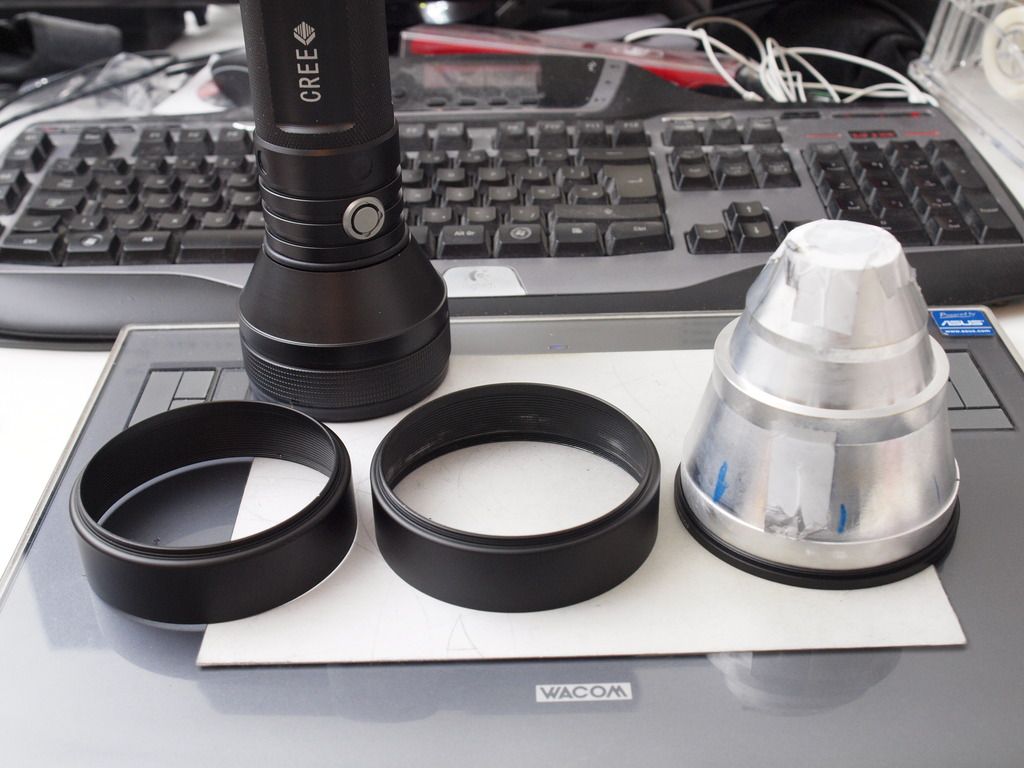
This is the diameter you’ll have to reduce the rim of the reflector down to in order for it to fit inside. It requires removing about 0.5mm all around so it’s not too bad. Again, some kind of a power sander is going to help a lot here.
50mm OD ~3mm Oring to allow the head of the light to be unscrewed a couple of millimeters and give enough clearance inside to fit a mcpcb and led in between pill and reflector. Not sure how much extra gap is required here until I get the led centering gasket and have a go at focusing up the reflector, the oring may not be needed or a thinner one could be used in it’s place. But in any case this is an decent approach to give extra clearance if needed.
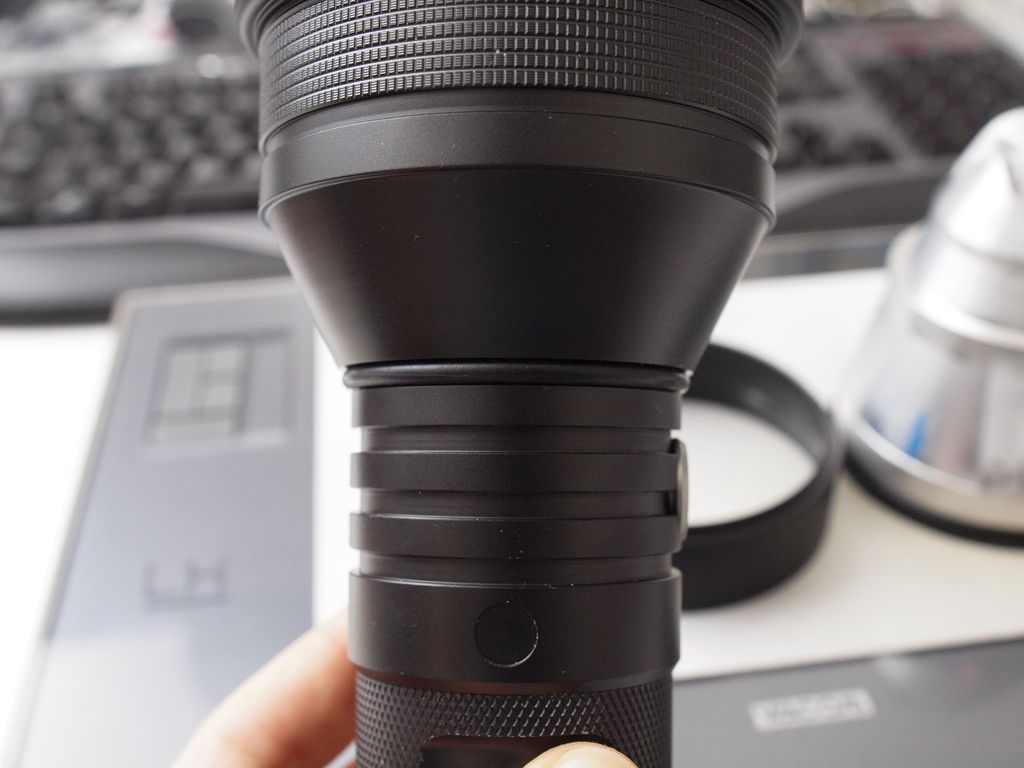
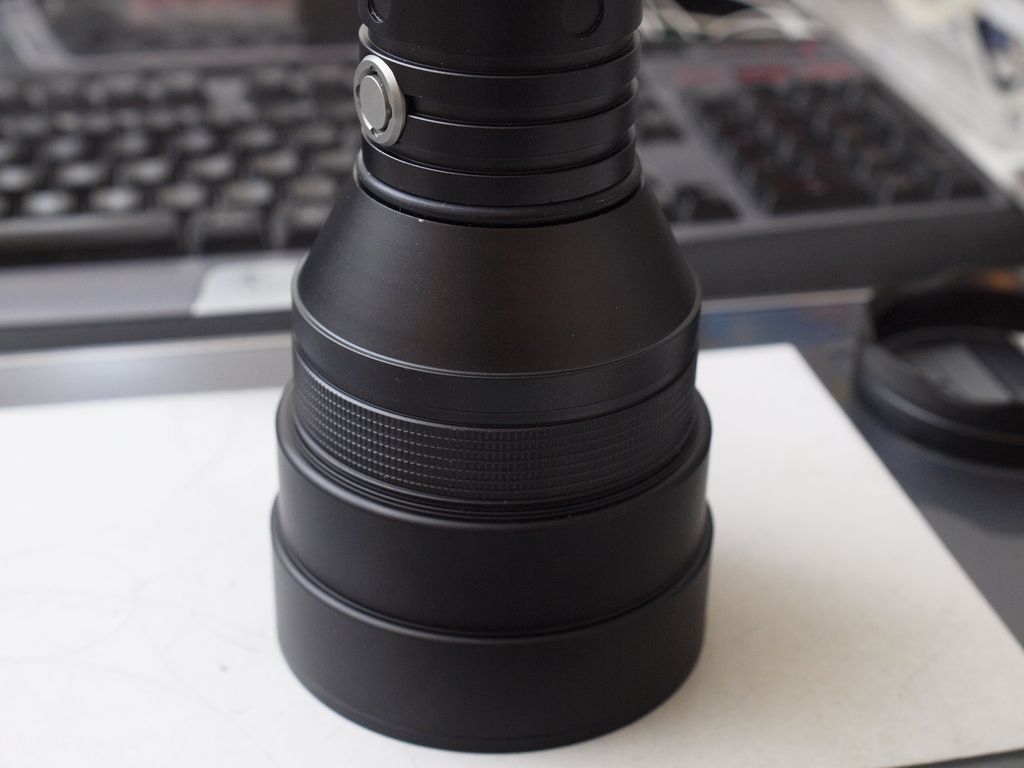
This is how the bezel screws back onto the original thread, clamping the first hood into place. Depending on your particular courui and the machining tolerances, you may need to apply some electrical tape to make the hood/head interface a tight fit.
You’ll also see why the crenelations need to be removed from the bezel ring to allow the reflector to fit in the full assembly.