Hi all!
This is my first attempt to give the @The_OL_Contest my best shot. For the flashlight, I will be using a broken Klarus XT2C flashlight which gave up the ghost on me a few weeks ago. It would be a shame to see its perfectly good parts go to waste after years of loyal service ![]() .
.
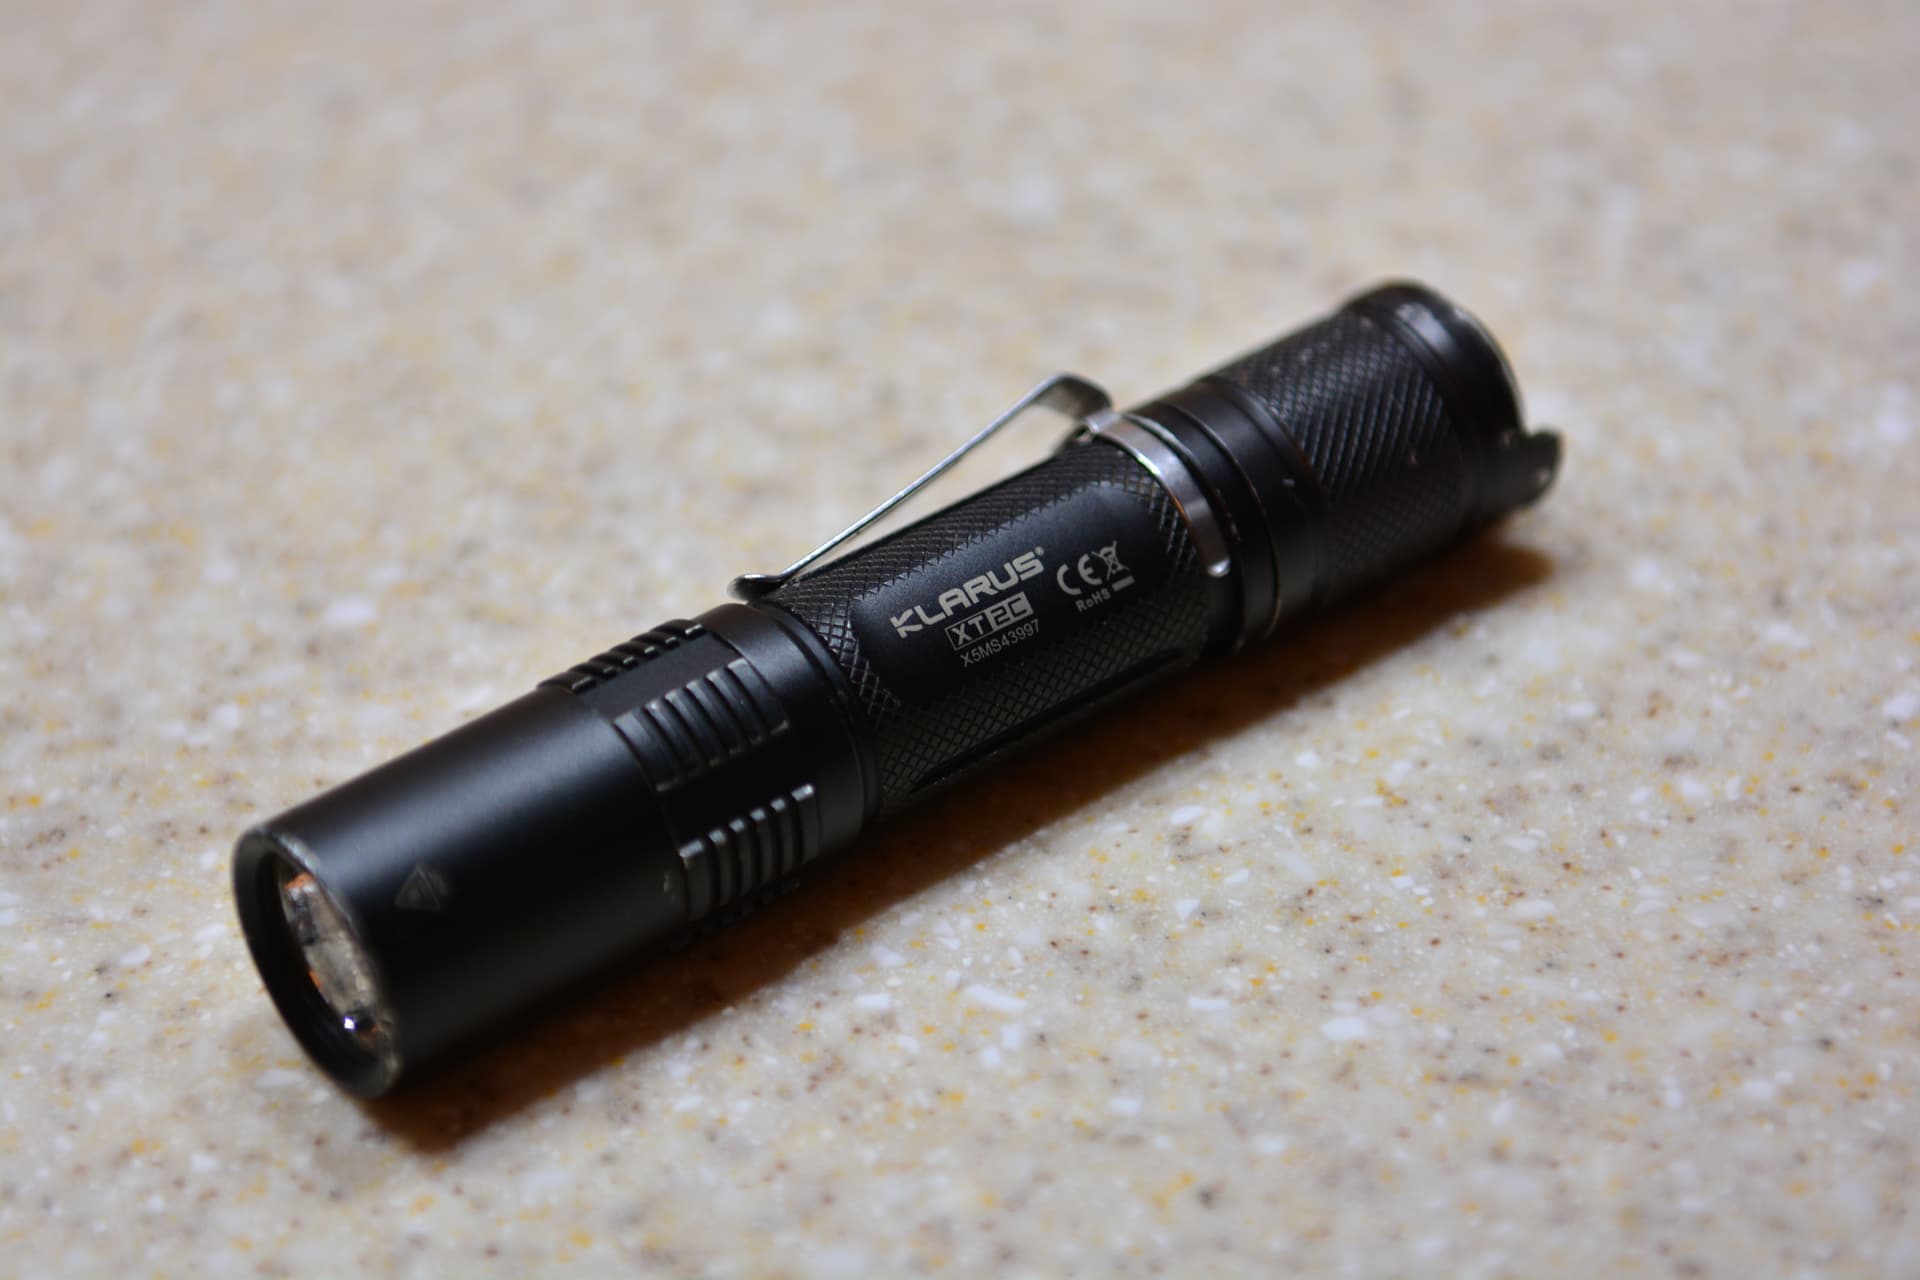
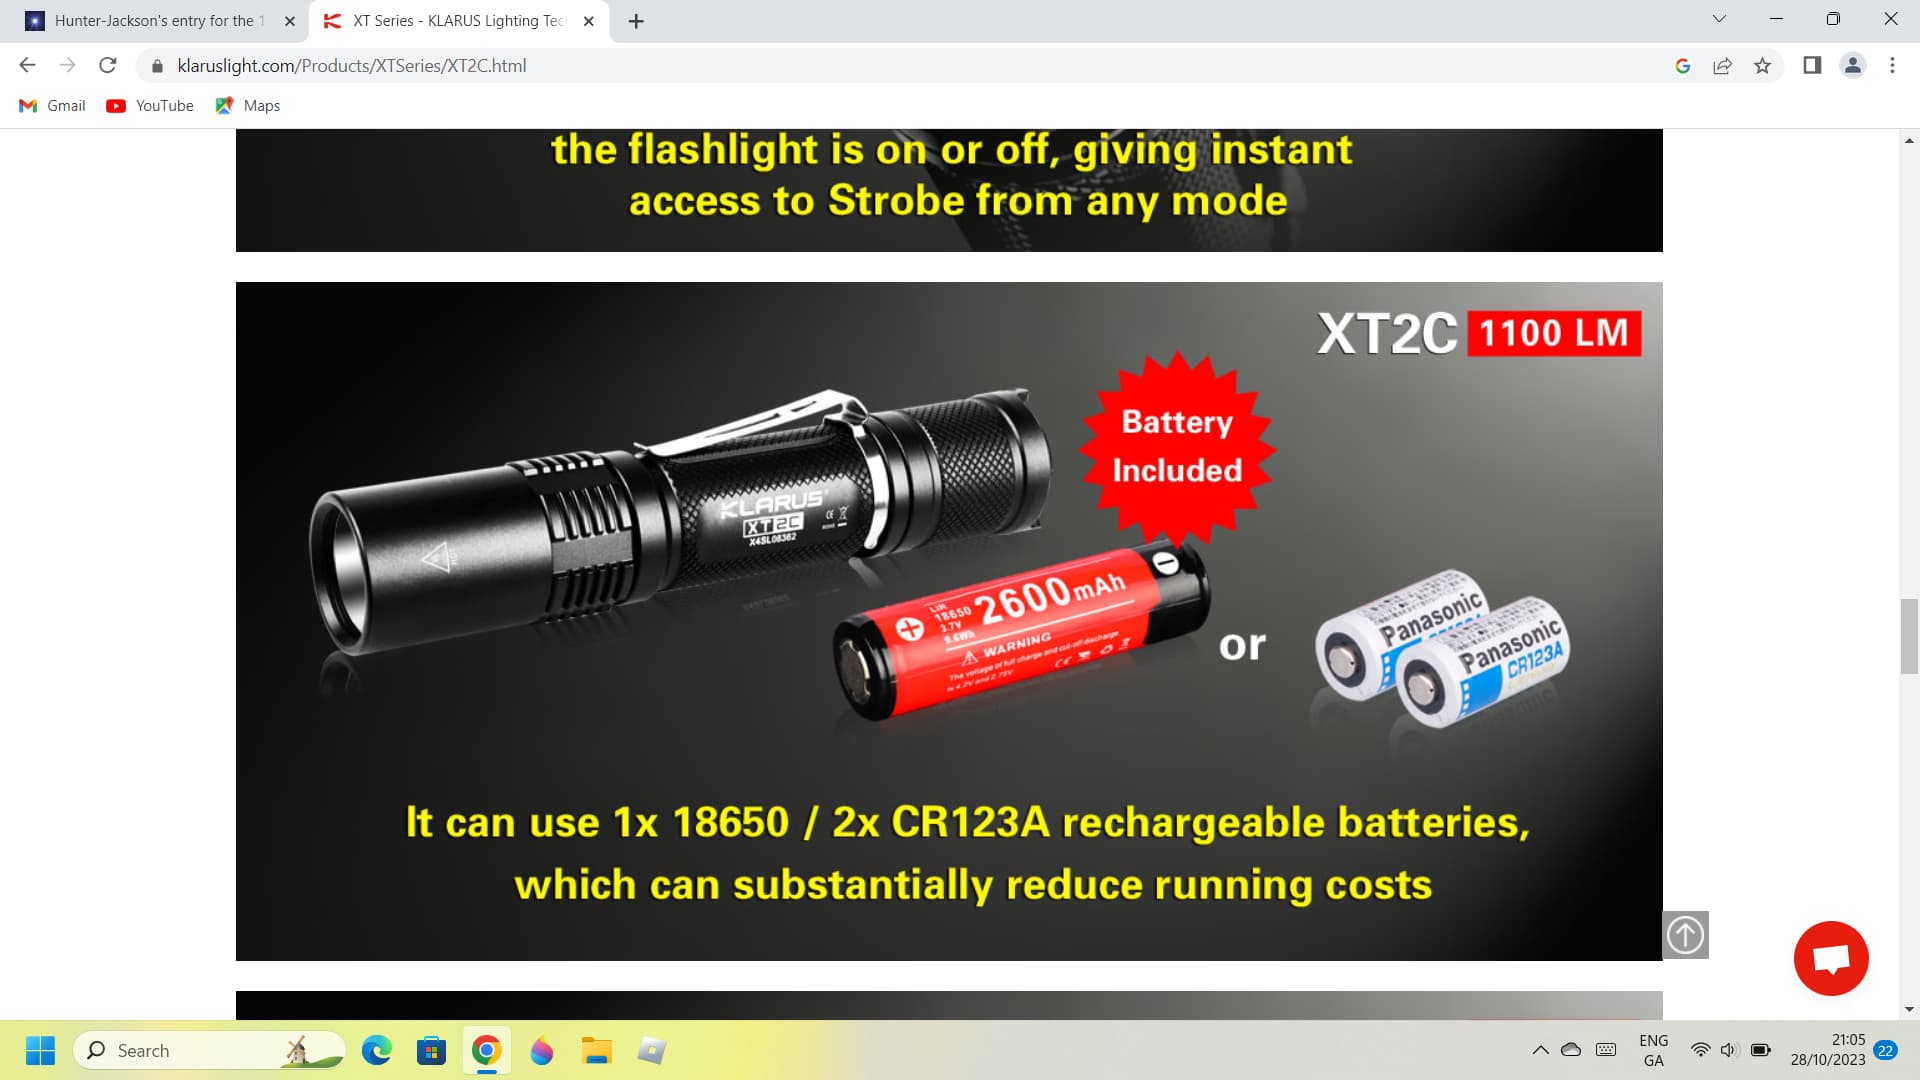
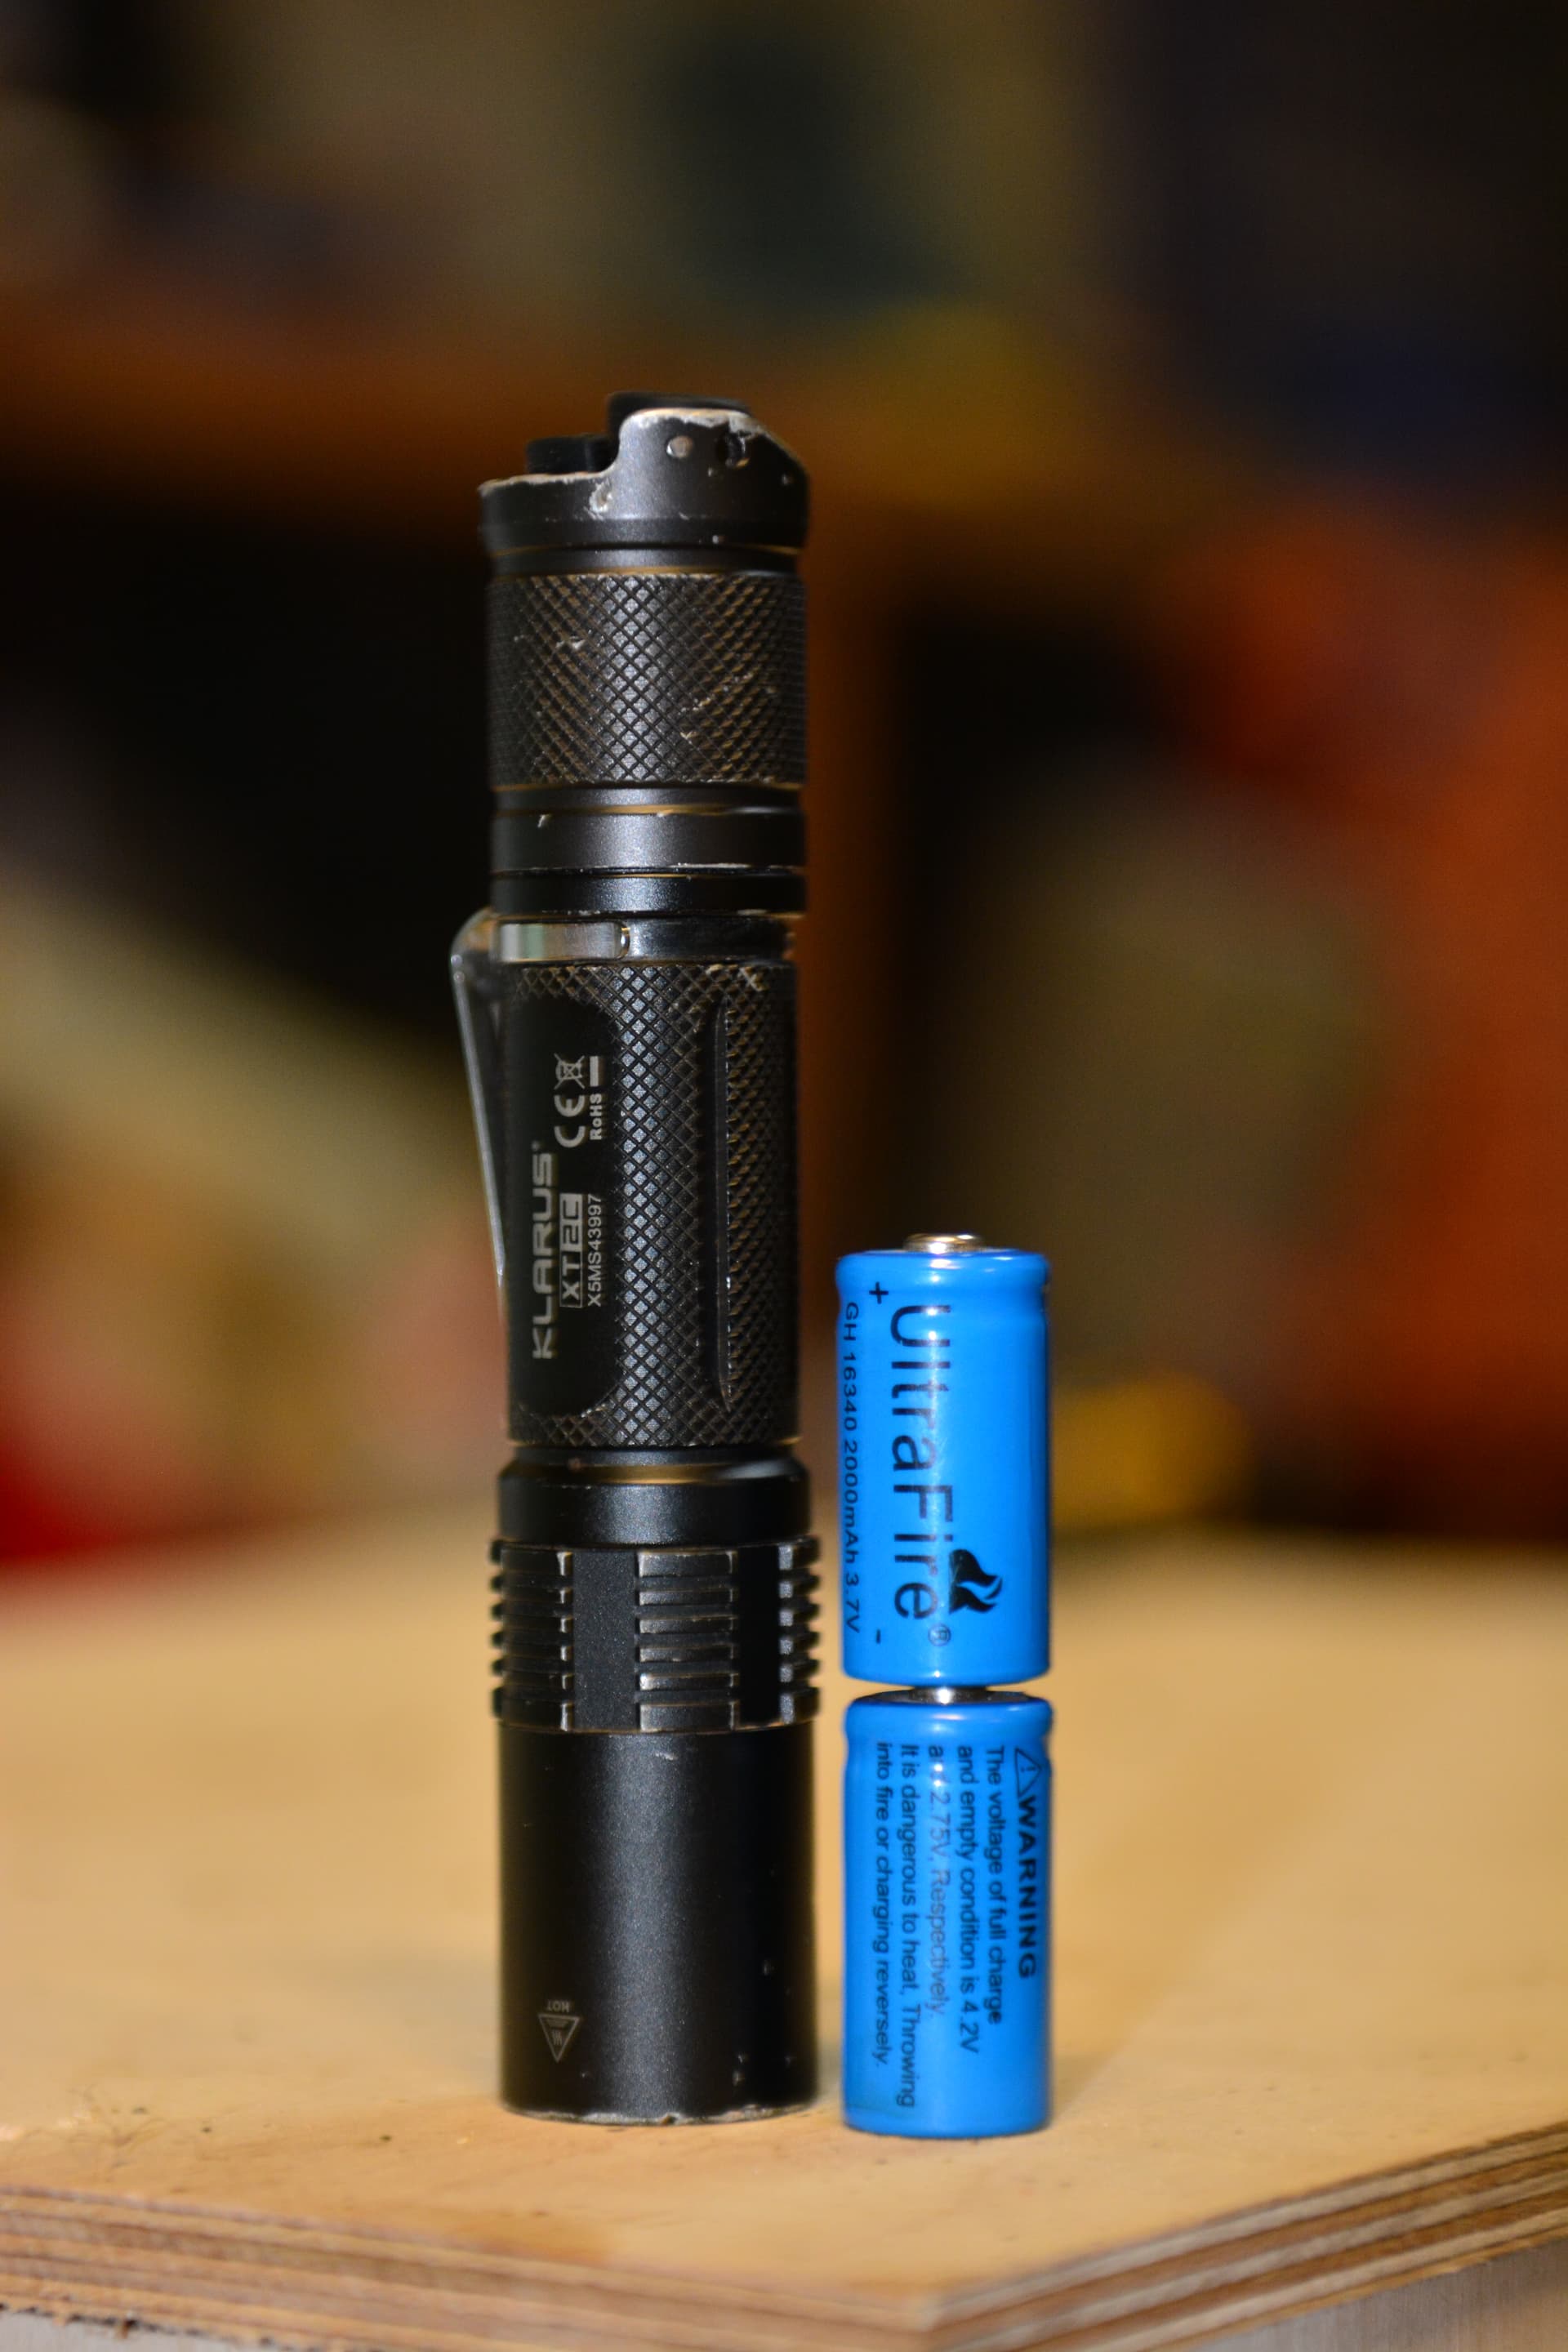
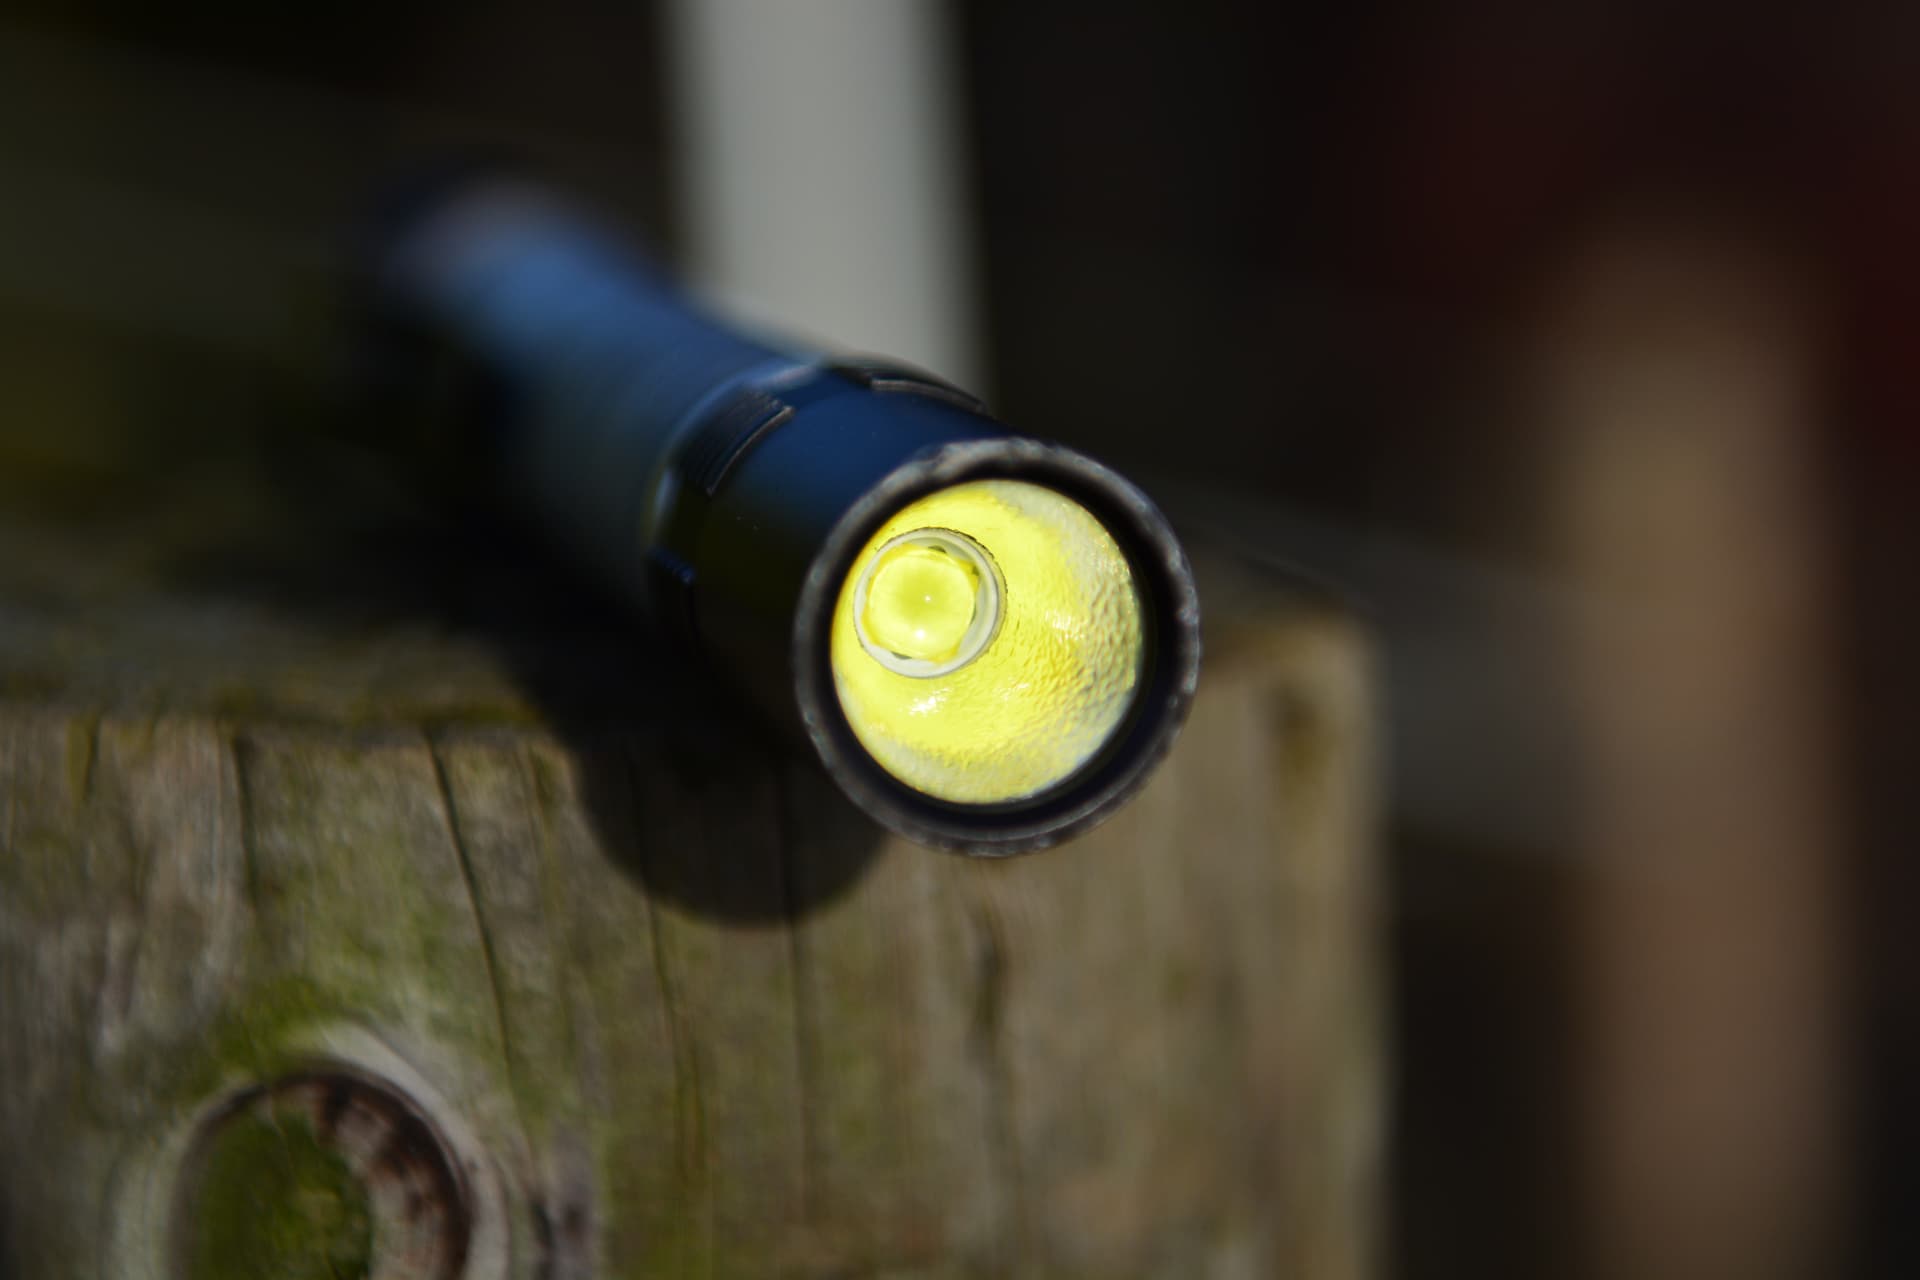
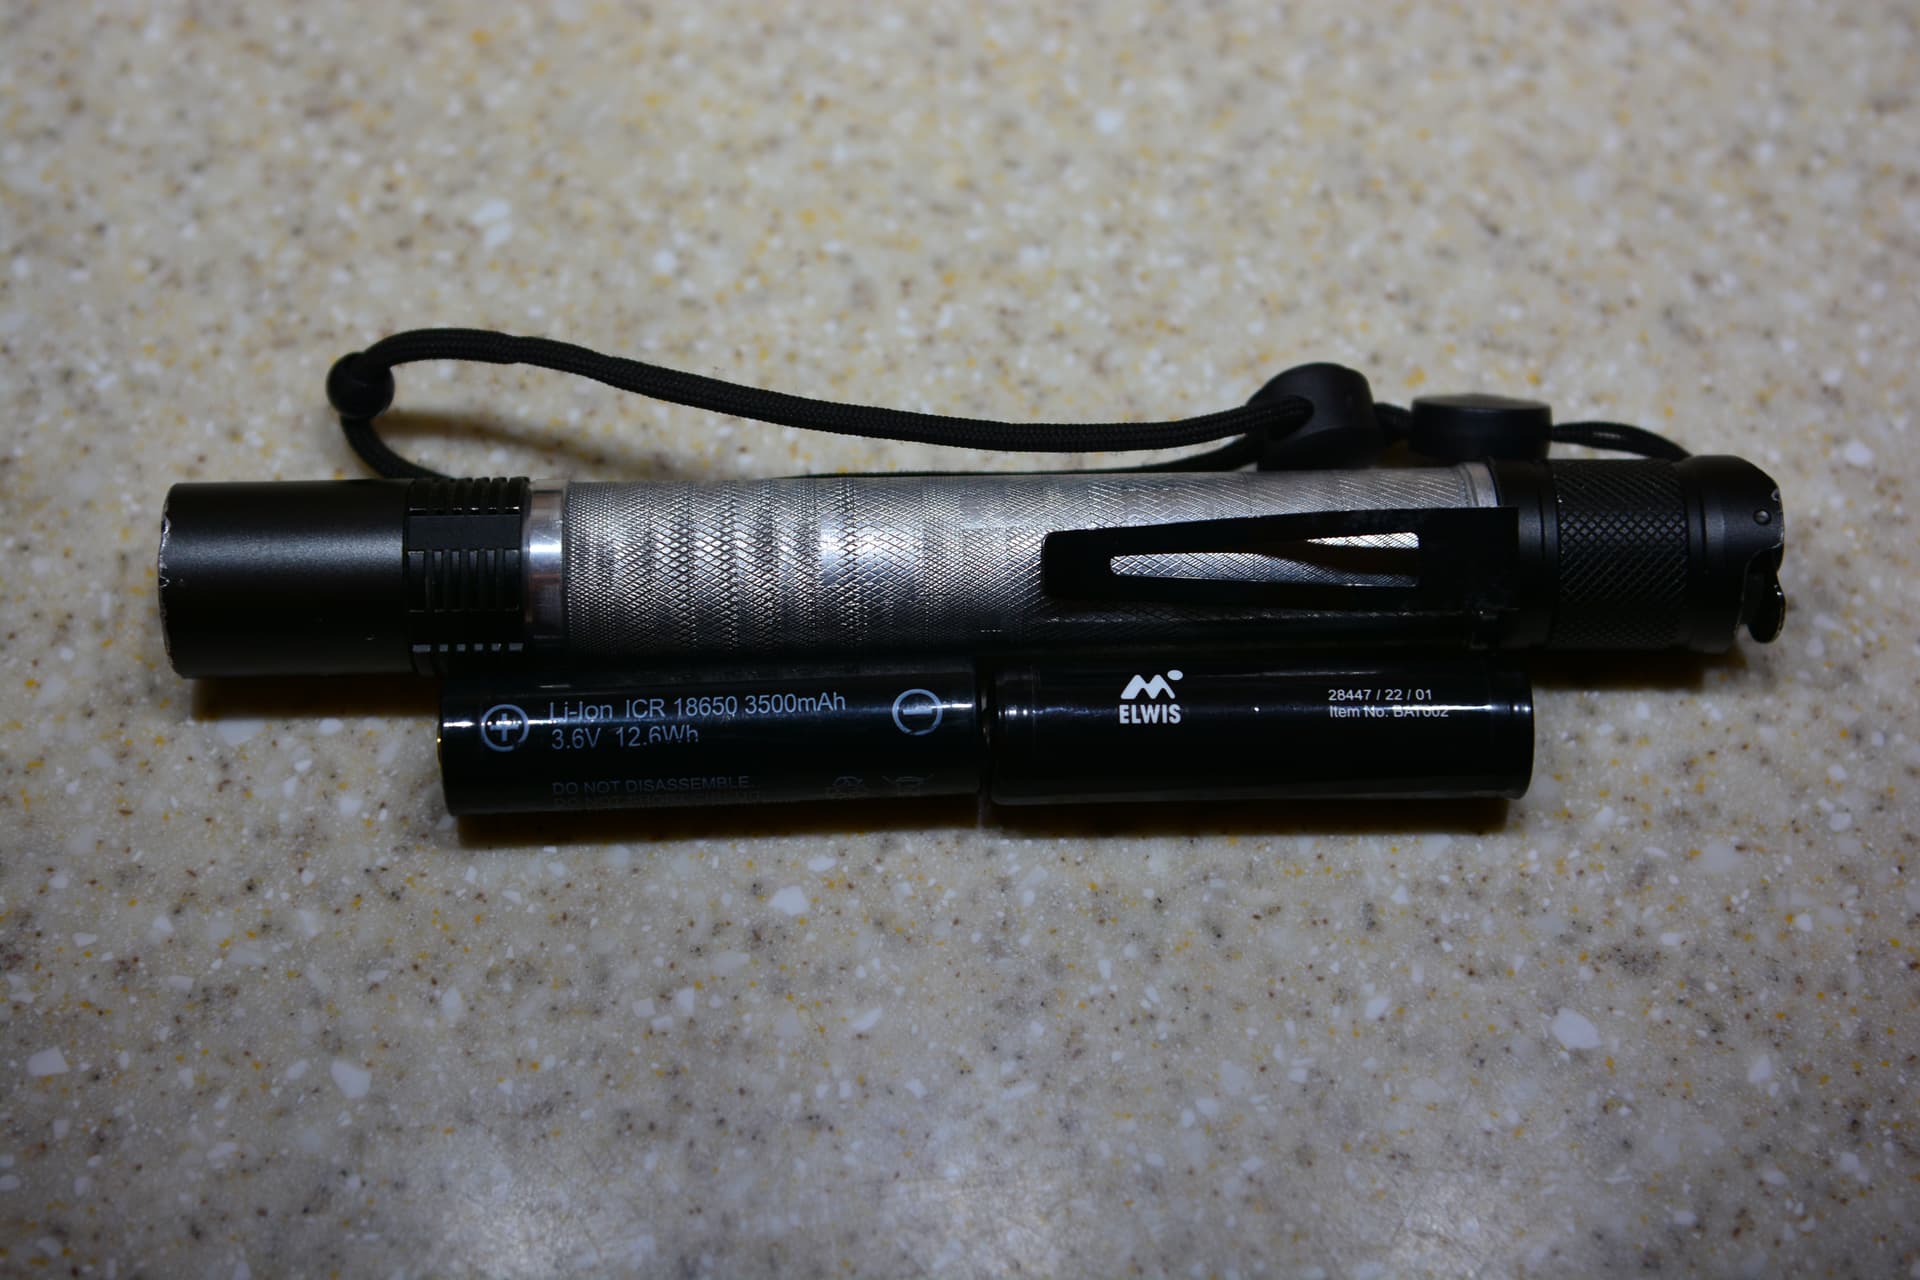
This is my XT2C flashlight^.
I kinda feel a good place to start this build thread is with its backstory: So this was my first ‘‘real’’ high-powered flashlight that runs on lithium batteries and outputs 900+ lumens. I purchased it a number of years ago, although Klarus wouldn’t be as prominent of a brand on the flashlight scene as Imalent or AceBeam, this was my first enthusiast grade flashlight. Without this thing I probably wouldn’t be even here, and stuck with the chinese AAA 1 million lumen junk! it was basically like a flashaholic’s first convoy S2+ for me, except maybe overpriced. One day, it suddenly stopped working and curiosity got the better of me and I opened up the glued head to find the LED was blown.
Anyway I better stop ranting on about how great this flashlight was when it was functional because I’ll bore everyone!
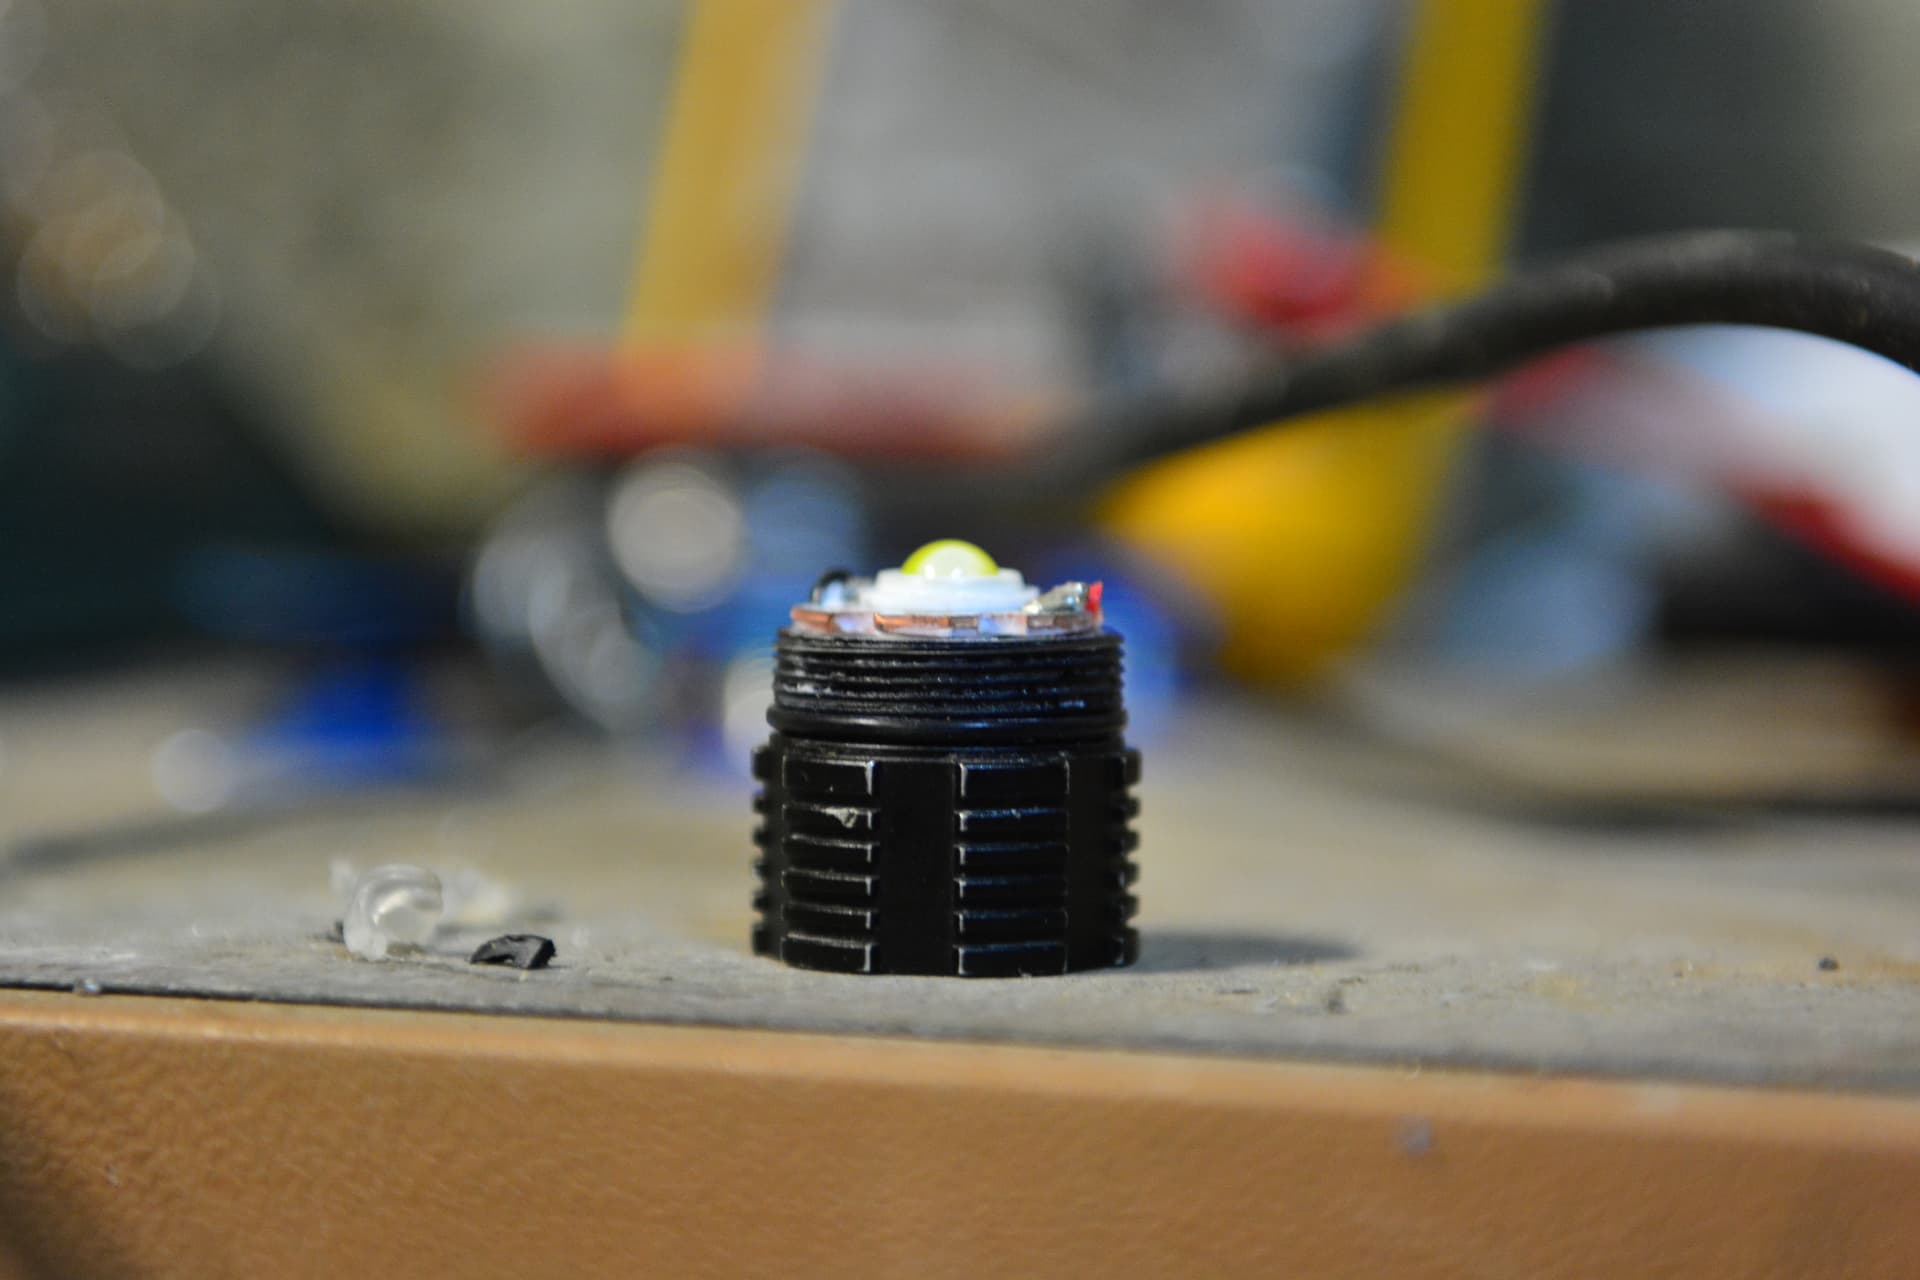
Today a shipment arrived for me which contained some parts, but I’m going to focus on the XHP70.2 emitter: mine is the 6500K version but this is just my personal preference as I like cool tints, alongside with the corresponding driver, this will be the heart of my build. And yes, you read right; this is an XHP70.2 flashlight so expect some serious power upgrades. I chose this emitter because I just didn’t get that same excitement from clicking the switch as I used to. Also in my shipment I ordered a cree XP-E2 infrared LED, and a chinese 10000K led but these are for other projects and completely irrelevant.
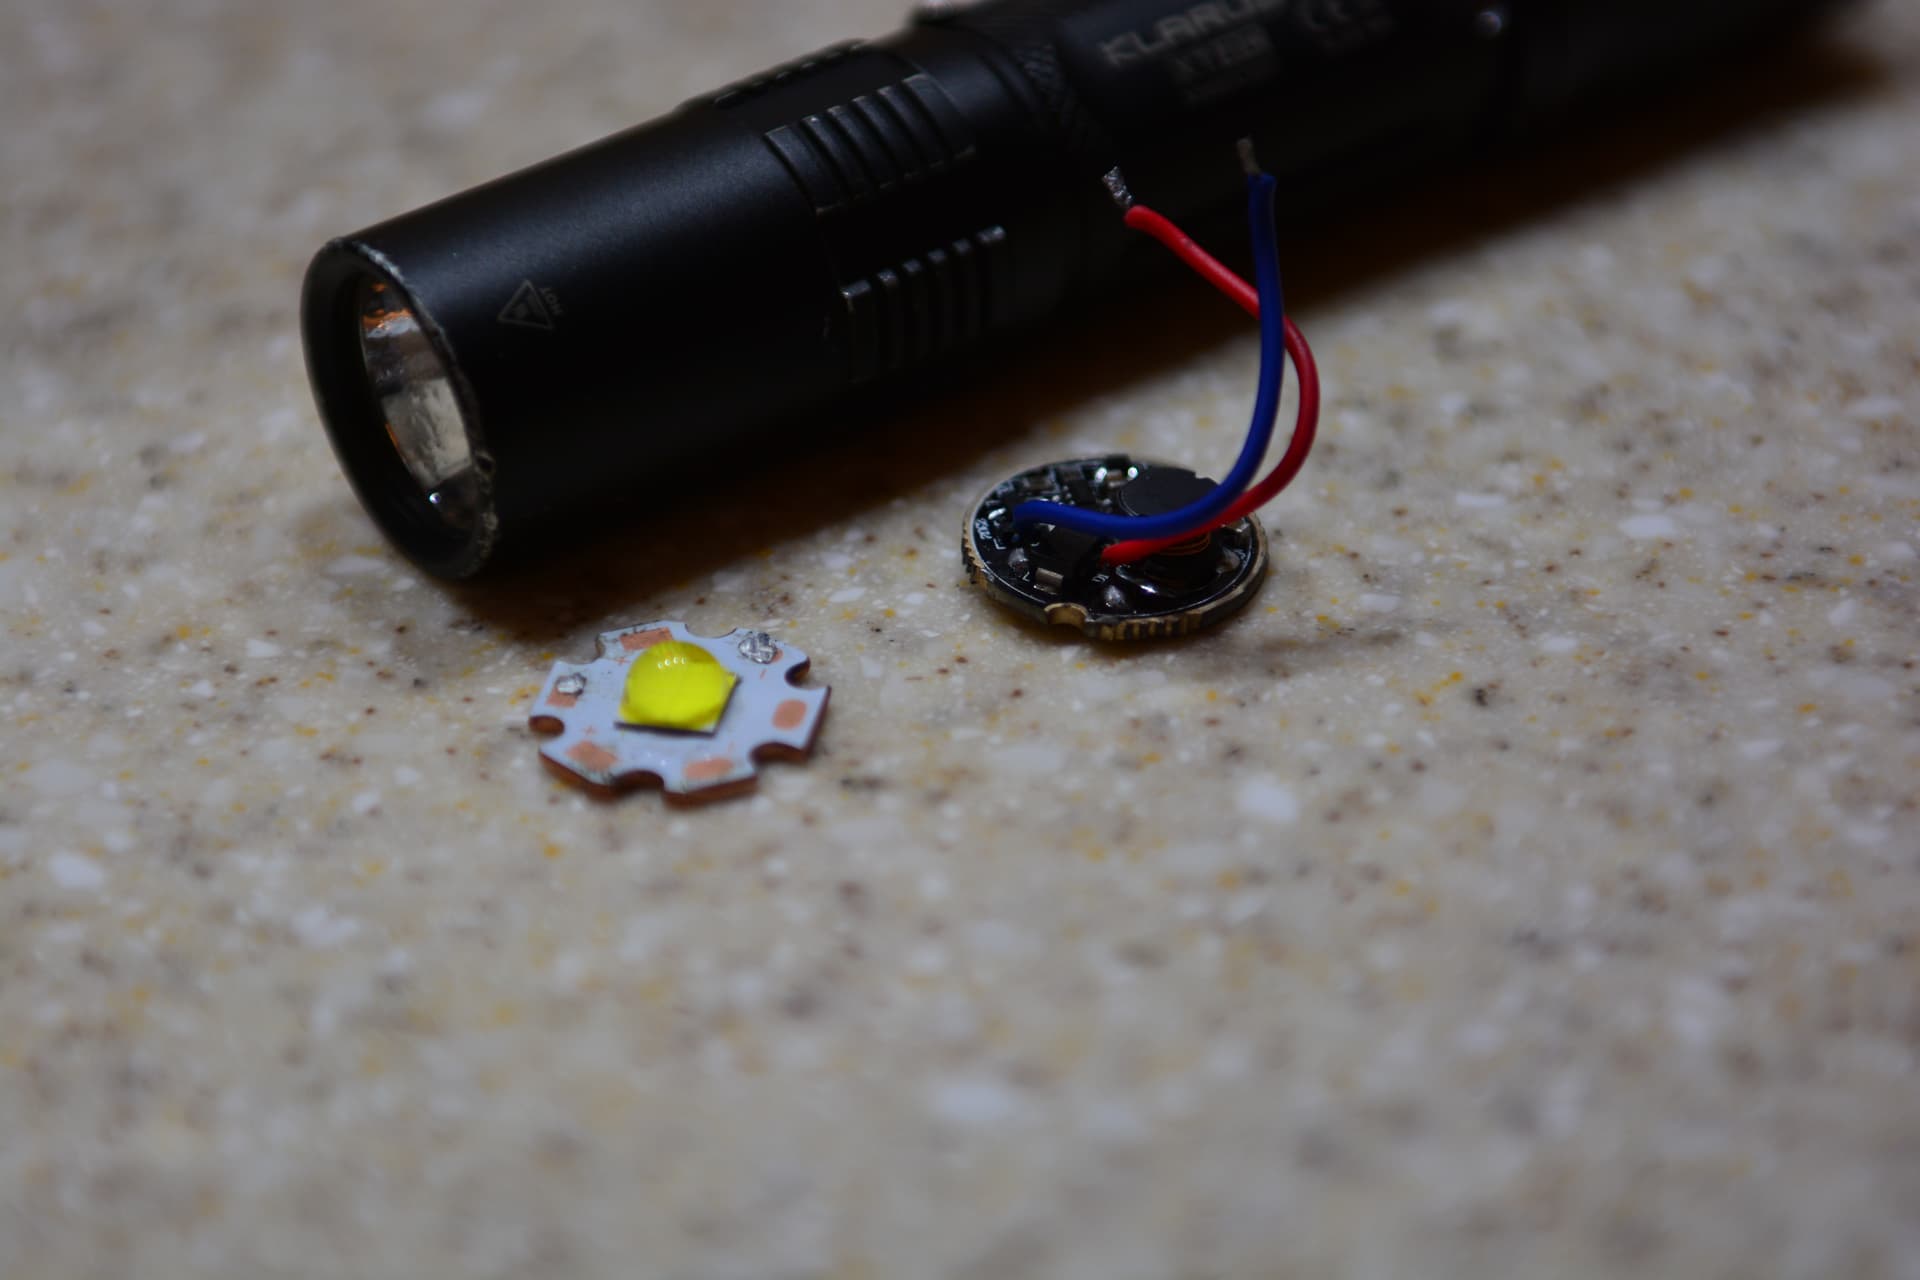
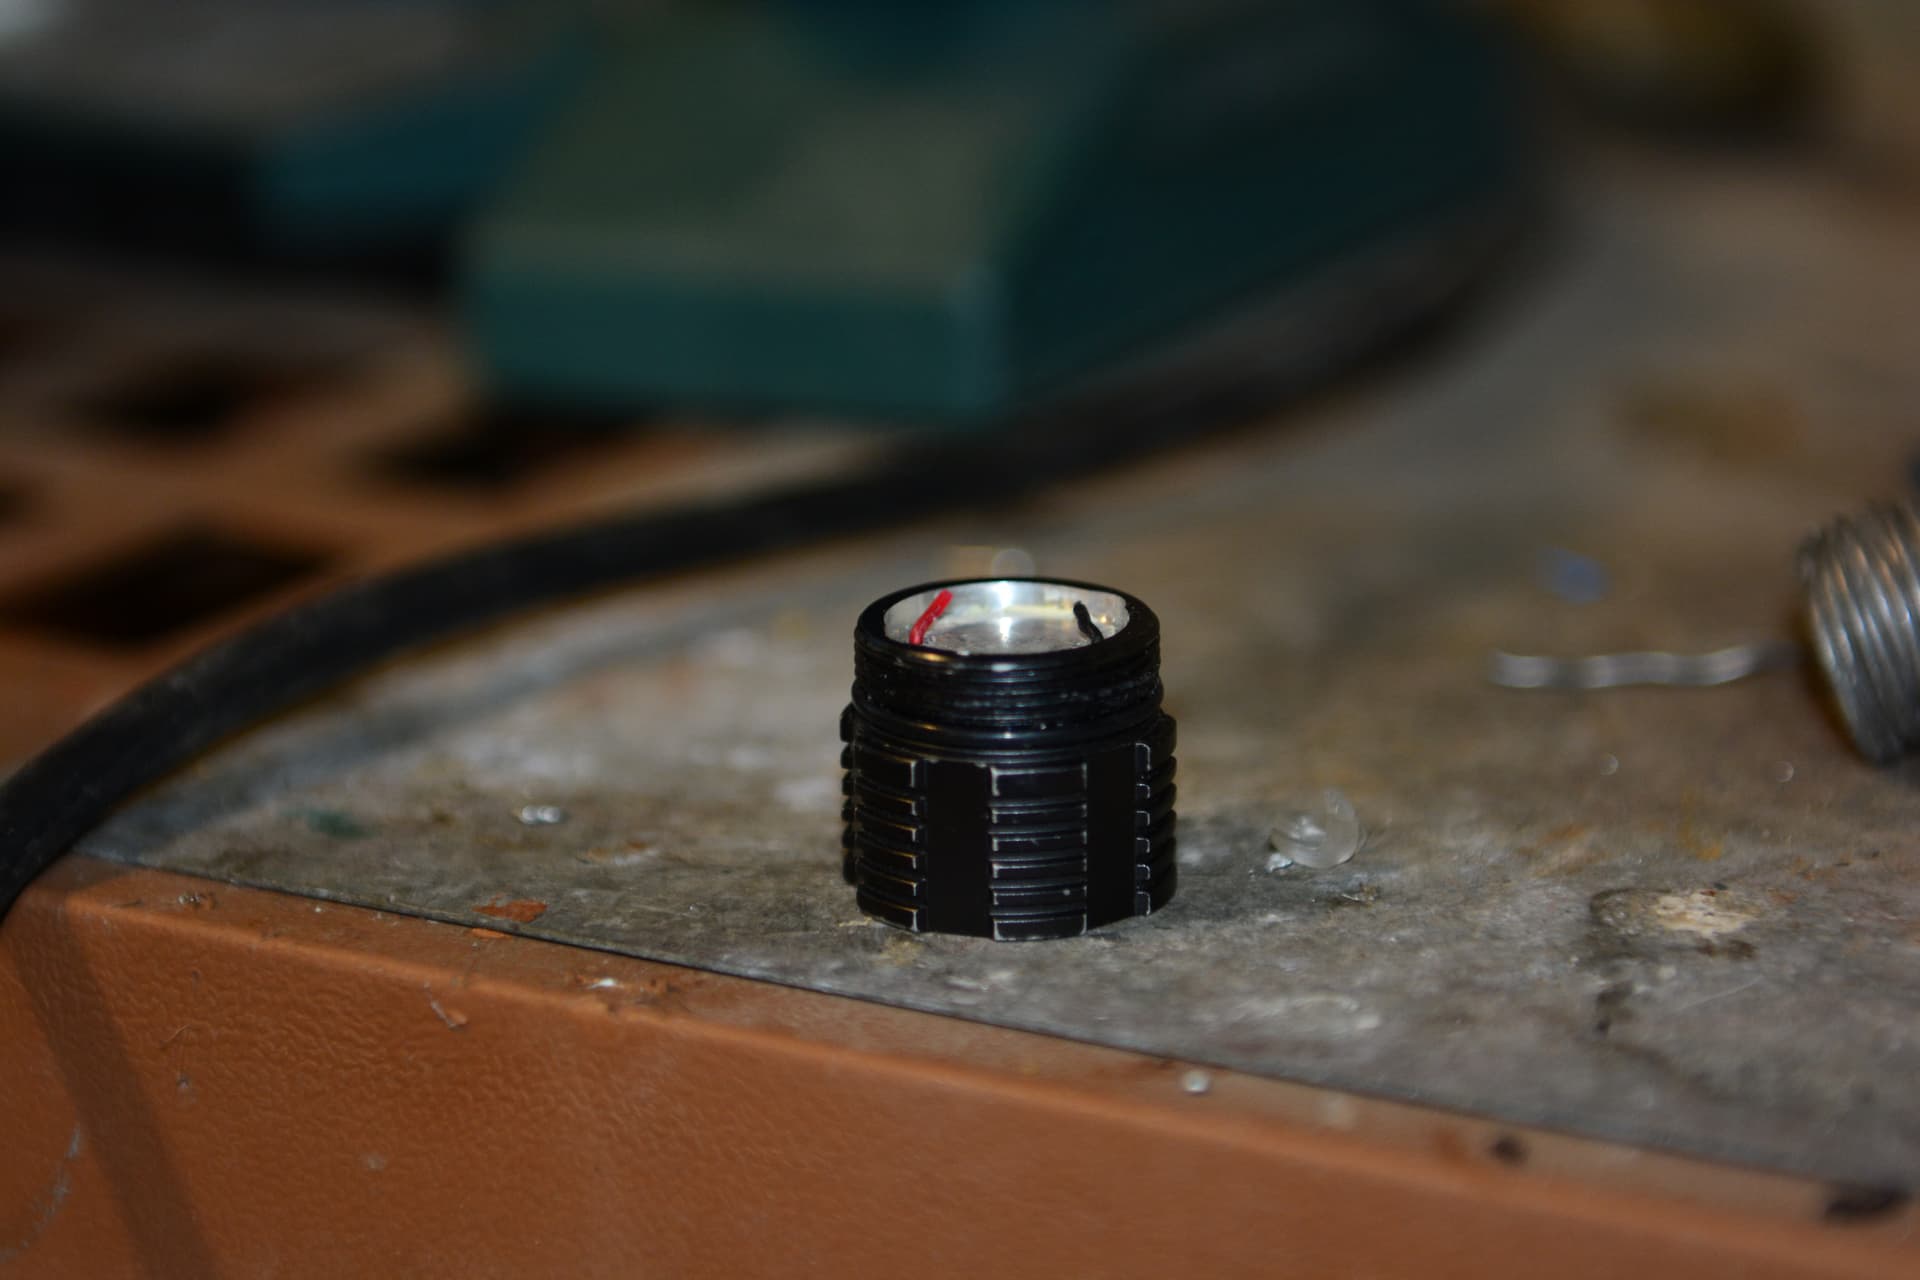
Here I have the LED and driver combination ready for installation but this will probably be in the next edit since I have to figure out how to modify the flashlight head. I definitely need to enlarge the hole in the reflector. (ignore the solder marks on the MCPCB as this is where I attached test leads to see if my emmitter was functional)
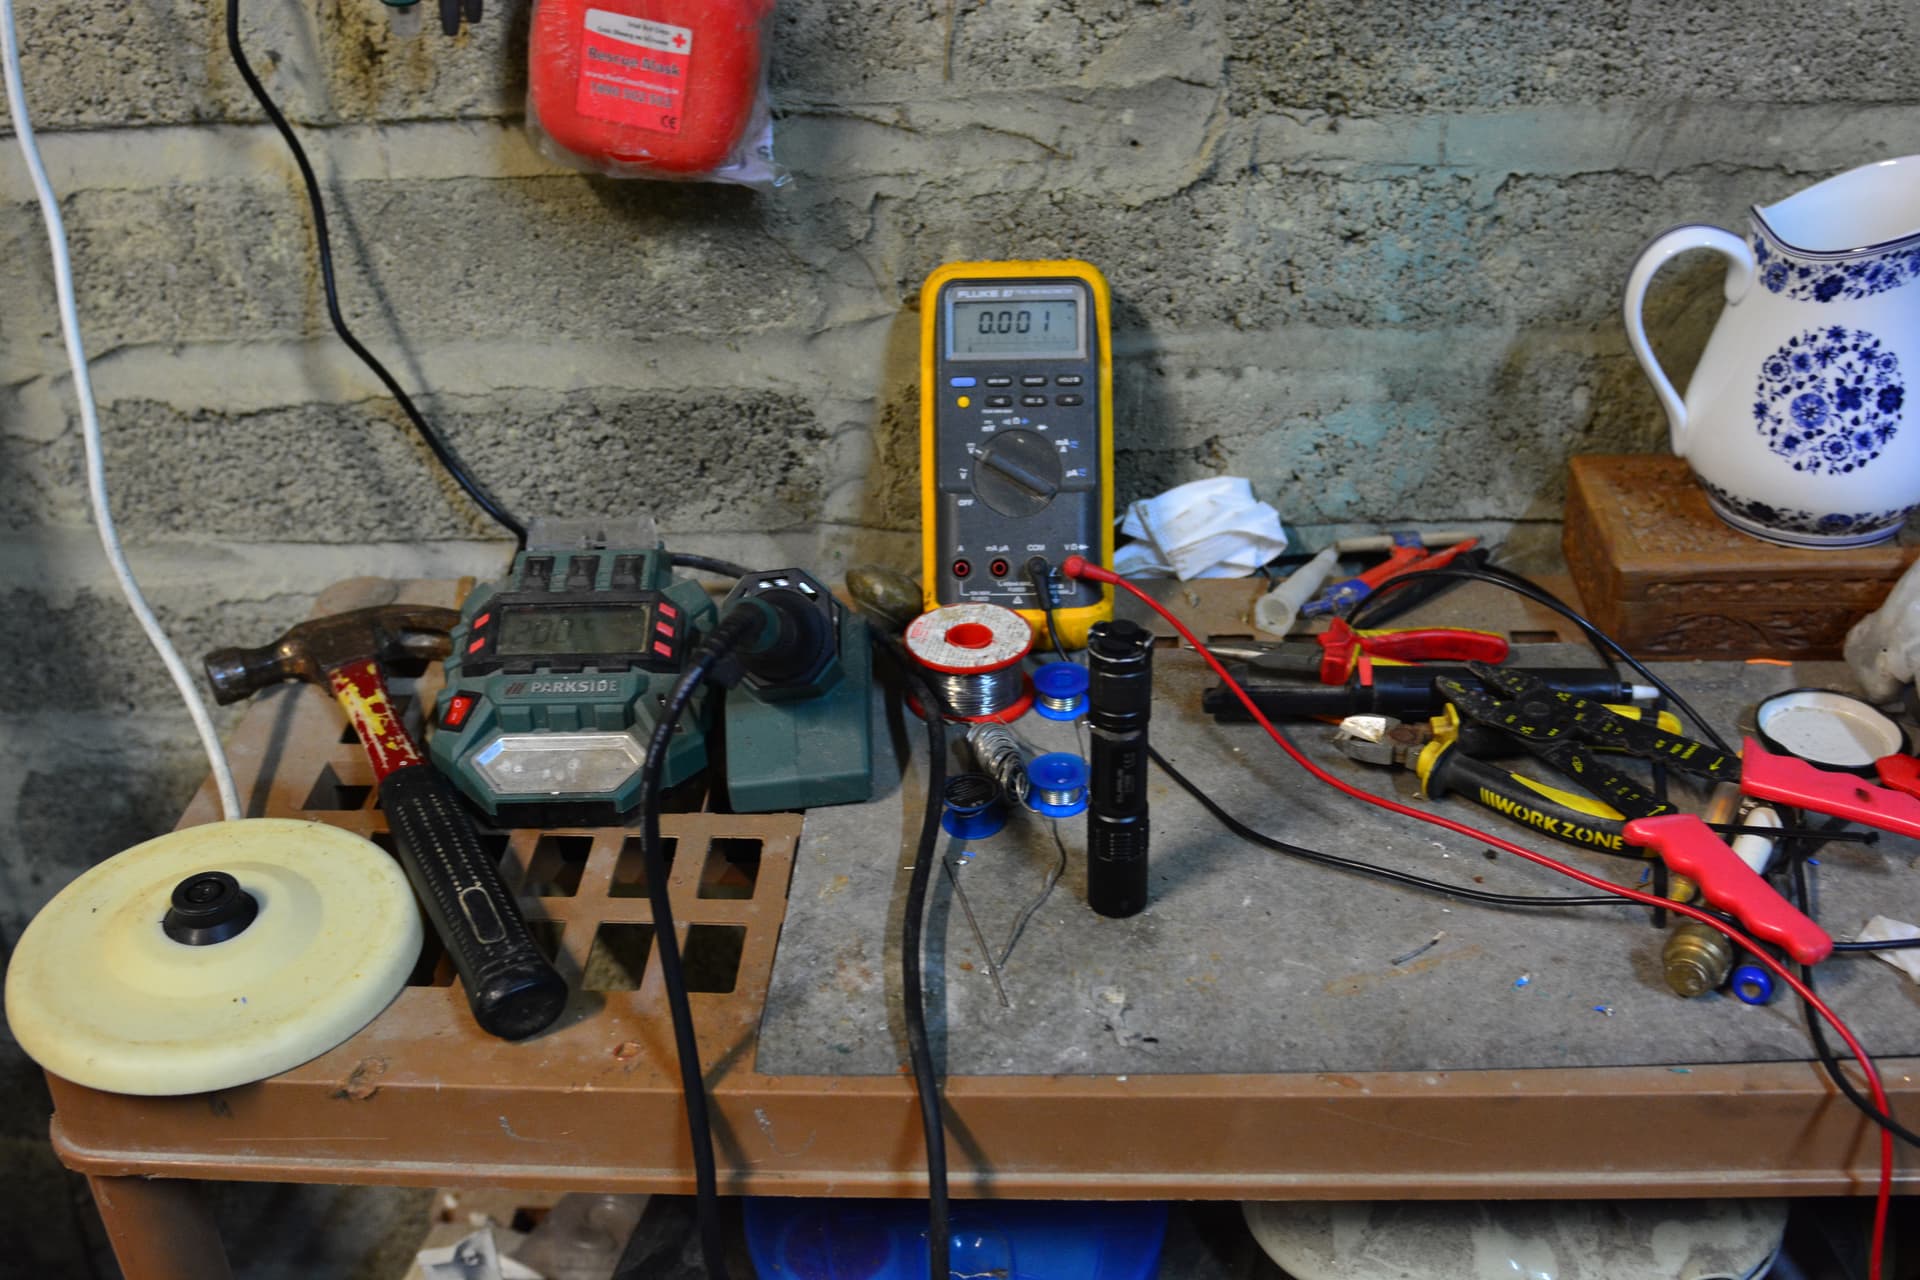
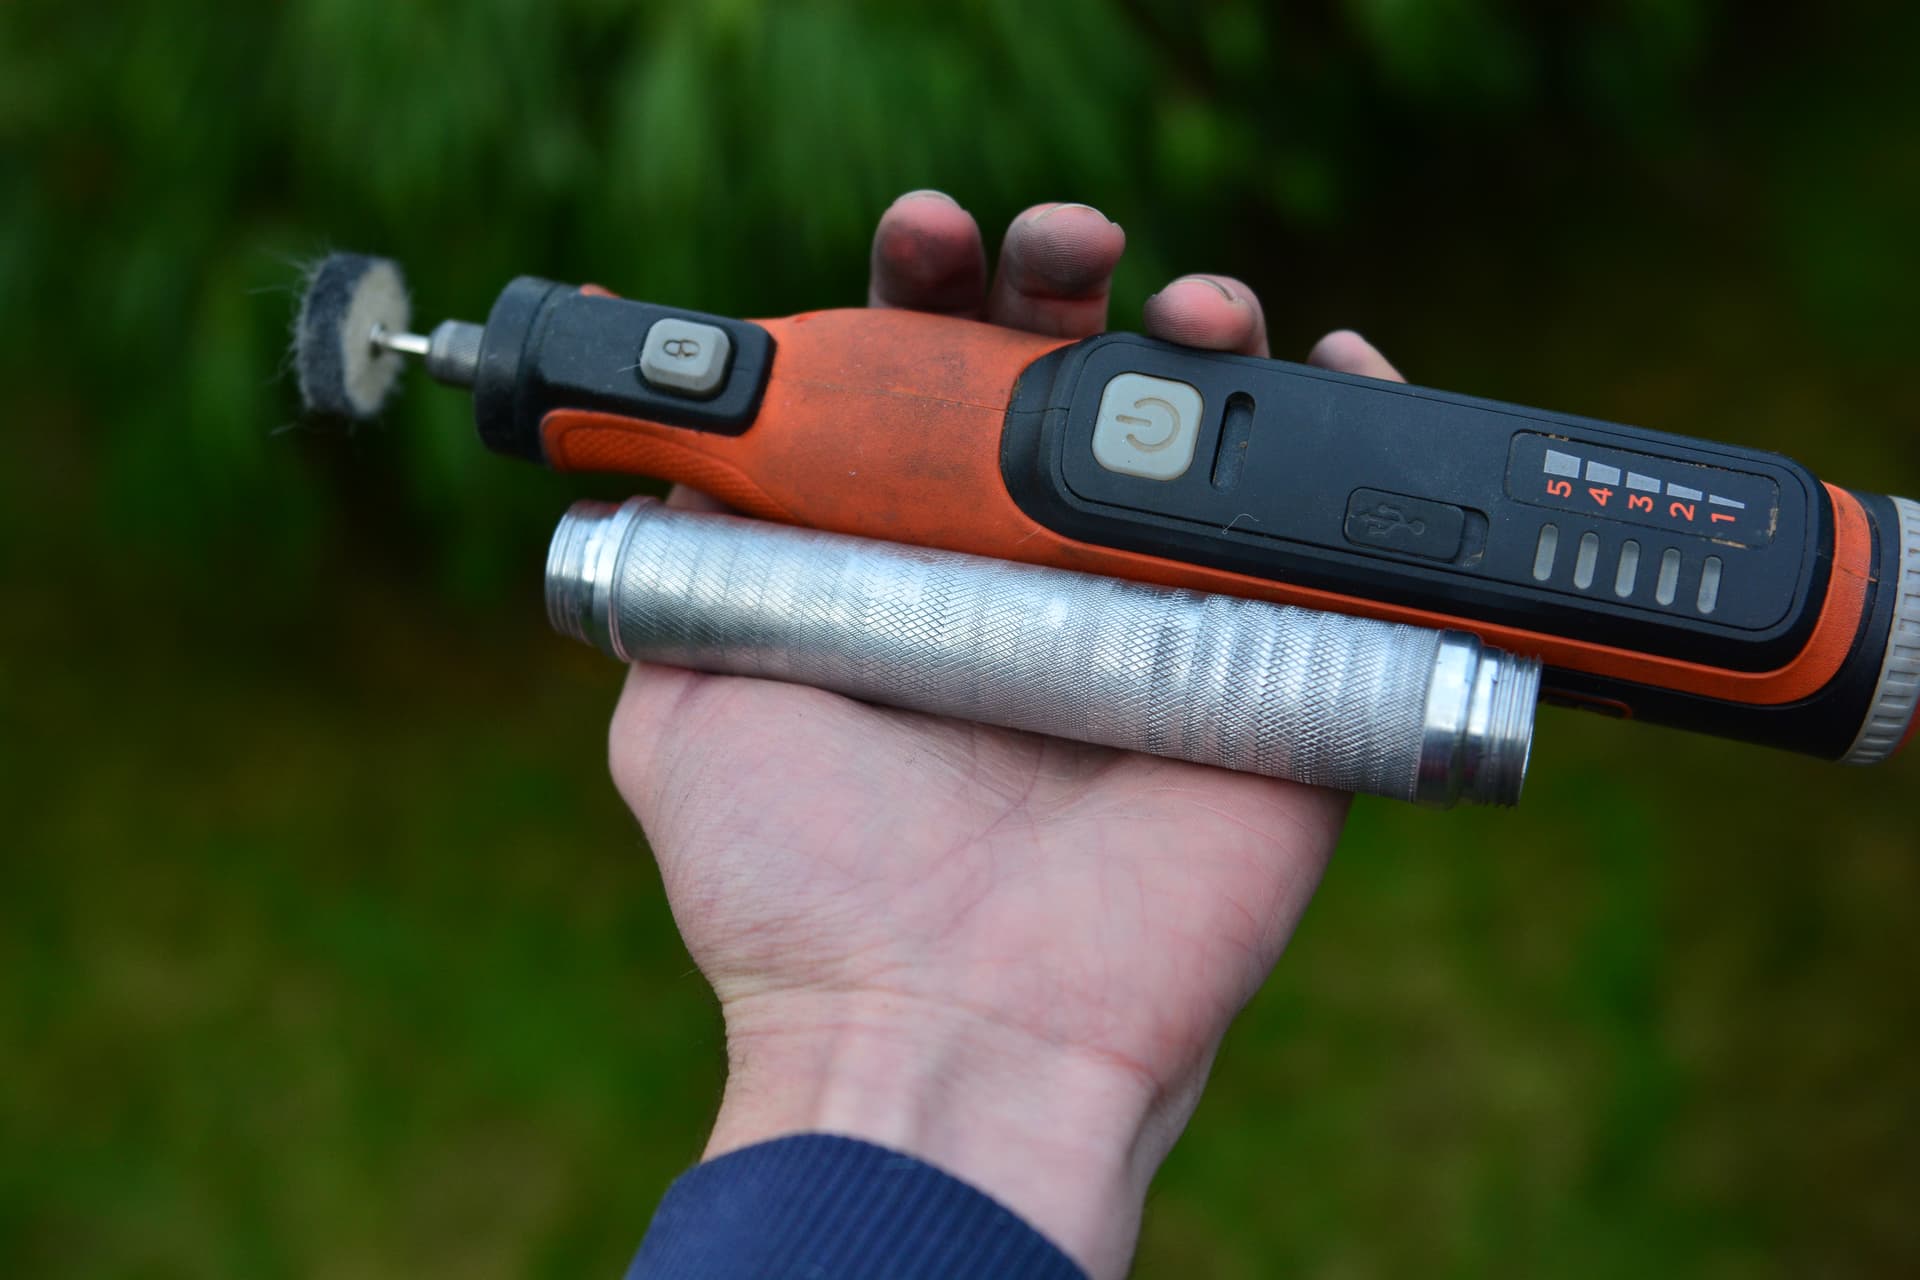
New update: Here I have laid out my tools in order to begin modding the flashlight!
I decided it would be a good idea to actually get the more ‘structural’ parts of the flashlight put together, as in modify the flashlight head in order to be able to see how this will fit together.
I got a few tips in the comments about my driver and battery combination. Unless I get a boost driver, I will need two cells of lithium battery to run the flashlight. The original flashlight driver in the head appears to be glued in or otherwise difficult to remove, so Id most likely need to use brute force to get it out. I thought about the idea of leaving in the original driver and switch combination because I’m a huge fan of the dual switch tactical UI.

I came across some piece of information in the klarus website which states the Xt2c can run off 2 CR123A batteries in series. Now I don’t have any CR123A’s on hand but I do have 16340’s which are basically the rechargeable version.
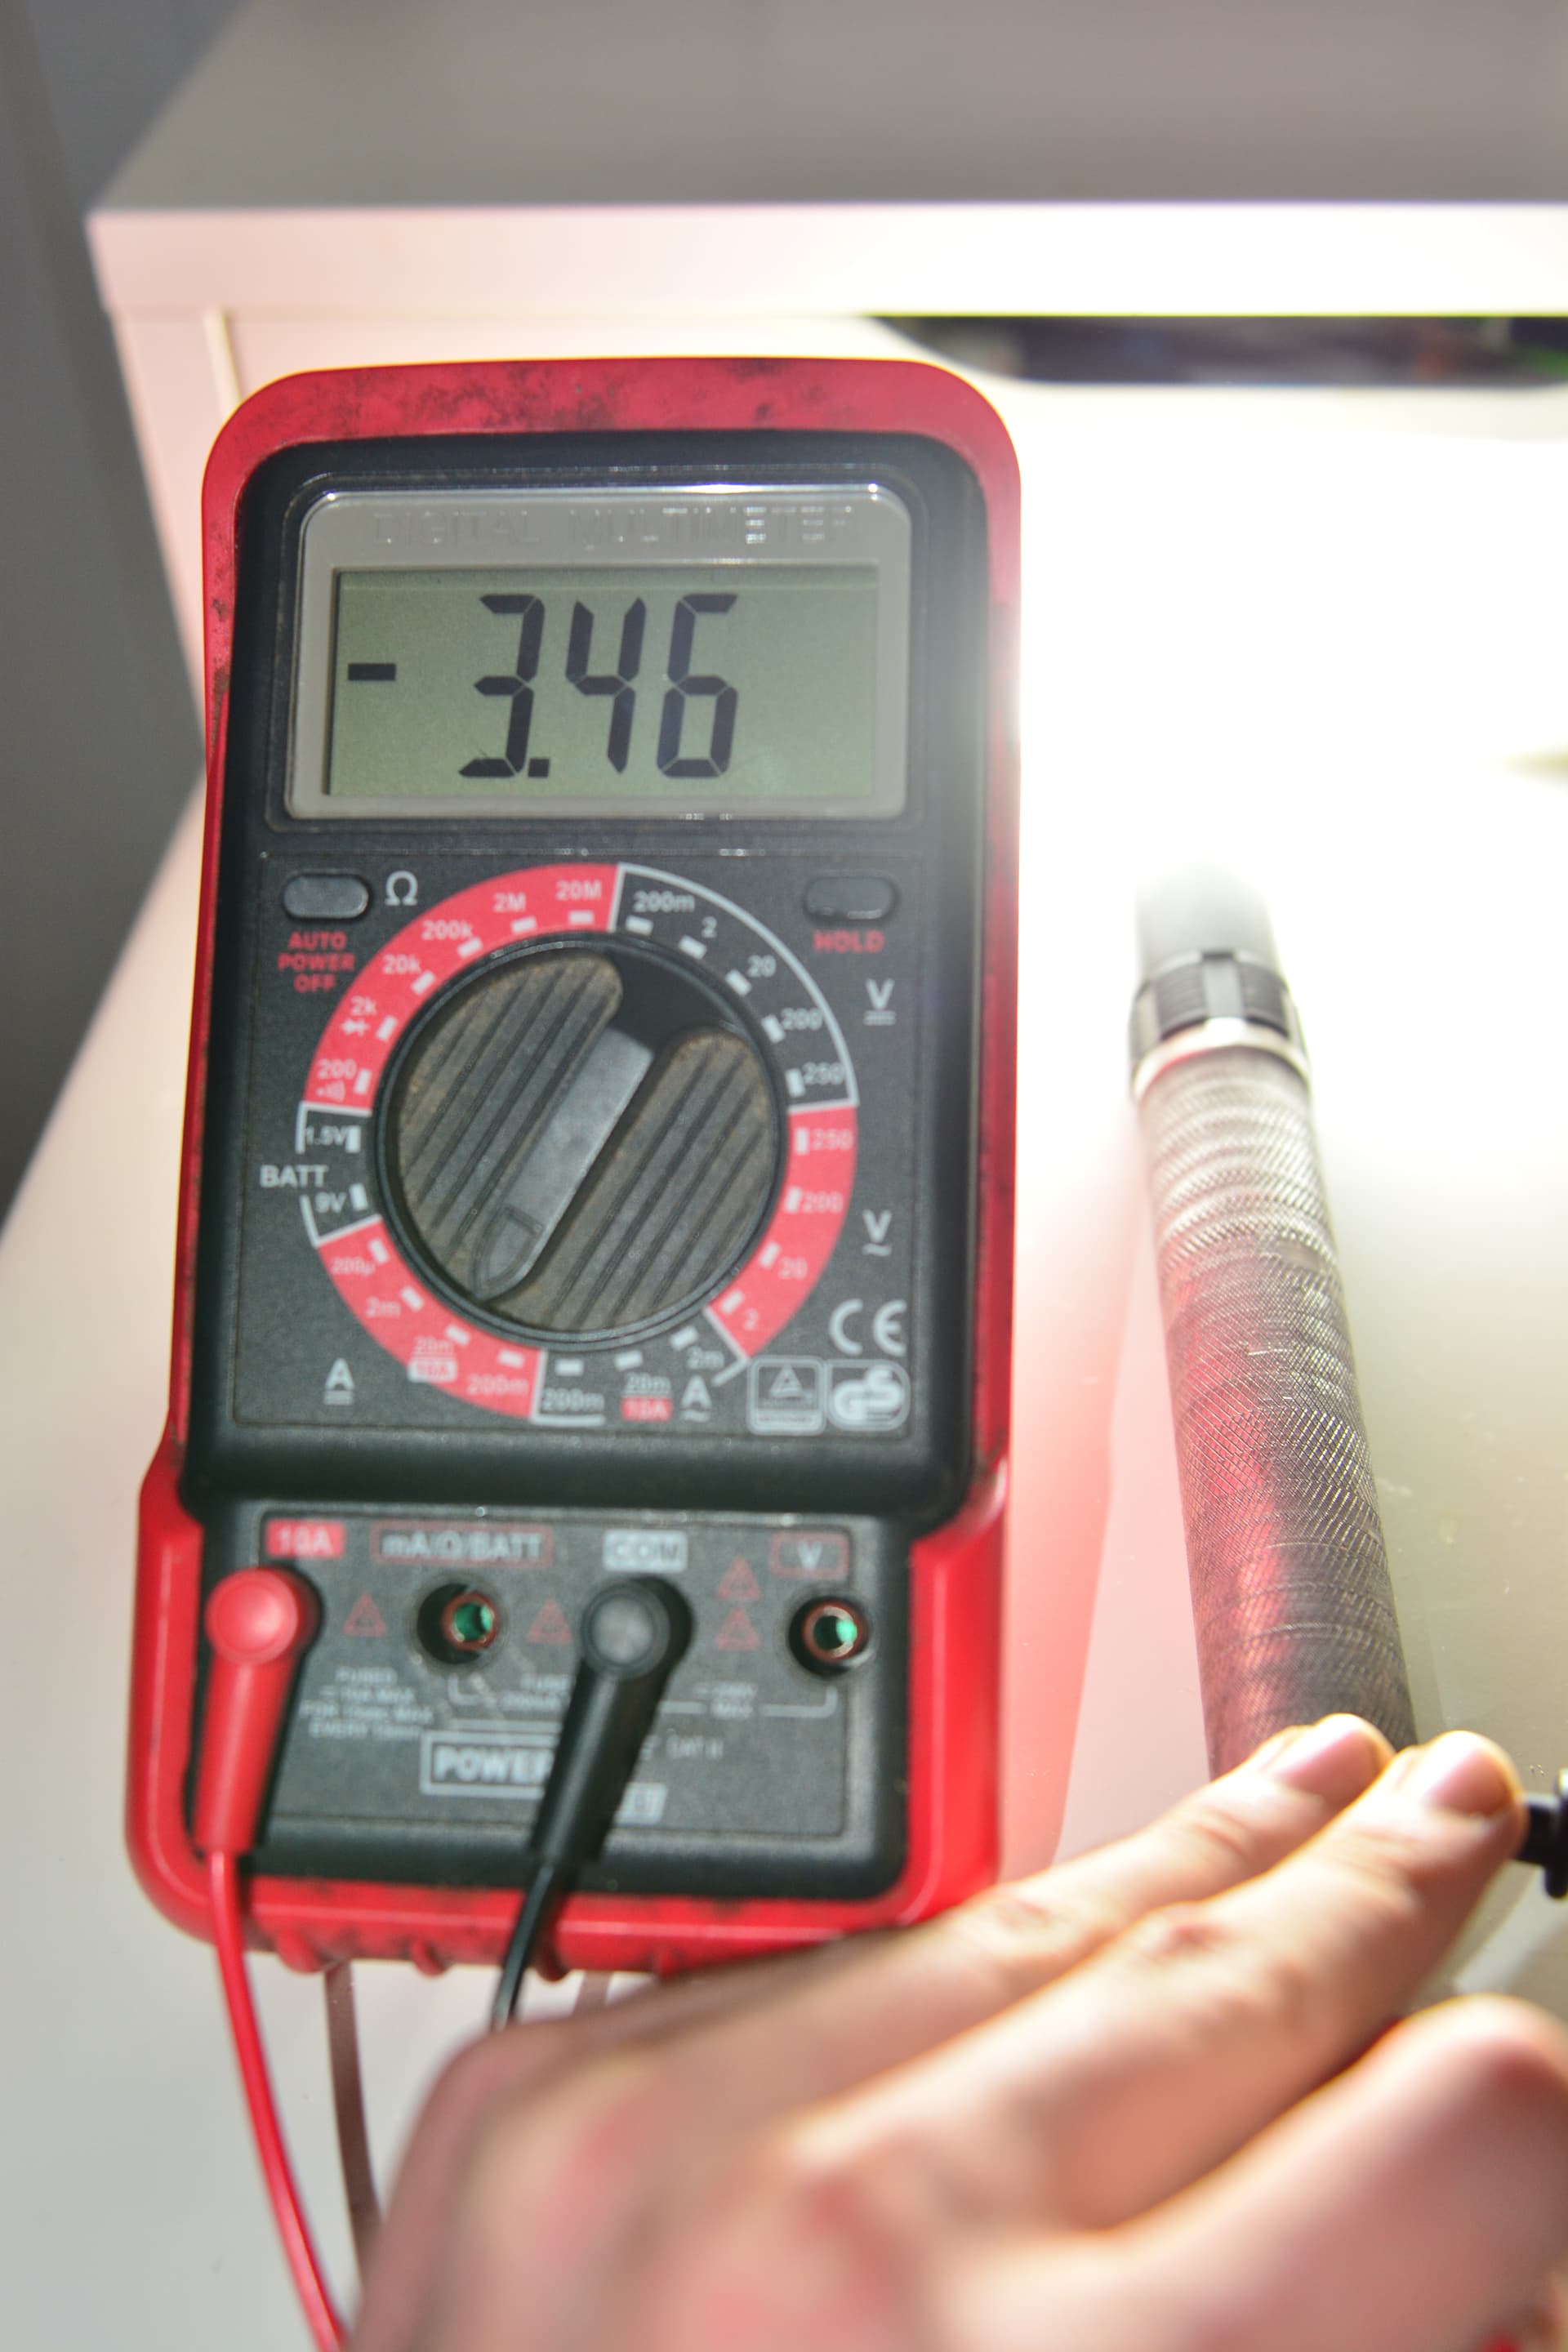
I was thinking it wouldn’t hurt to try wiring the LED to the original driver. Firstly, just as an experiment I inserted the two 16340’s in the flashlight, I desoldered the original faulty led and attached the 2 driver wires to my multimeter and I was happy to see a reading of around 6v (my new led is rated at 6v).
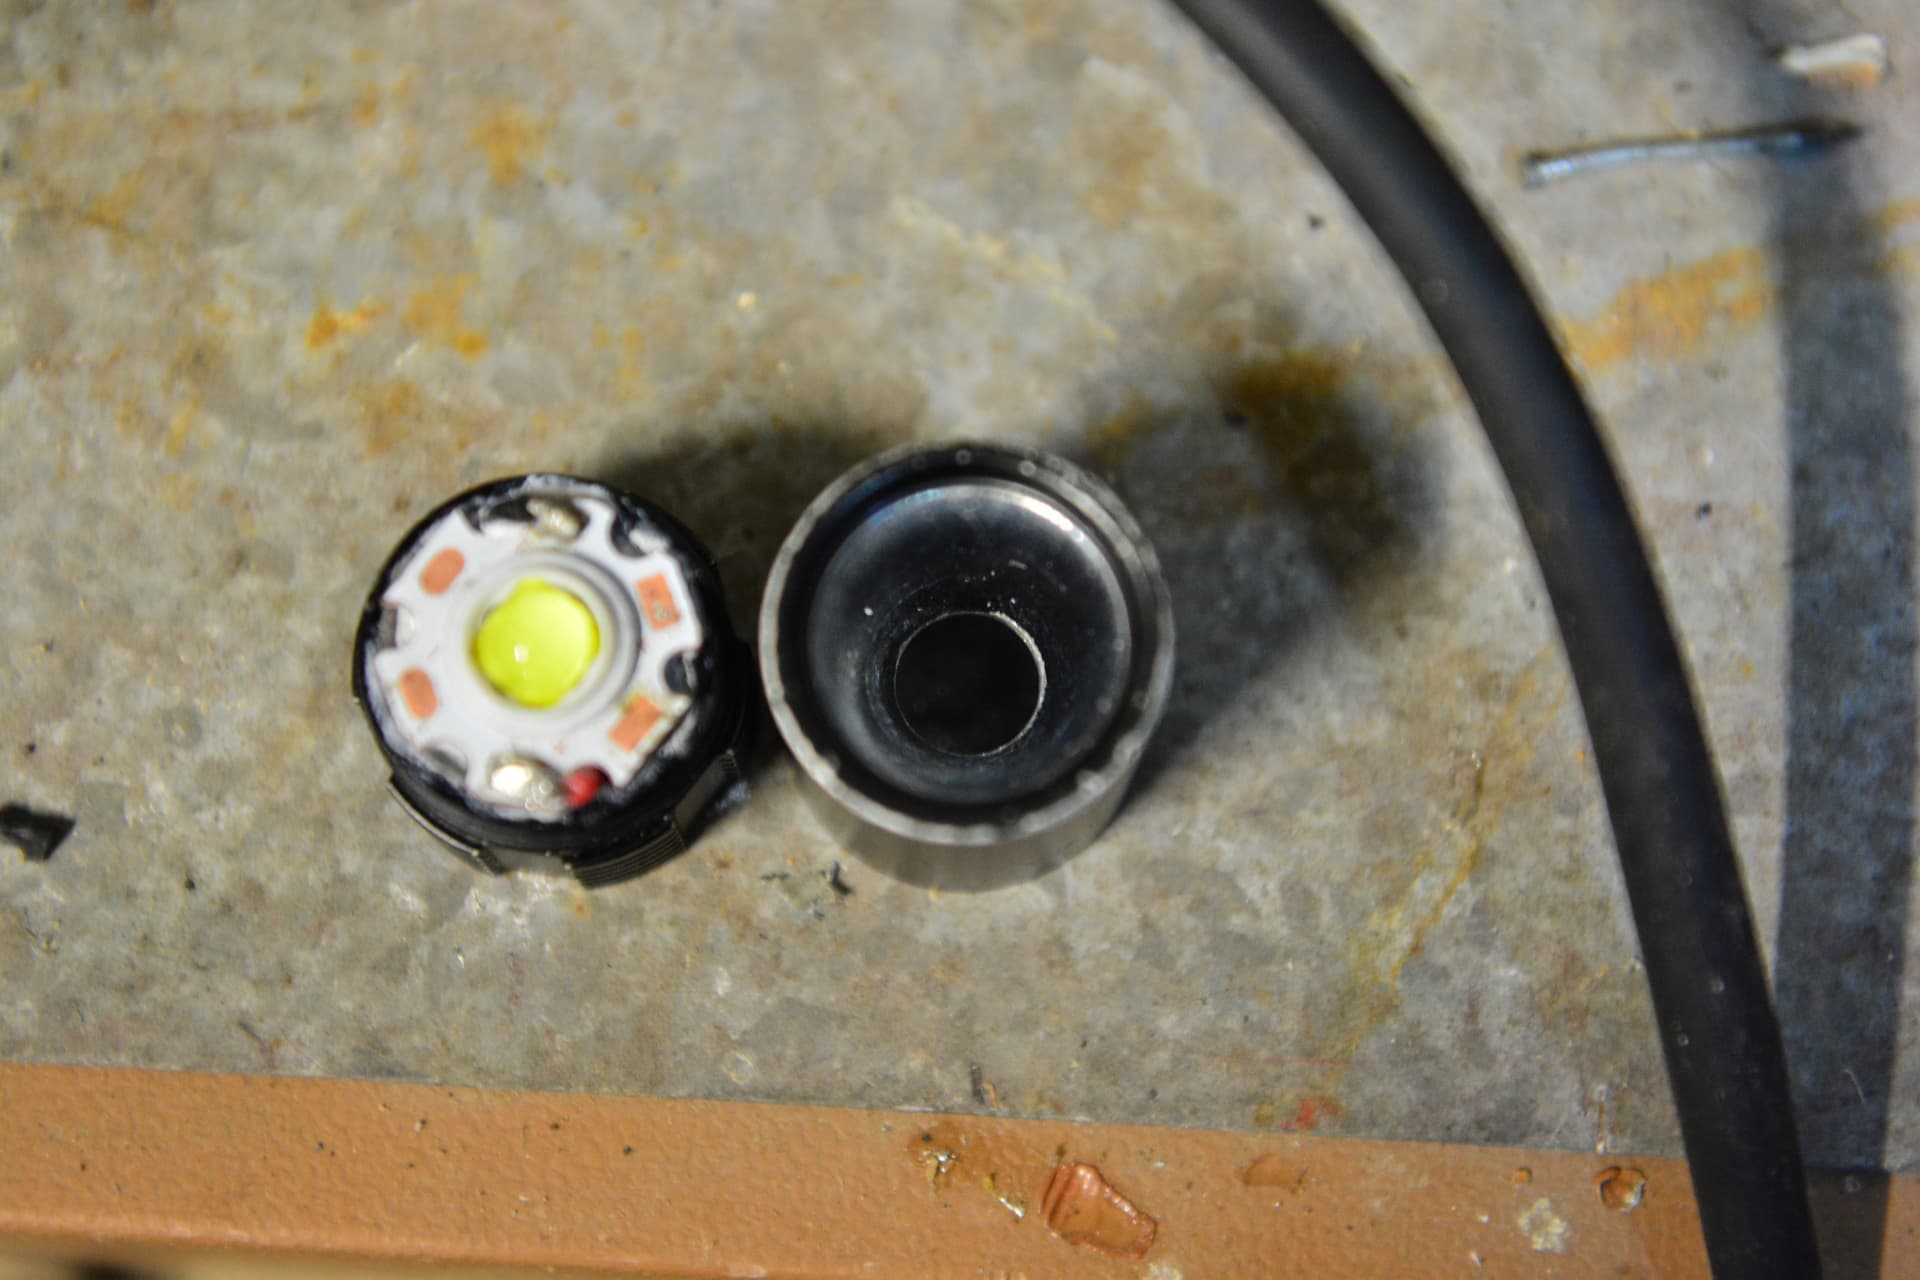
Then I wanted to try assembling the flashlight: the new Led and MCPCB was way too large and thick to close the flashlight head, even after drilling the reflector, so I sanded down the flat part of the flashlight’s heatsink with a Dremel style rotary hand tool.
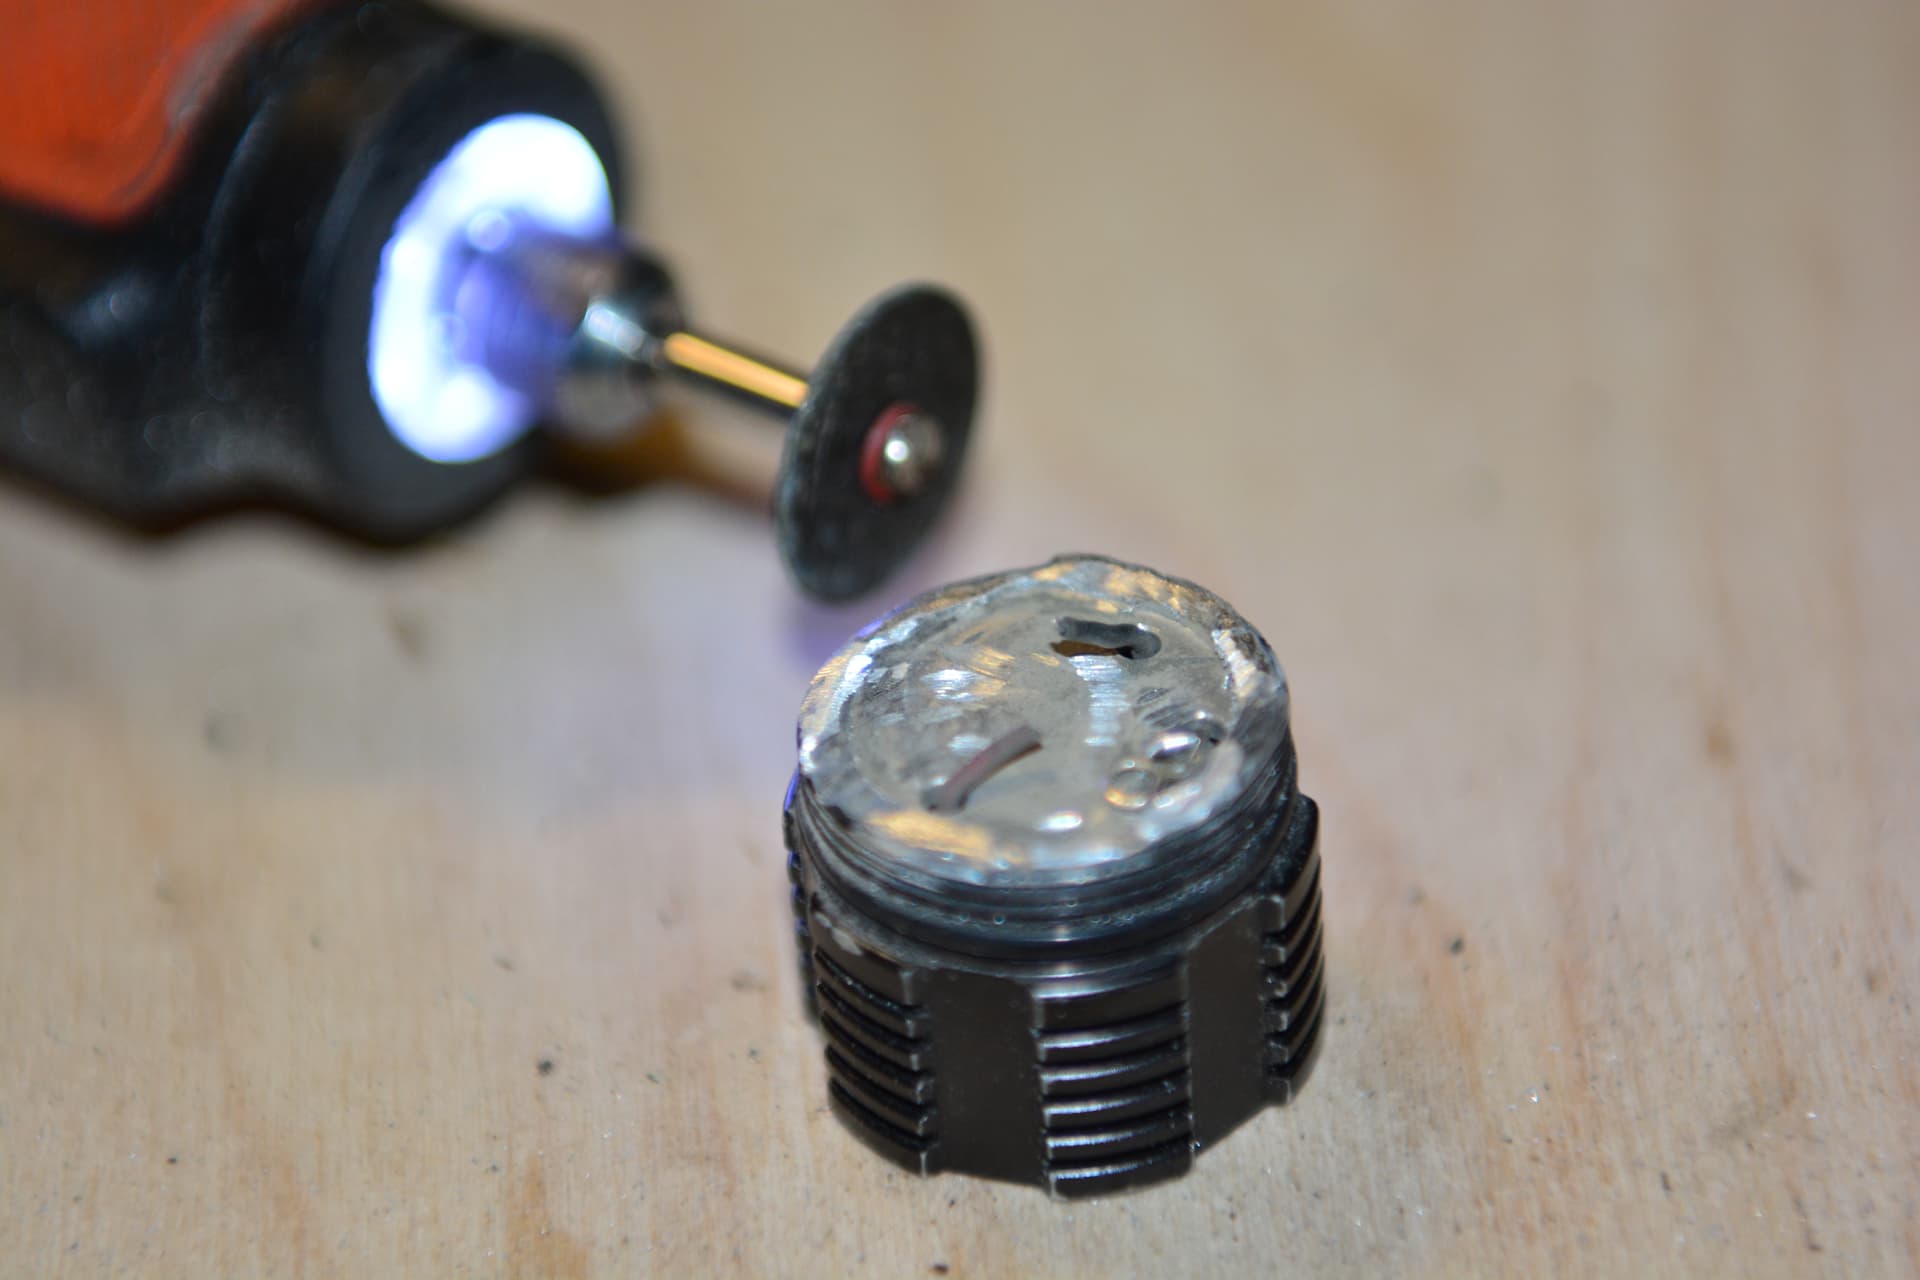
Grinding down the edges
I added thermal paste for computers as this was the only thing I had on hand. I made sure everything fits together before soldering the wires of the LED. I used kapton tape for lithium battery packs across the solder joints because the wires were way to close to the metal reflector in my opinion, and I wanted to prevent a short. after installing a plastic centering gasket, the LED sits nicely in the OP reflector.
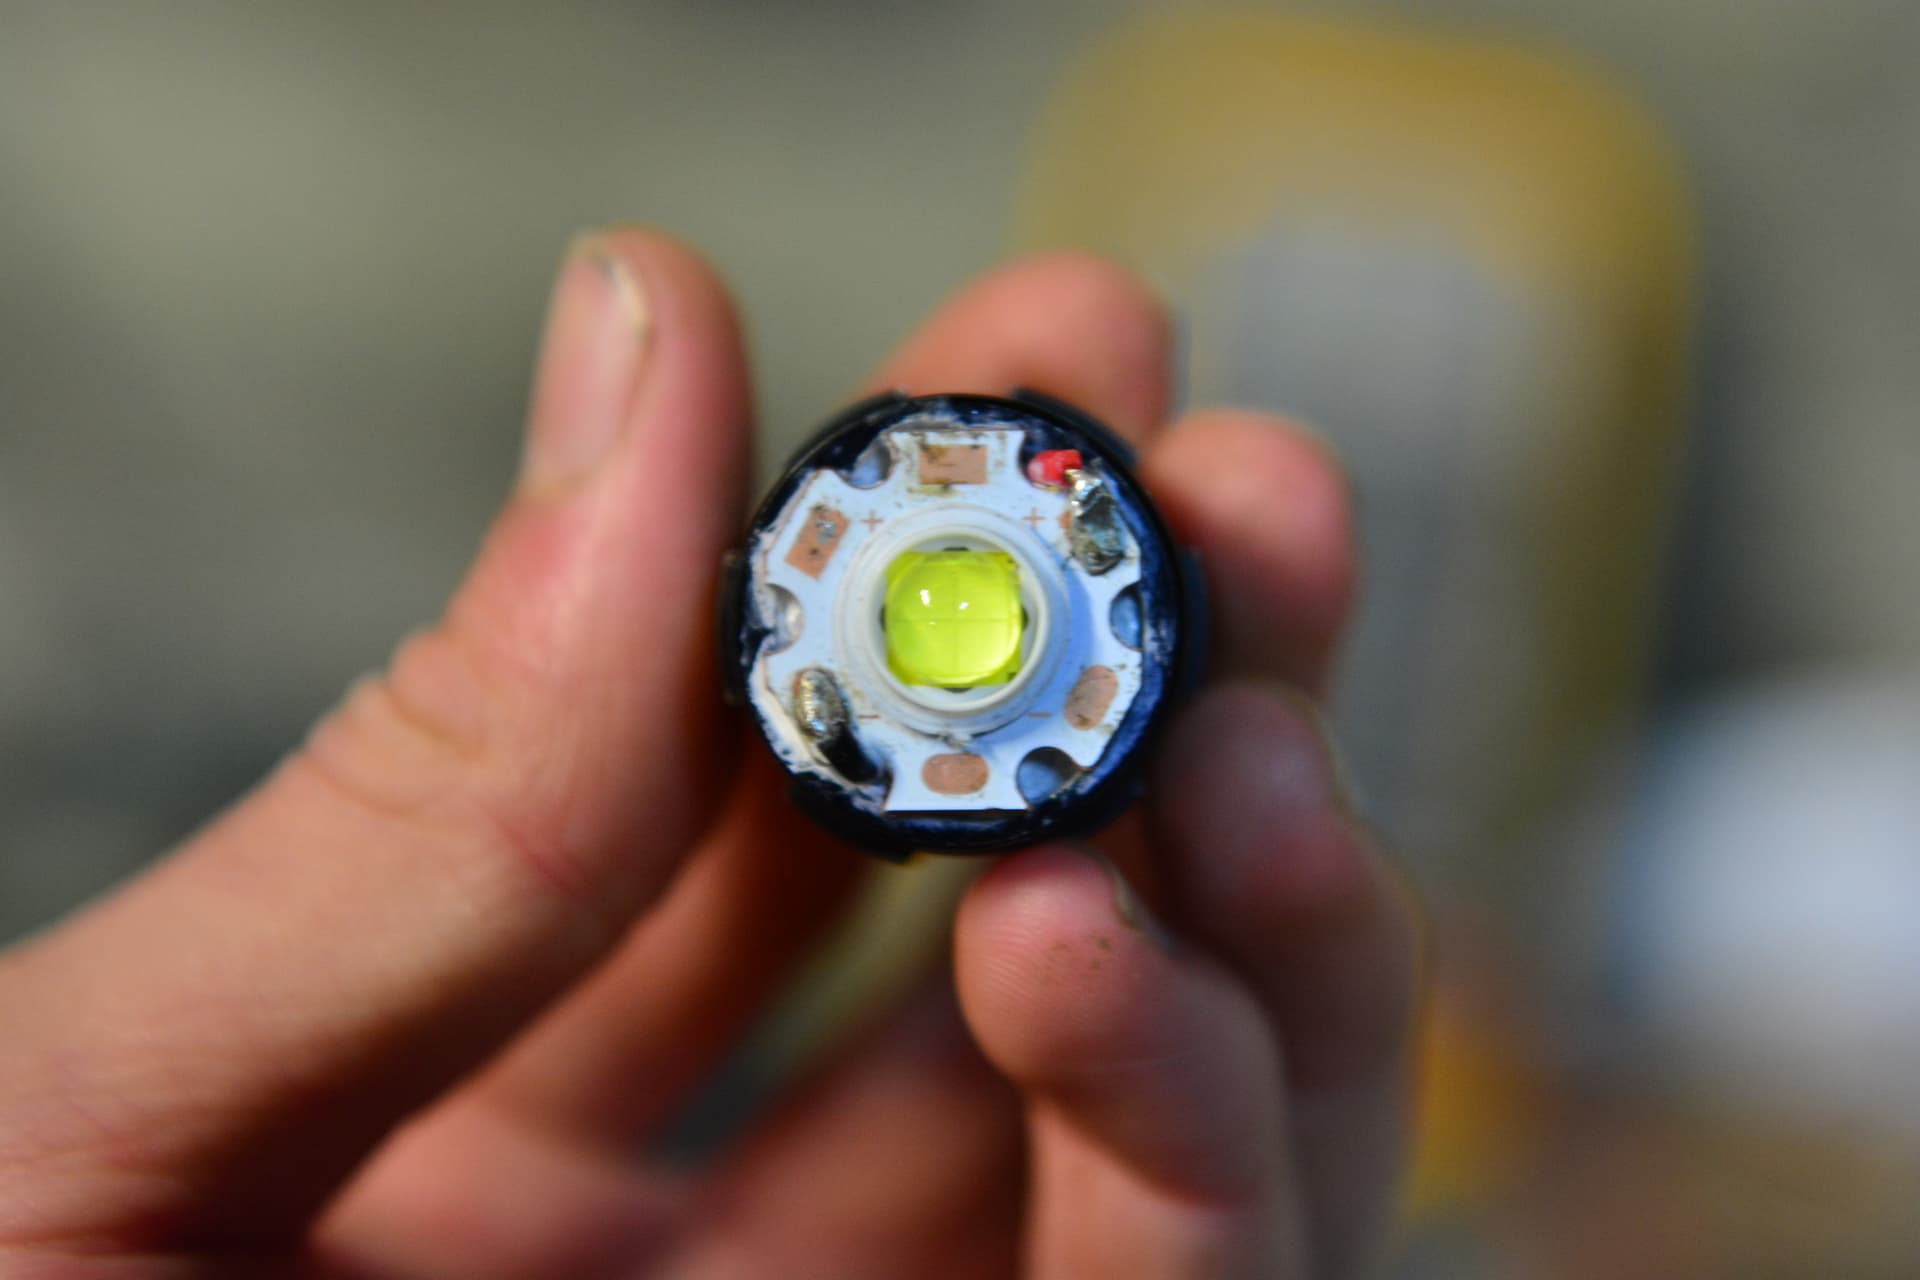
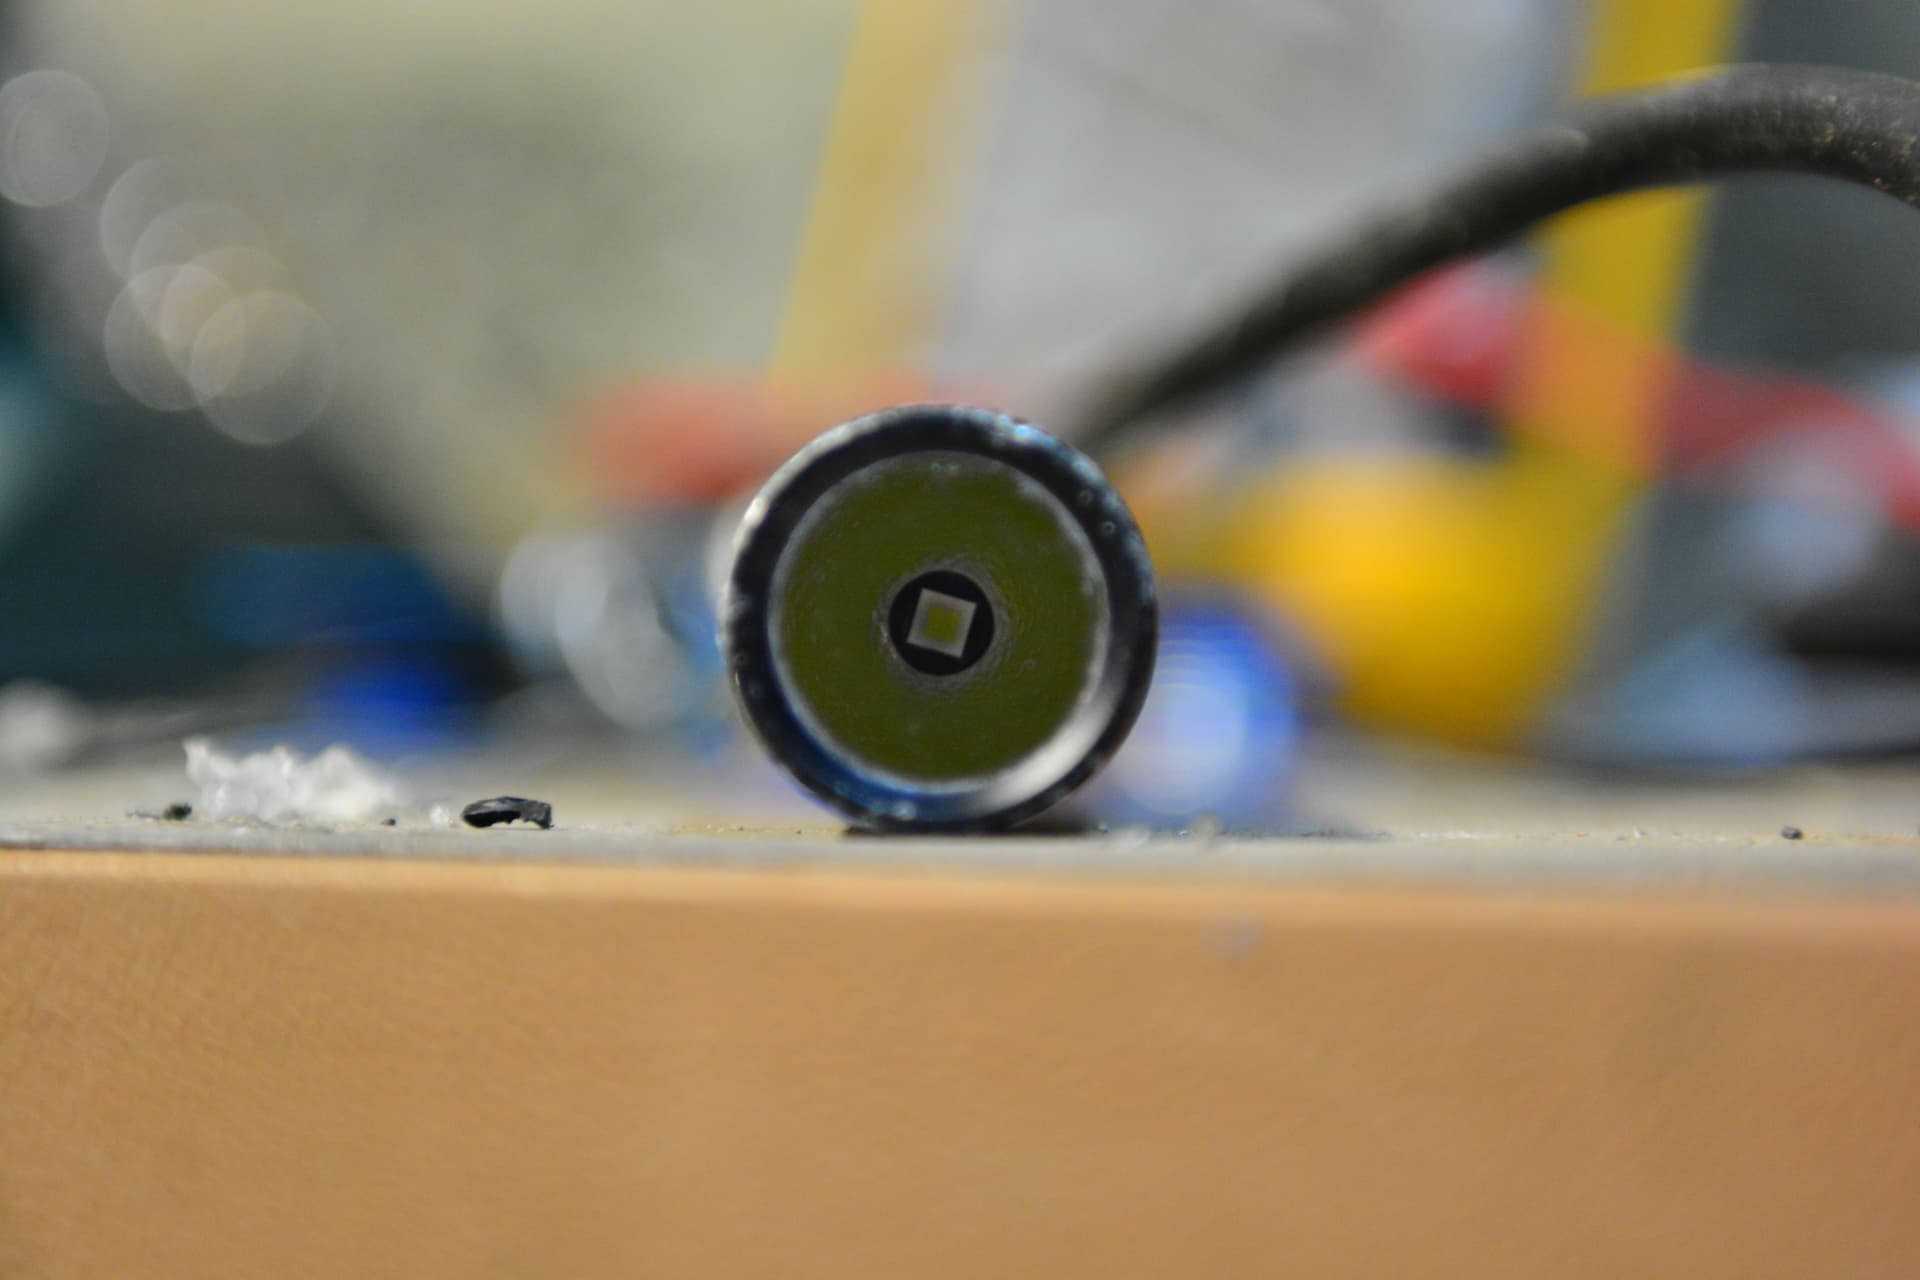
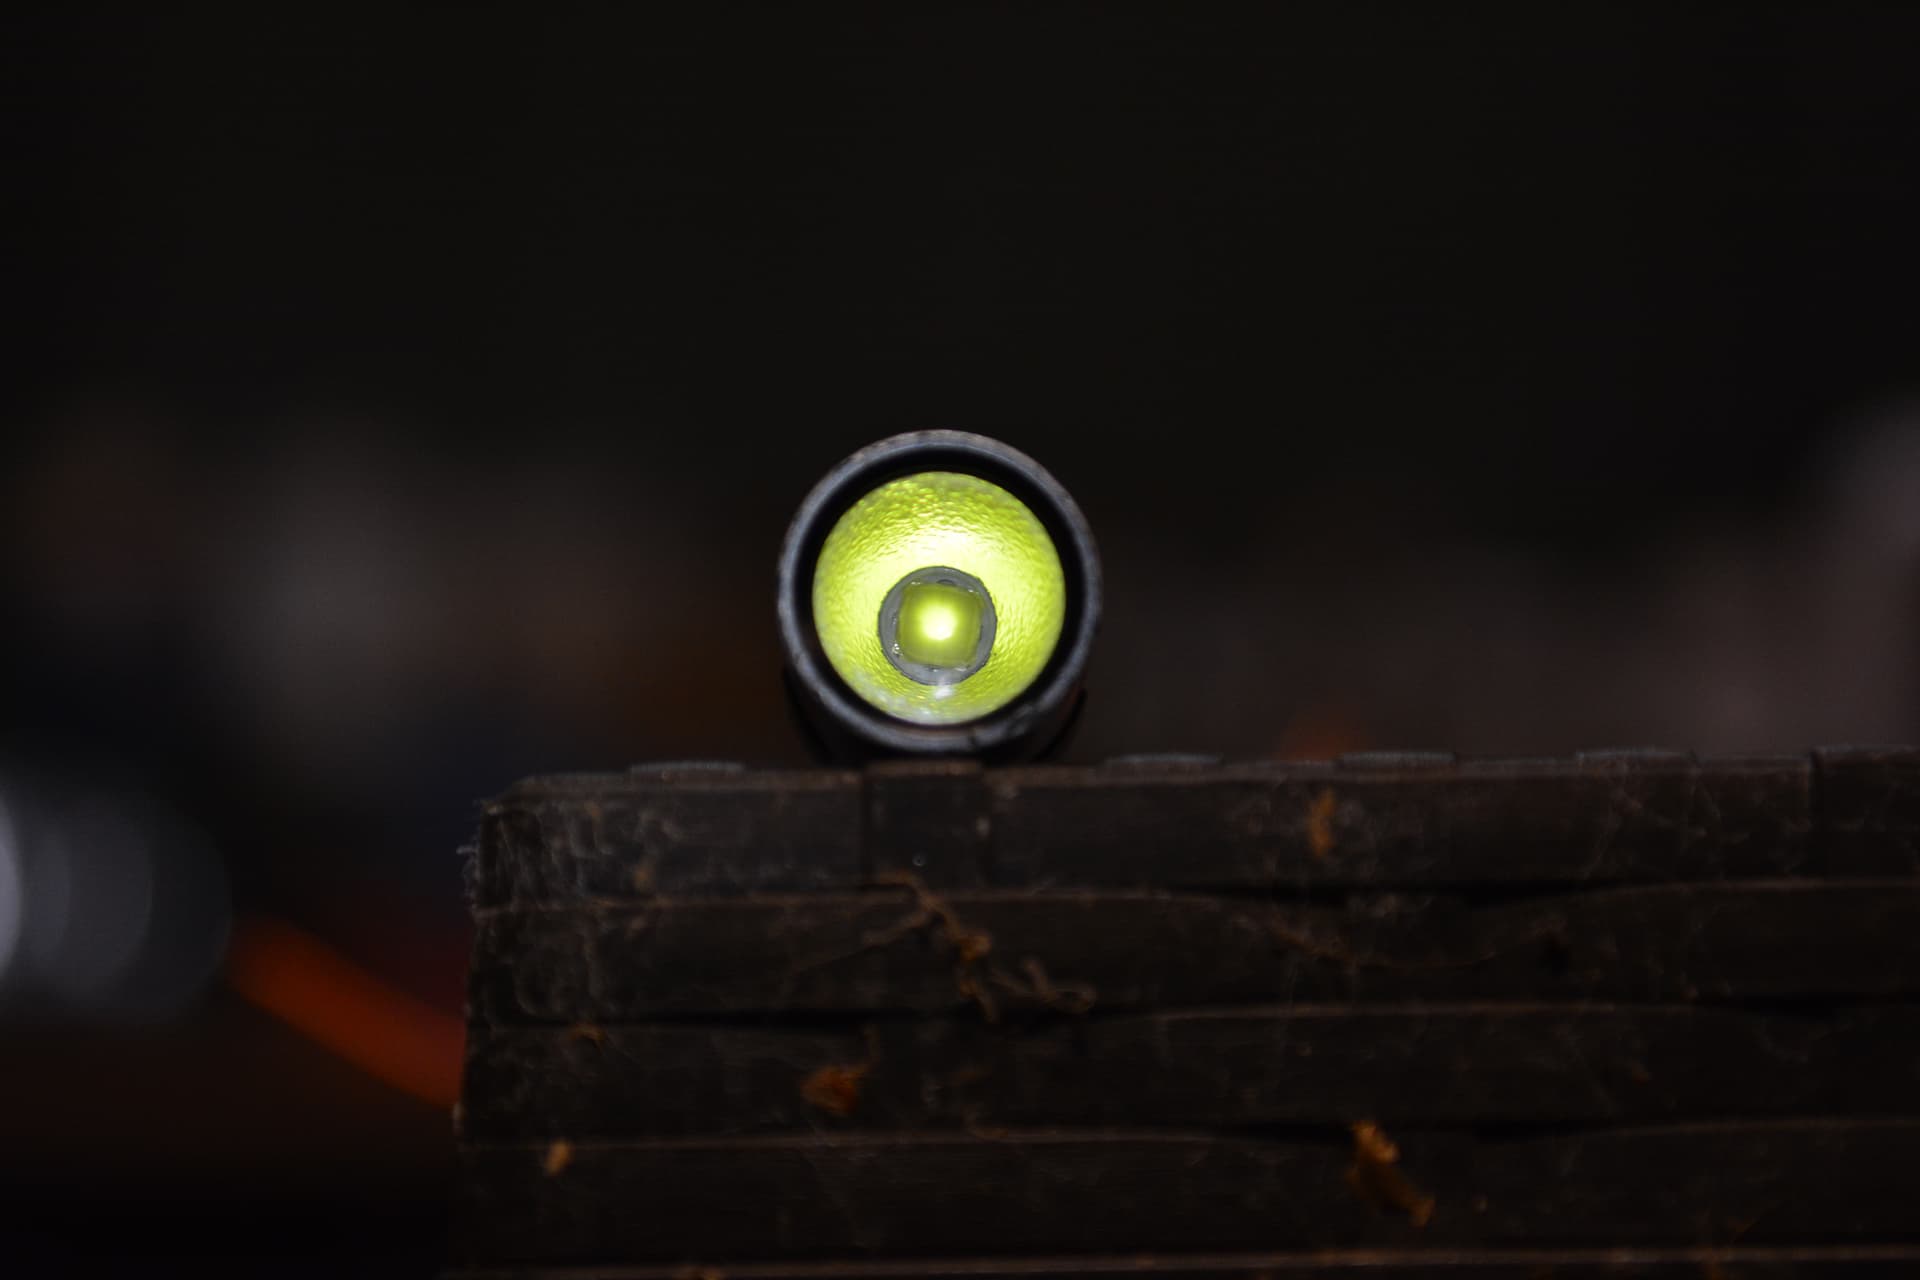
Here’s a quick before (CREE XP-L High Intensity) and after (XHP70.2 High Density mod):
At this stage I had the flashlight reassembled and ready to go. The only 16340’s I had on hand were the cheapest chinese dirt and I know its just a temporary experiment. Just to see if the original driver and switch combination works.
Here’s a quick beamshot: shot on Nikon D7100, lens 24-70mm ED VR F2.8E. settings : ISO400, 1.3 sec, F2.8. Sorry if the photo was shaky, I was holding the camera by hand and the flashlight in the other! more photos coming soon.
I was actually kind of nervous to hit the switch. It could have resulted in a fried LED, driver or battery, but the first thing I noticed was the brightness was insane! The beam was definitely more on the floody side but that was expected with a large surface area LED in a relatively shallow OP reflector. It could easily light up my entire backyard! I also tried the modes low, medium, high and strobe and all worked perfectly. I dismantled the switch and found a second circuit board (which I’m assuming controls the modes and PWM). There was a very fast PWM noticeable only on camera. I tested with my multimeter for current at the tail of the flashlight and it was about 2.5 Amps, which is the limit on my puny chinese batteries. The flashlight began blinking and died after about 5 minutes of use (not sure if the voltage was below the threshold of lighting the LED or LVP kicked in), however that behavior with the blinking was similar to the way it behaved in stock form. I checked the temperature by feeling the driver and it is only warm without any burny smell. I also checked the battery voltage was about 2.7V.
Now If I learned anything from my experiment, and I want to extend runtime I came up with these options:
Buy better capacity batteries like decent 18350’s ,
OR
Modify or extend the battery tube to accommodate a larger capacity battery type.
I kinda feel like choosing the latter, as I want to build this thing for power AND runtime and not a puny EDC flashlight that puts out a lot of light for a very short burst, I mean something like this already exists: the Imalent LD70.
Please let me know about any suggestions or comments on the build progress are appreciated, but for me the big thing is getting the flashlight to actually work and turn on!
I have received a suggestion to use 18350 batteries for my build, namely the Vapcell M11 which has a capacity advertised at 1100 mAh. Now a ‘good’ 18350 size battery is about 900-1000 mAh which won’t give me a huge runtime increase. This may be good for a pocketable EDC flashlight which only needs to use turbo for a few minutes/seconds which isn’t exactly what I’m after. After all I do want to build this thing for runtime, so I decided to go big or go home. I really wanted to give this my best shot, so here’s what I came up with:
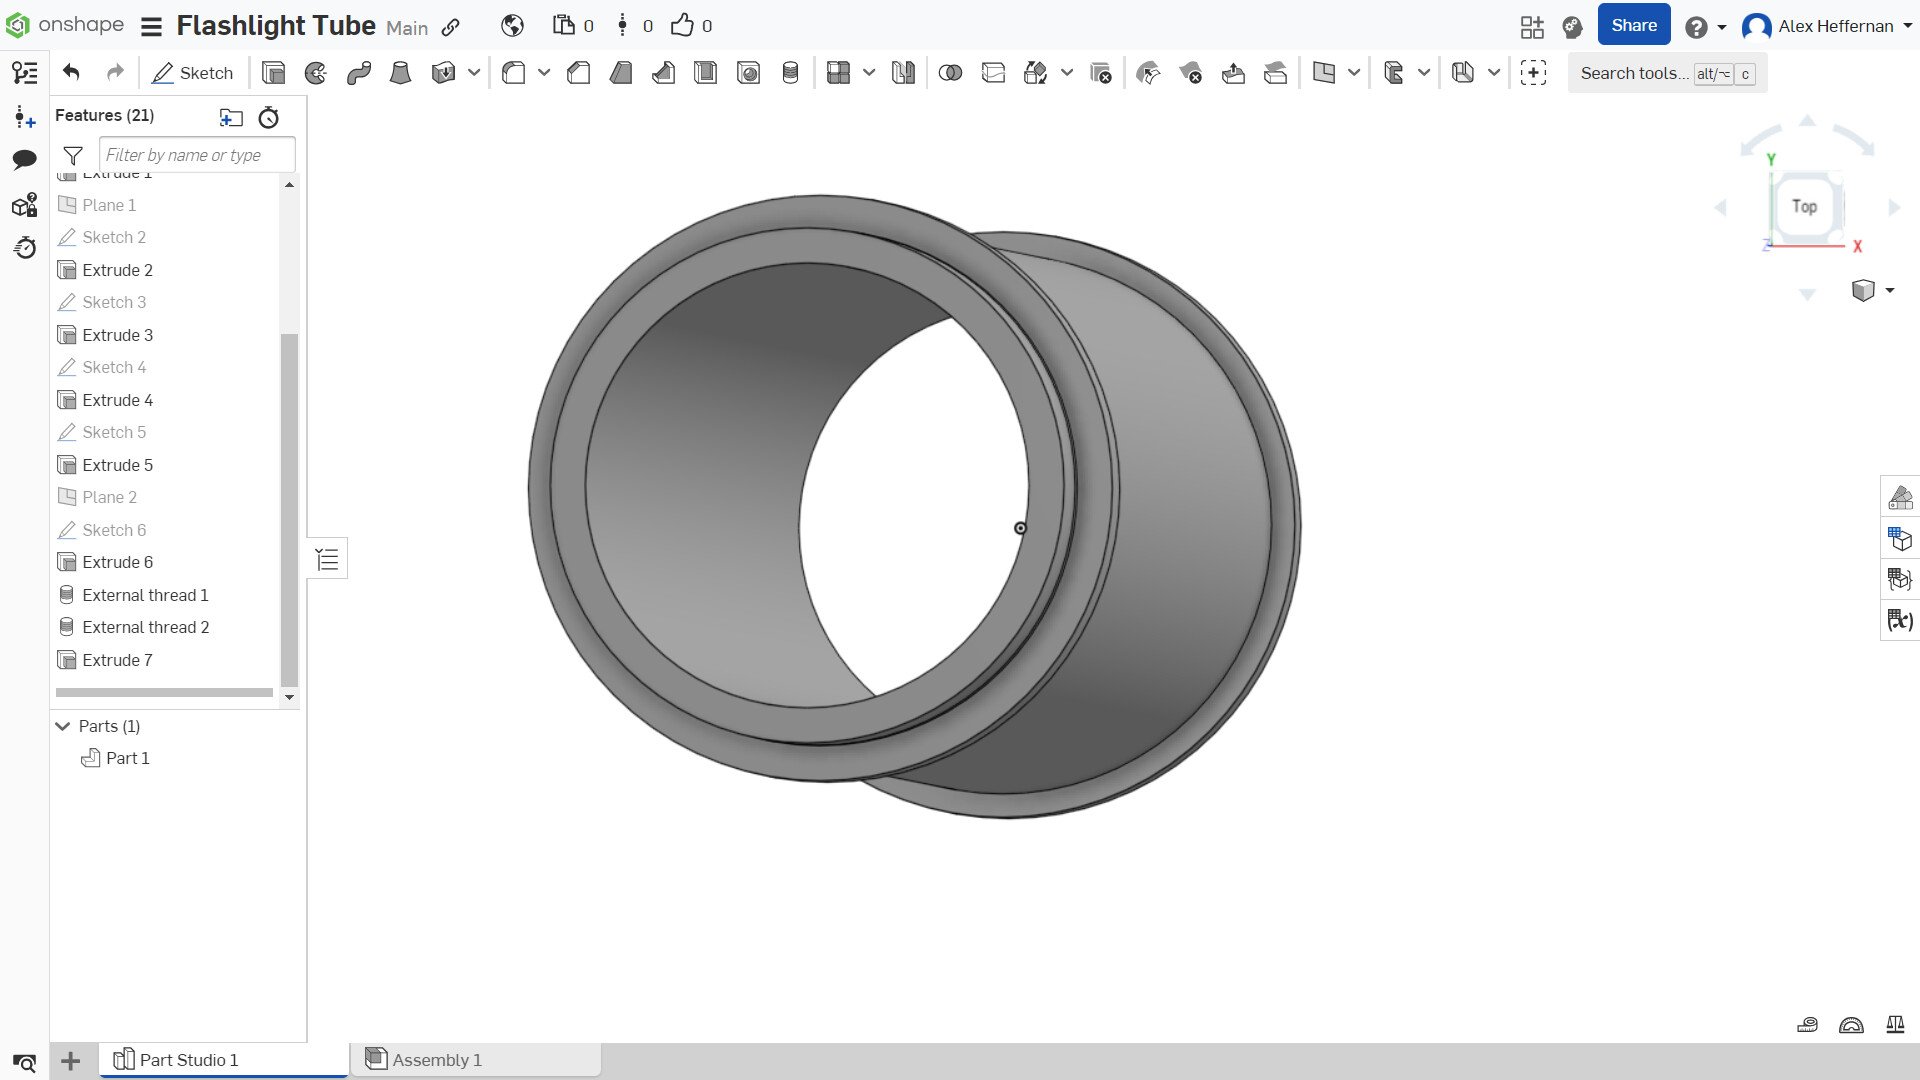
This is a homemade extension tube of my own design which is supposed to contain two 18650 size batteries. Hopefully this will be the answer to my runtime problem.

I have heavily based my design from the original flashlight host to ensure it is compatible with the original components.
So here’s the story of how I ended up creating this part: I felt like larger capacity batteries like 18650’s (they have up to 3500 mAh) would be the solution to my runtime problem I have encountered. Firstly I scoured the internet for any type of battery extension tube style part for flashlights, and unfortunately for me such a thing doesn’t exist (except for some kind of generic chinese flashlight). And because it doesn’t exist, I decided that I would make this part myself! At least it means I will need to put in more modification work into my flashlight project. So far my biggest mod was the emitter swap, and although this one proved more difficult because I had to modify the actual reflector and heatsink, basically I just changed a blown lightbulb and I figured most people here with a soldering iron could do it.

I really have to admit that I wouldn’t exactly be the type of guy who would sit around and use CAD. Either I get bored and give up halfway or I’d end up confusing myself with all the different functions. But this time was different. I sat down at my computer with the original flashlight and a digital vernier caliper. I designed a 3D model and then created a drawing with dimensions.
Now you may be thinking a drawing on paper or a computer of a part which doesn’t exist isn’t much good on its own: I actually need to physically make it. Now I personally do not own a lathe machine, but a really good friend of mine does. I showed him my design and told him what I wanted to do. He was completely cool with it and allowed me access to his lathe machine to create the part and even offered me a piece of diameter 25 bar made from 7075 aluminum metal to use to make the flashlight.
The lathe machine wasn’t the latest and greatest type of CNC automatic lathe but rather a manually operated smaller version. I knew my cad model wouldn’t really be of much advantage to me but I figured having the drawing with measurements beside me will make it easier to work with. I have had some experience with a lathe on some occasions (this would be my biggest and most time consuming as of yet) but I’m by no means an expert fabricator or machinist, so please ignore my sloppy machining ![]() . I had a huge diameter 18.6mm drill bit which was the closest I had to fit 18650 batteries. I used a M22 x 1.5 die to cut external threads on the outside of the tube. The lathe also had a knurling wheel tool, so I figured it would be good to cut grips into the outside of my flashlight.
. I had a huge diameter 18.6mm drill bit which was the closest I had to fit 18650 batteries. I used a M22 x 1.5 die to cut external threads on the outside of the tube. The lathe also had a knurling wheel tool, so I figured it would be good to cut grips into the outside of my flashlight.
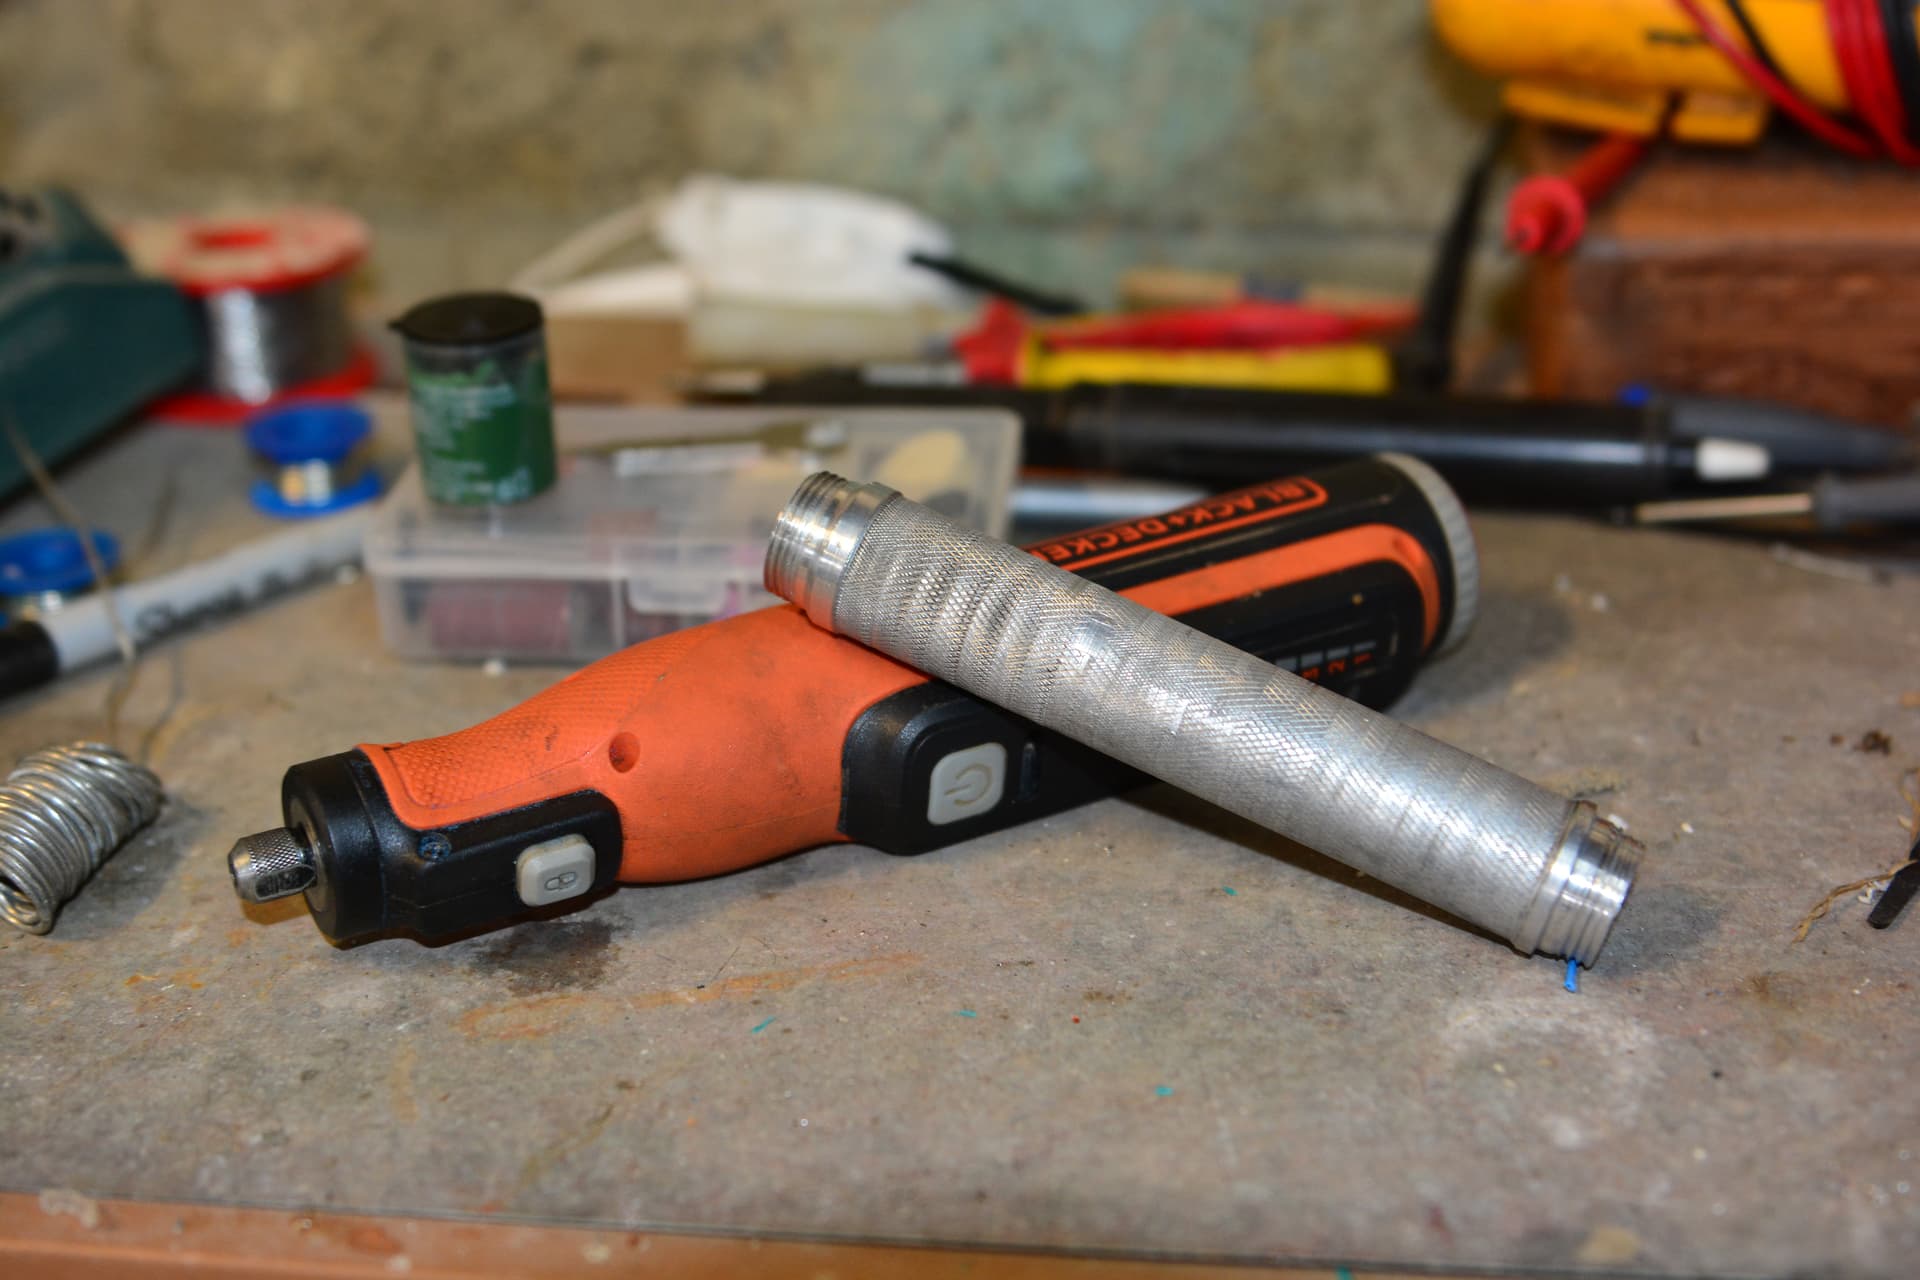
The actual machining process was straightforward enough, apart from drilling the hole through the center. The drill bit was overheating very quickly and drilling very roughly through the bar. I didn’t want the drill bit to jam and break because it would destroy my only drill bit anywhere near that size and waste my part. I also didn’t fancy being hit with metal shrapnel from something that is spinning very fast, so I bought a can of WD40 spray hoping it would drill more smoothly. Even at that, the drill bit would get so hot the WD40 would evaporate, so I only drilled a very small amount at a time and stop to remove the metal filings that accumulated.
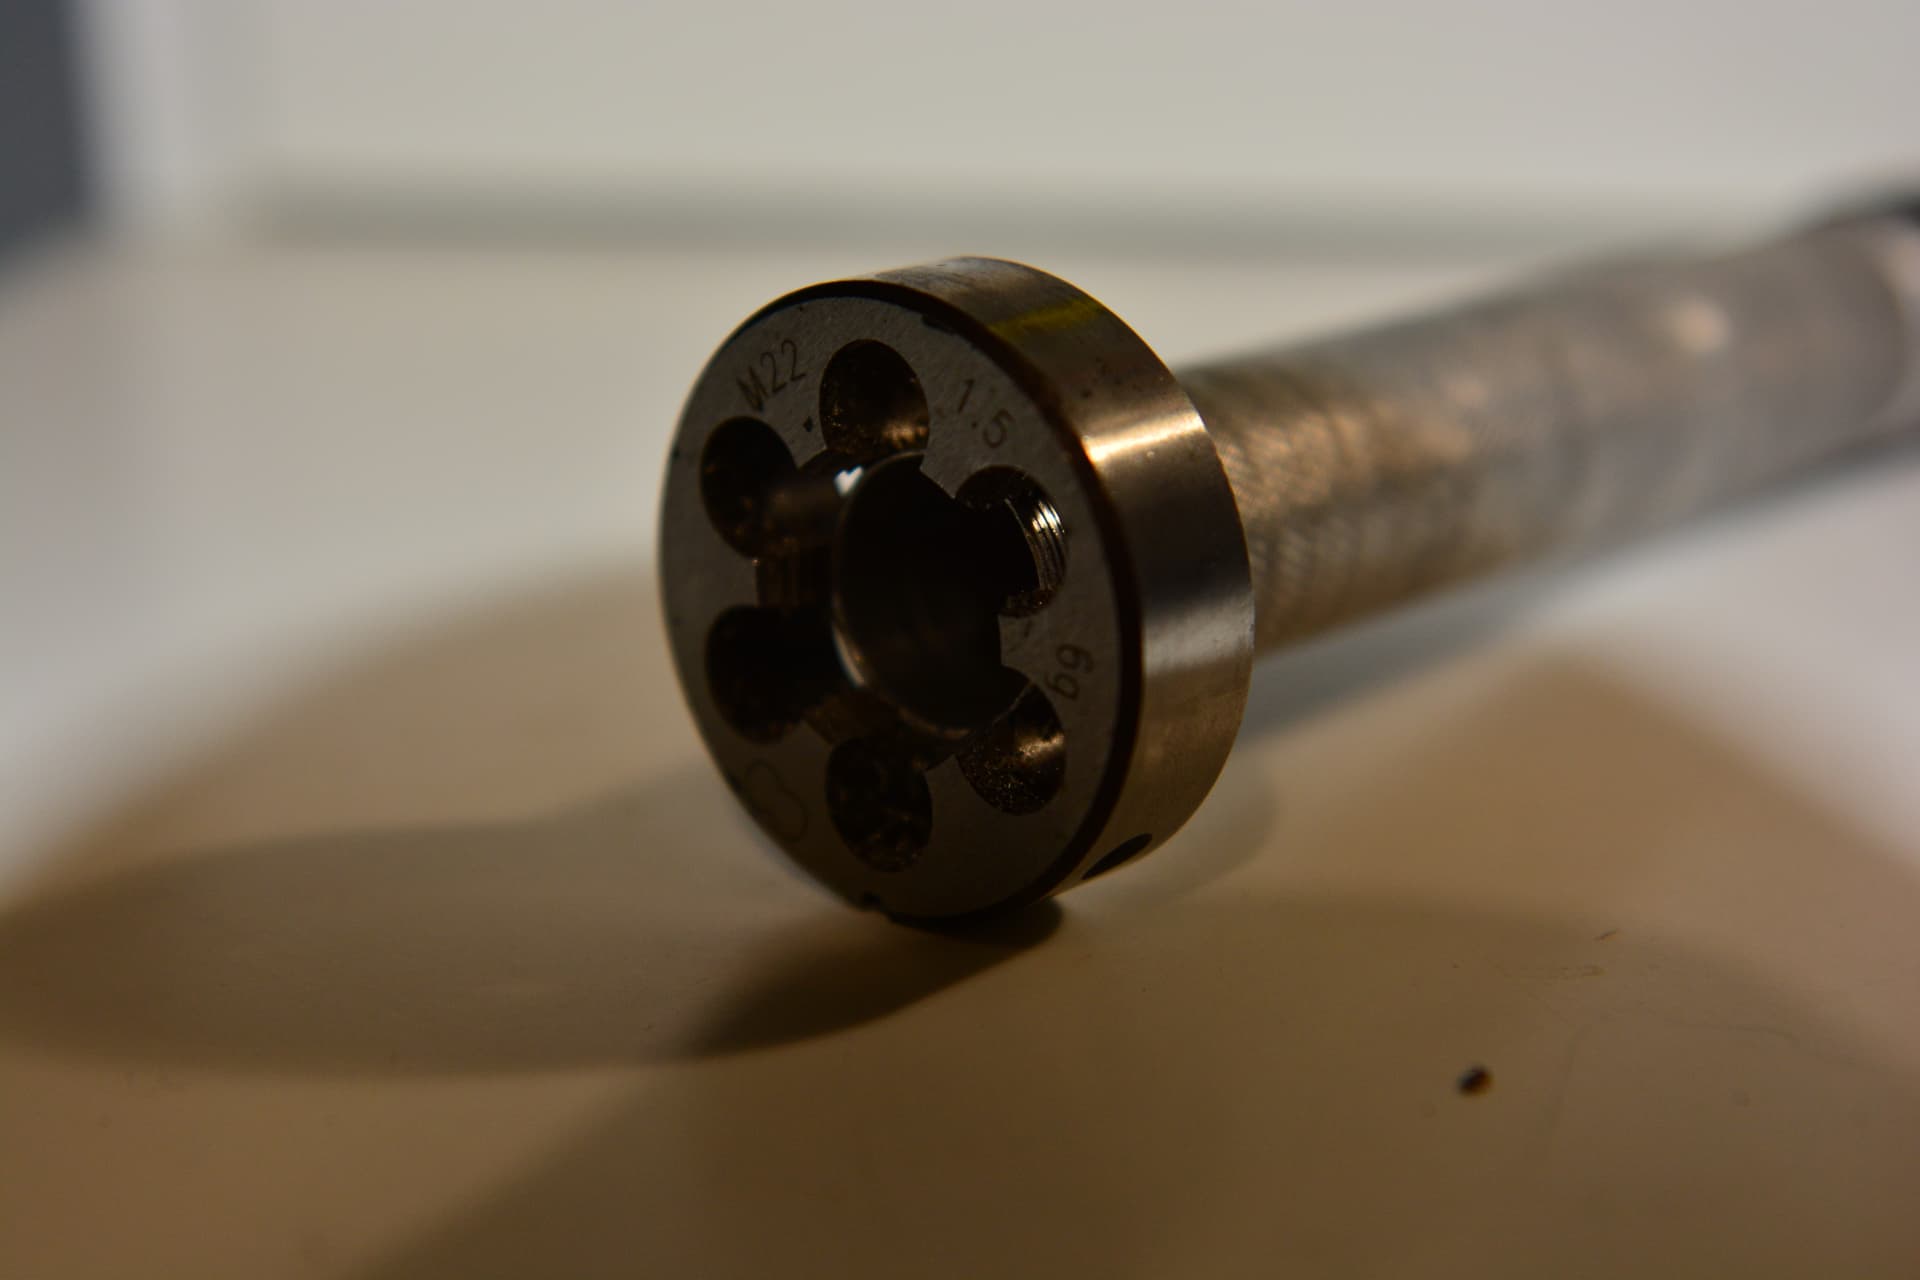
I used a m22 die to cut the threads.
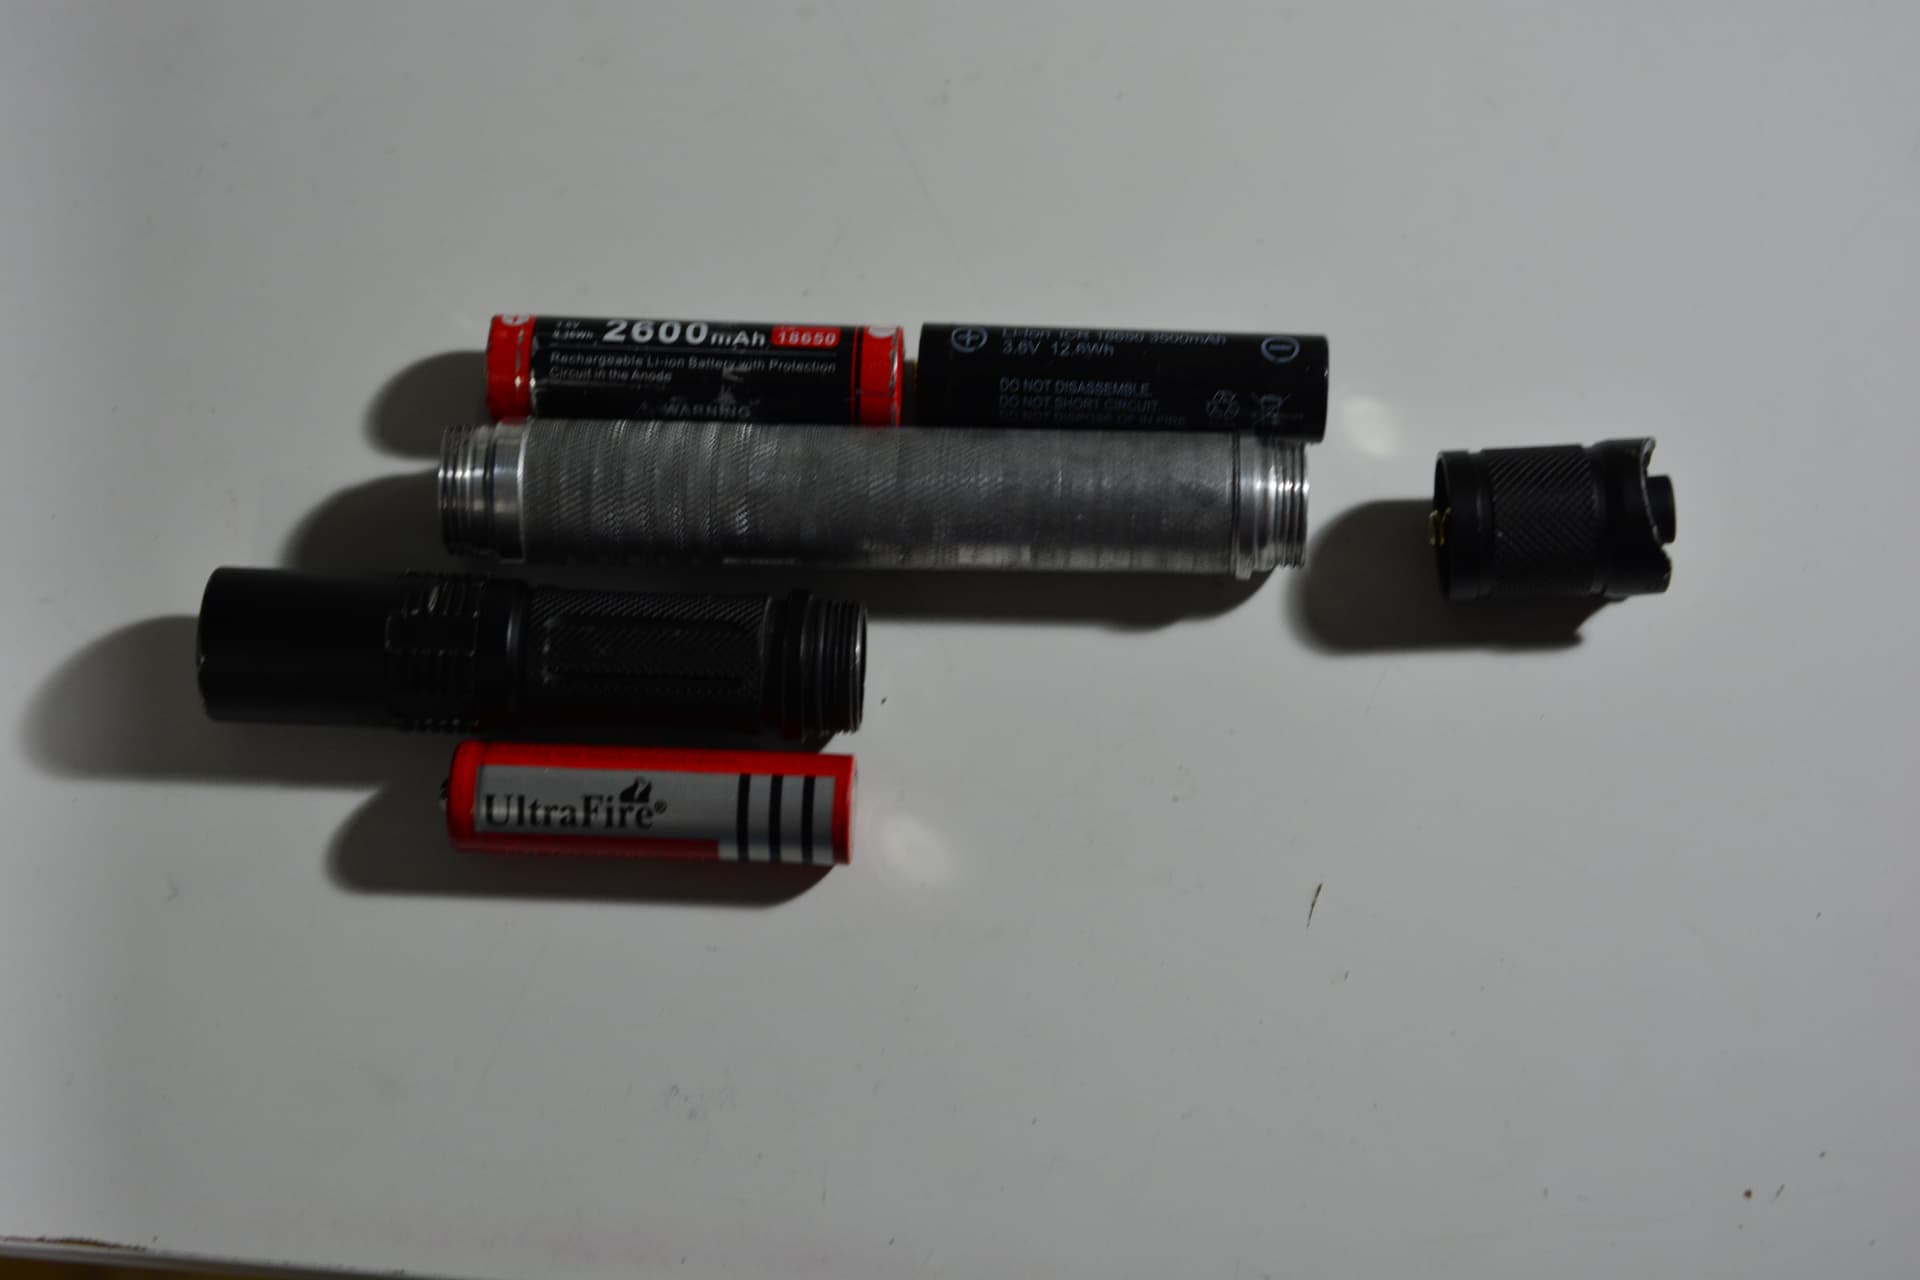
A comparison between the original Klarus flashlight and showing how the 18650 batteries would fit in

Double the size!
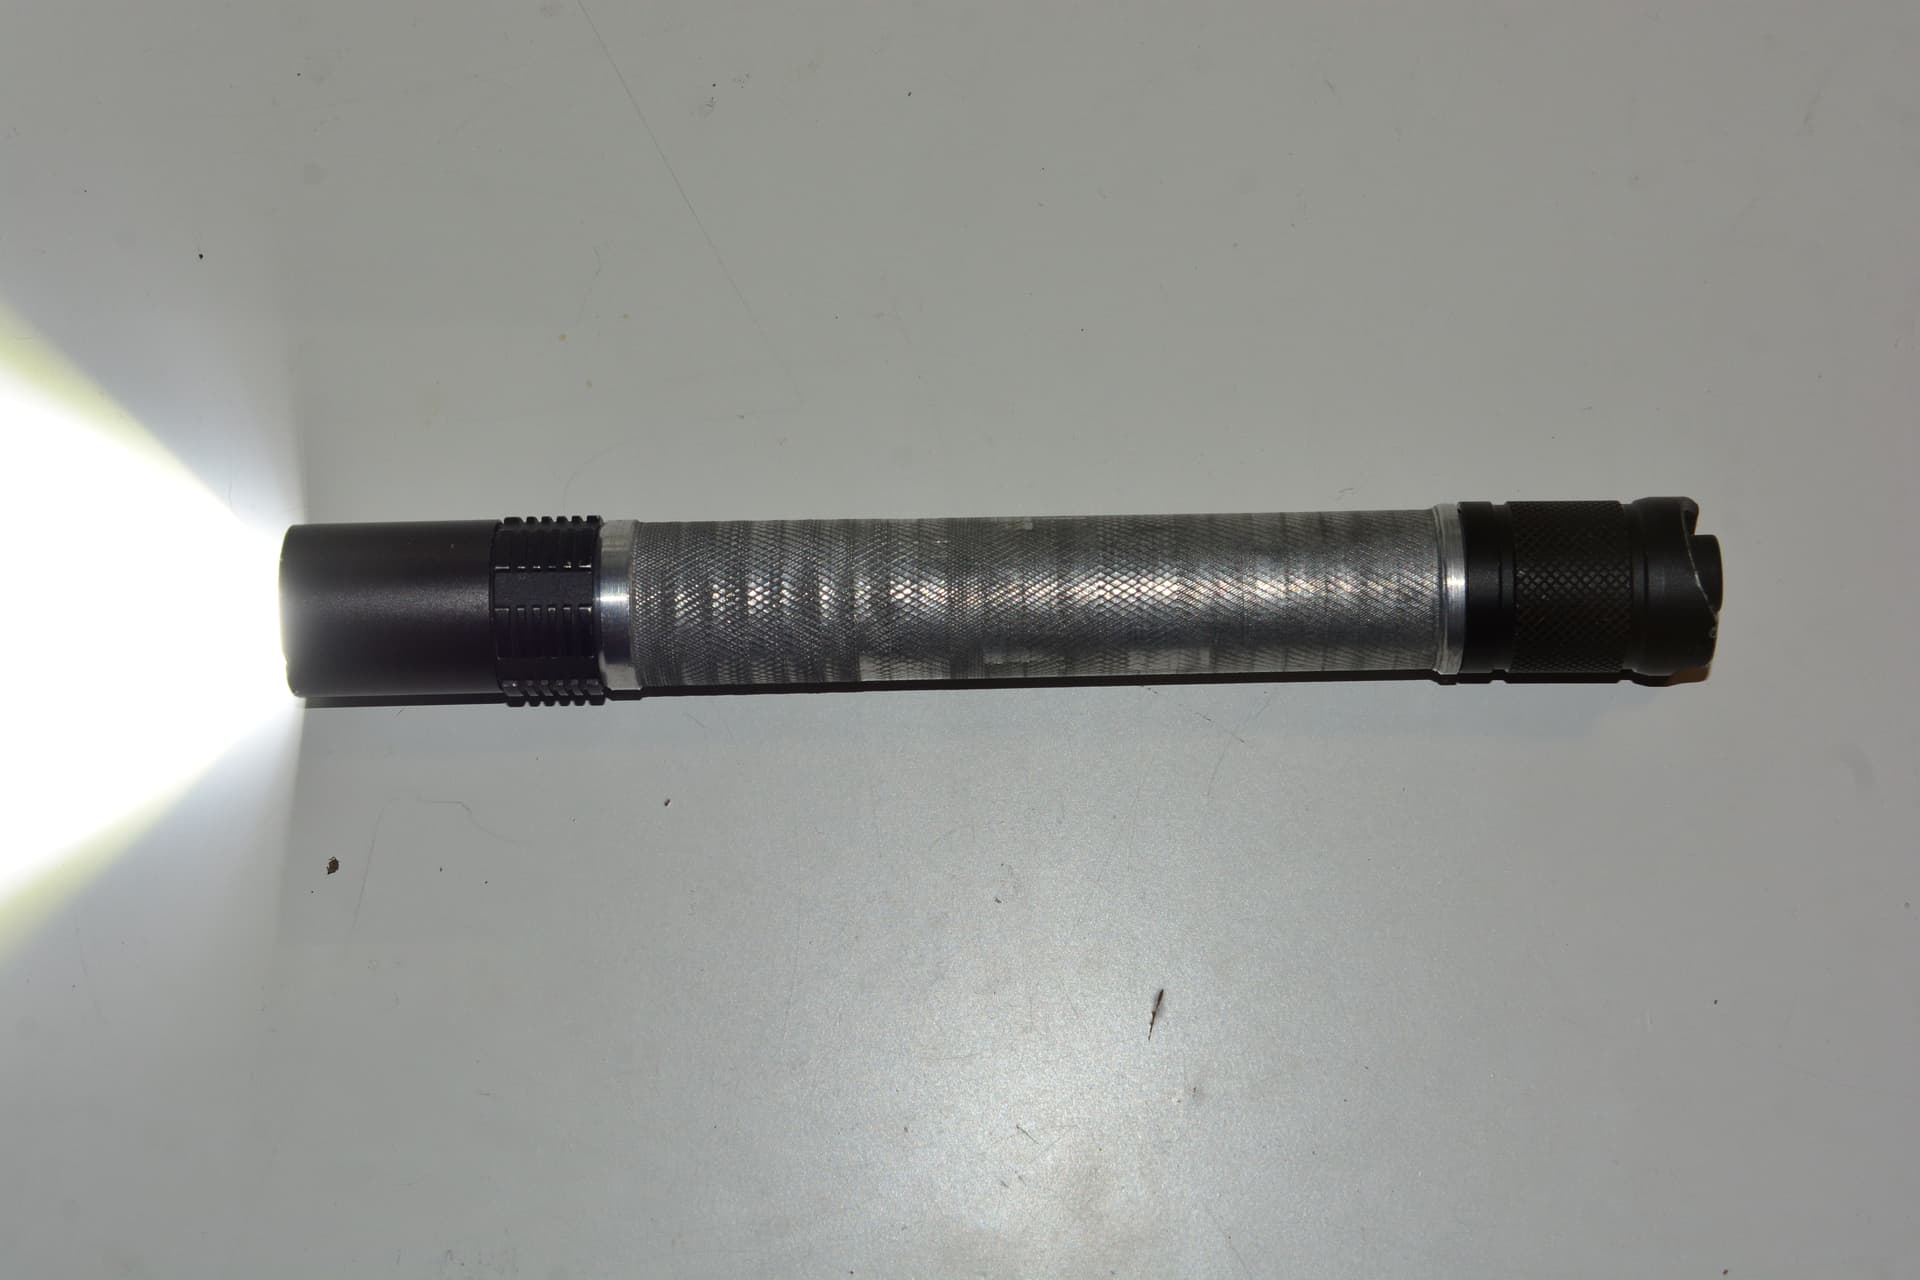
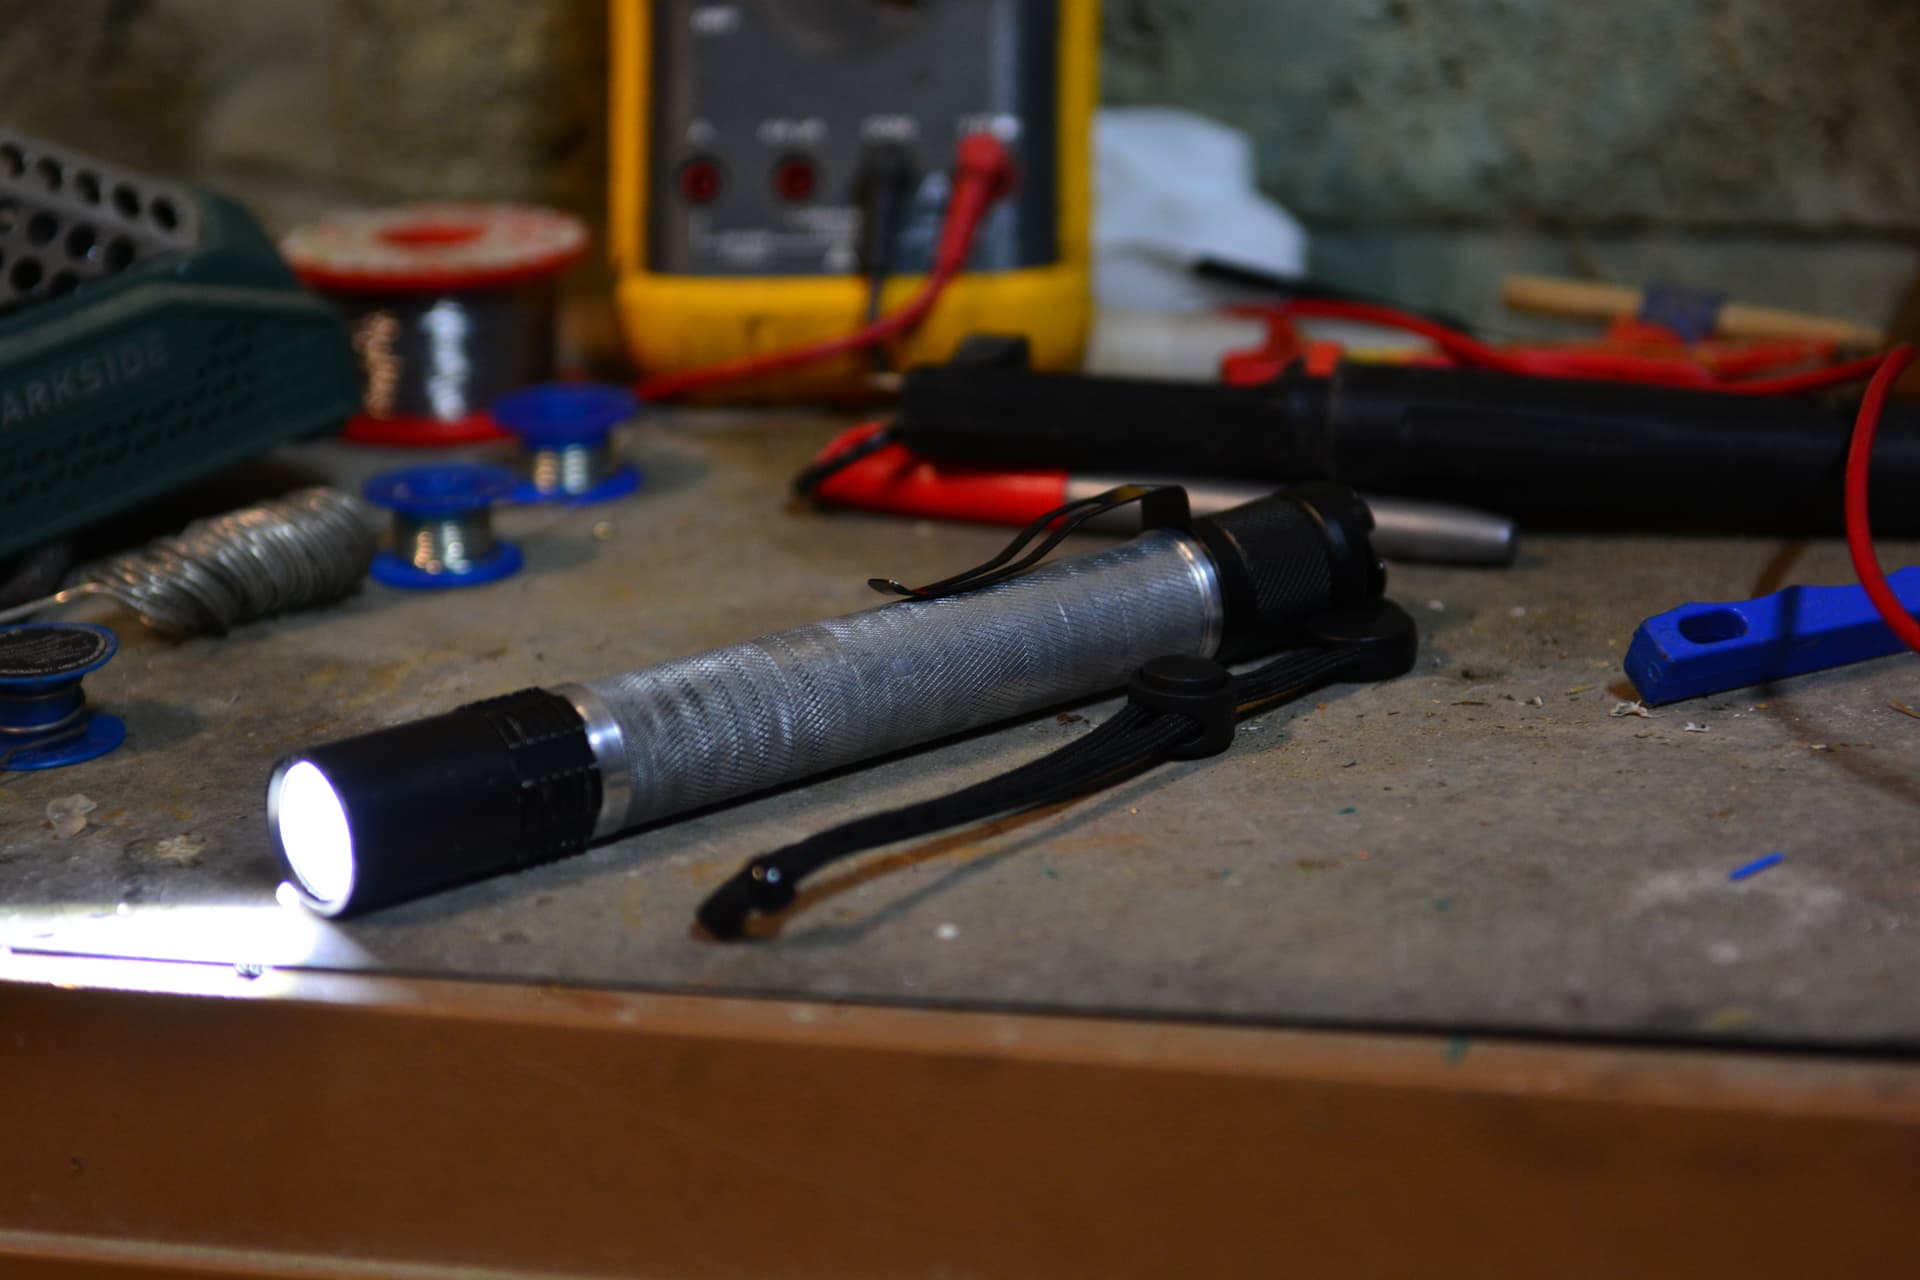
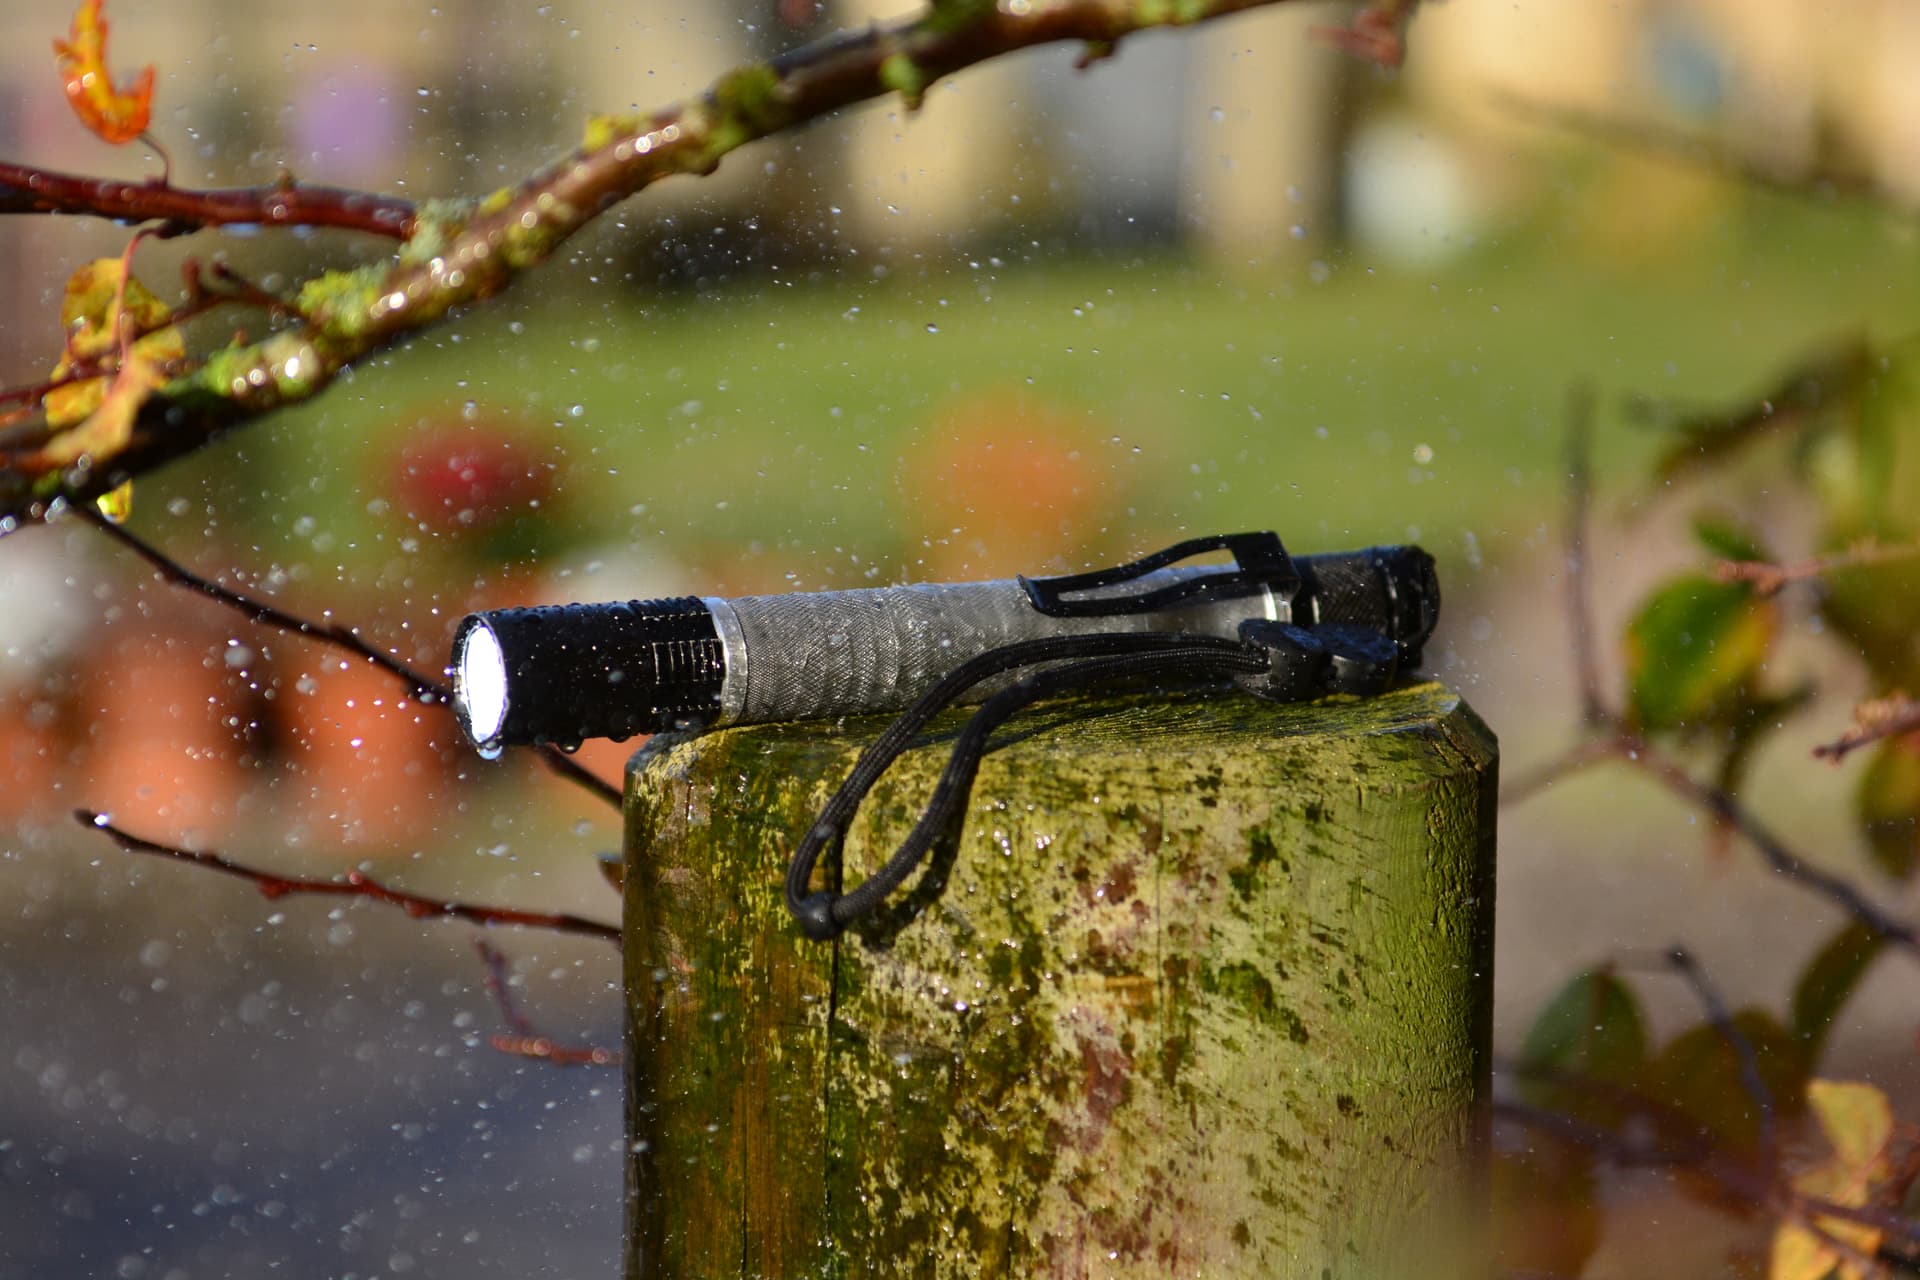
The flashlight is fully operational with 2 18650 batteries!
I’m asking you guys for my opinion: sadly, I do not have the equipment to carry out type III HA hard anodizing in my workshop. (but I do have a can of black spray paint). Should I paint the flashlight tube or leave it silver aluminum? So far I left it unpainted in order to show my machining, but I feel a black tube would match the flashlight better.
I did some testing and the flashlight seems to run for eternities on turbo mode with some 3500mAh batteries (mission accomplished ![]() )! I am starting to like this flashlight and with its high lumens and wide beam I feel this would make a nice worklight flashlight. I really think this is something that I will actually end up using, probably for doing jobs in my yard like feeding and walking my dogs and my horse. It also seems to feel like a very well balanced flashlight to hold (maybe because of its cylindrical shape) and it feels like something I won’t get too tired to hold for a long time. The flashlight doesn’t really seem to overheat: after about 15mins in turbo mode, the heatsink in the head will get quite hot and the heat will travel down the handle. It is not unbearably hot, just a bit warm. After switching to medium mode, the flashlight takes no length of time to cool down. I guess my altered heatsink in conjunction with the thermal paste is doing its job and brings the heat outwards. In terms of brightness (I sadly do not have an ANSI FL1 standard integrating sphere in my backyard work shed) I would say the flashlight emits light somewhere in the 3000-4500 lumen range. This is purely me just eyeballing it and comparing it with flashlights of known output, so take this number with a grain of salt – I meant a bucket of salt.
)! I am starting to like this flashlight and with its high lumens and wide beam I feel this would make a nice worklight flashlight. I really think this is something that I will actually end up using, probably for doing jobs in my yard like feeding and walking my dogs and my horse. It also seems to feel like a very well balanced flashlight to hold (maybe because of its cylindrical shape) and it feels like something I won’t get too tired to hold for a long time. The flashlight doesn’t really seem to overheat: after about 15mins in turbo mode, the heatsink in the head will get quite hot and the heat will travel down the handle. It is not unbearably hot, just a bit warm. After switching to medium mode, the flashlight takes no length of time to cool down. I guess my altered heatsink in conjunction with the thermal paste is doing its job and brings the heat outwards. In terms of brightness (I sadly do not have an ANSI FL1 standard integrating sphere in my backyard work shed) I would say the flashlight emits light somewhere in the 3000-4500 lumen range. This is purely me just eyeballing it and comparing it with flashlights of known output, so take this number with a grain of salt – I meant a bucket of salt.
Anyway, I think I’m boring everyone who may still be reading at this point, so let’s get back to the build.
Here I was measuring the current in turbo at the flashlight tail, and the flashlight seems to be drawing around 3.5A from my 18650 batteries in series (the XHP70.2 is rated for 4A). Now in theory, if I used 3500mAh batteries and the flashlight draws 3.5A, this would give me a turbo runtime of a full hour! Now to me this is a hell of a good turbo runtime for something this small and this bright! I don’t think you can buy something like this too easily!
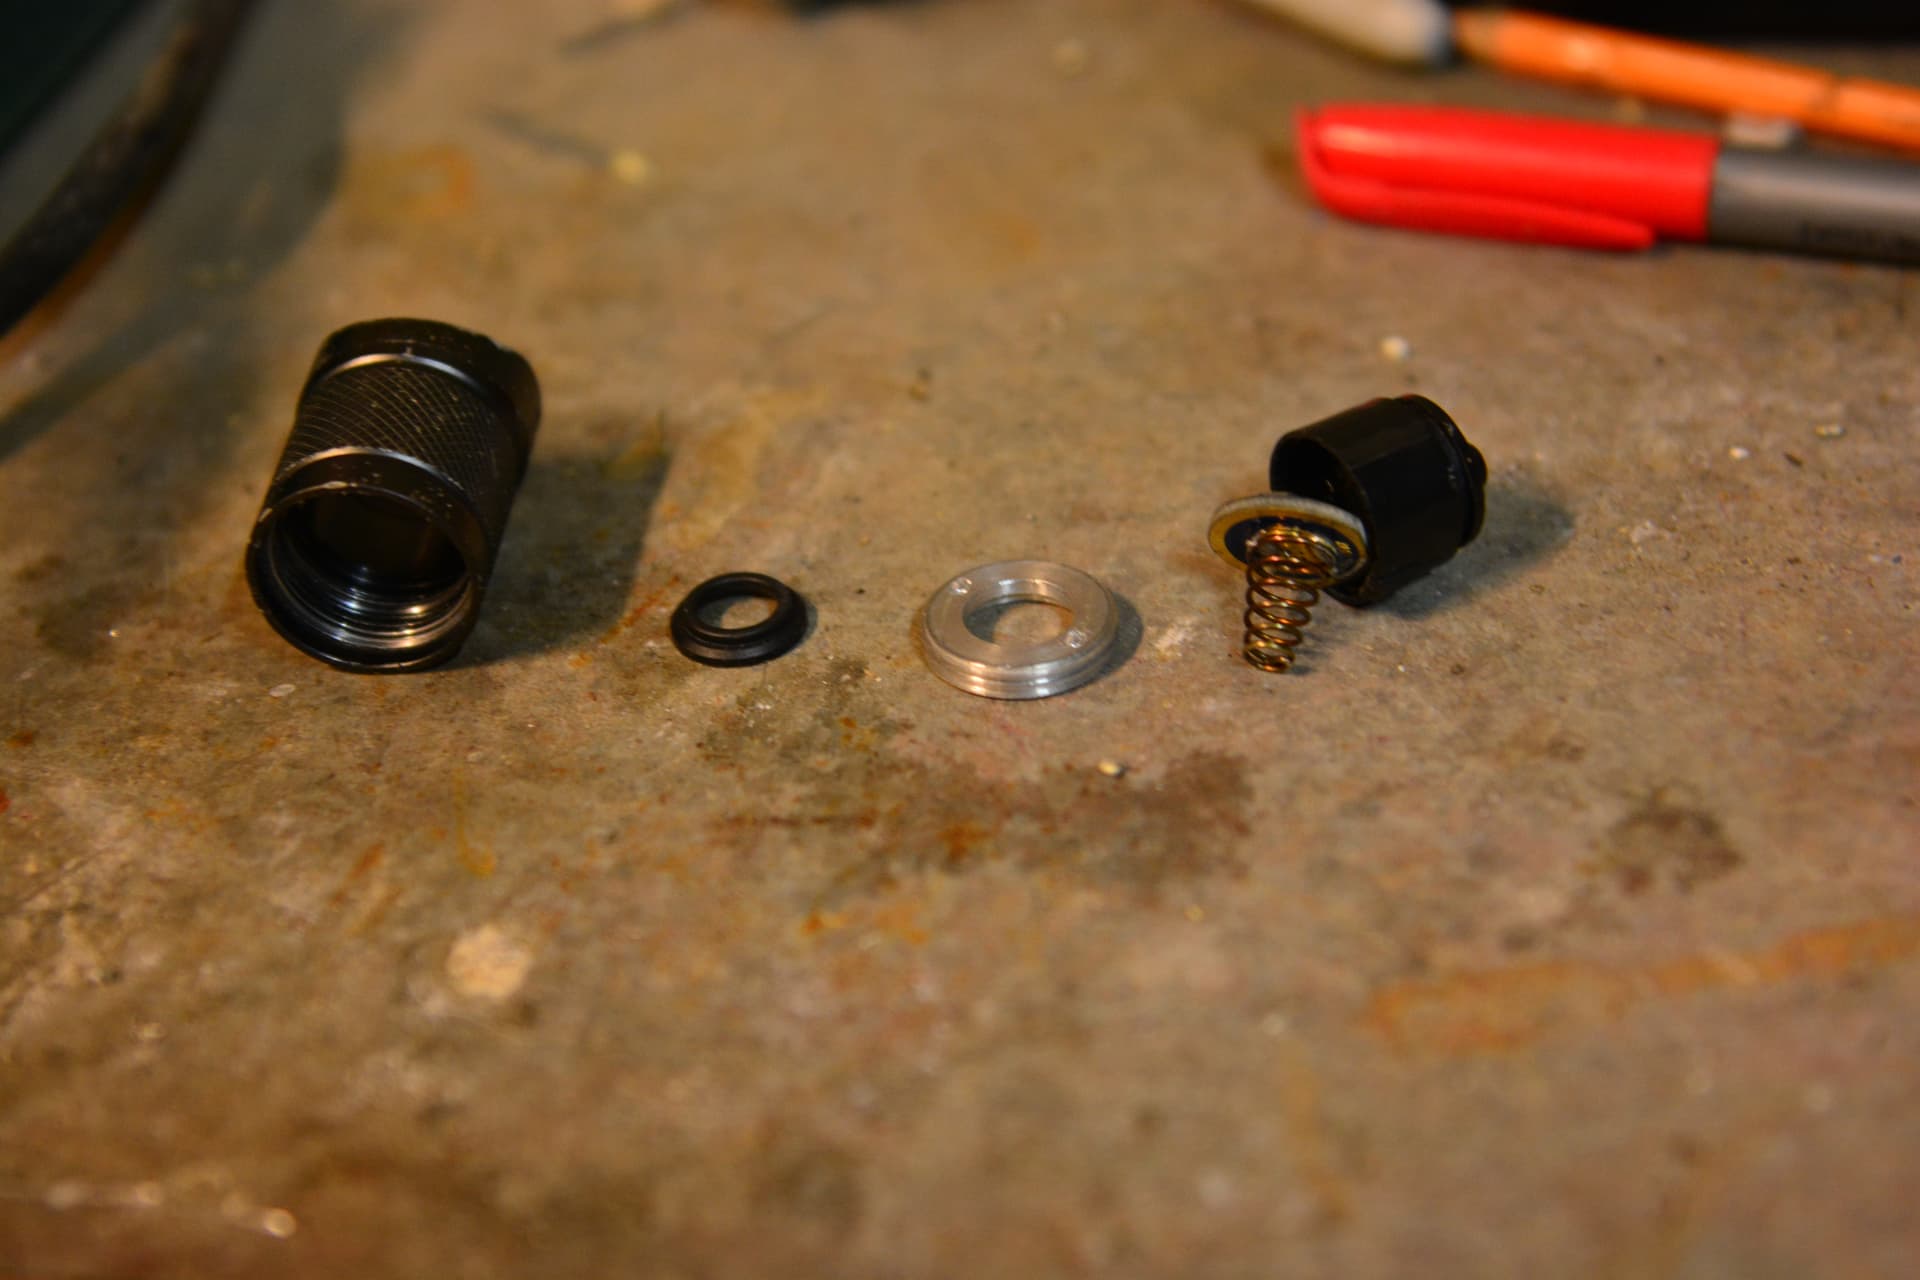
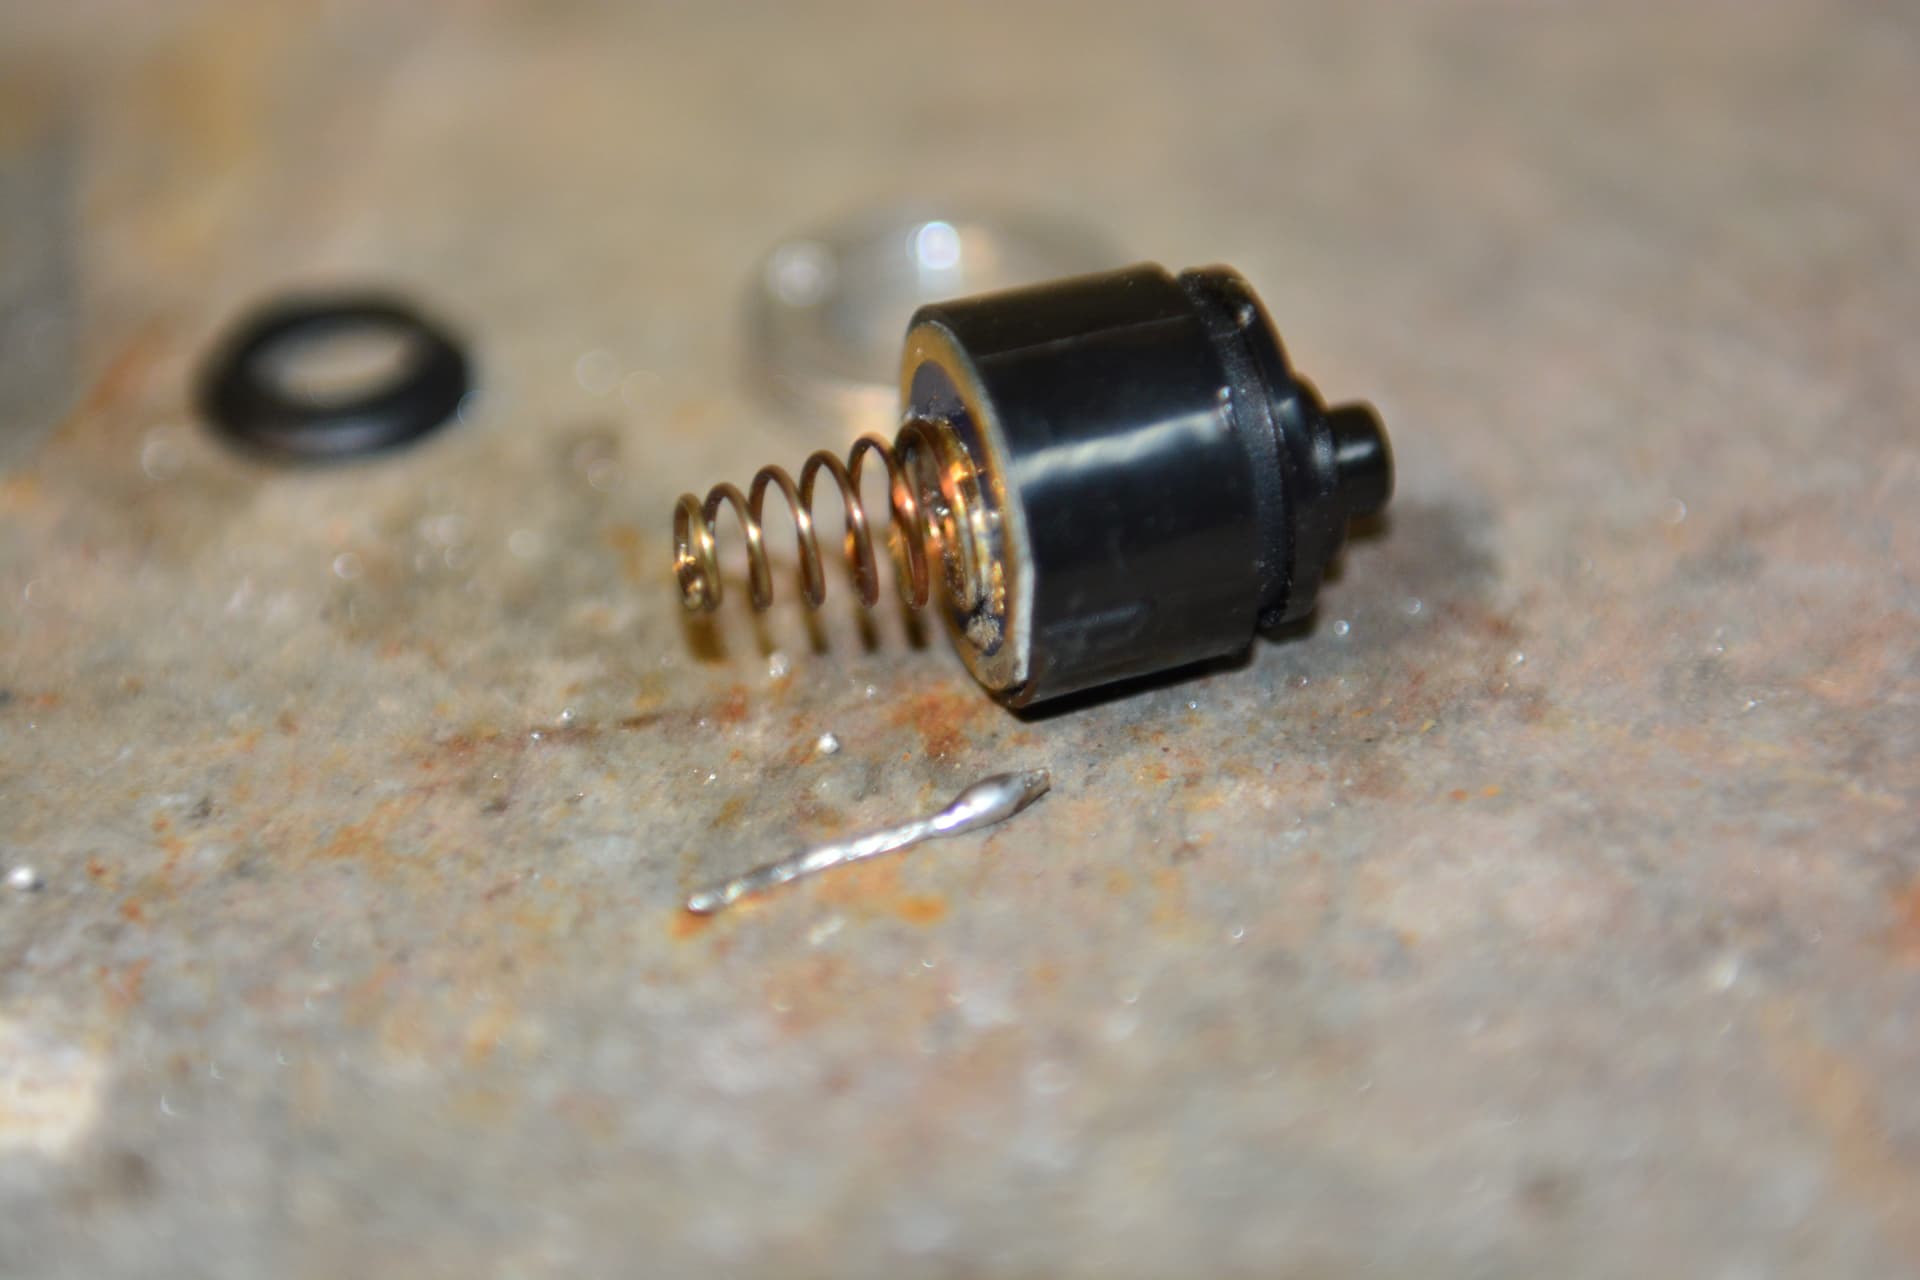
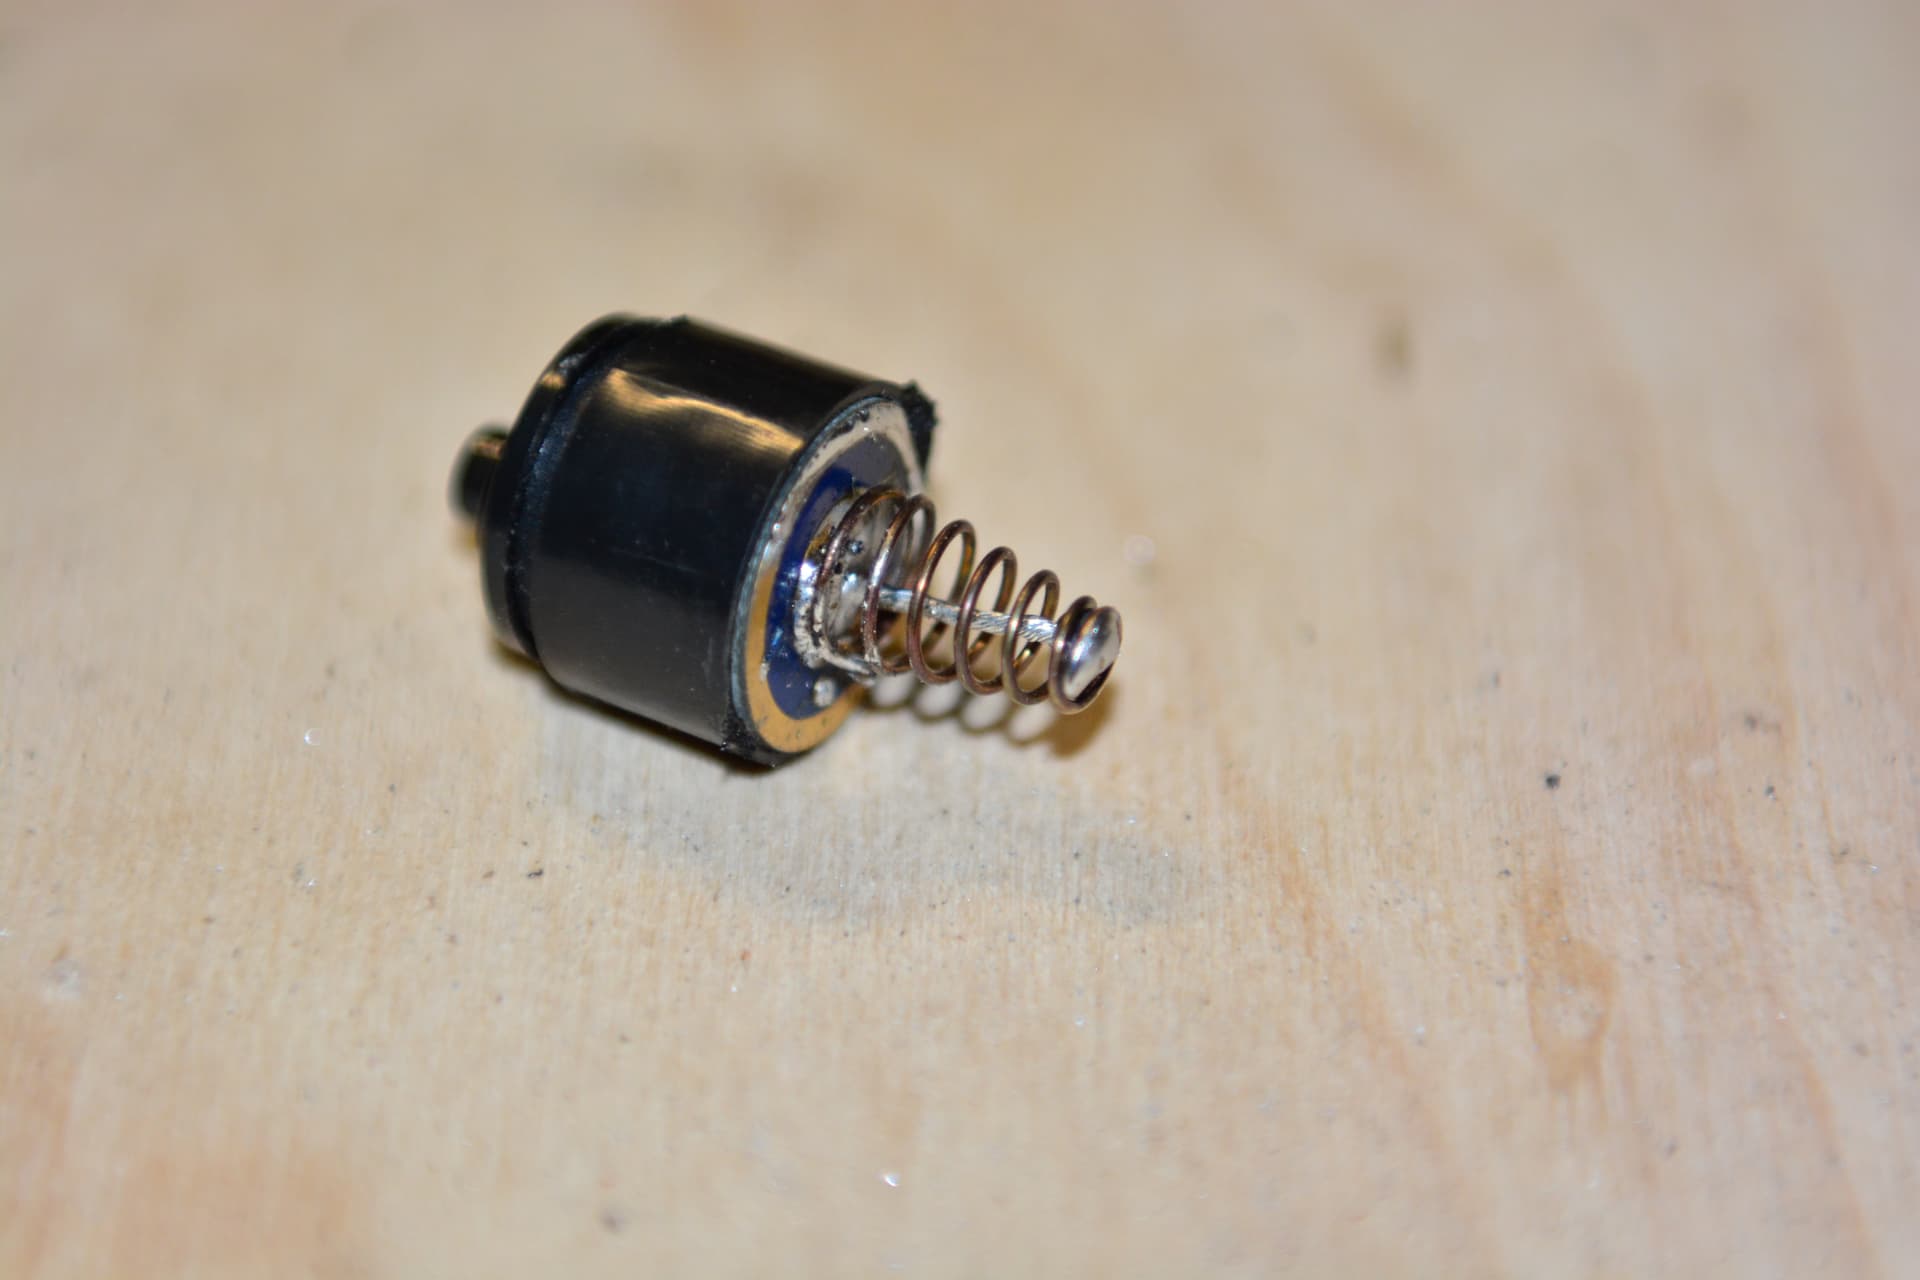
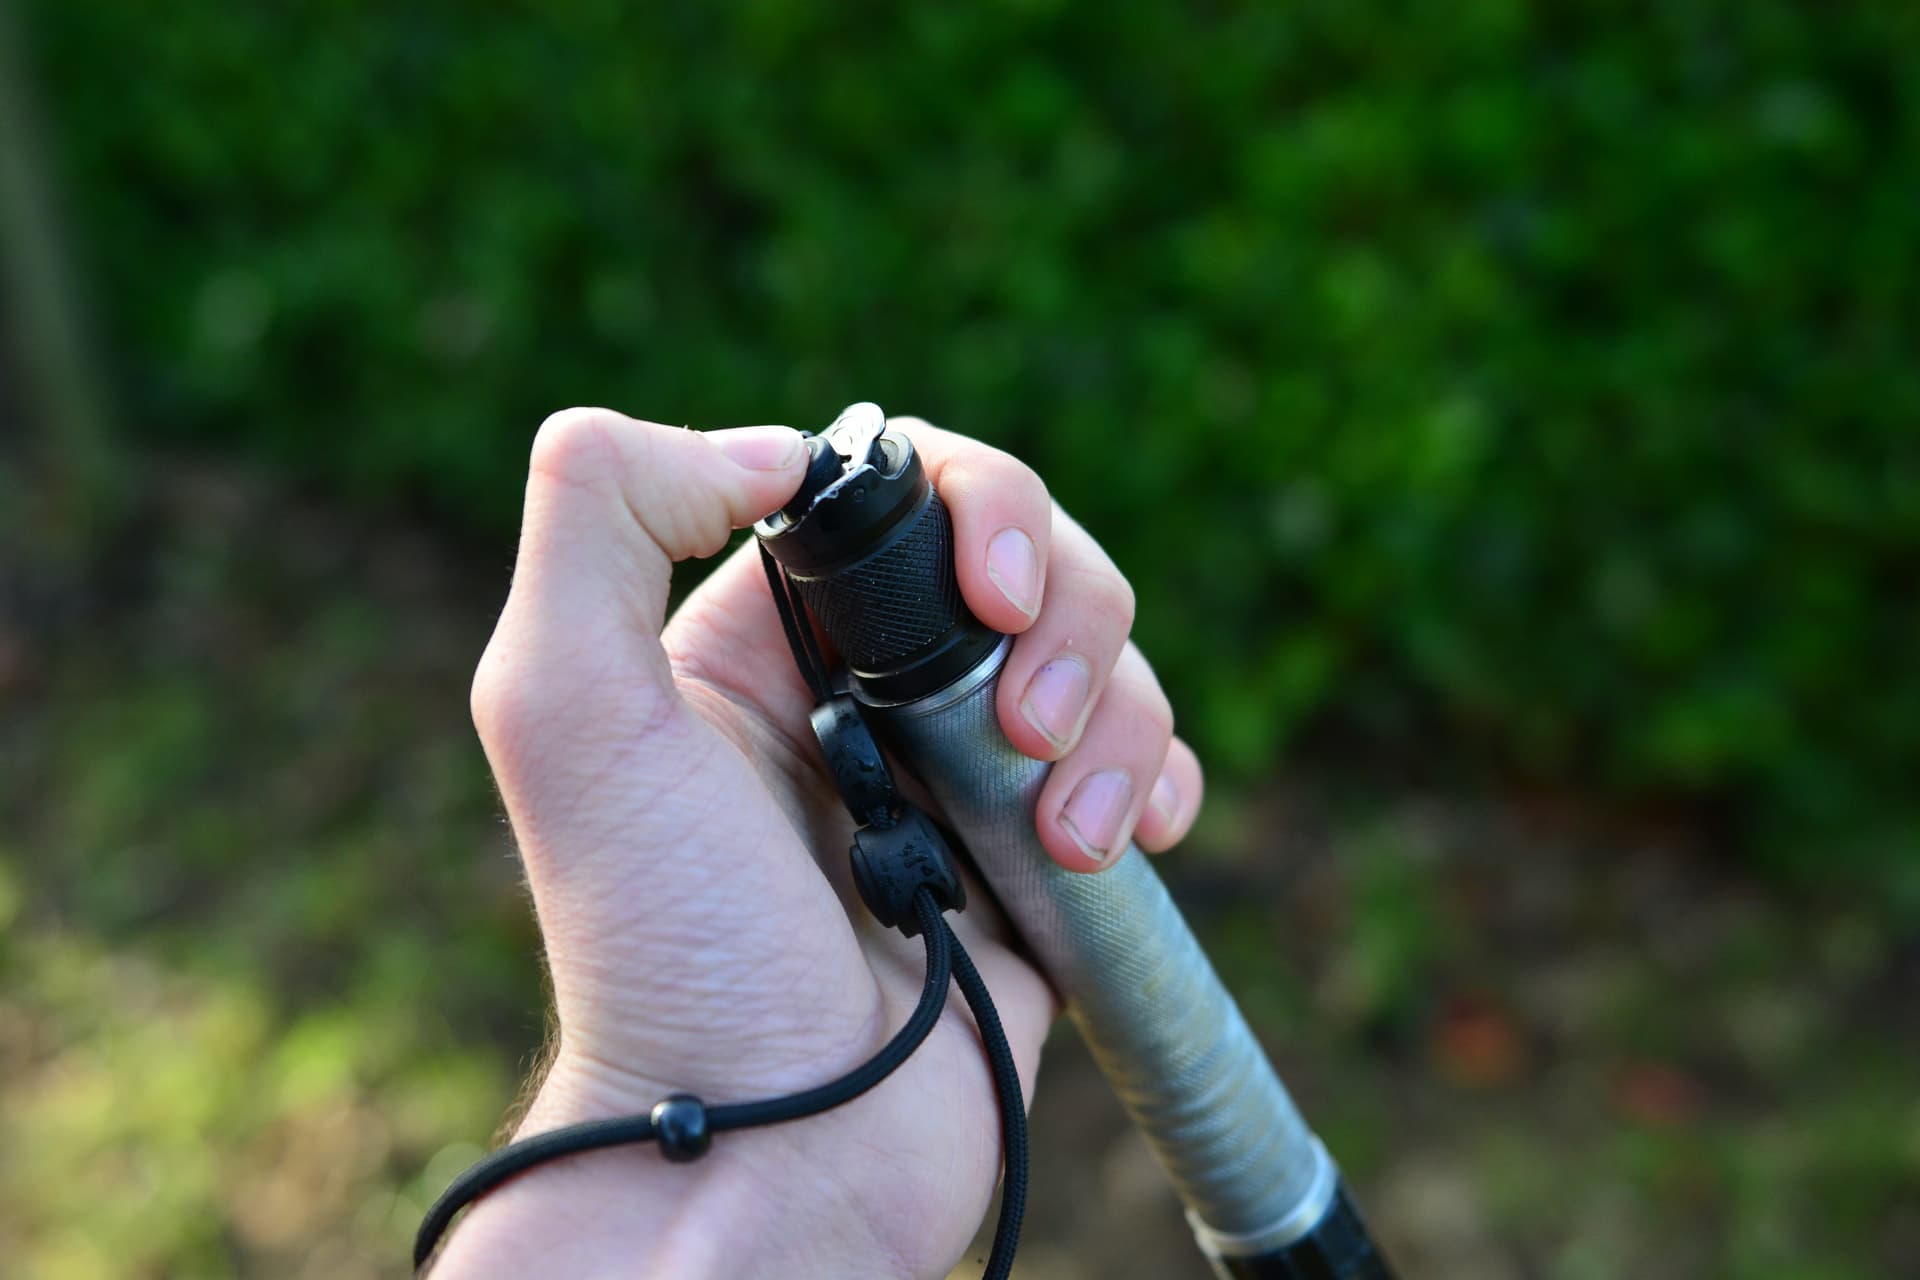
Here’s a close-up of the flashlight tailswitch. The main rubber button is a forward-clicky mechanical on/off switch for the light. The secondary metal E switch is used to change modes in order turbo>medium>low and holding it down at any time gives instant access to strobe. Now I personally love this tactical style UI and I was able to use this switch without any major modification.
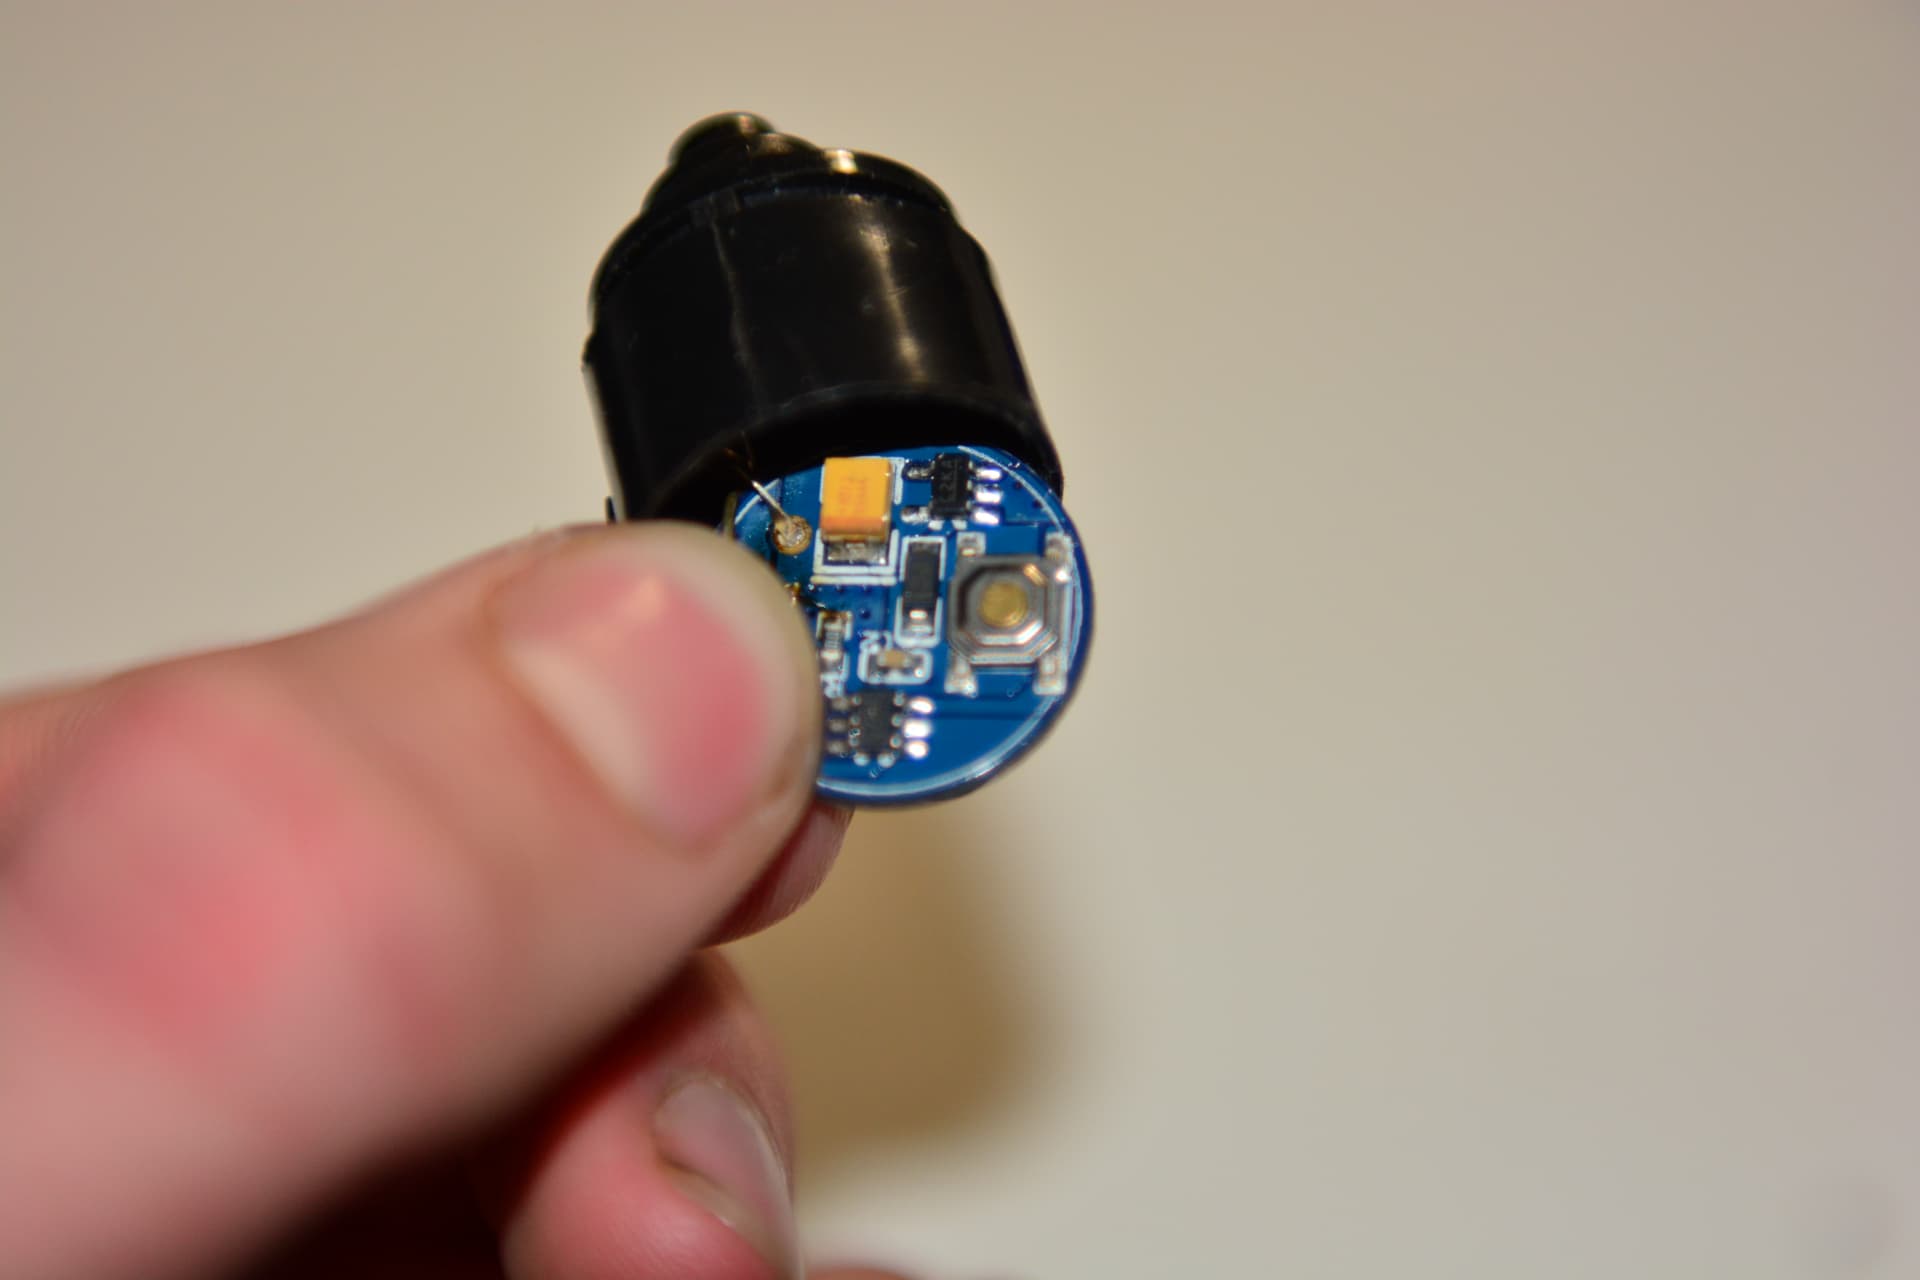
Here I have dismantled the flashlight switch. It was screwed it by a simple retaining ring. The switch contains this PCB. I’m not 100% sure what it does, I’m guessing it has something to do with controlling the modes and the PWM (which is visible on camera in all modes but invisible to me). If anyone is more knowledgeable than me please let me know what I’m looking at here!
Anyway, I did do one mod to this tailswitch, which was bypassing the rear battery spring by soldering on a piece of wire. I was hoping it would lessen the resistance because the flashlight is drawing more power than it was designed for. Not sure if it made a huge difference, but at least I was trying to modify it. Would you trust 3.5A through a pen spring for extended time ![]()
Please be free to give me any feedback as the build progresses, any suggestions, etc. I will post beamshots and show the flashlight operating in the next edit, just the weather is extremely wet and cold now!
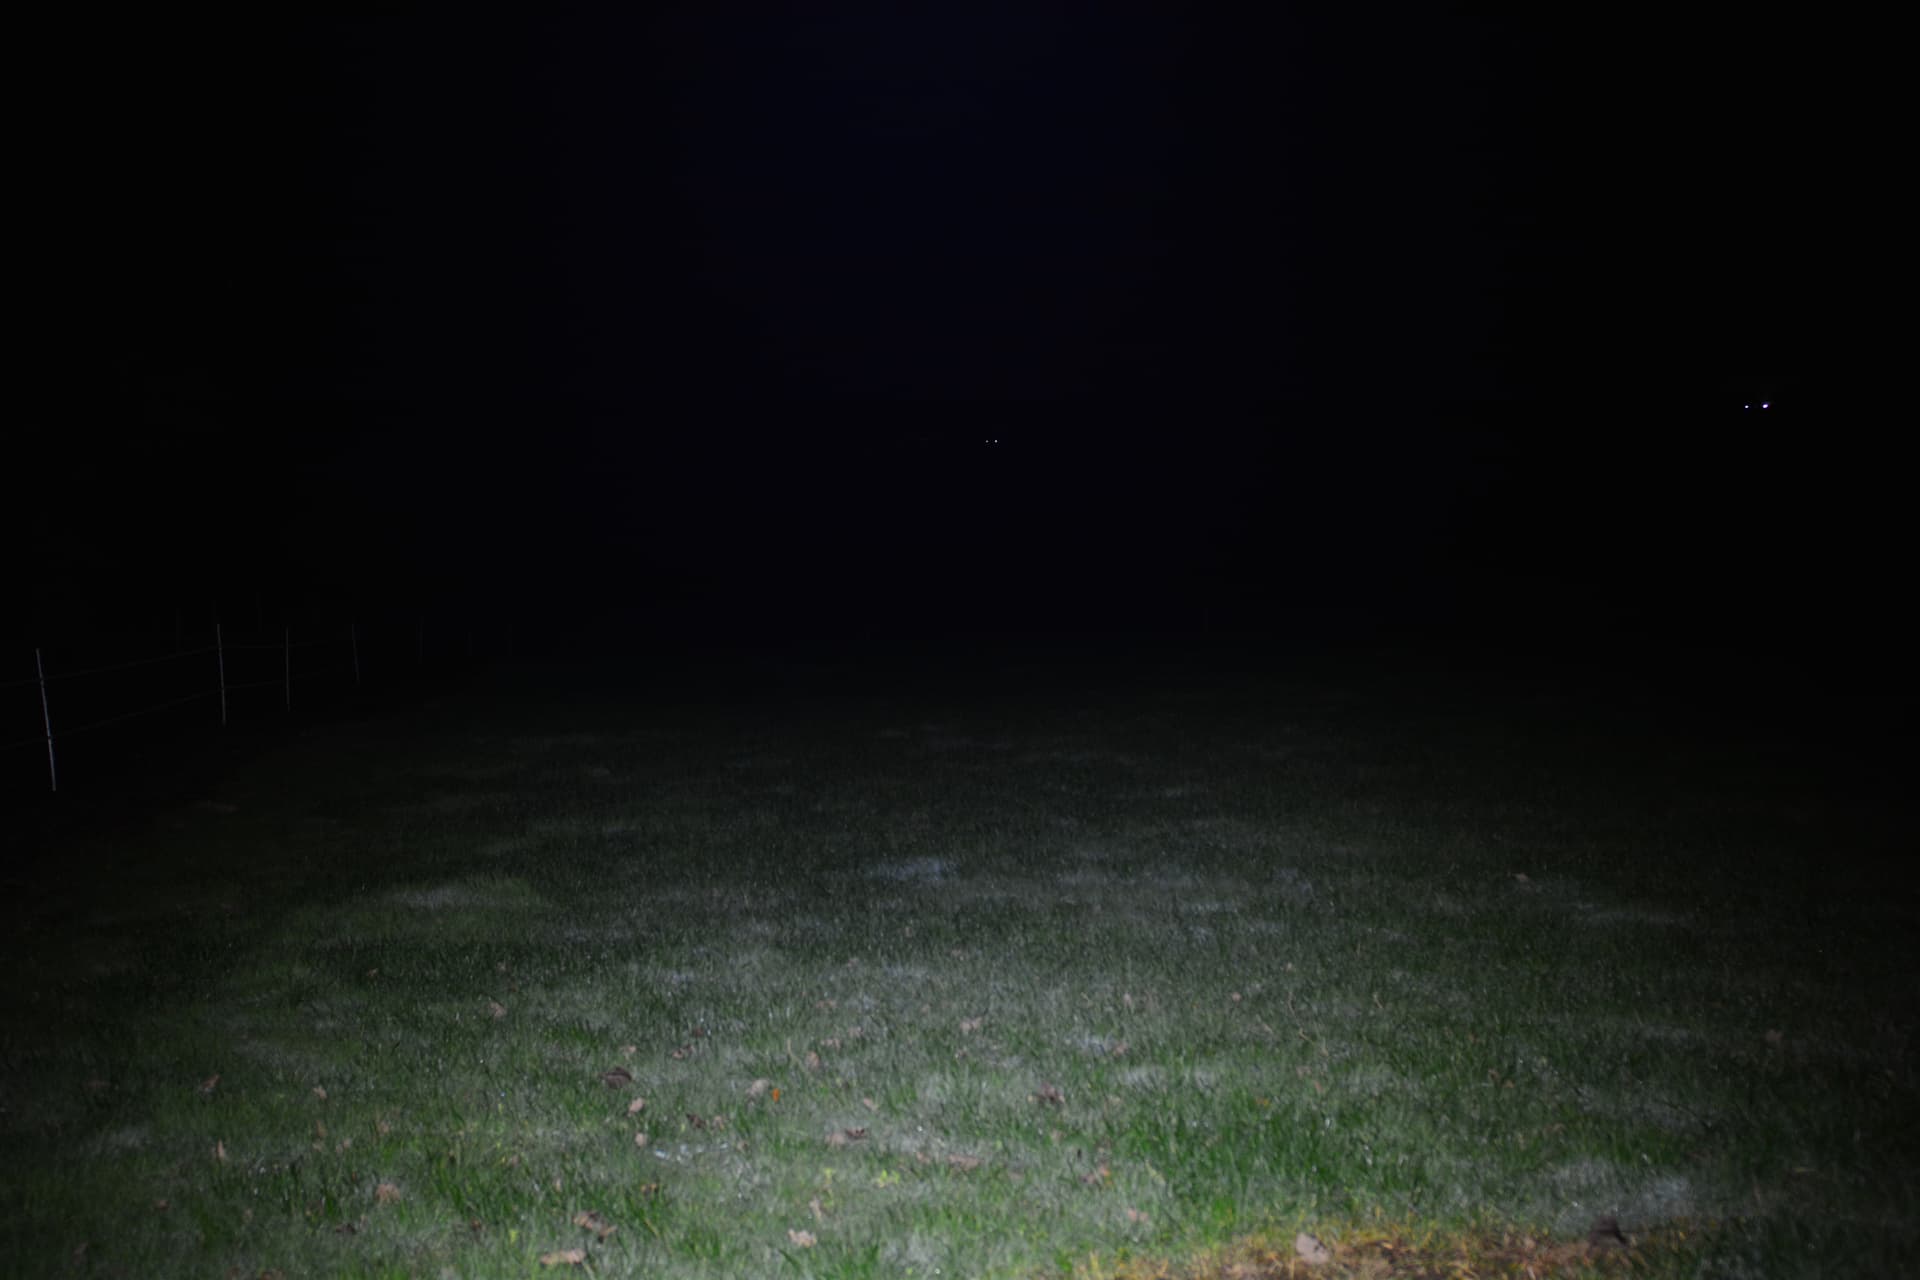
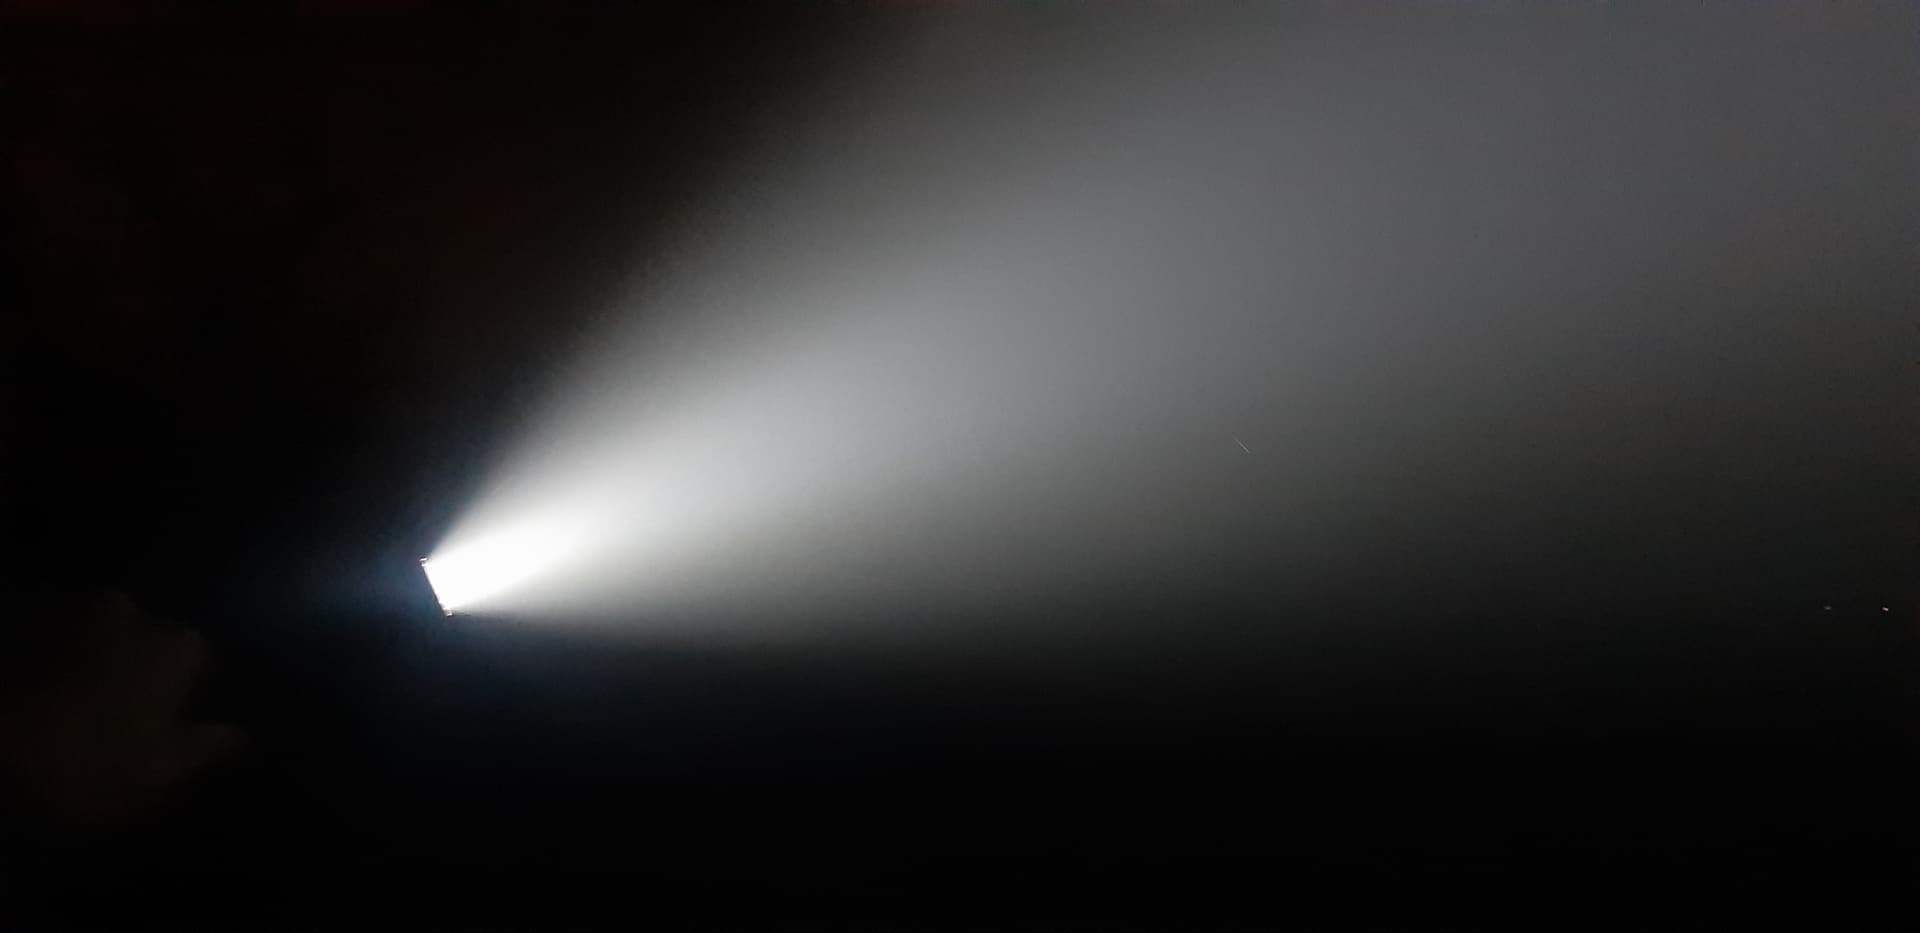
Flashlight shown operational (beamshots).
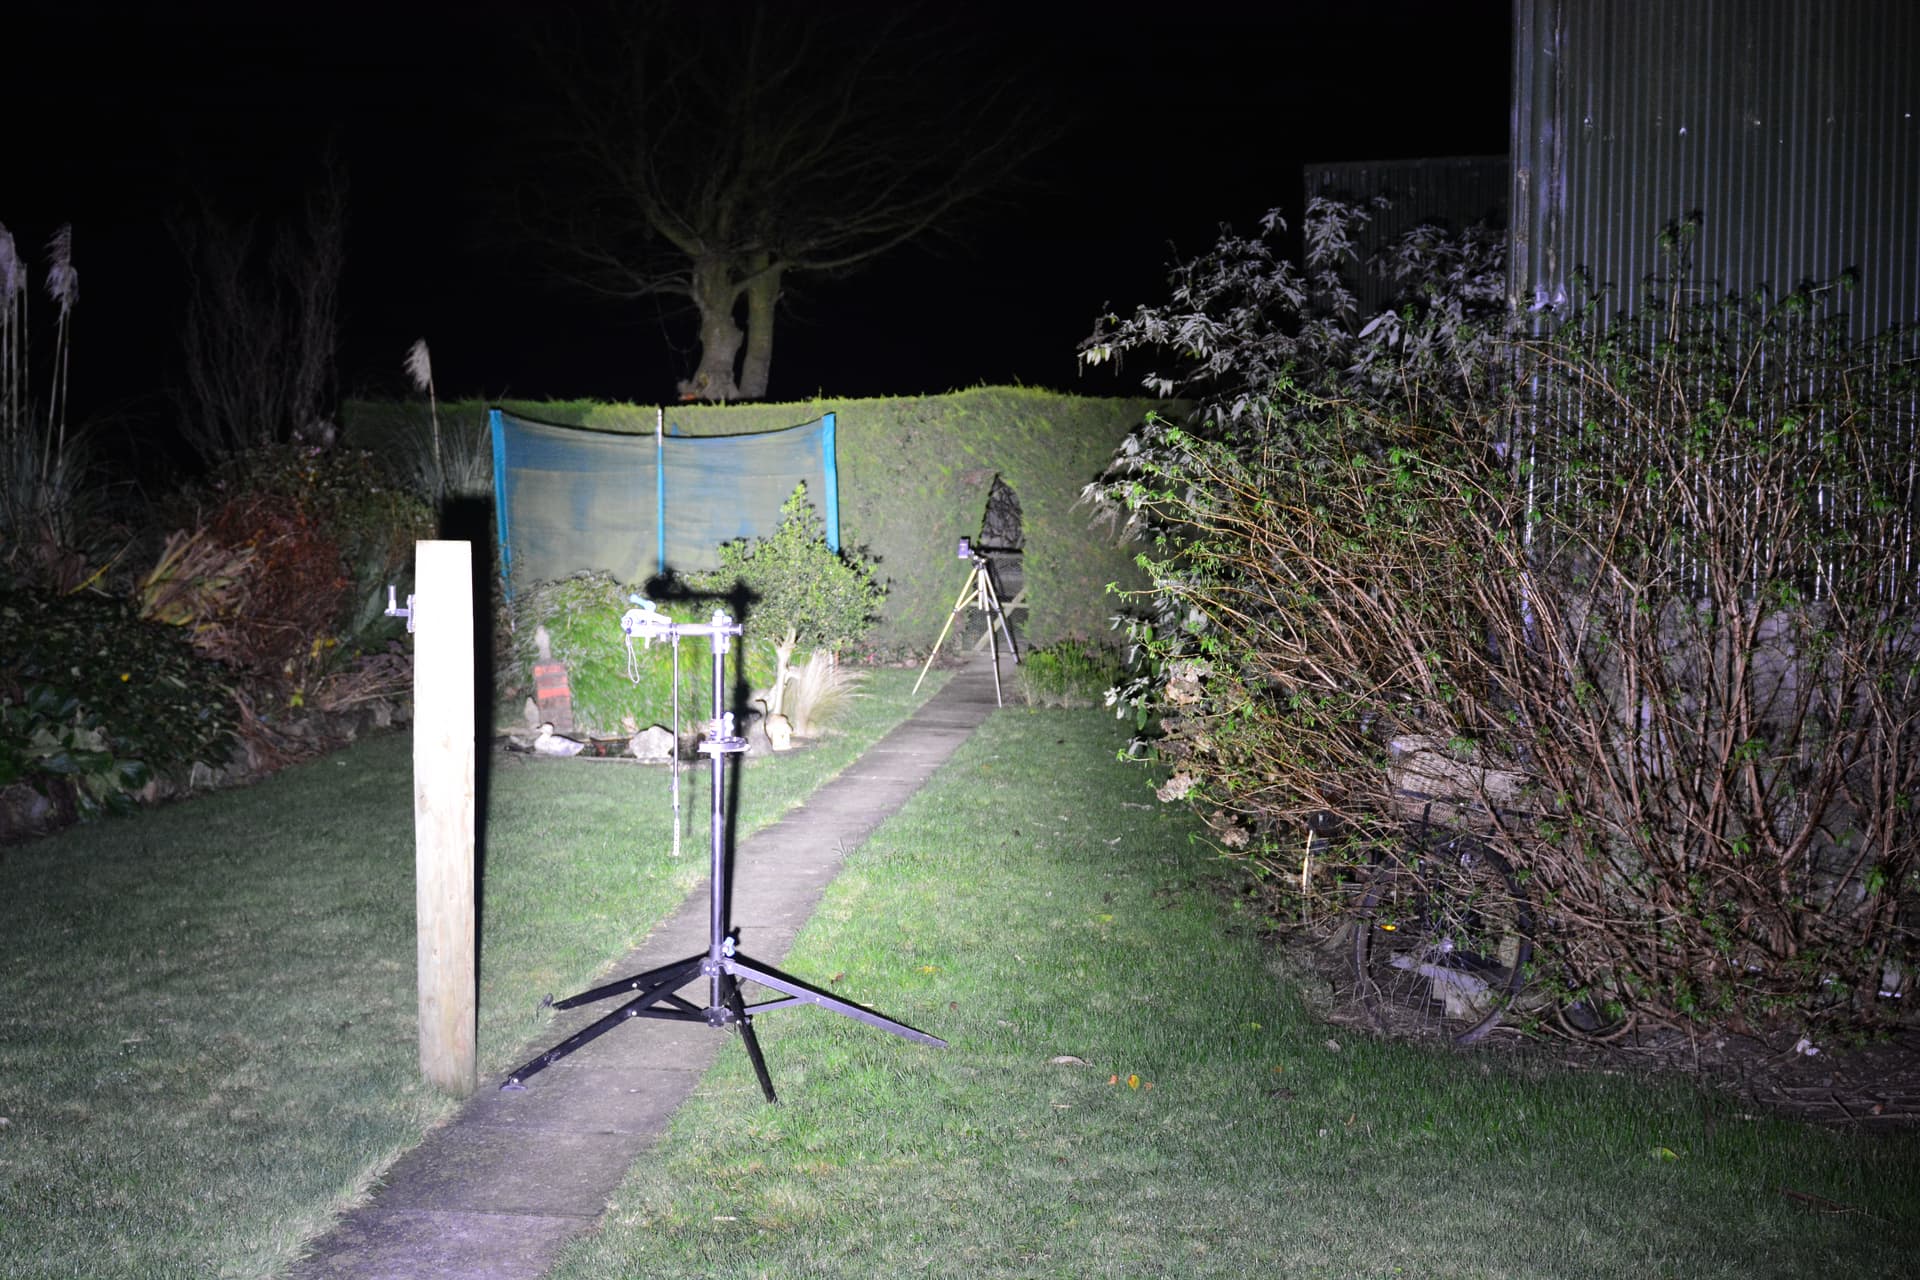
For these I was shining the flashlight down the length of my field and photographing it. The camera is a Nikon D7100 with the Nikkor 24-70mm F2.8E ED VR lens. The camera is on a tripod and the exposure settings are the same as I was shooting in manual mode: shutter 1/6 of a second, aperture F2.8, ISO (sensitivity) 400. The white balance is daylight (5200K). I was holding the flashlight by hand slightly above the camera and shining parallel with the lens.
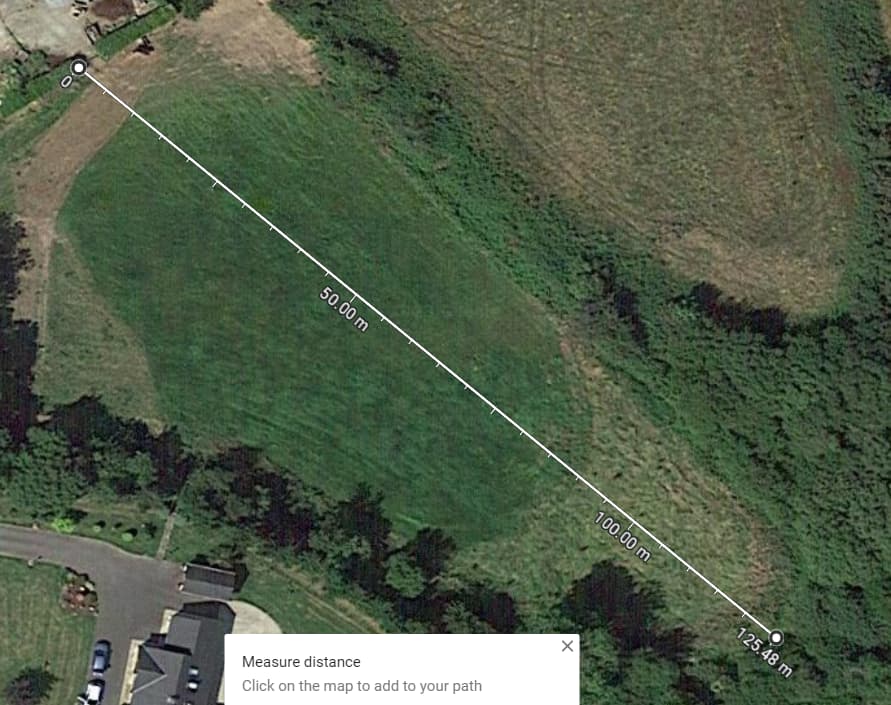
This is the field where I tested the flashlight. According to google maps, the distance to the trees is 125 meters. I was standing near the zero mark.

Control shot
Turbo mode
Medium mode
Low/moonlight
So there was the beamshots. If I had to guess, turbo is around 3000-4500 lumens. Medium is still quite strong, probably around 1000-2000 lumens (but doesn’t overheat and much more sustainable), low mode is rather dim like a moonlight mode. Around 20-100 lumens. Its worth noting these values are most likely inaccurate as it is me just guessing it and not measured with instruments. I feel turbo is insanely good as from actually using the flashlight it is quite sustainable as far as turbo modes go, and It can definitely hit the far treeline and I feel like I could easily make out a human or animal there. The flashlight does have a hotspot, however it is very large in diameter and not very throwy (however it does have some decent reach in turbo mode). In fact this flashlight is extremely floody (as expected from a large emitter in a textured reflector) and lights up my entire field! I think with this thing I can illuminate a large area and be able to see everything near me. Sadly, im not able to compare it with the original xt2c as the flashlight broke before I even knew about the contest.
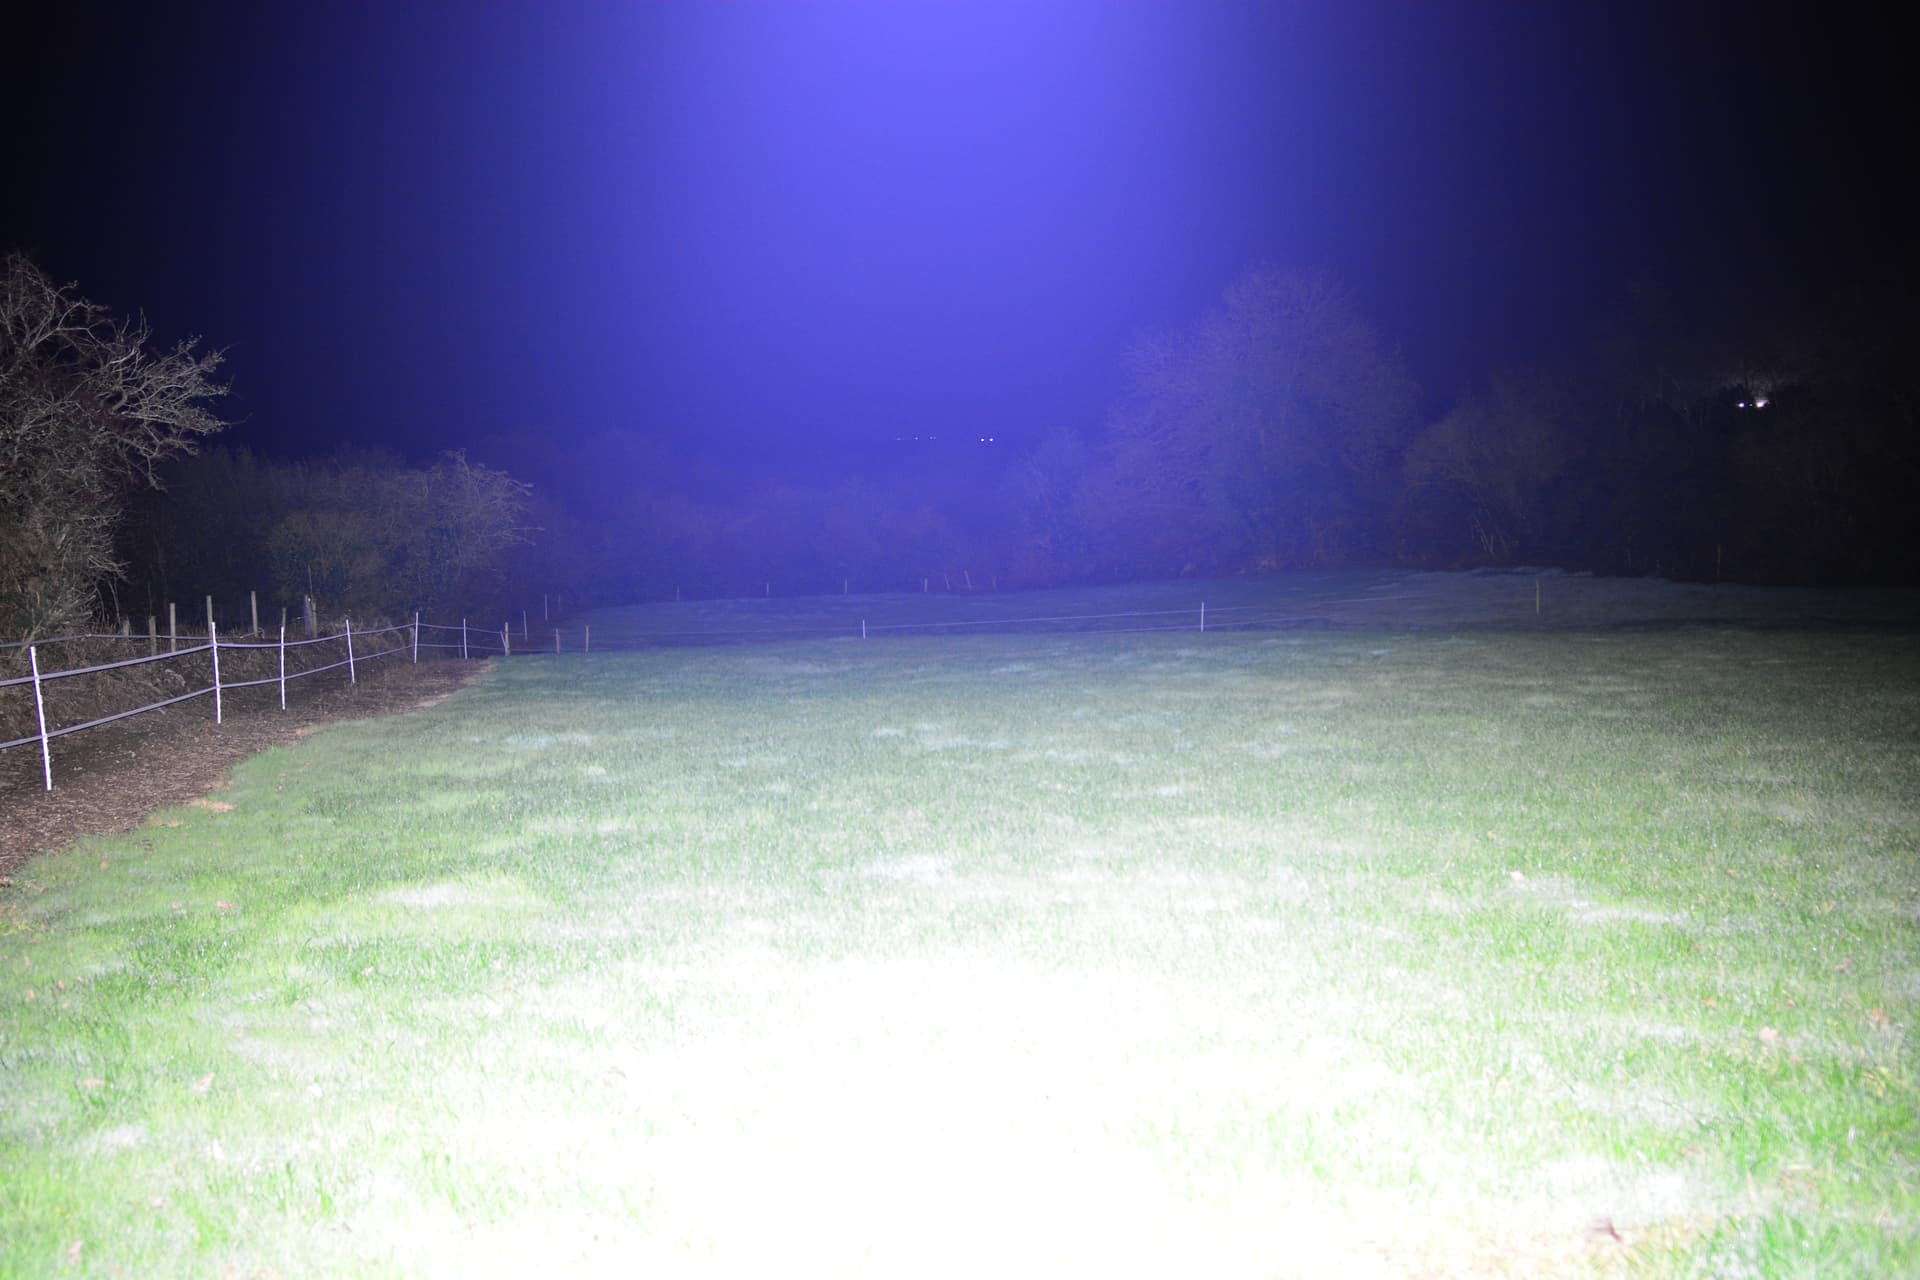
This image (above) is overexposed (I have made it brighter) on purpose simply to show the effect on camera that light is getting to the far treeline. It is NOT realistic. The real thing is about twice as dim and the first 4 photographs are a far more accurate representation. Here I have let up the shutterspeed to 1.3 seconds. Not even sure if Im boring anyone who may still be reading by talking about the technical side of digital photography, however I finetuned the first 4 photos (control, turbo, medium, low) to look close to the way I can see the flashlight with my own eyes. (At least with my particular monitor settings)
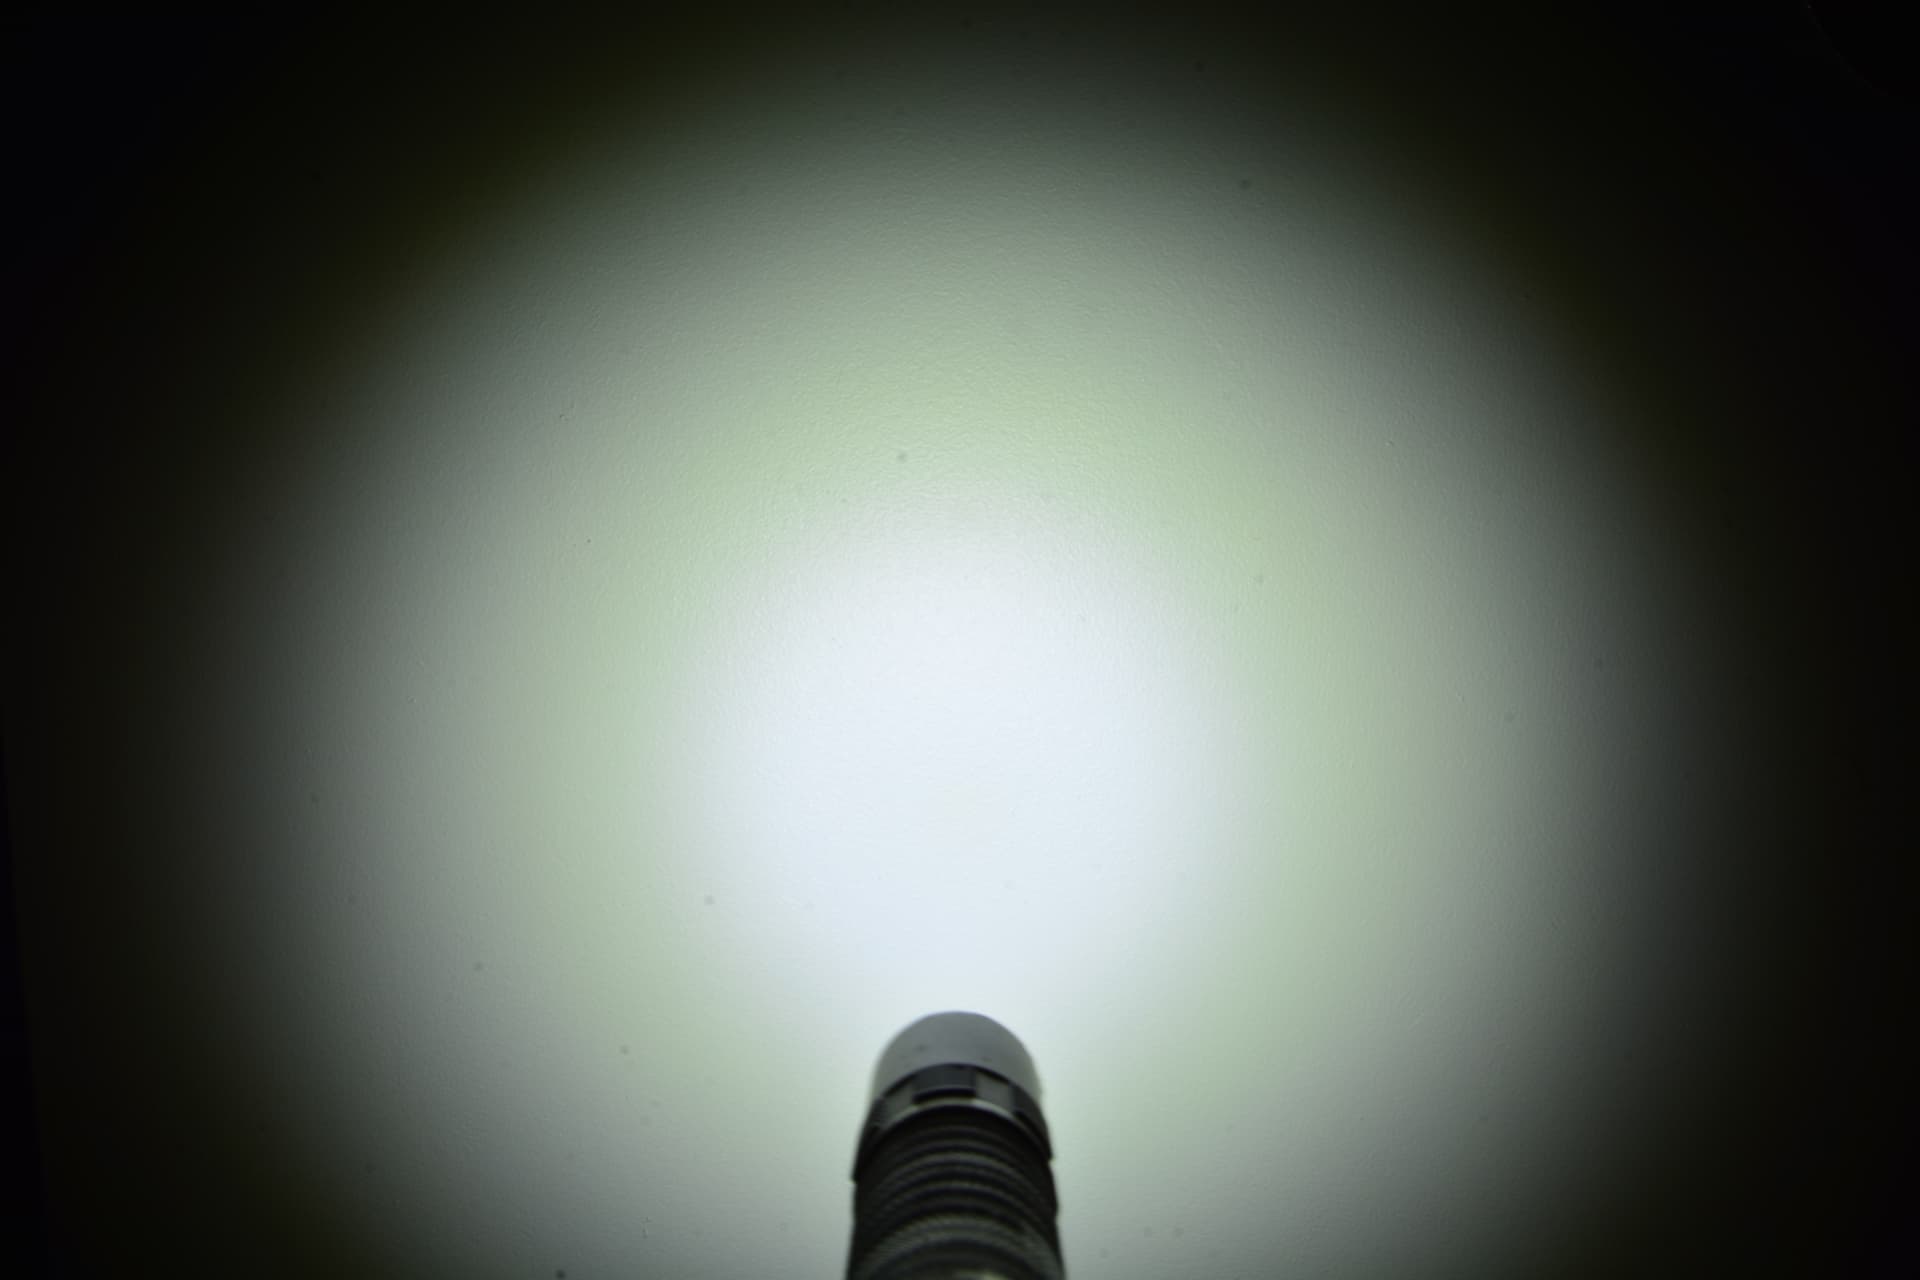
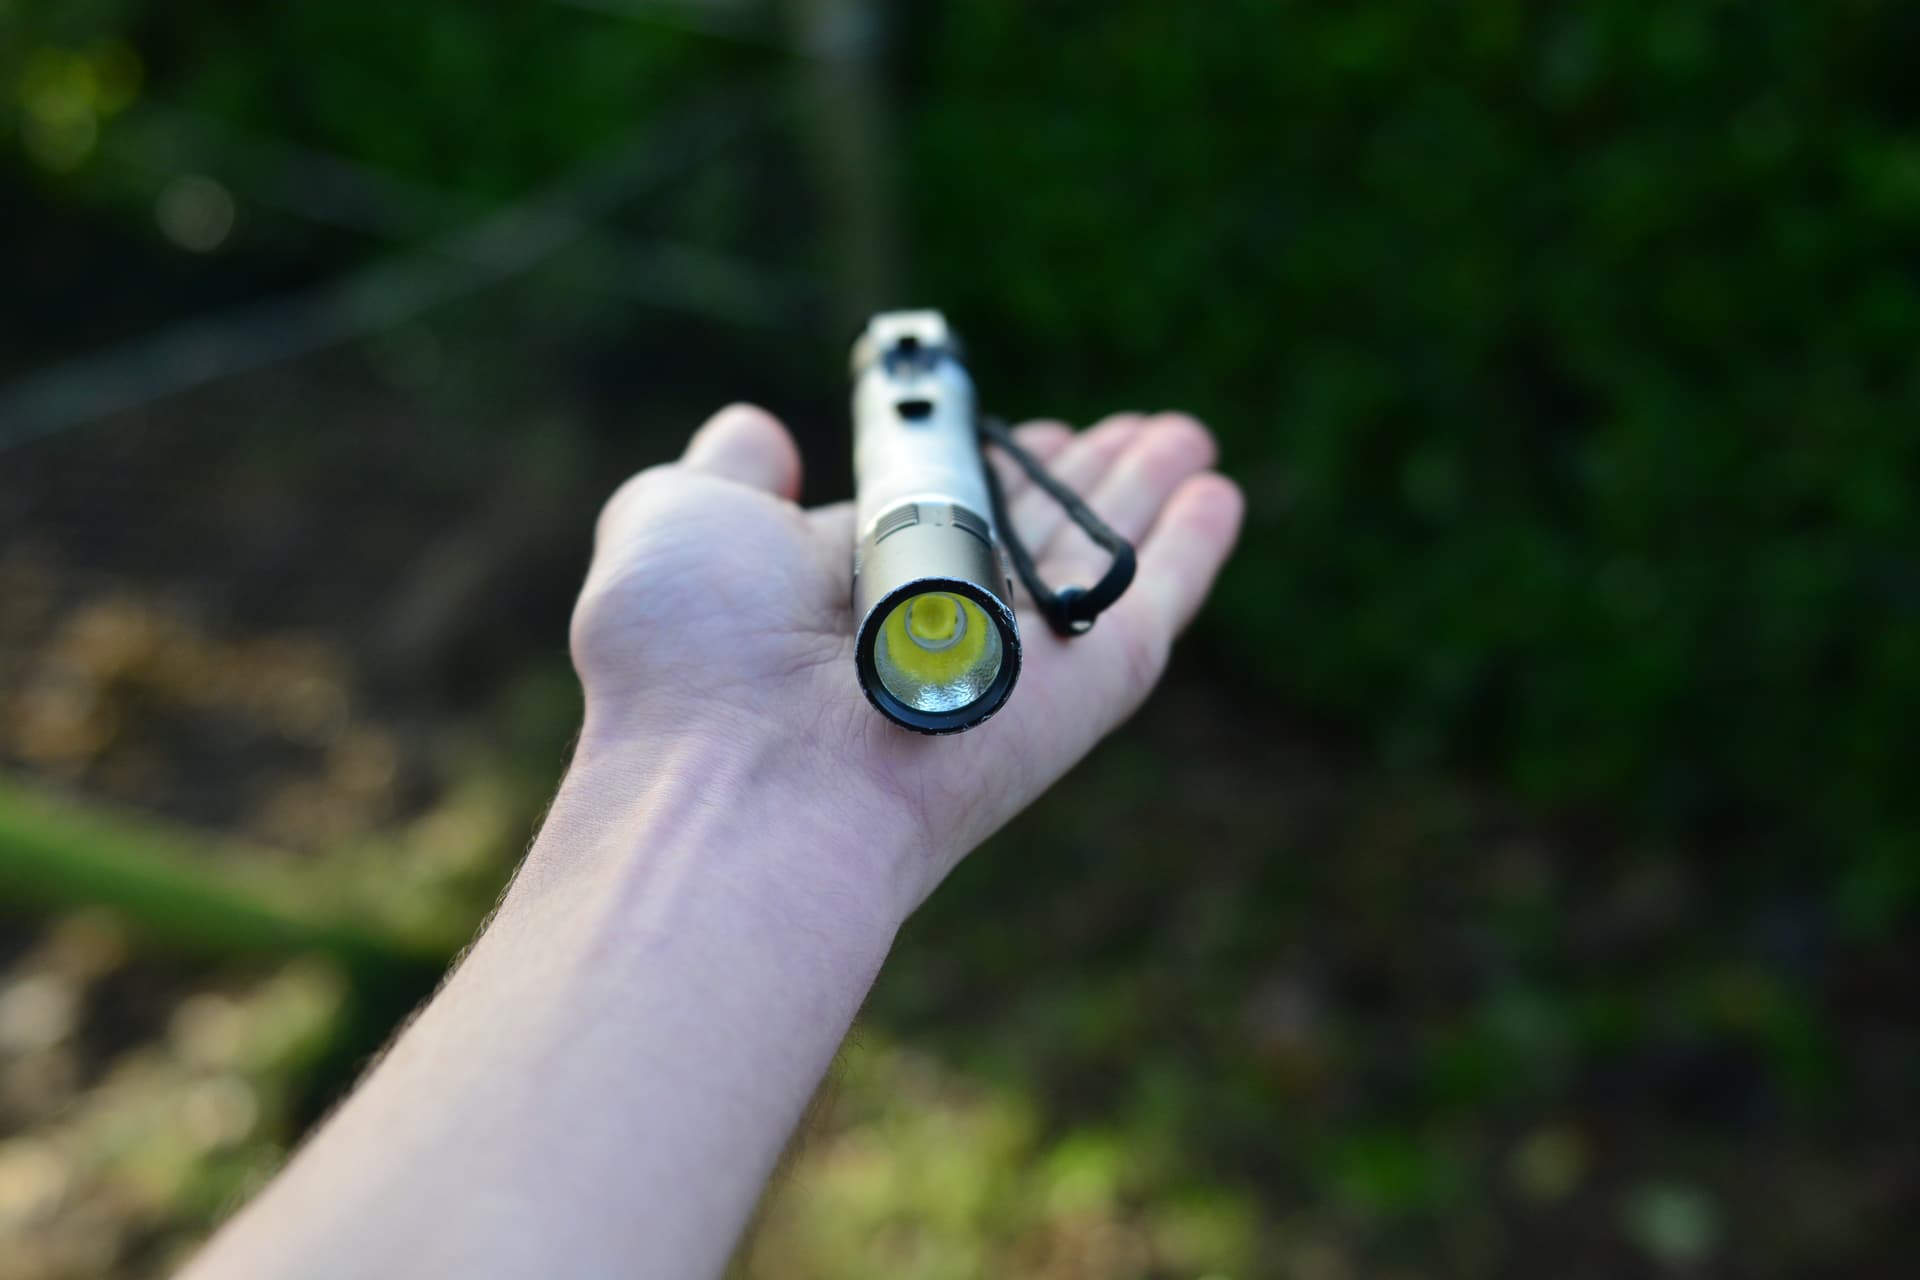
Here is a beamshot against a cream wall (sorry this is the whitest in my house!). The flashlight is about 15 cm away. It does look a bit greenish on camera but in person the beam is pure white. The beam is one of the smoothest I have seen with no artifacts, and it is very circular. There is a visible hotspot, however it is not very well defined, but also large in diameter and not very throwy. The hotspot seems to blend in with the spill at larger distances. While talking about spill, there is a LOT of it. The beam angle is about 120 degrees and it gives a great field of vision. Also the textured OP reflector seems to get rid of the dreaded cree rainbow associated with the XHP emitters for the most part.
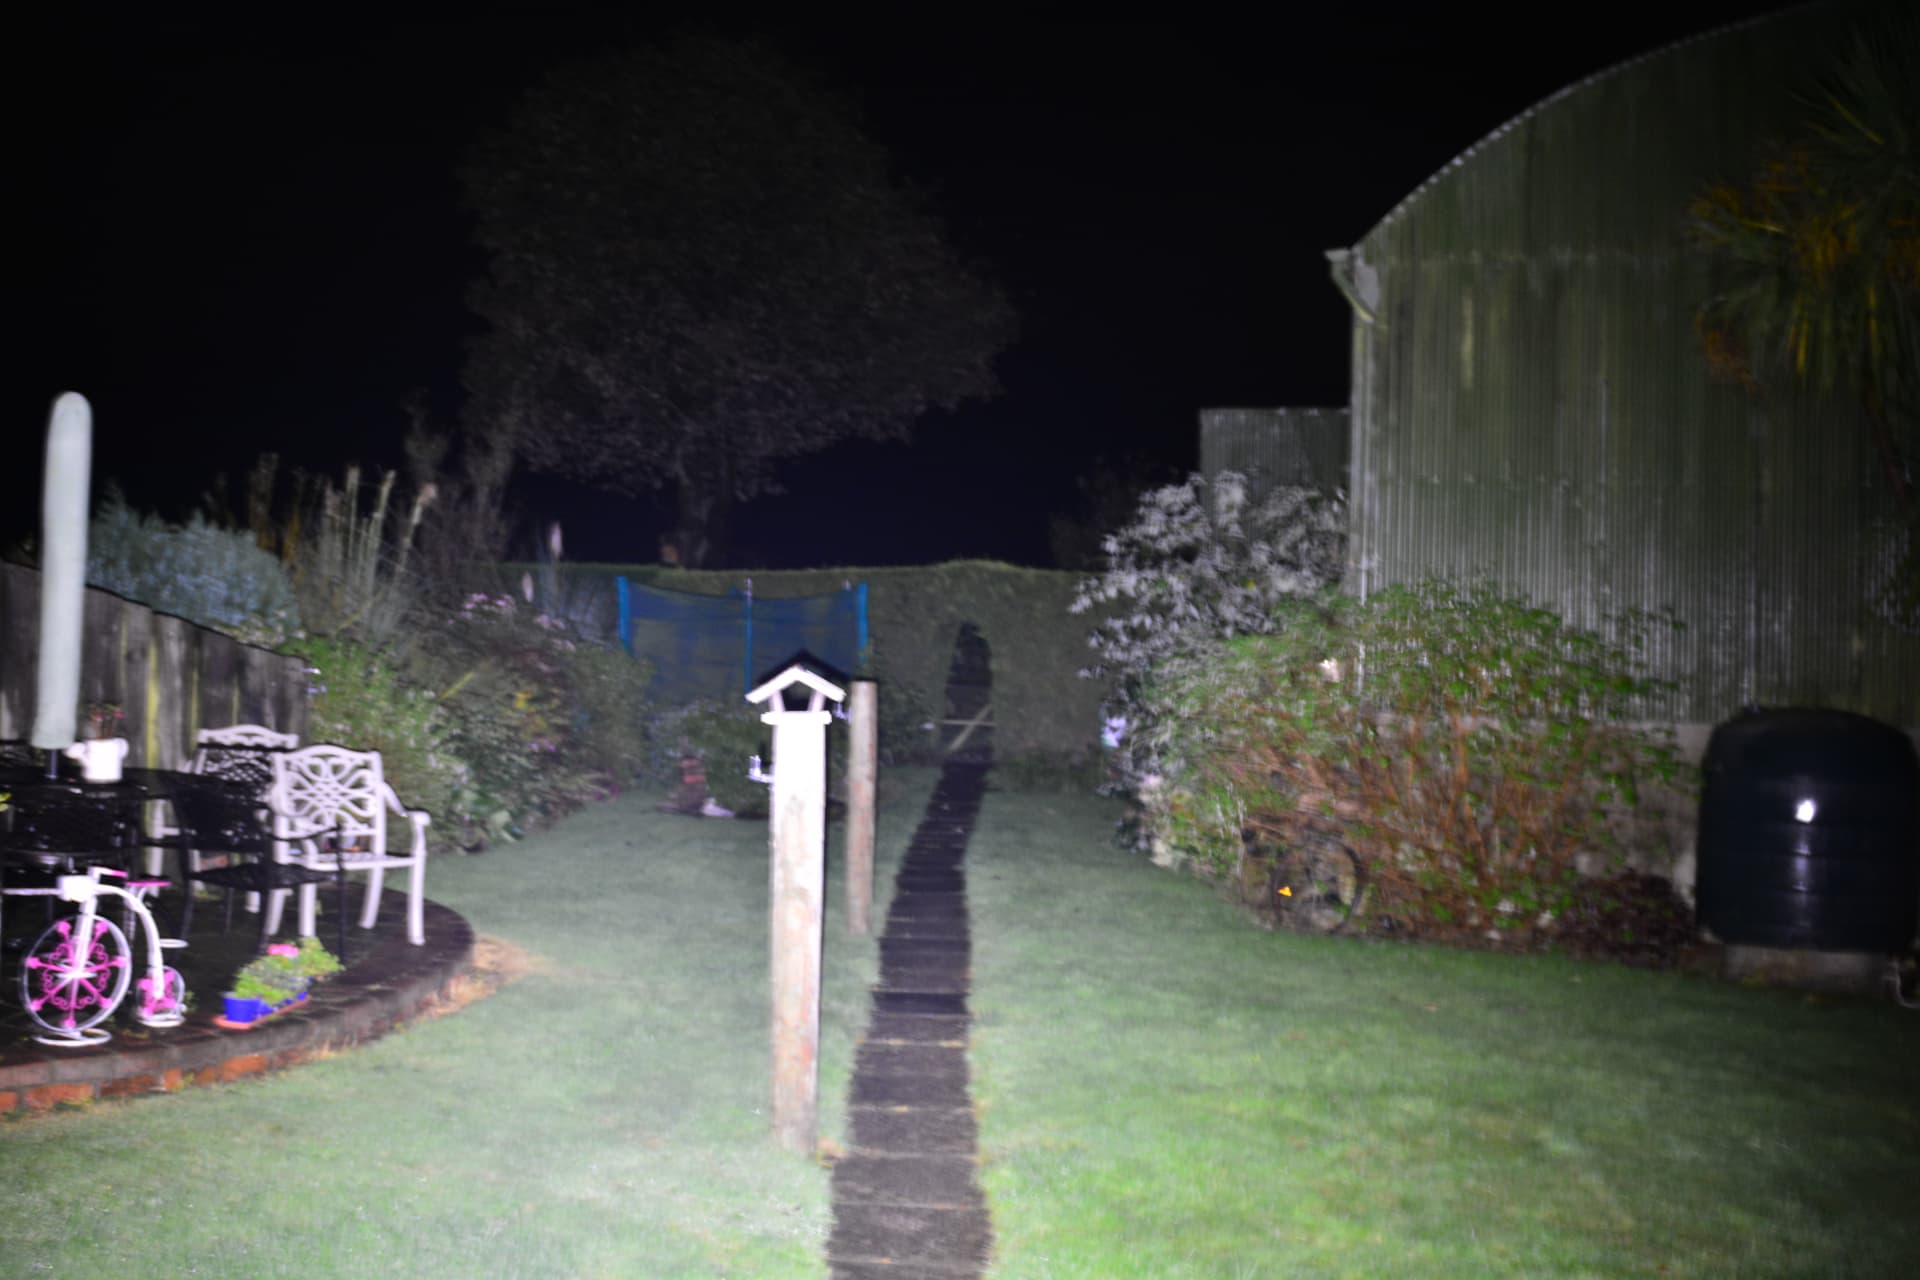
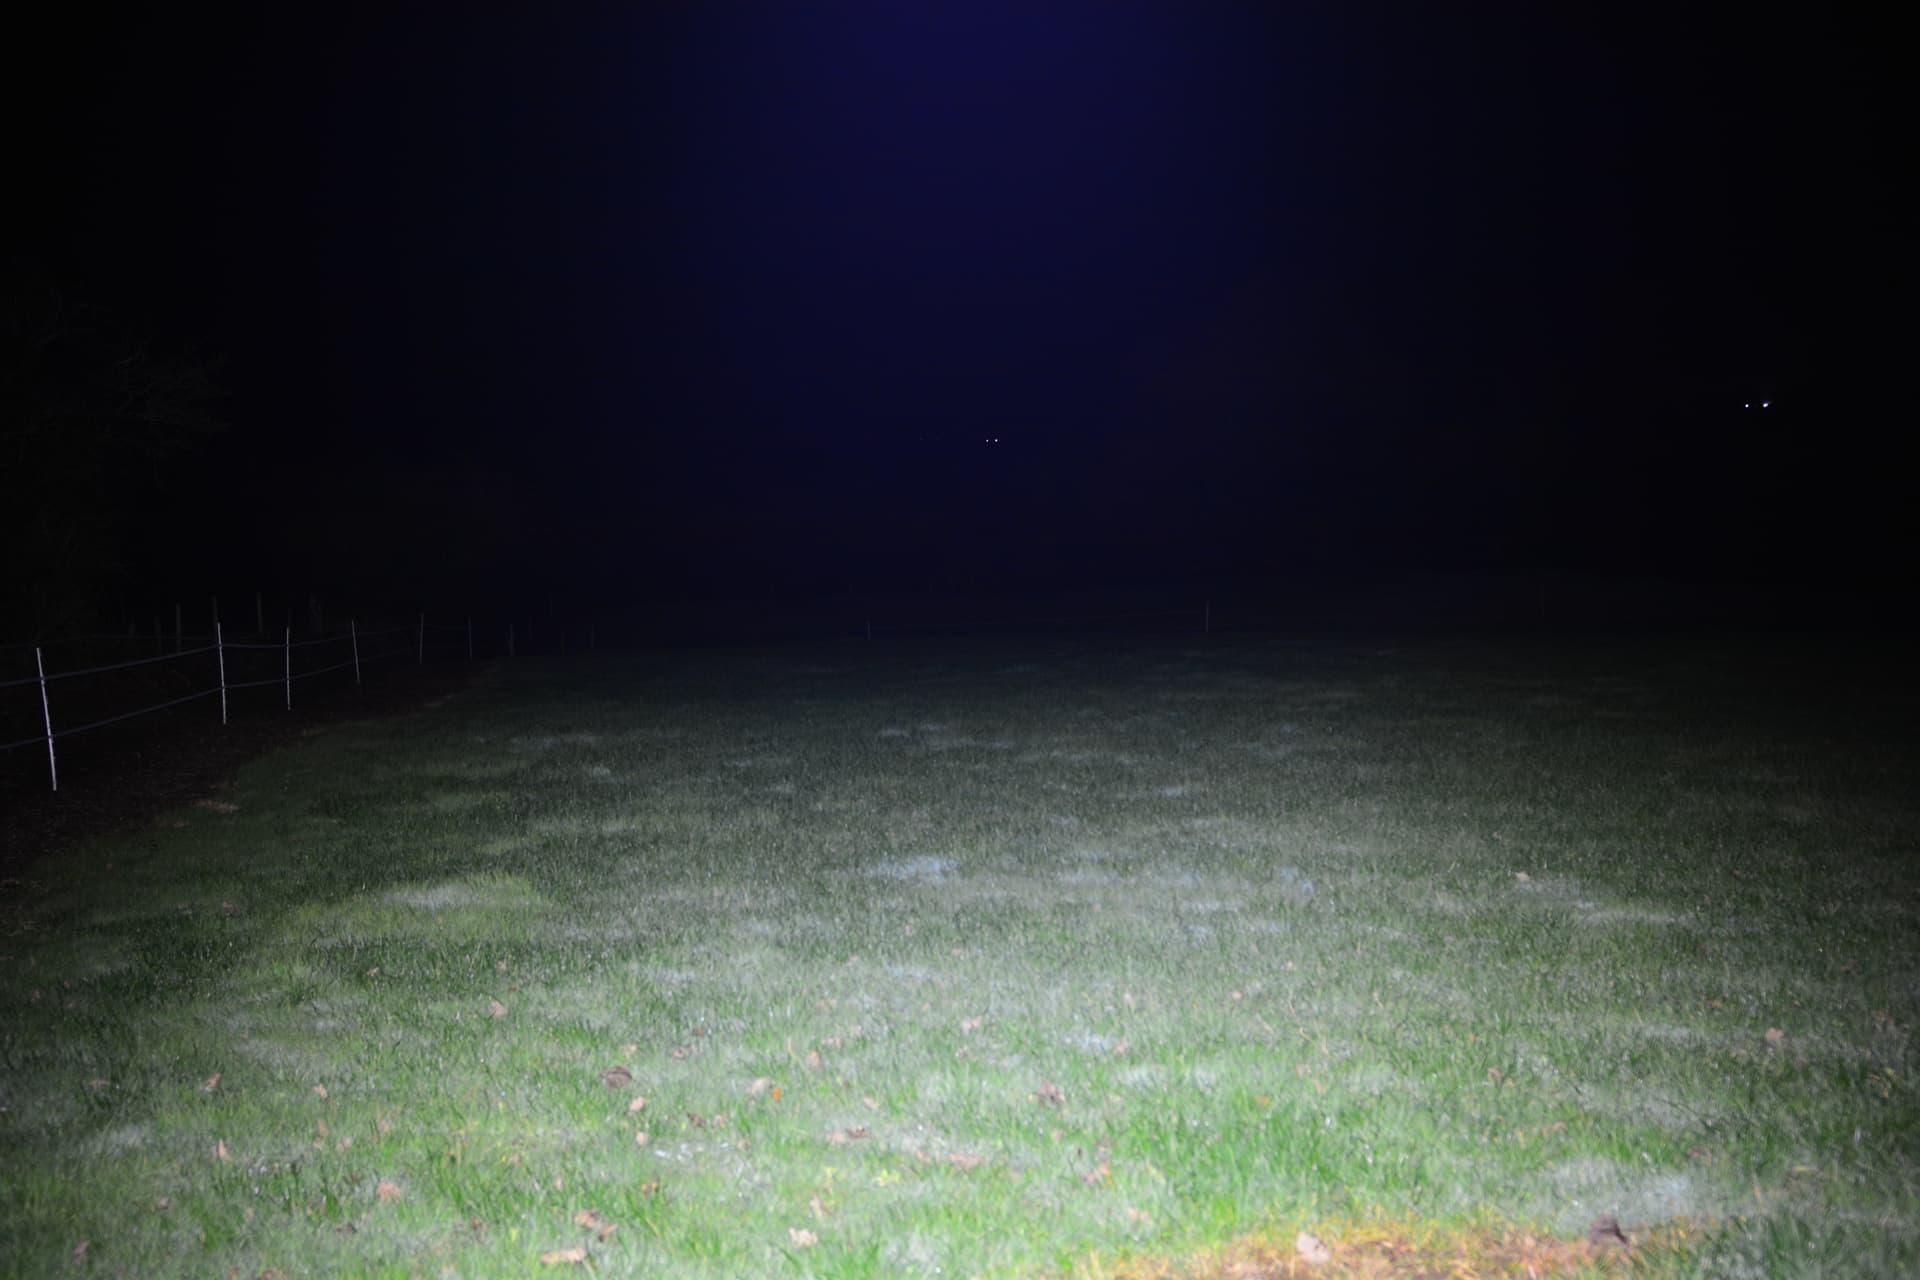
A photo of the beam profile viewed from the side, on a very foggy night. Shot on samsung phone in auto mode.
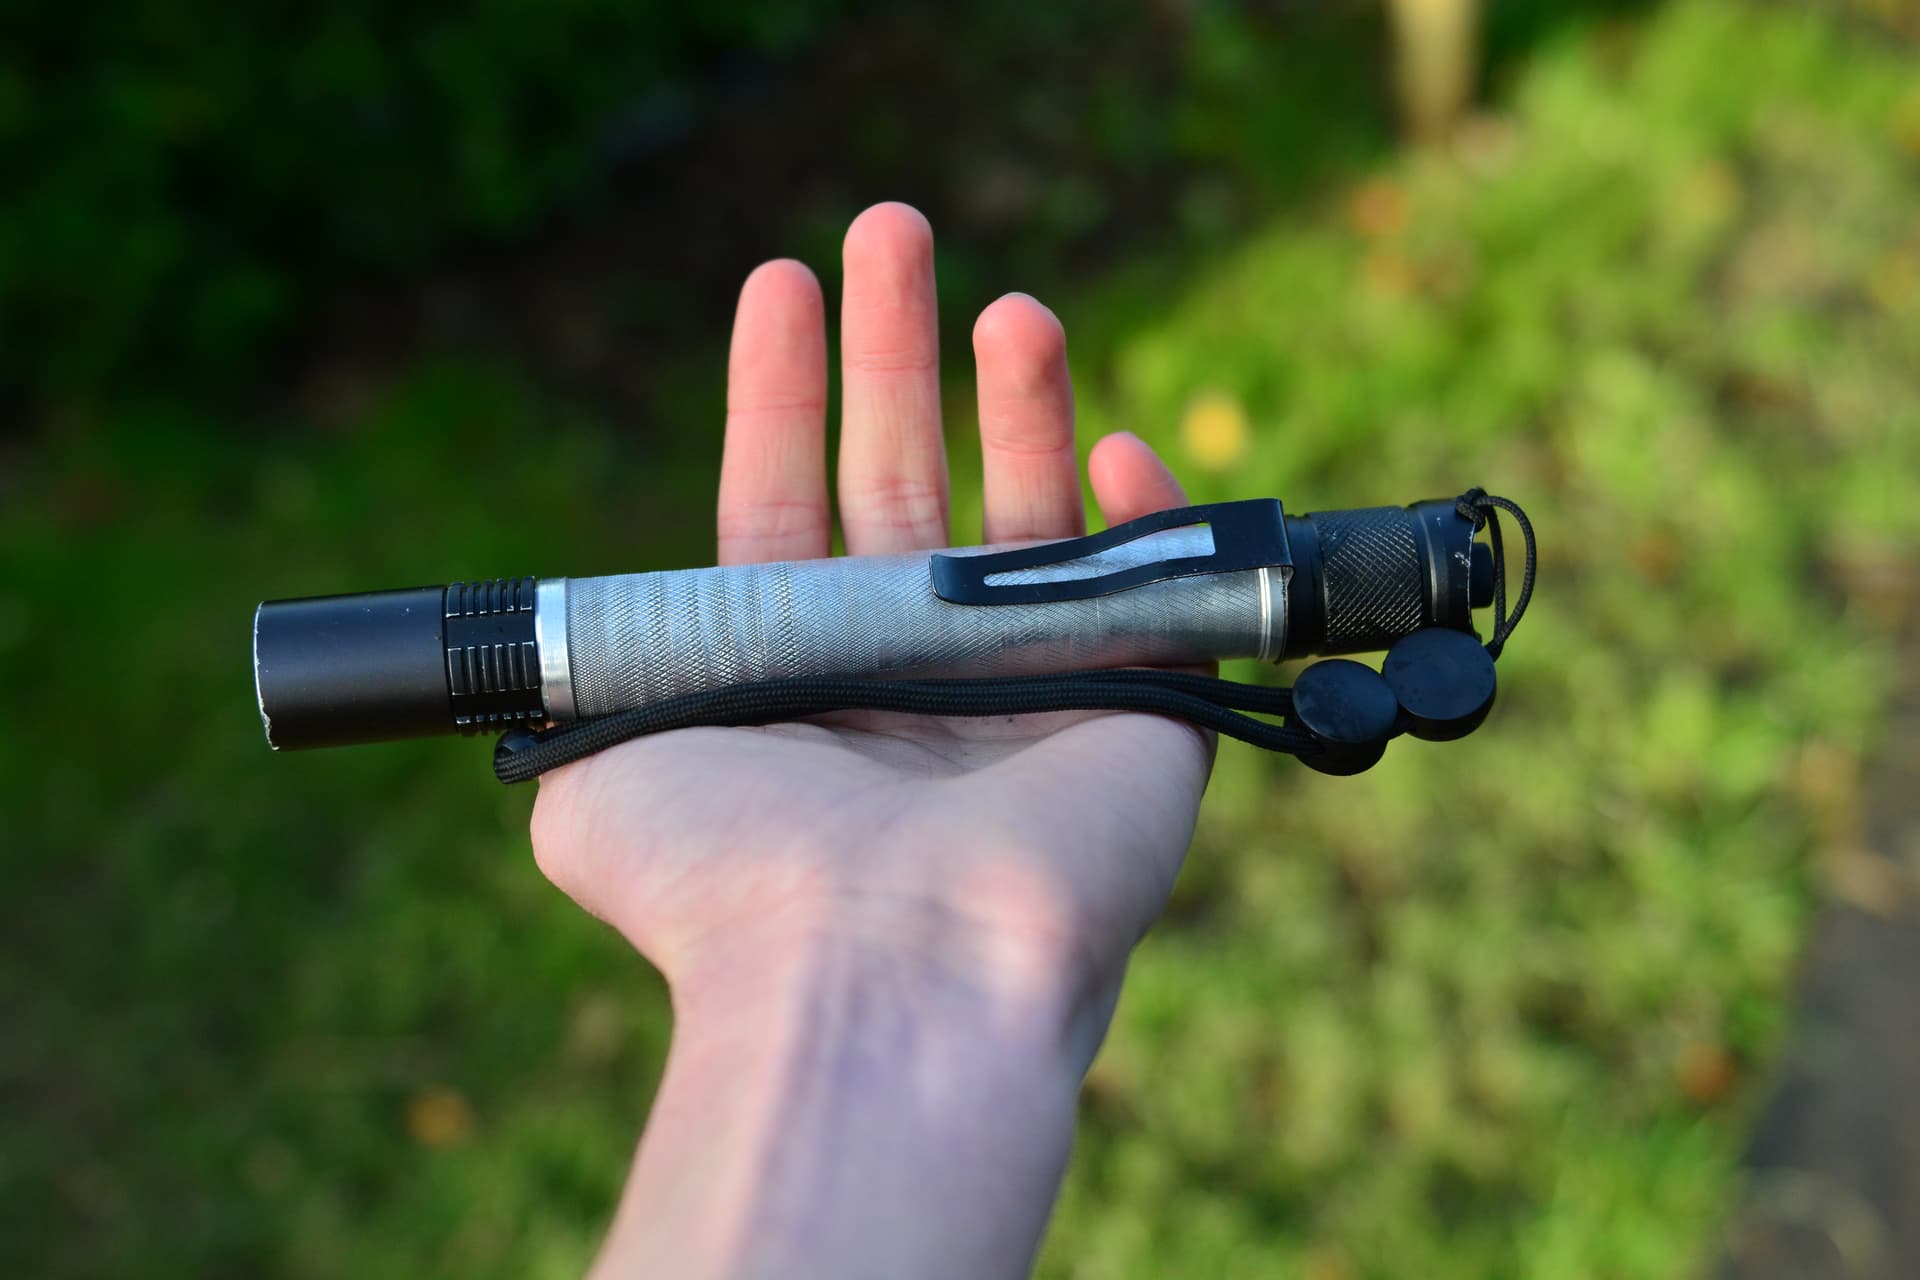
Flashlight paraphernalia (accessories)
I have decided to add some accessories in order to enhance the practicality and functionality of this flashlight. While these aren’t exactly a modification as such, I feel like I personally will get some benefit from having these. Here I have decided to add this flashlight clip (which I got off an old, broken chinese generic flashlight), and I have also added this nice lanyard/flashlight strap which came with my Amutorch DM90 (but I never used it because the DM90 is way too large and heavy to carry on a lanyard. I mean dropping that thing would dislocate your wrist
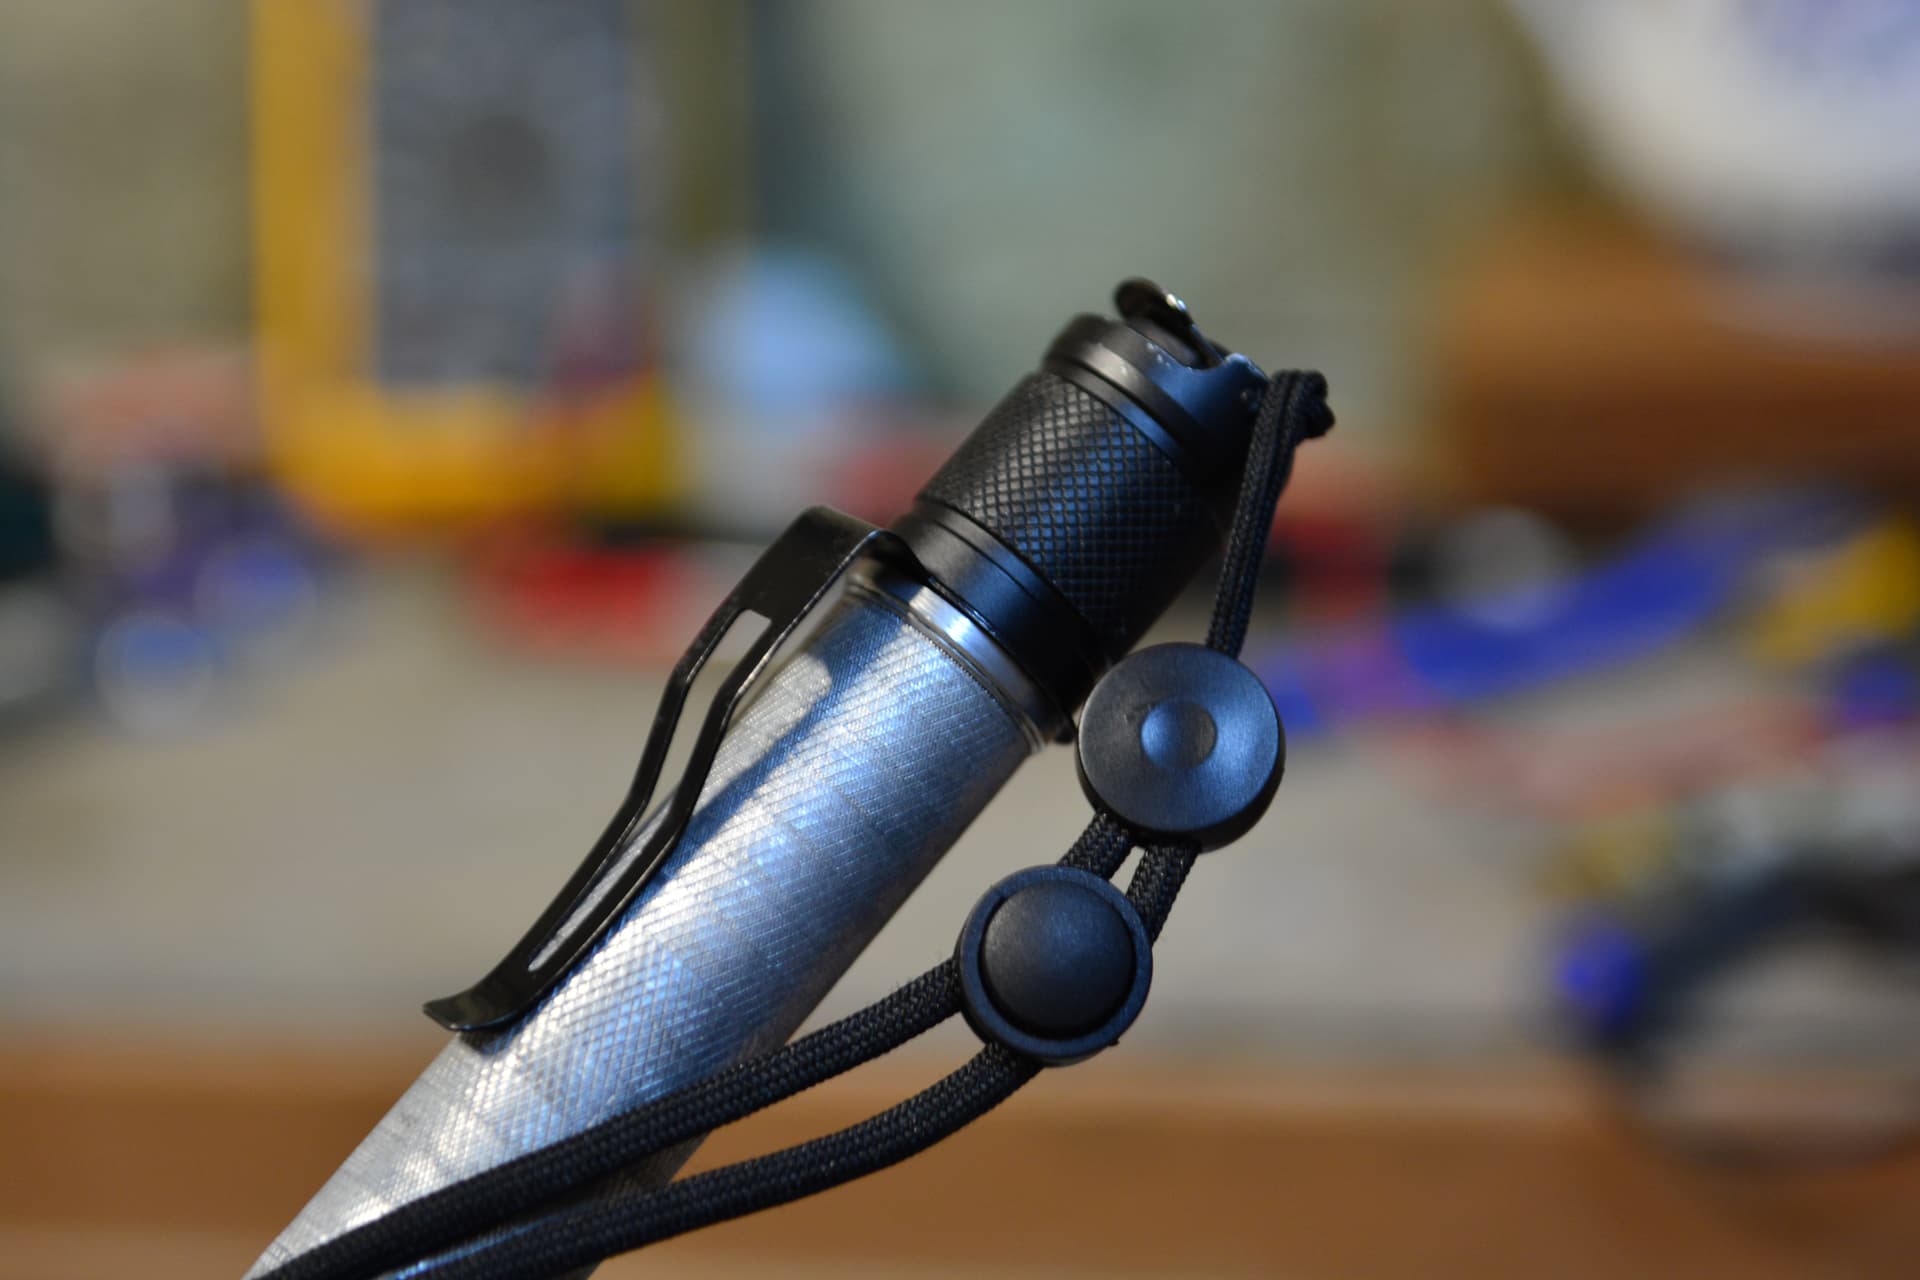
I think the accessories look really well on my flashlight!
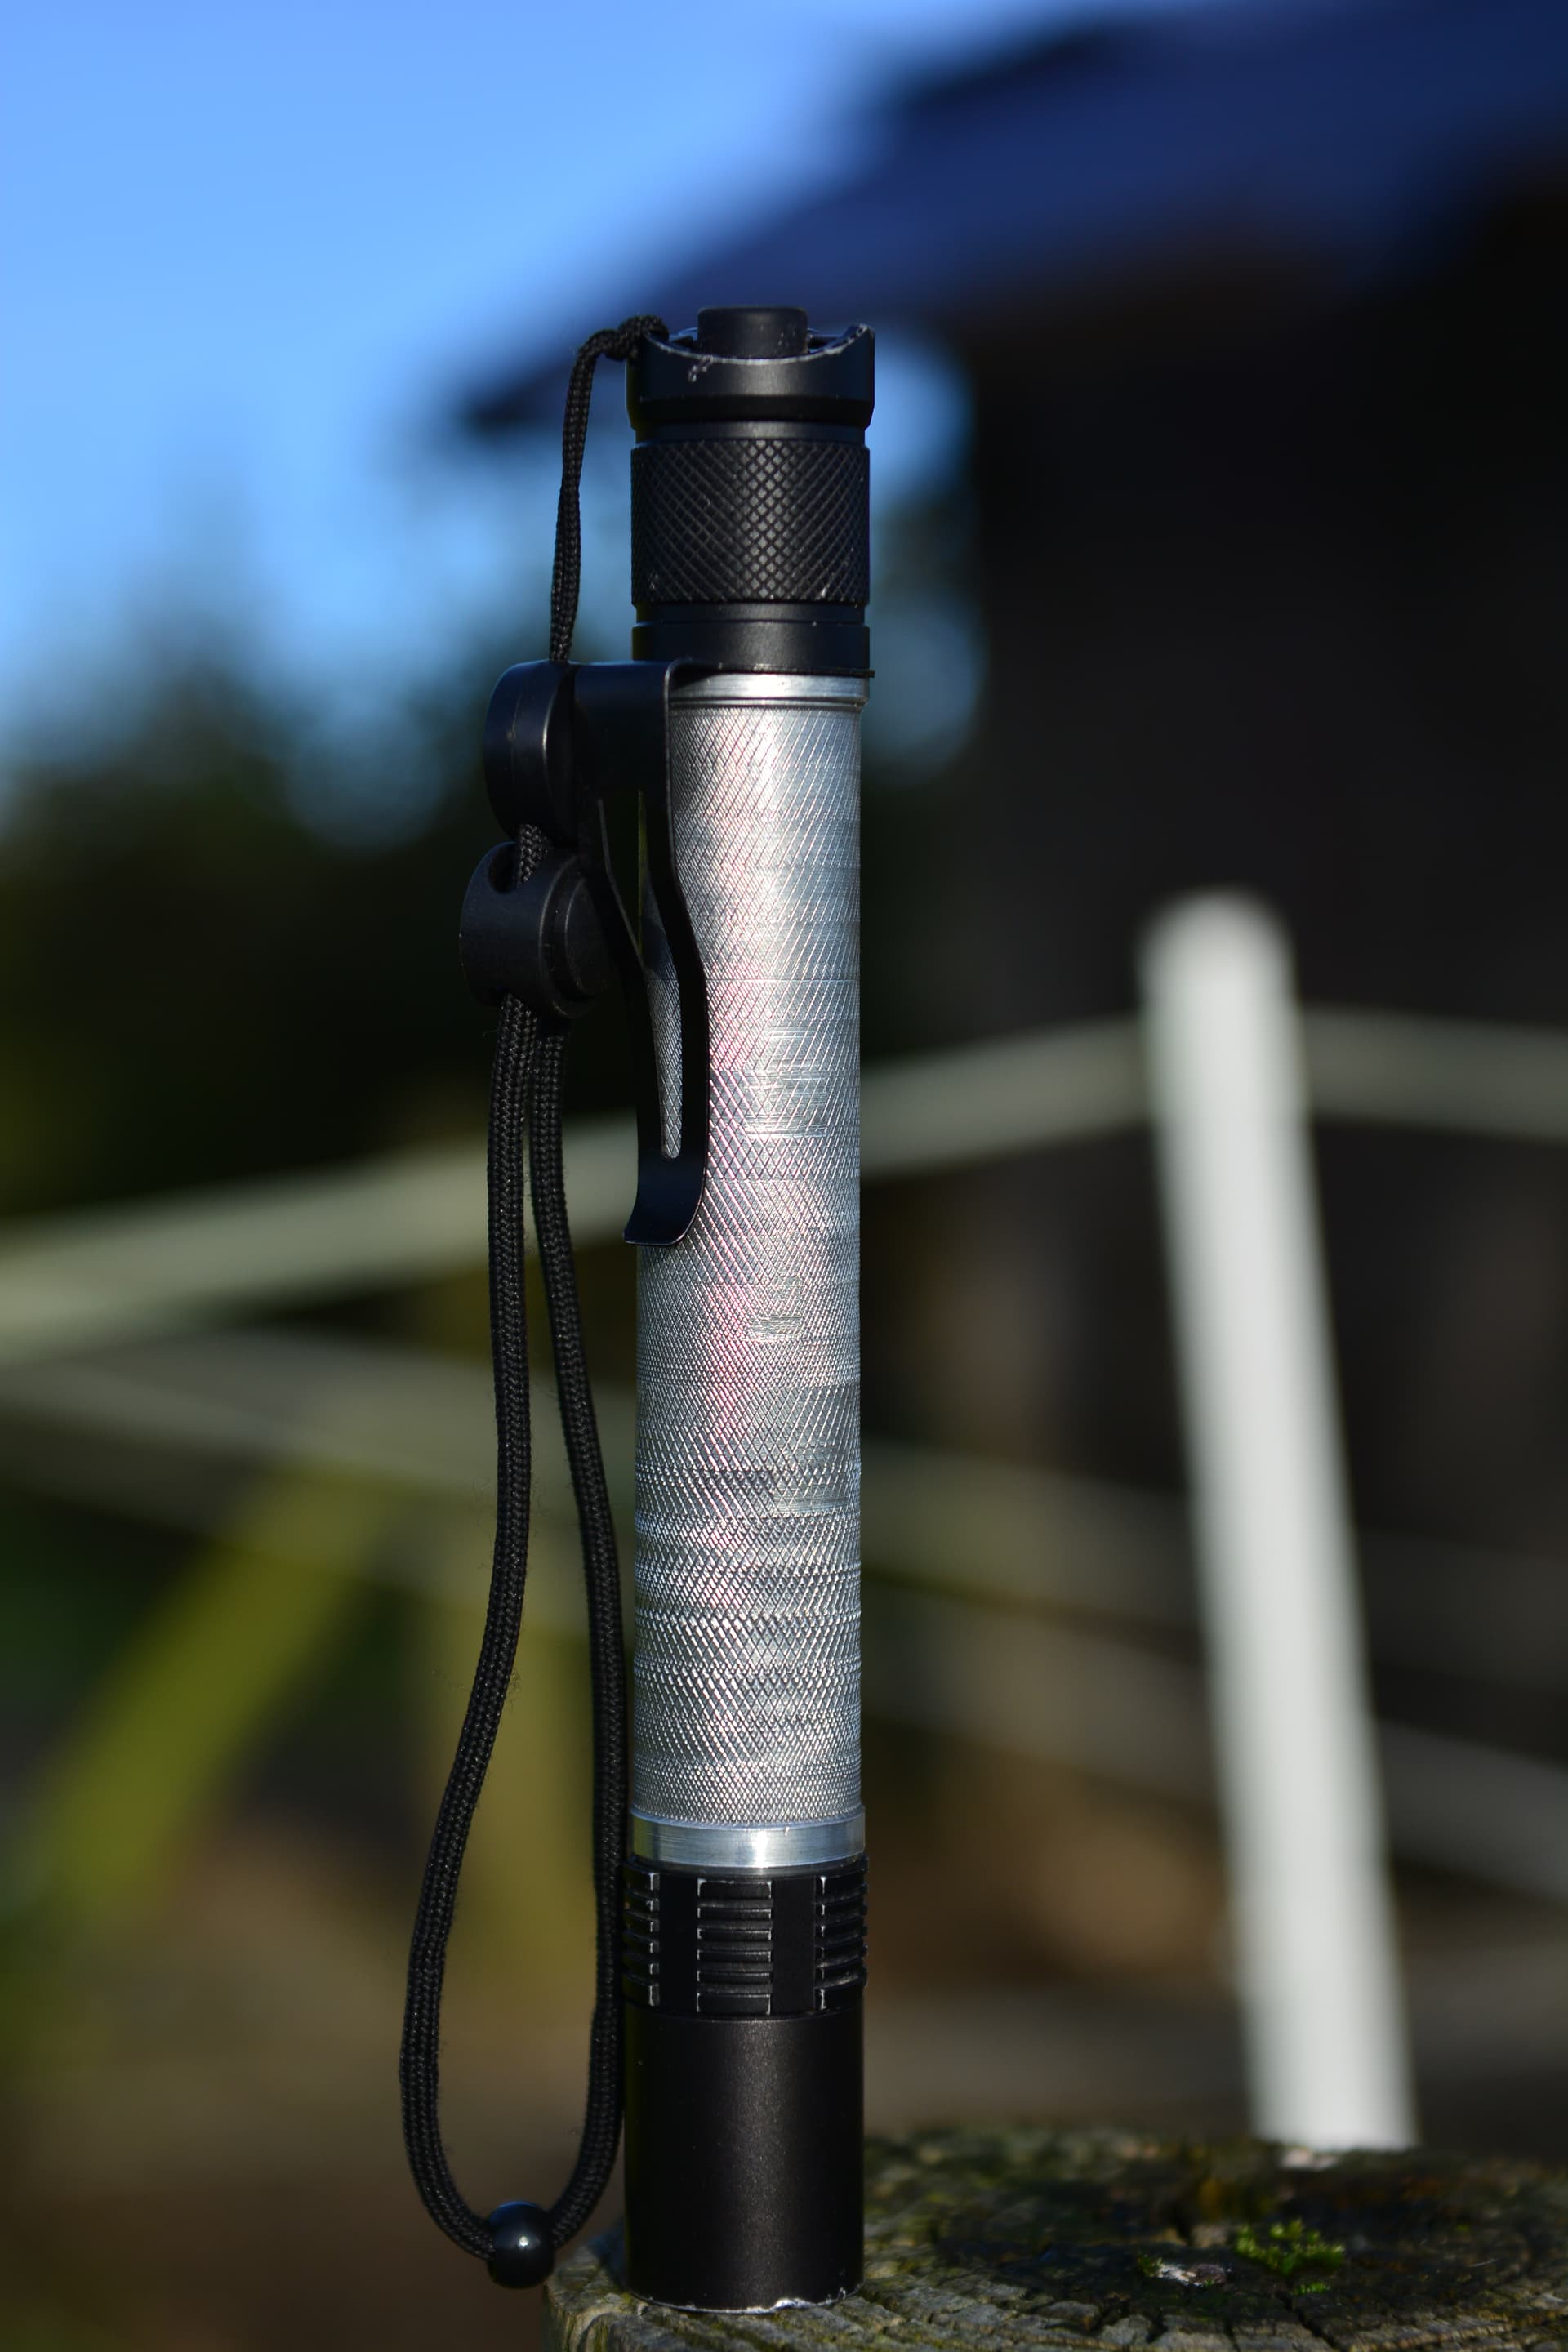
I wasn’t sure what kind of surface finish I wanted to add to my flashlight. I was considering paint but not sure how that would turn out or even if it will last.
I got some great advice regarding the flashlight. I decided to end up polishing the flashlight in order to make it more appealing.
It was time to pull out the dremel style rotary hand tool again, but this time with polishing paste.
I know there isn’t a huge visible difference on camera, maybe the lighting or the fact I was using a camera flash, but trust me there is! The aluminium wasn’t exactly dull to begin with as the part was freshly machined, however it just looks much cleaner to me because it was covered in WD40 while trying to keep the drill bit cool. If I wanted to build this flashlight more for aesthetics, I would probably have omitted the knurling (cutting a grip pattern on the lathe), but for me this is a worklight/tactical flashlight that I actually want to use. For me the knurling is a practical feature because it gives me a good grip on the light and is more comfortable in the hand.
If anyone has any more great suggestions, or feedback on the build thread, feel free to reply, I will greatly appreciate it. Do I need more photographs, or a video recording? Is it boring, or do I need less or more text? Im not 100% sure Im relatively new to the forum, LOL.
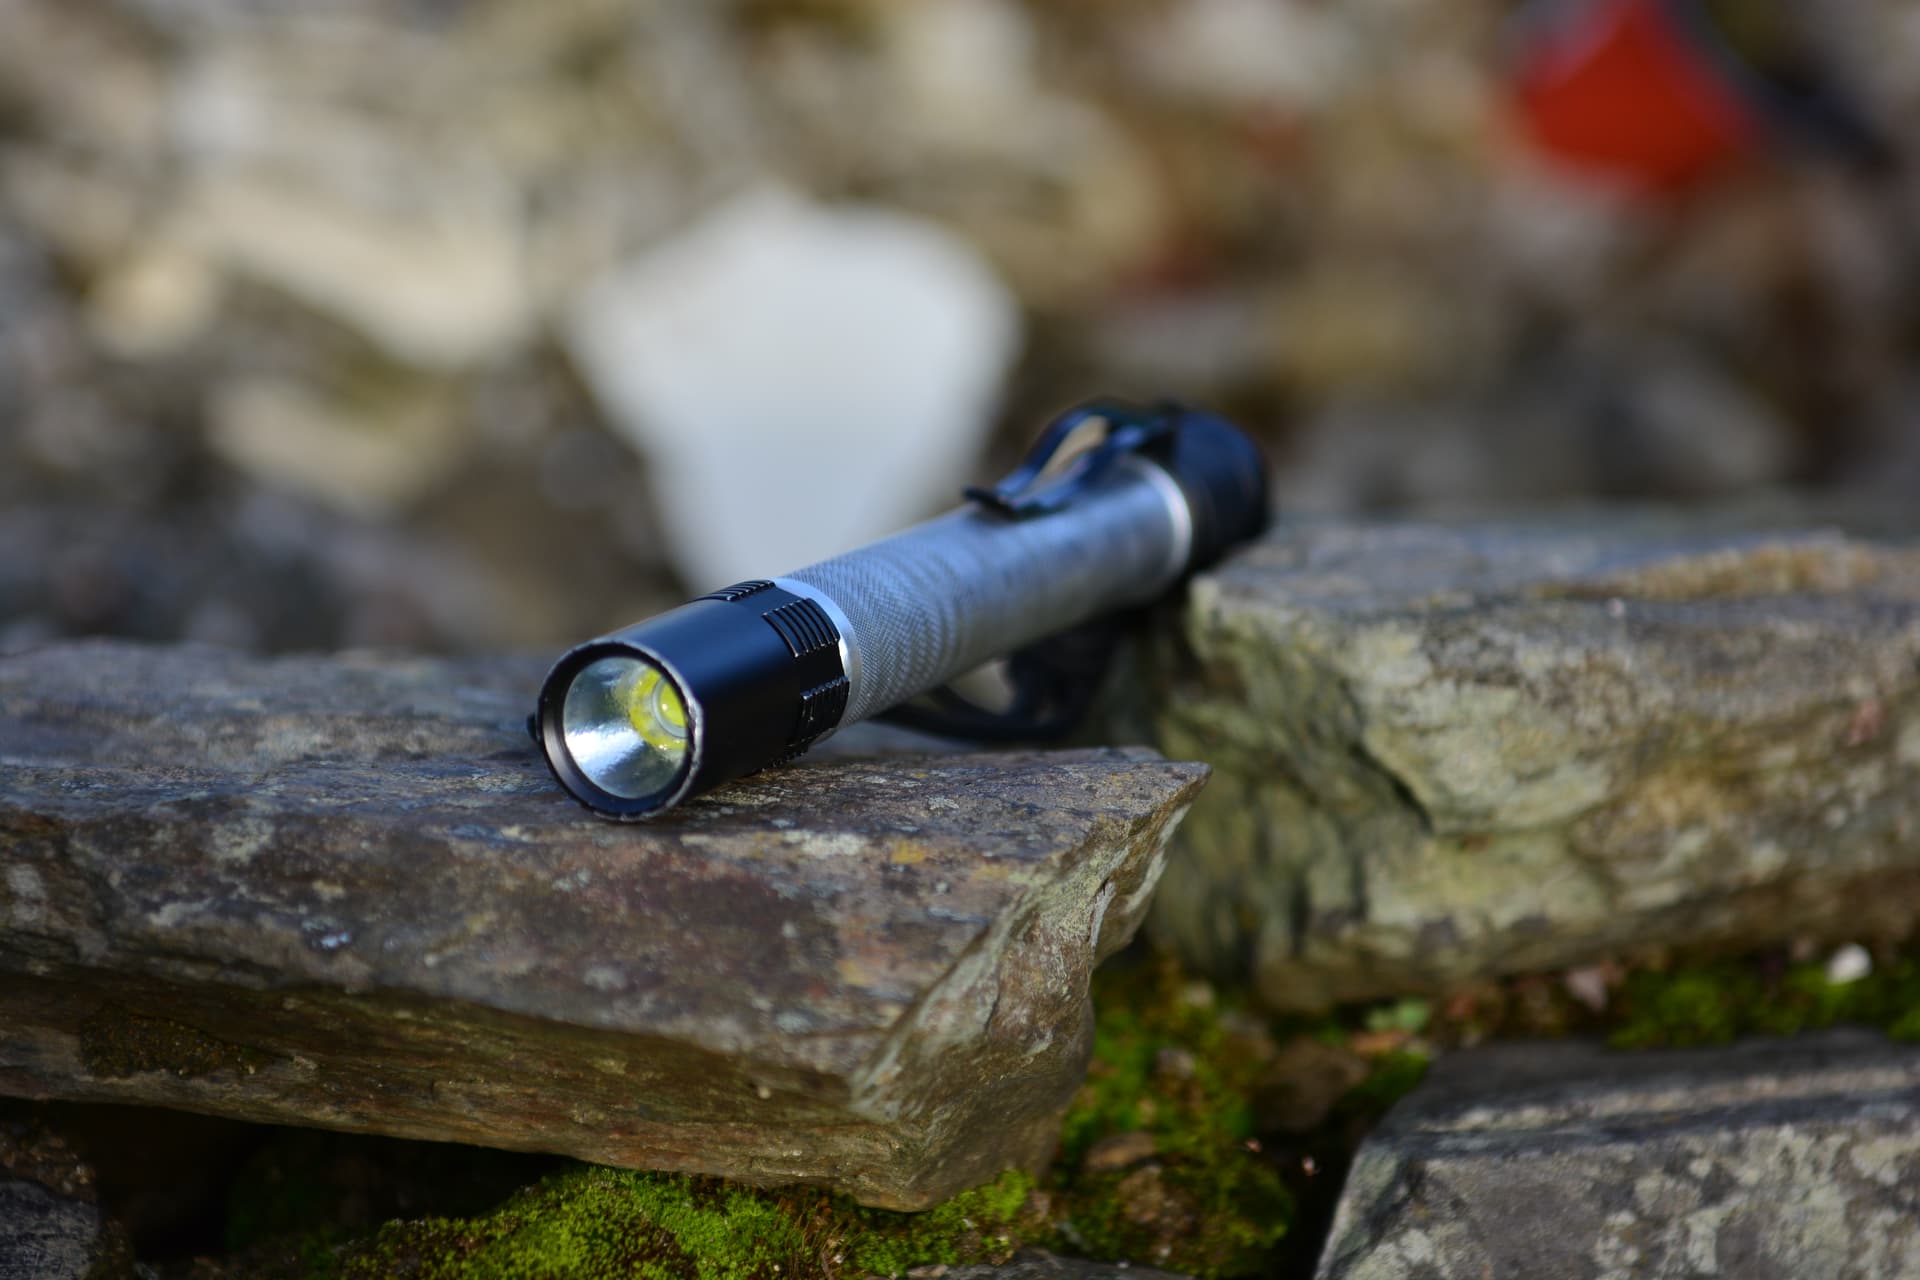
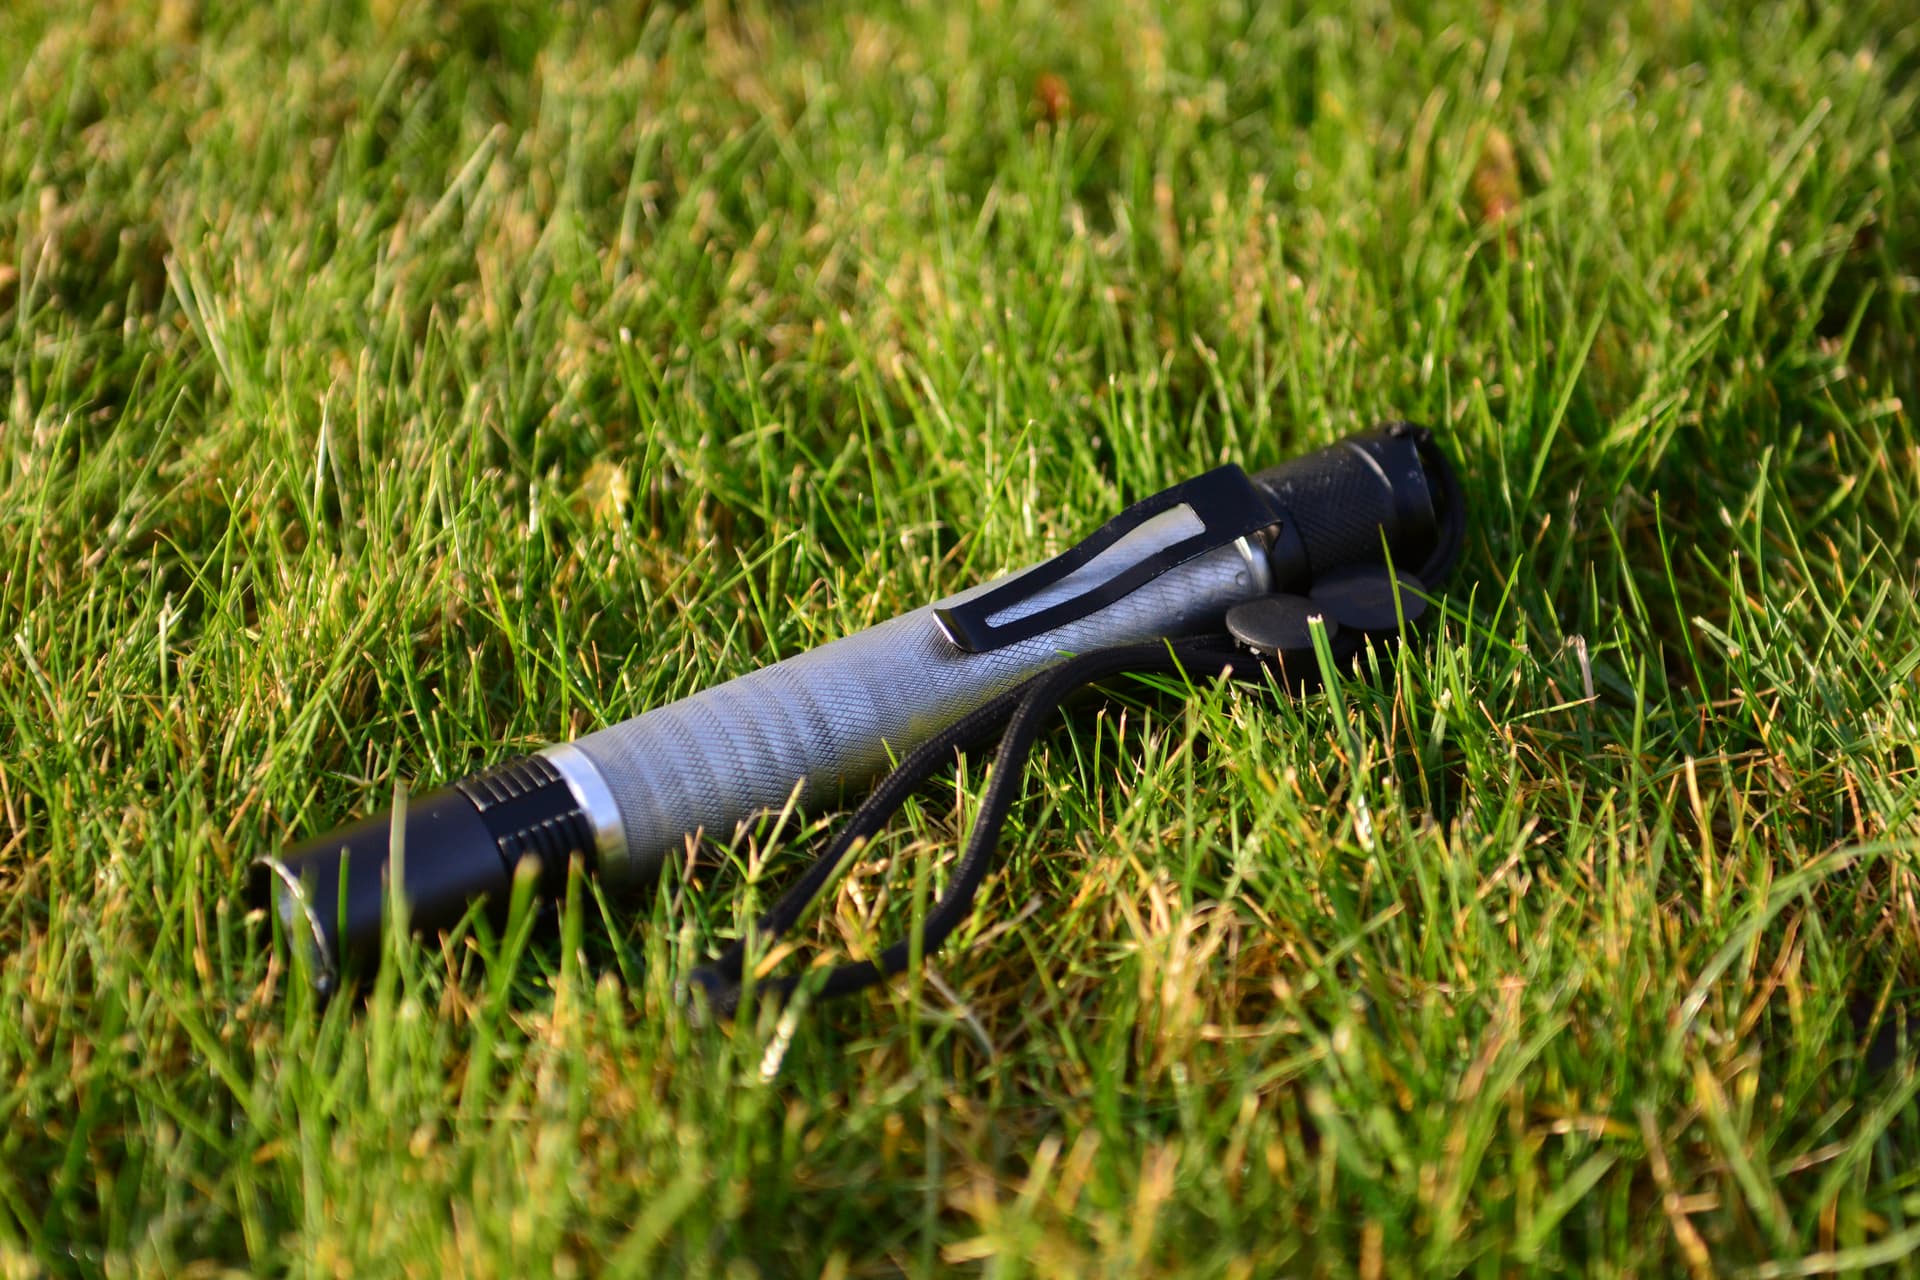
Photo gallery of the finished flashlight
I then showed the flashlight to chief engineer Jackson (![]() ) to give it a good sniff. It passed his inspection and he told me that my machining was top notch.
) to give it a good sniff. It passed his inspection and he told me that my machining was top notch.
Jackson also volunteered to appear on camera to demonstrate the functionality of the flashlight clip. (this part would probably have been funny if this was a mule flashlight, but it isn’t due to the reflector!)
Conclusion/wrap-up
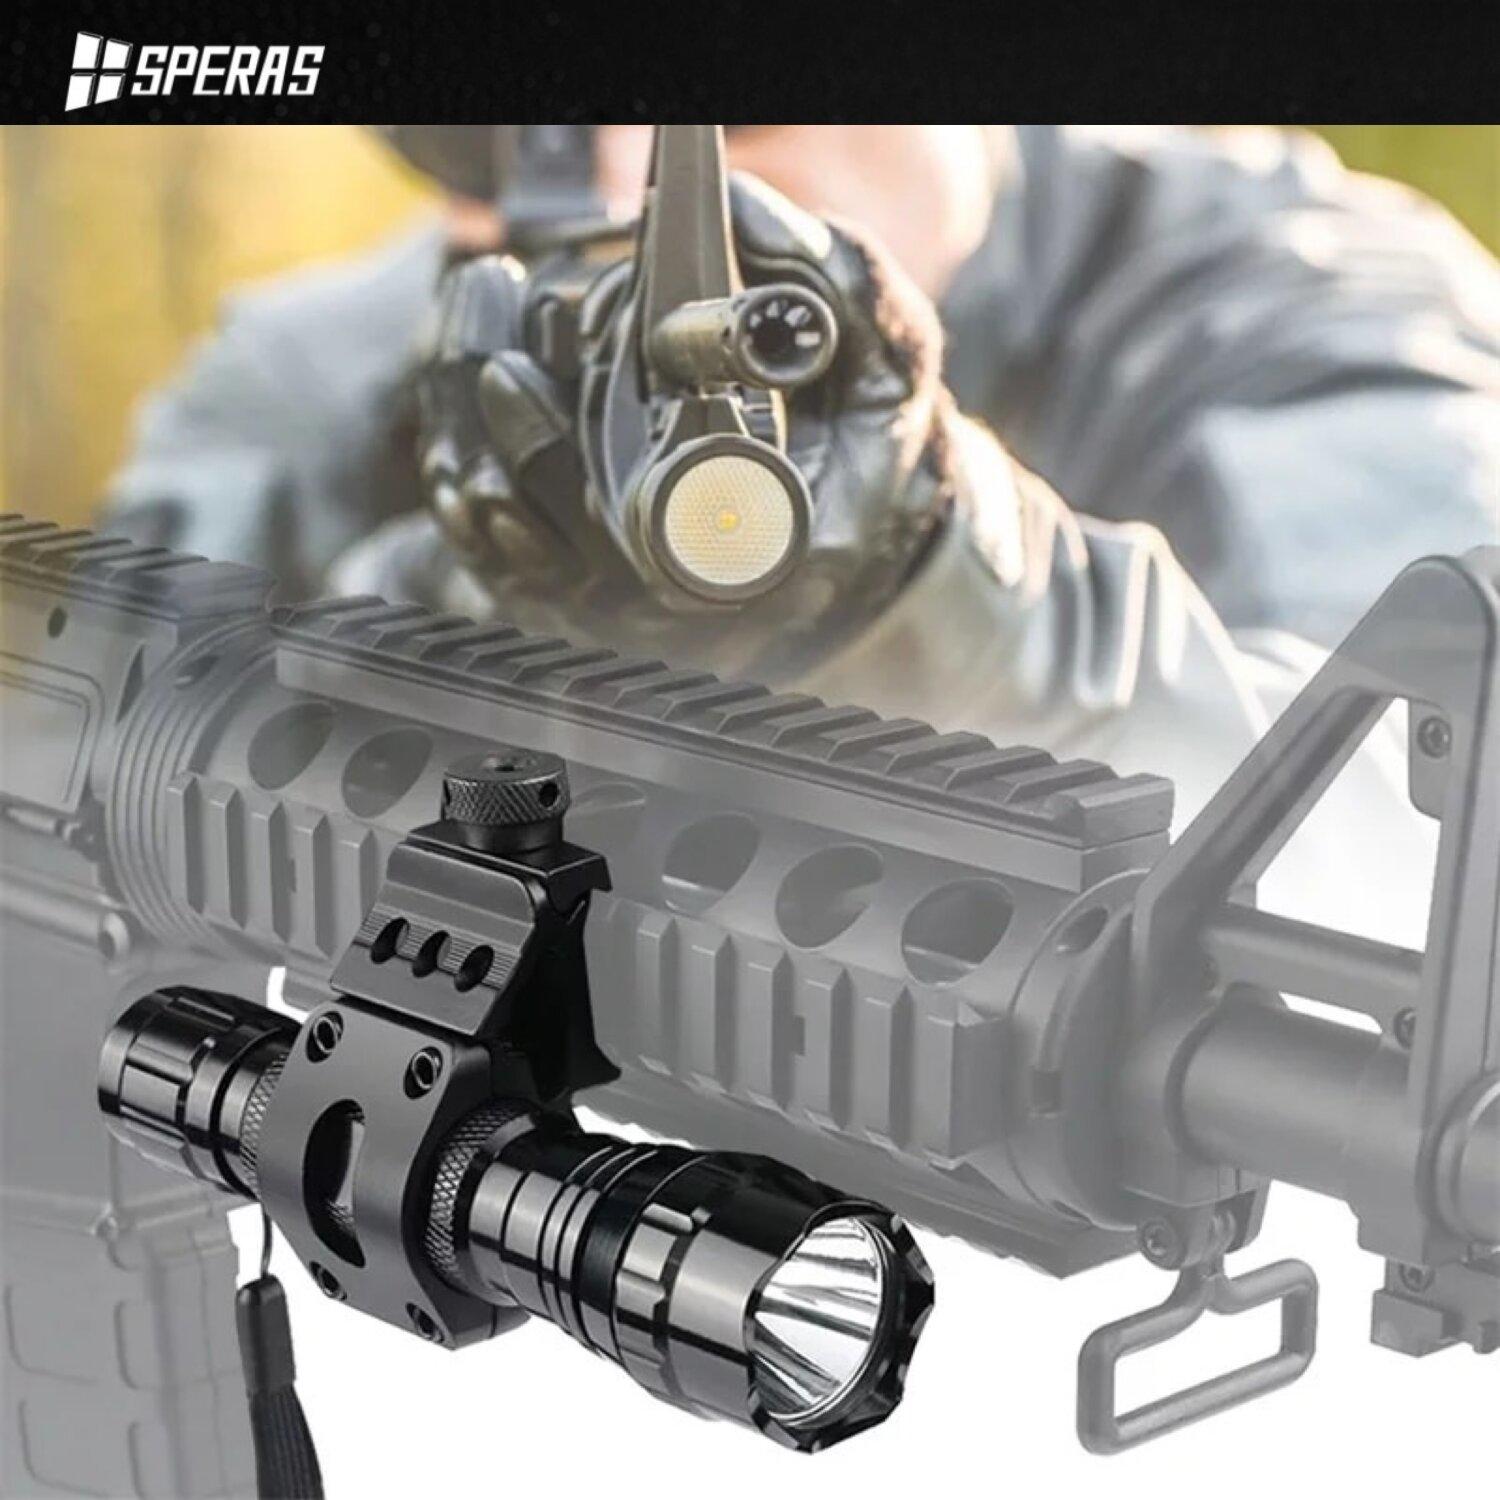
I feel satisfied with the way this build/mod has turned for me and I guess it is time to finish my build thread, however there is plenty of time to change either something about the flashlight itself, or this thread. Let me know if you have any feedback/suggestions. Now the real question is this: What have I actually achieved by modding this flashlight? I personally think that I have mixed together the best parts of a tactical flashlight (like the tactical switch with instant turbo/strobe, and high brightness) with the best parts of a worklight (like a floody beam, long runtime and durability). You may be wondering if this still qualifies as a tactical flashlight; well according to google, a tactical flashlight is any flashlight for use in conjunction with a firearm (it can be either mounted or handheld). My mod has affected the form factor of this light, increasing the length, however I think it is still small enough for tactical use. For comparison, Imalent’s UT90 predator flashlight is the biggest tactical light I can think of. It is 245mm long. It is designed for use with firearms (I mean it actually comes with a mounting bracket and remote switch wire). My flashlight is only about 200 mm long and thinner with a smaller head, so it ticks this box for me. I won’t be able to demonstrate anytime soon as firearms are strictly regulated in my country, however it could be used with a bracket like this:
I also feel like it should qualify as a work flashlight as this was my main goal for building it. It has a good runtime and a floody beam that lights up a large area. I used and tested this flashlight myself for a while, doing jobs around the yard and taking my dogs for walks. Using elwis brand 18650s with 3500mah it seems to last 1 hour in turbo and even longer in medium. These are the only identical matching 18650s that I have that are any decent quality at all.
I guess that’s it for now. Its just insane the amount of time and effort I put into this flashlight, so lets hope my work pays off. If not, I have still gained an awesome flashlight that I will actually use. (And perhaps I need to start coming up for ideas for next year)! I guess this wasn’t time wasted for me, as I was doing something I enjoy. However if I could change one thing about my design, I would enlarge the diameter of the ‘ring’ closest to the side with the tailcap, to create a tactical style ring. I was unable to machine one, because the bar was diameter 25 to begin with. I was considering buying a silicon tactical ring to enhance the functionality of the tailswitch, however I am satisfied with the clip and it is an adequate attachment for it.
Beam video/measurements
I posted this after declaring my build thread as finished, however I feel like this would be a nice add-on. I have noticed some of the other entrants posting videos. I have also decided to create a beam video to demonstrate the features of this flashlight. I downloaded a free lux meter app to try and get performance measurements although I don’t know if these are accurate, but its nice to have some kind of numbers.

This is my outdoor demonstration beam video of the flashlight in operation, the various modes (strobe warning!!!) and its a good guideline to what this thing is like at night. I find it doesn’t do as good of a job as I hoped at showing the range of the beam, as my samsung mobile phone camera keeps adjusting the exposure or something. I will try record a better video with my real camera whenever I get a chance. (ignore the blue lights in the distance, that is my nextdoor neighbor setting up his christmas lights display, lol)
My next video is my first attempt ever at measuring a flashlight’s performance. A quick google search revealed that there is a mobile app used for measuring lux. There is a few mathematical formulas to calculate candela and throw based on that.
My measurement apparatus consists of a photography tripod containing a mobile phone with the lux meter app screen recording. 10M away is a bicycle maintenance stand holding the flashlight steady. they are both set to the same height. The app is calibrated so the dark night with no moon reads 0 lux.

Above is the screen recording of the lux meter app. I left it running for about a minute. there seems to be a fluctuation, starting at around 200 lux at turn on, dropping to around 180. Must be the battery or something, it wasnt quite 100%.
Time for the maths.
Lux= 200.
distance= 10 meters
According to 1lumen flashlight reviews, the calculation for candela is distance x distance x lux.
10m x 10m x 200lux = 20,000 candelas
To find throw distance, its √(cd x 4)
√(20,000 x 4) = 282.8427125m of throw
Approximately 283m.
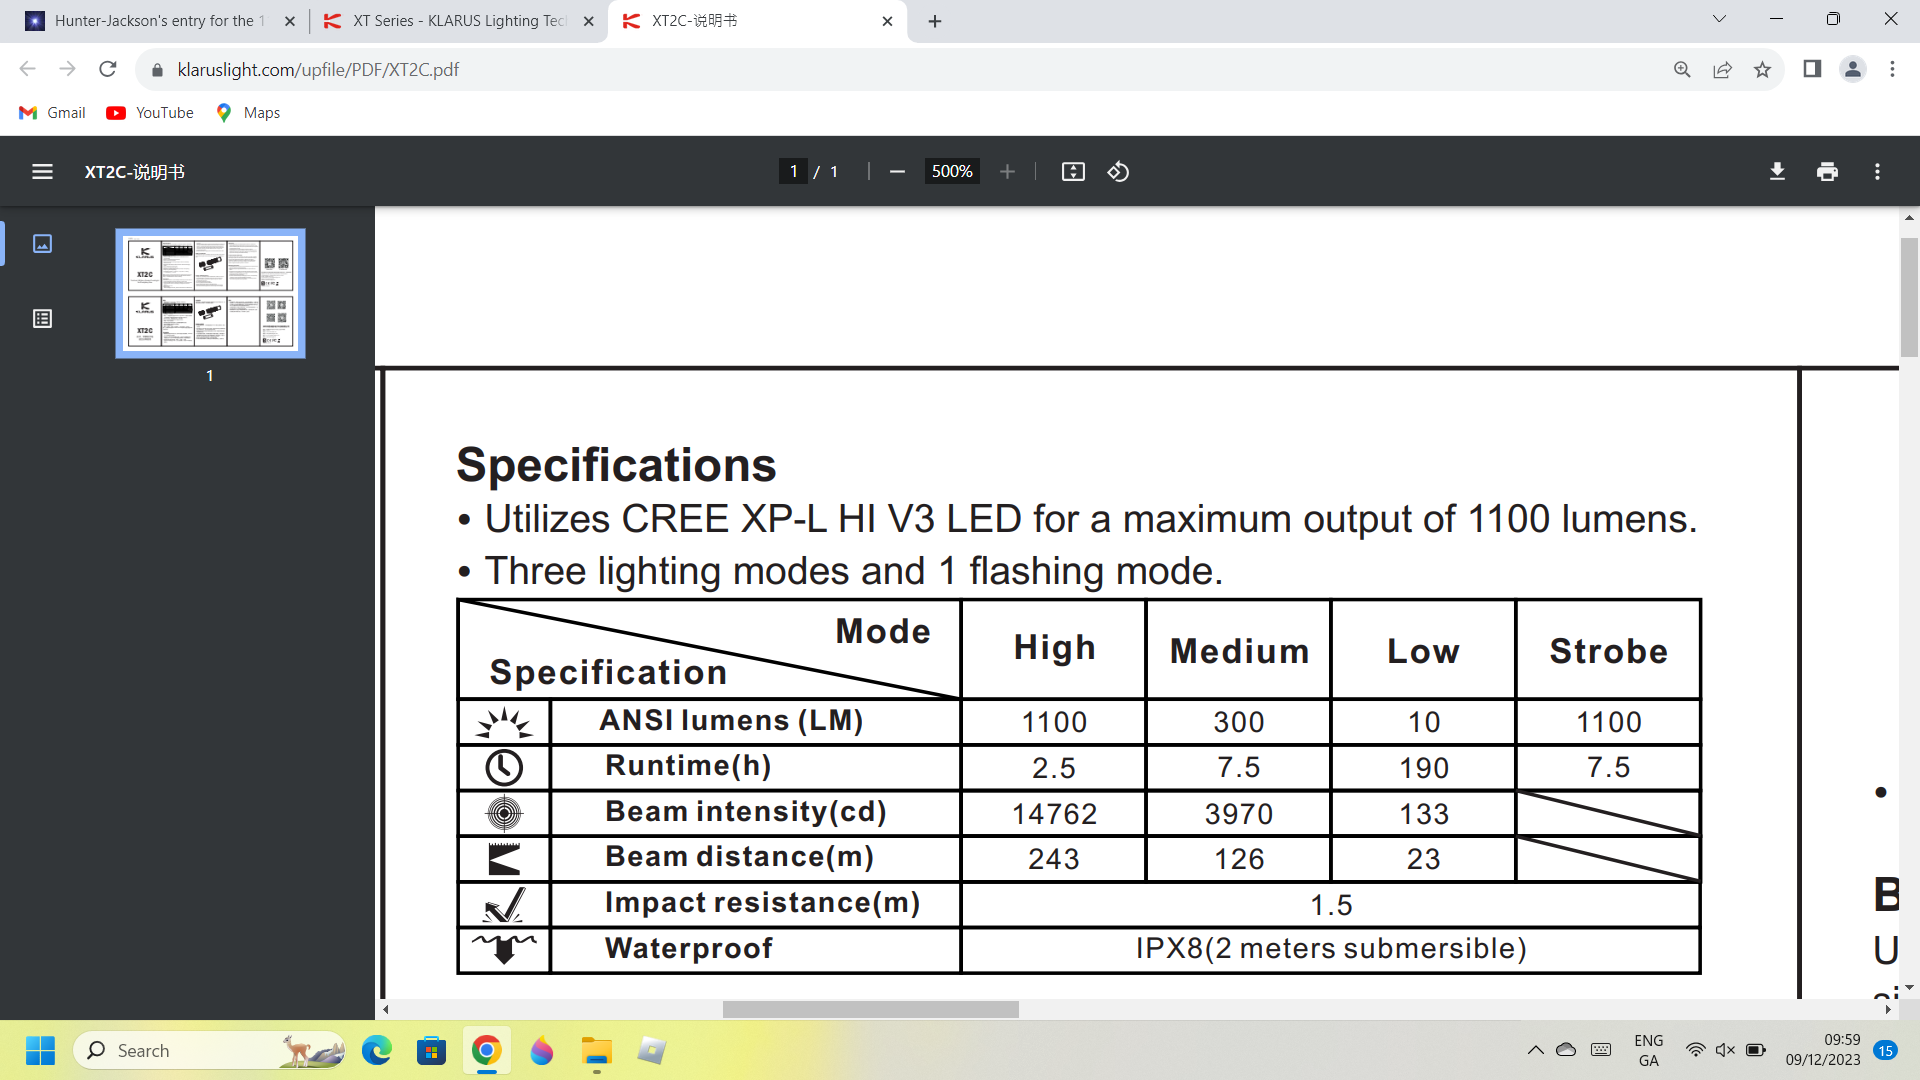
I mean that’s not bad for such a wide beam, as it is not a dedicated thrower. In fact, my mod actually appears to be throwier than the original Xt2c. This is according to an ANSI runtime chart from the manufacturer.
If I get a chance, Ill try to create an additional flashlight video.
I want to also wish anyone else who has entered this contest the best of luck, and thank you to the organizers