Just want to say at the start, this isn’t a full review of this light. Just an initial impressions and technical teardown, to see what this light is all about.
It’s also done firmly with the idea of modding in mind, and frankly if you’re looking for a light that works great out of the box without having to get your hands dirty. I can say right now, this light probably isn’t for you ![]()
-
Right, so this is a relatively new light and was brought to our attention by Pok a few weeks ago in this thread
It has some very interesting features and a form factor that I (and quite a few others) found very appealing.
Key interest points that caught my attention were:
1. Big head and reflector. 75mm head diameter. Combined with and XML2 this should offer some very good throw performance. Also a decent sized reflector for bigger emitters like the MT-G2 perhaps.
2. Electronic side switch. Rare to see this type of UI on a thrower.
3. 3x 18650 in Parallel as a power source. This offers very flexible driver options for modding along with great runtimes and high current potential even with weaker cells.
4. The colour ![]() Non-black flashlights always catch my eye
Non-black flashlights always catch my eye ![]()
Ok so does it live up to the expectations, let’s find out…
First up some shots from the outside. This is a very nice looking torch with a well balanced and chunky feel. I love the aesthetics and finish on mine. Really nothing to complain about at all.


The reflector is indeed aluminium, and what a reflector it is…more detail below.


In terms of overall size it fits in almost perfectly between a HD2010 and a BTU Shocker. It’s not a small torch by any means but it sits in the hand really well and the side switch makes operating it a total breeze.


The side switch falls perfectly under your thumb/index finger and is easy to find even in the dark.

The machining is very good overall, no sharp edges or burrs anywhere and the anodizing is really attractive and even with a dark/gunmetal grey colour. Fit and finish is all really good.
The electronic side switch is probably very similar if not identical to the type you’d find on a SkyRay King or similar, a small SMD switch with a machined aluminum plunger and holder sitting on top. Very slightly rattly if you tap the switch lightly with your finger, but I’m sure that could be easily fixed with some double sided sticky tape.
The diamond knurling on the handle isn’t particularly deep but the large recessed parts of the the handle offer a pretty good grip. Should be fine even in wet conditions.
There’s single o-rings in all the usual places and as long as the side switch cover is decently watertight I’d imagine the whole thing will handle a bit of water just fine. Again I’m not going to go into detailed testing on stuff like this. At least not at this stage.
Threads are not square but they are smooth and the front ones even came greased so no problems there. The “tailcap” screws off and there the threads are anodized and completely dry. But again they feel like good quality cut threads. All orings were dry and the bezel oring is fairly loose and can get jammed when reassembling the light so watch out.

TailCap Threads
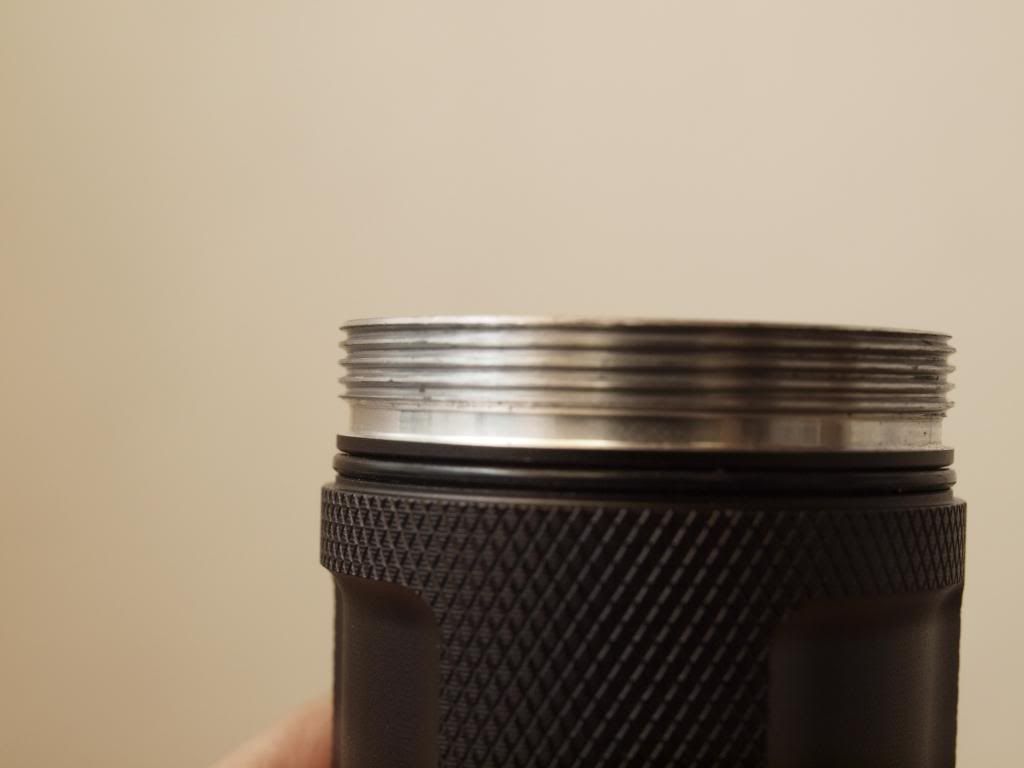
Battery Tube Threads

Finally here it is next to another “grey” anodized light. The colour on the Apex/Solarstorm is considerably brighter so that should give you some idea of the colour of this light. I like them both and would take this dark gunmetal grey over completely black any day!
-
Ok so that about covers the exterior. Lets tear this thing apart and see what’s inside!
First lets take a look at the battery carried and driver contact plate.
The cells are inserted in parallel and there is no clicky at the tailcap end so all it needs is a set of springs and a contact board to transfer ground from the batteries to the flashlight body. Let’s take a look how that’s done here.

Here’s the contact board for the driver and the + contact ring in the middle. This is all the same setup as a SkyRay king/Apex 5t6 except with 3 cells instead of 4.

Inside the battery tube is a 3 cell carrier machined out of the solid tube, it’s quite a substantial and weighty piece as a result and helps balance the big head nicely. The contact springs are a bit flimsy and could do with being replacing or at least adding some copper braid.

On the other side we see the contact plate that the springs mount to and in place of the usual reverse clicky switch we have a filament from a tungsten bulb…or maybe it’s a low amp fuse designed to protect the led. Or maybe a built in heating filament to keep your hands warm during the winter. Not sure, but whatever it is it will do a great job of turning current into heat that’s for sure! ![]()
Honestly what were they thinking, this is a ridiculously thin wire (probably 26AWG) to handle even the modest 3A that an XML can draw if driven to spec…not to mention what this light should be driving the LED at!
This just has to be replaced and it’s the first sign that if you don’t own a soldering iron then this light isn’t really for you.

Tail parts laid out.
—
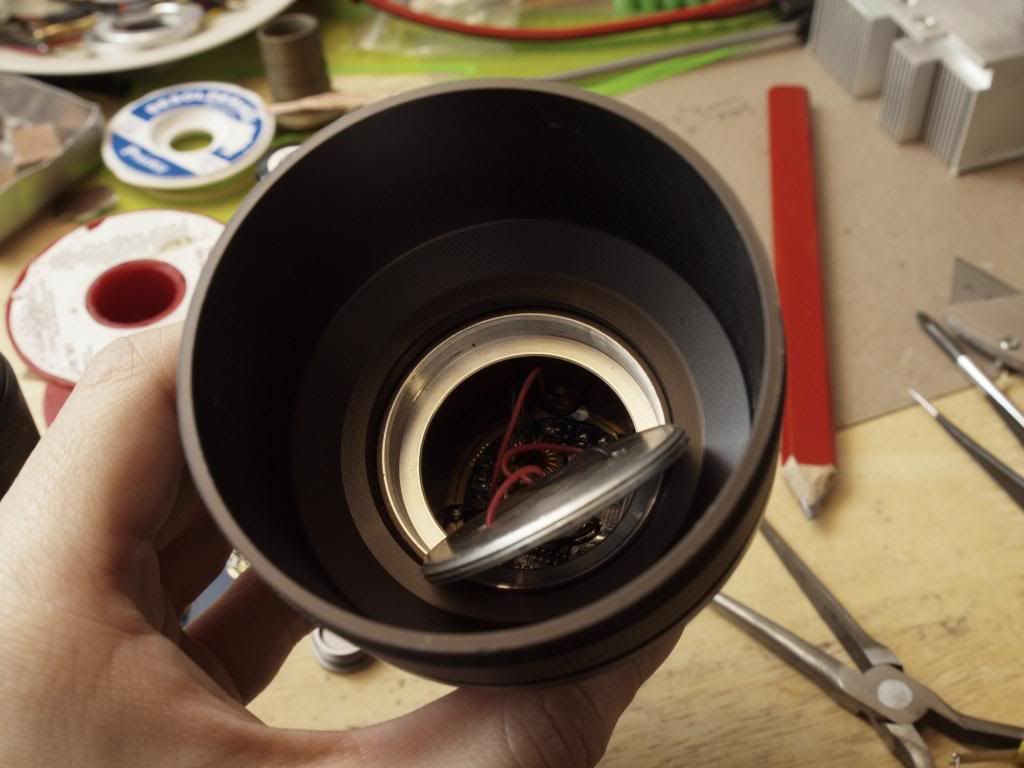
Next up we take a look at the front of the light. First things first, lets take off the bezel and check out the reflector.
There was some concern and lack of solid specs about this reflector, many of us thought it might be a plastic unit going by the pictures posted on the Wholesale website.
Well I can confirm now that this reflector is indeed Aluminium and it’s also probably the nicest cleanest and smoothest reflector I’ve ever seen come out of a budget flashlight. Not to mention one of the biggest single XML reflectors I’ve seen! This thing is fantastic! ![]()

Definitely Aluminium
The surface under the coating is free from any machining swirls or edge burrs or any of the other machining artifacts that give away the fact that it’s an aluminium reflector.
There is also no haze or dirt visible on the coating even when the light is turned on and generally it puts the average HD2010 reflector to absolute shame!
Lastly but also nice was the lack of any dust inside, in fact I didn’t want to mess it up at all by taking photos of it without the glass lens protecting it so you’ll have to take my word for it. ![]()
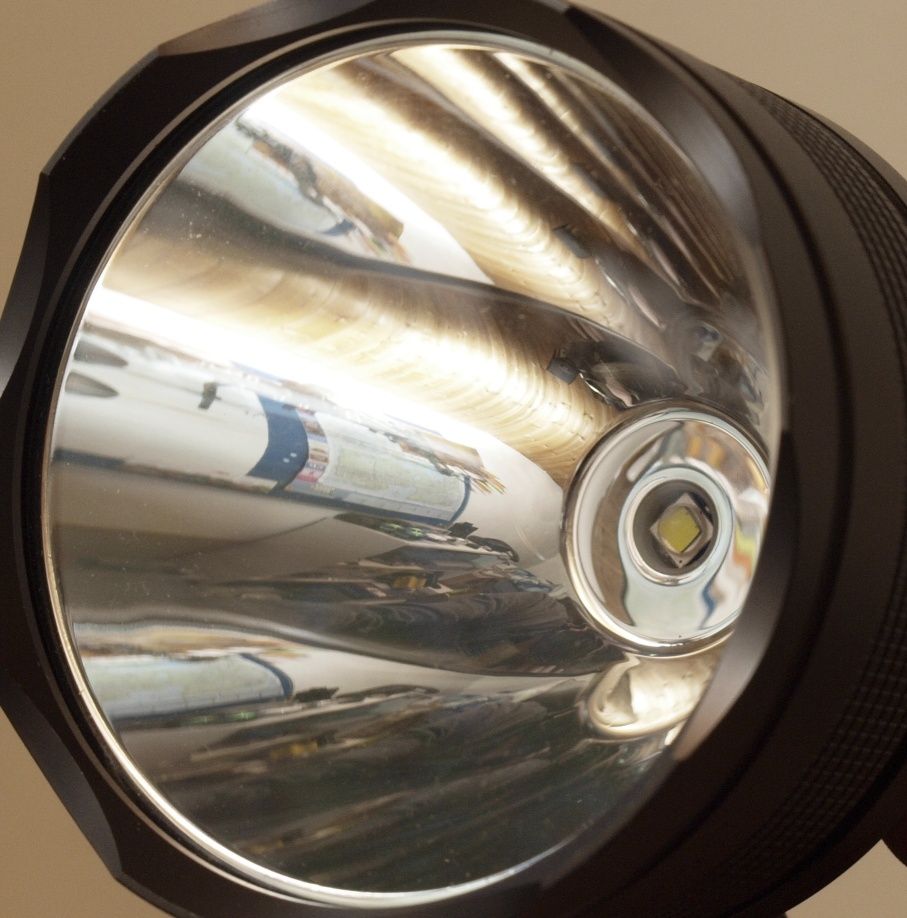
Or you can use this closeup photo from the outside, although it doesn’t really do it justice ![]()
The lens on the other hand, while definitely made of uncoated glass was pretty dirty and could do with a good clean with an optical cloth. I fact to better show off the impressive reflector an AR coated lens is a must mod for this light. Just hope we can find one in the right size.
The dimensions of the reflector are 70.5mm x 47mm and the hole for the led centering ring is 8.5mm
So other centering rings should work.
The glass lens measures 72mm x 2mm thick.
—
Now despite how nice the reflector looks in this light, the beam and hotspot profile it produces is probably the most disappointing thing about this light. It’s anything but well defined and shows the typical double intensity ring with a brighter center of a badly focused emitter.
The emitter itself is perfectly centered thanks to the centering ring but looking closely you can see that the emitter doesn’t sit very deep inside the reflector.
Removing the reflector confirms this, the plastic centering ring is very tall and only the very tip of the XML2 dome is actually sitting above the flat part of the reflector. Really not good, most of the light it produces will be hitting the centering ring and not the reflector in this setup.
The next thing I noticed with the reflector gone is that there is in fact a pill inside this light, the shelf that the emitter sits on is a removable pill that threads into the head.
Again slightly disappointing because I was hoping the shelf was machined out of the body of the light itself. However this isn’t the end of the world, it may be relatively thin but at least it’s solid underneath the emitter pcb ![]()
Prime opportunity for machinists to make a copper shelf replacement… Ryan, VestureofBlood? Who’s up for it!? ![]()

Pill unscrewed and again showing the measly 26AWG emitter wiring used throughout this light. It’s really only appropriate in connecting the smd switch to the board but they use it for everything here…and generous lengths of it to boot! Horrible but relatively easy to fix.


At least there’s no hole under the emitter!

The “Pill”/shelf is a little over 2.5mm thick and here you can see just how high that centering ring is in relation to the XML dome. Not enough of the emission angle of the led is actually visible to the reflector. Again this needs to be fixed with a shorter centering ring and better wiring, hopefully the spacing to the relfector will still work and the shelf can screw out far enough to get a tight fit. We’ll have to see what can be done but I definitely intend to try these mods soon to see what this light can really do!
The emitter pcb itself is aluminium and glued to the shelf using a grey type of thermal adhesive/fujik. Pretty standard stuff and not really too bad, definite room for improvement though.
I’m also keen to see if the Courui branded version of this light available from kaidomain suffers from the same problems or if they have improved it.
—
Next up we tackle the driver.
The switch UI is a pretty standard electronic switch affair. Press the button once and the light comes on in High, then press it again to switch to low. One more click and the light turns off. The “low” mode is not particularly low however, maybe 50% which isn’t really low enough and it has very visible PWM.
A long press on the switch ~2secs activates a hidden strobe. Which I quite like since it’s only there when you really want/need it…ie very very very rarely! ![]() Otherwise it’ll never bother you.
Otherwise it’ll never bother you.
I don’t own any Skyray King type lights but from what I hear the UI is probably very similar to one of those.
Not terrible and switching modes with the side switch works great but a driver swap is what I’m going to be doing with this light. Maybe try a DrJones momentary switch driver or have a go at flashing my own. We’ll see.
I don’t have any idea yet what the driver delivers to the emitter and frankly with those crappy wires in stock form it can’t be very impressive. On top of that with the stock centering ring a lot of the light is missing the reflector so that won’t help it’s output figures much. Still I’ll reassemble the light in stock form and take some tailcap measurements when I get a chance.

The momentary switch is easily accessible by unscrewing the retaining ring as such.

Below is a SMD momentary switch glued into the housing.

The driver pops out from a firm push from the inside and this is the wiring…all very thin and the emitter wires are also fairly long. Not a good combination for high output…
The driver board has a diameter of 38.5mm and is press fit into the body.

And for the driver gurus, here’s a closeup of the driver. I’m particularly interested in the 16 legged MCU, haven’t seen one like that on a flashlight board before ![]()
Ok so that about sums up my first impressions and teardown.
In summary…
The exterior and build quality of the light in general is really great, better than expected especially for the price. Unfortunately as a tradeoff the electronics and general assembly of the working components of the light leaves a lot to be desired and I really wouldn’t recommend the light if you intend to use it in it’s stock form.
And I have yet to see just how much can be gotten out of it when fully modded, but I’m optimistic that this can be turned into a fantastic light.
Get it if you want a fantastic modding host in this form factor, can’t wait to get stuck in to this myself….although I’m sure there was something else flashlight related that I should be finishing first…![]()
…and get it fast before they replace the reflector with styrofoam and downgrade the wires to 30AWG!! :bigsmile:
Cheers
Linus


