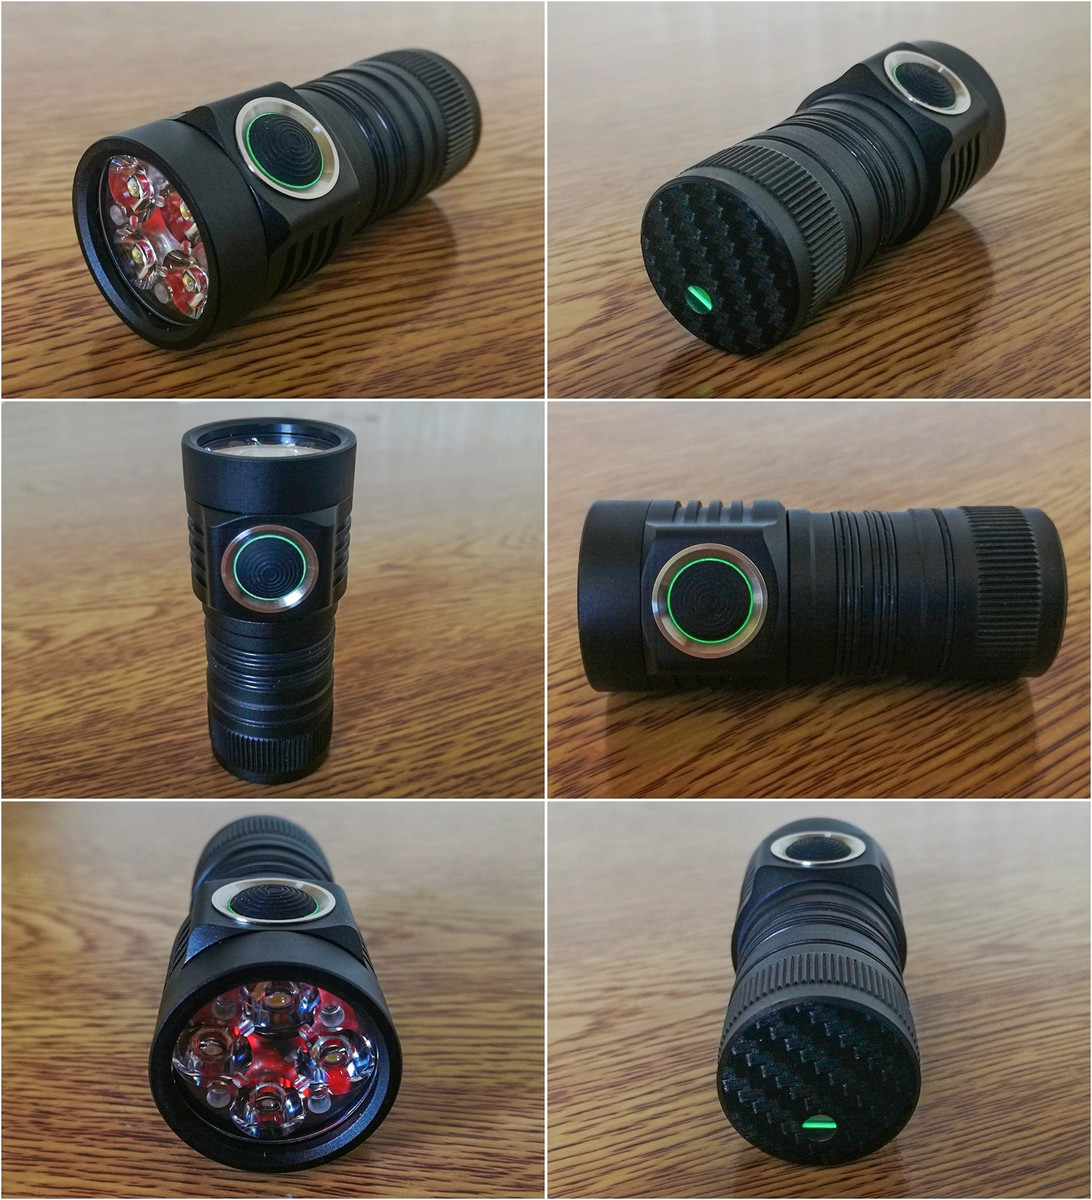
Emisar D4 Mods

Quad Nichia 219C 5000K emitters
Copper DTP MCPCB
Carclo 10622 TIR optic
Green GITD glow disc
Stock driver, D4v2 Firmware
Lighted carbon fibre electronic side switch
Built in micro USB charging circuit
Red/ Green charging indicators
6mm x 1.5mm tritium vial
Magnetic Tail

Length - 65mm
Width - 28mm/ 26mm
Weight - 80g (With 18350 cell)
Max - 3300lm

I used a piece of 14mm x 12mm carbon fibre tube, 12mm x 10mm clear acrylic tube, 0.5mm clear silicone sheet and 0.5mm black kydex for a green lighted glow circle around the switch button and DIY glow disc under the optic.

Emisar D4 Runtime graph:

.

Making a magnetic tail.

After some measurements I decided it was workable although I had to destroy the PCB in the process as it is glued in place but that doesn't matter now ;)
I did try heating the tail cap and pulling on the spring but that snapped off at the solder joint so I chose to drill some holes in it until it yielded. I could have applied more heat but didn't want to risk altering the colour.
One good thing about installing the copper plate is that I was able to adjust where the tail cap lettering aligns, if that sort of thing bothers you :D
This also allows me to know at a glance whether the light is locked out or not.

Some measurements:

Spring compressed & PCB combined - 2.2mm
PCB alone - 1.07mm
Internal tail diameter - 22.24mm
External tail threads - 23.2mm
End cap thickness - 2.54mm

I had originally hoped to just fit a 22mm magnet in there with a thin copper plate but a 22mm x 2mm magnet is too thick, all I had, so used instead an N52 18mm Neodymium magnet with a pressed copper disc and some 1mm copper wire as I did not want to shorten the tubes either.
A 22mm x 1mm N52 magnet might do but seem very hard to find.

.

Micro USB Rechargeable Version.

I made a charging module and changed the magnetic tail.
The charger is made from copper sheet, tiny ME4056 board and brass contacts. Space was lacking so I drilled holes for the new 6mm x 2mm neo magnets and made a new copper contact plate.
The internal top of the battery tube was stripped of anodising using drain cleaner for electrical contact with a slot cut in to just above the o-ring for the USB port.

.

PK Paladin two way clip.

.

Feel free to post your own D4 mods here too

Sweet!!!

You sure don’t waste any time CRX! :+1:

WOW, no flies on you Steve……………looks fantastic and even more useful with a touch of your magic.

Thanks :beer:

Awesome hacks :+1:

Making the contact springless should slightly reduce resistance making the light another bit brighter, right?
Anyway, the mod is much harder than I expected.

Maybe marginally. I had a closer look at the PCB copper, it is about 0.2mm thick :+1:
Coupled with the HQ spring when compressed is very low resistance although not as clean as my 0.3mm one piece copper.
What did bother me was how easily the spring detached, almost like a cold solder joint.

Possibly not, I like to do things the hard way :smiley: , the most difficult part was getting that contact out, left sitting in boiling water for a while would probably do it but I got no patience, then if you find a 22mm x 1mm magnet, the highest strength possible due to the thick tailcap aluminium and some 0.2mm copper sheet you wouldn’t have to press it into shape or bother with the support copper wire ring.
Also note the magnet won’t hold the 18650 version horizontal, only works with the 18350 due to the 2.54mm aluminium in between.
Another way is to file down the battery tube about 1mm and install a strong 22mm x 2mm magnet with a thin copper disc on top but filing the tube is a bit dodgy.

I took the liberty to lighten the pic up some so your work could be seen, now that I can see the carbon fiber end plate and all it’s easy to see how much you’ve brought out the D4. Nice work!

Thanks mate, I guess most of my pictures look too dark to everyone else then? I’ll lighten them up some in future :+1:

Love it!

You just gave me an idea. I hated my Acebeam X80 tailcap with all the unnecessary branding. I’m going to cover it up like you did with this light.

Cool :+1:

How did you do the trit like that?!

I first thought about a slot which would have been better but more risky to do so I just drilled a 6mm hole right in the centre of the D4 letters for the 6mm x 1.5mm trit, backed by a 6mm x 0.5mm magnet.
After the hole was drilled & cleaned I put the 18mm magnet in the tail, stuffed blutak in to hold in place, put the 0.5mm magnet in the hole followed by the trit then filled with layers of UV glue. I do deeper sets like this in layers because the glue shrinks a bit when hardening with UV light.

Bravo

Double bravo!!

CRX, I’m looking for ways to hang my D4 in a tent.
Slightly loose o-ring seems to be the best option so far. What size did you use and how tight was it?

Another reason I like to install magnets in my lights and other stuff is because I have a couple large neos stitched into pieces of fabric to the top tent pole sleeve underside of my tent so you can just stick stuff there like lights, small USB fan, radio etc.
I also have a line of paracord running along there too for stuff with clips, but anyway the o-rings I used for a tight fit are about 18-20mm x 1mm, nitrile or other firmer material is best as silicone is too soft and will pull out of place easily but for your needs maybe a soft 22-24mm id x 2 or 3mm would do or make a thin piano wire type clip. Don’t be hanging the D4 in a tent on full power though… :wink:

Excellent mod sir! I love the o-rings in the body grooves for grip. I’m buying a bunch a o-rings today for my light grooves in all my lights. I bought this light and have really enjoyed showing it off to my buddies. They can’t be.ieve something so small can be so blazingly bright. Some are planning on buying their own. Thanks for the great info and ideas. :+1:

Could hurt the eyes; other than that, TK will come and restrict the output to some stable level.
Thx for suggestions.