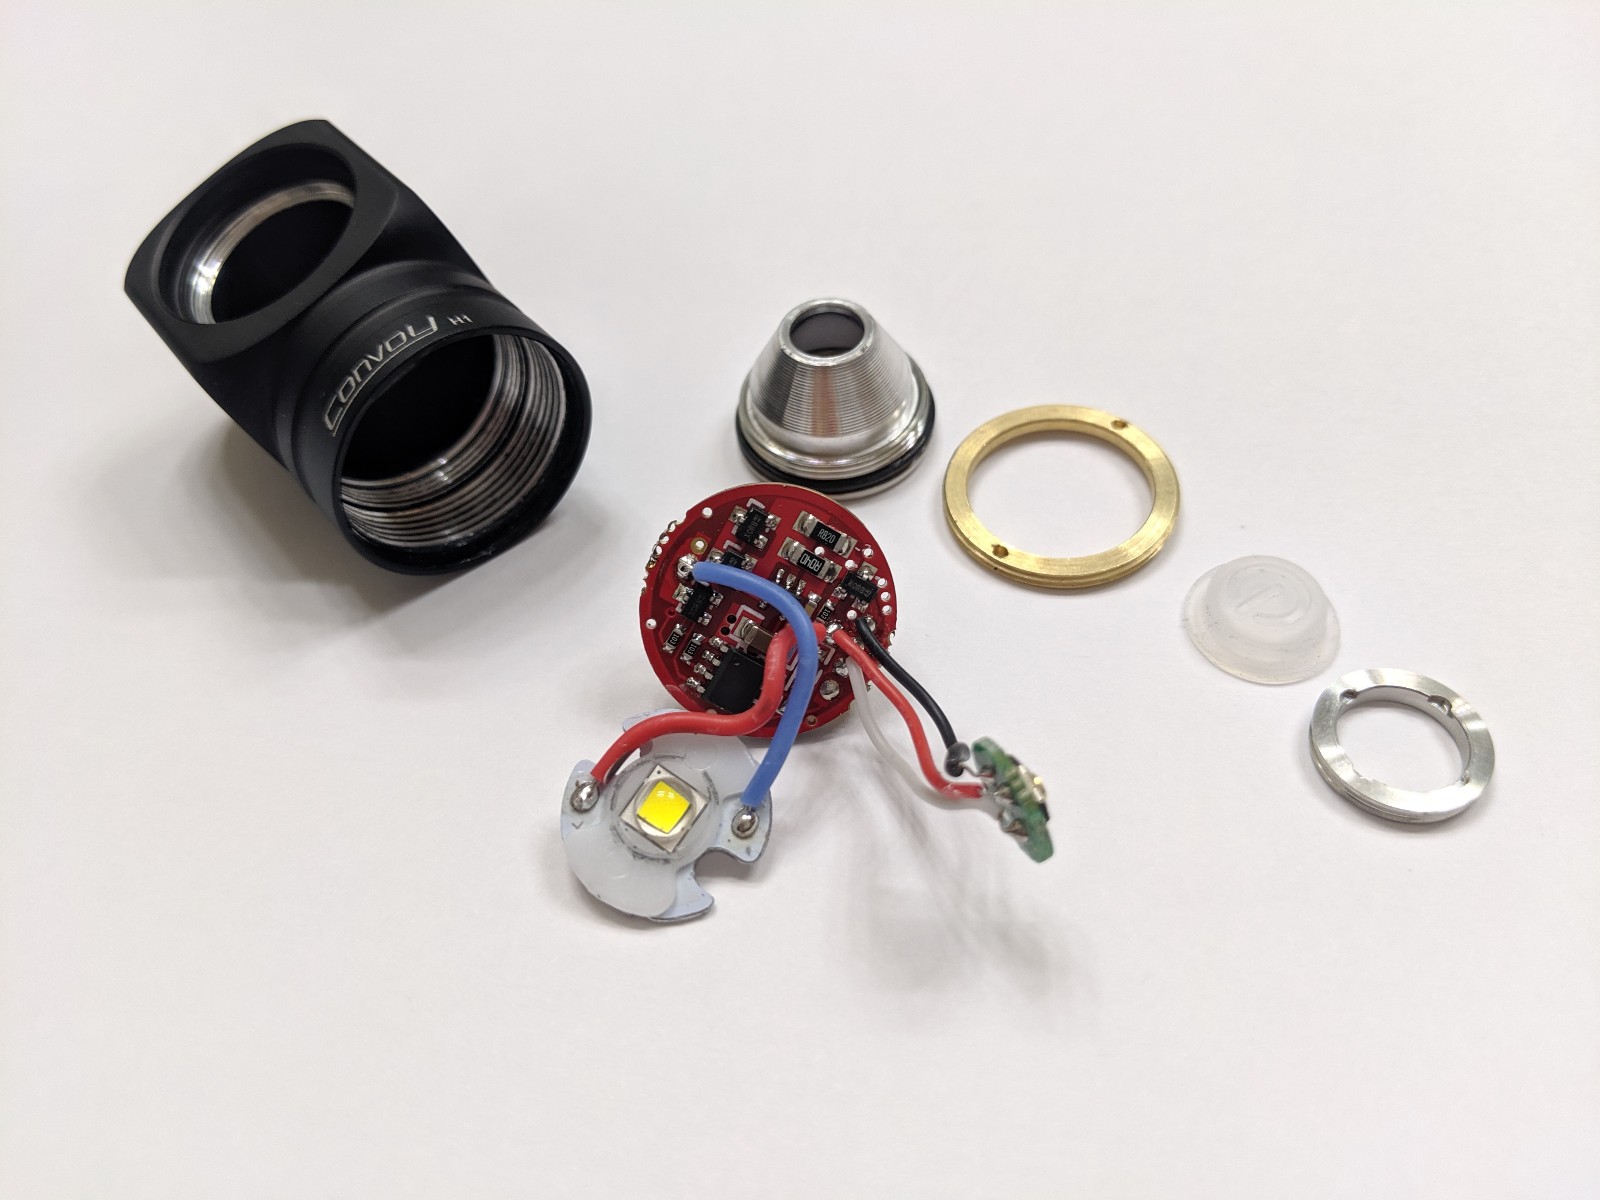
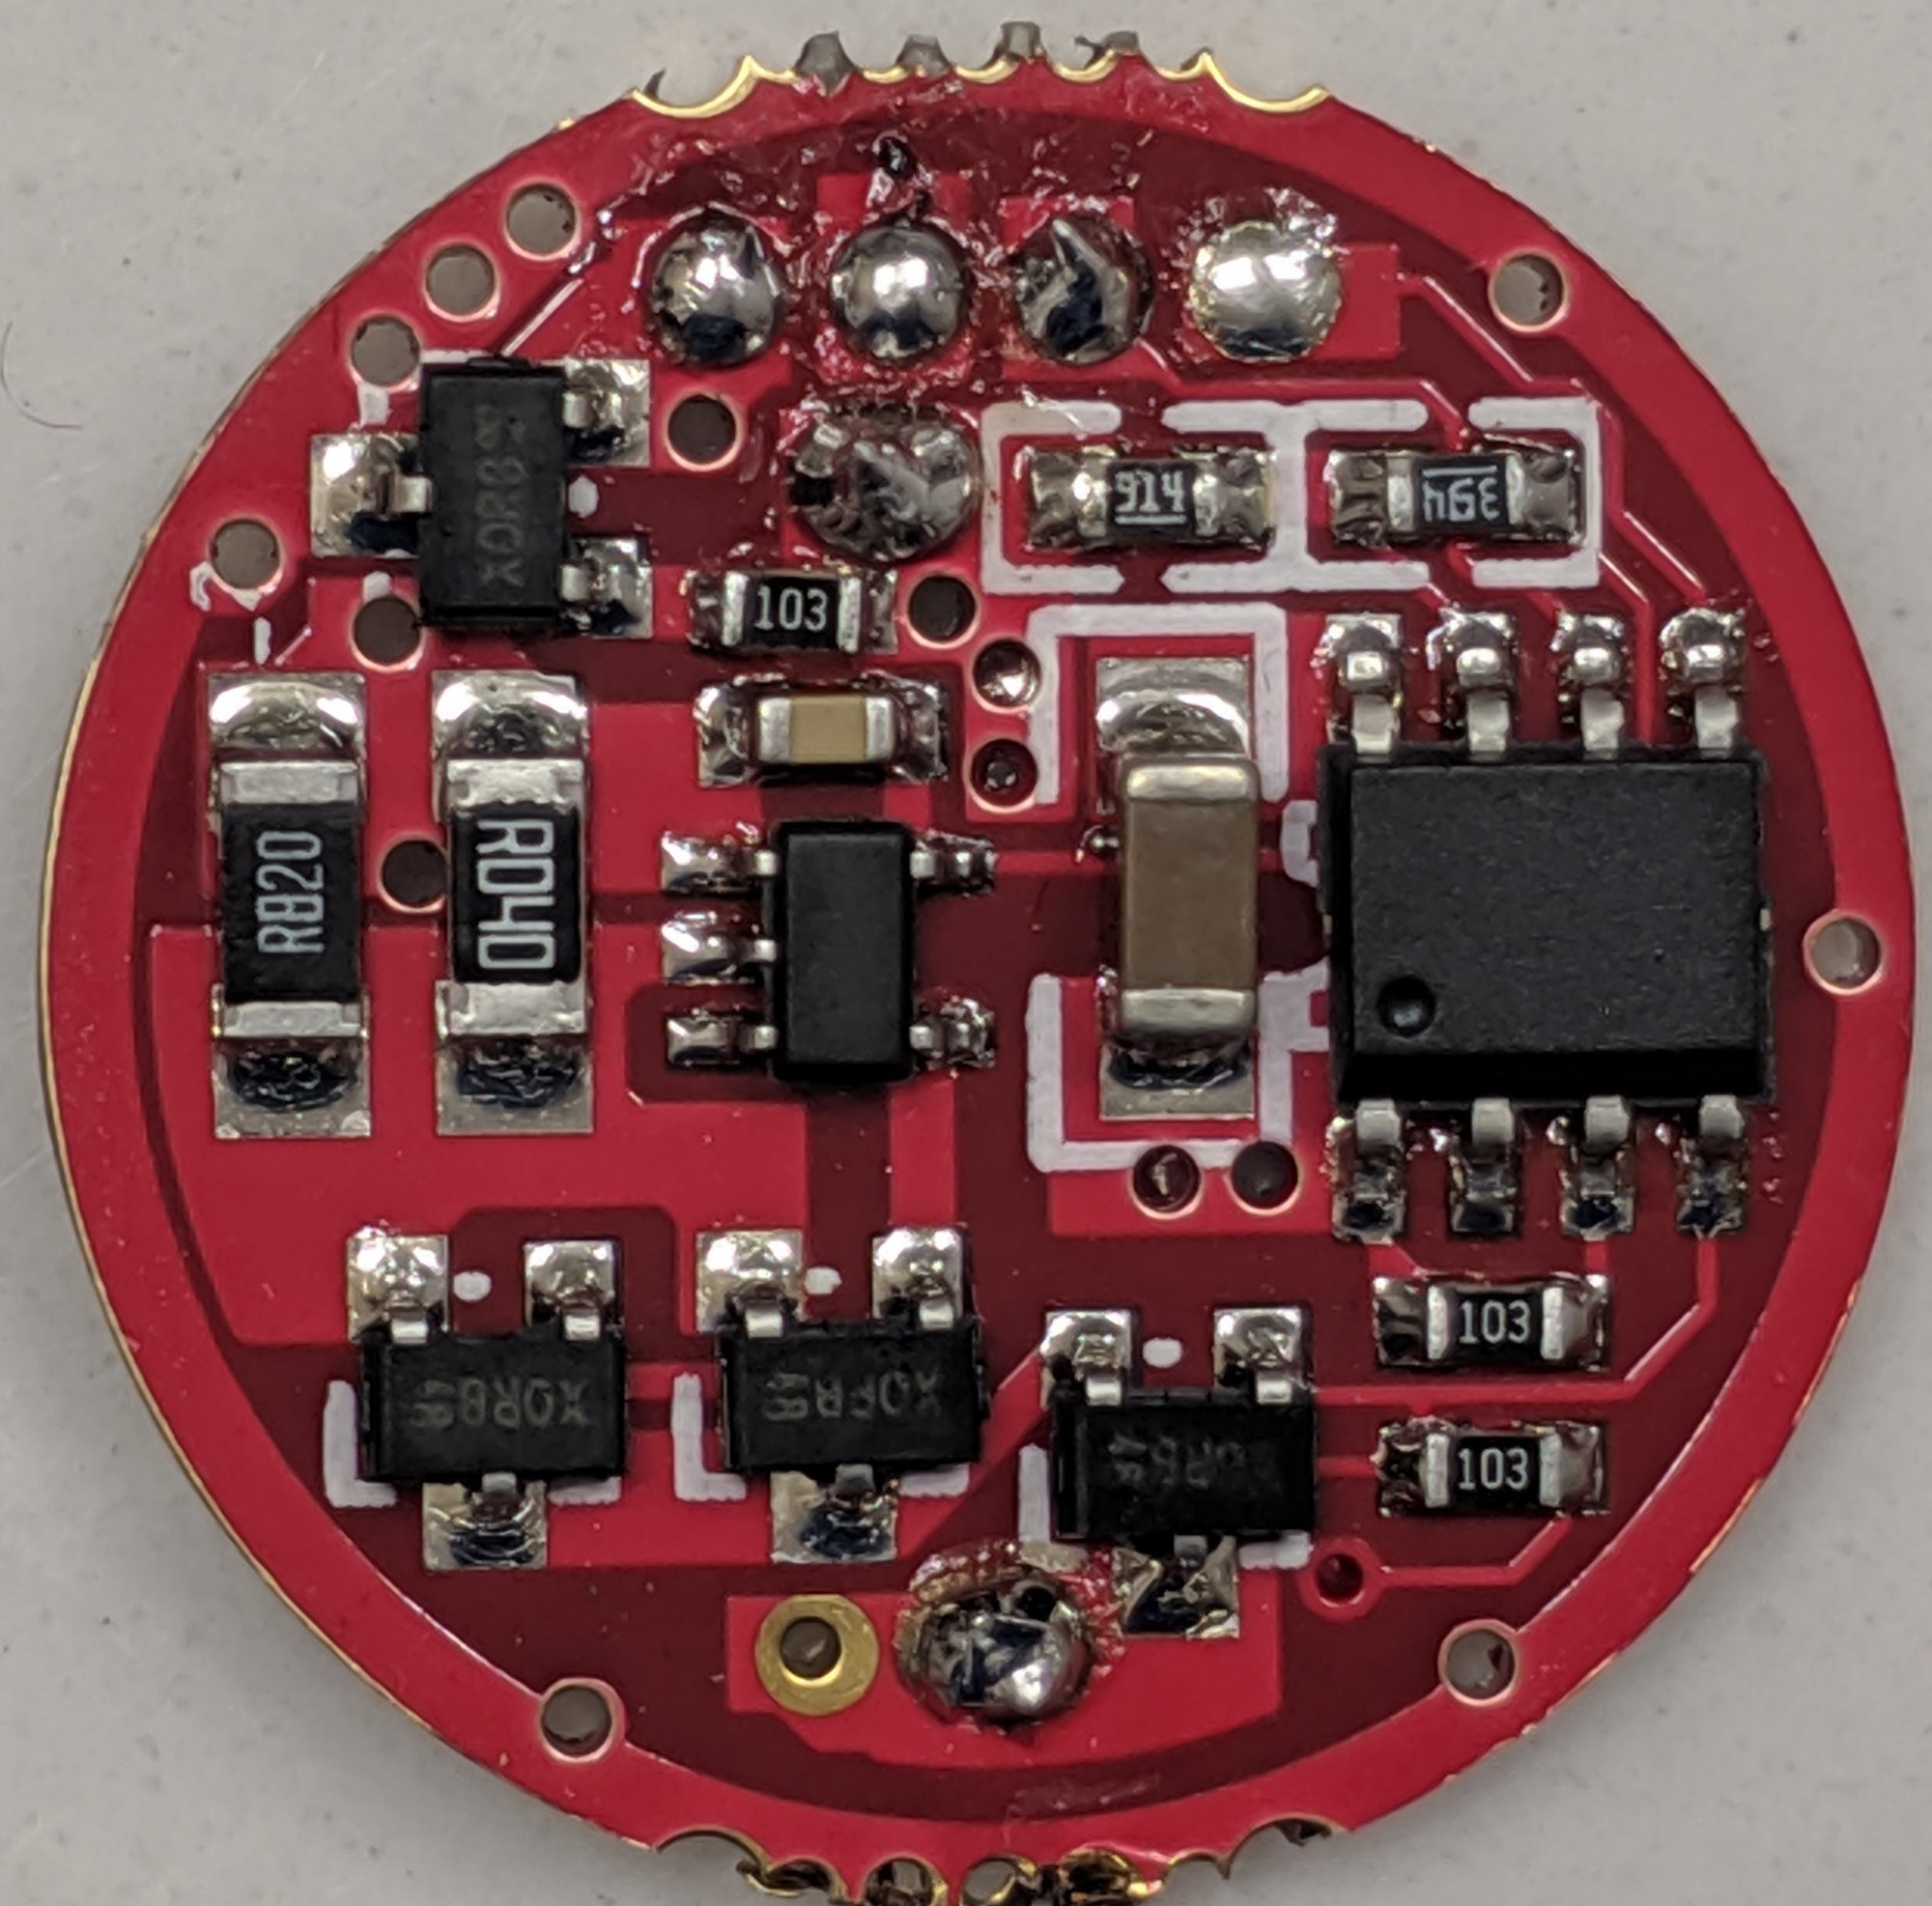
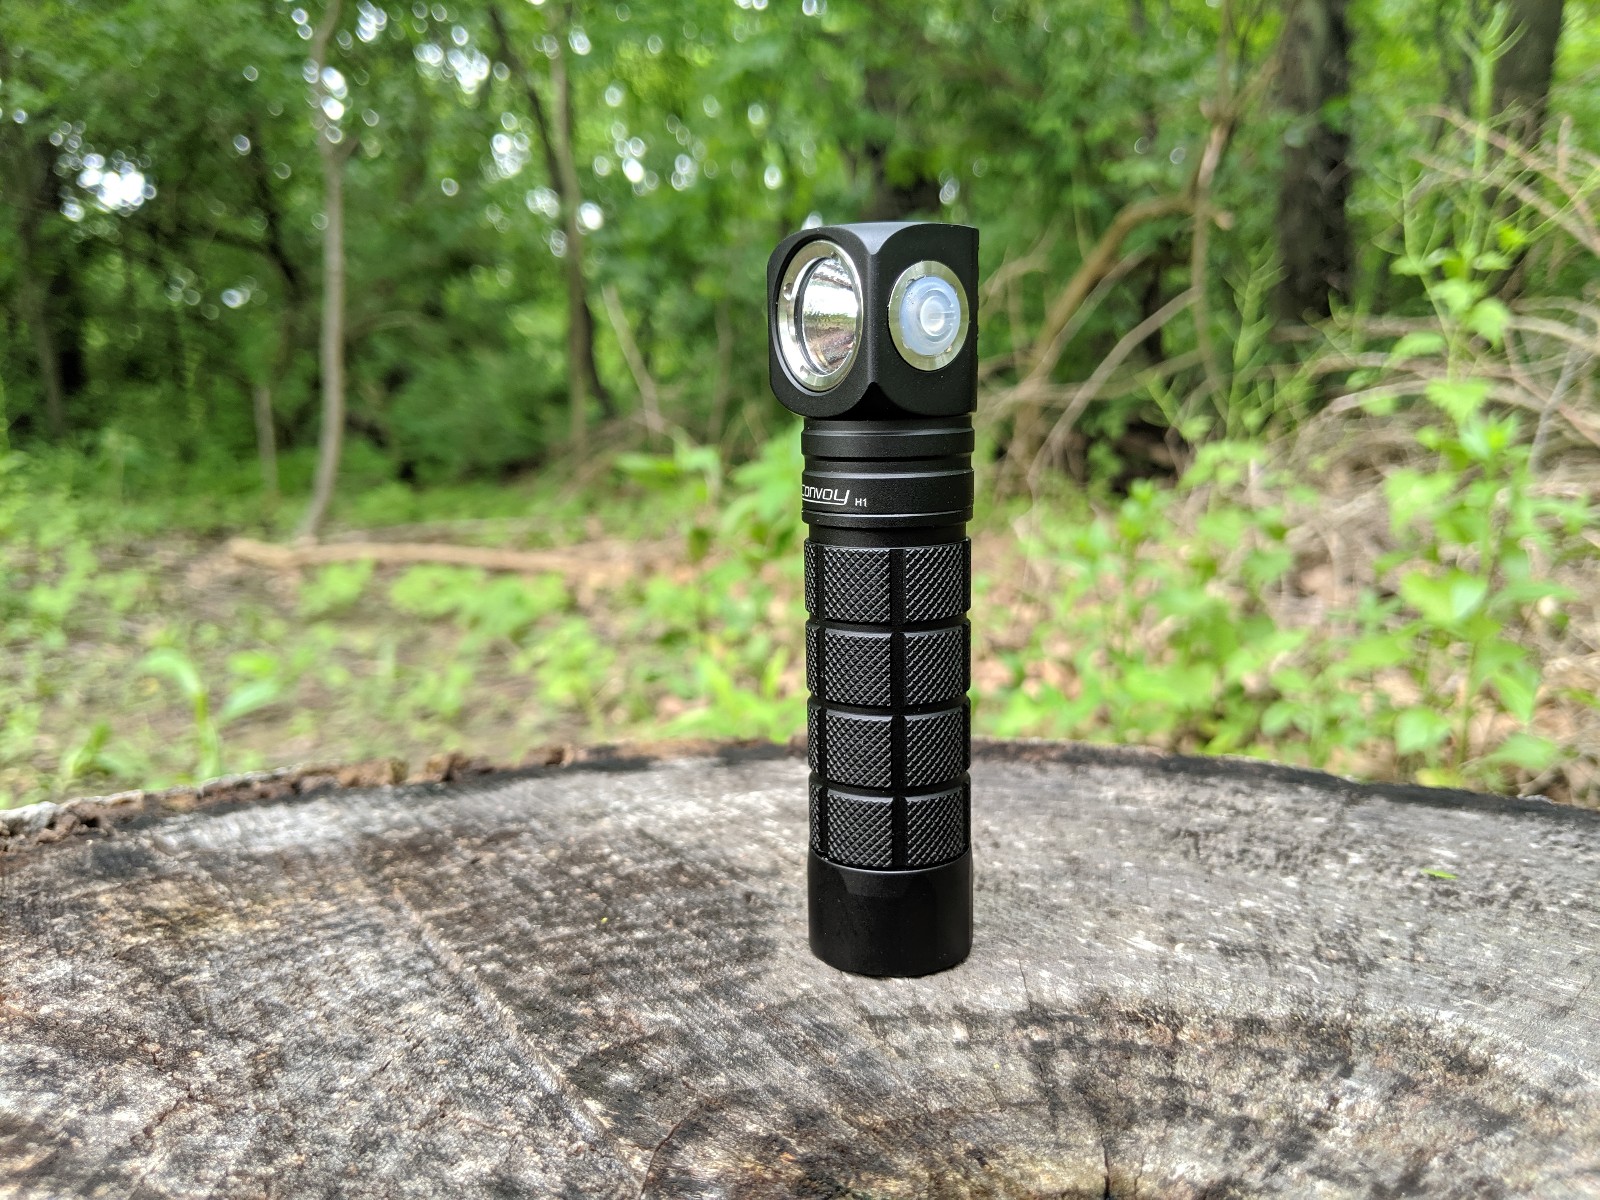
I received my Convoy H1 today. After checking to make sure it was working properly, I did a quick disassembly to see how difficult it would be to modify. To my pleasant surprise, the head can be completely taken apart without any soldering or even removing of screws (there are none). Just remove the three retaining rings and slide the innards out.
I didn’t think until after I had it back together that I should have taken some measurements. Oops. Oh well, I can easily do that later.
I think I might have to built a new driver for this: either linear or FET+1, attiny MCU, and RampingIOS or NarsilM with aux LED control.
Components:
Unmarked MCU with PIC-style layout
One 7138C (constant current driver)
Four three-legged chips marked X0RB48 (small FETs, likely AO3400A)
Standard issue 16mm aluminum MCPCB
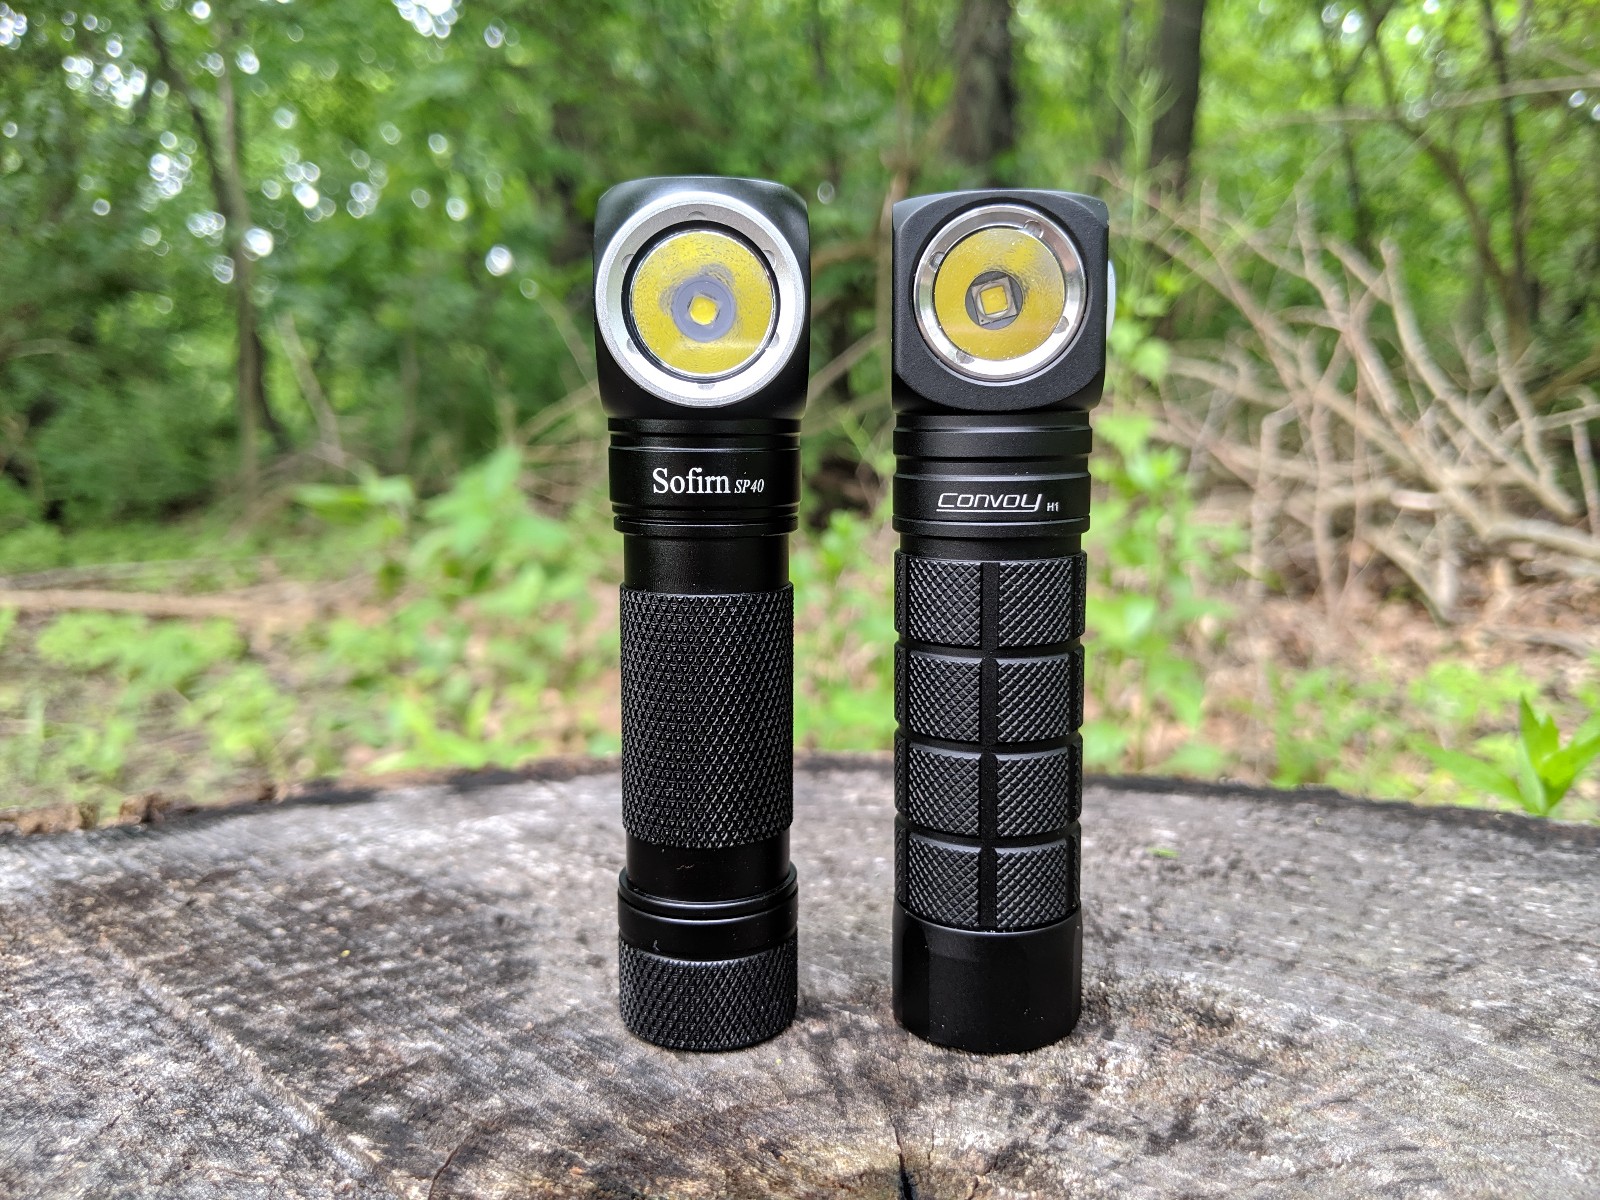
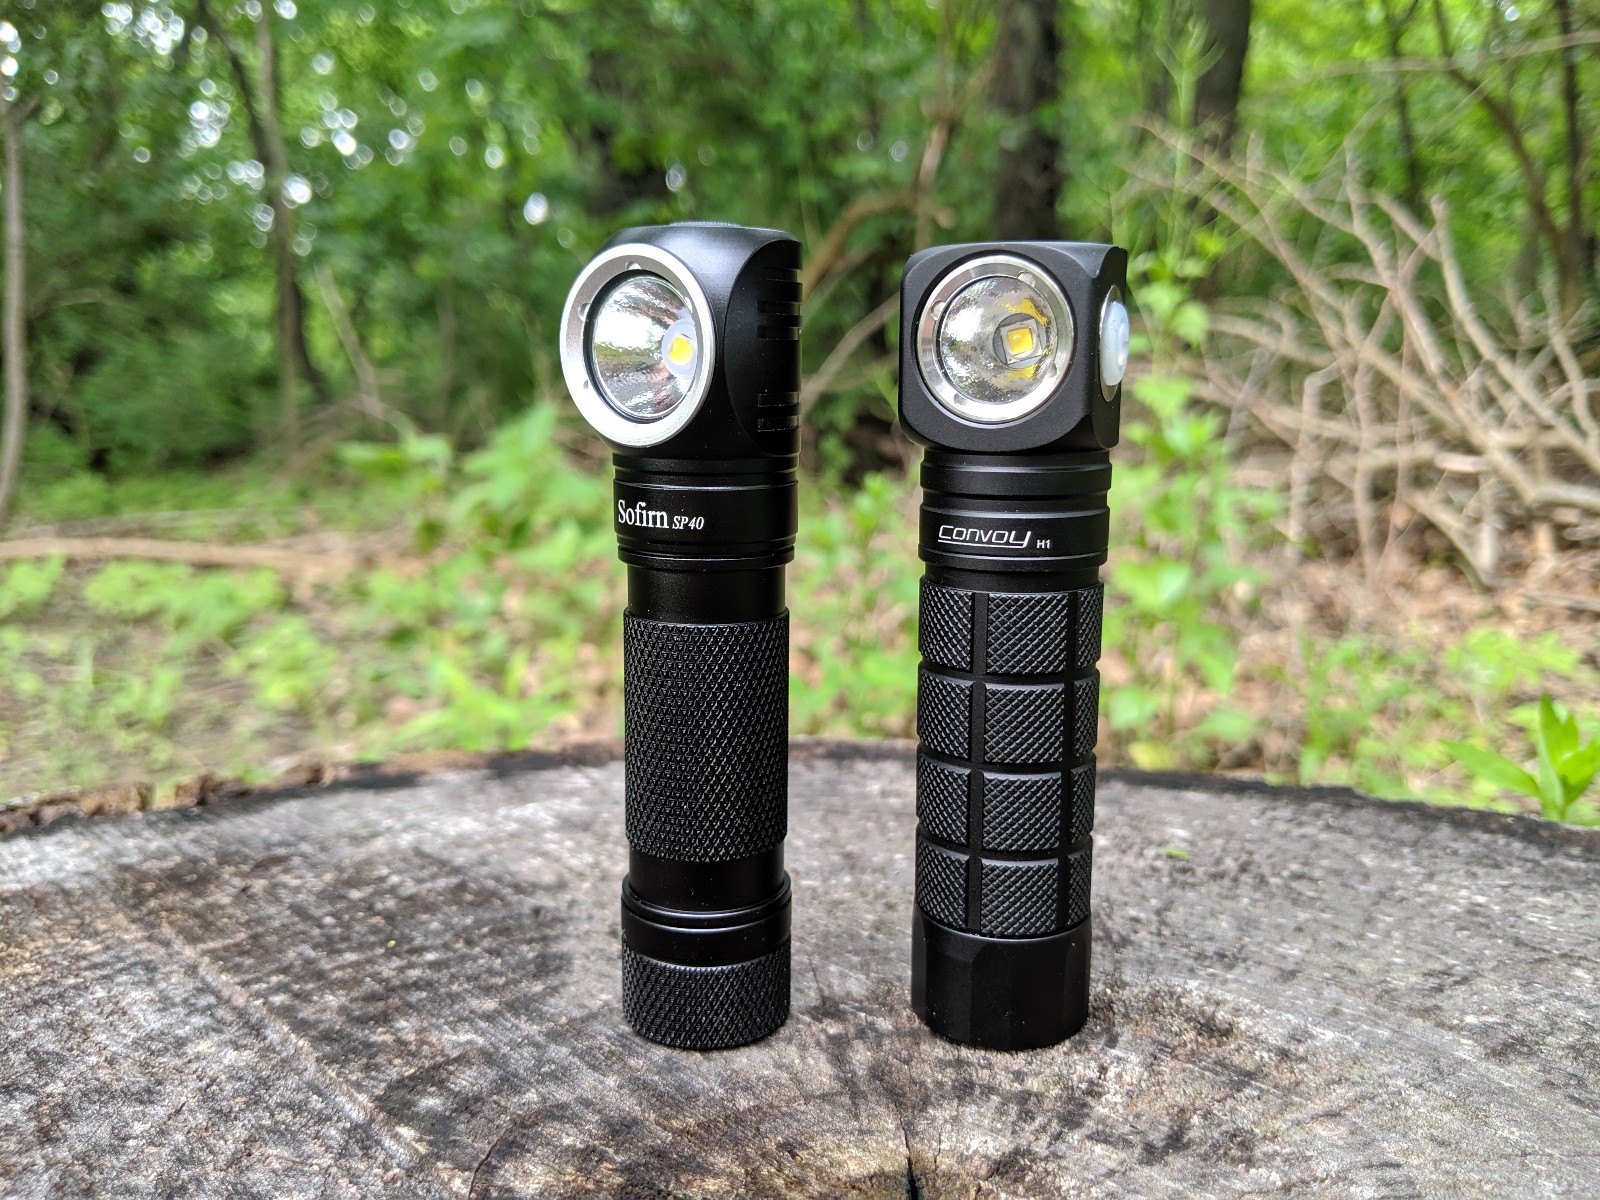
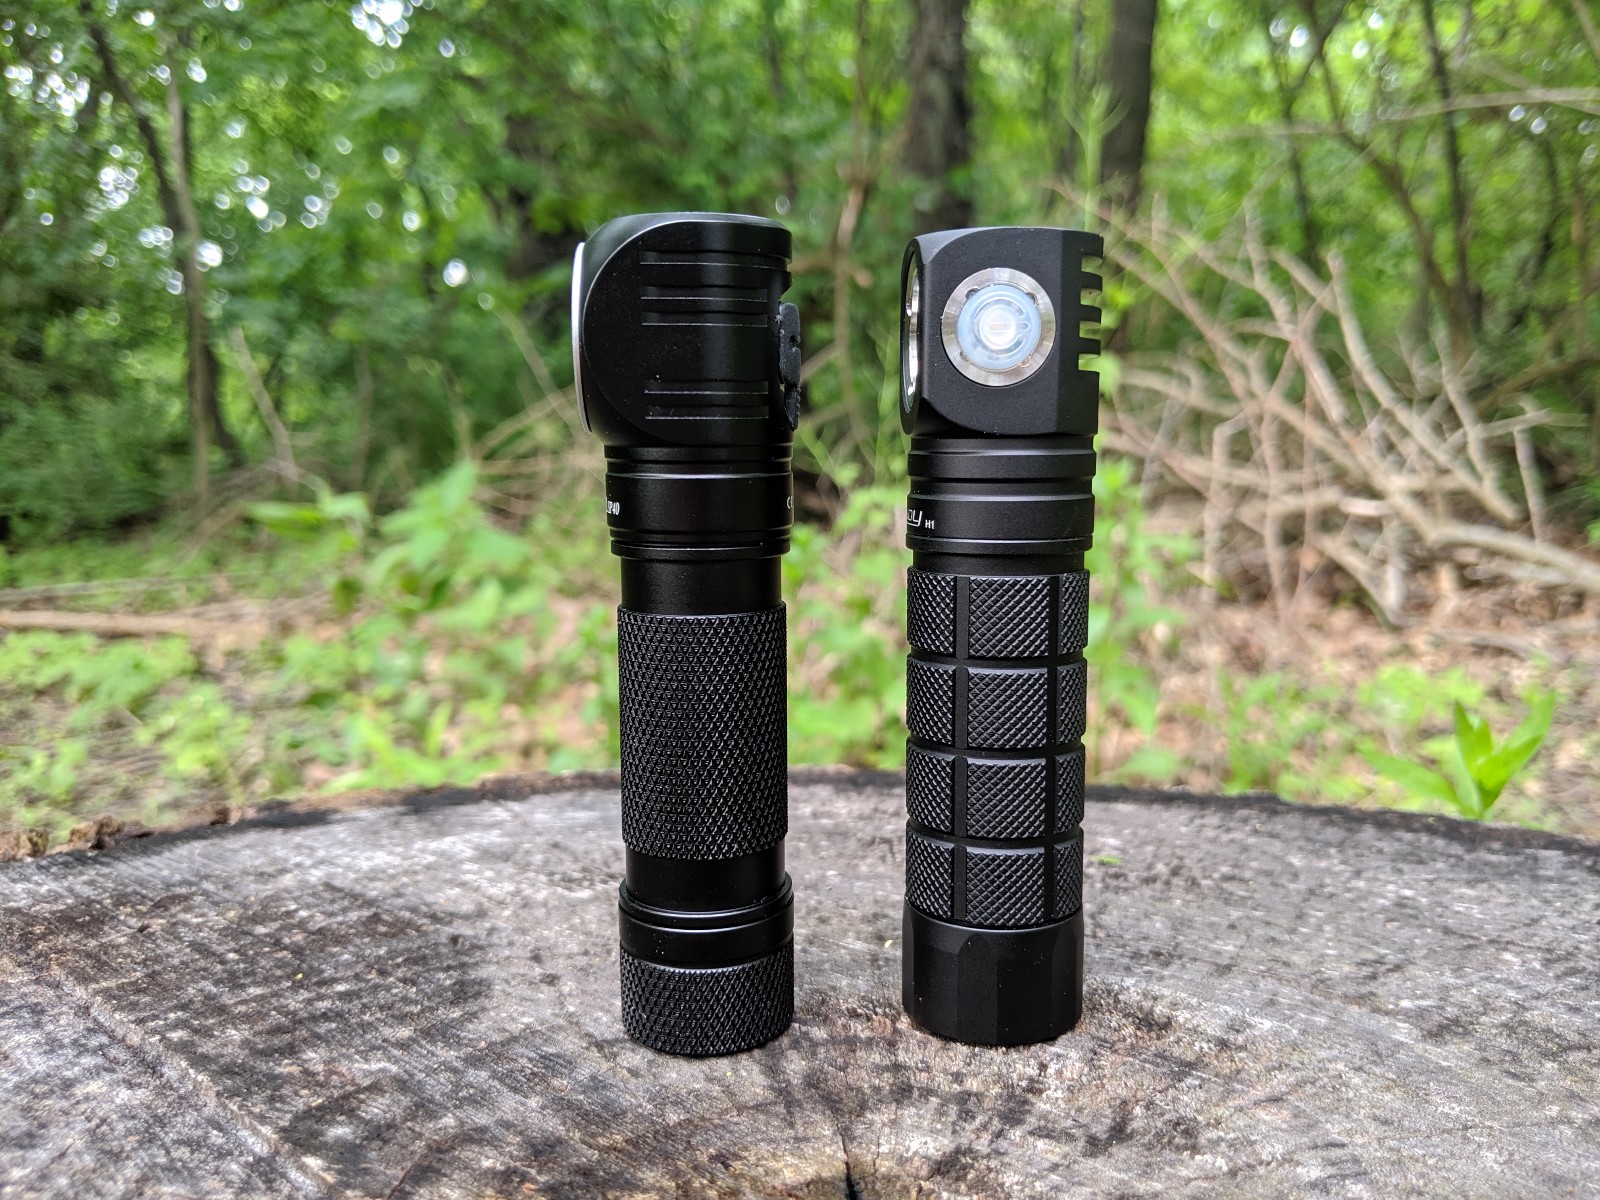
PS - I now have a Sofirn SP40 on the way. I can’t wait to do a head-to-head comparison .
Thanks for sharing gchart. I’m waiting for mine to arrive and planning on buying a SP40 too. Not a fan of the H1 (1st gen) UI but good to know it’s easily dissassembled.
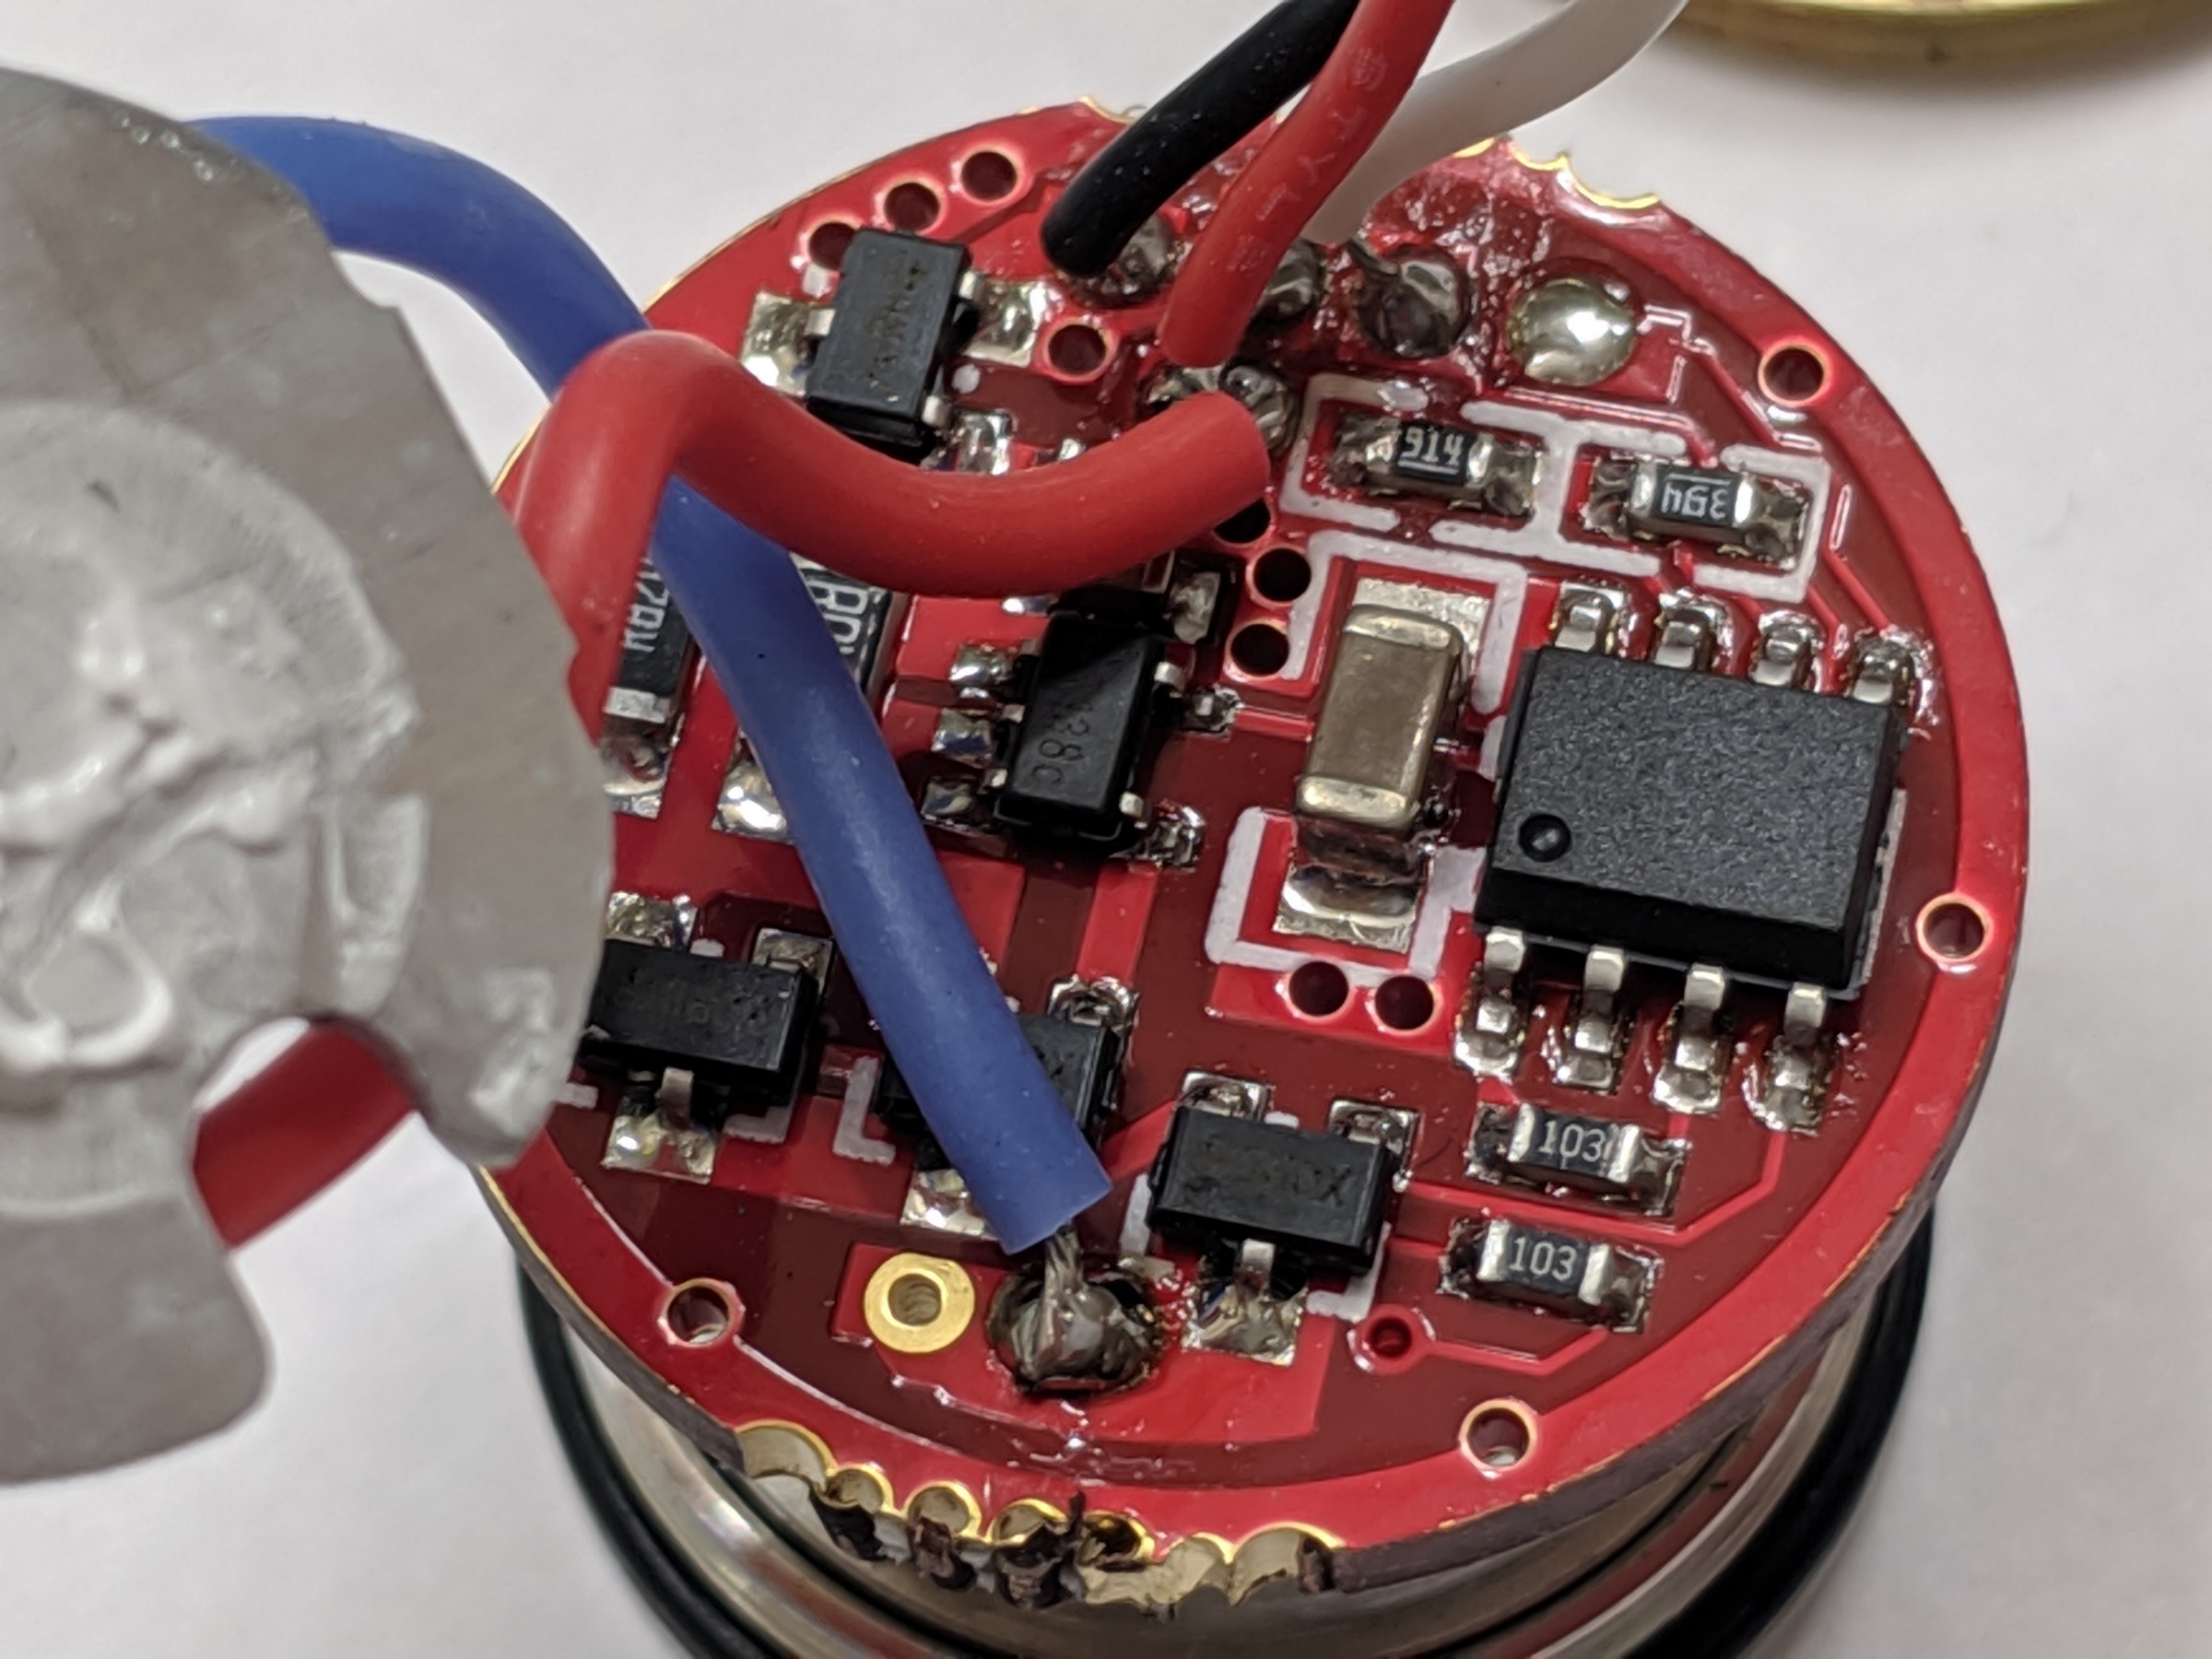
Ok, I disassembled it again to dive into the MCU pinout. Before I forget, the driver is 20.9mm in diameter.
First, a nicer up close shot:
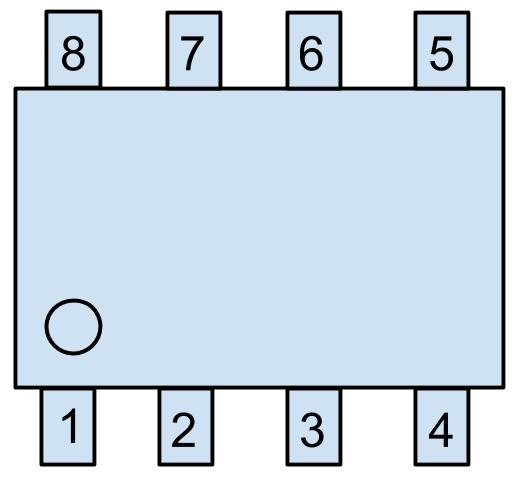
Using the SOIC8 pin numbering as follows, here’s what I see for connections:
VDD (battery +)
PWM dimming control of the 7138
Switch input
Main LED on/off control (seems redundant a bit with the 7138 bring actively controlled through PWM, but maybe it can’t be completely turned off using PWM?)
Routed to unused pad next to switch board connections, would be used for a second switch LED if implemented (the switch board has pads for a second, separate LED)
Switch LED, powered by setting the MCU pin to internal pull-up
Voltage divider for voltage checks
Ground
Misc notes:
Reverse polarity protection is handled by a FET on the low-side
If you wanted a second switch LED color, the hardware exists for it. Or you could bridge the connection and just add a second LED of the same color to illuminate the switch more evenly
I’m sure the specs vary by manufacturer, but I see the QX7138 is rated at 20mA - 3.0A, 3.0V - 6.0V, and PWM dimming at 200Hz - 10kHz.
The current setting resistors look like they’re set for 2.5A output
The QX7138 is described as: a linear constant current LED driver chip with PWM Dimming
QX7138 current: ILED = 100mV / RCS * DutyCycle%
So the current is flowing through the FETs, but the flow is controlled linearly by the 7138
Current plan of attack: keep most of the existing driver, but swap the MCU for an attiny412 with RampingIOS and hopefully some custom aux-LED control baked in.
Let me know if you have any questions while I’ve got this cracked open and still in stock form.
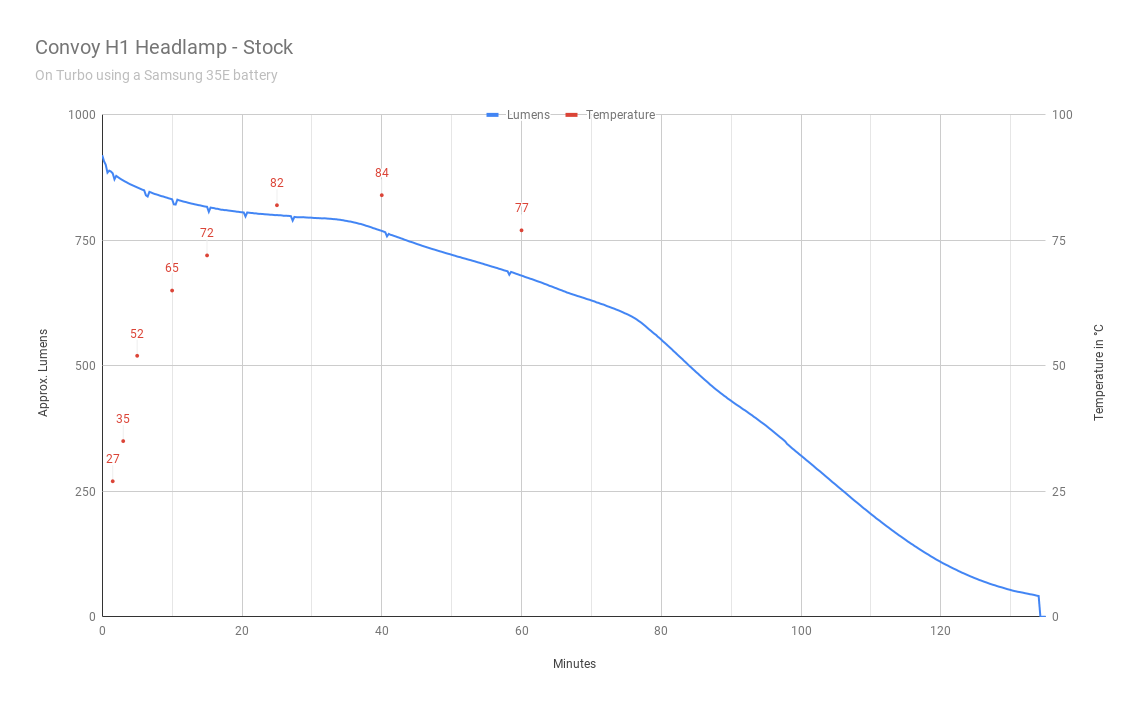
Runtime tests on stock setup
Boy, this thing is HOT. And not in a good way… sitting on my desk (room temperature, no air movement), it reached 84°C. I definitely do not recommend running this thing on Turbo for extended periods of time unless you’ve got the perfect cooling environment.
If that SVG iamge doesn’t show up for you, a PNG version is available here
PS - I have a new MCU/firmware ready to go for this… customized RampingIOS on an ATtiny412. Added Aux LED control as well as control for the on/off FET. This headlamp is in dire need of the thermal regulation this will bring.
I’m not aware of any plans to do so. I know Simon (owner of Convoy) is going to be making some changes based on our feedback, but it doesn’t sound like he’s planning an emitter changed. When asked about using a High CRI SST20 or LH351D, he said:
Source (some good Convoy updates in that thread if you haven’t seen it)
One good thing here, though, is that the H1 uses a standard 16mm MCPCB. So if you feel somewhat comfortable soldering the wires to a new MCPCB, swapping in a new emitter is pretty easy to do.
I think Simon mentioned a UI update (single click for off instead of click and hold) as a possibility as well as maybe weight reduction and better strap. Built in charging has also been discussed.
I wouldn’t say that emitter options are out of the question. He’s been asked about it, so he’s knows there’s the desire. And he’s been switching it up with emitters lately. So who knows for sure.
With all due respect, that’s not quite how I would communicate constructive feedback. And considering Simon sells TIR optics in his store, I’m pretty sure he is aware of them.
Thermal path is really good. I just finished up the MCU swap last night. My runtime test is wrapping up right now. RampingIOS with it’s thermal capabilities are just what the doctor ordered!
I coded the MCU to try and stay at 60°C. The body stayed at 56-57°C, so very close to the MCU’s temp.

